Mastering Realistic Muzzle Flash Effects in After Effects
Illuminate Action Sequences: A Step-by-Step Guide to Muzzle Flash Mastery
Lights! Camera! Action! The world of filmmaking and video production thrives on captivating visual effects, pulling you into the stories on screen. Amid these effects, muzzle flashes are crucial in action-packed scenes involving gunfire, injecting realism and intensity into your videos. You can now master creating realistic muzzle flashes in After Effects, enhancing your action sequences. Let’s dive into the step-by-step guide to achieve dynamic and convincing muzzle flash effects.
Get 10% off when you subscribe to our newsletter

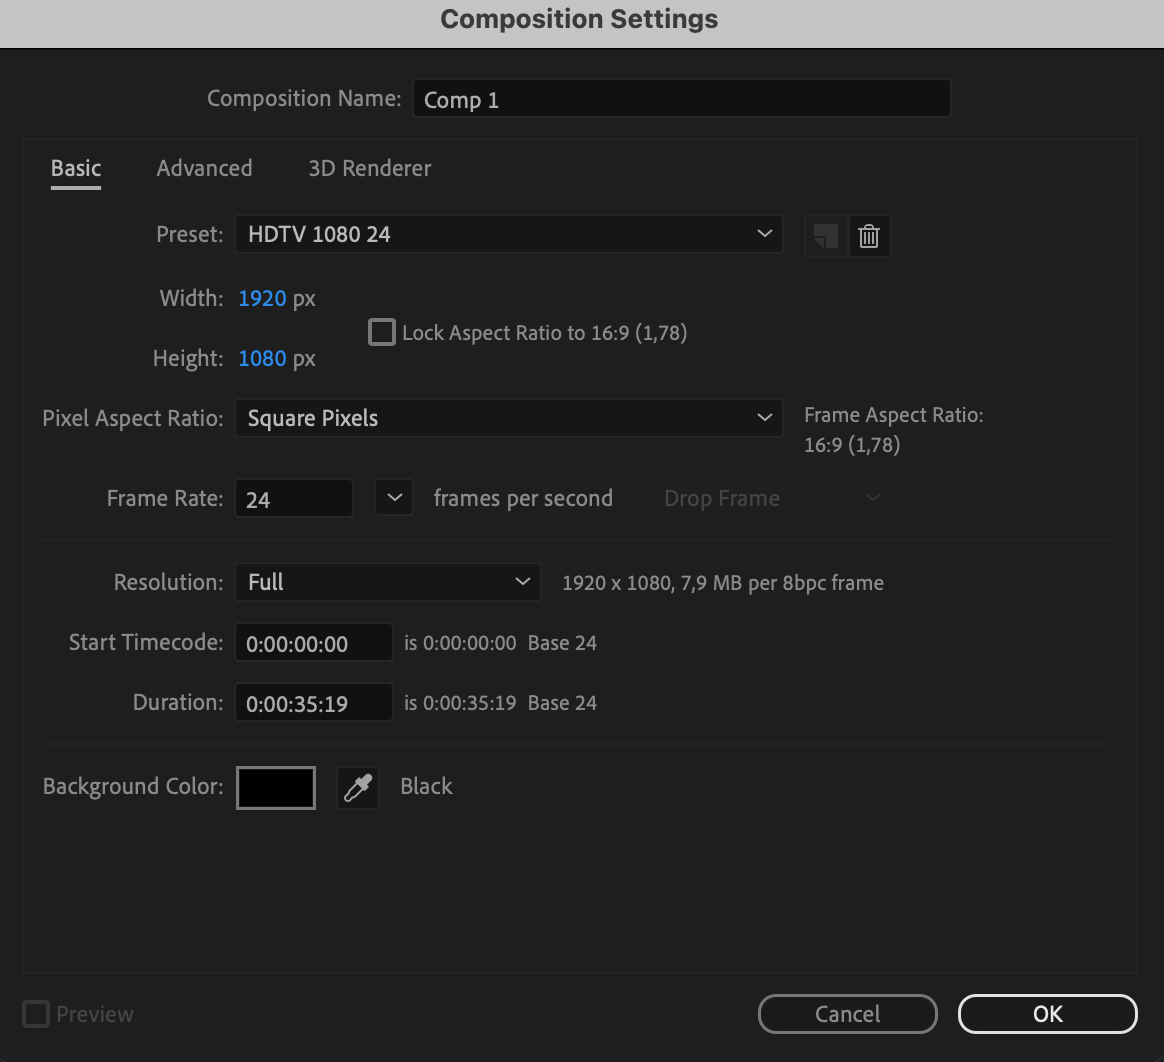
Step 1: Create a New Composition and Set Its Parameters
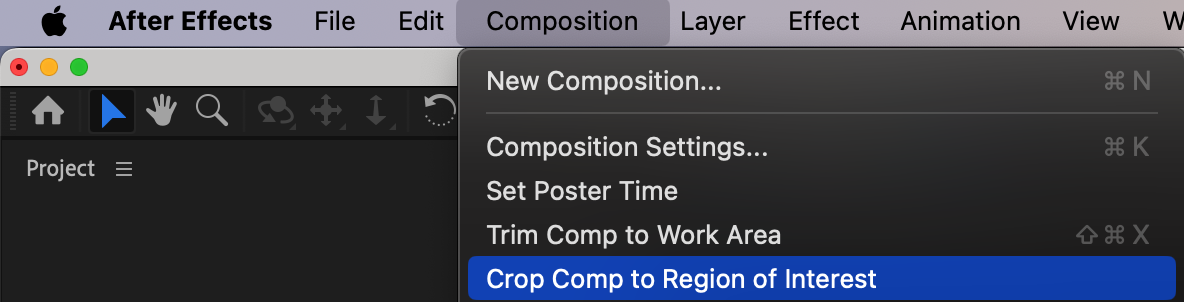
Open After Effects and create a new composition by navigating to Composition > New Composition. Set the parameters to match your desired video resolution and frame rate. 
 Step 2: Create a Black Solid
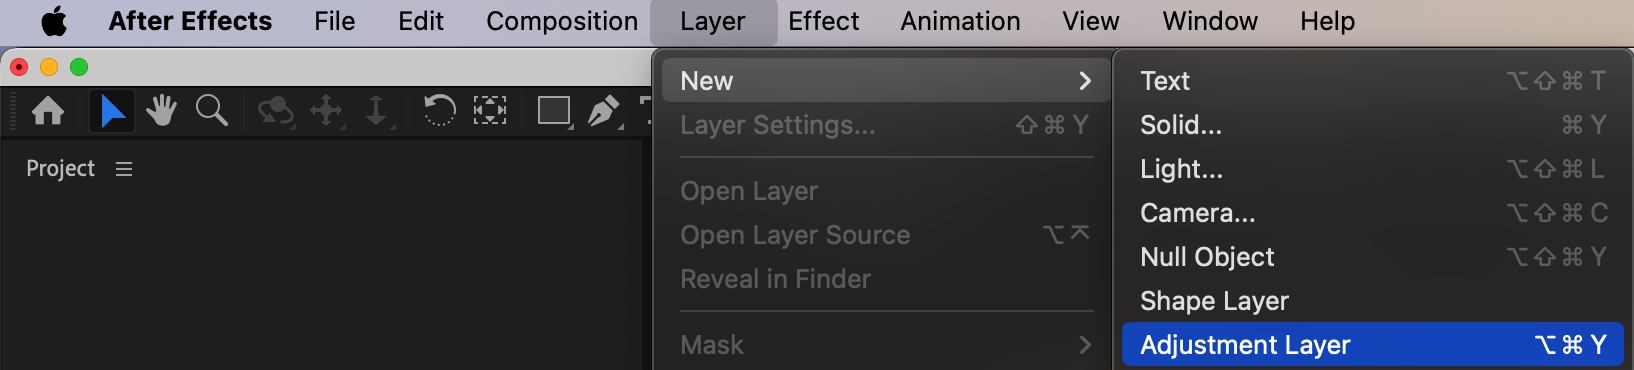
Go to Layer > New > Solid. Choose black as the color for the solid layer and name it “Black Solid”. This will serve as the base for your muzzle flash effect.

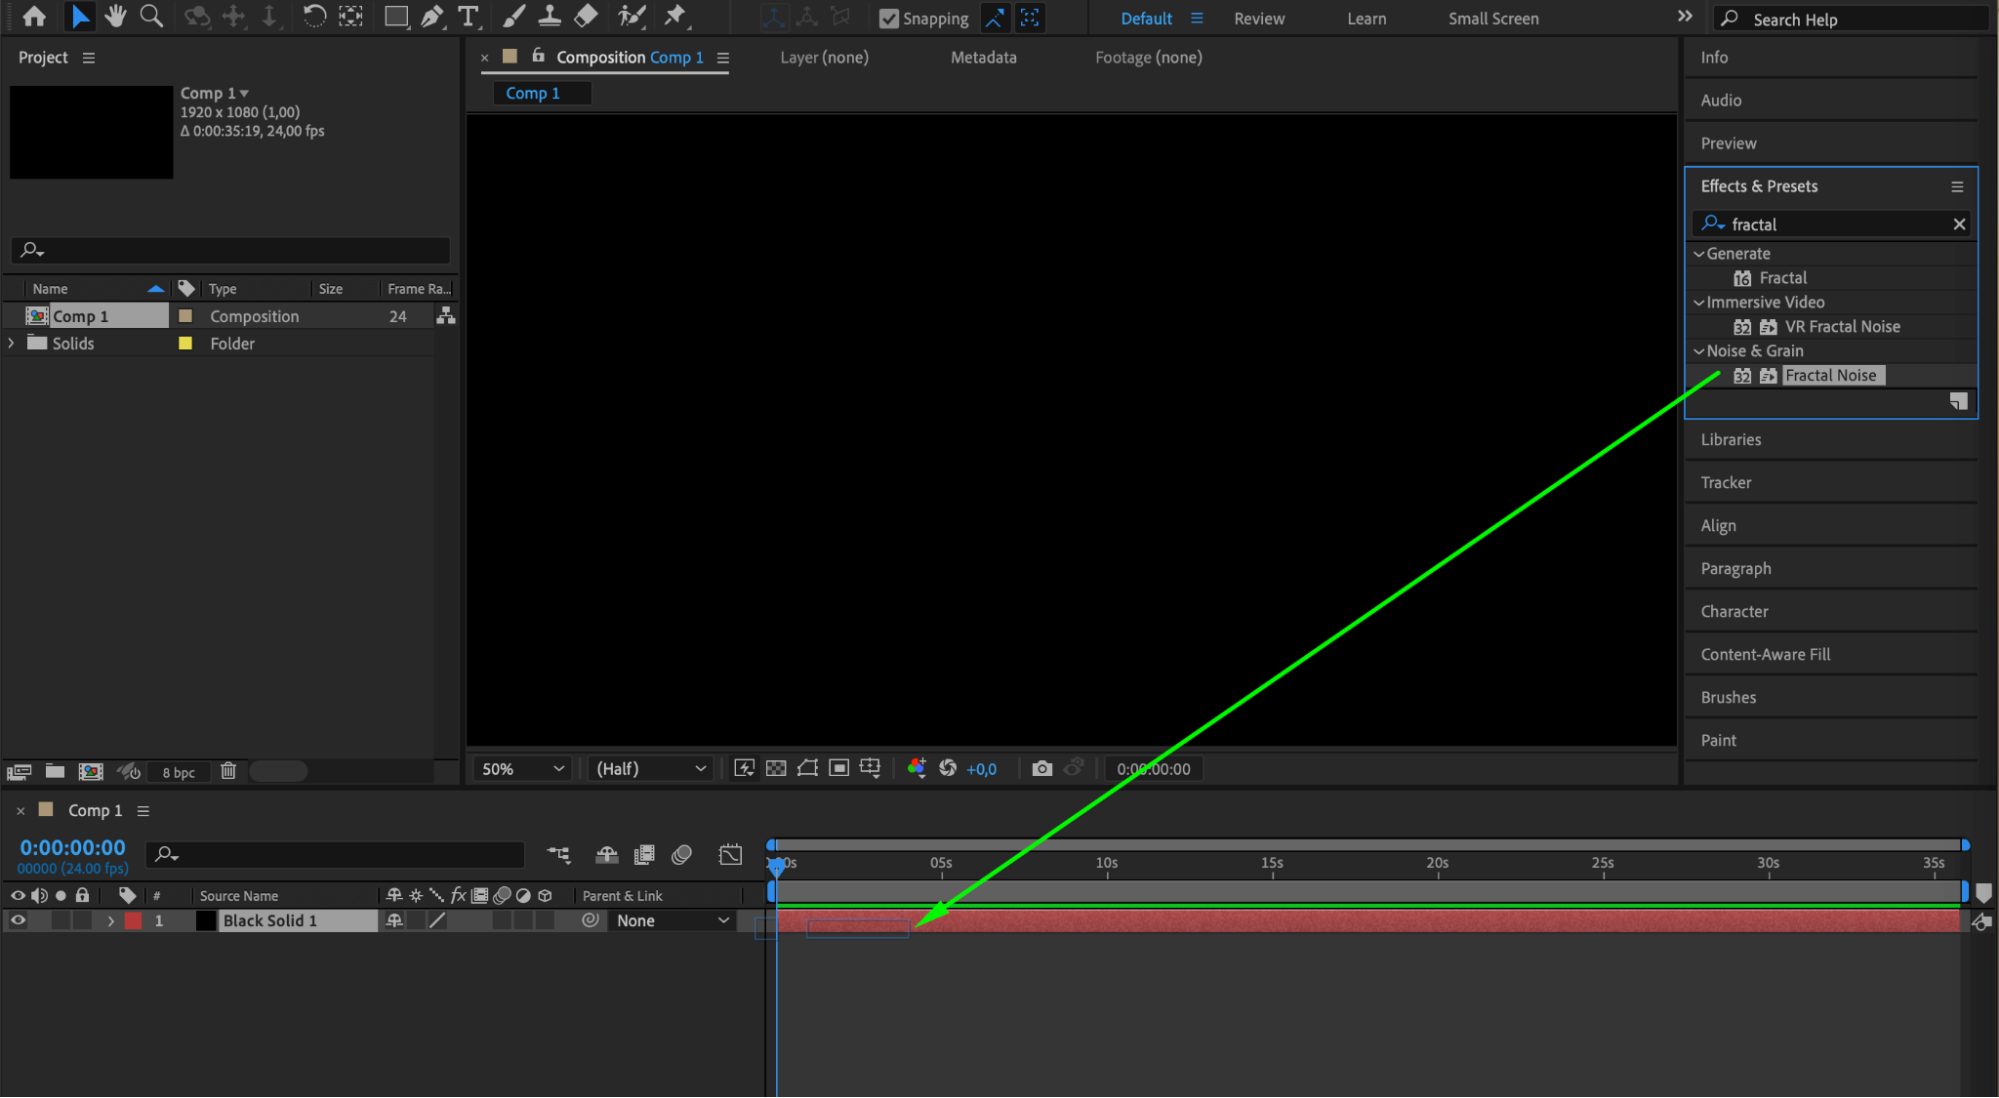
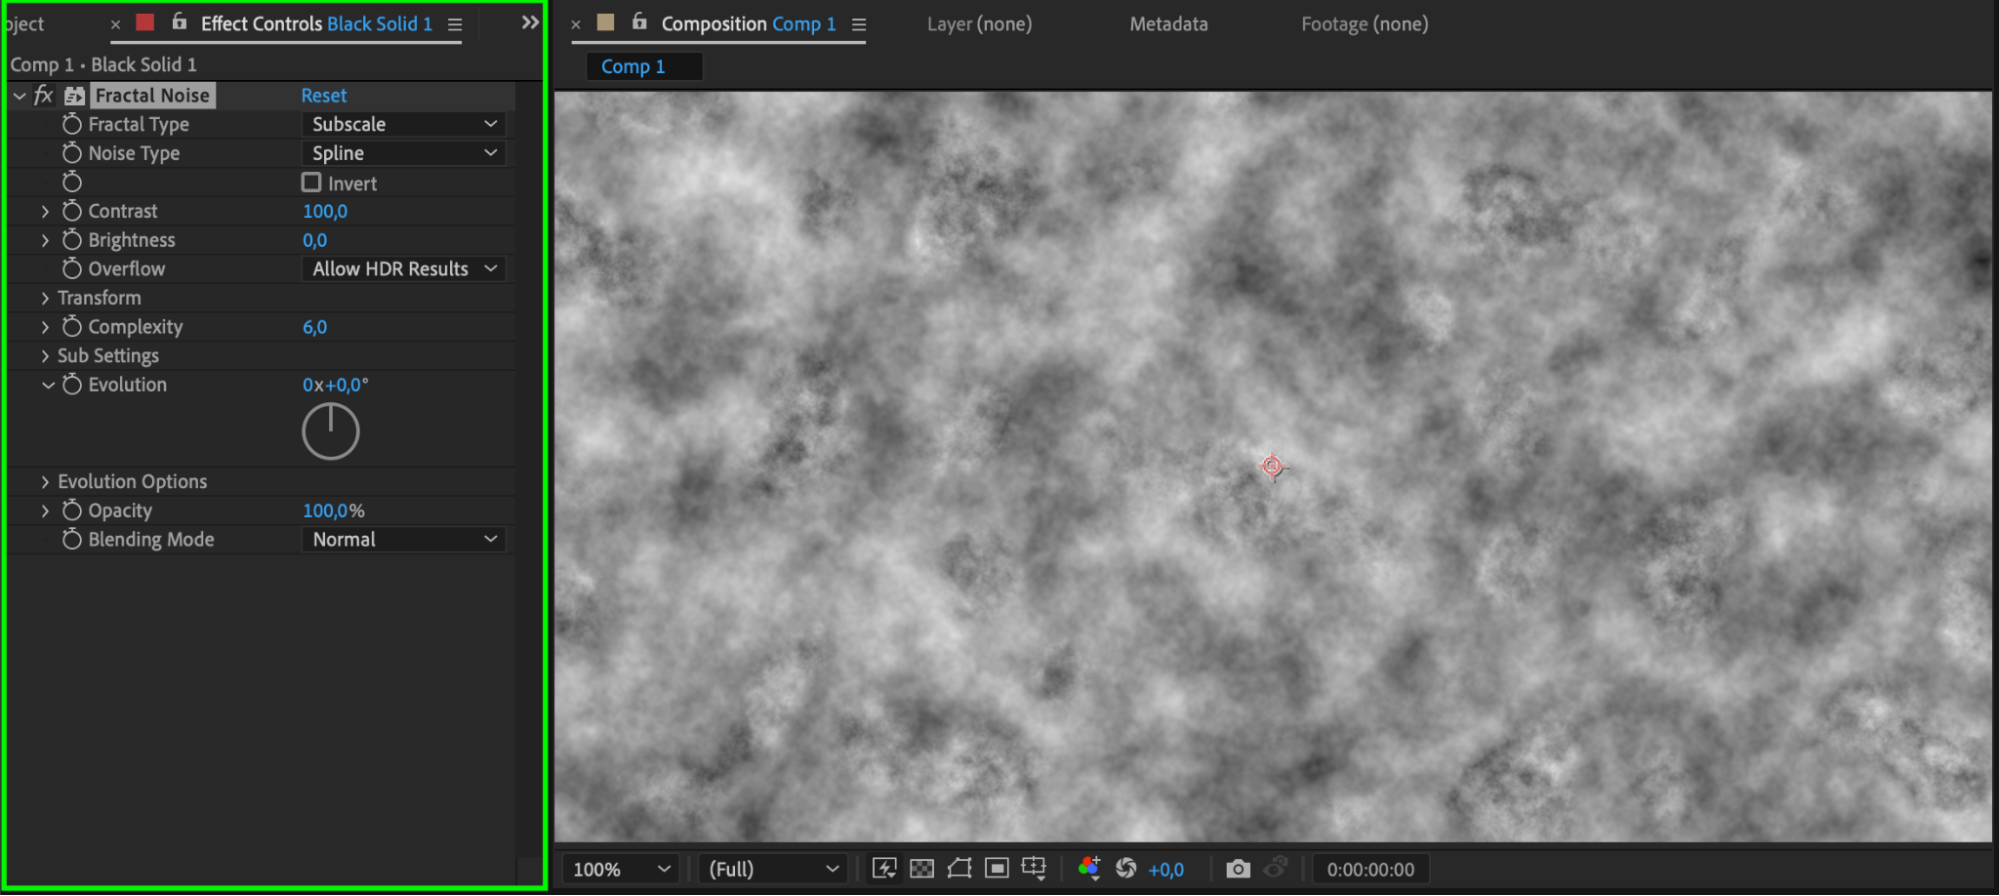
 Step 3: Apply the Fractal Noise Effect
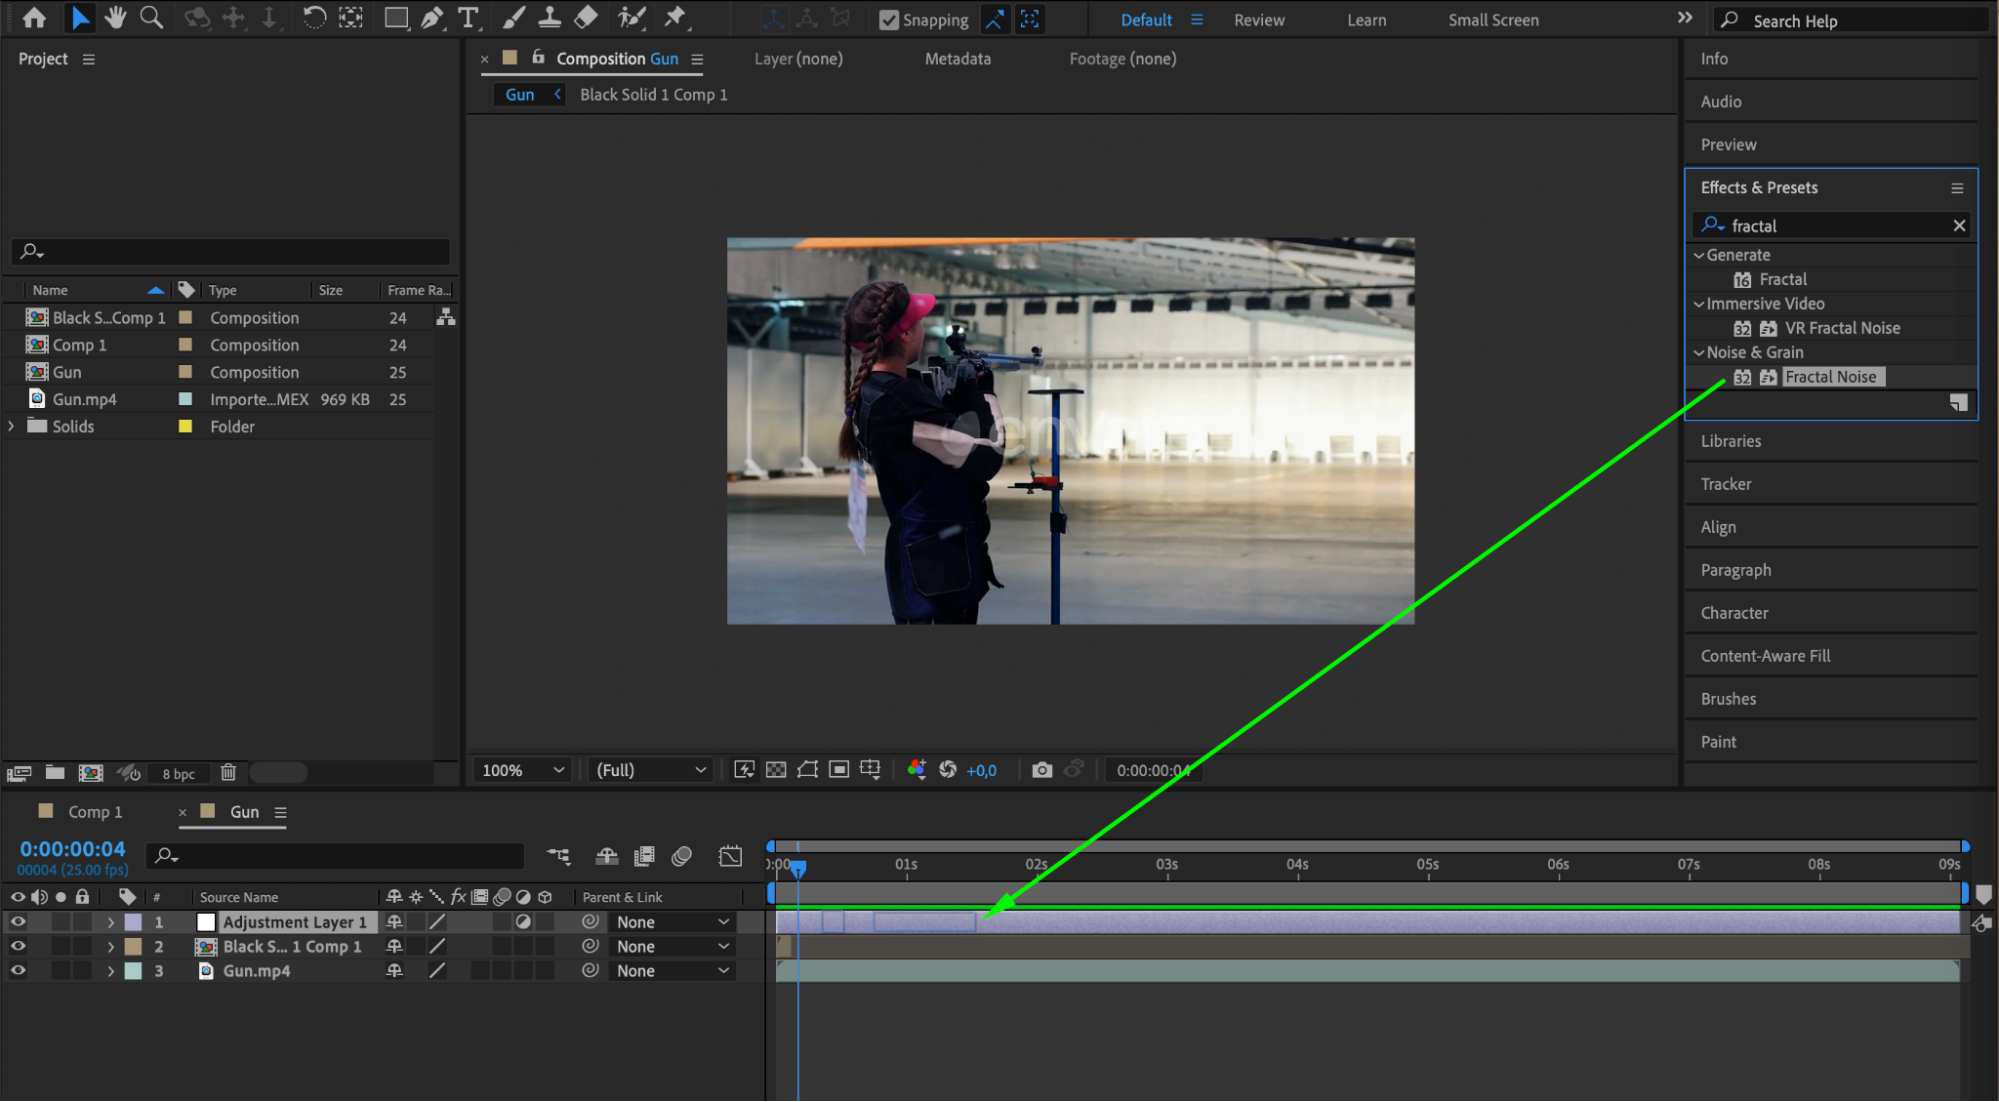
Select the black solid layer, then go to the Effects & Presets panel and search for “Fractal Noise”. Apply this effect to the solid layer. Adjust the settings in the Effect Controls panel to create a rough texture that will form the basis of your muzzle flash.
 Step 4: Create a Mask Using the Pen Tool
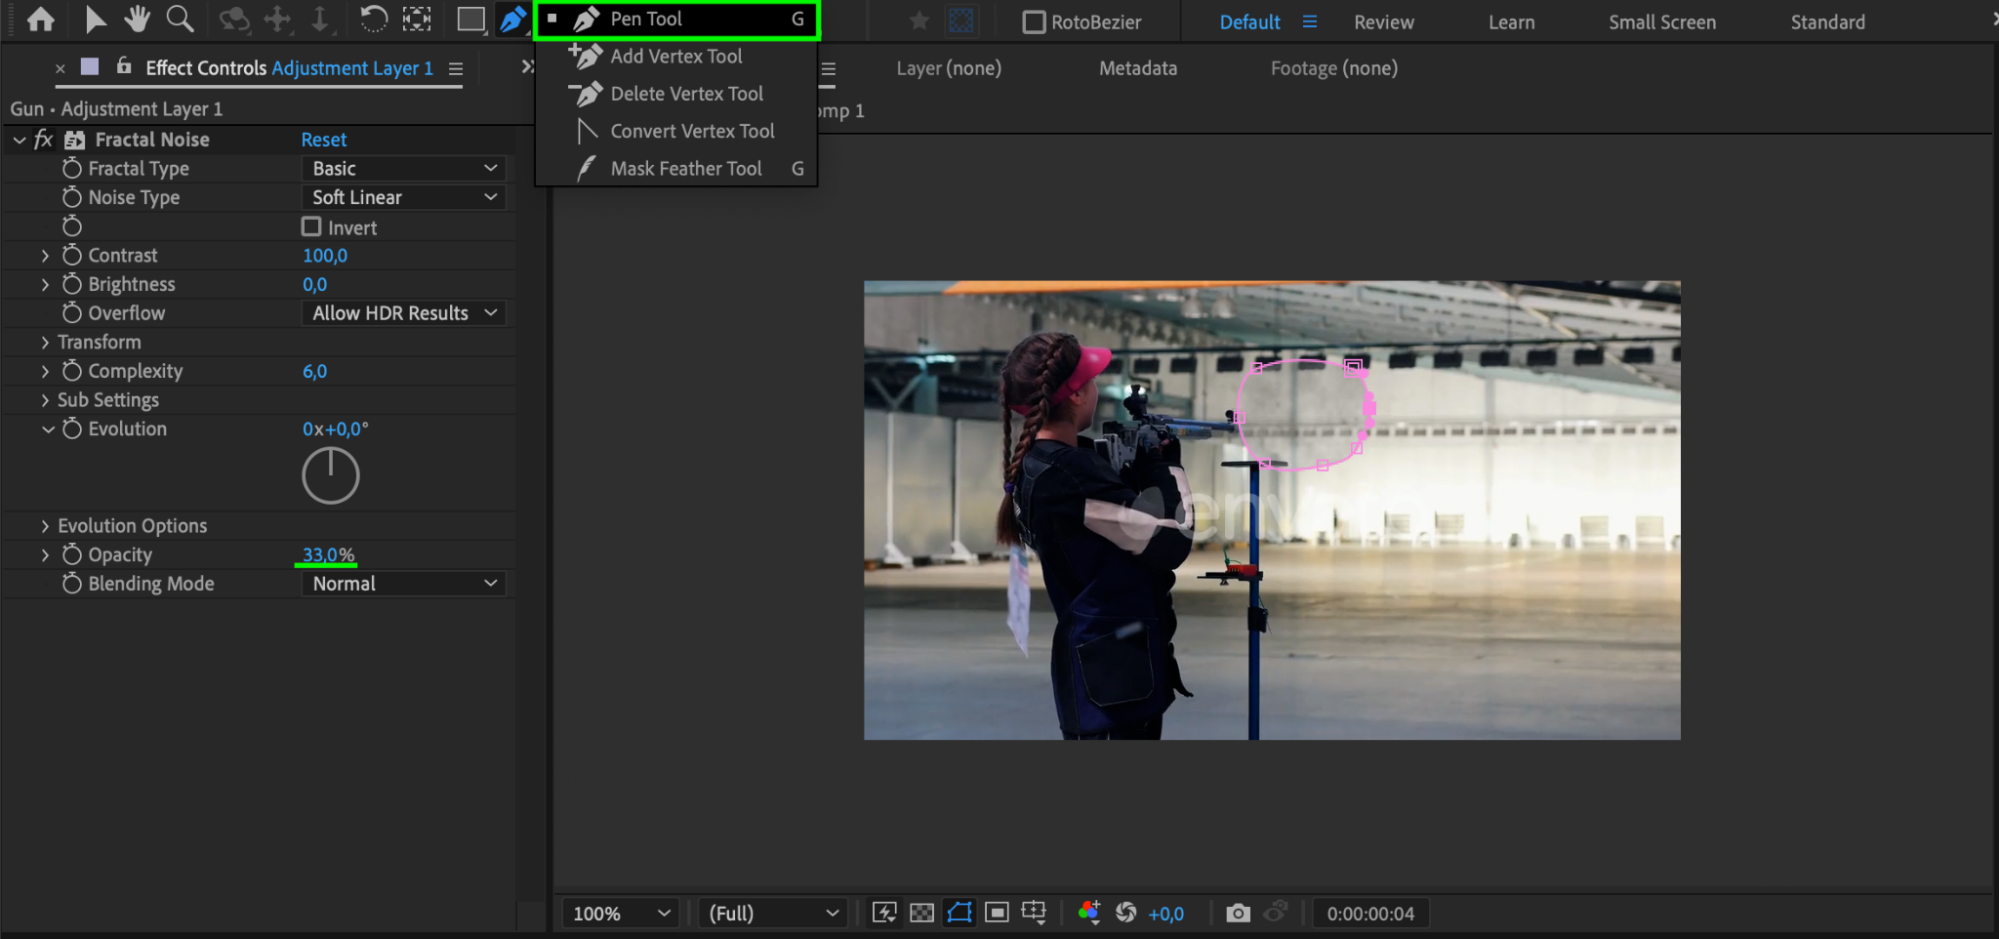
Select the Pen Tool from the toolbar and draw a mask on the black solid layer. The shape should resemble a muzzle flash, with a sharp, bright core and rough edges.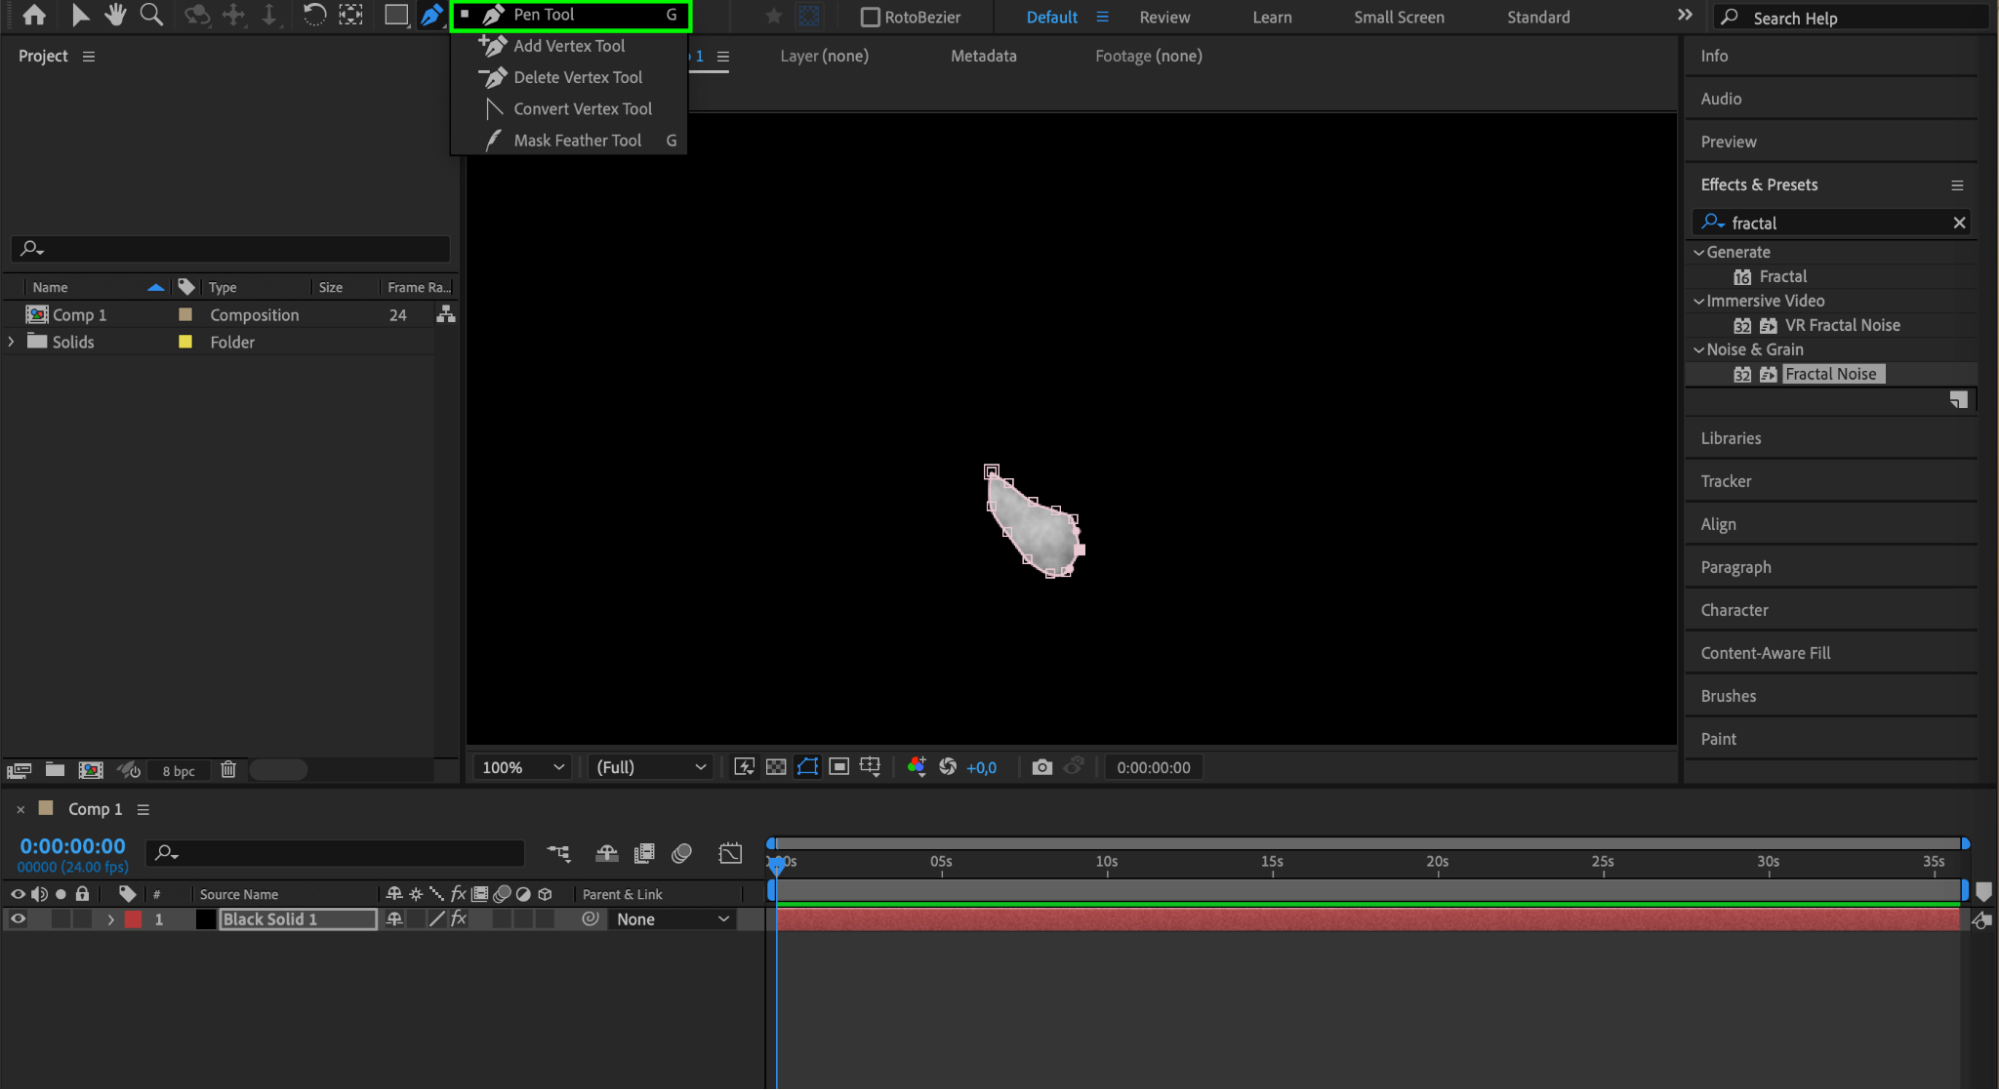 Step 5: Apply the CC Light Burst Effect
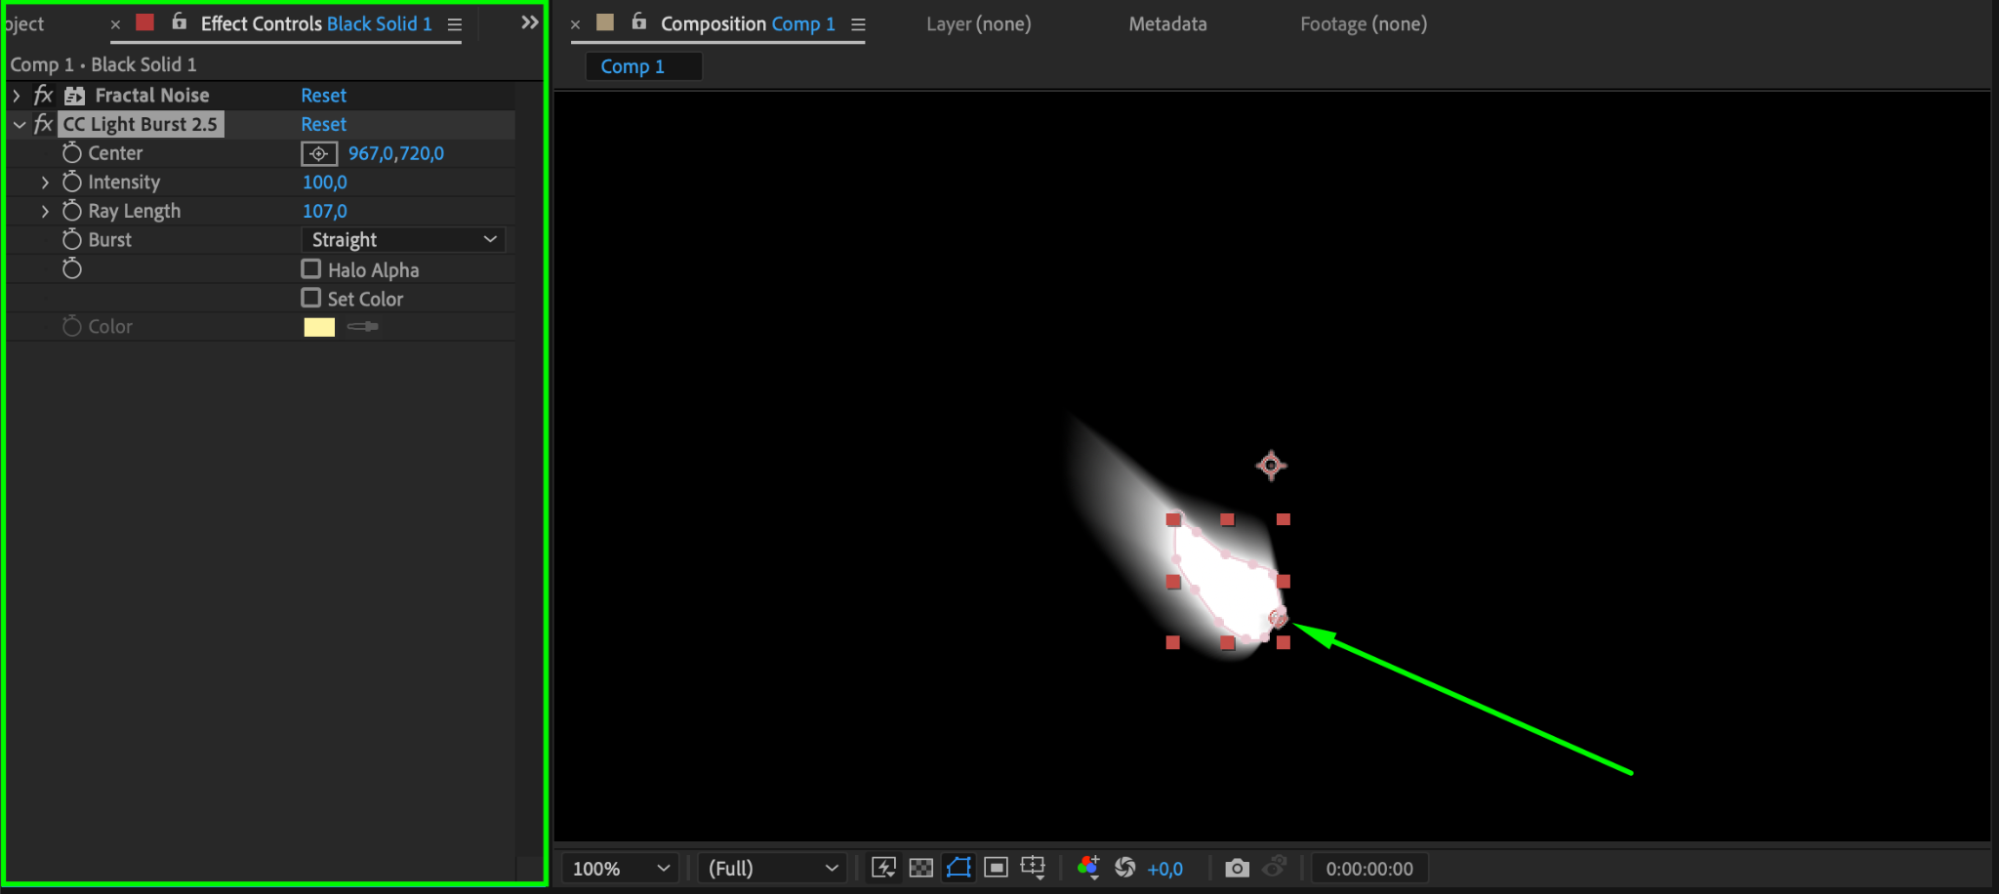
With the black solid layer still selected, go to the Effects & Presets panel and search for “CC Light Burst”. Apply this effect and adjust its parameters in the Effect Controls panel to create the burst of light characteristic of a muzzle flash.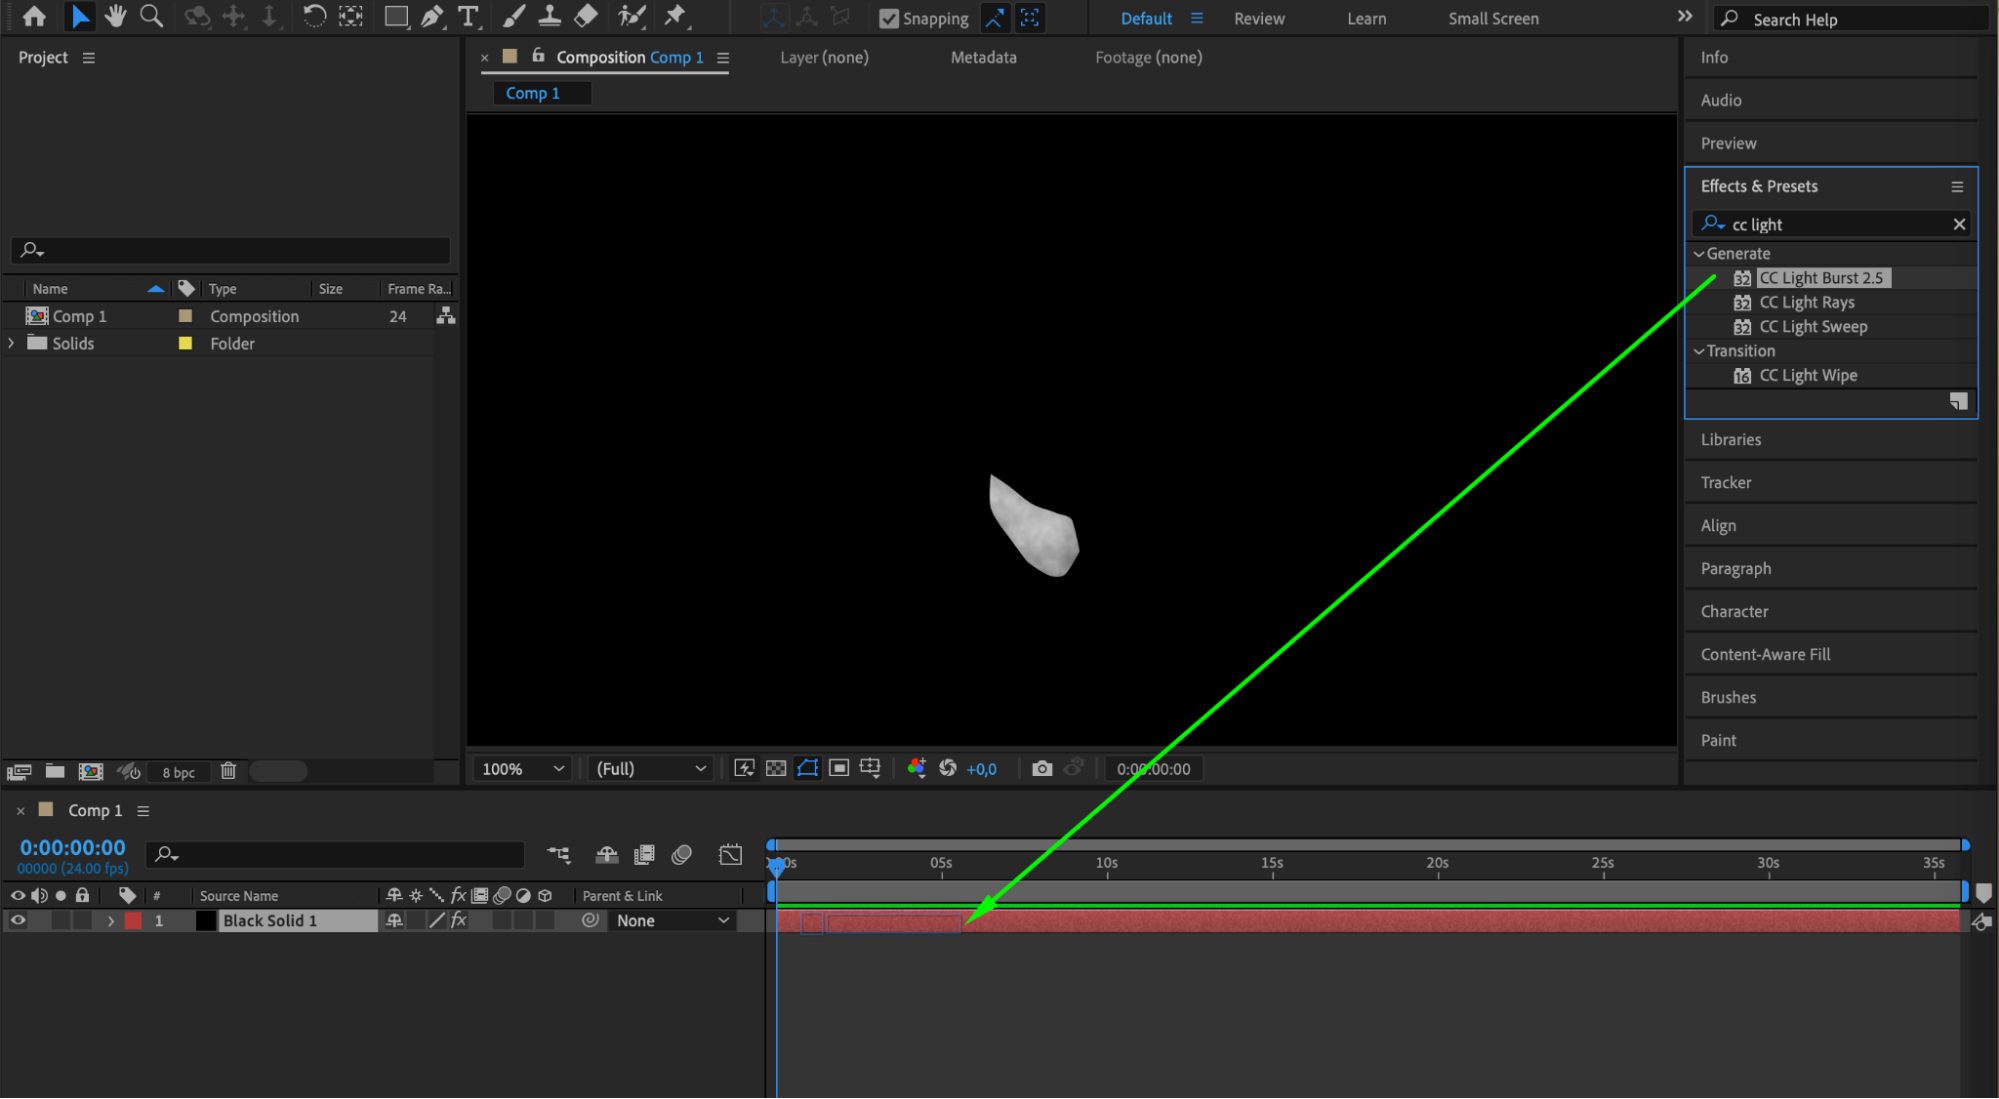
 Step 6: Apply the Fill Effect to Add Color
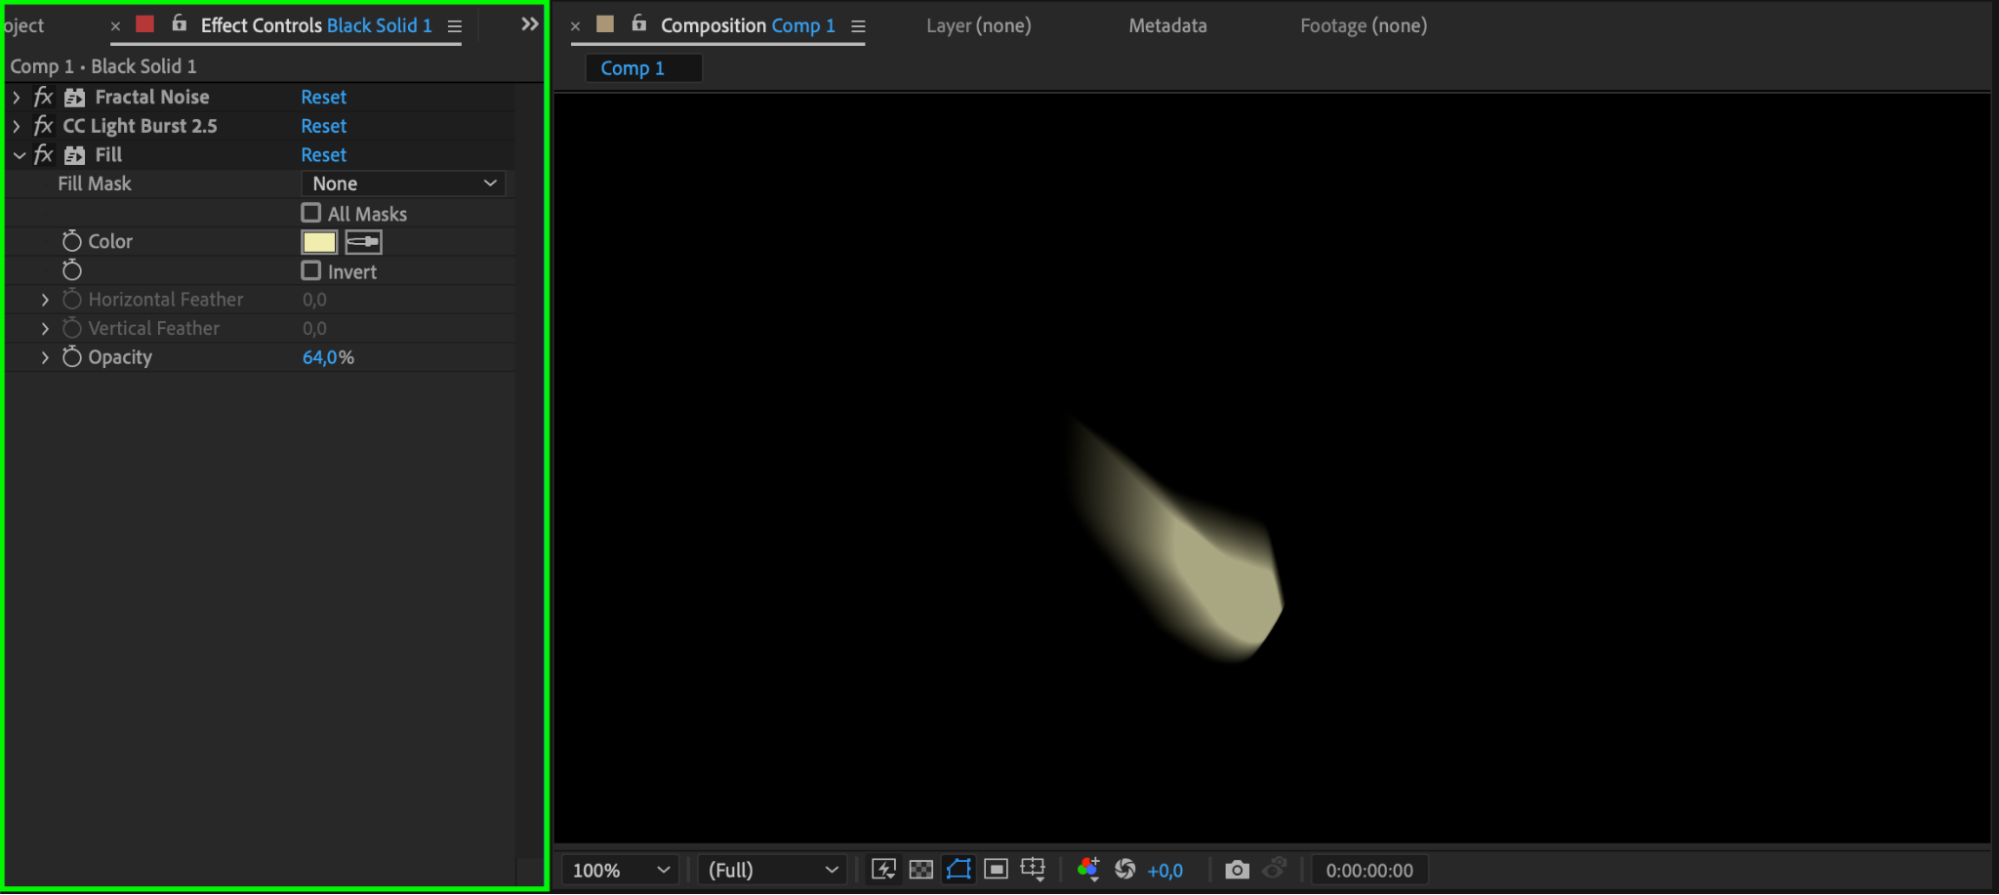
Search for the “Fill” effect in the Effects & Presets panel and apply it to the black solid layer. Choose a yellow or white color to mimic the color of a real muzzle flash.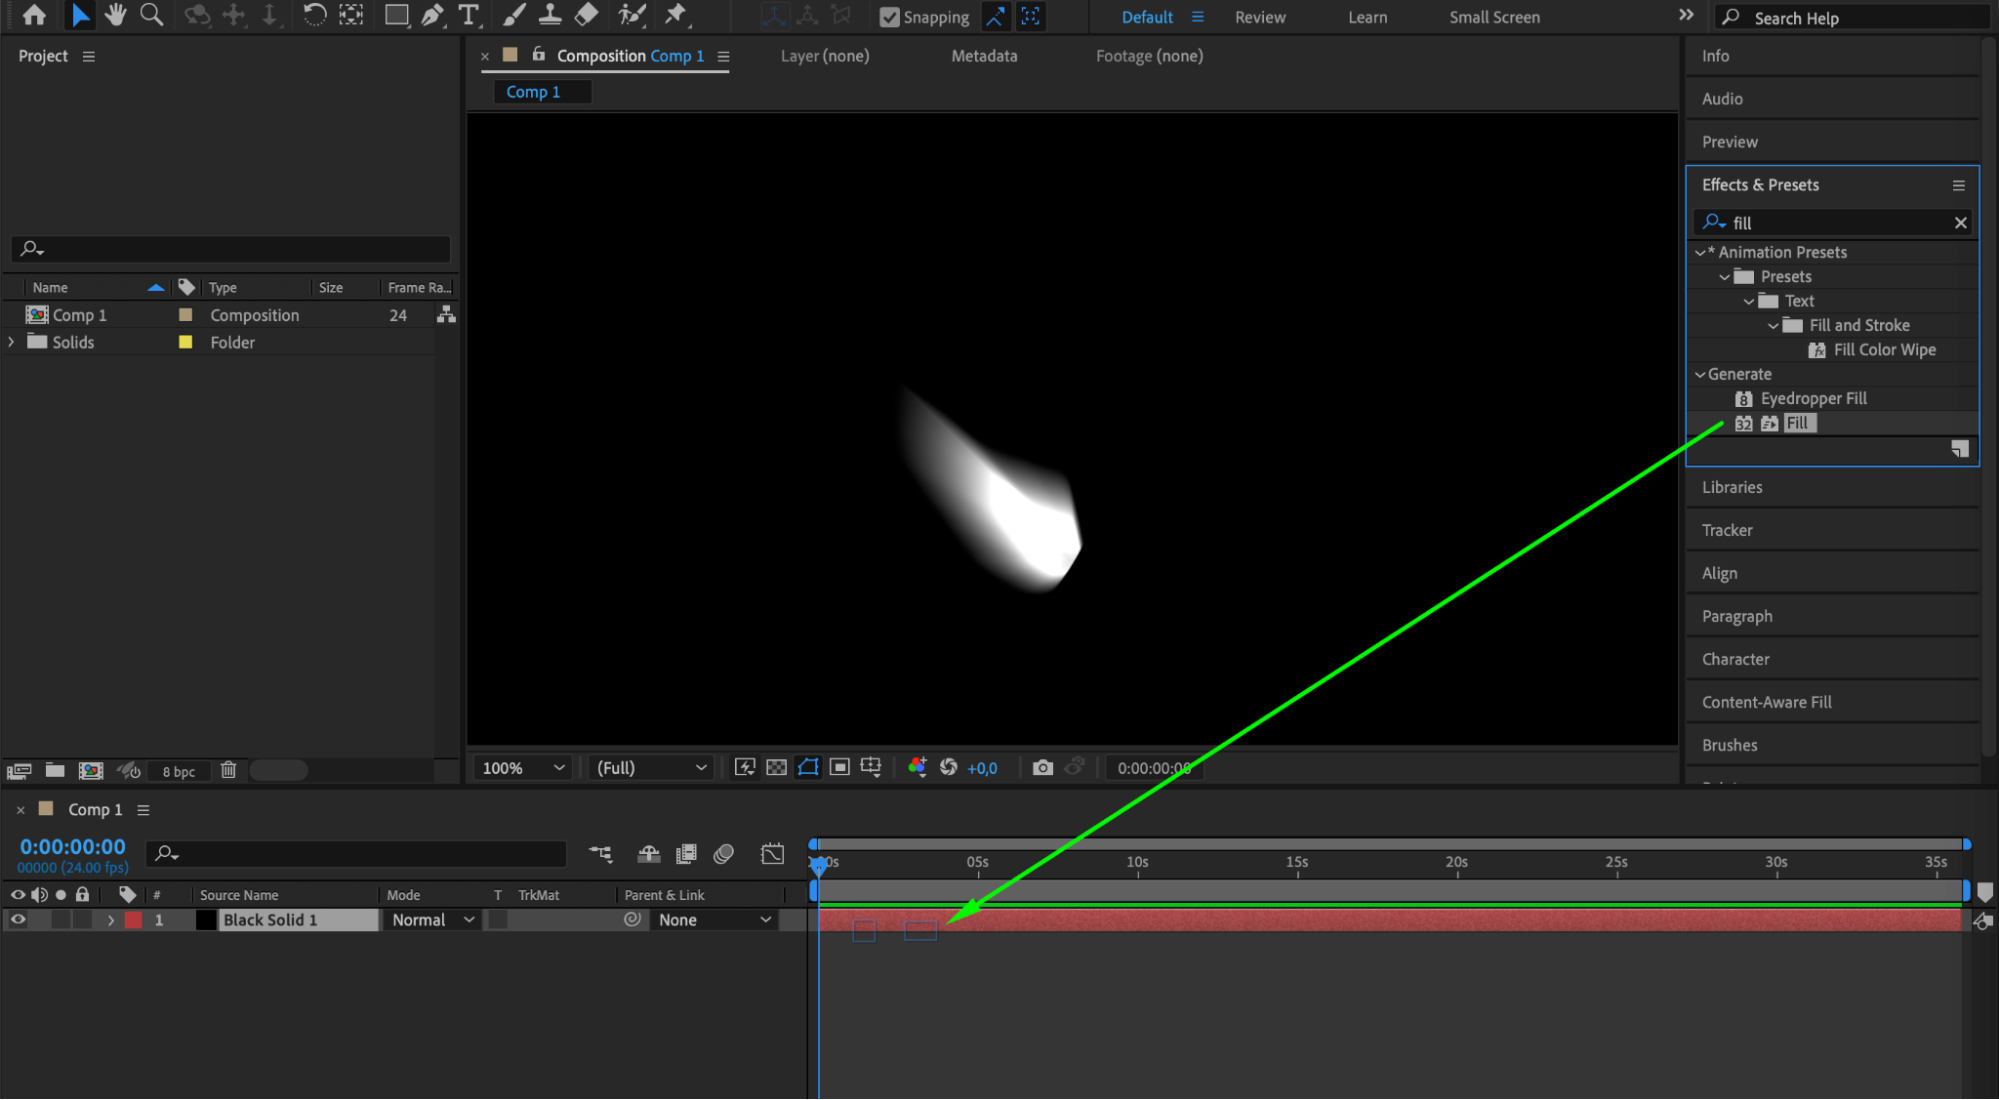
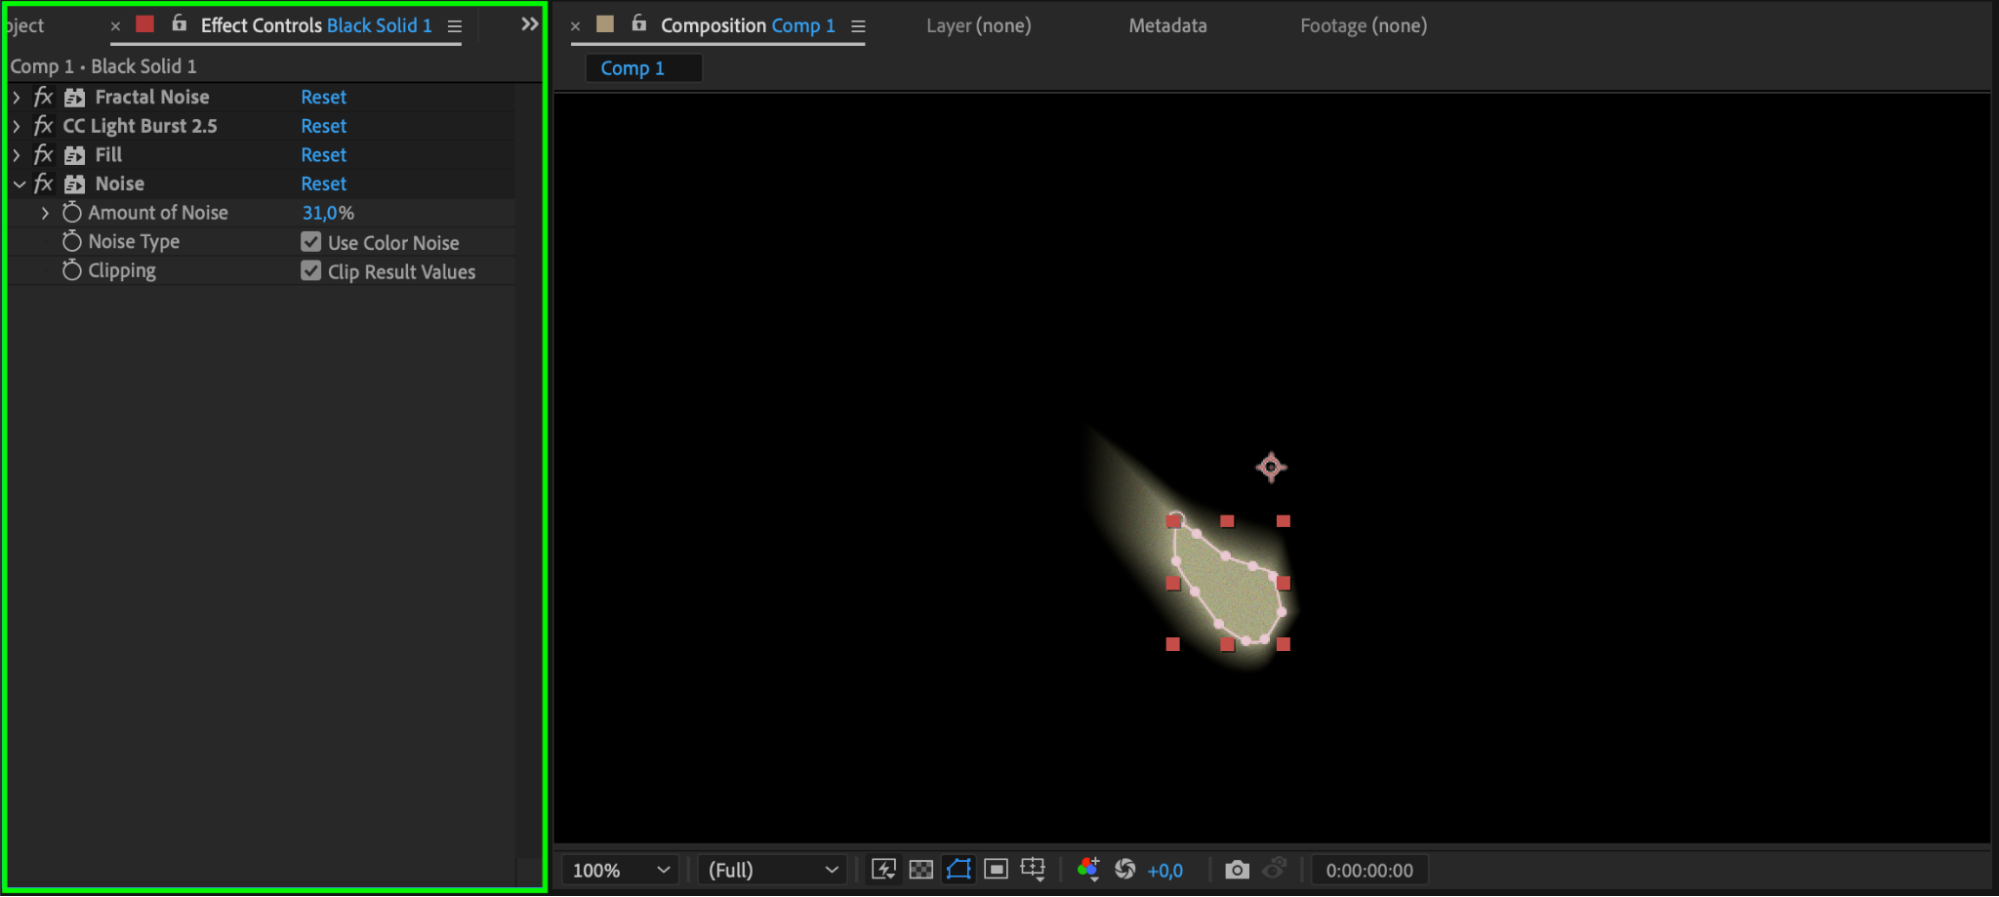
 Step 7: Apply the Noise Effect
To add a bit of graininess and realism, apply the “Noise” effect from the Effects & Presets panel. Adjust the amount of noise to your liking, ensuring the effect is subtle yet noticeable.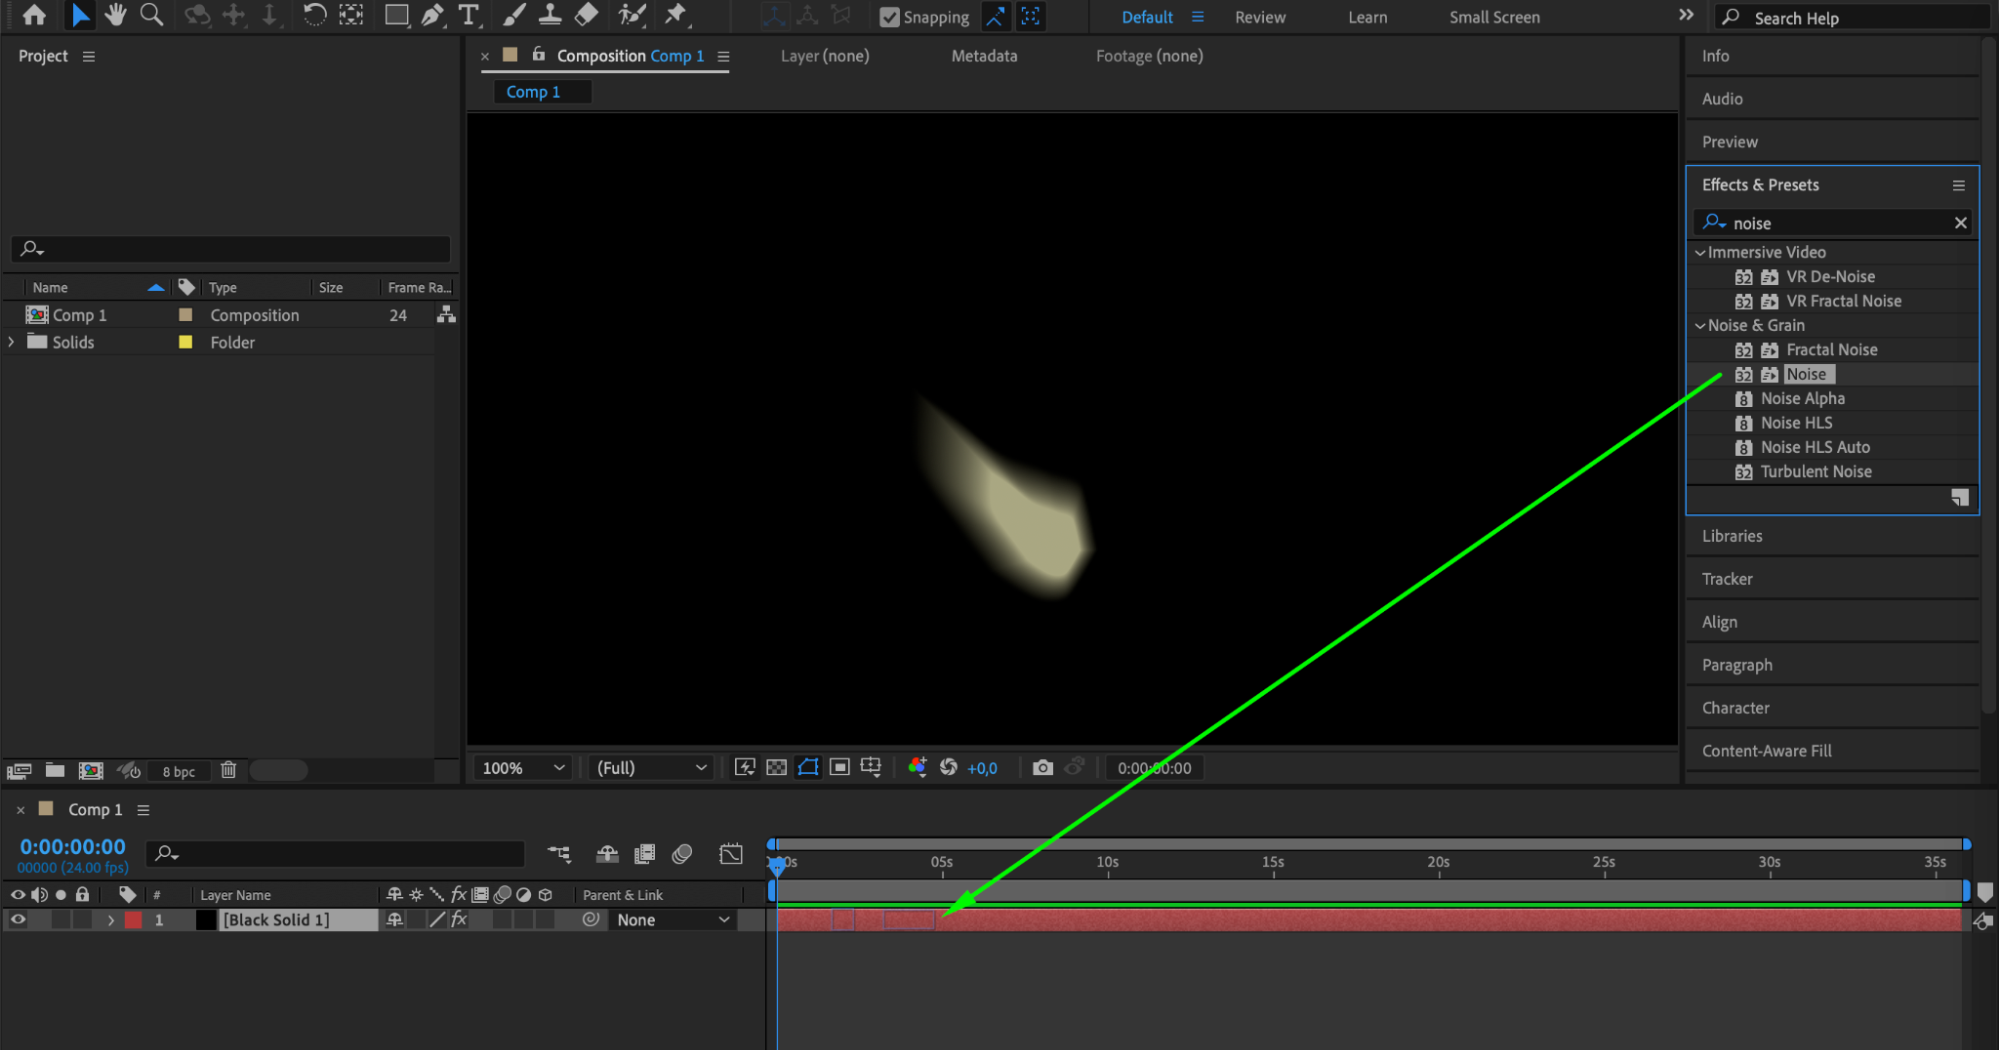
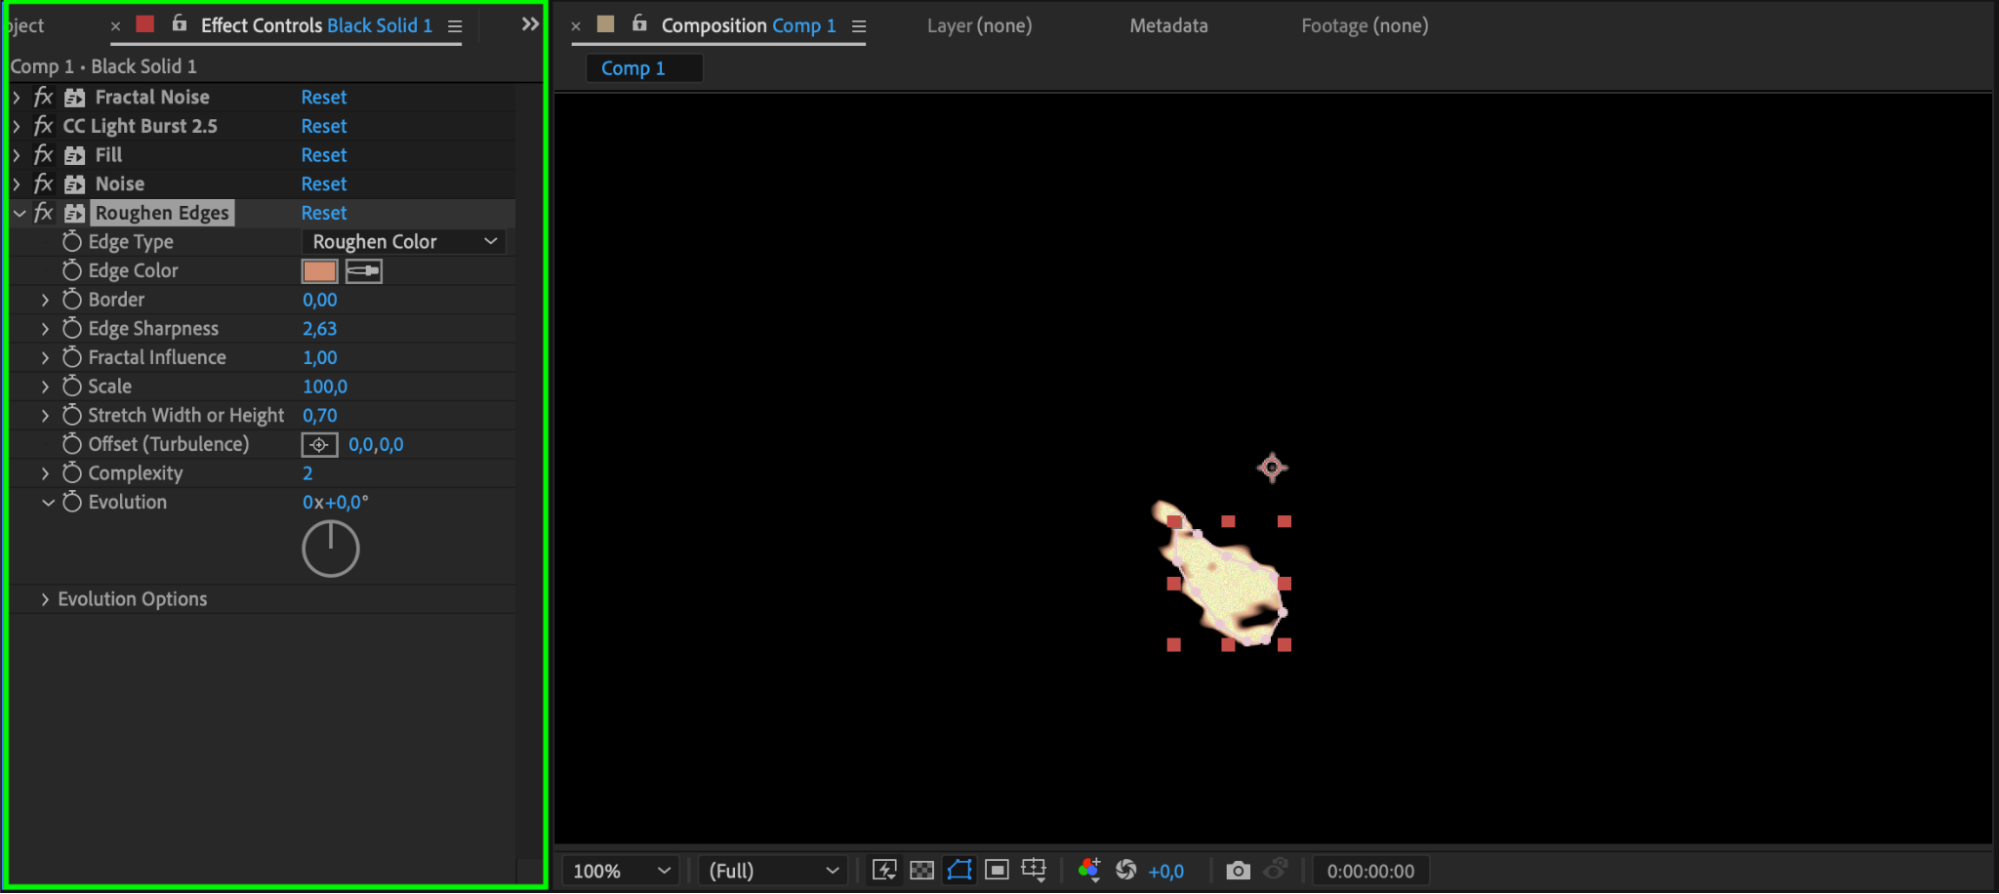
 Step 8: Apply the Roughen Edges Effect
For more organic edges, apply the “Roughen Edges” effect. Adjust the settings to create irregular and jagged edges, enhancing the realism of the muzzle flash.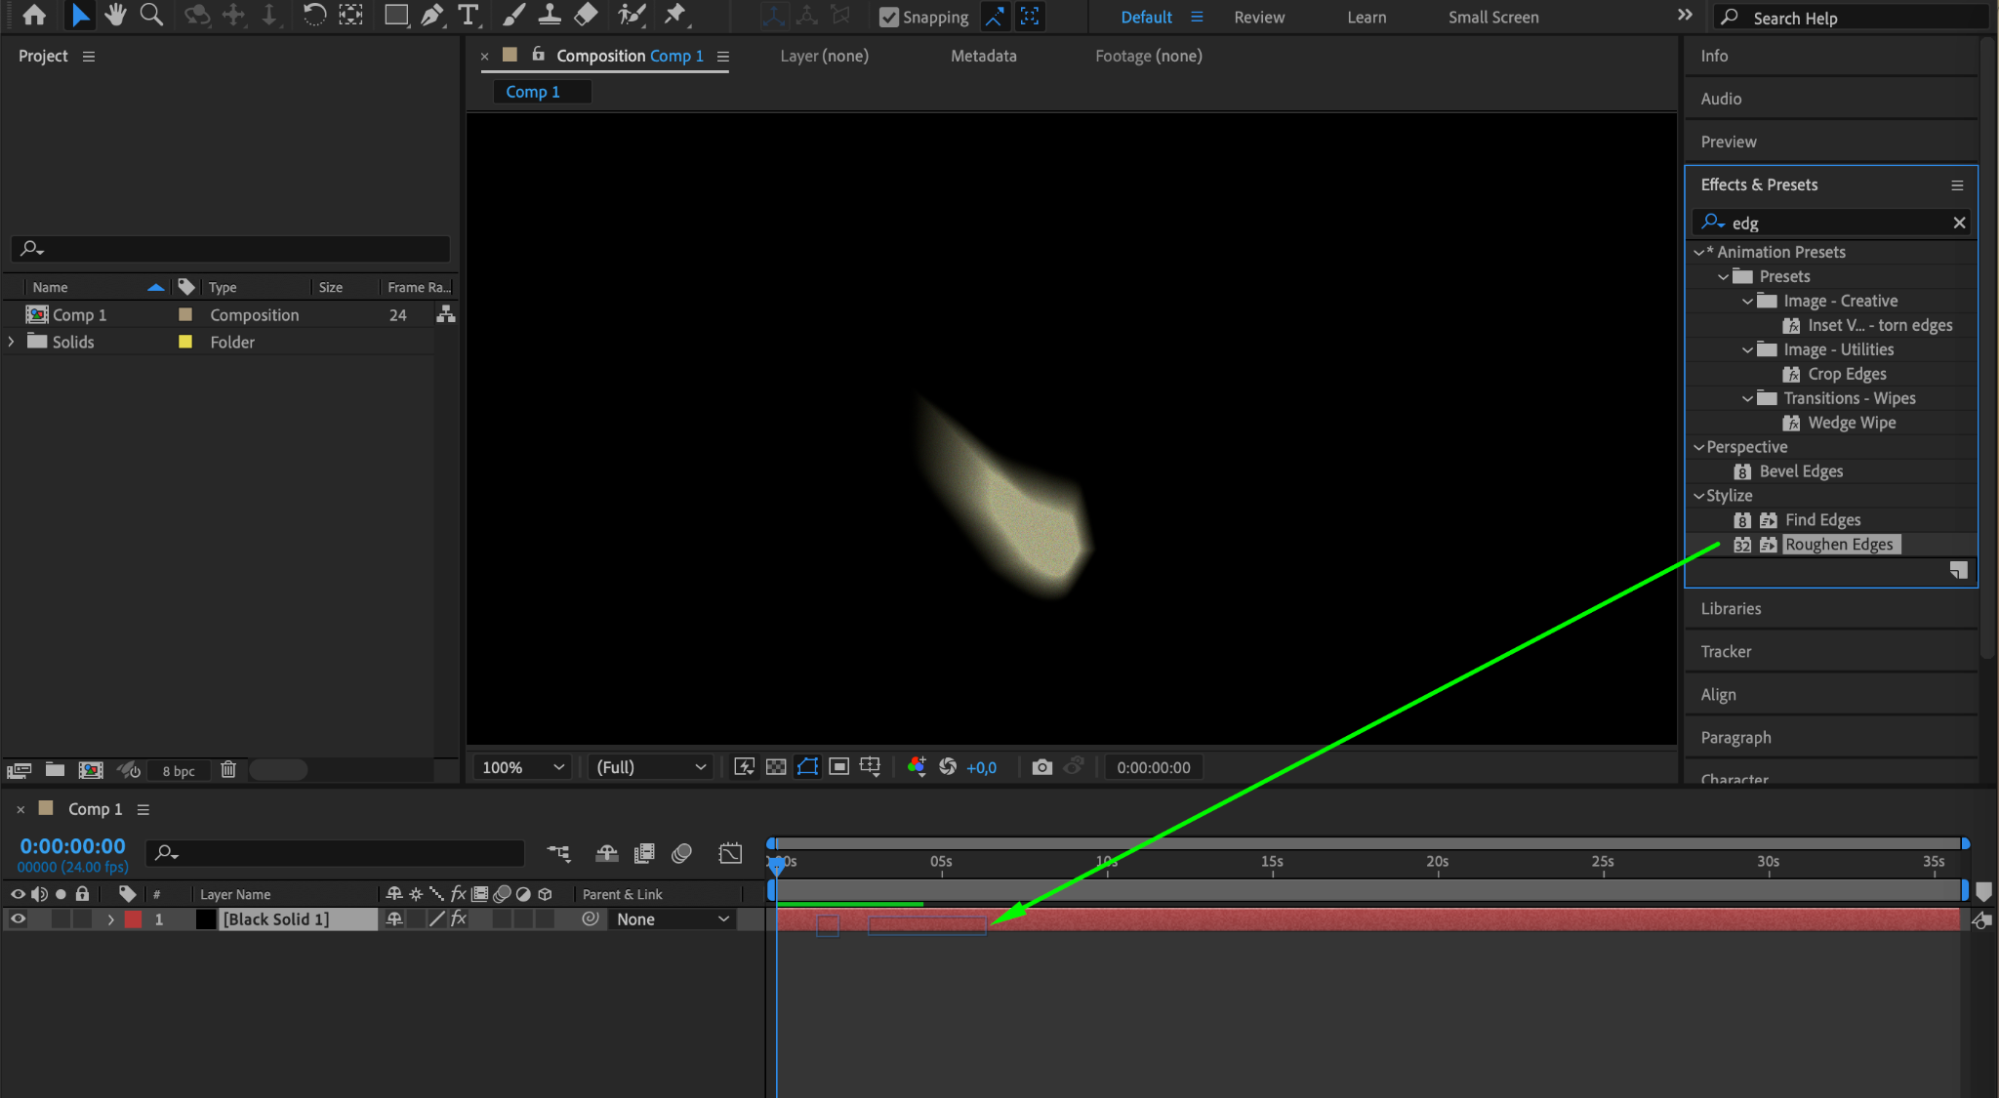
 Step 9: Use Region of Interest to Focus on the Muzzle Flash
Activate the Region of Interest tool and draw a box around the muzzle flash area. This helps you focus on the specific part of the composition you are working on.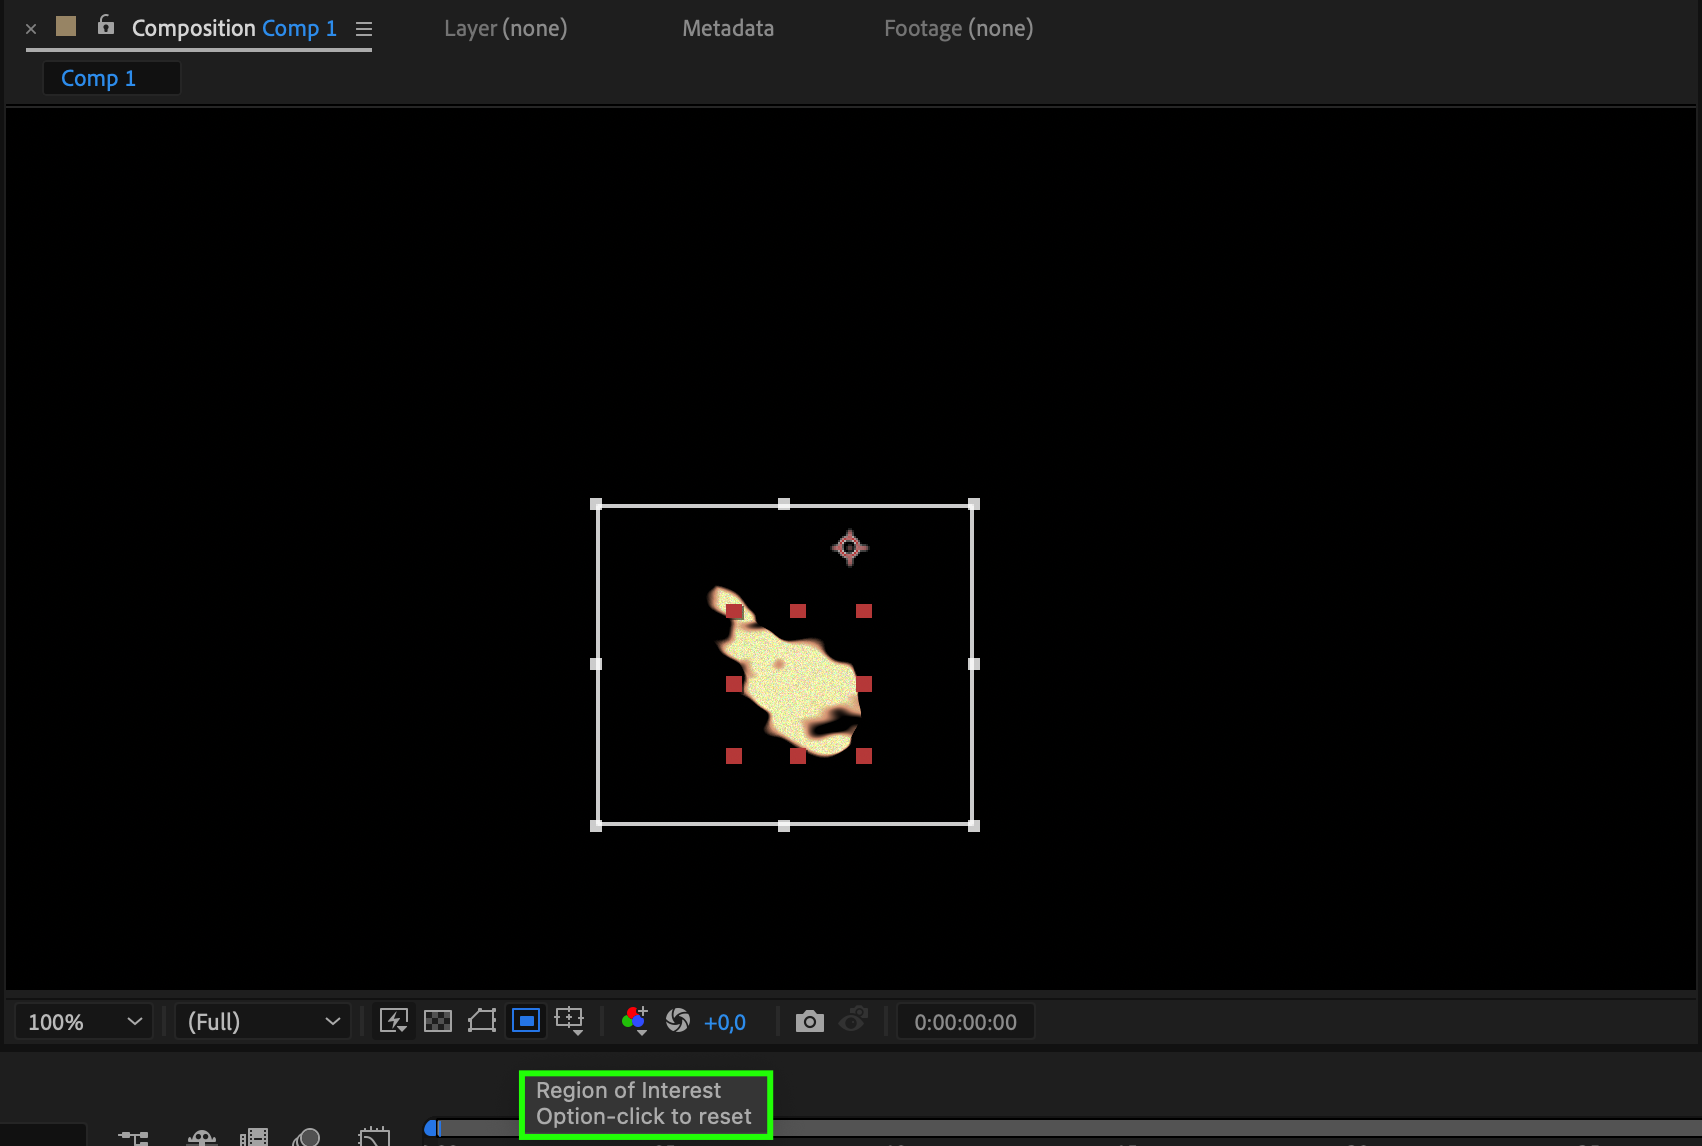
 Step 10: Pre-compose the Muzzle Flash
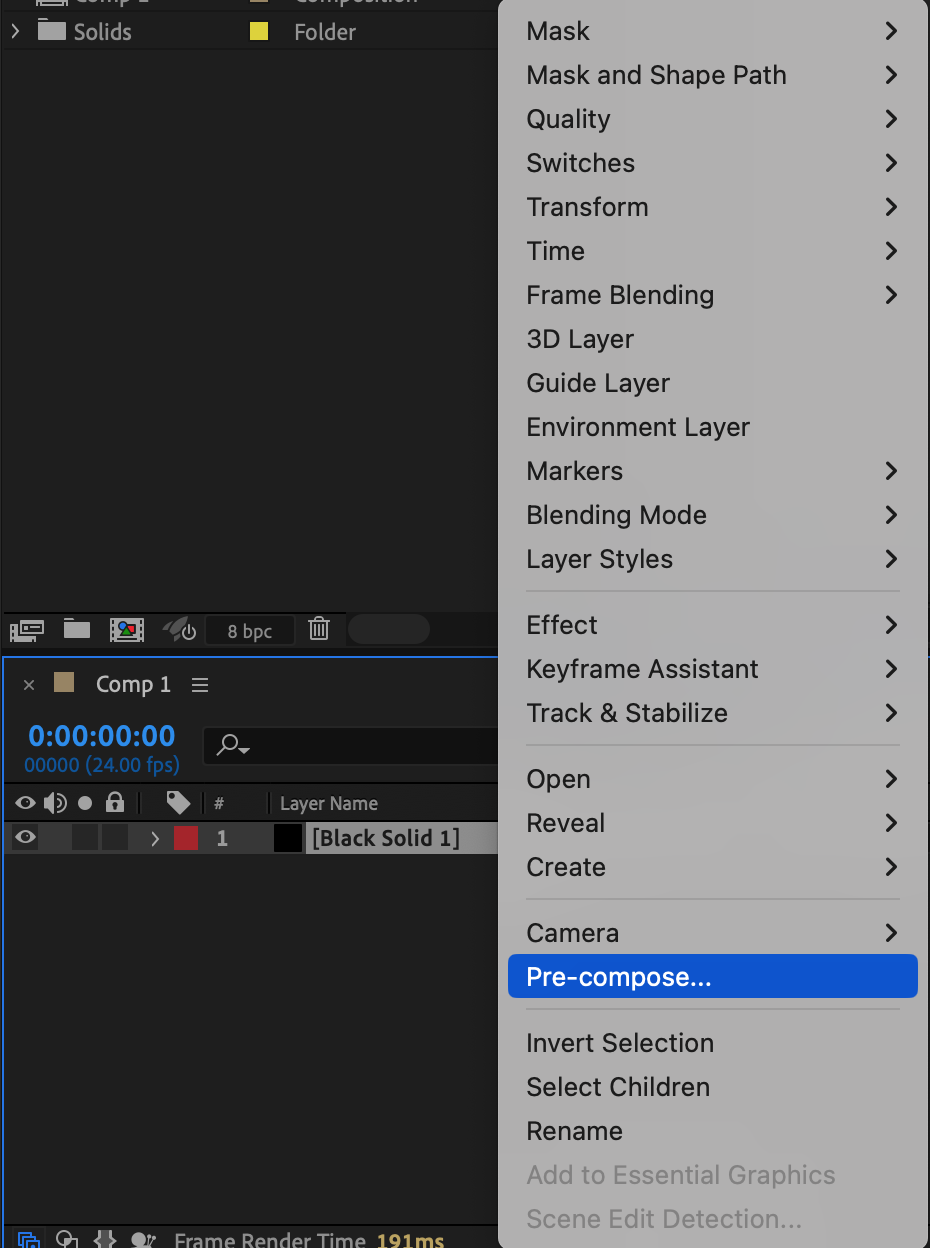
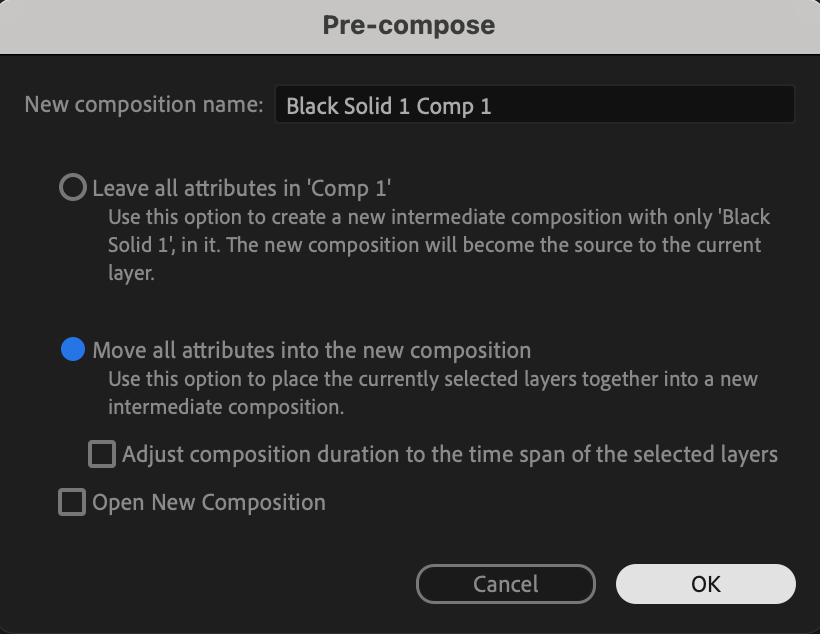
Select the black solid layer and go to Layer > Pre-compose. This helps keep your project organized and makes it easier to apply the muzzle flash to your footage.
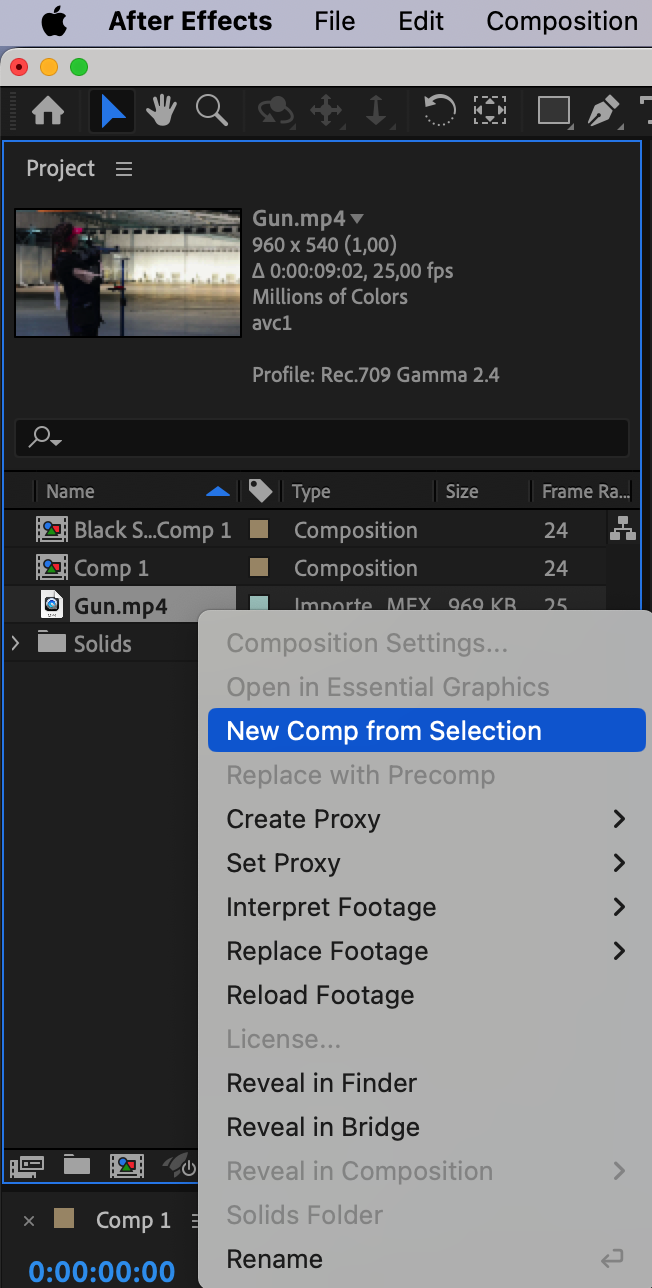
 Step 11: Import Your Video File and Create a New Composition
Import the video footage where you want to add the muzzle flash. Create a new composition with this footage.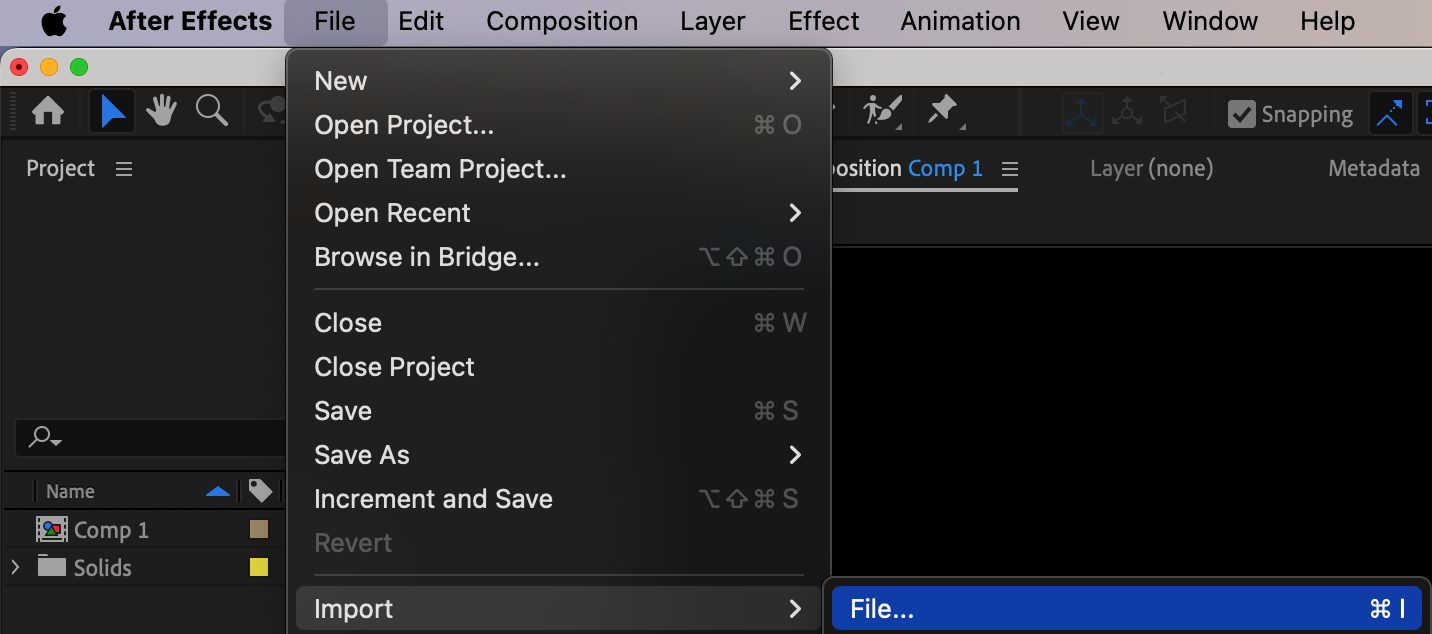
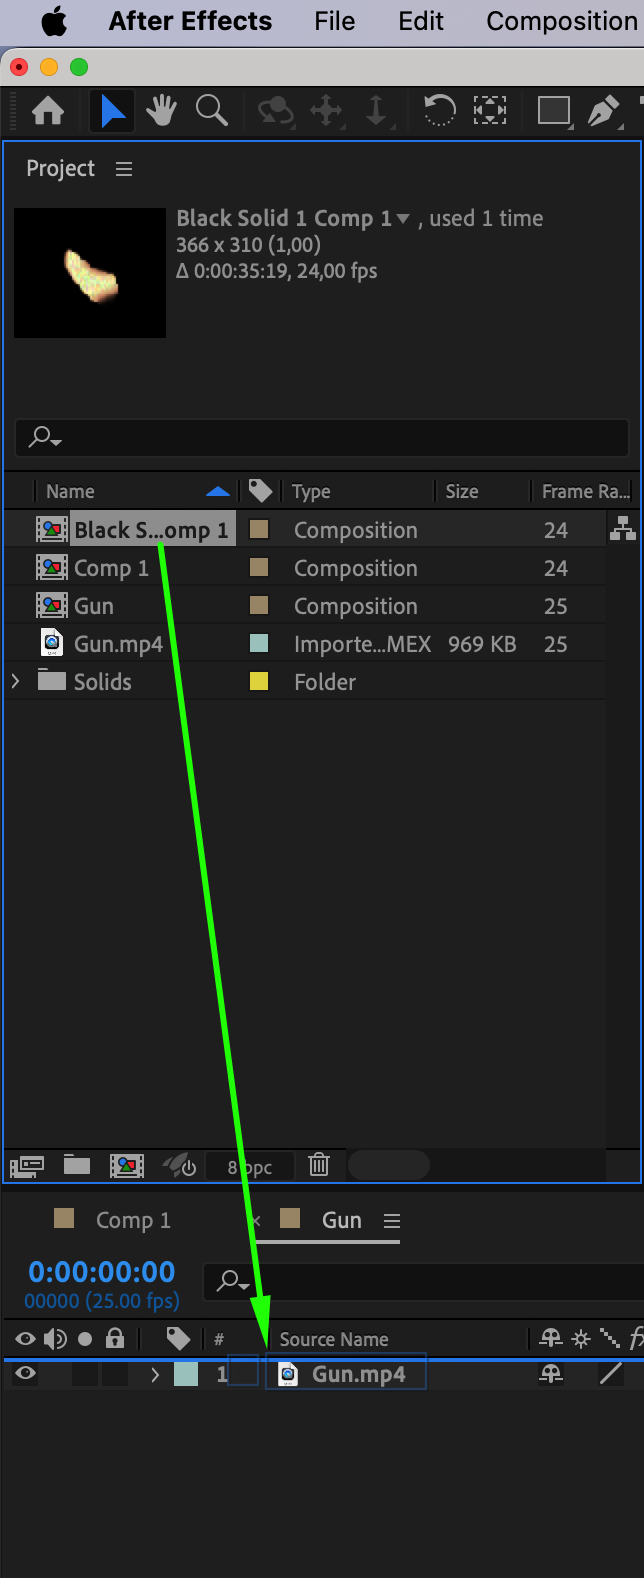
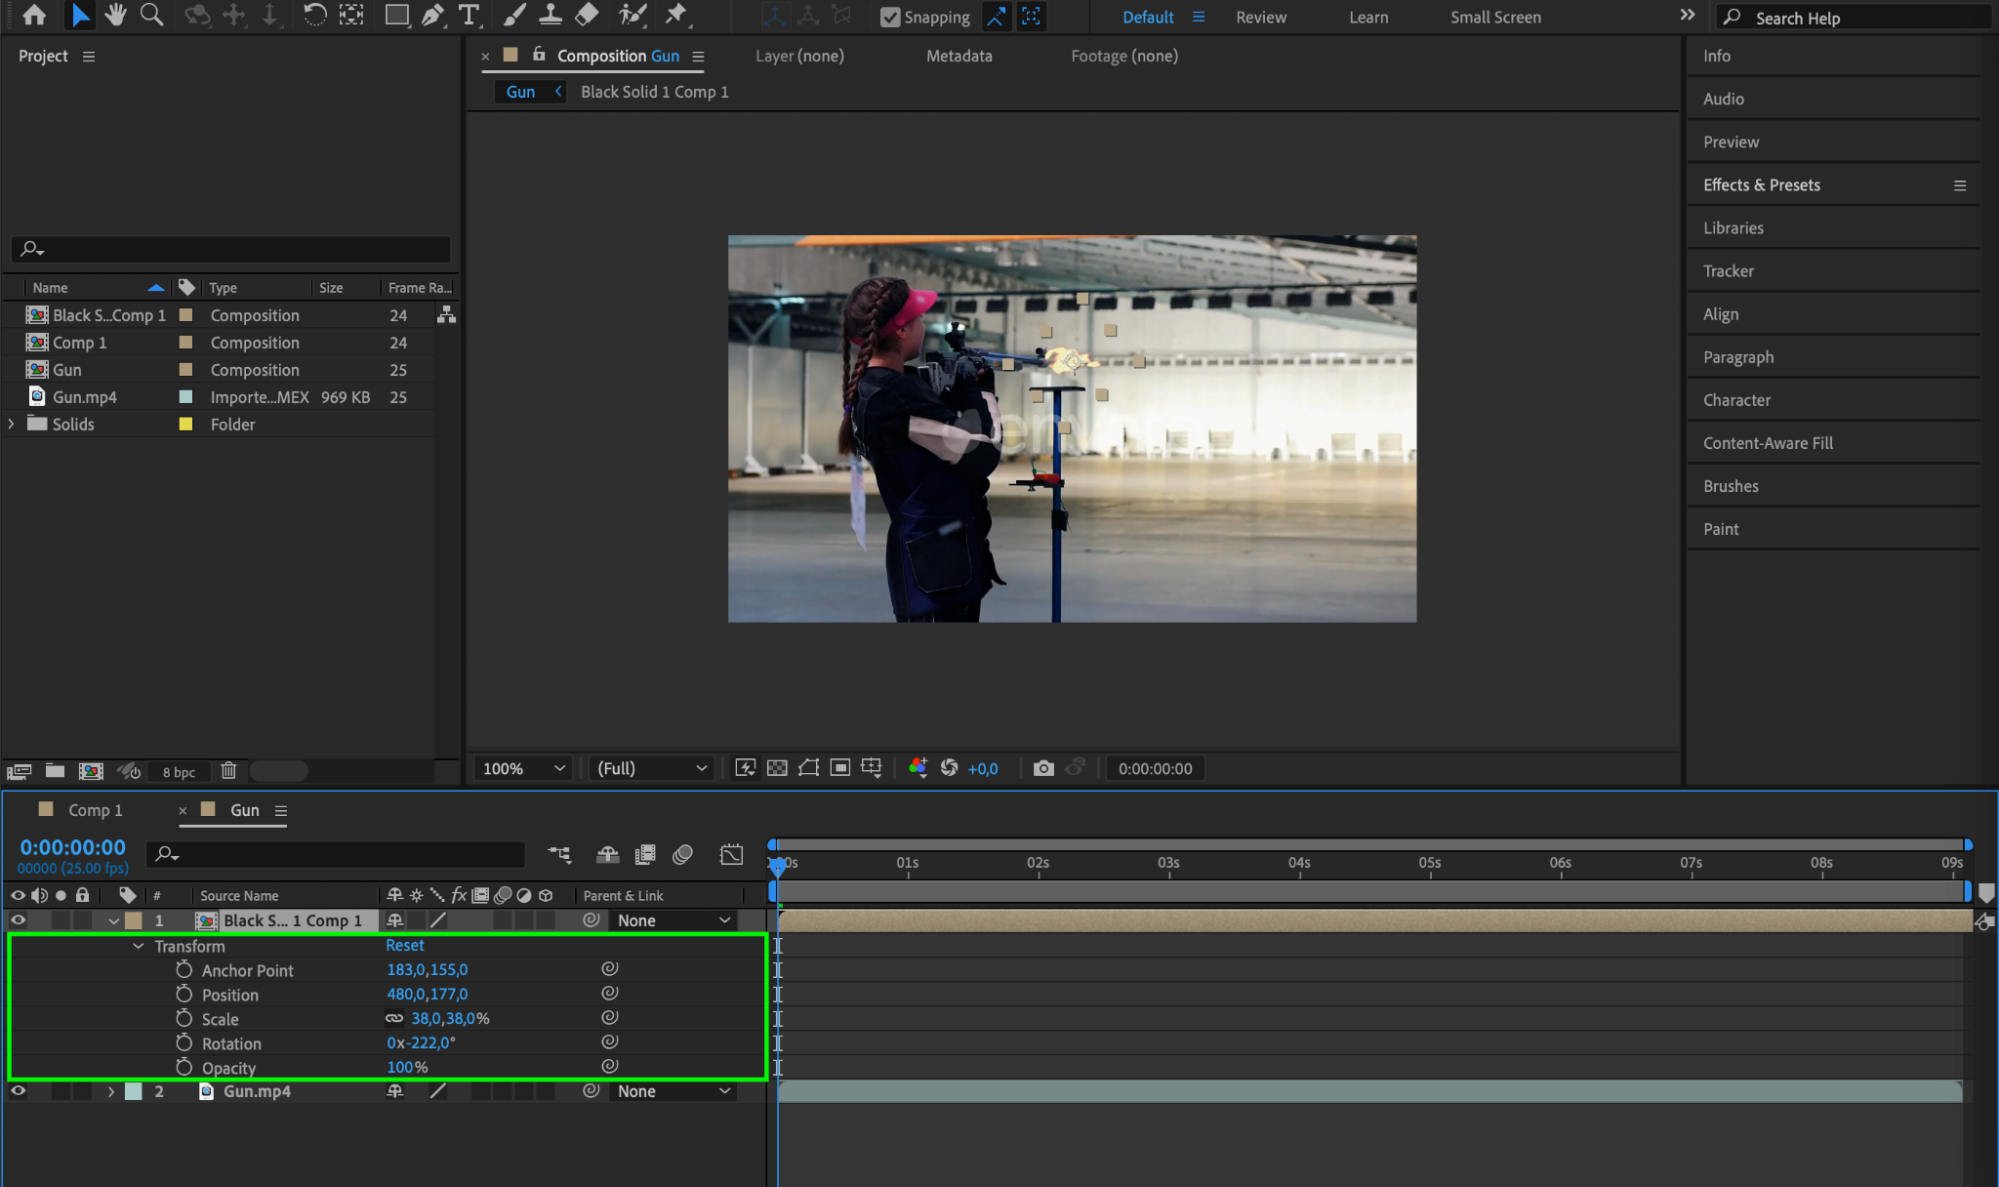
 Step 12: Add the Muzzle Flash to Your Video
Drag your pre-compe onto the timeline of your new composition. Use the Transform controls to position and scale the muzzle flash appropriately over the gun barrel.
 Step 13: Trim the Muzzle Flash Layer
Use the shortcut “Alt/Option + [” and “Alt/Option + ]” to trim the muzzle flash layer, ensuring it only appears for a few frames. This mimics the brief duration of a real muzzle flash.

 Step 14: Create an Adjustment Layer for Smoke
Create a new Adjustment Layer and apply the “Fractal Noise” effect. Lower the opacity in the Effect Controls panel so you can see your video beneath it. Use the Pen Tool to draw a mask that simulates the shape of smoke.
 Step 15: Adjust the Smoke’s Opacity and Feather
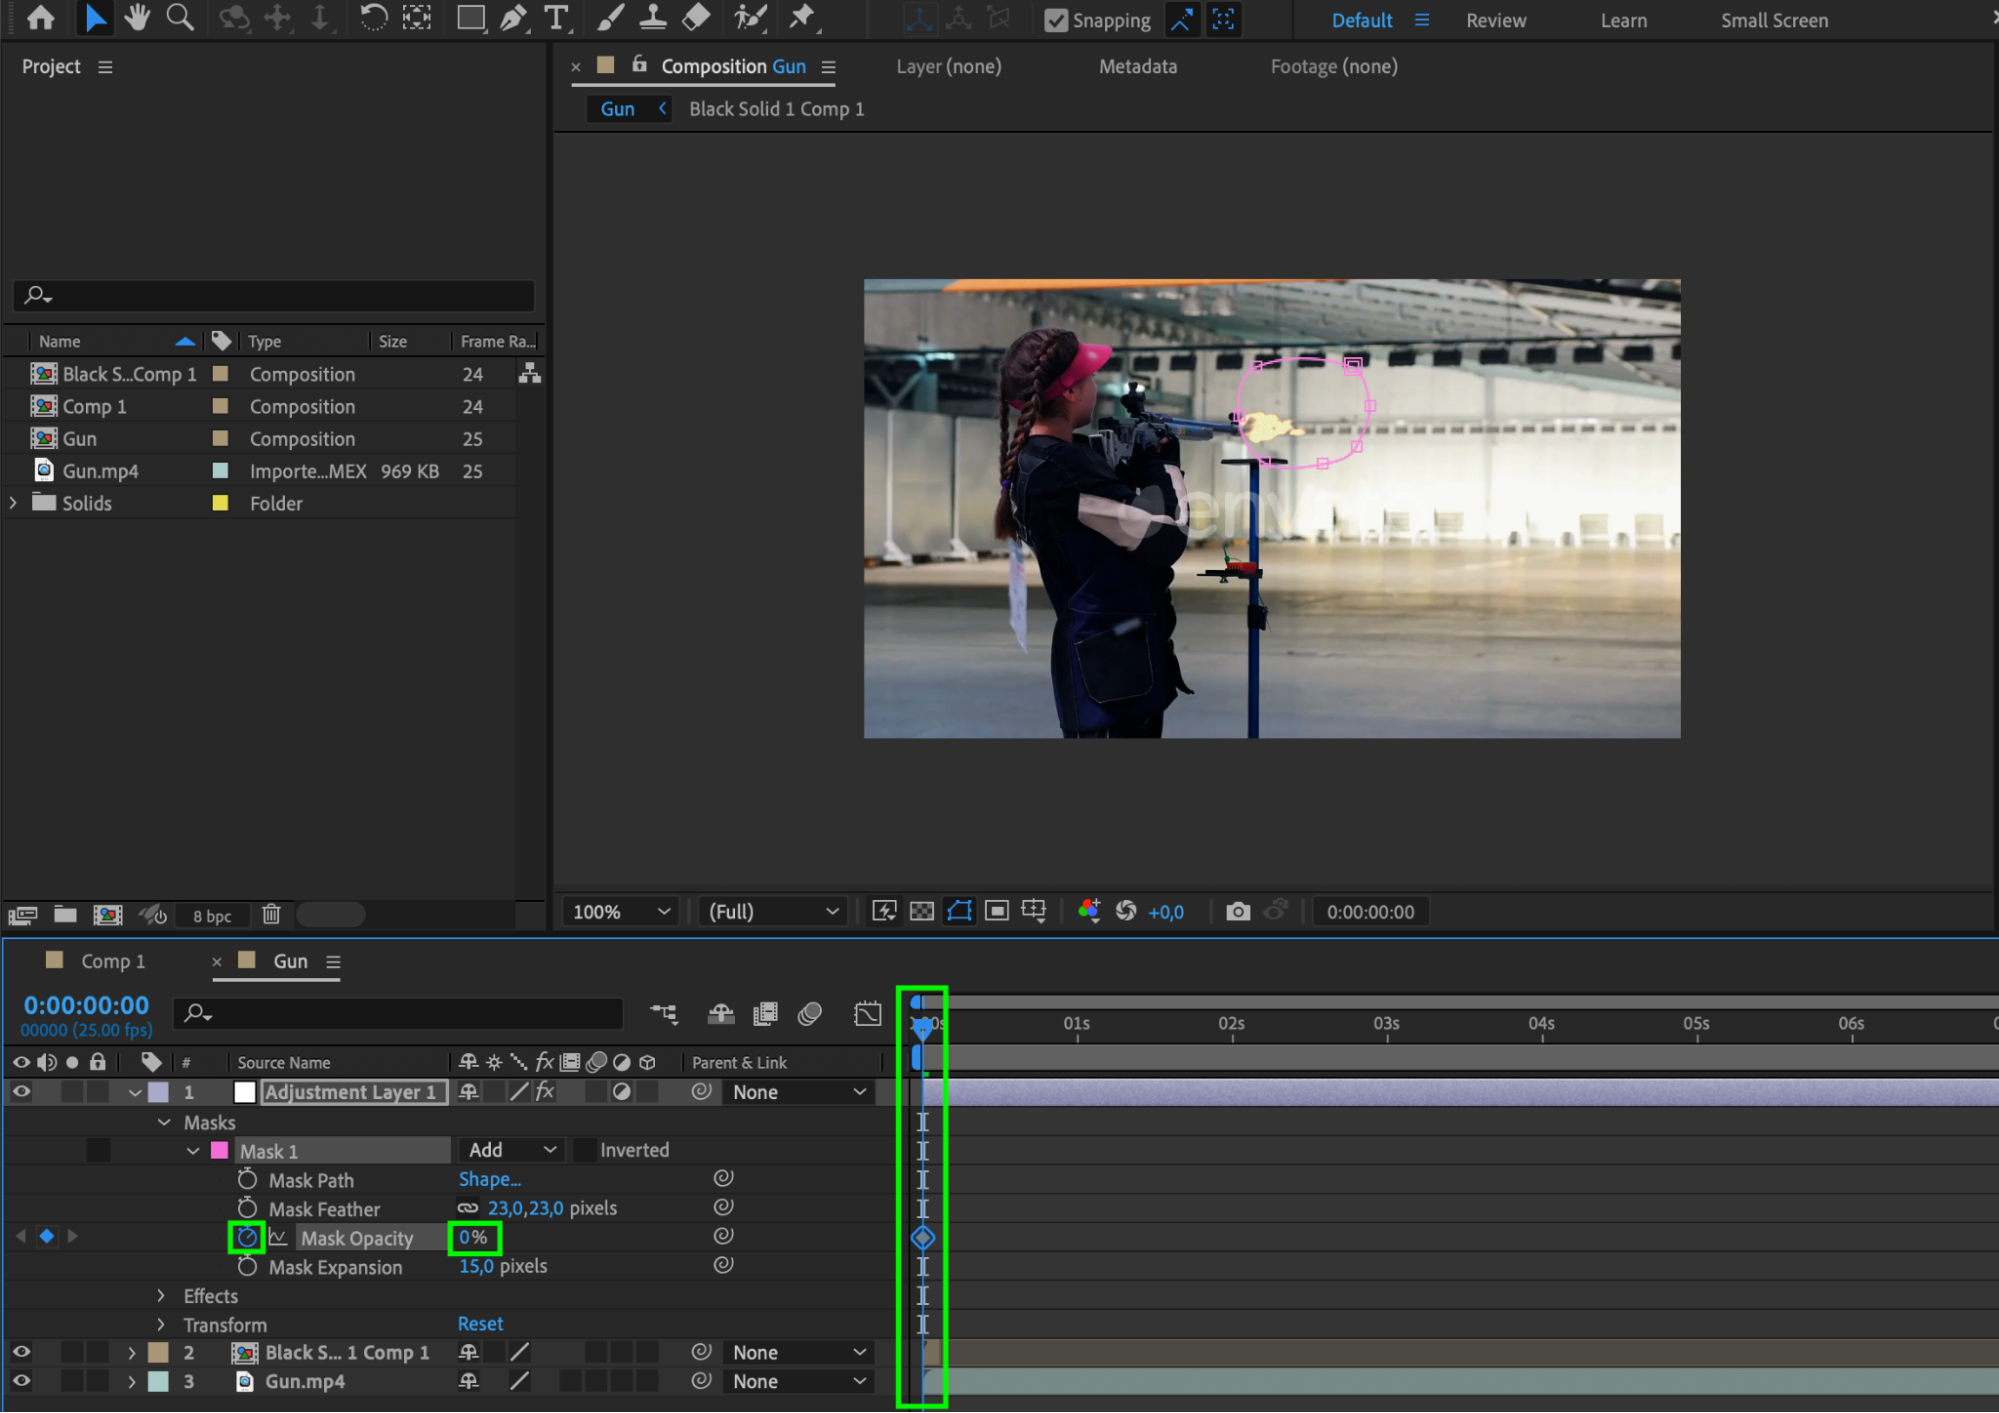
Set the opacity of the mask in the Effect Controls panel to make it look like realistic smoke. Use the Mask Feather property to soften the edges, creating a more natural smoke appearance.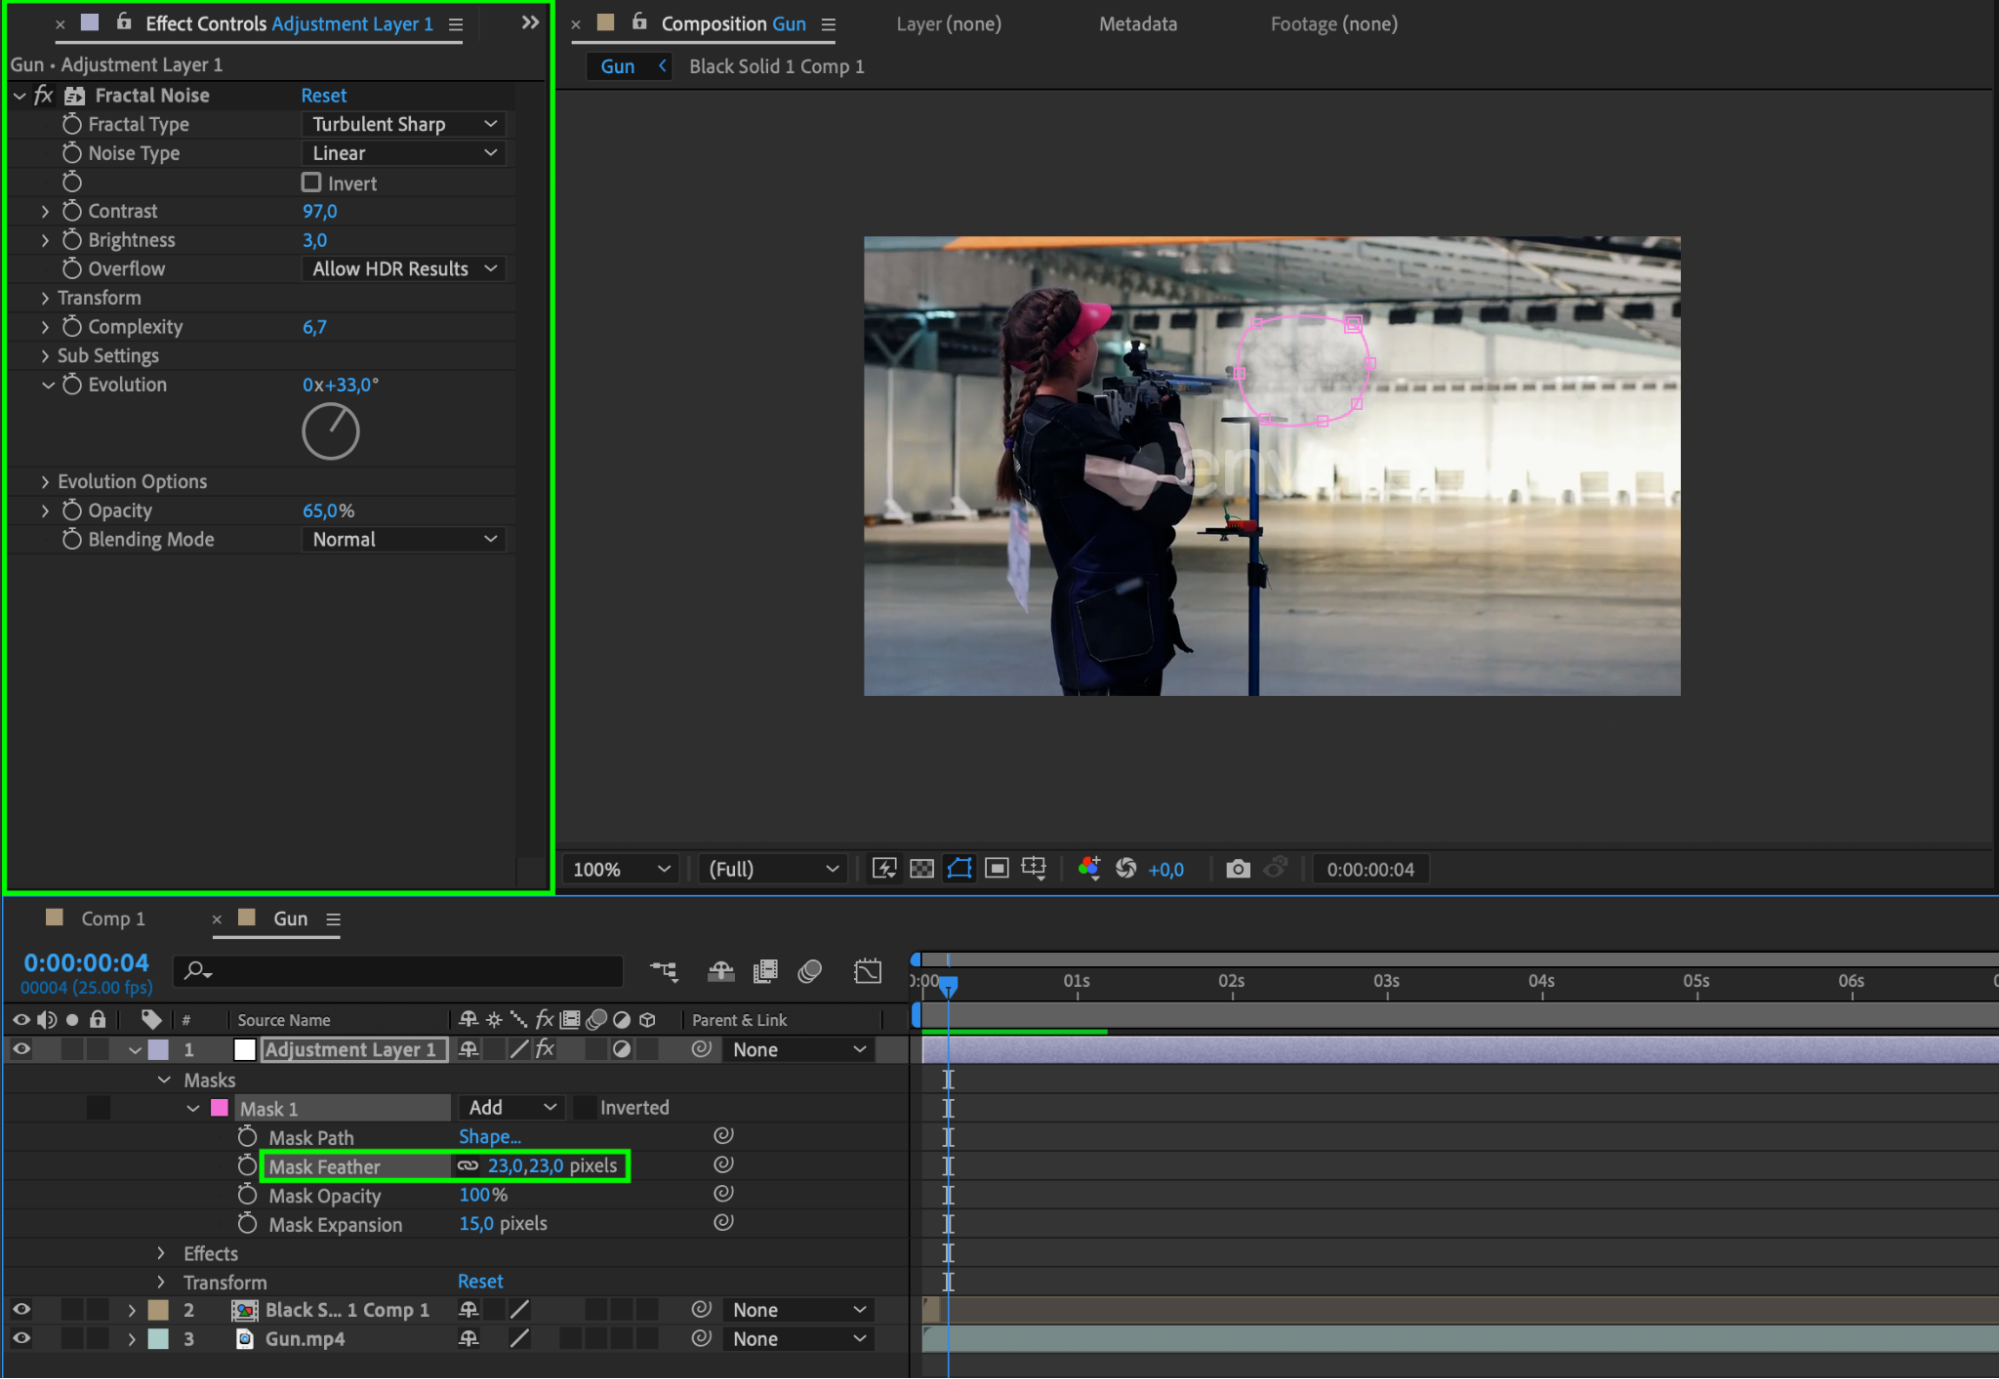 Step 16: Animate the Smoke’s Opacity
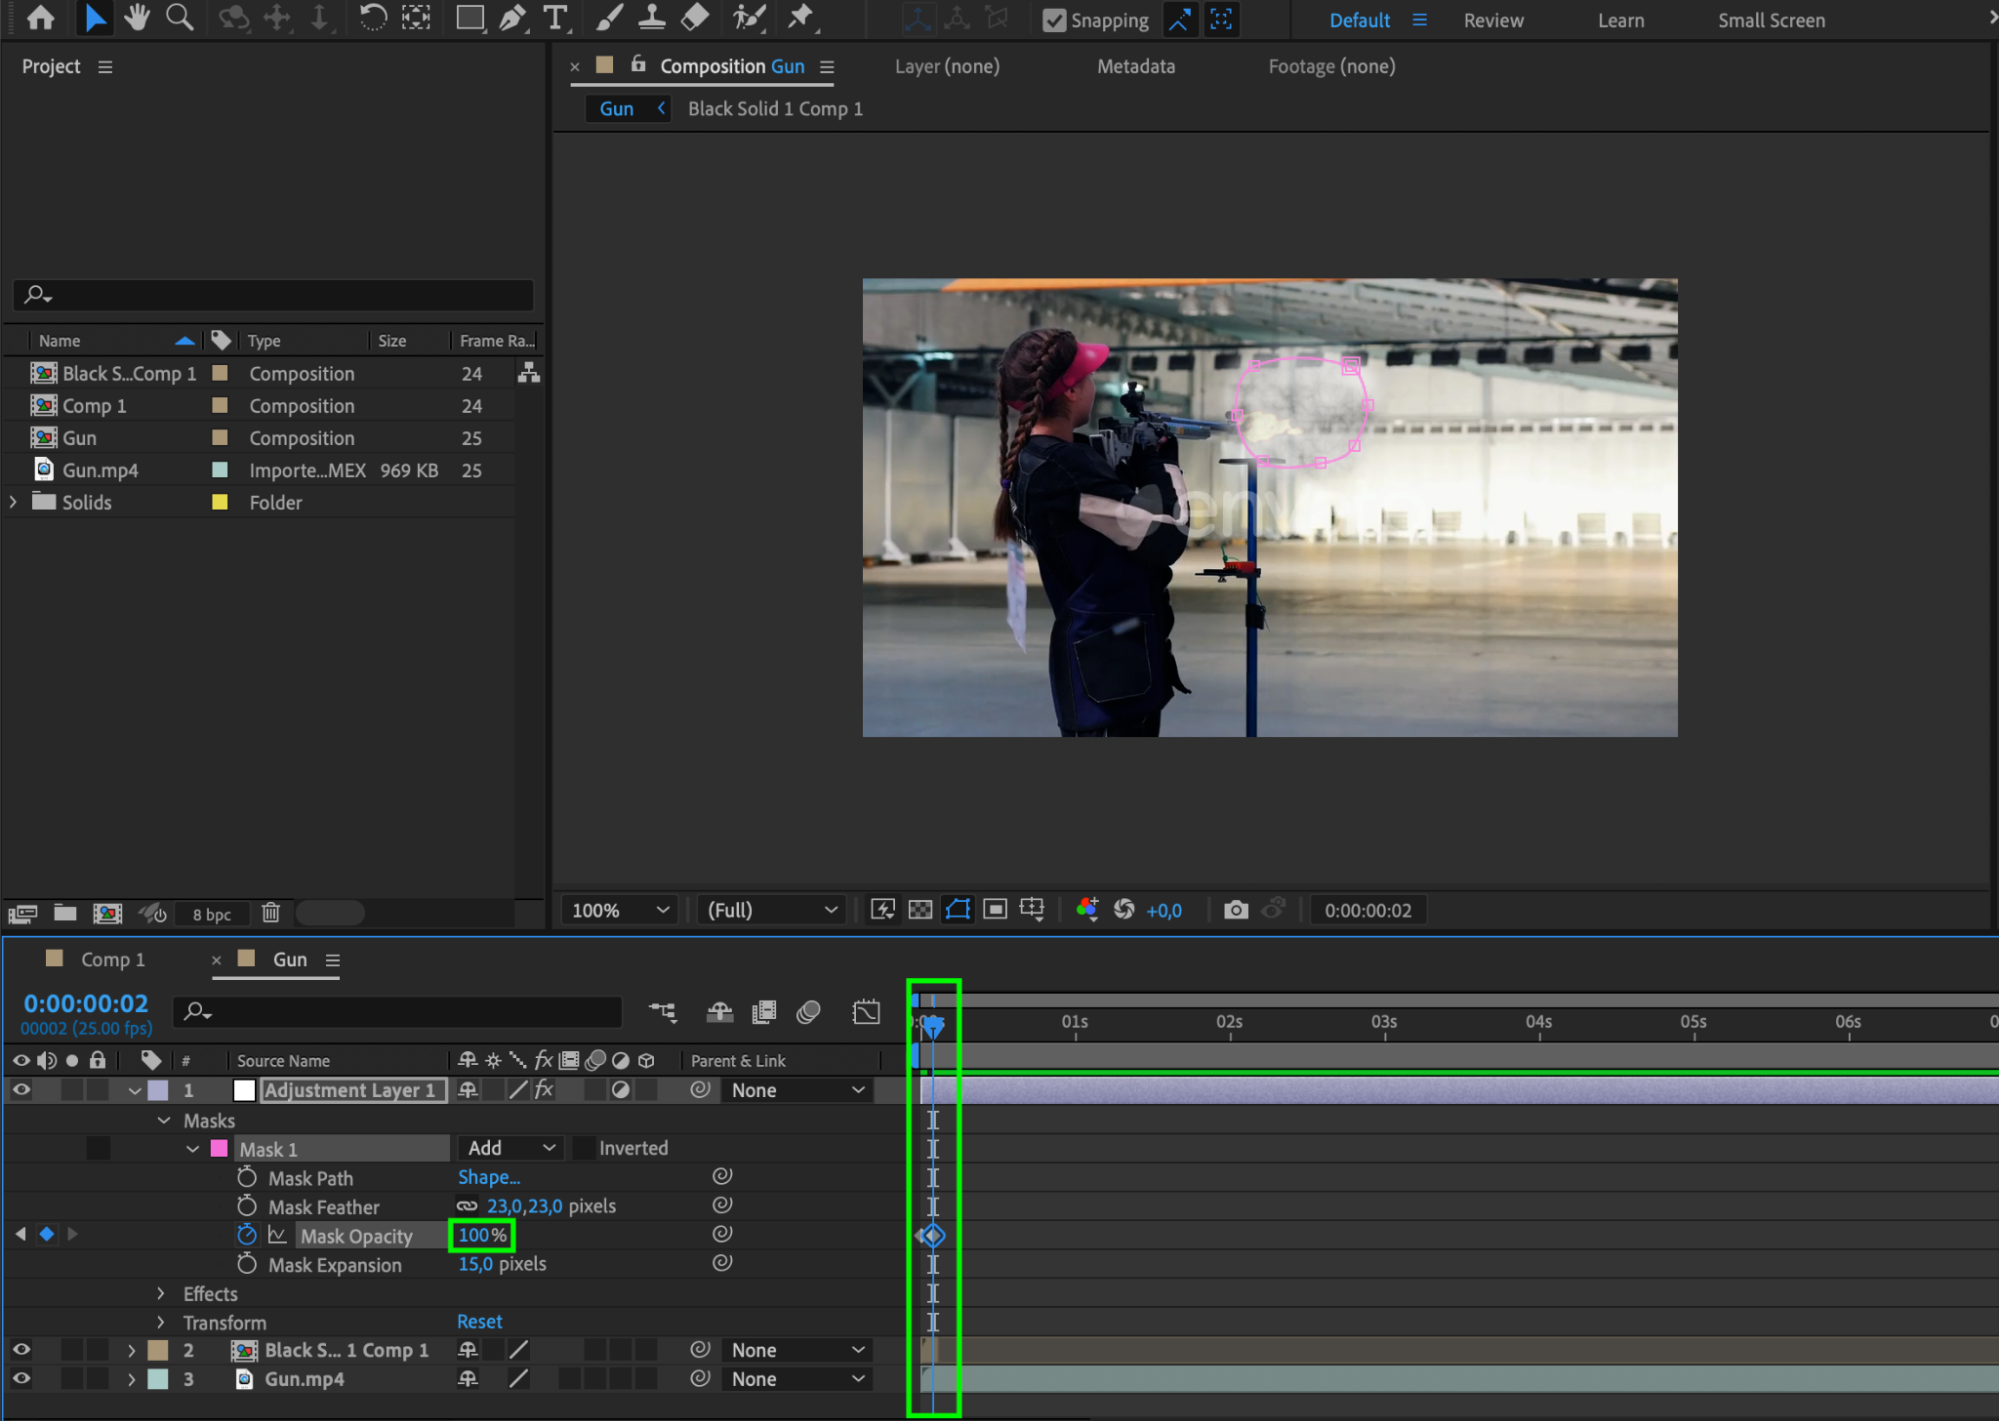
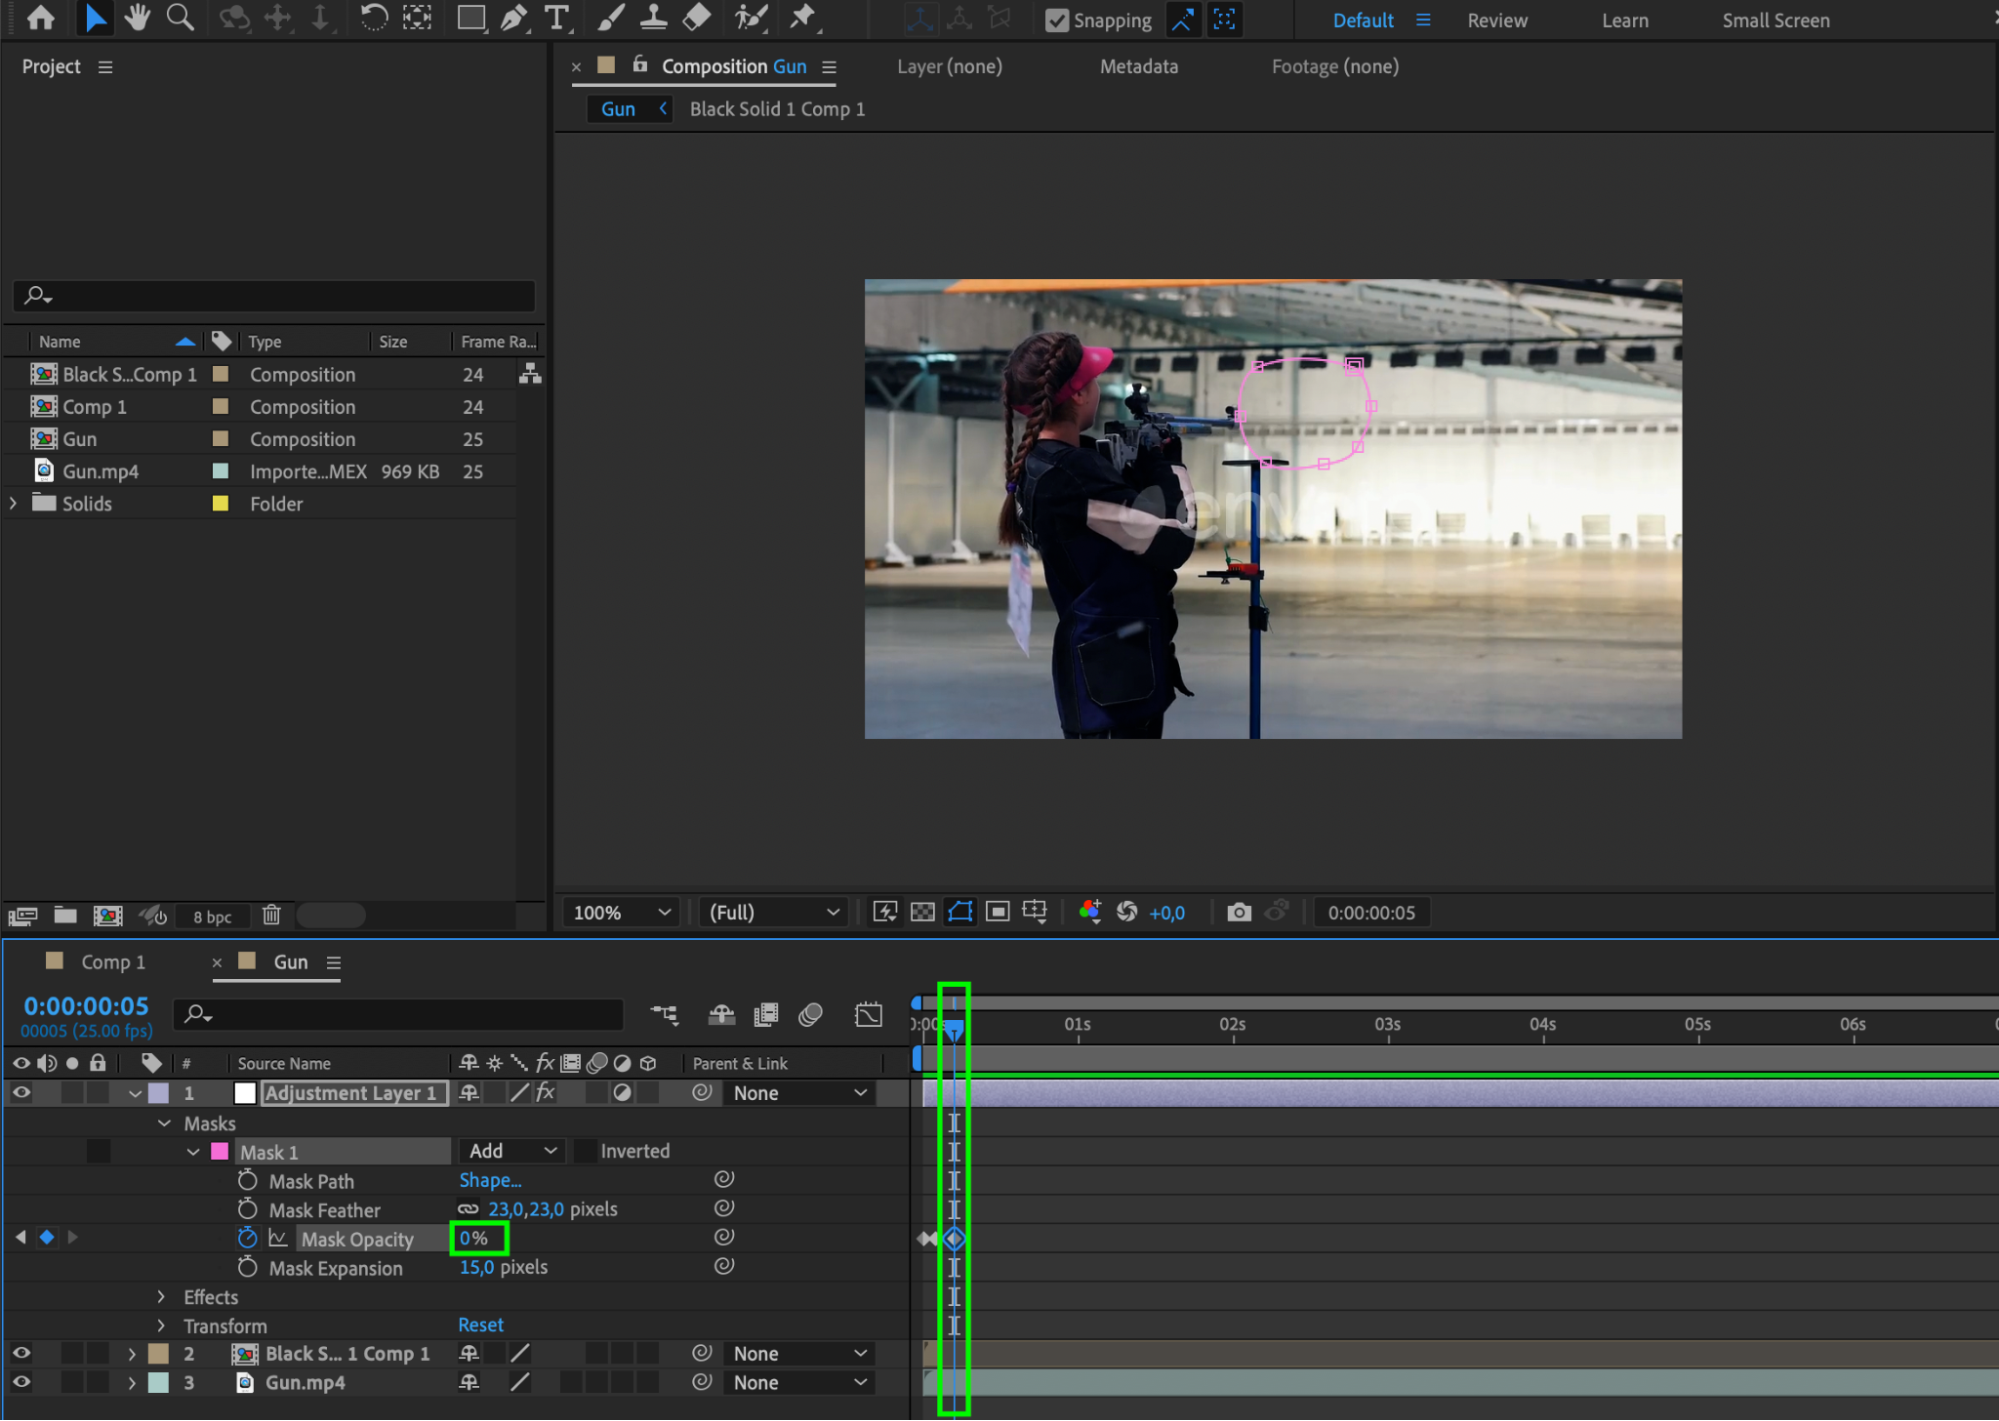
Set keyframes for the mask’s opacity to simulate the smoke dissipating. The opacity should start higher immediately after the gunshot and gradually decrease, mimicking real smoke.
 Professional Tips:
Use the correct video segment: in the selected video segment where you want to insert the muzzle flash, enhance realism by adding gun and hand recoil, matching the muzzle flash.
Add Sound Effects: Incorporate gunshot sound effects to complete the illusion of live fire.
Keep Effects Short: Ensure your muzzle flash and smoke effects are brief to maintain realism.
By following these steps and tips, you can create stunning and realistic muzzle flash effects in After Effects, making your action scenes more immersive and dynamic. Happy editing!
Our Bestsellers


