How to Turn Your Logo into 3D in After Effects
Introduction
Making your logo 3D in After Effects adds depth and professional appeal to your design. Whether you’re creating a cinematic intro, promotional material, or a personal project, turning a flat logo into 3D can make a strong visual impact. In this guide, we’ll walk you through the steps to create a stunning 3D logo animation using After Effects’ built-in tools and effects like Shatter.
Get 10% off when you subscribe to our newsletter

Follow these easy steps to bring your logo to life in After Effects:
Step 1: Create a New Composition
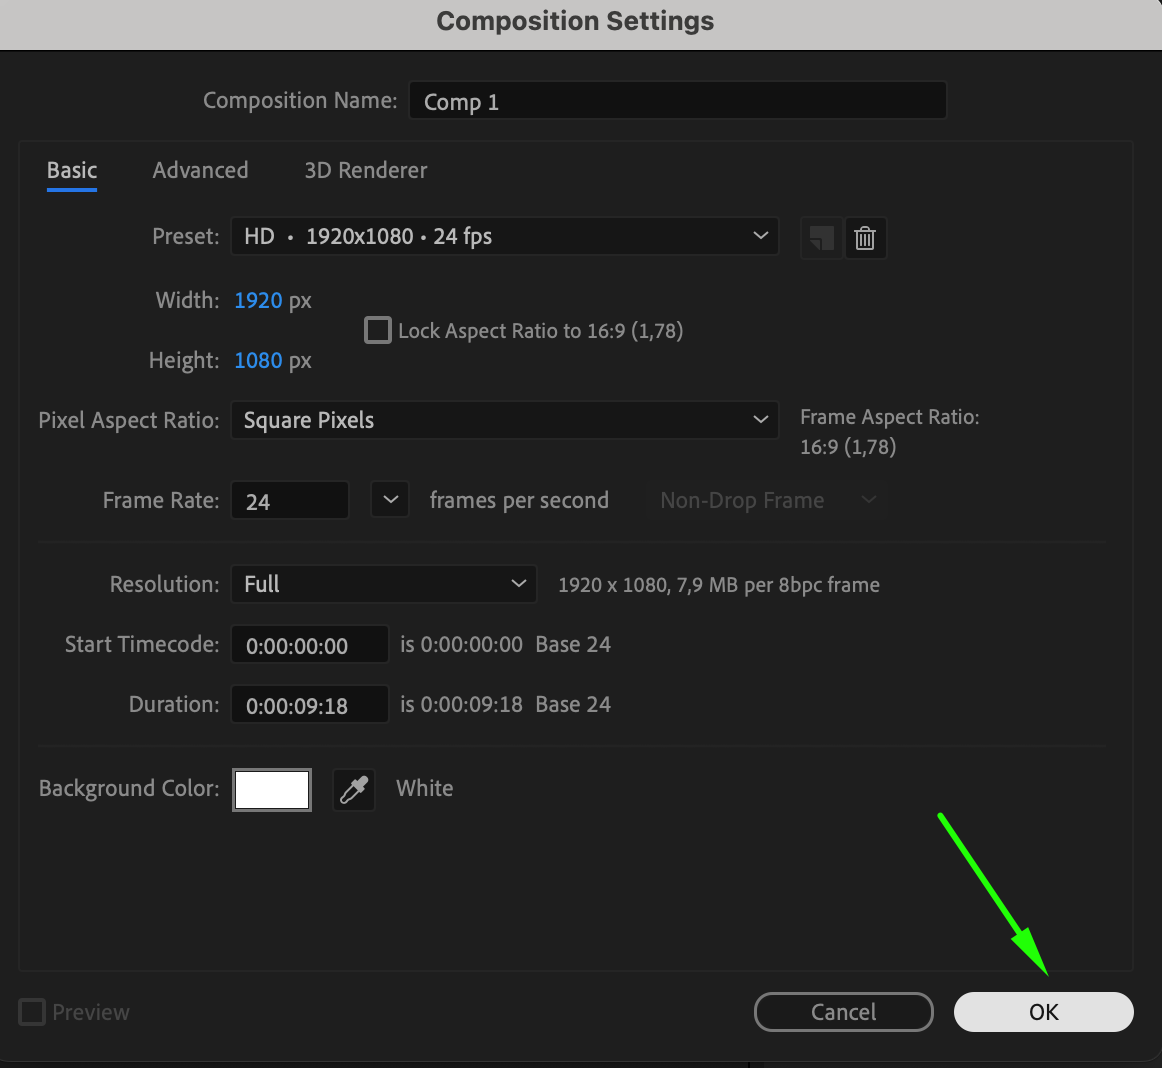
Start by creating a new composition in After Effects. Go to Composition > New Composition. In the pop-up window, set your desired parameters such as width, height, frame rate, and duration. This composition will be the base for your 3D logo animation. Adjust the resolution to fit your project needs (for example, 1920×1080 for HD). Name your composition to keep your project organized.
 Step 2: Import Your Logo File
Get 10% off when you subscribe to our newsletter

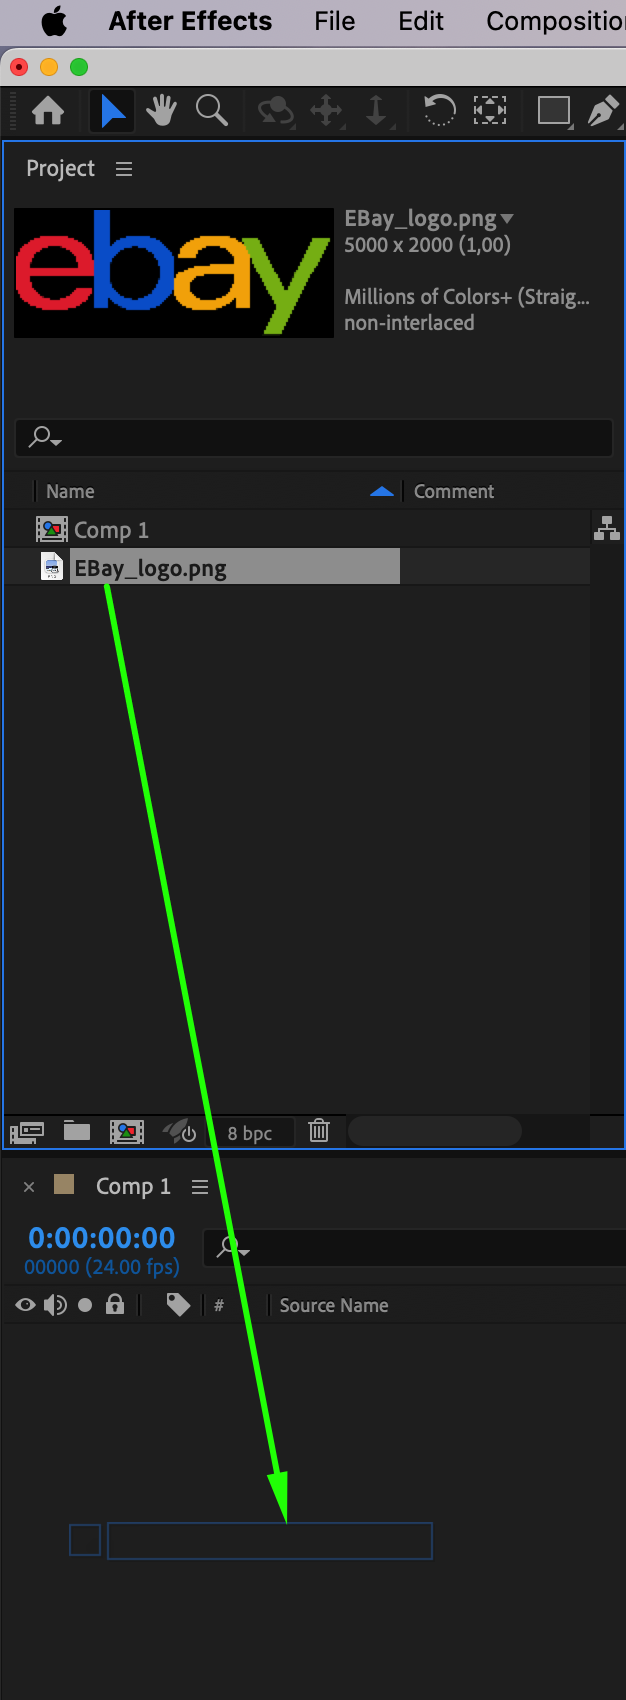
Next, import your logo file into After Effects by navigating to File > Import > File. Select the logo file. After it appears in the Project panel, drag it down to the Timeline to add it to your composition.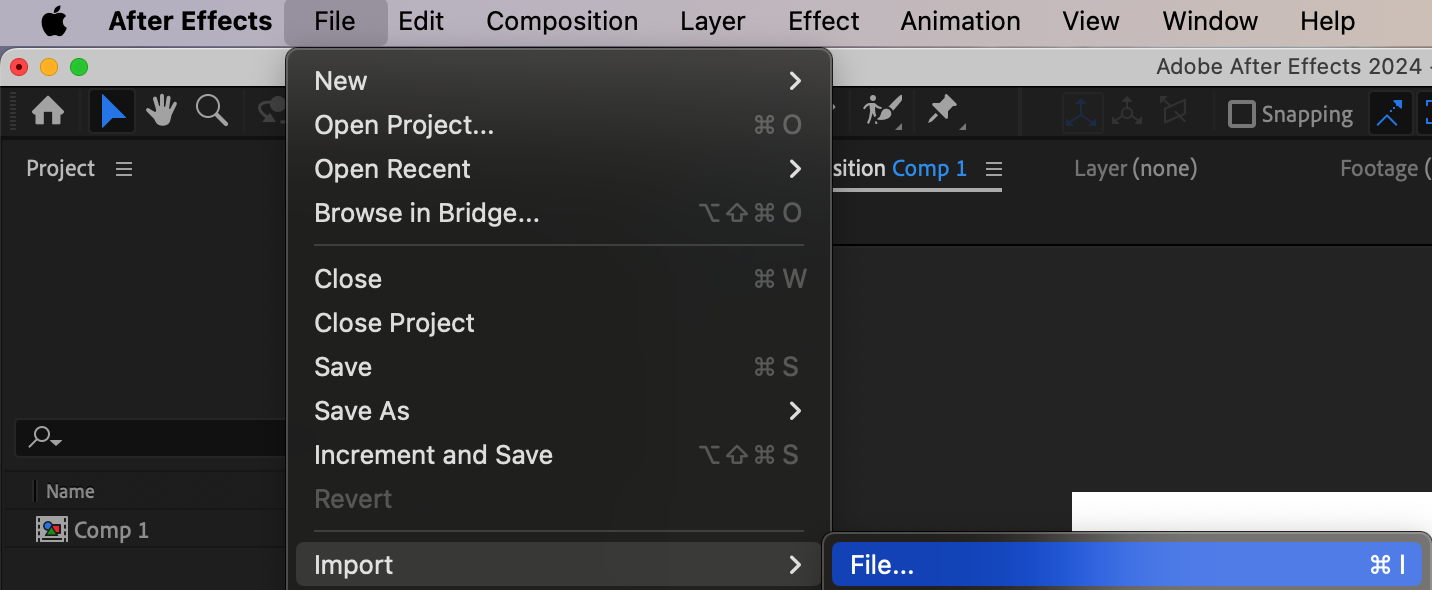
 Step 3: Adjust the Logo’s Position
Get 10% off when you subscribe to our newsletter

Use the Transform properties to position your logo. Select the logo layer in the timeline and press “P” to bring up the Position settings. Adjust the values as needed to place your logo centrally within the frame. You can also press “S” to scale the logo to your preferred size, ensuring it fits well in the composition.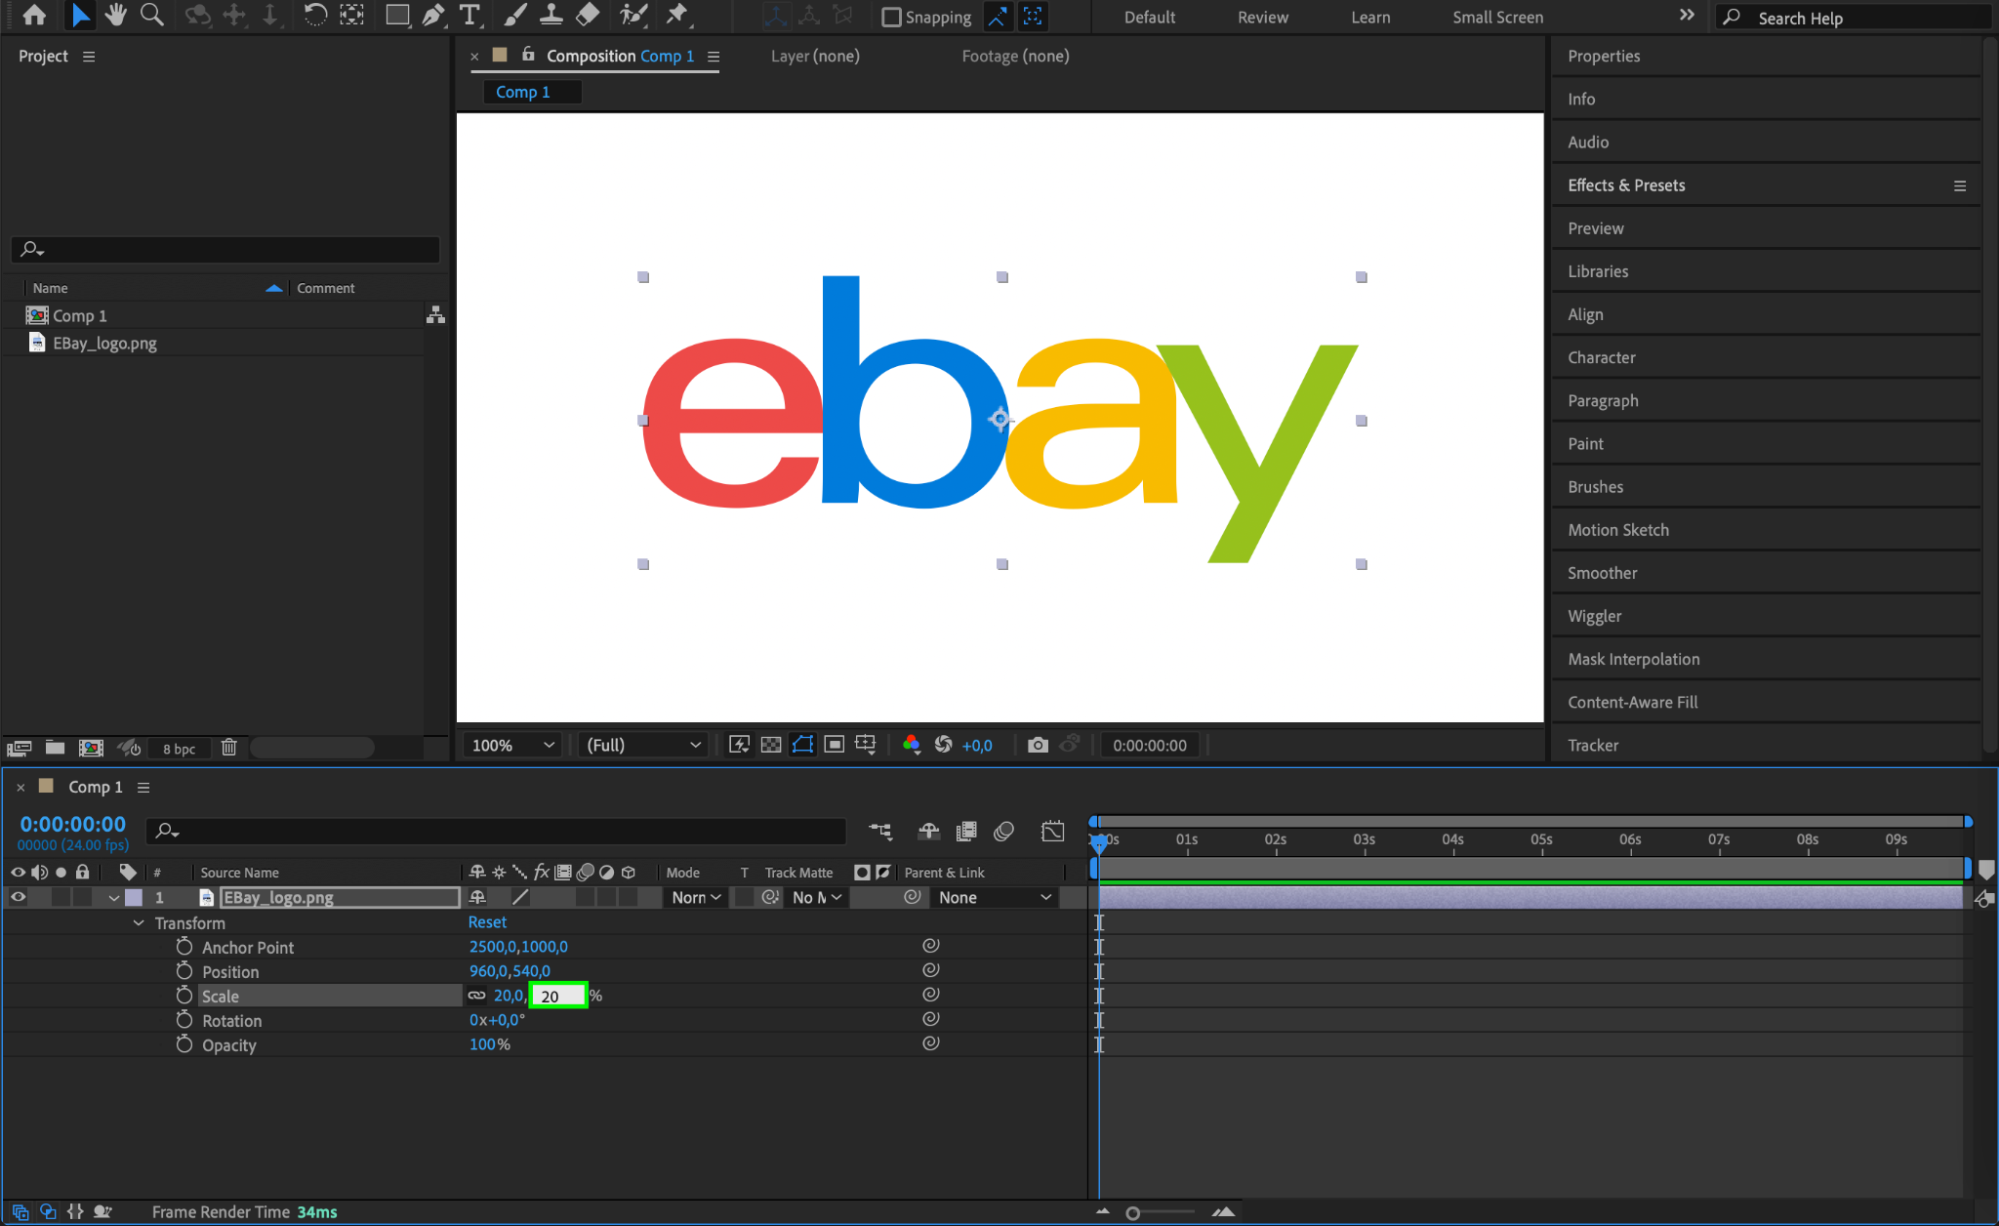 Step 4: Pre-Compose the Logo Layer
Get 10% off when you subscribe to our newsletter

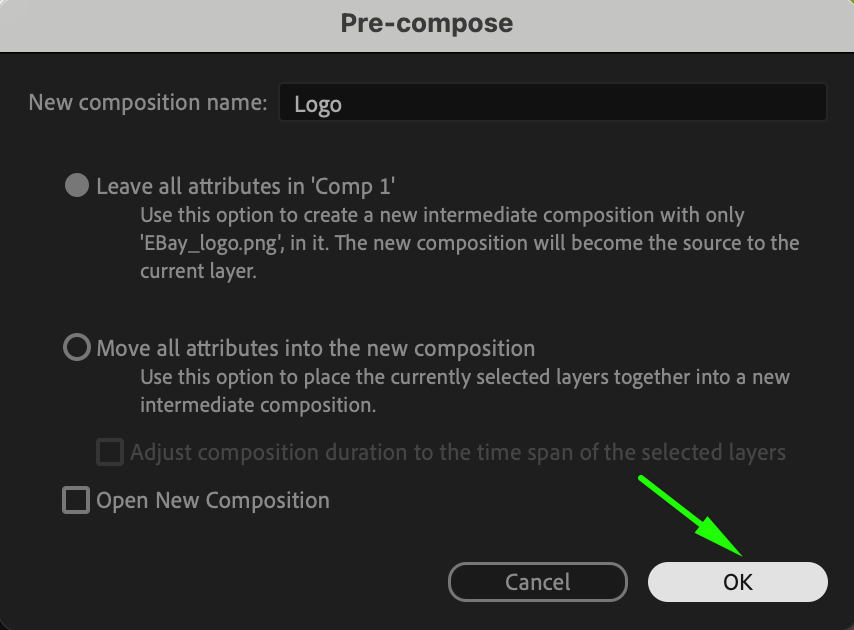
To better manage the upcoming effects, right-click on the logo layer and select Pre-compose. This step ensures the Shatter effect will apply seamlessly to the entire logo.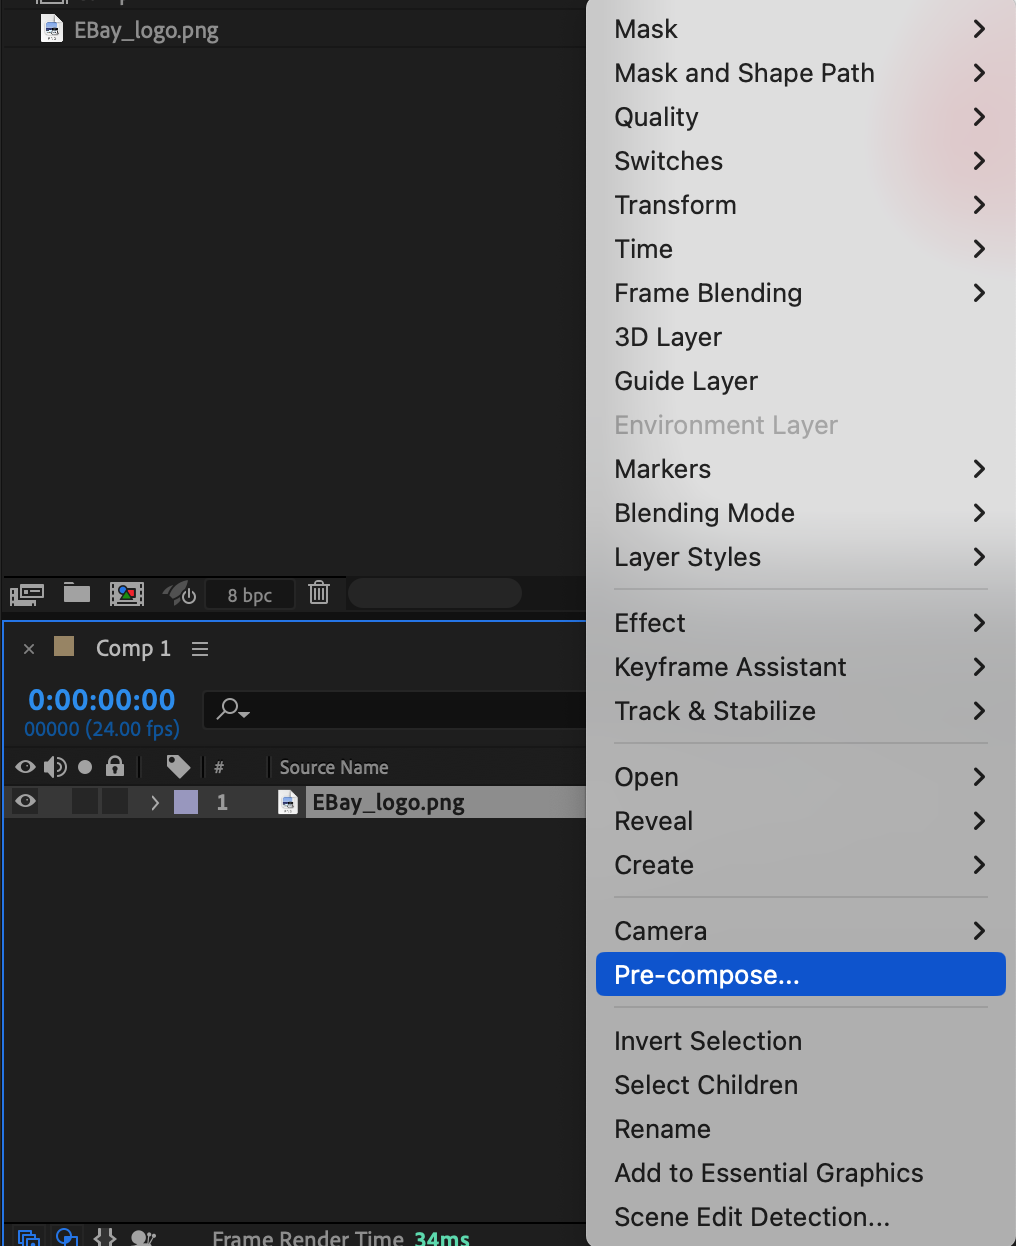
 Step 5: Apply the Shatter Effect
Get 10% off when you subscribe to our newsletter

Now that your logo is pre-composed, apply the Shatter effect. Go to the Effects & Presets panel, search for “Shatter,” and drag it onto the pre-composed logo layer. This effect will give your logo the desired 3D appearance.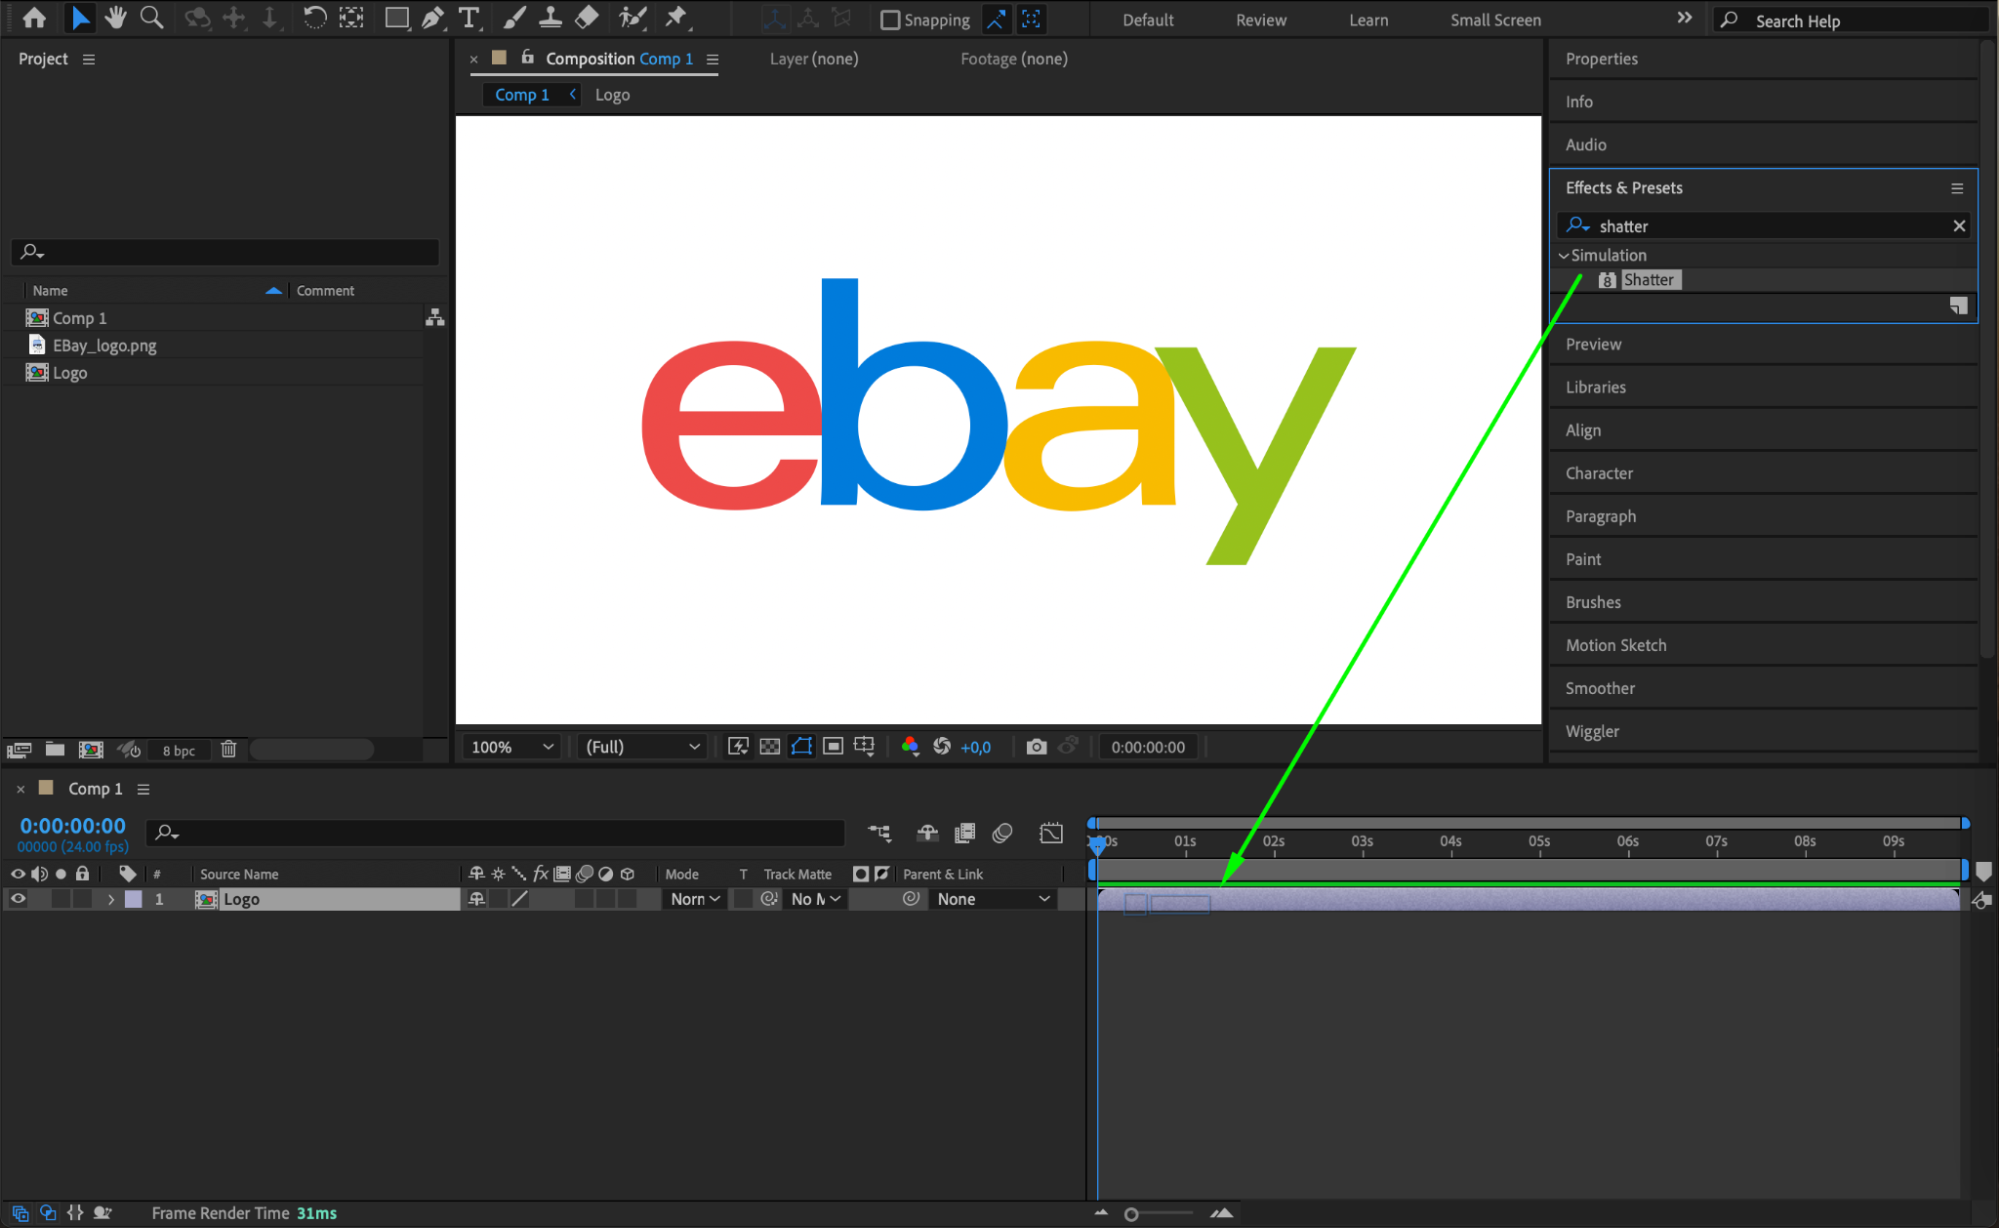 Step 6: Customize the Shatter Effect
In the Effect Controls panel, customize the Shatter settings to make your logo appear 3D. Adjust the following parameters:
View: Set to Rendered to preview the 3D effect.
Pattern: Set to Custom.
Custom Shatter Map: Select your Logo Precomp as the custom map.
Extrusion Depth: Set it to around 0.77 to give thickness to your logo.
Depth, Radius and Strength: Set to 0.
Y Rotation: Adjust this value to rotate and view your logo from different angles.
This step gives the logo a realistic 3D look, with depth and perspective.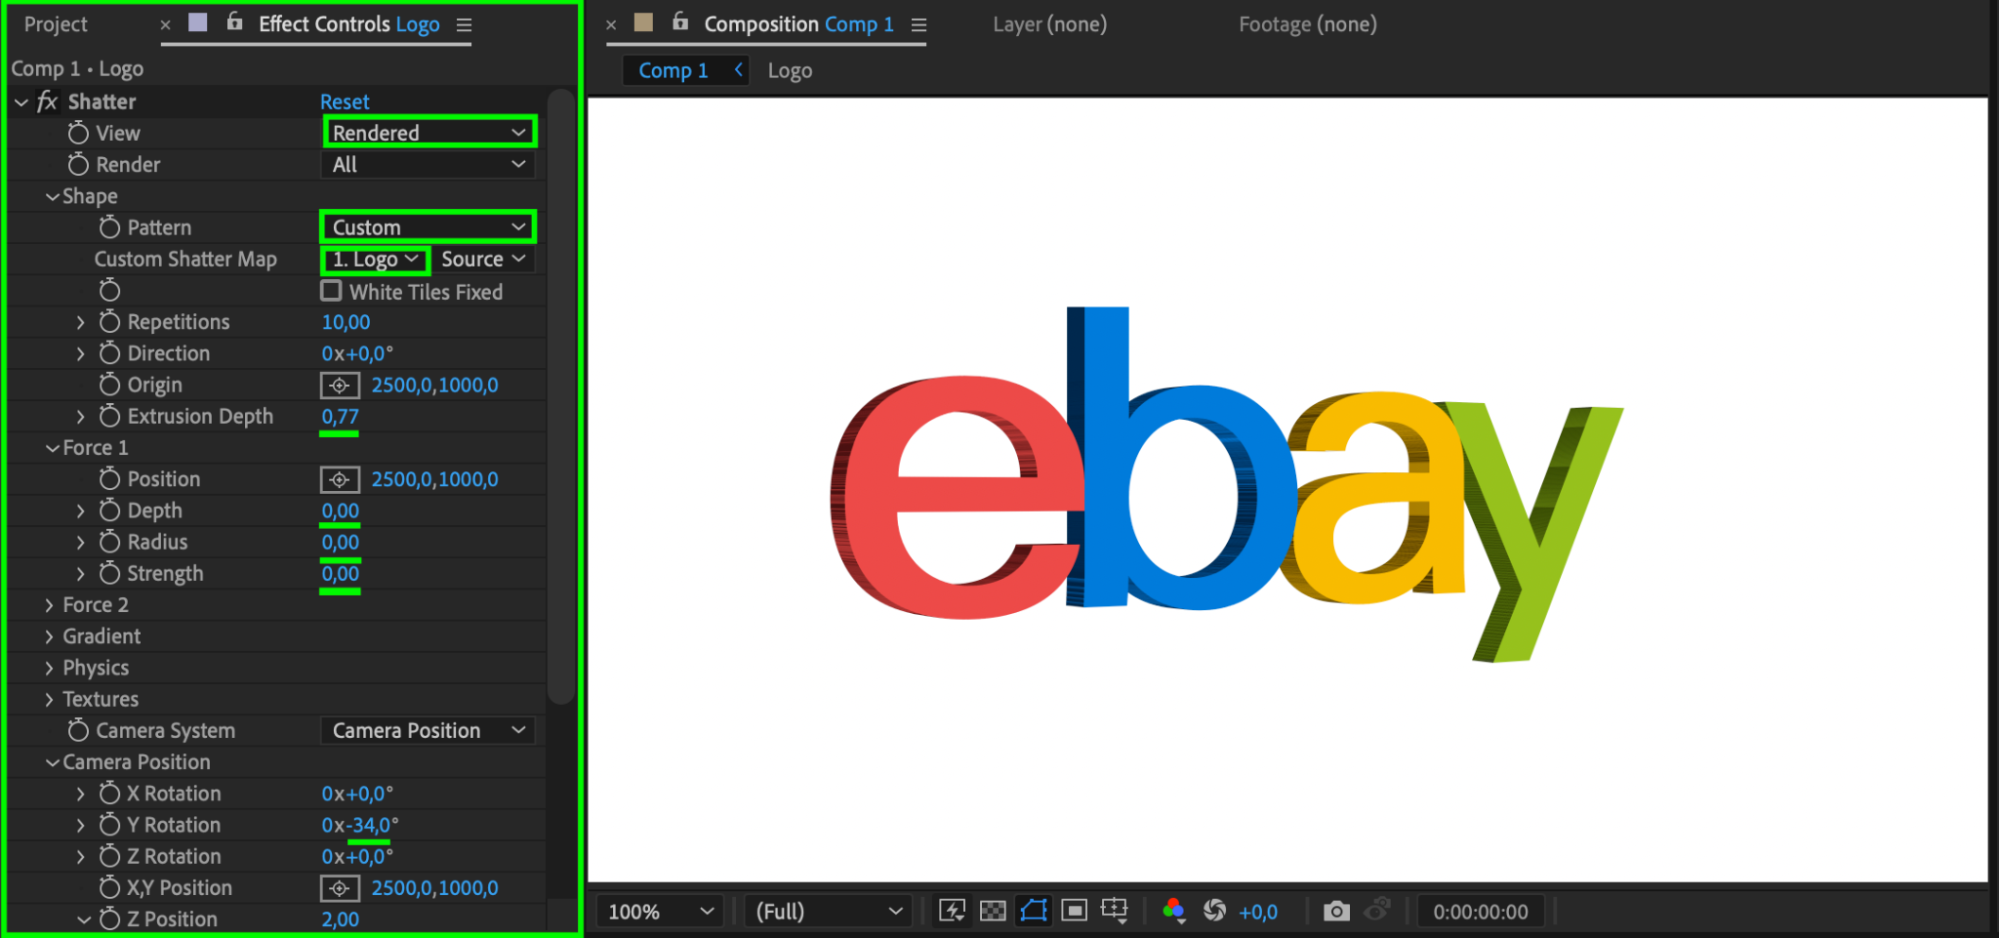 Step 7: Apply Presets or Create Custom Animations
You can enhance your 3D logo by either applying pre-made animation presets or creating your own custom animations. To animate manually, use keyframes for various properties like Position or Rotation. For example, press “P” to bring up the Position property, click the stopwatch to set keyframes, and adjust the values over time.
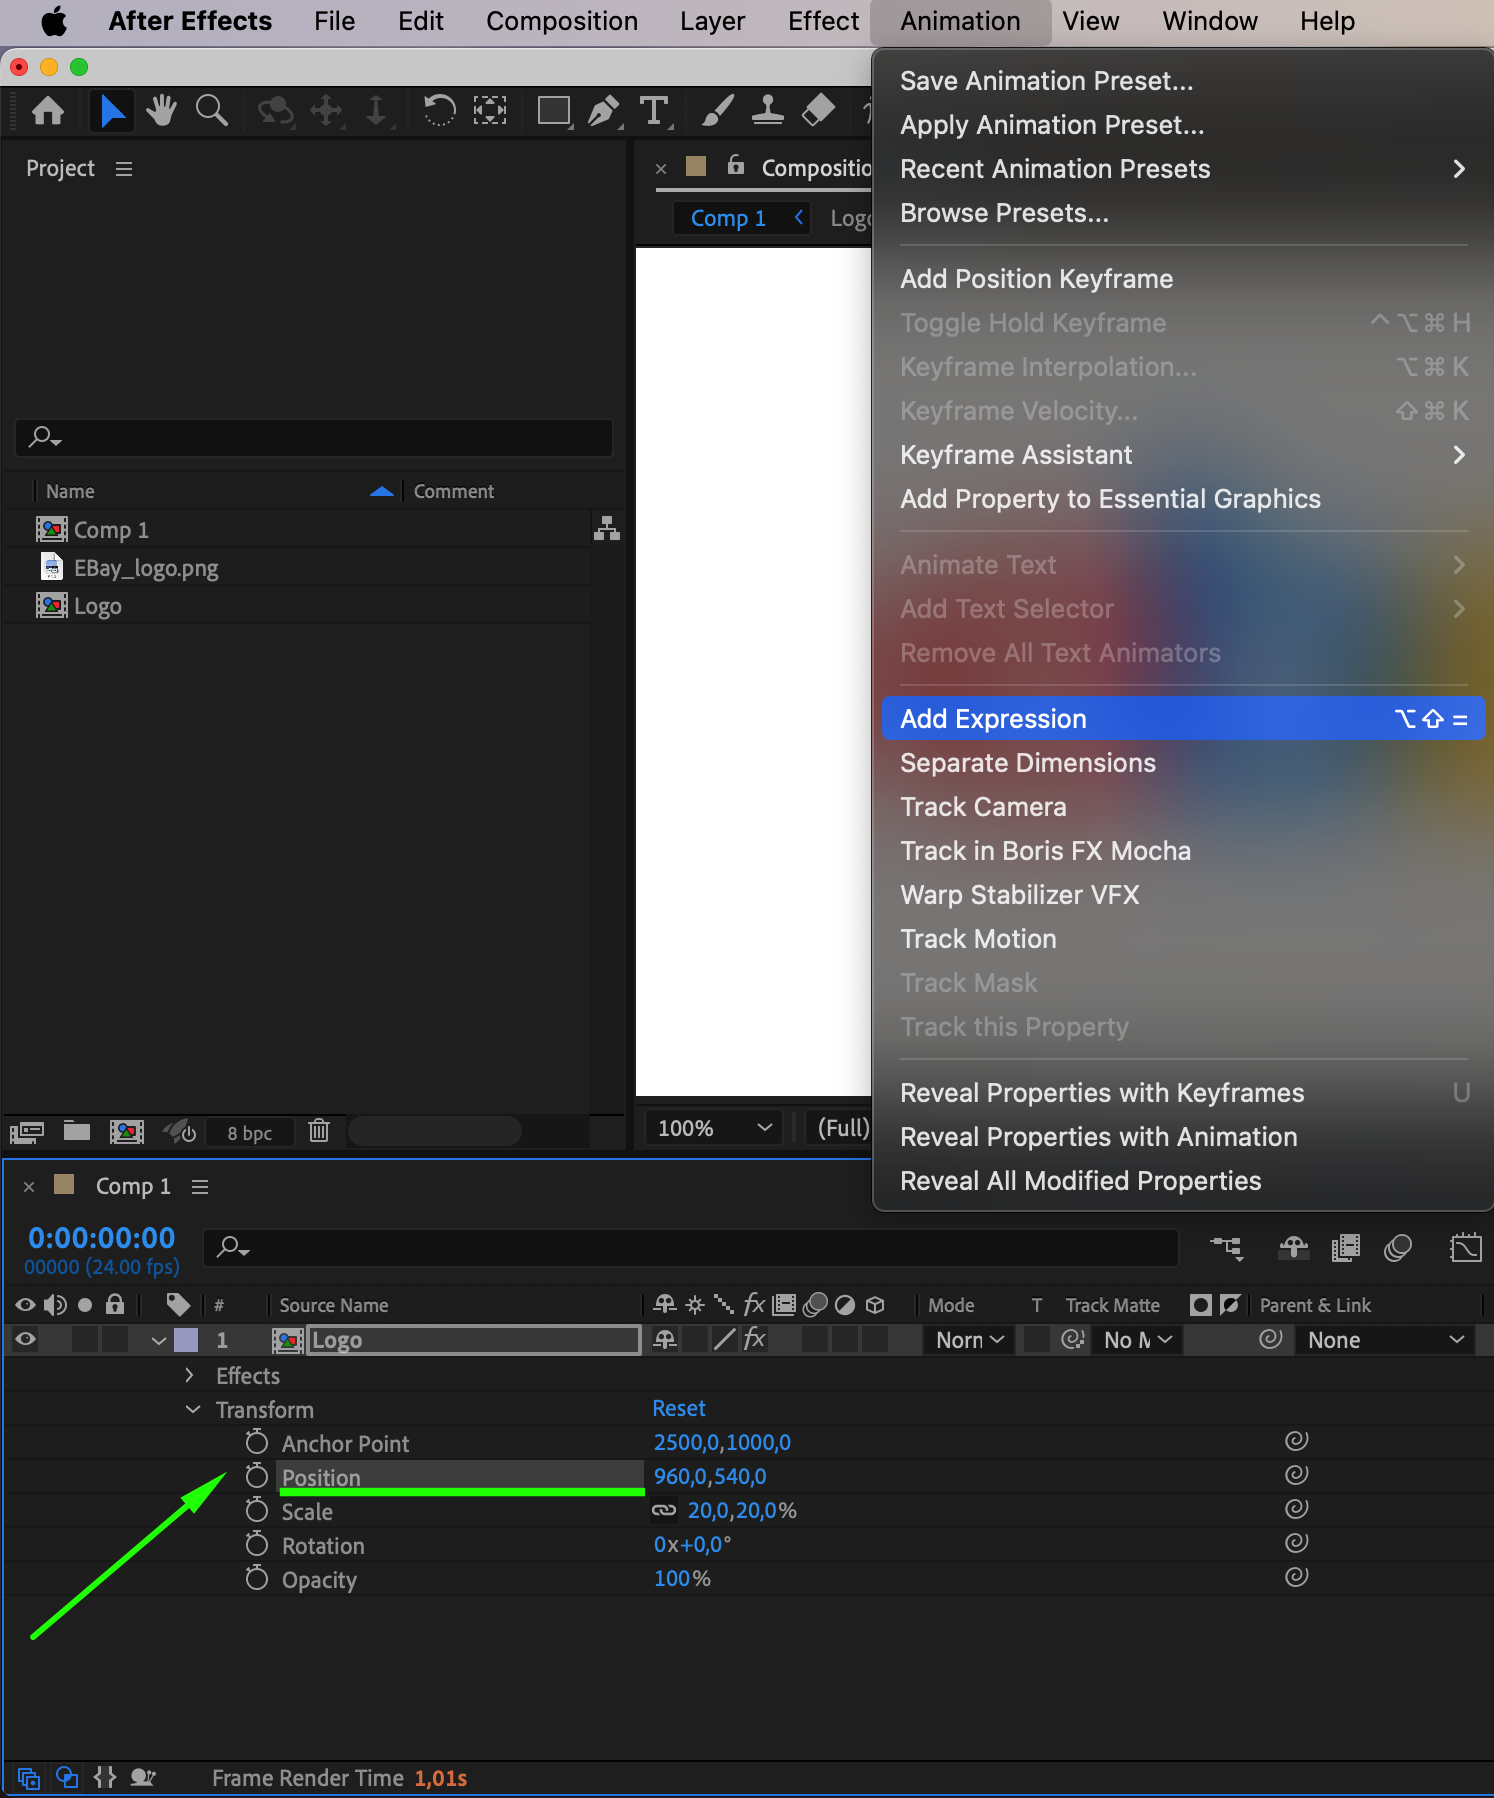
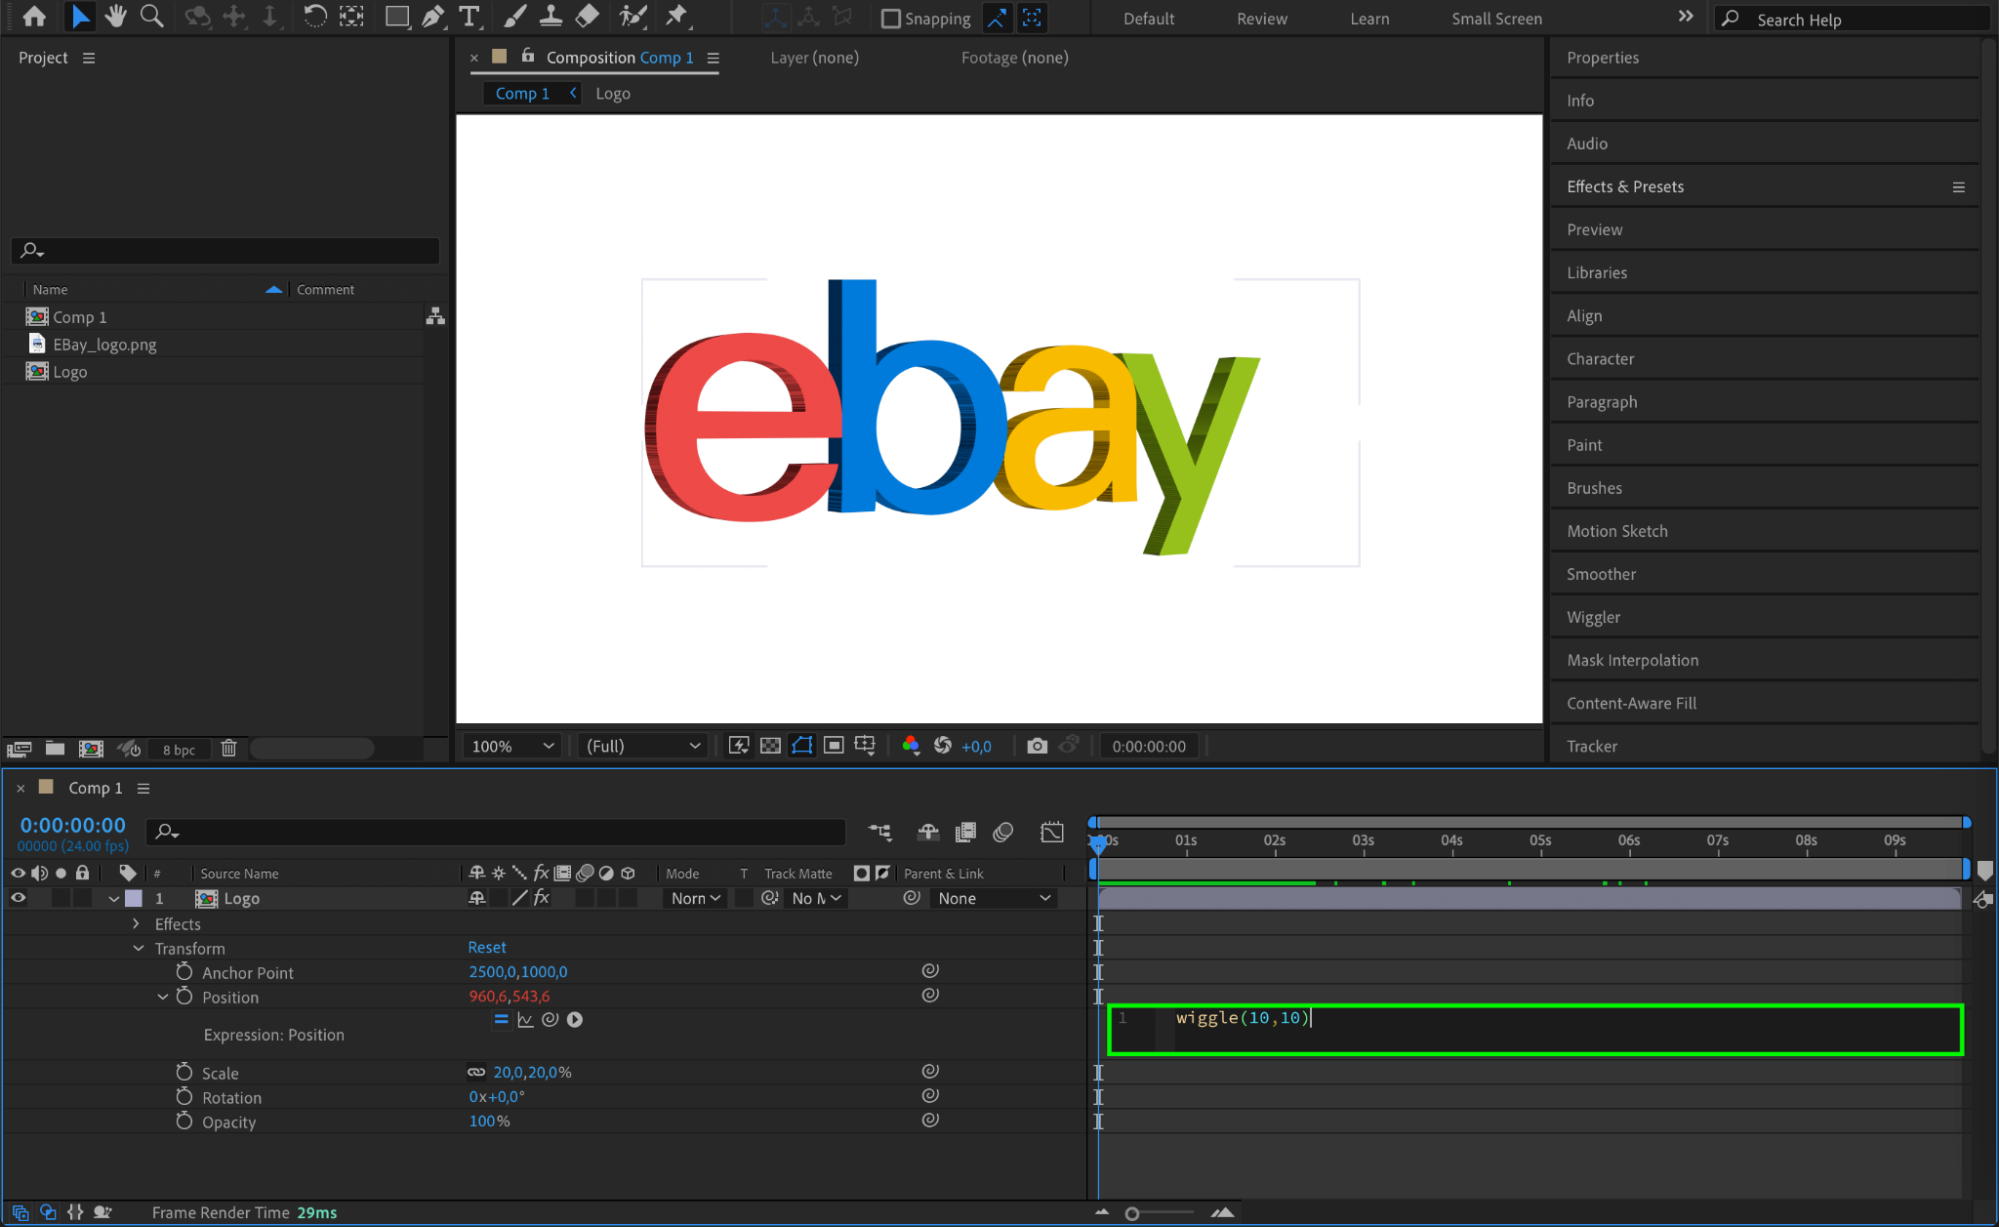
For more advanced animations, you can add expressions by going to Animation > Add Expression. Enter an expression like wiggle(10,10) to make the logo randomly move 10 times per second within a 10-pixel range. This allows for dynamic, unpredictable movements that can make your logo animation more engaging.
 Step 8: Add Additional Effects
Get 10% off when you subscribe to our newsletter

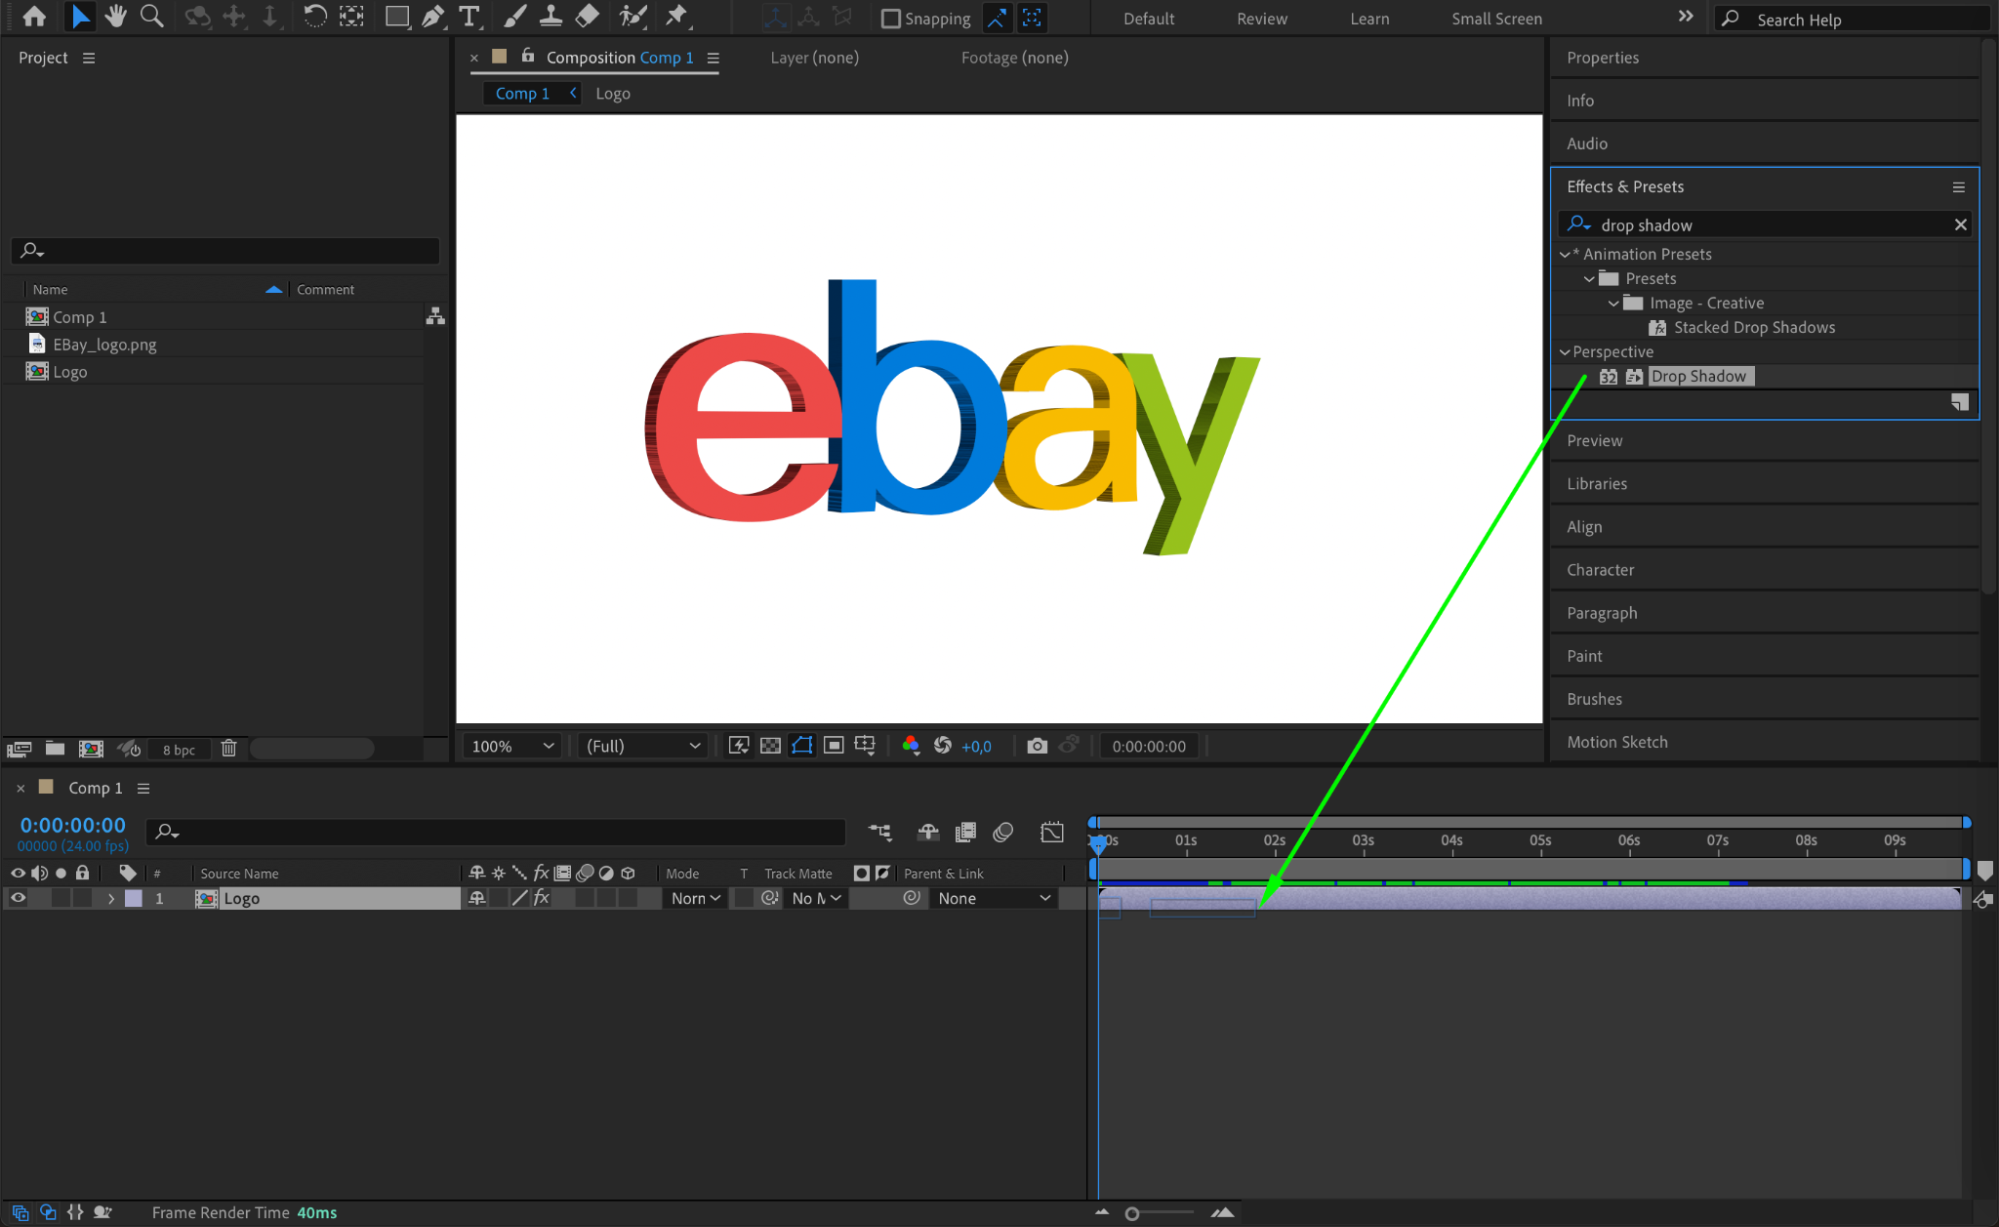
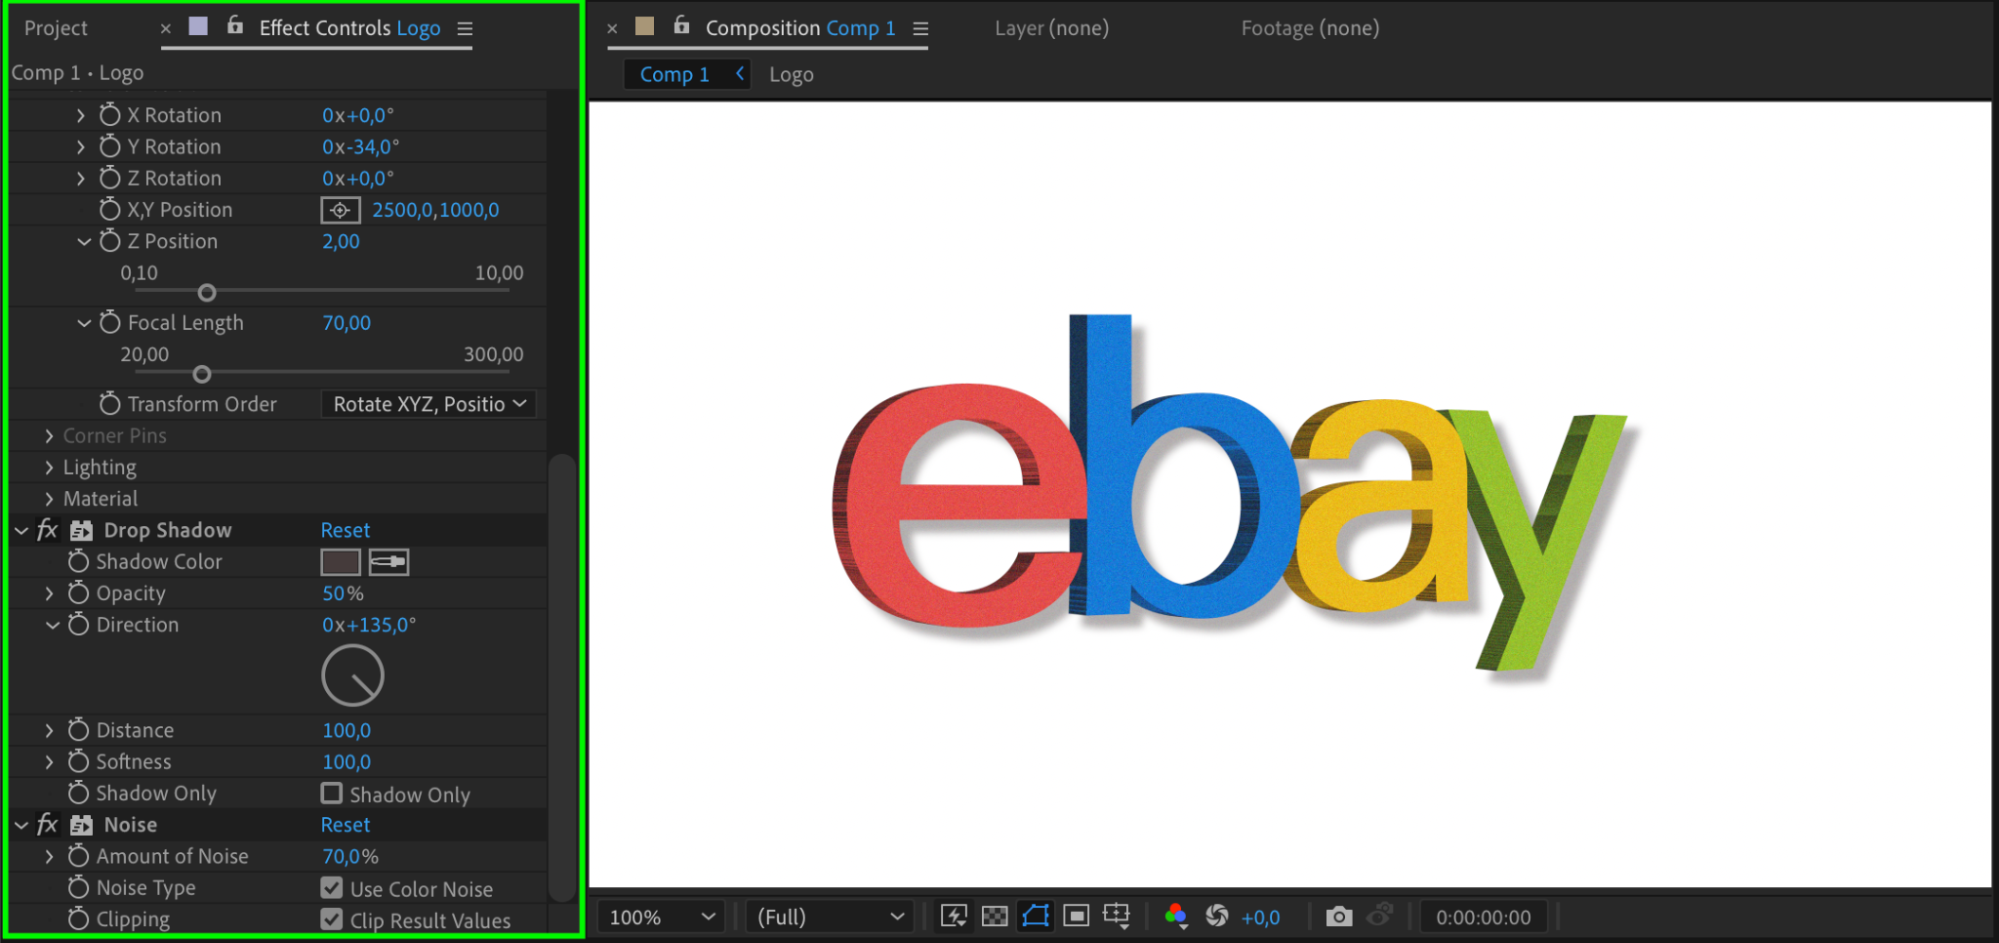
To enhance the appearance of your 3D logo, apply additional effects. For instance, search for Glow and Drop Shadow in the Effects & Presets panel and apply them to the logo layer. Adjust the settings to match the style you want to achieve. These effects can make your logo stand out by adding depth and light, improving its overall appearance.
 Step 9: Preview Your Animation
Get 10% off when you subscribe to our newsletter

Once you’ve set the keyframes and added effects, preview your work by pressing the Spacebar. Ensure the animation runs smoothly and tweak any parameters if needed. This step allows you to check how your 3D logo looks in motion before rendering.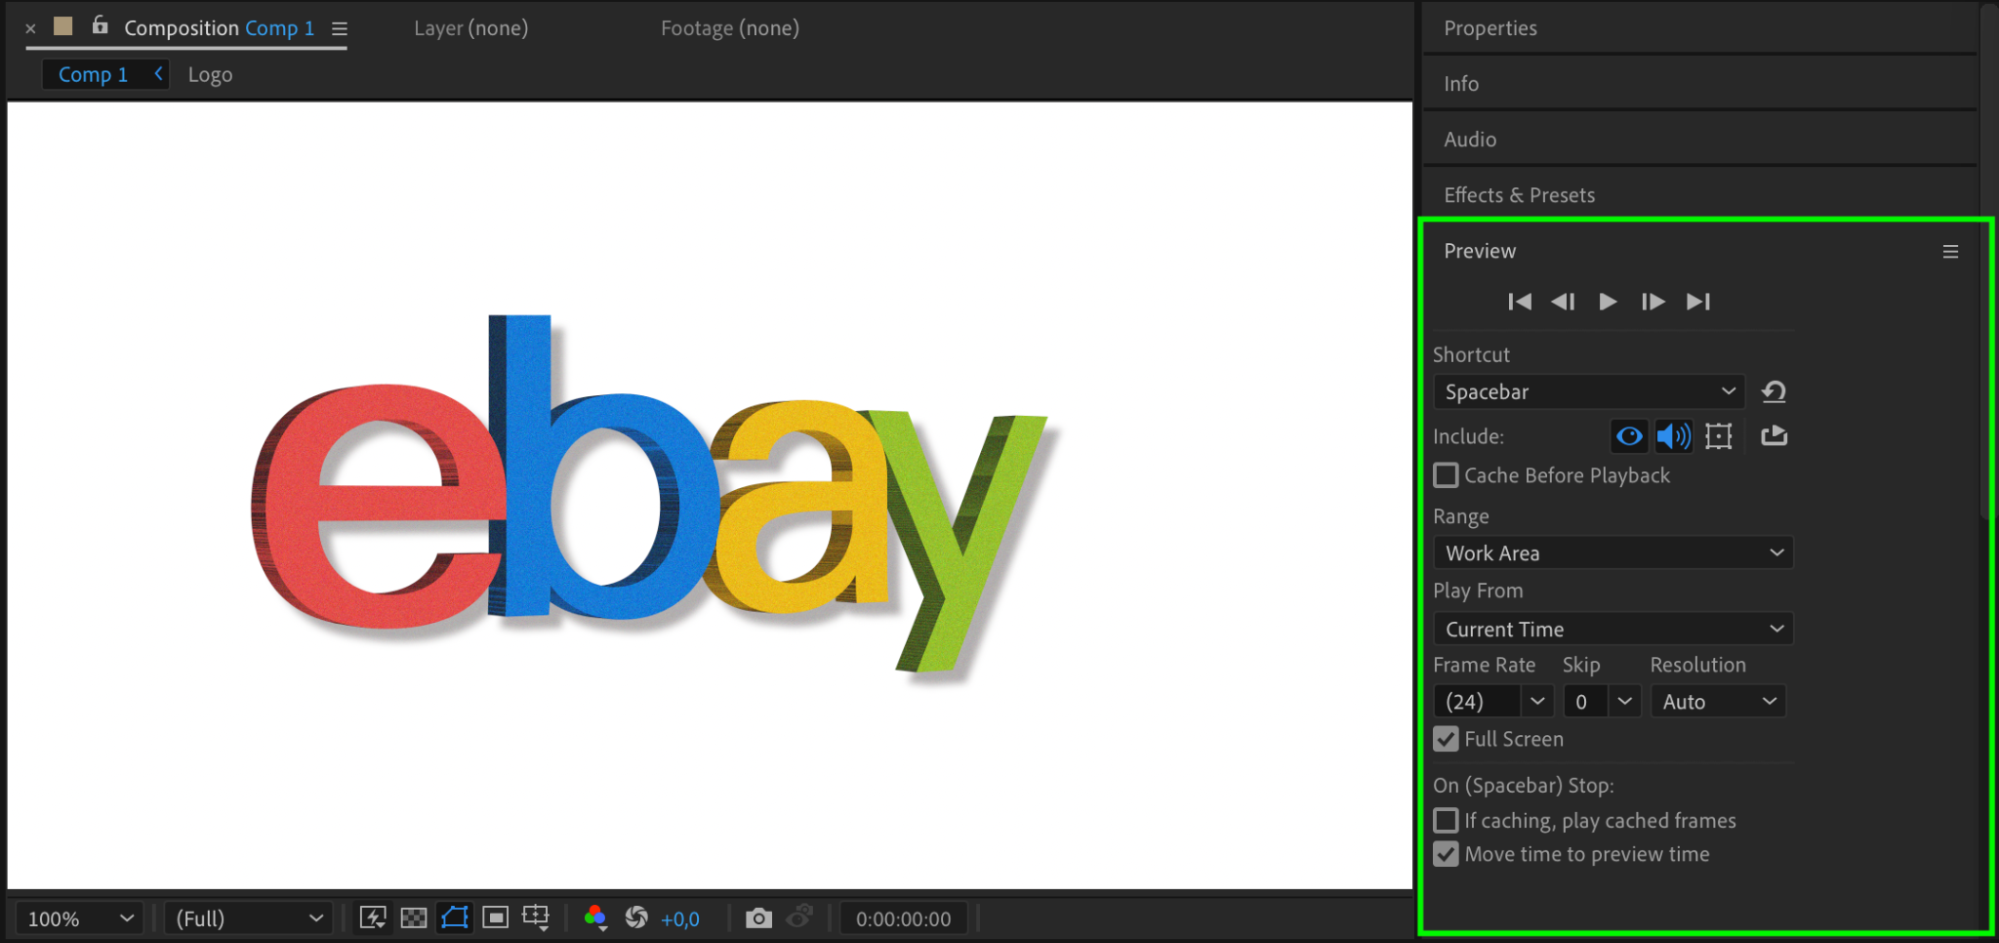 Step 10: Export Your 3D Logo Animation
When you’re satisfied with the animation, it’s time to export. Go to Composition > Add to Render Queue. Choose the desired output format and settings (e.g., MP4 or MOV) and click Render. Once the rendering is complete, your 3D logo is ready to be shared with the world!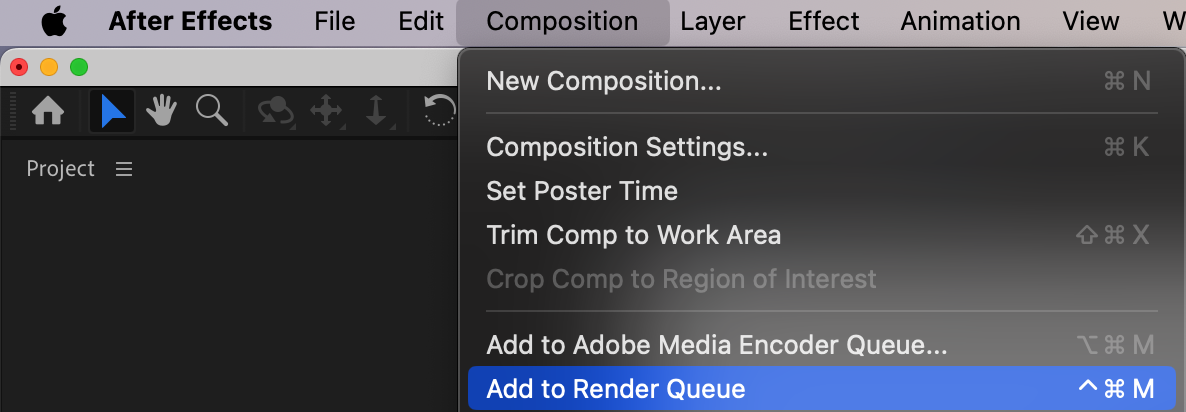
 Conclusion
By following these steps, you can easily turn a flat logo into a dynamic 3D object in After Effects. With this skill, you can make your brand or project stand out with eye-catching visuals. Don’t hesitate to experiment with different settings, effects, and animations to create a logo that’s truly unique and professional. Happy animating!


