Guide to Making an Object Follow a Path in After Effects
Introduction to Object Path Animation
Have you ever wondered how to make an object follow a specific path in After Effects? Well, you’re in luck! In this tutorial, we’ll walk you through the step-by-step process of creating dynamic motion with object path animation.
Object path animation is a powerful technique that adds visual interest and creativity to videos and motion graphics projects. By animating an object along a predetermined path, you can simulate various movements like flying, car driving, or even a character walking. This technique brings a sense of realism and professionalism to your videos, making them more engaging and visually appealing.
Step 1: Create a Composition
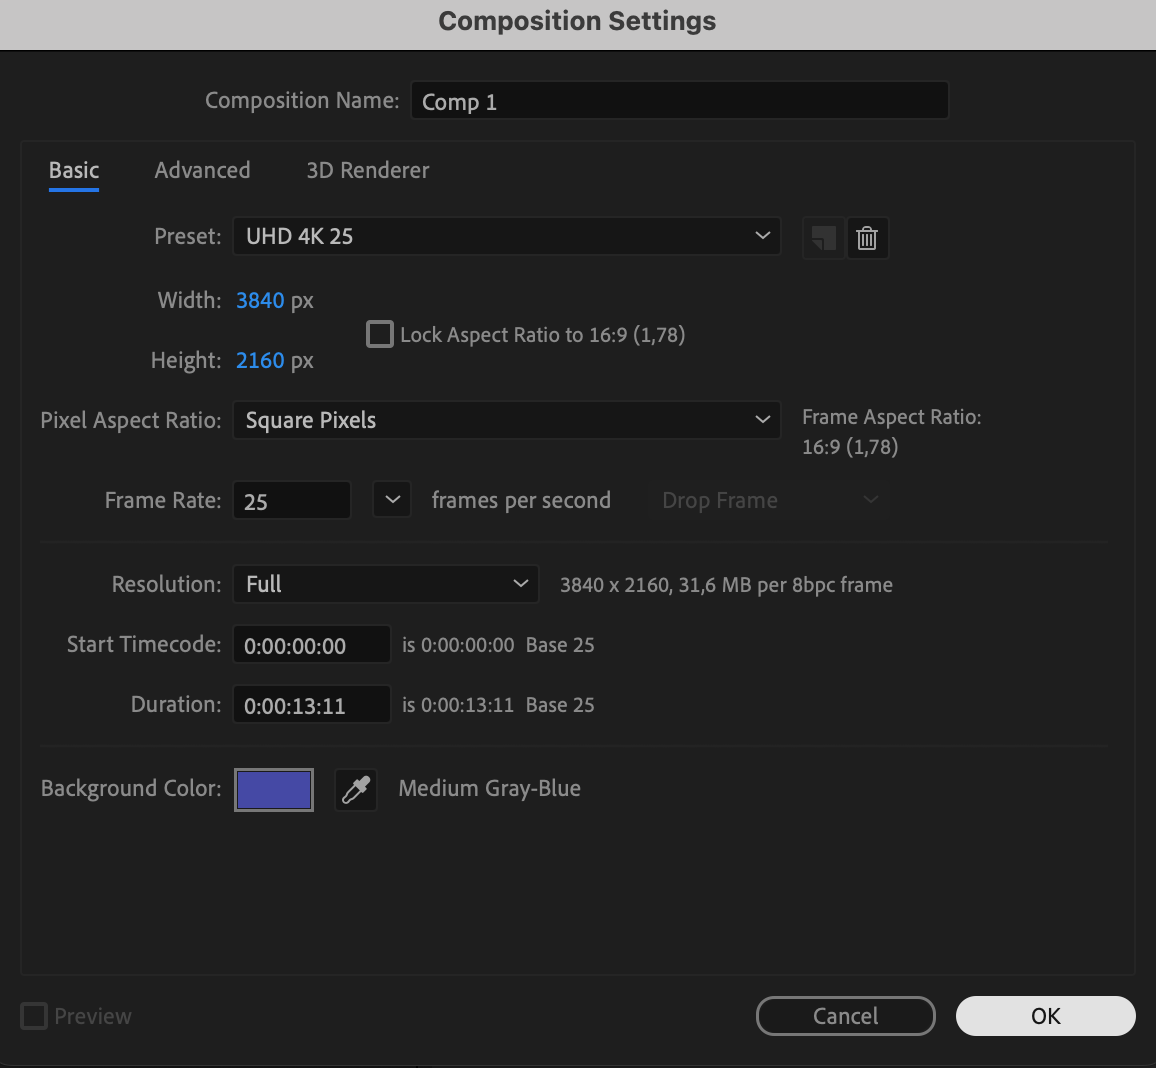
To get started, open After Effects and create a new composition. Go to “Composition” > “New Composition” and set your desired parameters, such as resolution, frame rate, and duration.
 Step 2: Import or Create Your Object
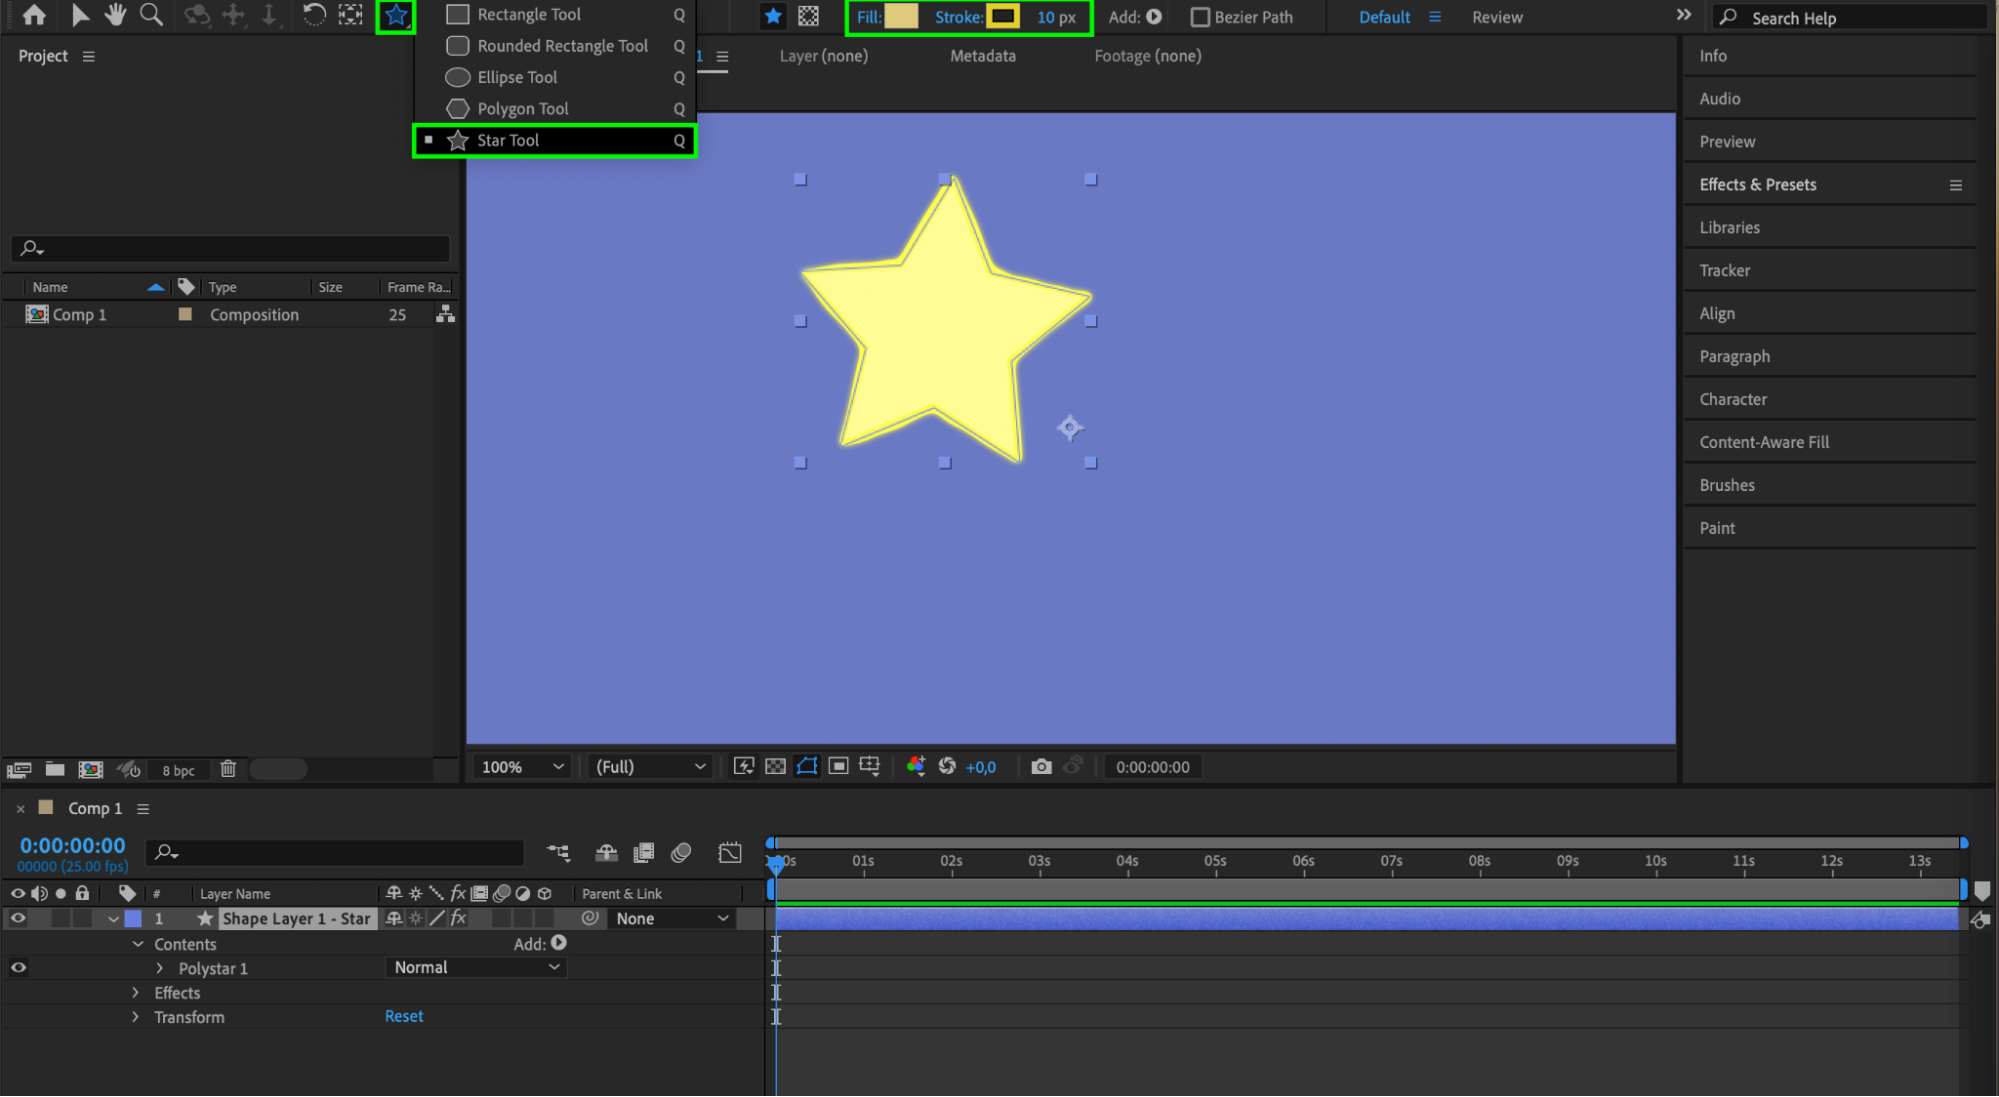
Next, import your object or create one using the Rectangle (Shape) Tool (Q). If you are importing, drag and drop the object into your composition timeline.
 Step 3: Create a Path with the Pen Tool
Get 10% off when you subscribe to our newsletter

Use the Pen tool (G) to draw the path you want your object to follow. 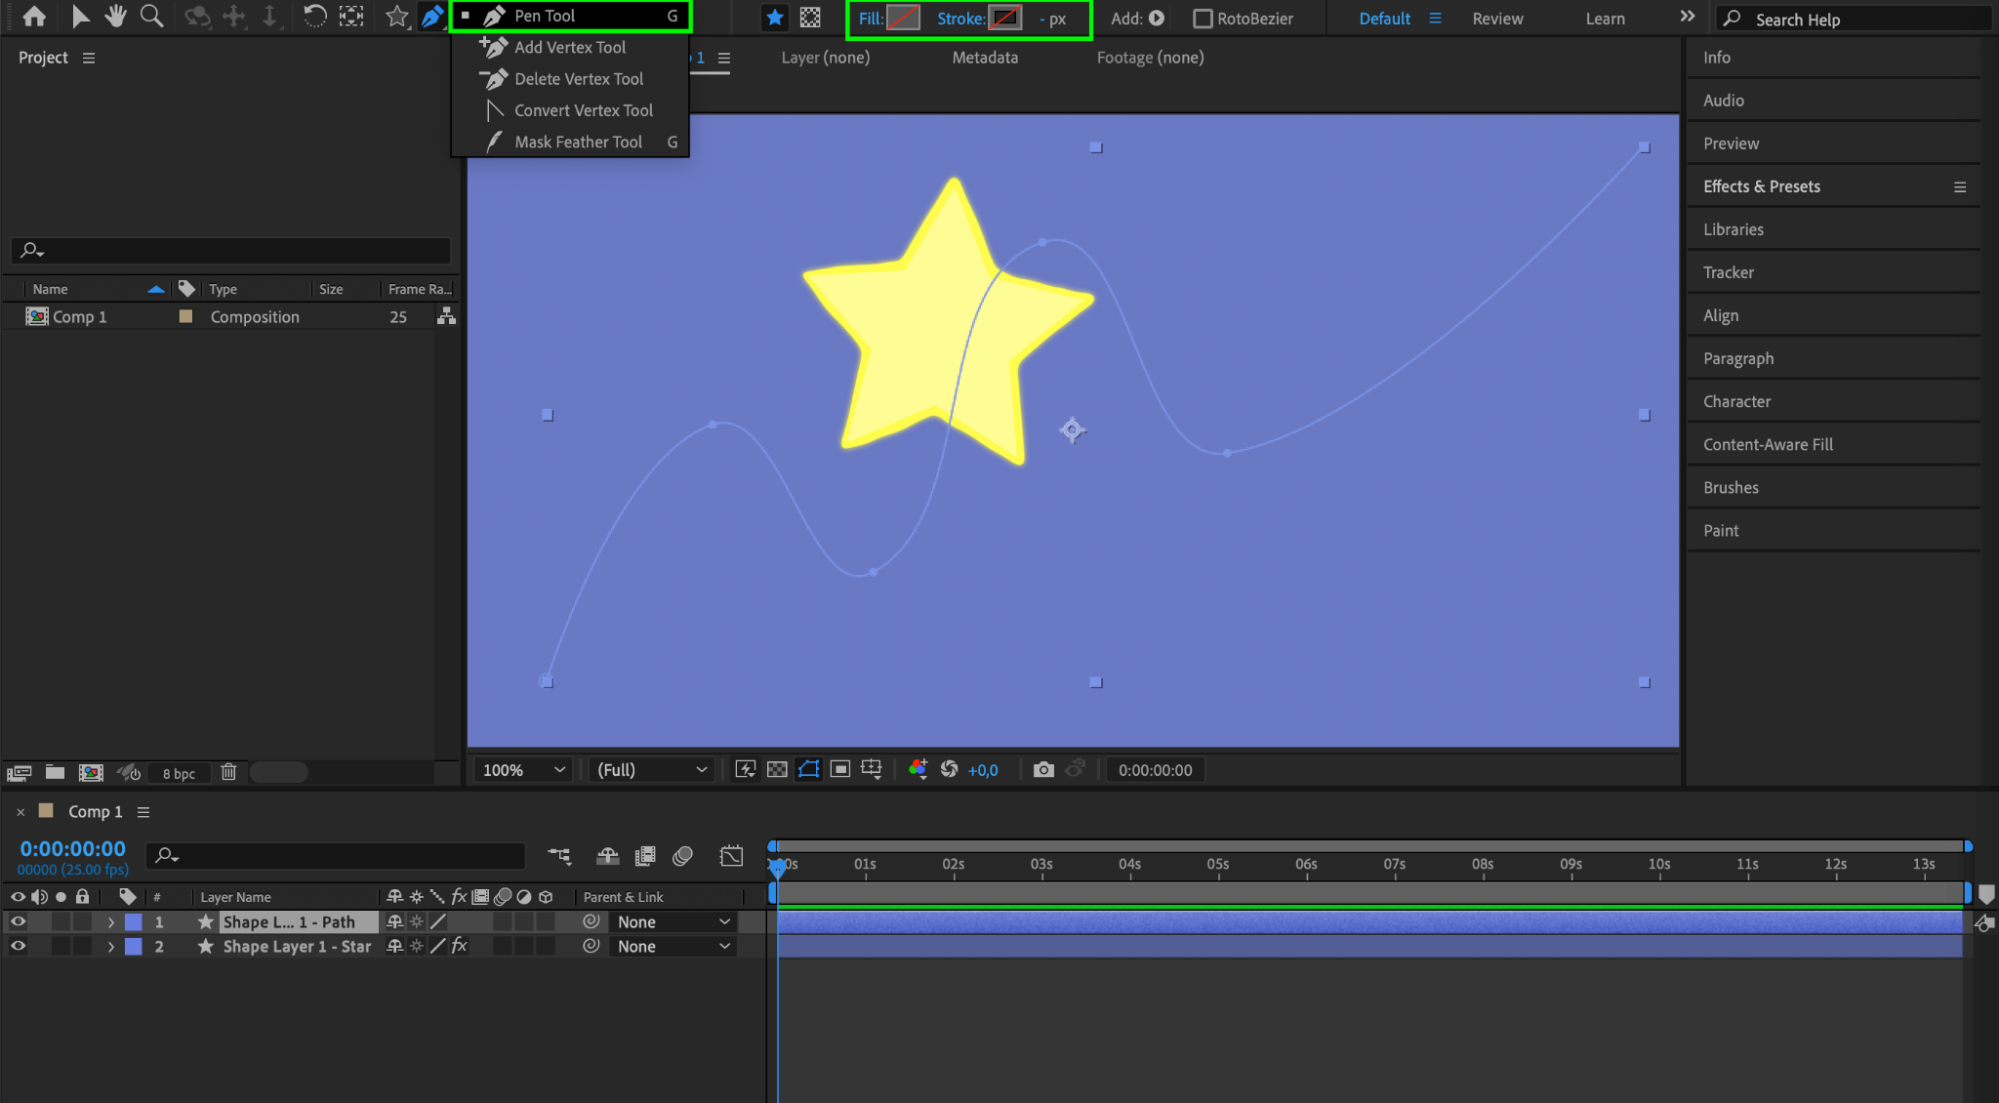 Step 4: Copy the Path
Expand the properties of the shape layer containing your path. Navigate to “Shape 1” > “Path 1” > “Path”, then click on the Path to highlight it and press “Ctrl/Cmd + C” to copy it.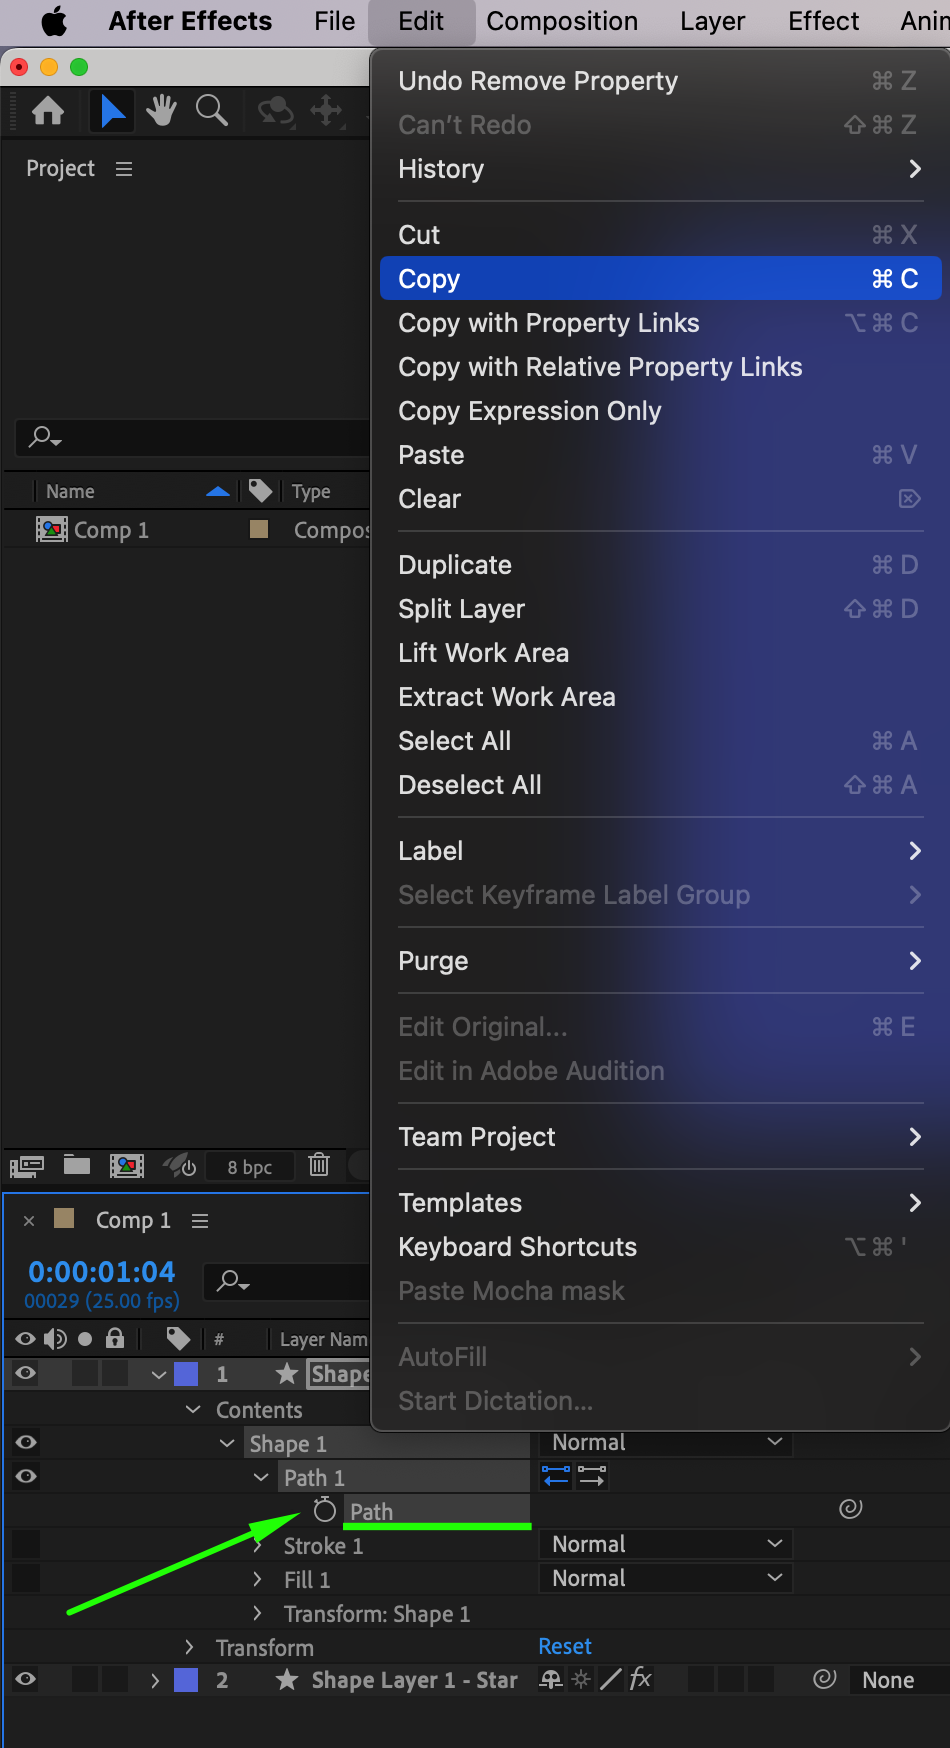 Step 5: Apply the Path to the Object’s Position
Get 10% off when you subscribe to our newsletter

Select your object layer and press “P” to reveal the Position parameter. Click on the Position parameter and press “Ctrl/Cmd + V” to paste the copied path. Your object will now follow the path you created.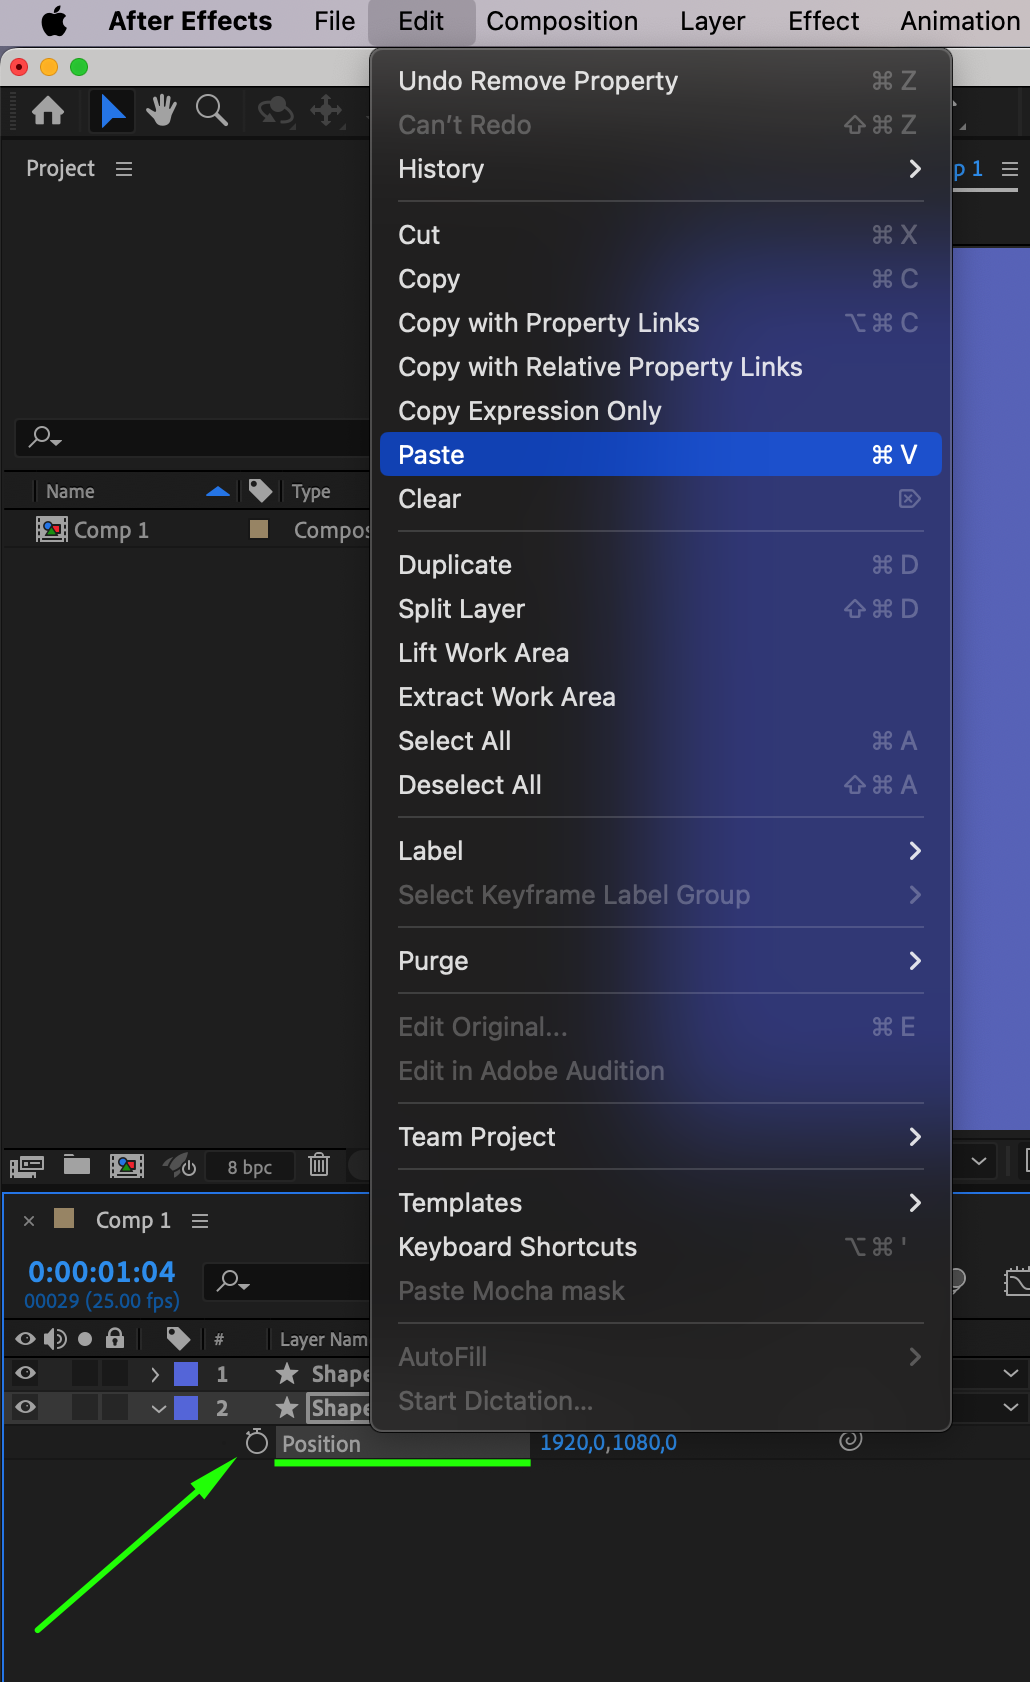
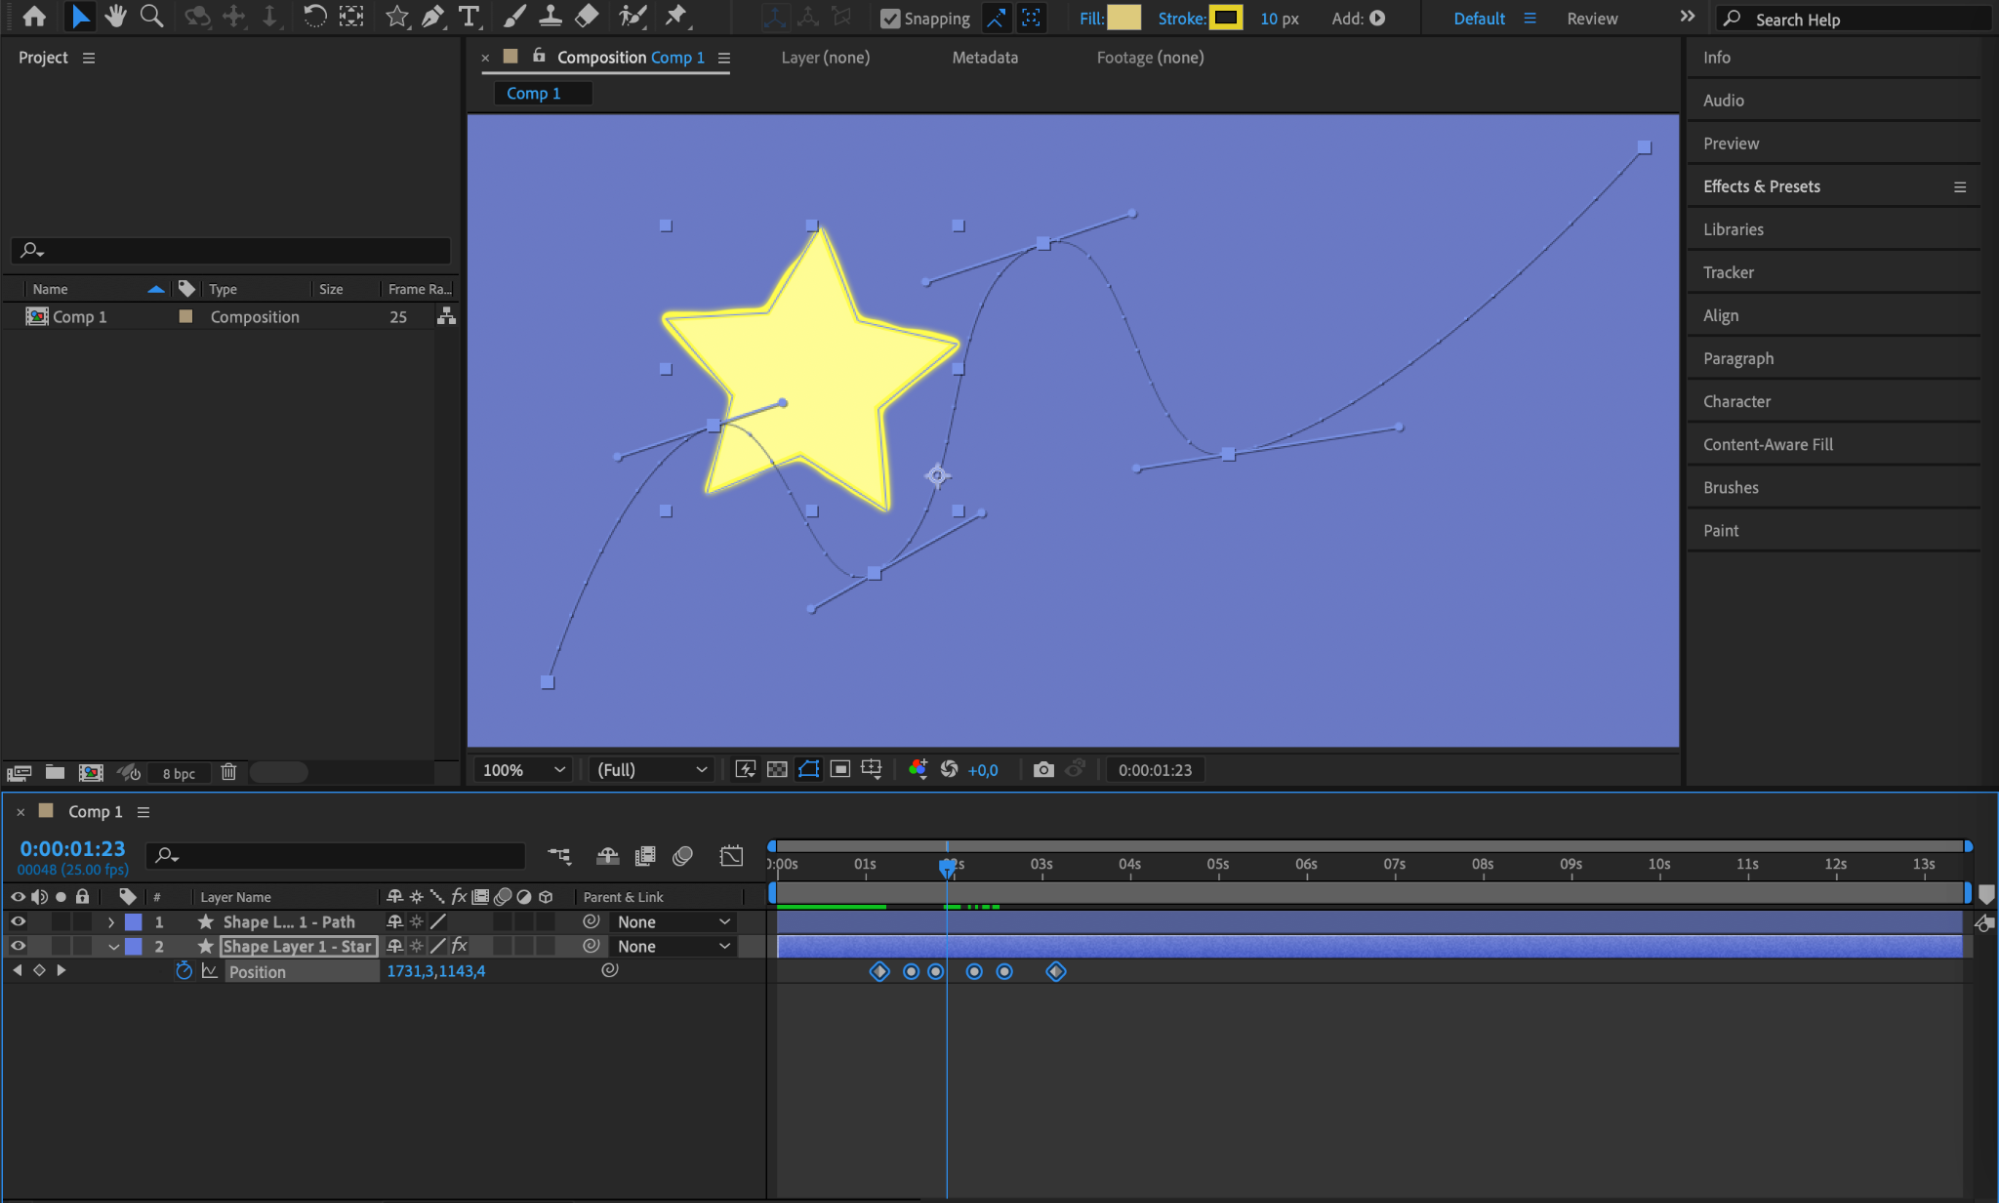 Step 6: Adjust the Anchor Point
Get 10% off when you subscribe to our newsletter

Expand the properties of the object layer and navigate to the Transform section. Adjust the Anchor Point, so the object follows the path in the desired orientation. This ensures the object aligns correctly as it moves along the path.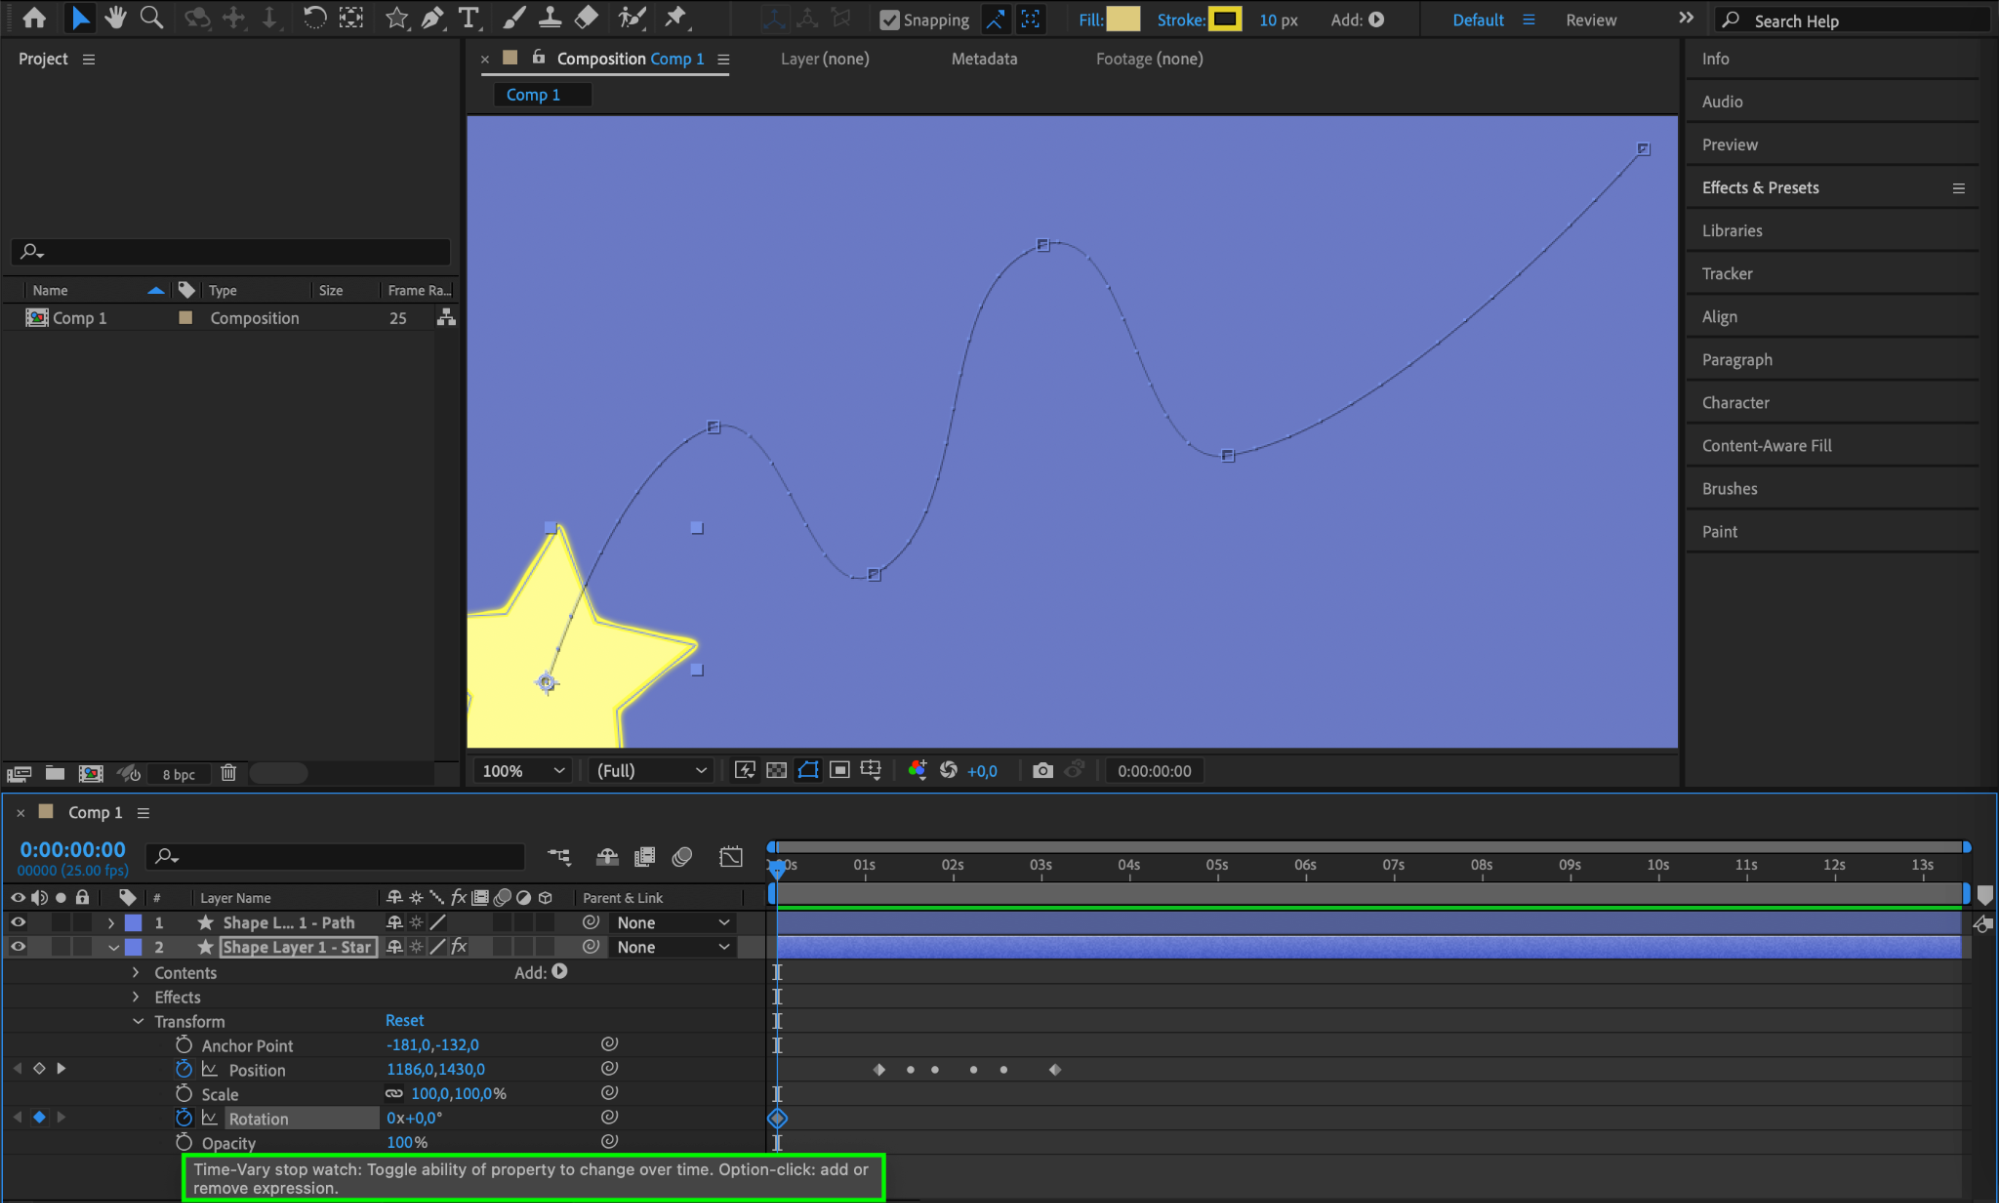 Step 7: Create Keyframes for Animation
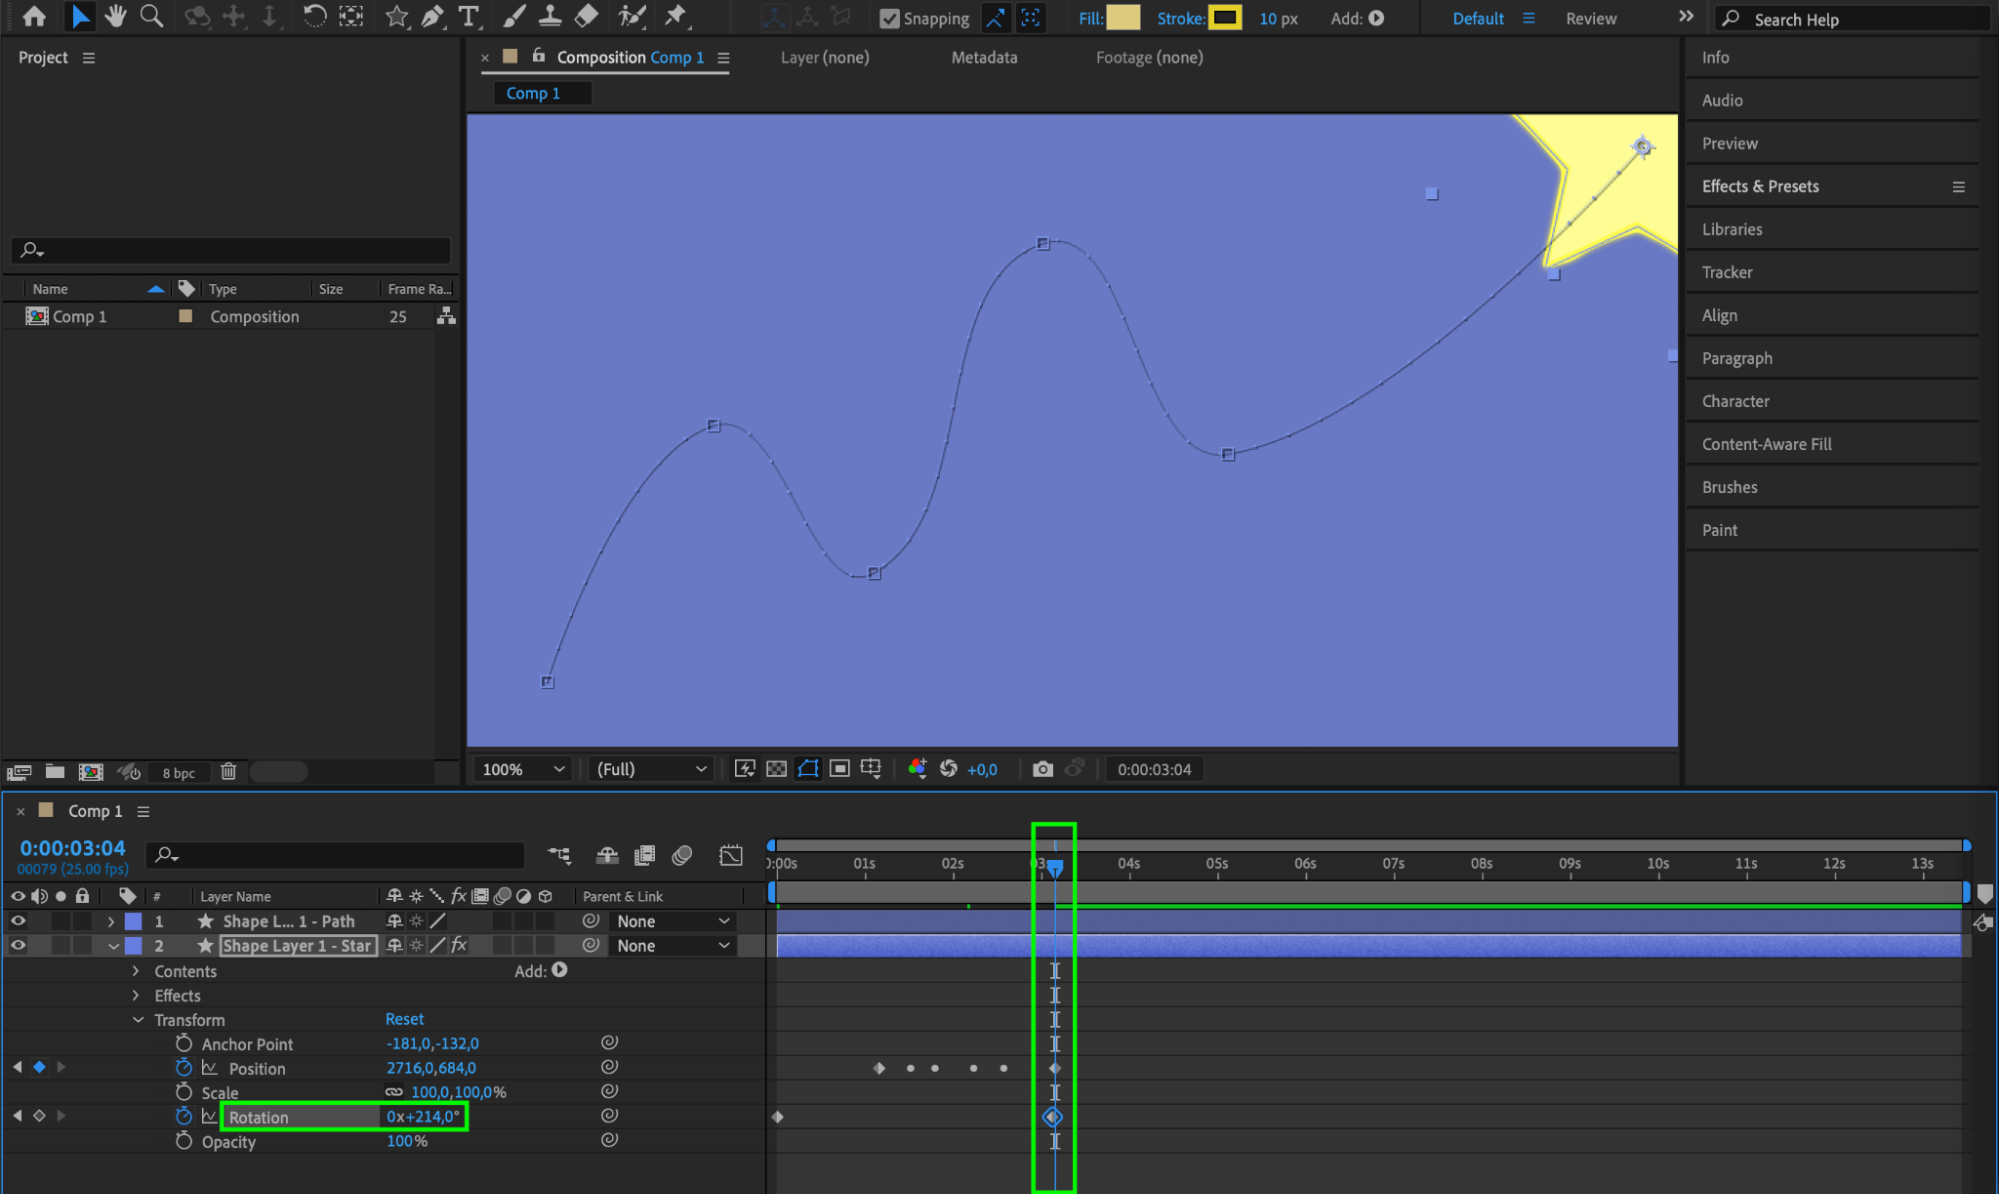
Animate other properties by creating keyframes. For example, you can adjust rotation, scale, or opacity to add more dynamism to your animation. Click the stopwatch icon next to each property to create keyframes and adjust their values over time.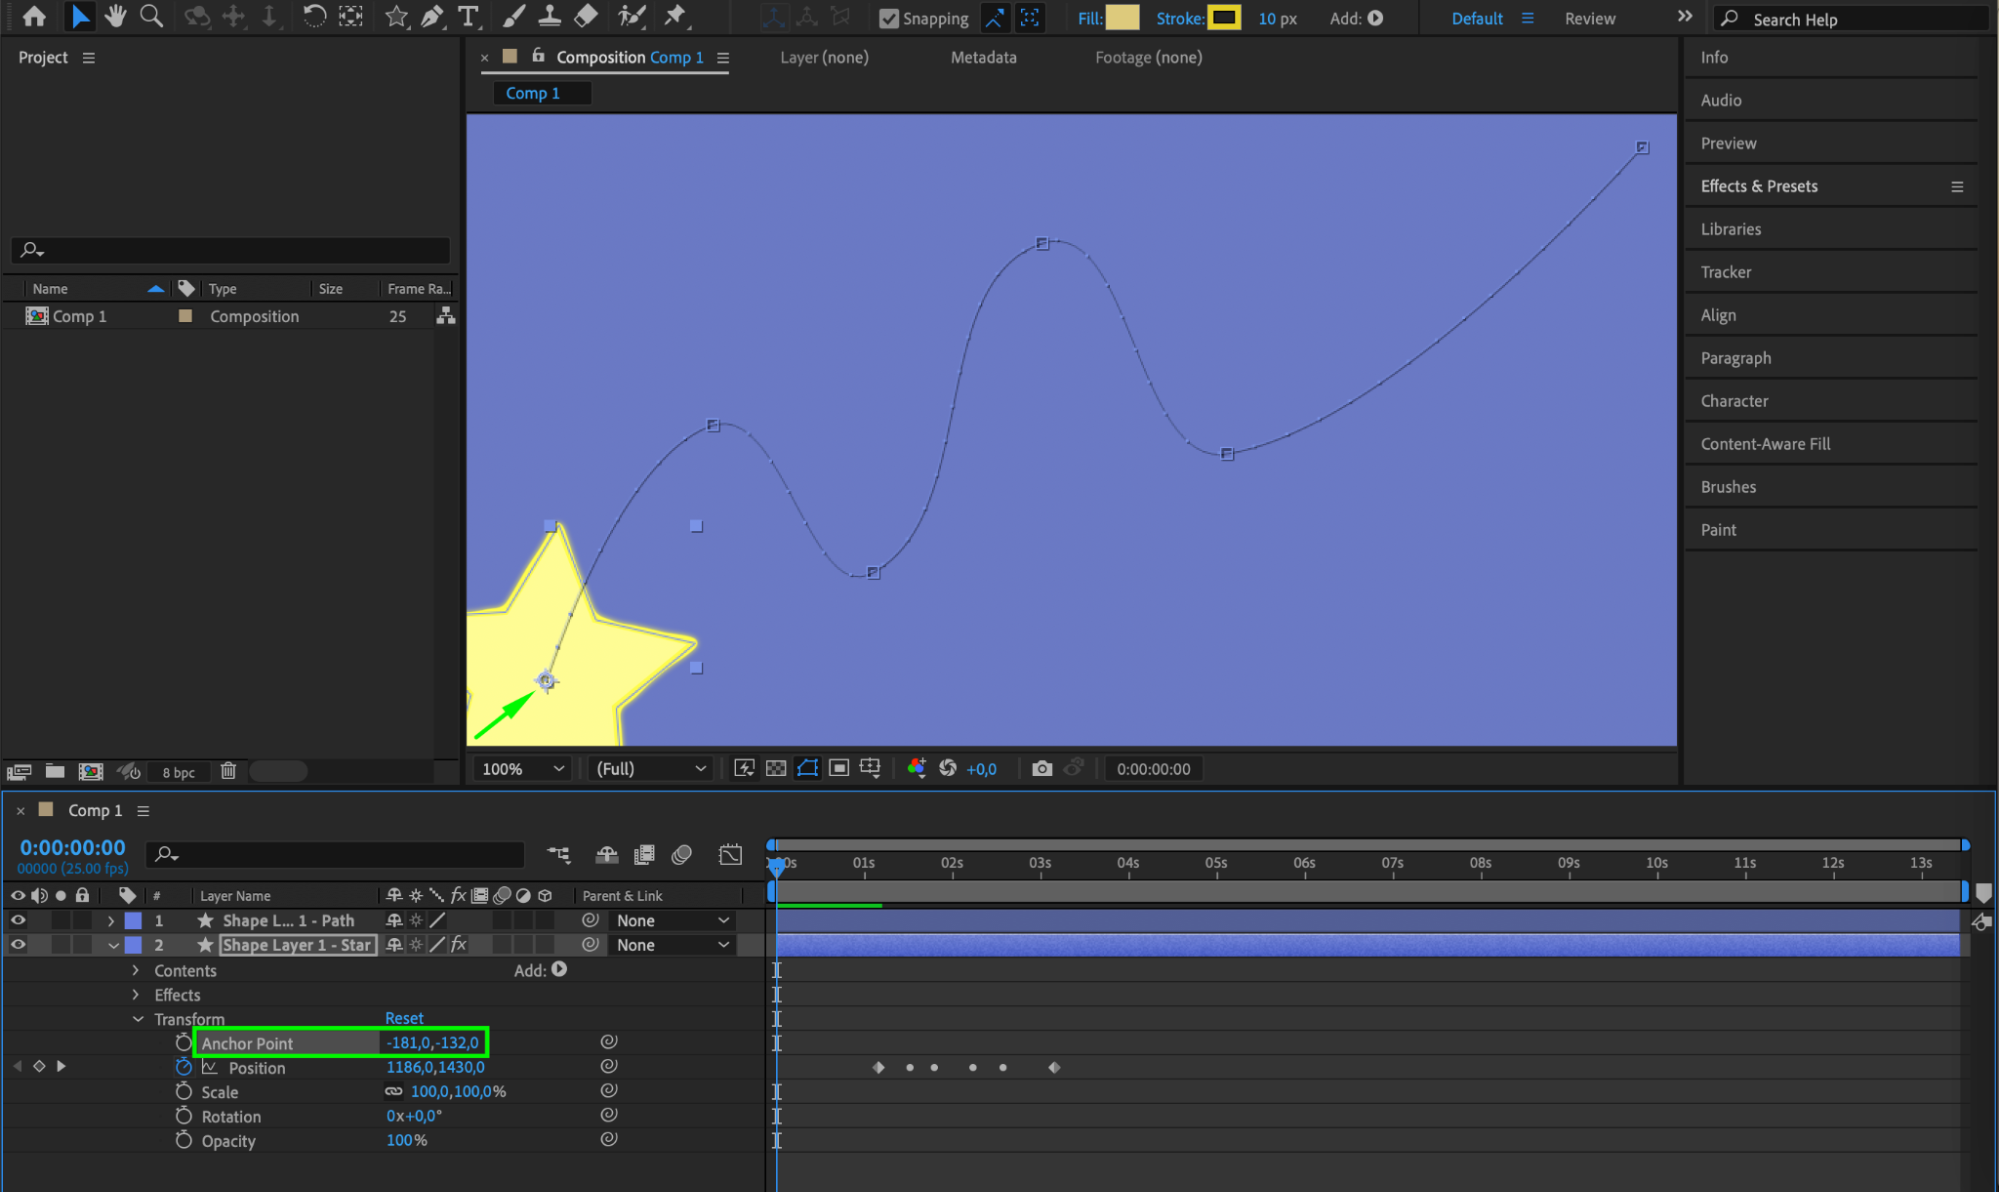
 Step 8: Extend the Path Duration
Get 10% off when you subscribe to our newsletter

To lengthen the duration of the path animation, drag the last keyframe to the right in the Position parameter timeline. This will slow down the movement and extend the animation duration.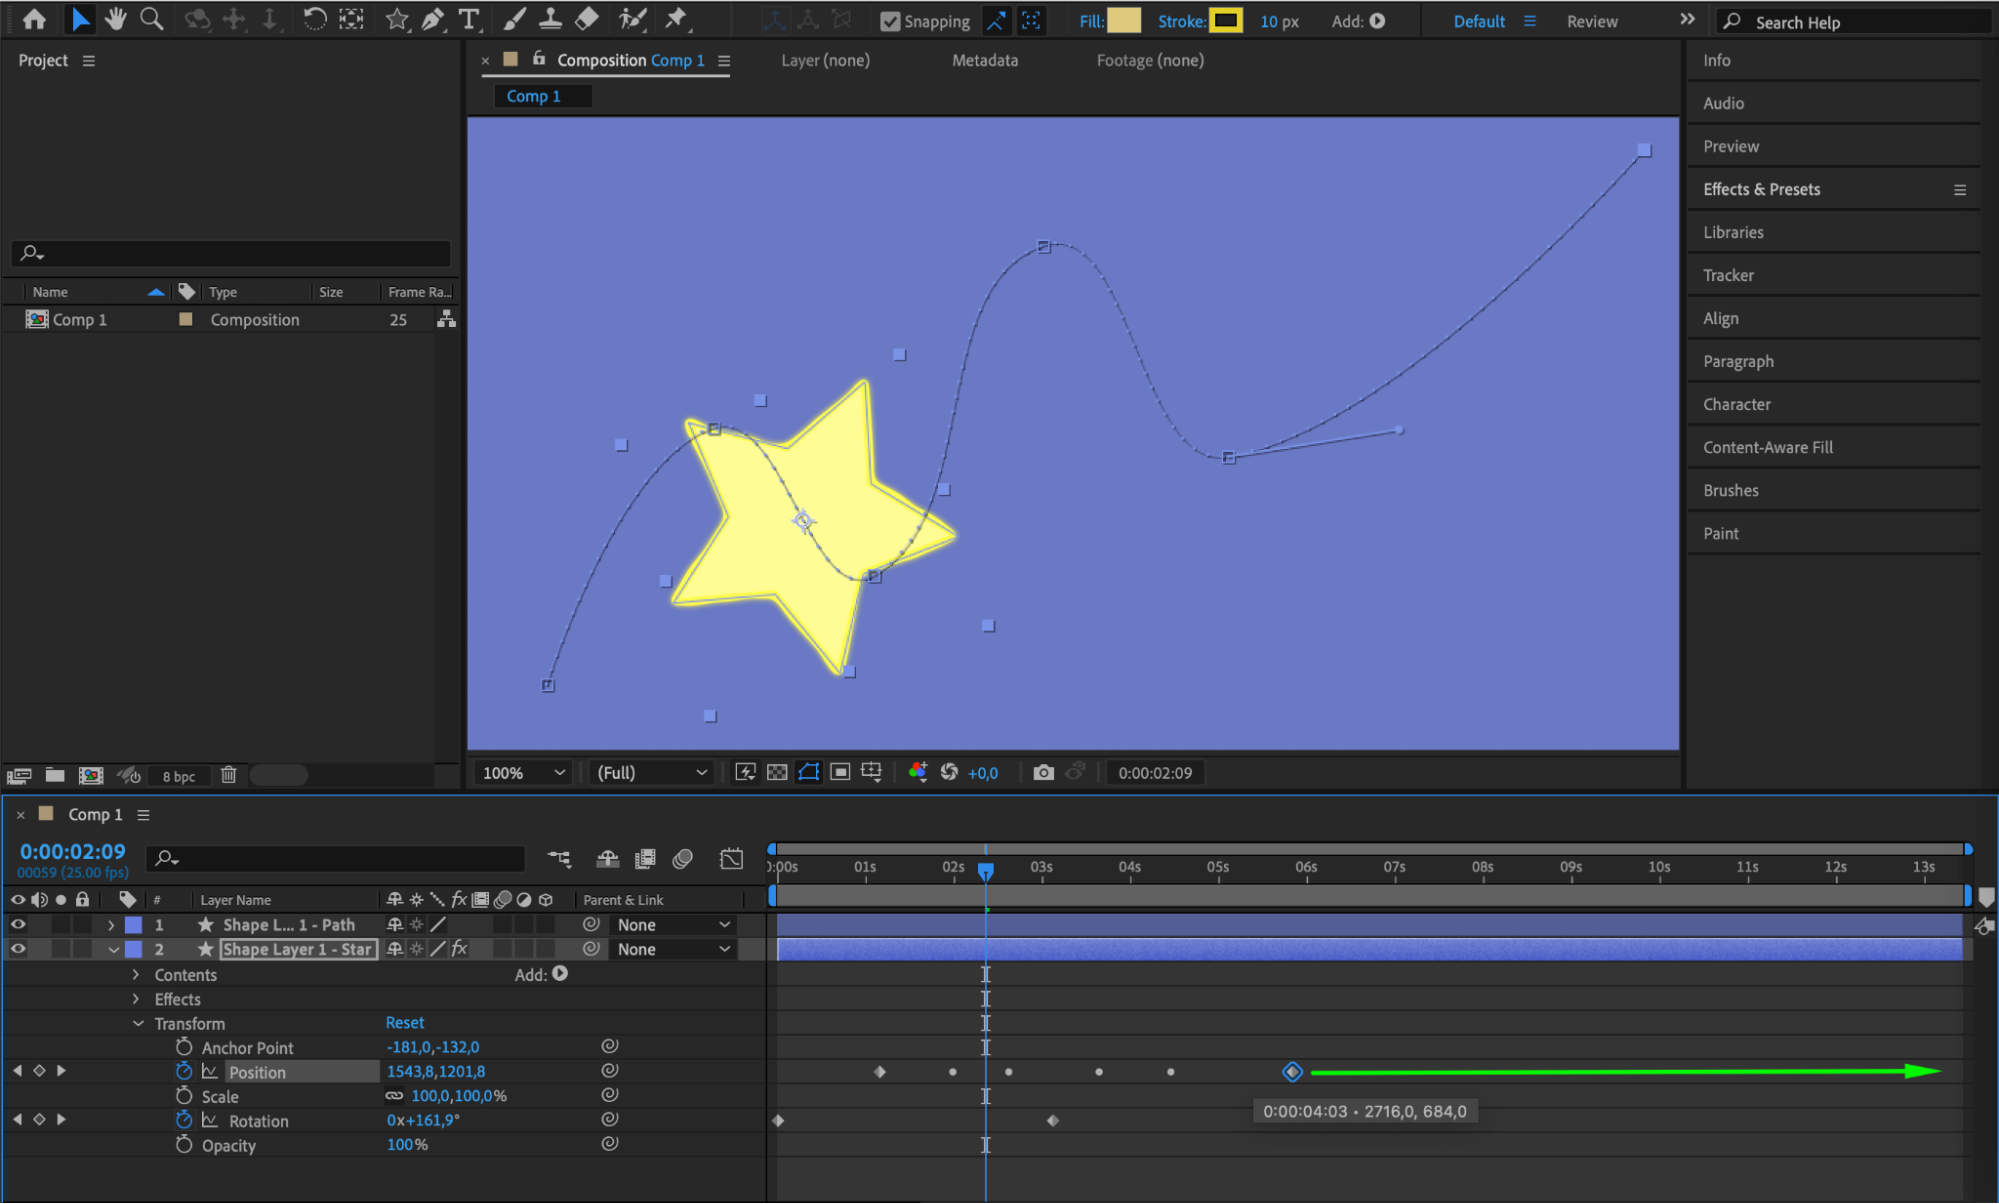 Step 9: Preview Your Animation
Press the space bar to preview your composition in the composition window. Make any necessary tweaks to ensure the animation looks smooth and achieves the desired effect.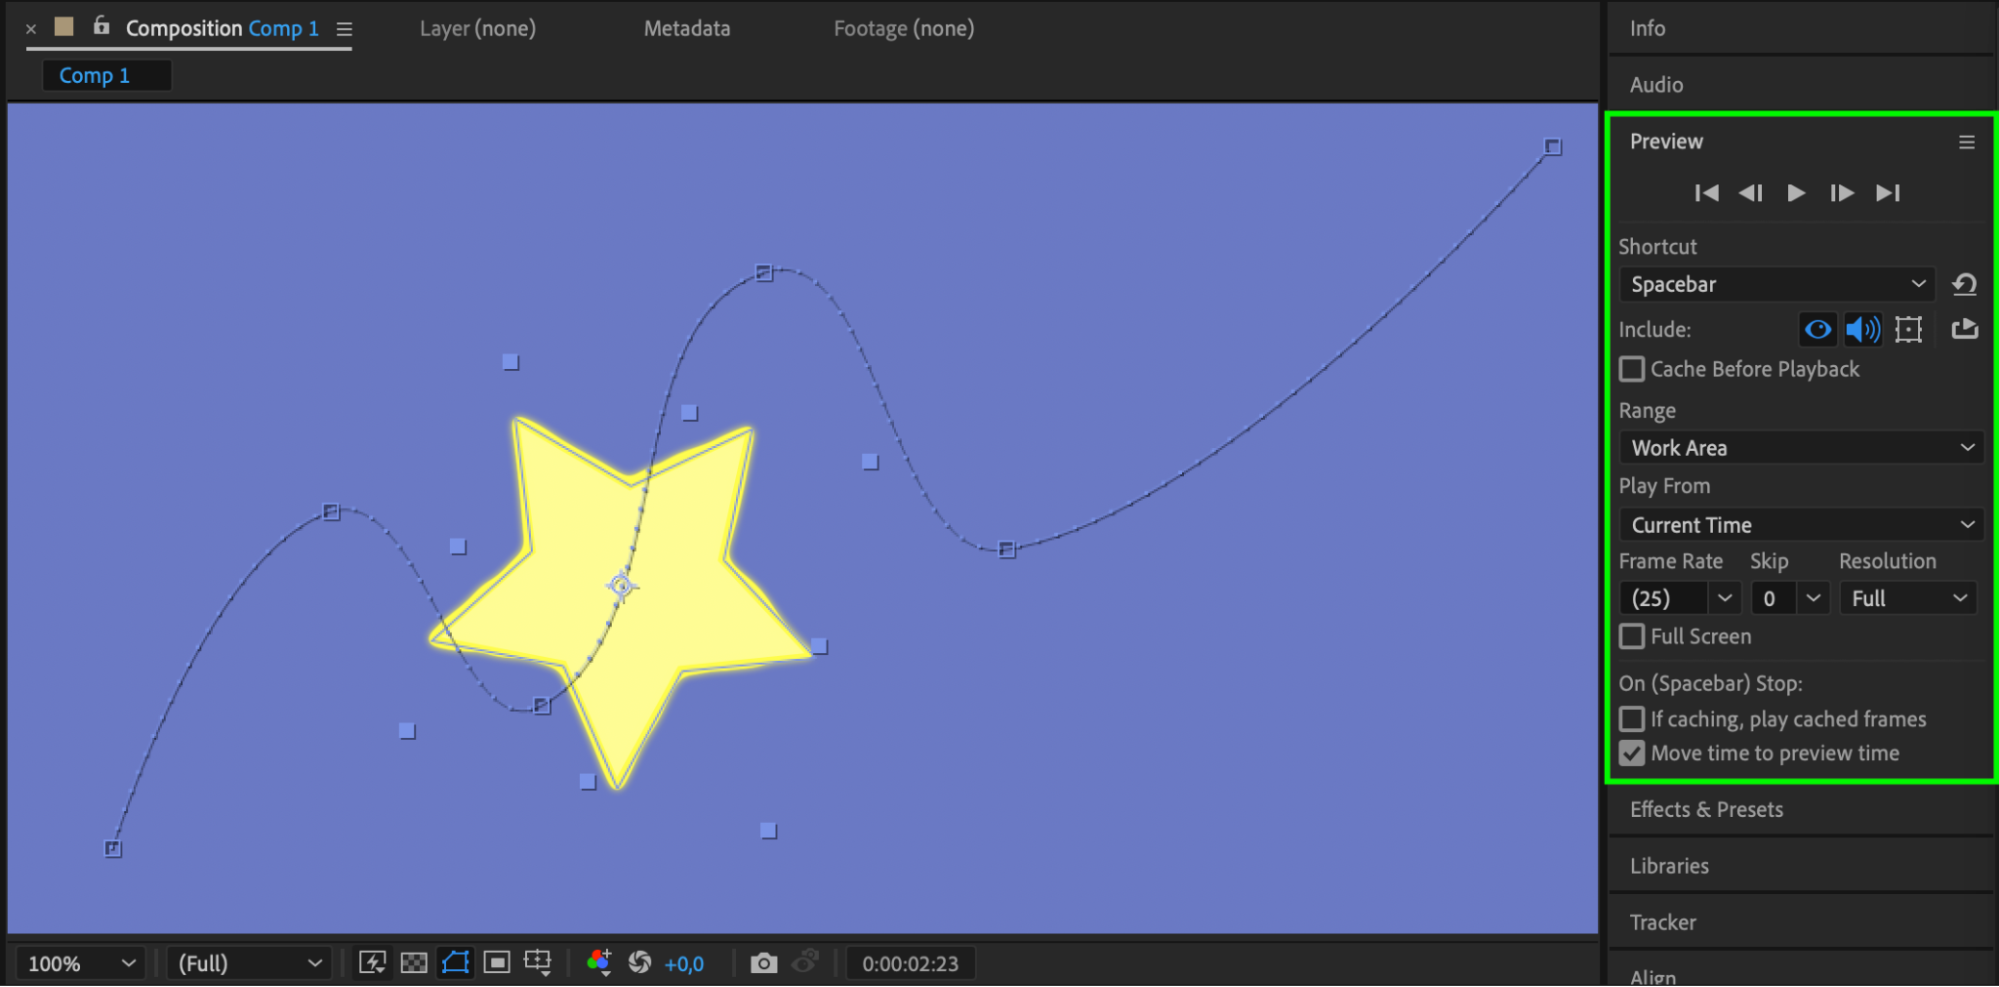 Conclusion
Whether you’re a beginner or an experienced user, this tutorial will provide you with the necessary knowledge to create stunning object path animations in After Effects. By following these steps, you can bring life and movement to your designs and videos, making them more engaging and visually appealing. So, let’s dive into the world of object path animation and enhance your projects with this creative technique!

