Introduction – Unleashing the Vibrancy of Shaky Text in After Effects
Vibrant and dynamic text animations can bring life and energy to your design projects. Whether you’re creating a promotional video, a title sequence, or simply adding a touch of excitement to your motion graphics, incorporating shaky text effects in After Effects can make a bold visual statement.
In this comprehensive tutorial, we will guide you step-by-step through the process of creating captivating shaky text animations in After Effects. You don’t need to be an expert in animation – we’ll break down the techniques and provide valuable tips that will help you master this effect and take your designs to the next level.
By the end of this tutorial, you will have the skills and knowledge to add a dynamic and multidimensional touch to your text, giving it a shaky appearance that will grab your audience’s attention. So let’s dive in and explore the powerful potential of shaky text animations in After Effects.
Step-by-Step Guide: Creating Shaky Text in After Effects
To achieve eye-catching and dynamic shaky text in After Effects, here’s a step-by-step guide that will help you master this effect:
1. Import your footage:
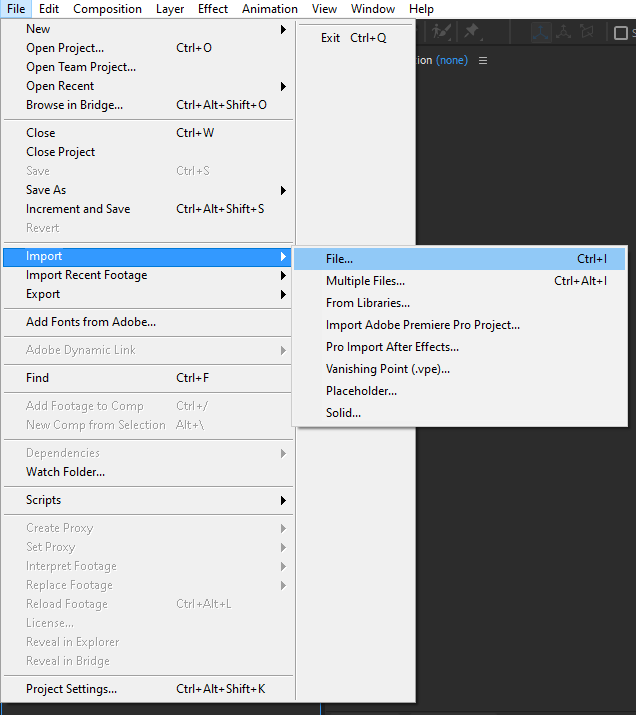
Start by opening After Effects and importing the footage or composition you want to add shaky text to. You can do this by going to File > Import > File or by using a hotkey < Ctrl/Command + I>.
 2. Create a new composition:
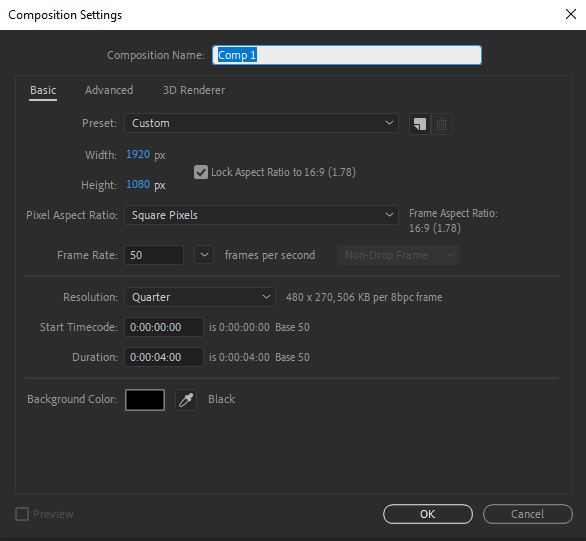
Once footage is imported create a new composition by clicking Composition > New Composition, also you can do this using a hotkey < Ctrl/Command + N>. Specify the desired settings for the composition, such as the resolution, frame per second (fps), and duration.
 3. Add text layer:
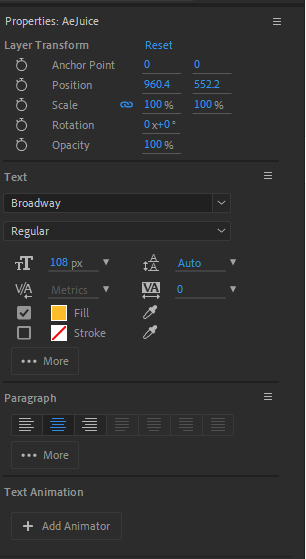
Now, it’s time to add the text layer to the composition. Click on the “T” icon in the tool panel or use a hotkey < Ctrl/Command + T> to create a new text layer. Type in the desired text and format it according to your preferences using the Character and Paragraph panels.
 4. Apply text animation:
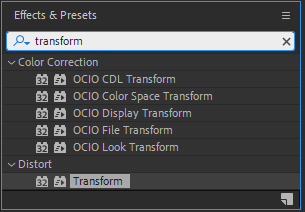
Select the text layer and navigate to the Effects & Presets panel. Search for the “Transform” effect and apply it to the text layer. This will allow you to manipulate the position, scale, and rotation of the text.
 5. Add wiggle expression:
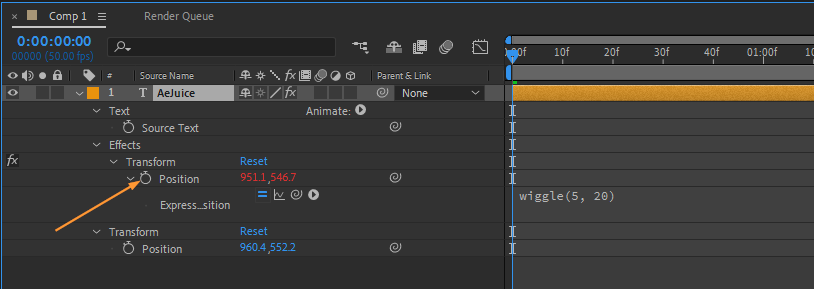
To create the shaky effect, we’ll use a wiggle expression. Alt-click on the stopwatch icon next to the “Position” property of the text layer. In the expression editor, type “wiggle(frequency, amount)” and replace “frequency” and “amount” with desired values.
For example, “wiggle(5, 20)” will create a text that randomly wiggles at a frequency of 5 times per second and with an amplitude of 20 pixels. Adjust these values to achieve your preferred level of shake.
 6. Fine-tuning the effect:
If the shake feels too intense, you can reduce the overall intensity by adjusting the opacity of the text layer or lowering the amplitude in the expression. Experiment to find the right balance that enhances your design without overpowering it.
7. Preview and refine:
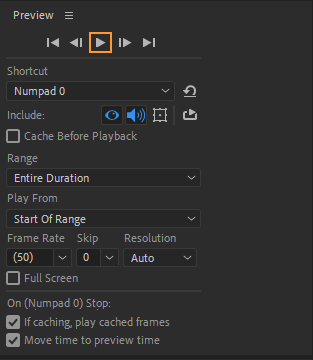
Once you’re satisfied with the shaky text effect, preview it by pressing the spacebar or using the hotkey “0” on the numeric keypad. Make any necessary adjustments to the text animation or composition settings to perfect your design.
 8. Export and utilize:
After fine-tuning the shaky text animation, it’s time to export your masterpiece. Go to Composition > Add to Render Queue or use the hotkey Ctrl/Command + M. Choose the desired output format and destination folder. Finally, click on Render to export your composition into a video file that can be used in your projects or shared online.

By following these step-by-step instructions, you’ll be able to create captivating and attention-grabbing shaky text effects using After Effects. Remember to experiment with different settings and variations to add unique touches to your designs. So go ahead and unleash your creativity to captivate your audience with dynamic and vibrant shaky text animations.
Conclusion – Shake Up Your Designs with Shaky Text in After Effects
Congratulations! You have successfully learned how to create dynamic and eye-catching shaky text effects in After Effects. By following the step-by-step guide provided, you gained valuable insights into applying the wiggle expression and manipulating key properties to achieve the desired level of shake for your text animations.
Remember, the key to mastering shaky text effects lies in experimentation and fine-tuning. Don’t be afraid to push the boundaries and explore different variations of frequency and amplitude settings to create unique and captivating animations that suit your design projects.
Whether you’re working on promotional videos, title sequences, or motion graphics, incorporating shaky text in After Effects allows you to inject vibrancy and energy into your creations, making them stand out from the crowd. Use this technique to grab your audience’s attention, emphasize key messages, or simply add a touch of excitement to your visuals.
Now, armed with the knowledge you’ve gained, it’s time to put your skills to the test and create stunning shaky text animations that leave a lasting impression. So go ahead, unleash your creativity, and shake up your designs with the power of After Effects.
We hope you enjoyed this tutorial and found it helpful in expanding your motion graphics repertoire. For more inspiring tutorials and resources, visit AEJuice.com. Happy animating!

