How to Create the Illusion of Someone Flying in After Effects
Introduction
Have you ever wondered how films or music videos make someone appear to fly? With Adobe After Effects, you can create this illusion by blending special effects with motion graphics. Whether you’re creating a cinematic scene or a playful video, these techniques will help you make your subjects fly through the sky. Follow this step-by-step guide to bring your imagination to life.
Get 10% off when you subscribe to our newsletter

Step 1: Import Your Footage
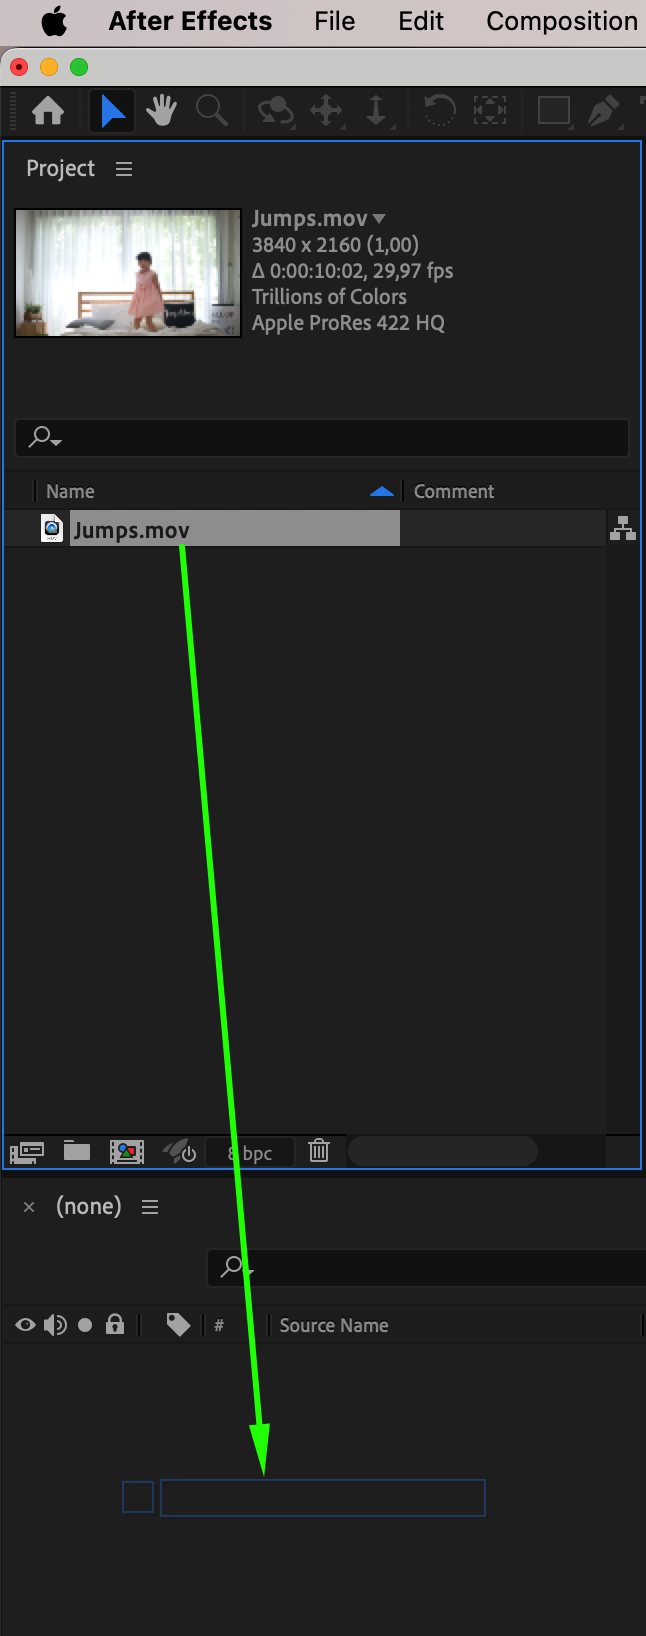
First, import the video footage you’ll be working with. Navigate to File > Import > File, and select the video from your computer. Once it’s in the Project panel, drag it to the Timeline panel. This will be the base layer for your flight scene.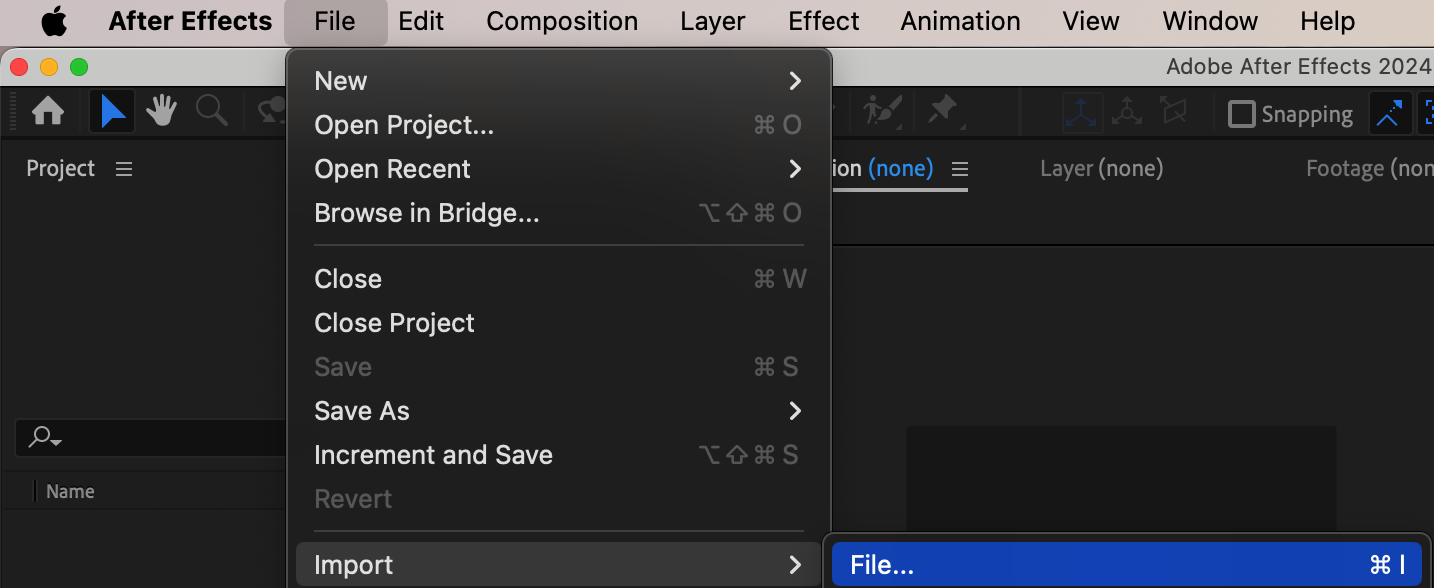
 Step 2: Mask the Person You Want to Fly
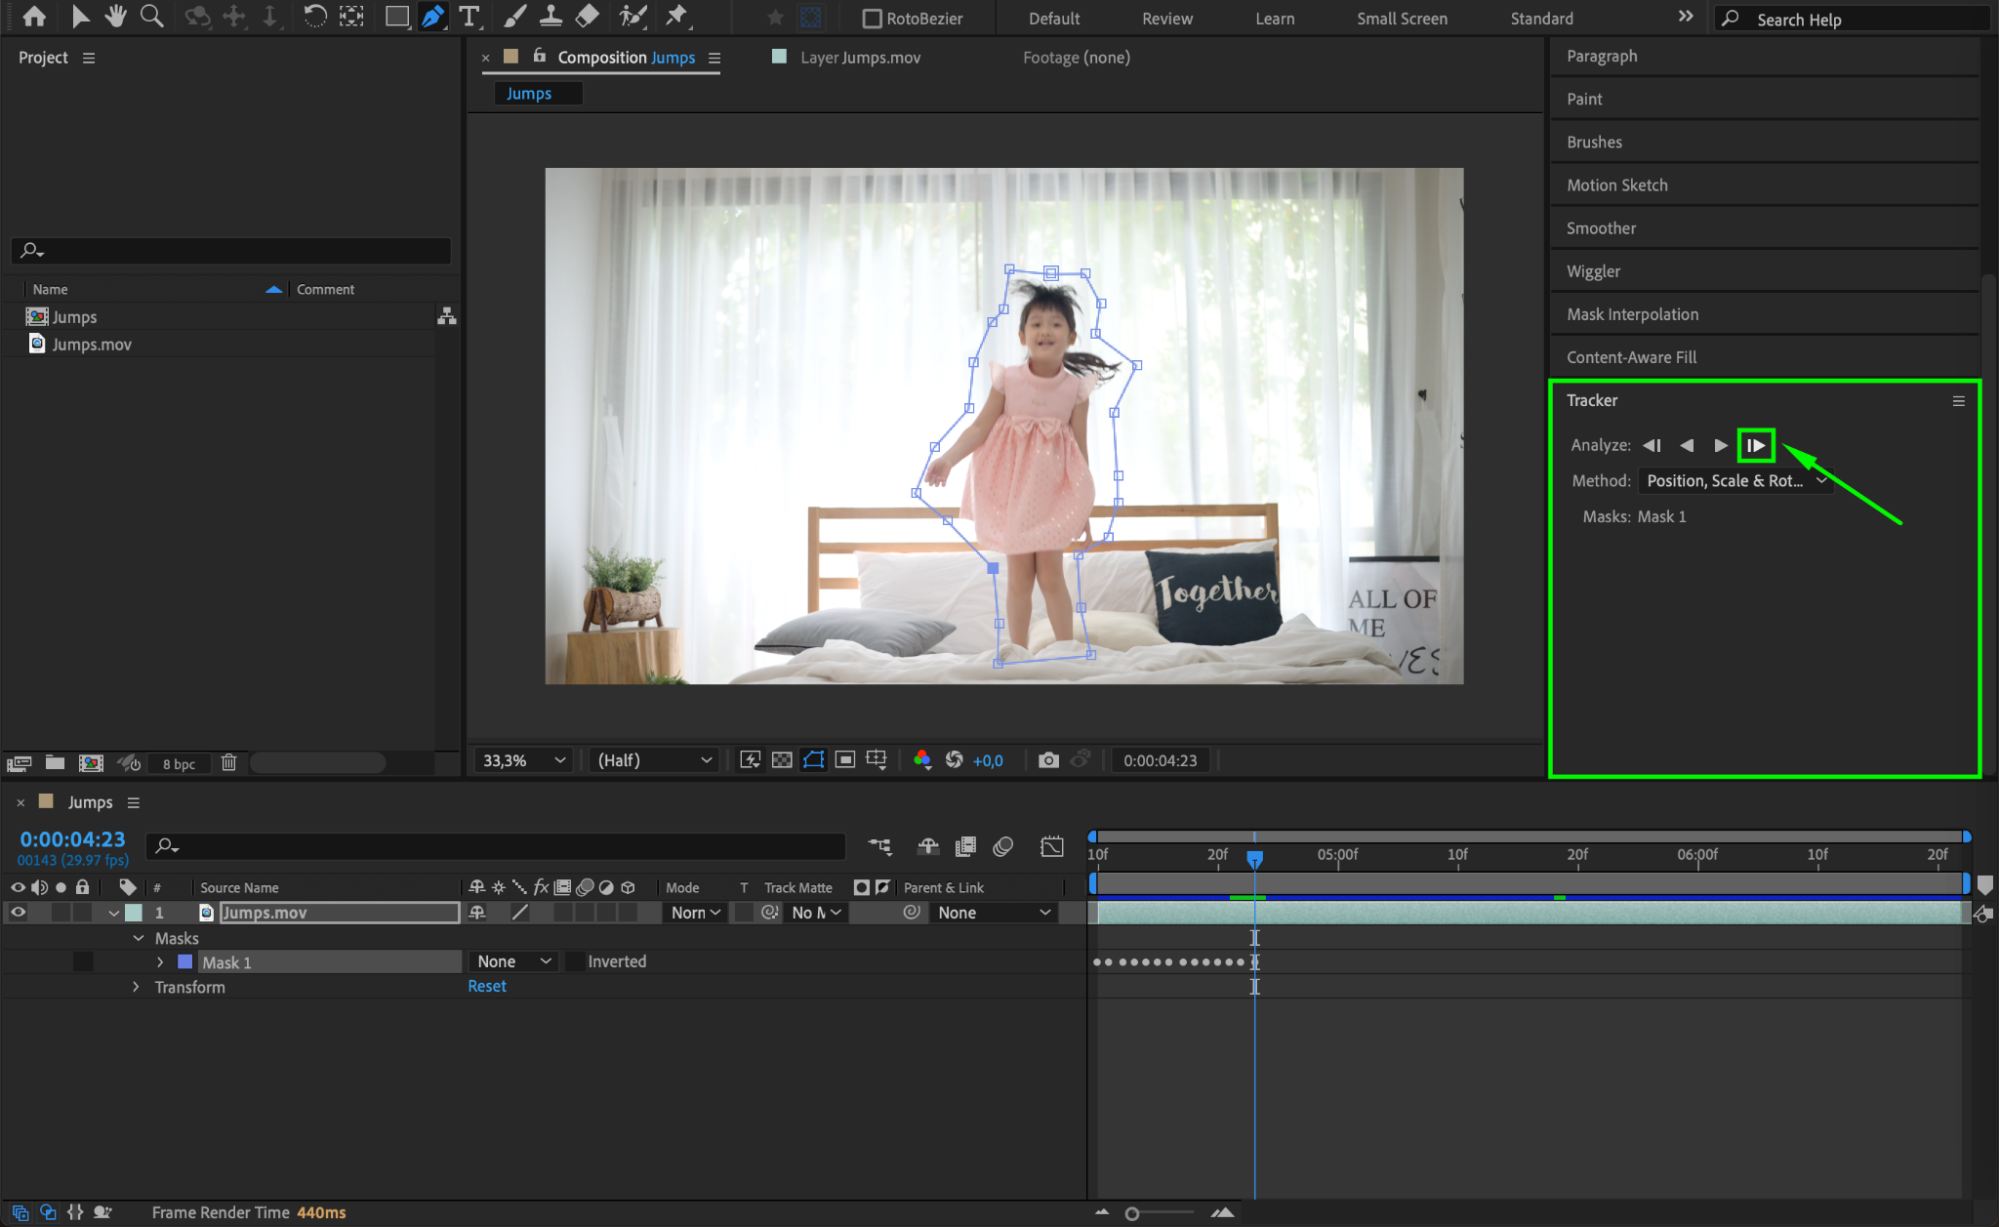
Use the Pen Tool (G) to draw a mask around the person you want to appear as if they’re flying. 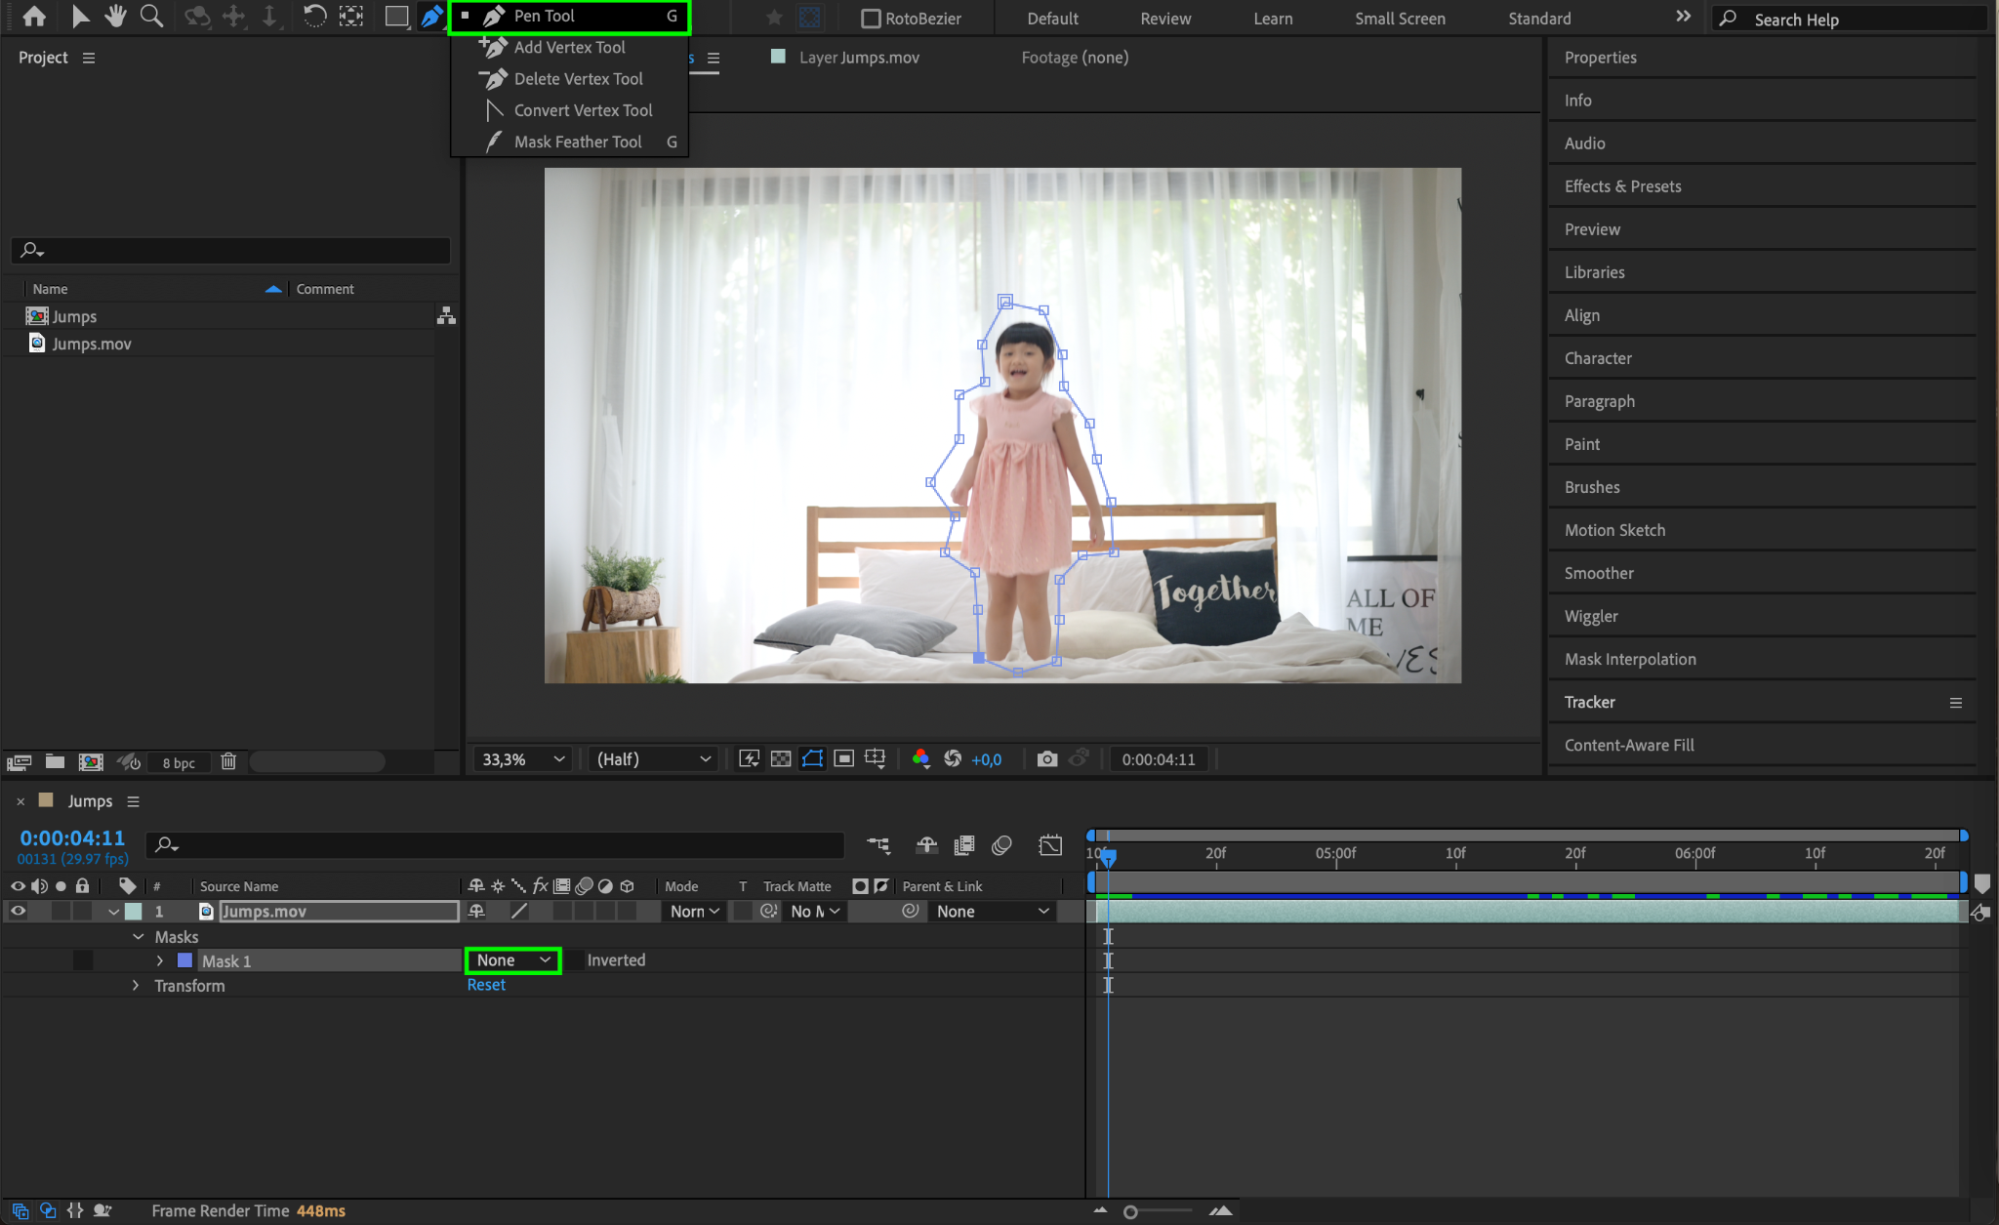 Step 3: Track the Mask
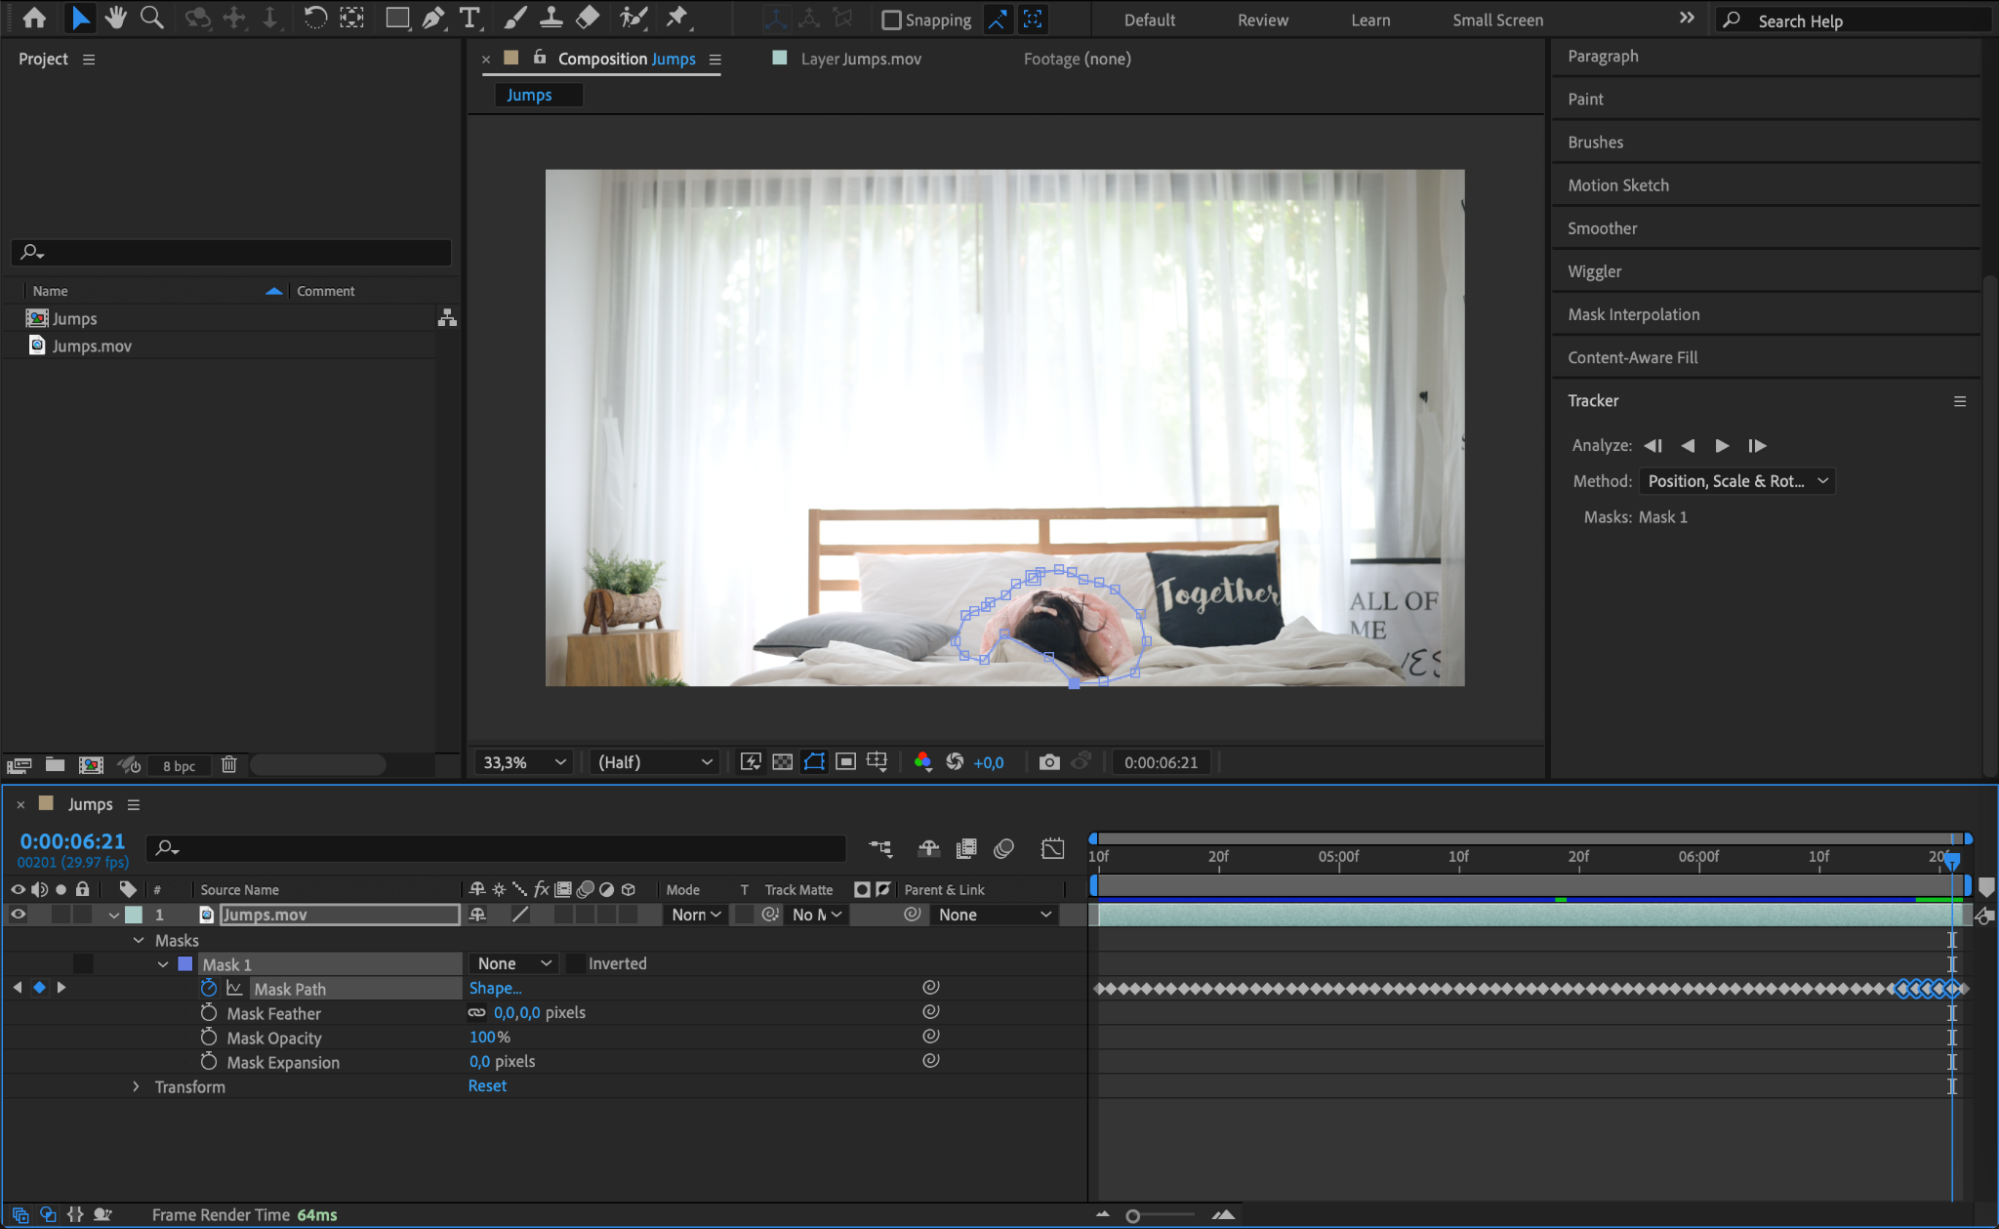
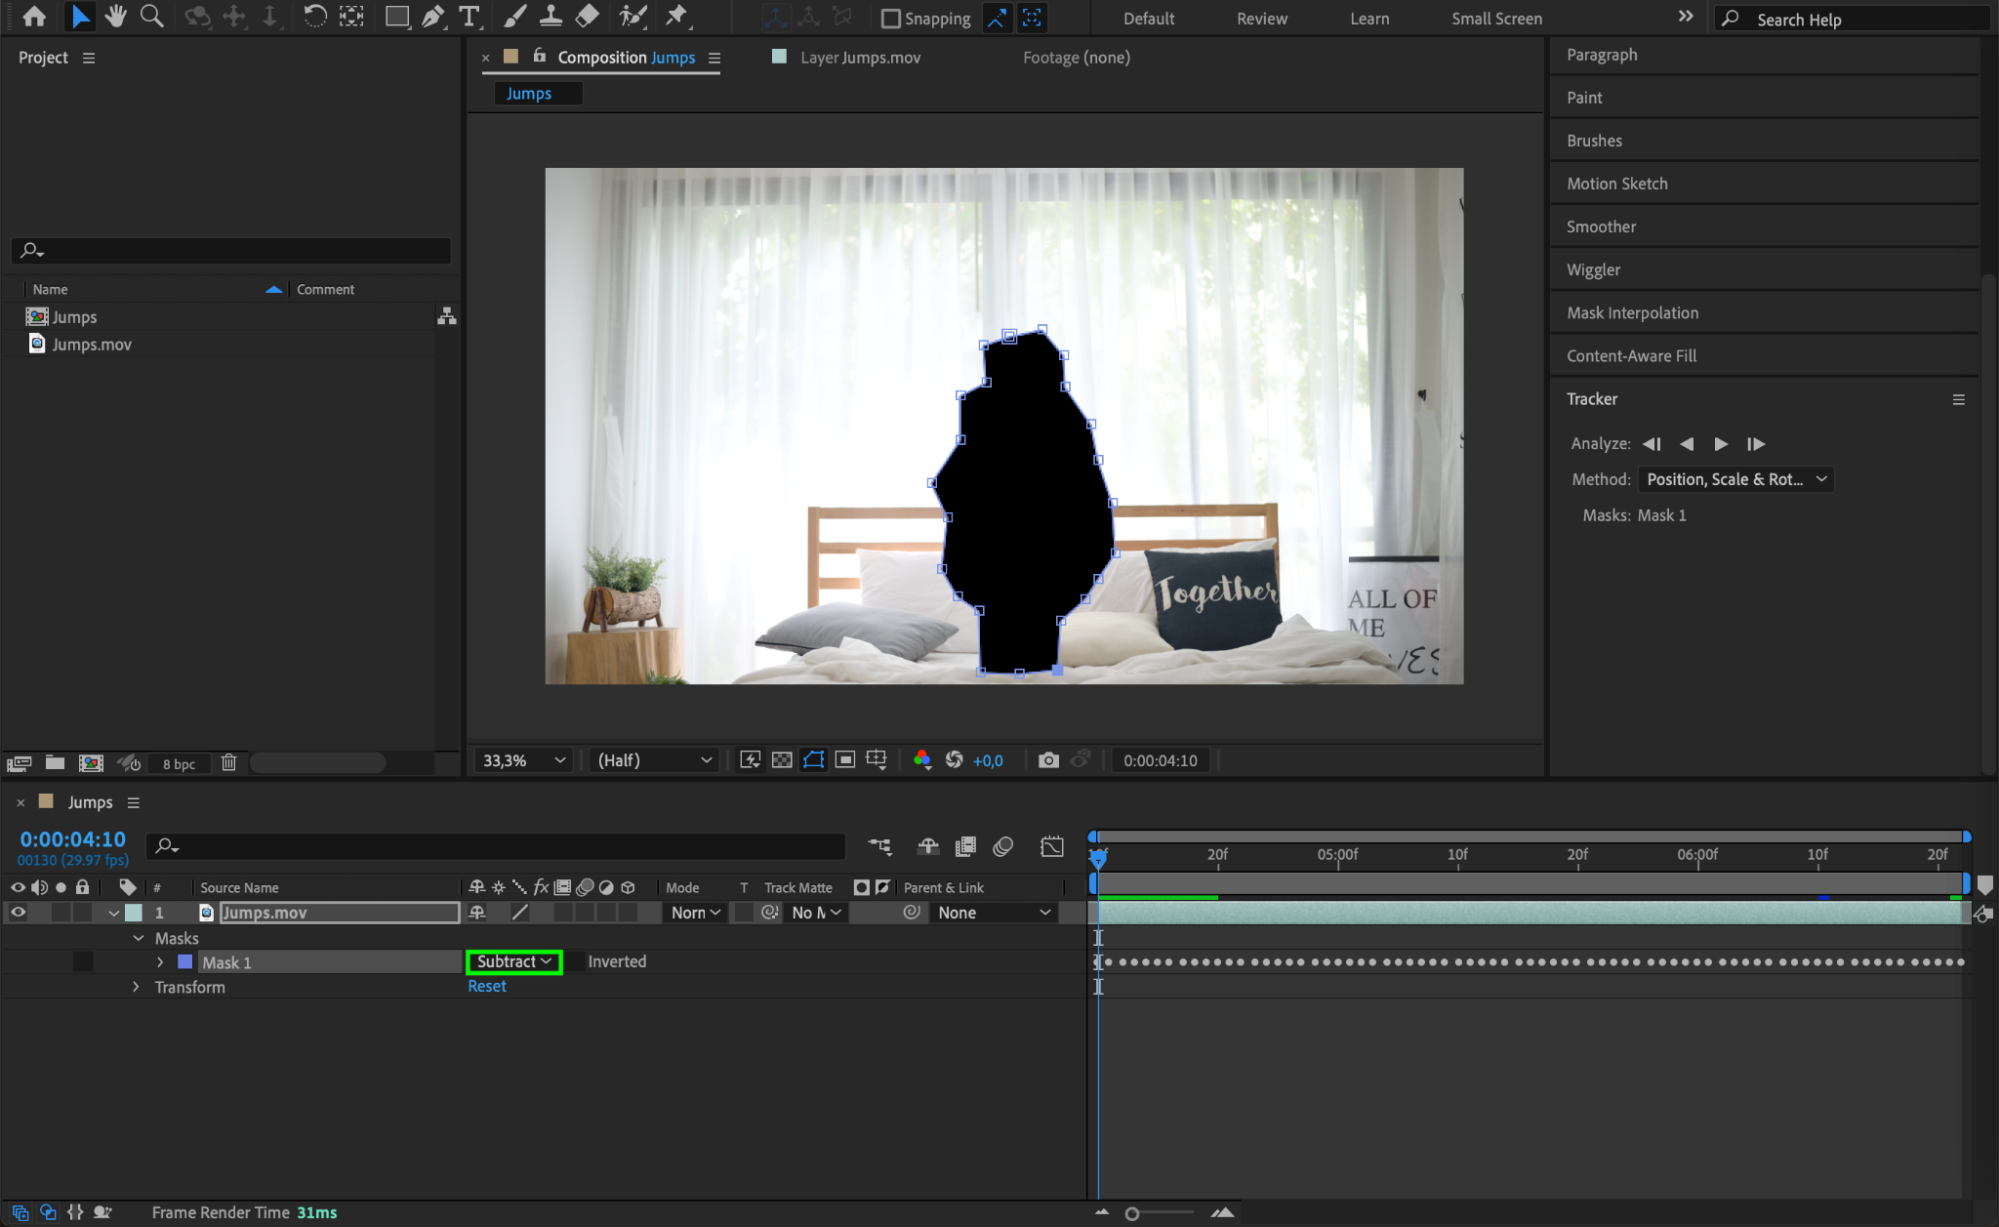
Right-click on the mask and select Track Mask from the submenu. The Tracker Panel will appear. In the Analyze section, press Play to begin tracking the movement of the person in the video. Alternatively, you can manually edit the mask frame by frame. After Effects will automatically create keyframes for the Mask Path, allowing the mask to follow the subject’s movement. Set the Mask Mode to Subtract to hide the background.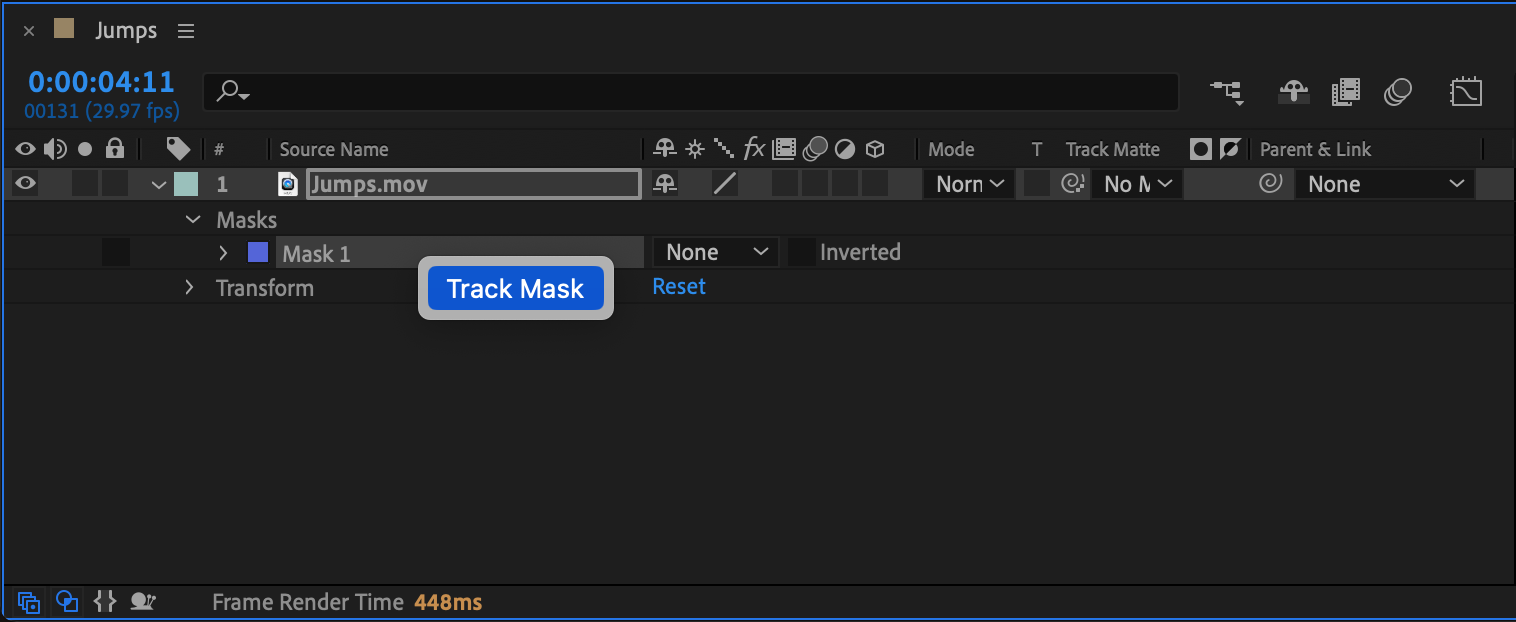
 Step 4: Use Content-Aware Fill
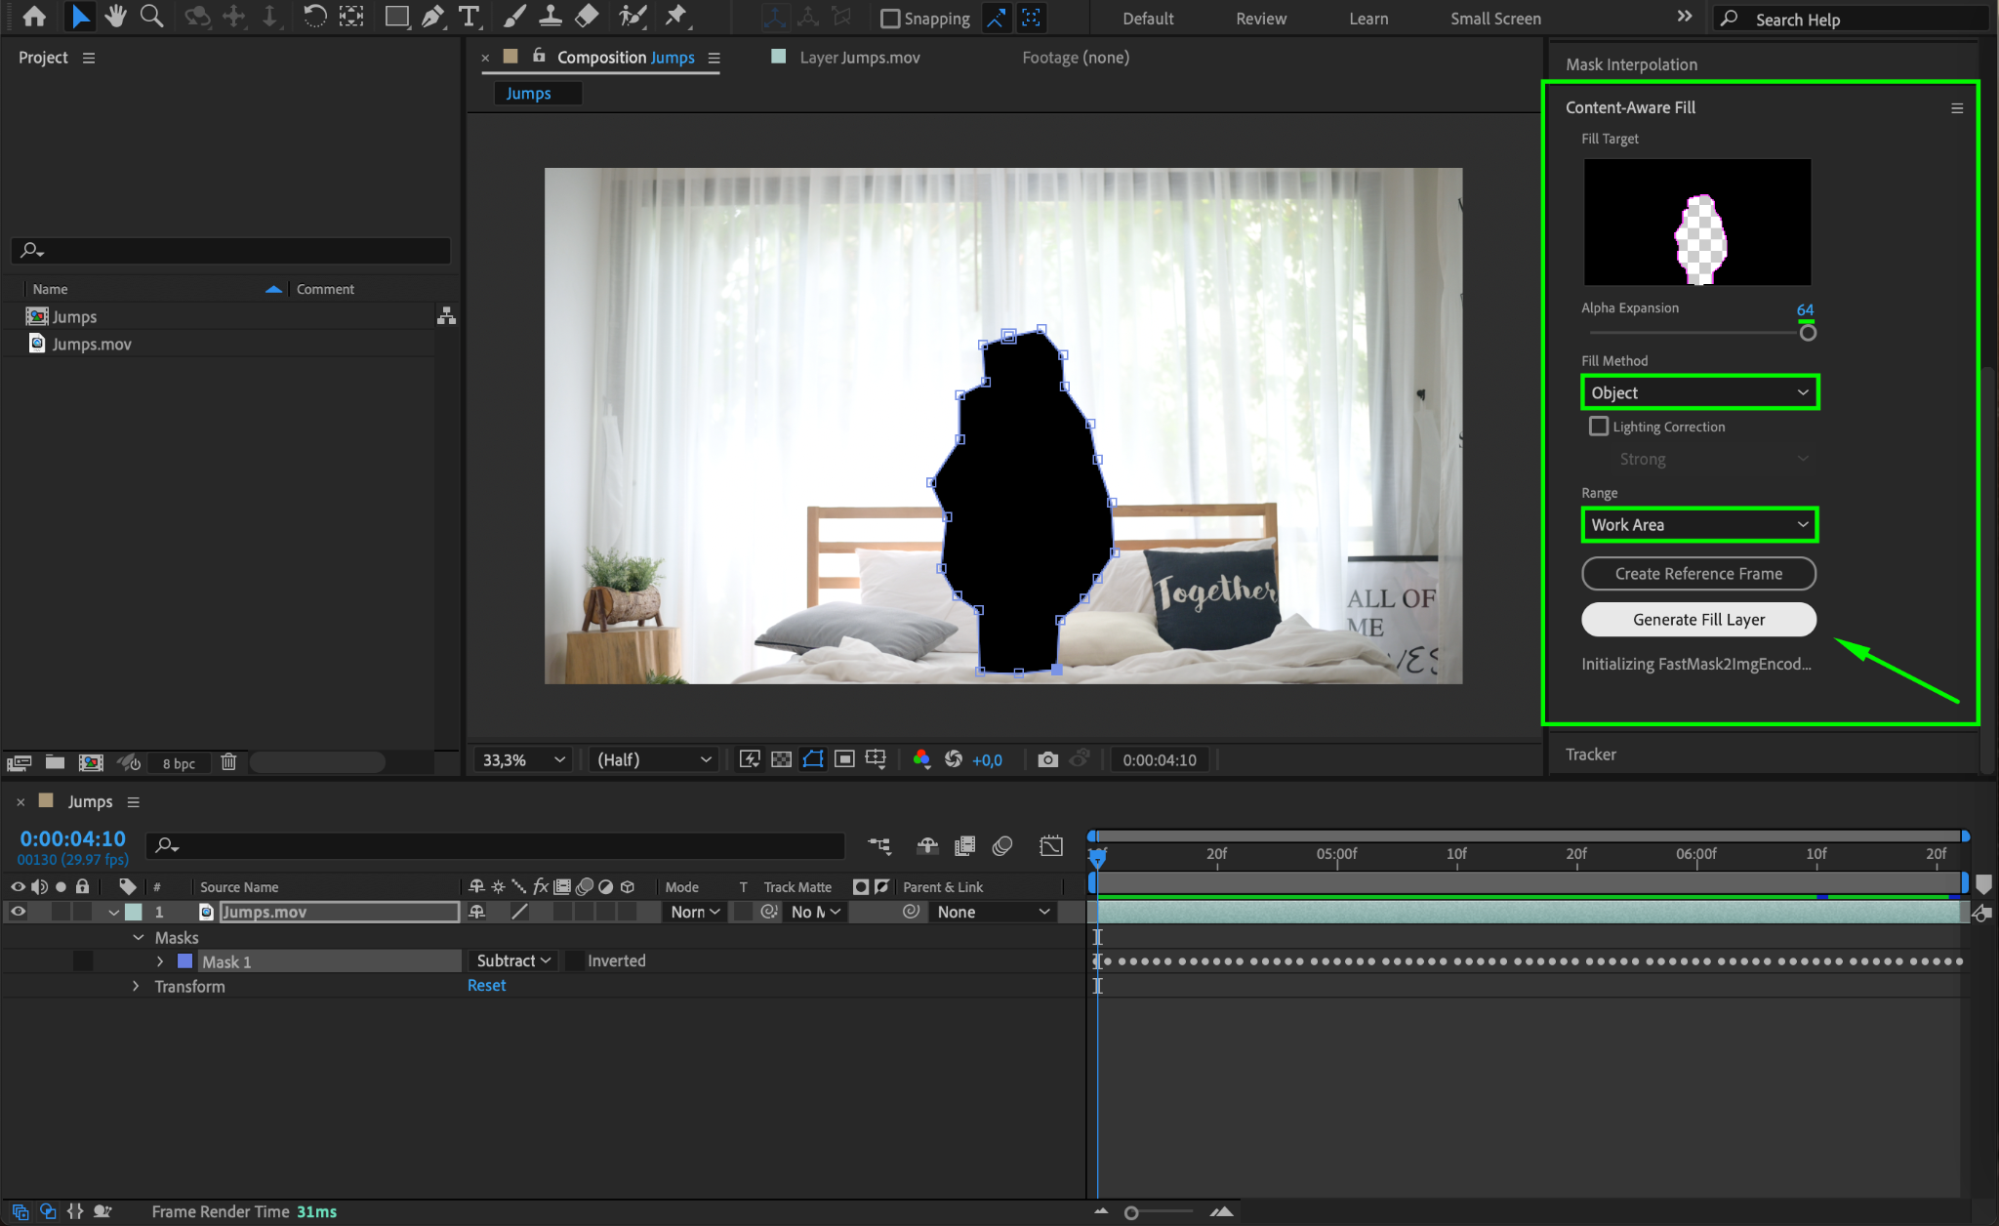
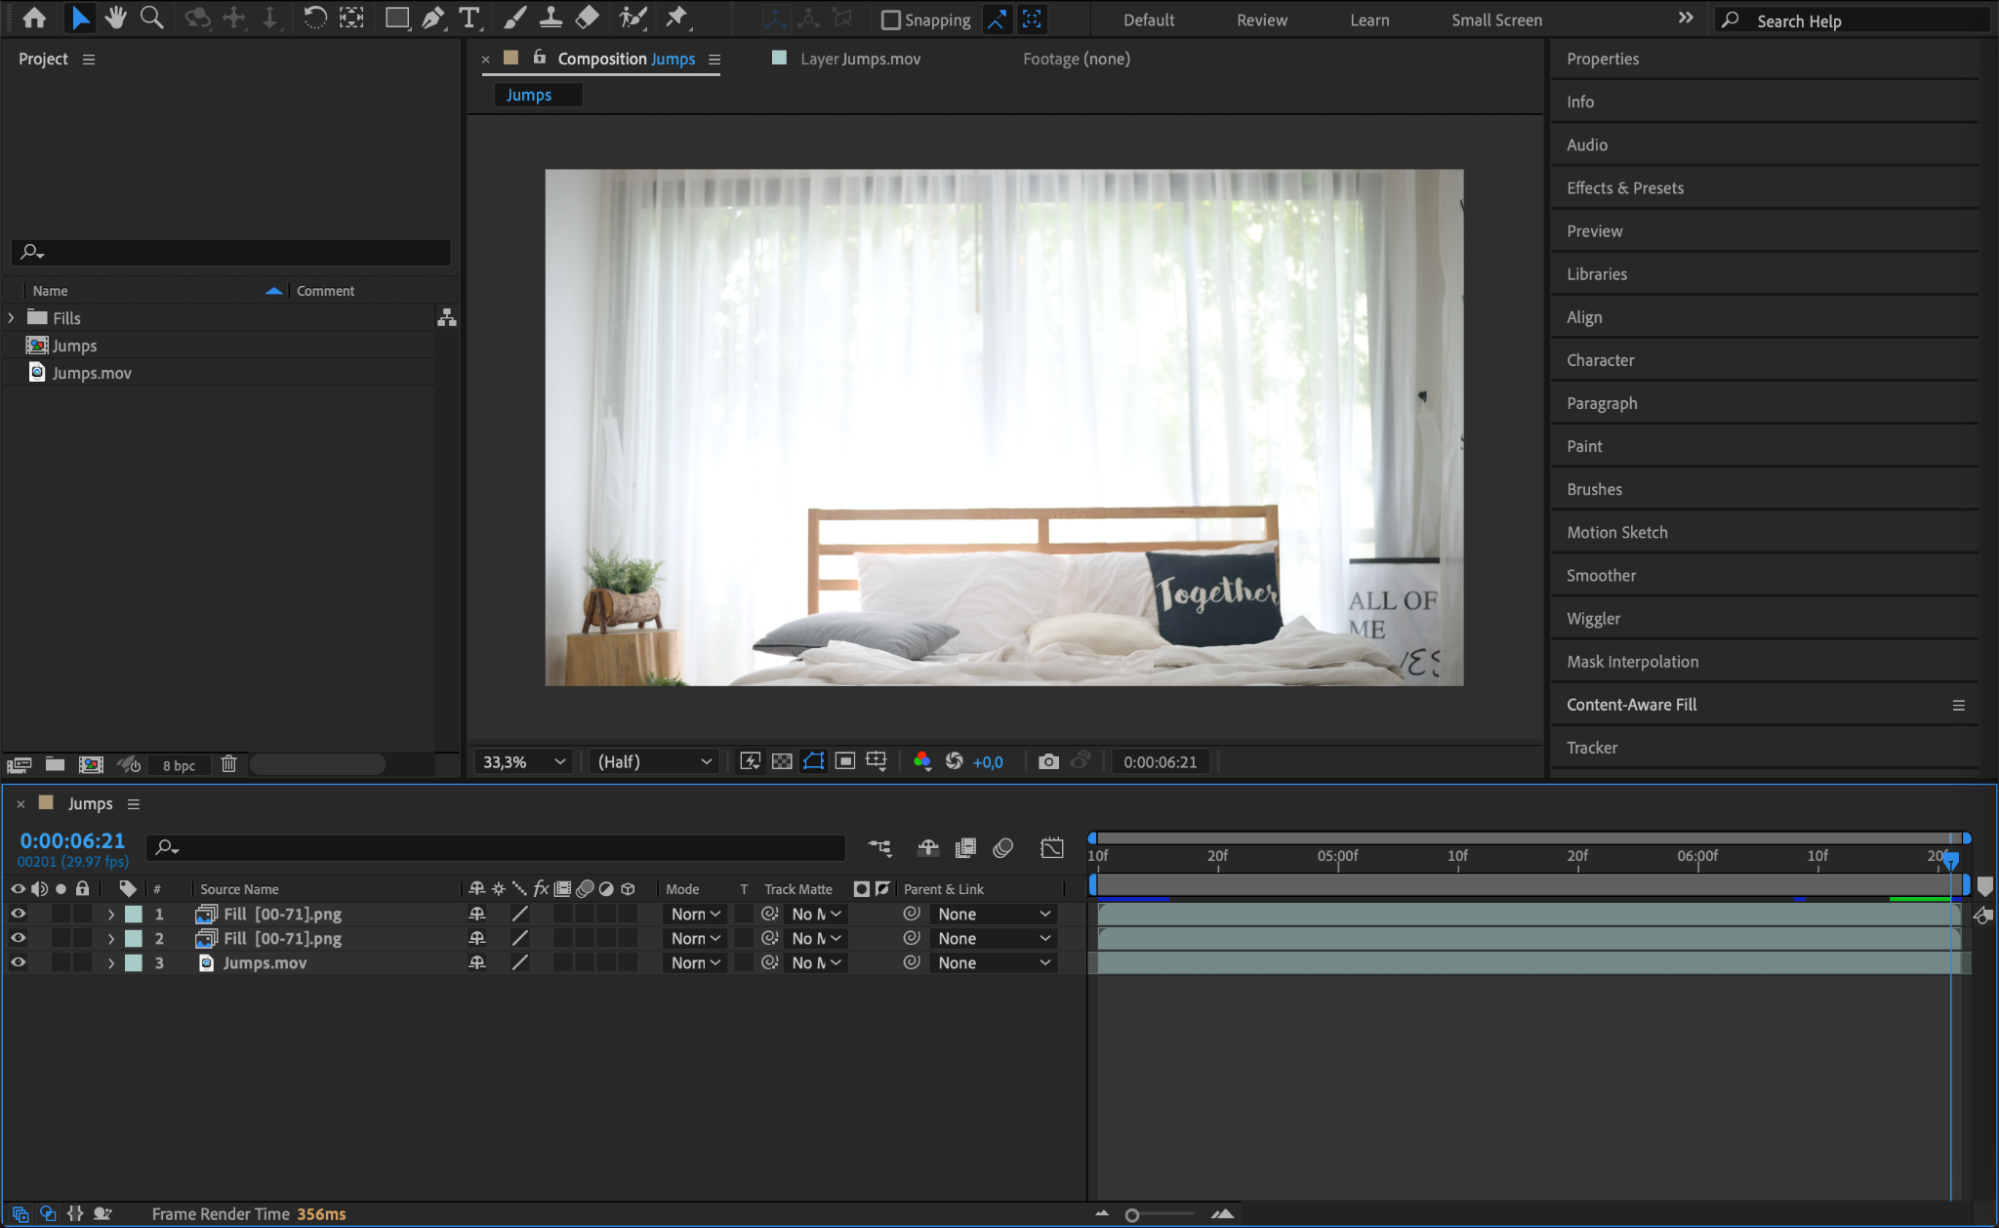
Go to Window > Content-Aware Fill to open the panel. Set the Alpha Expansion to 64, the Fill Method to Object, and the Range to Work Area. Then press the Generate Fill Layer button. This tool will fill in the background where your masked subject was, creating a seamless background replacement.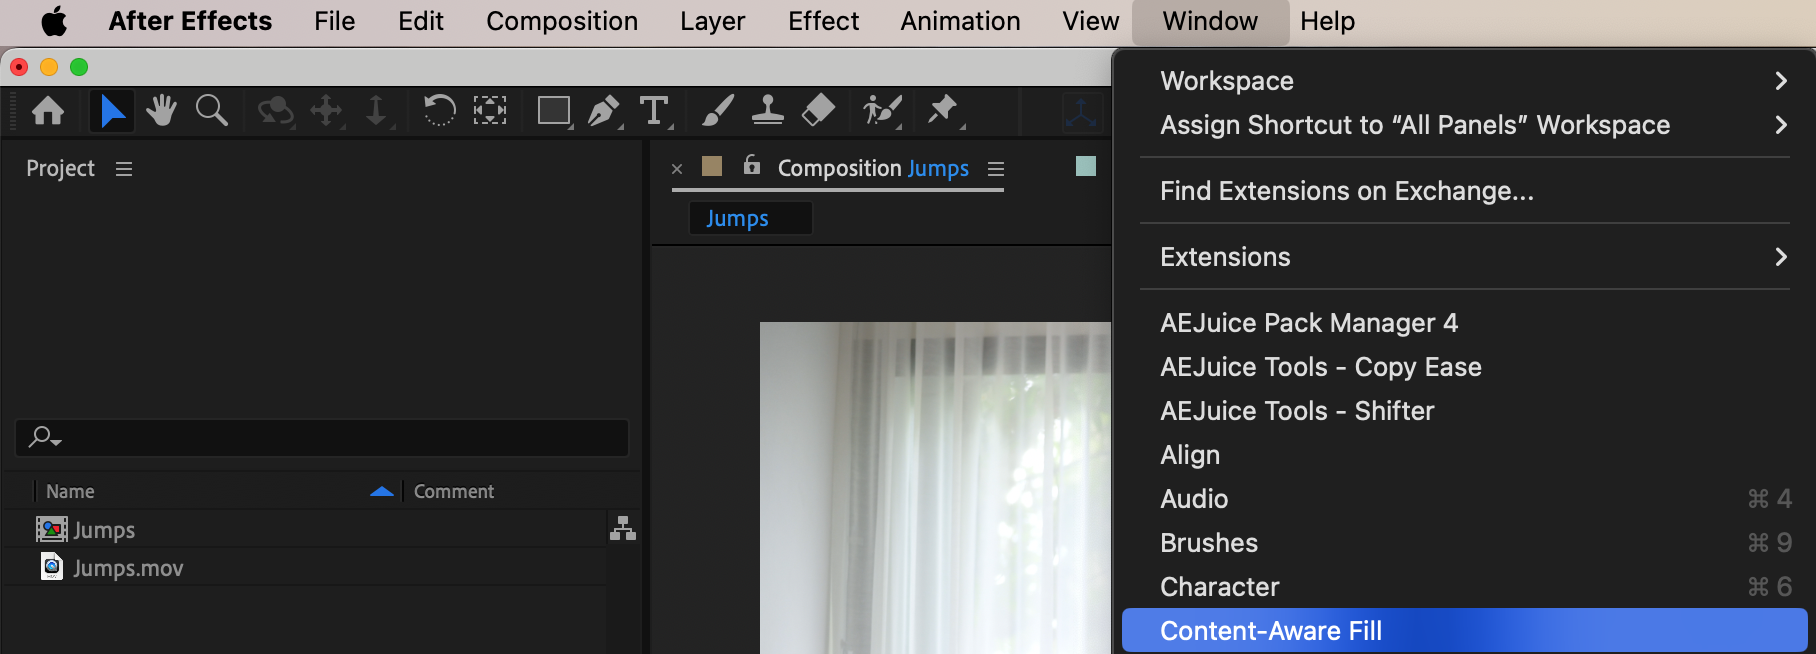
 Step 5: Pre-compose the Layers
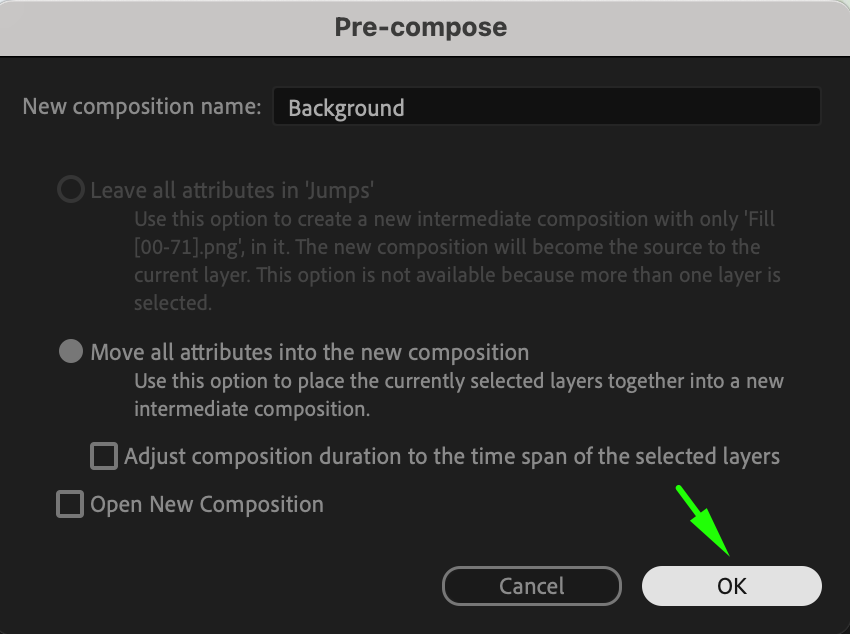
Select both the Fill Layer and the original Video Layer. Right-click on them and choose Pre-compose from the submenu. Name the pre-composition Background. This will allow you to treat the two layers as a single unit, simplifying your timeline and making it easier to animate the flying effect.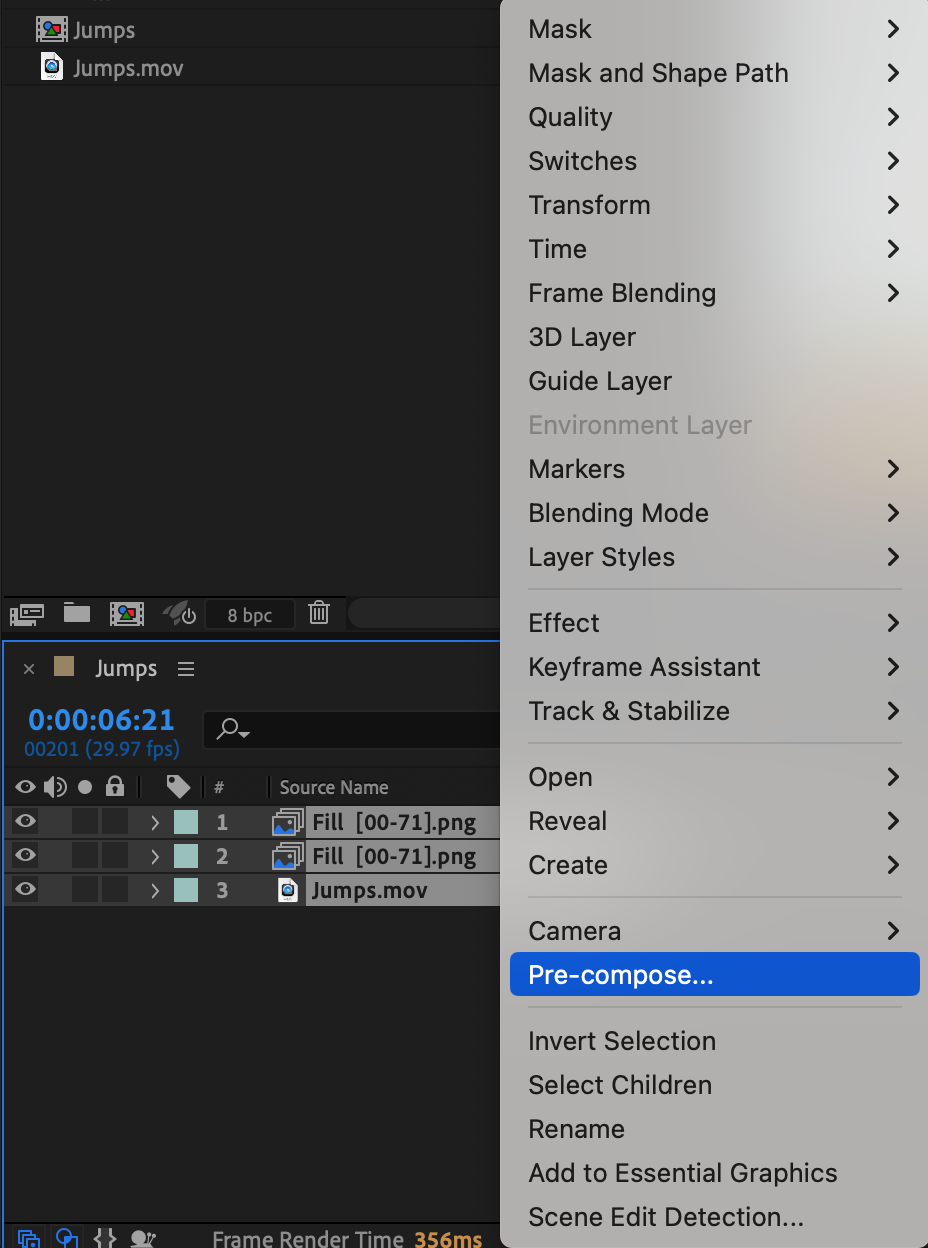
 Step 6: Re-import the Video Layer
Drag the original video file from the Project panel back into the Timeline, placing it above the pre-composed background layer. This will act as the base for creating the flying effect.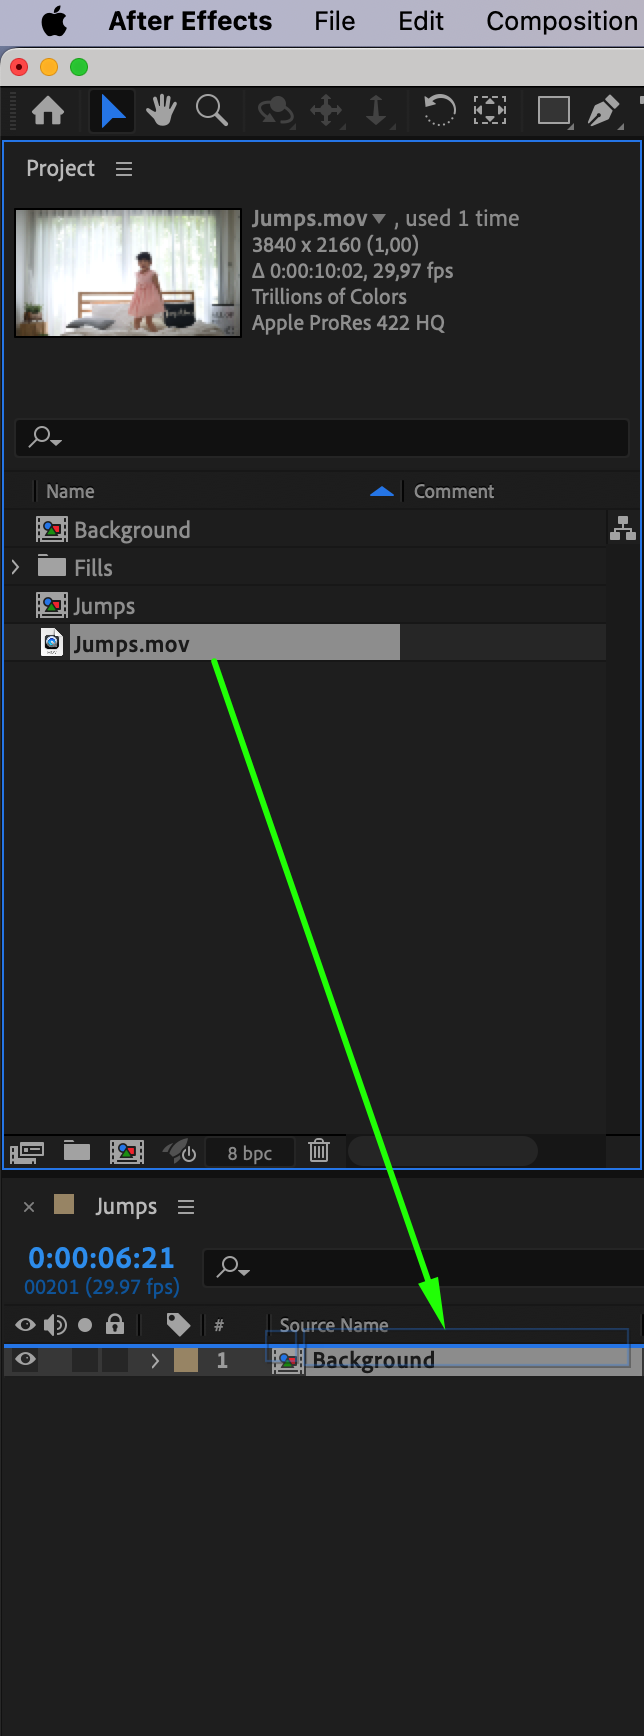 Step 7: Split and Duplicate the Layer
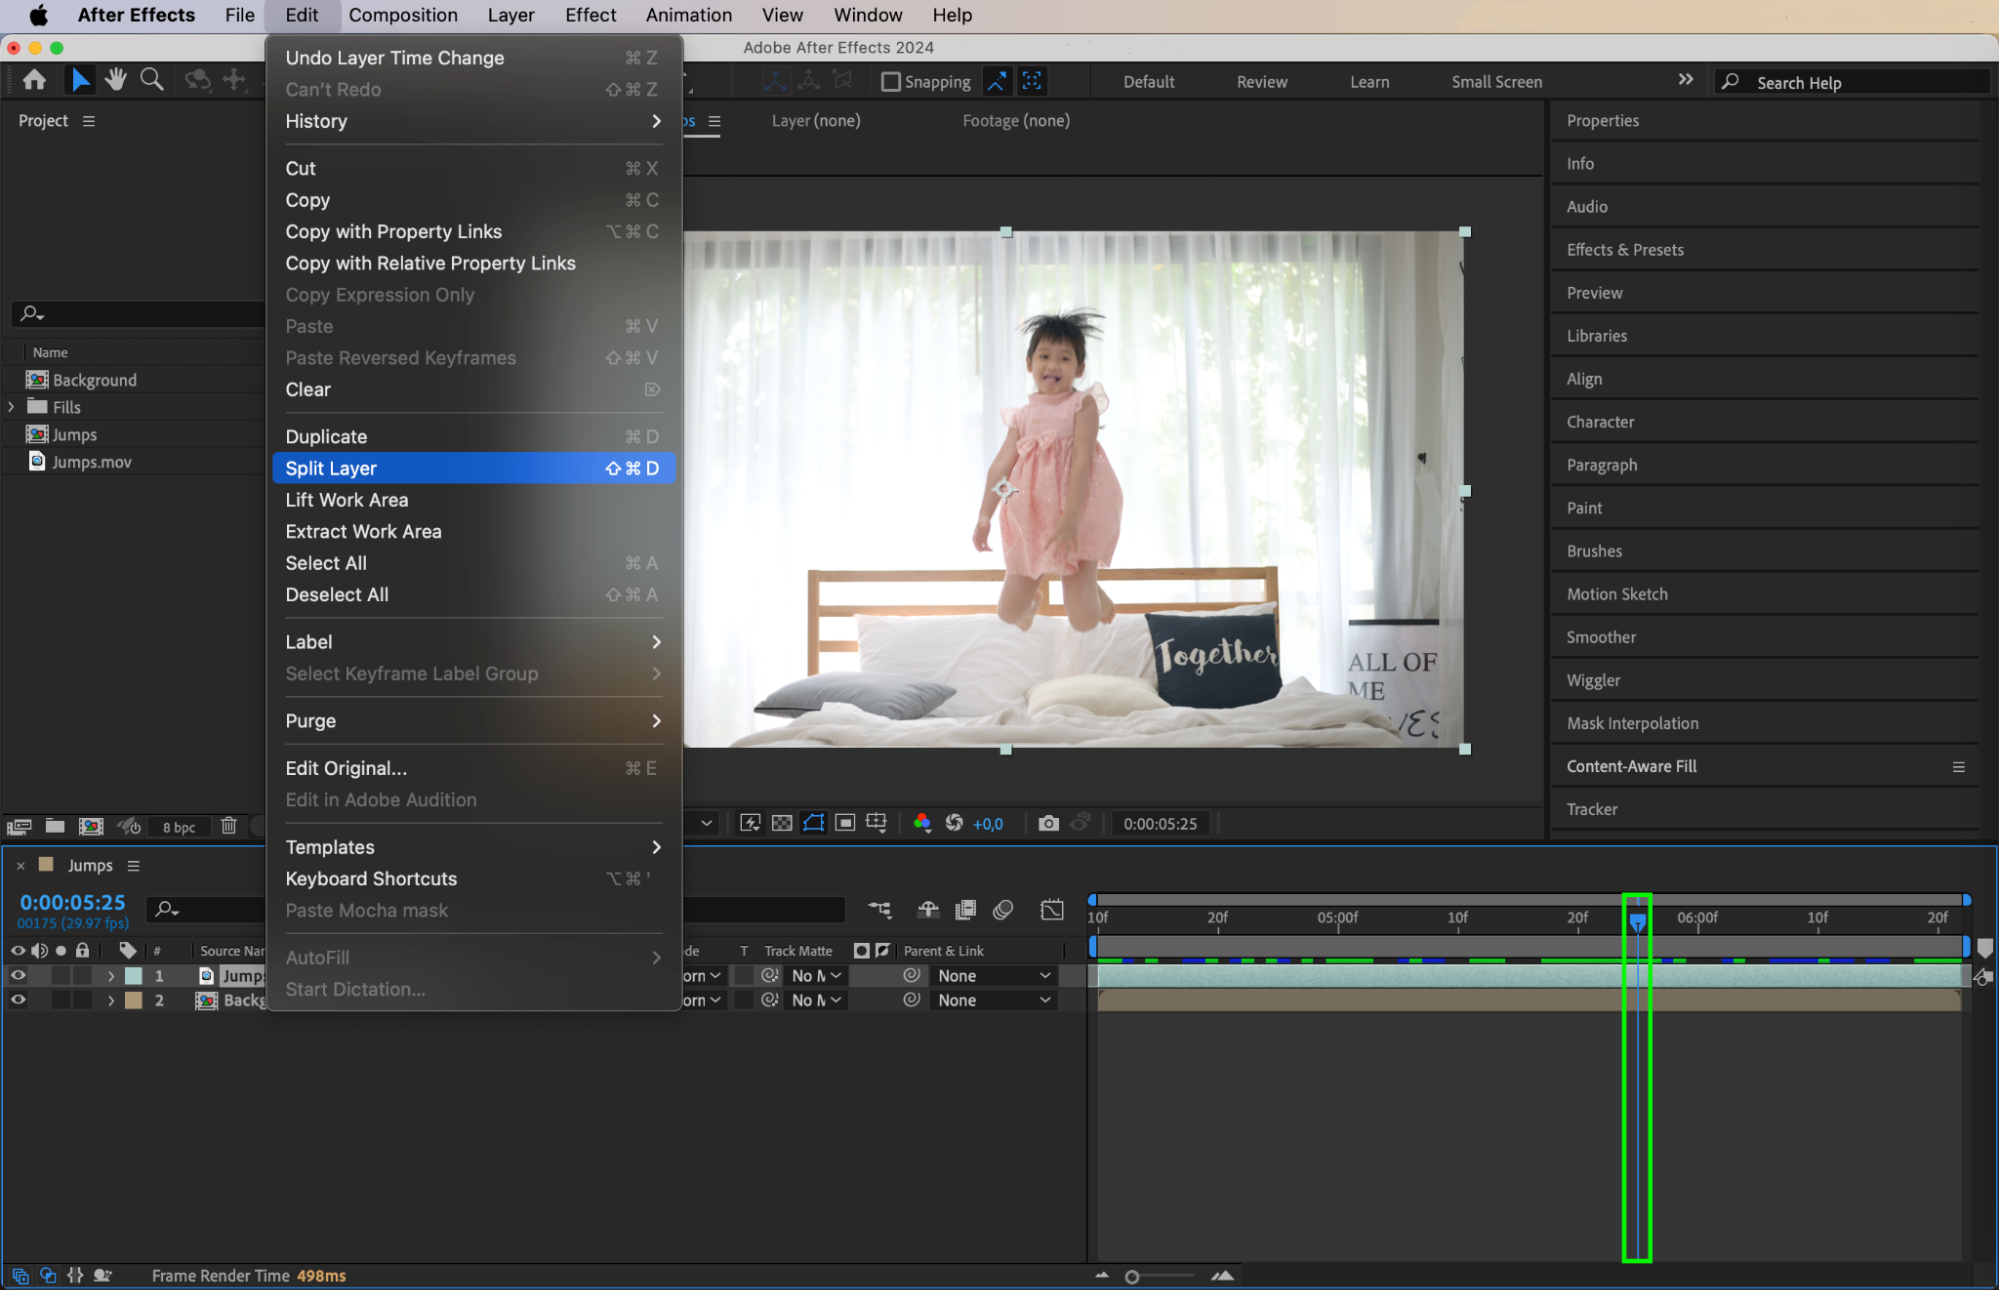
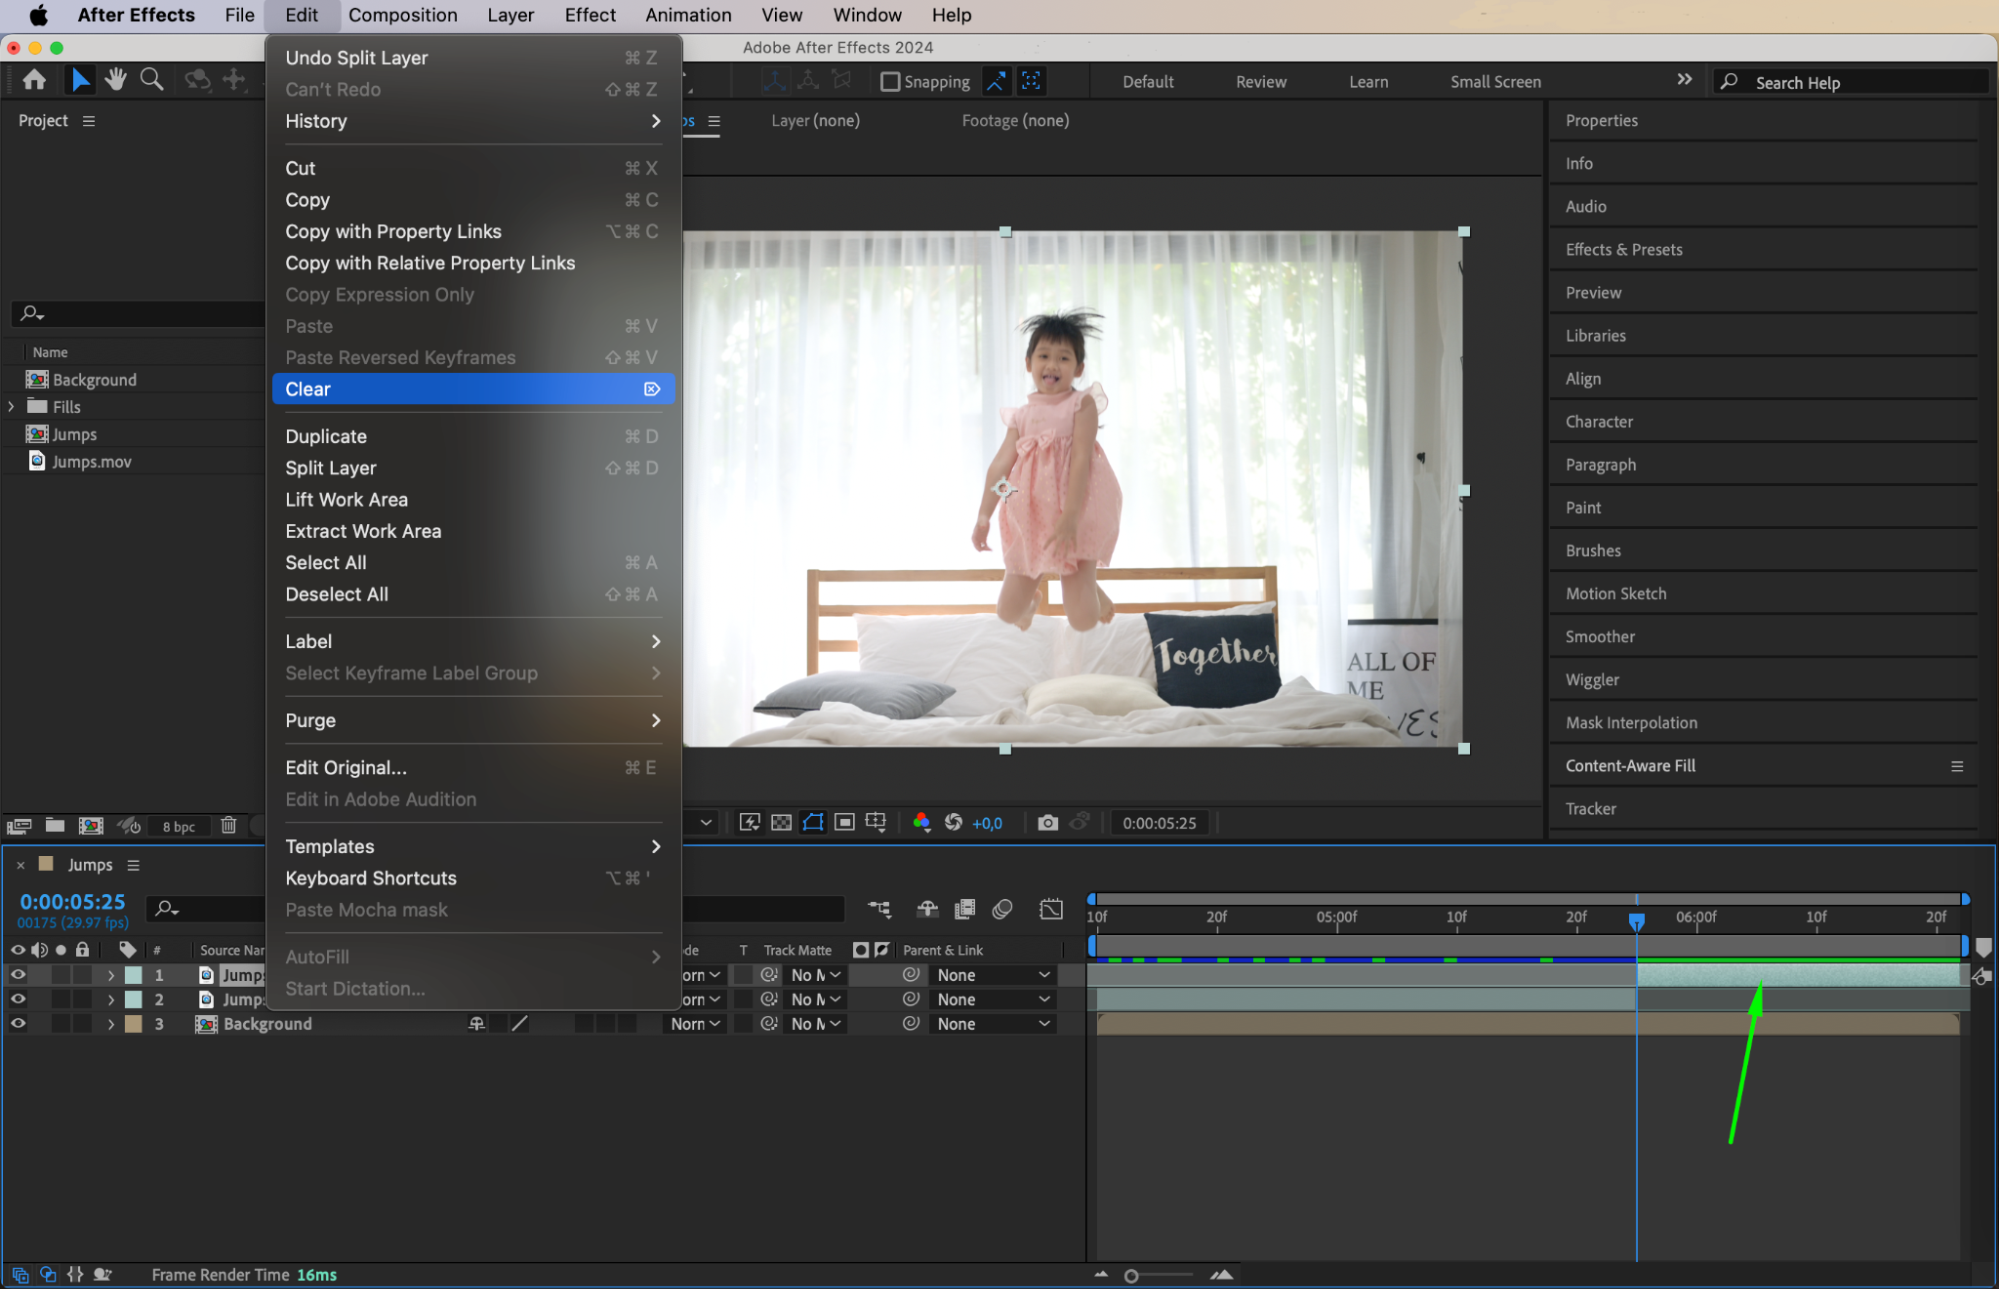
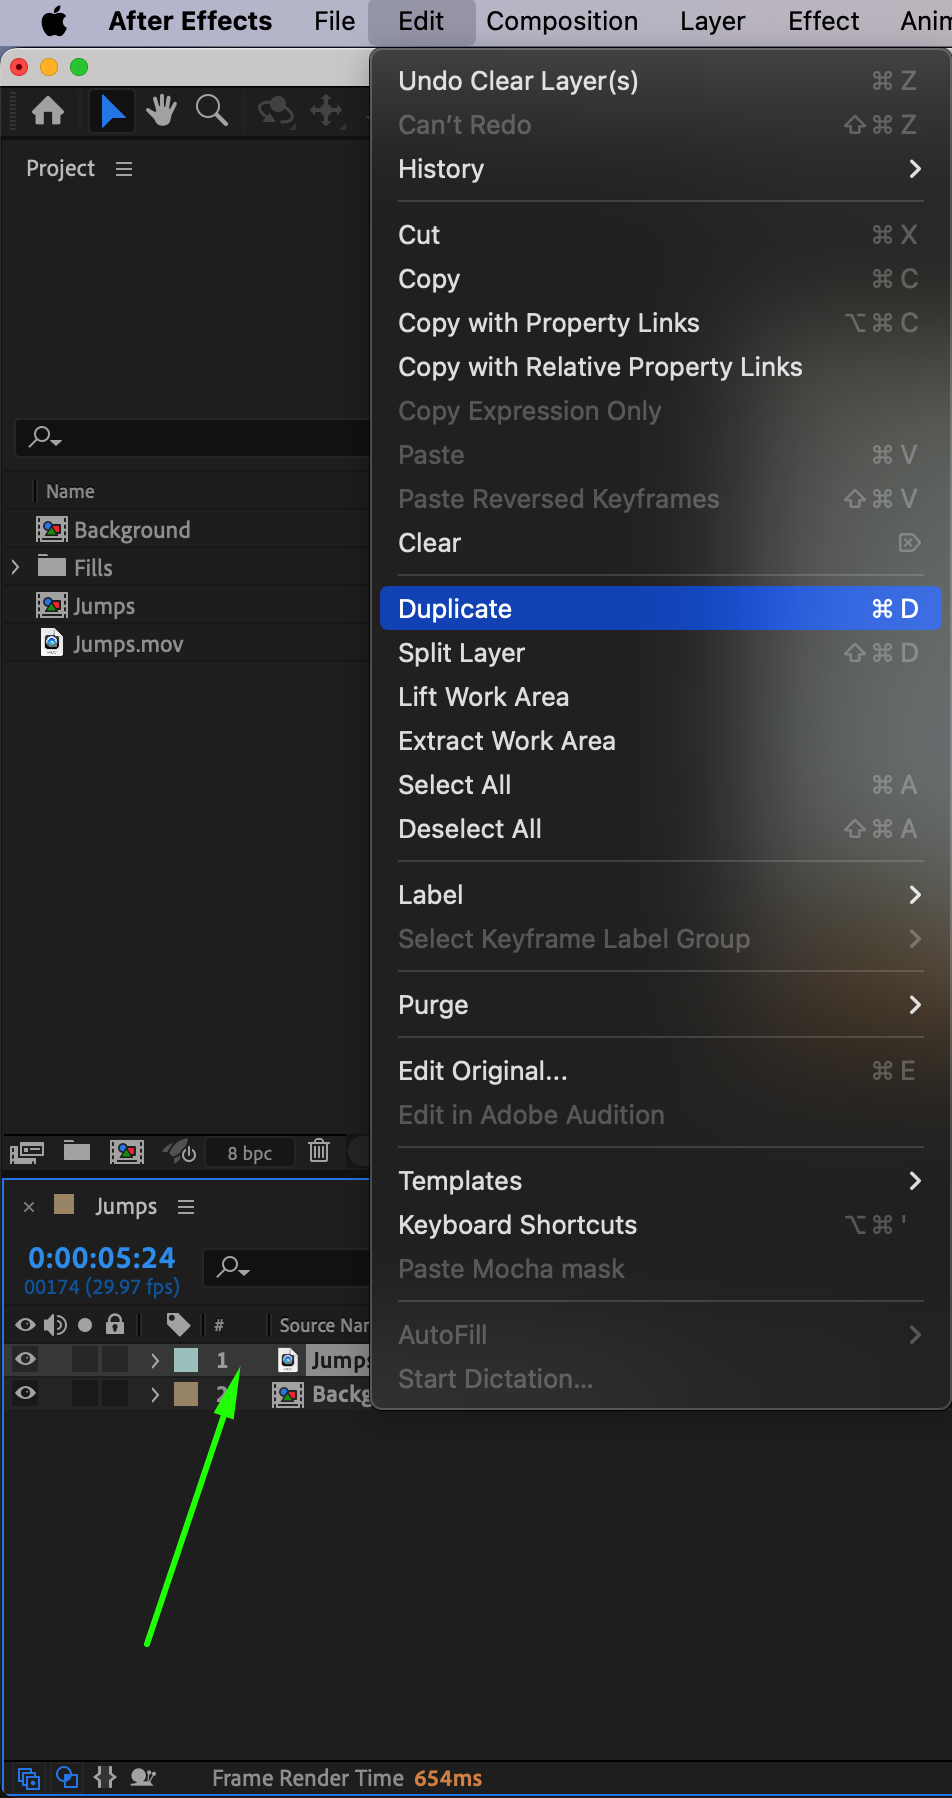
Move the CTI (Current Time Indicator) to the point where the person jumps. Use the shortcut “Ctrl/Cmd + Shift + D” to split the video layer at that point. Delete the second part of the layer, as it’s not needed. Now, duplicate the first part of the layer by pressing “Ctrl/Cmd + D”. This will give you a copy to use for creating the flying effect.
 Step 8: Freeze Frame for the Flight Effect
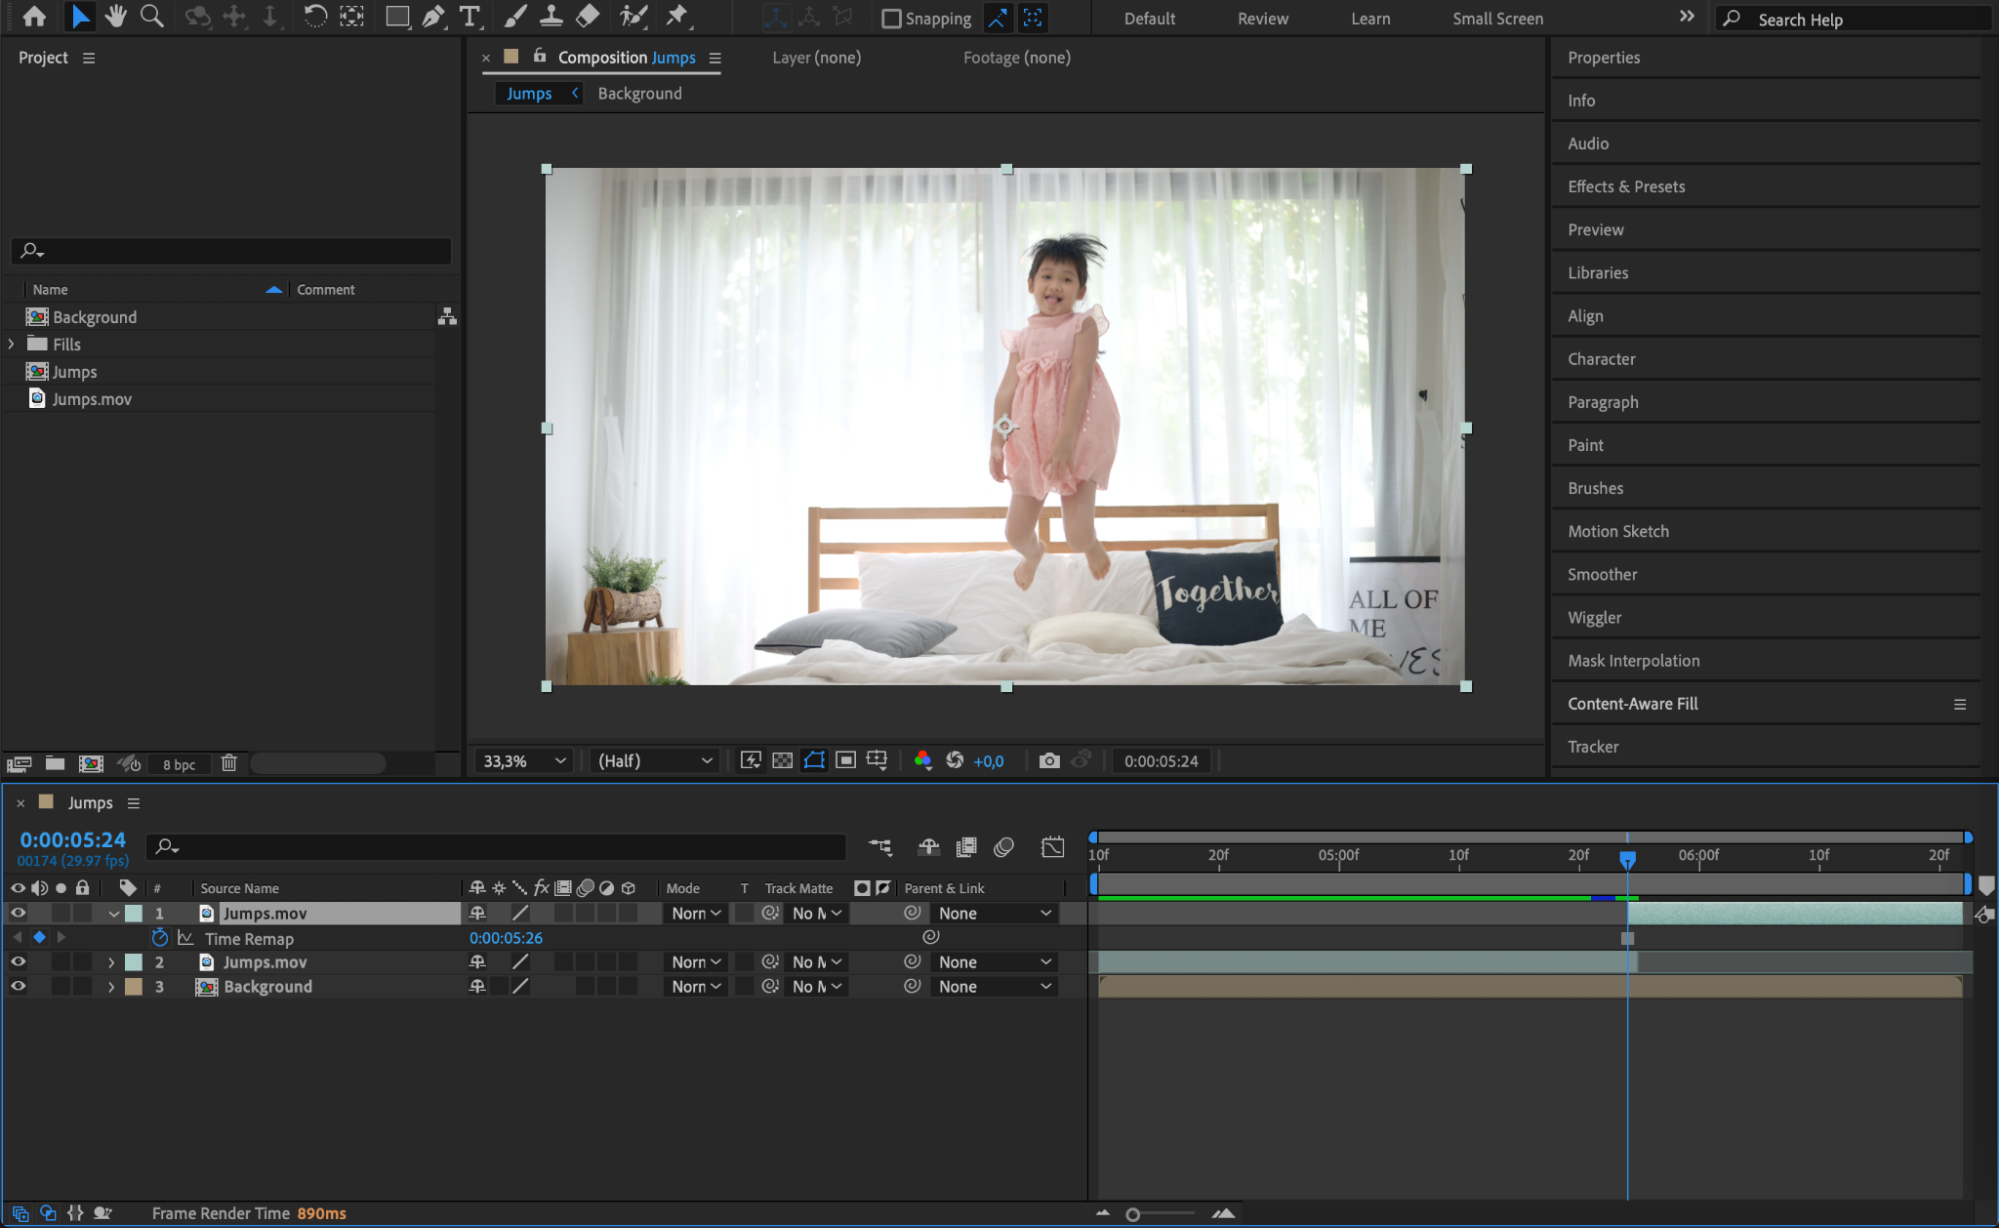
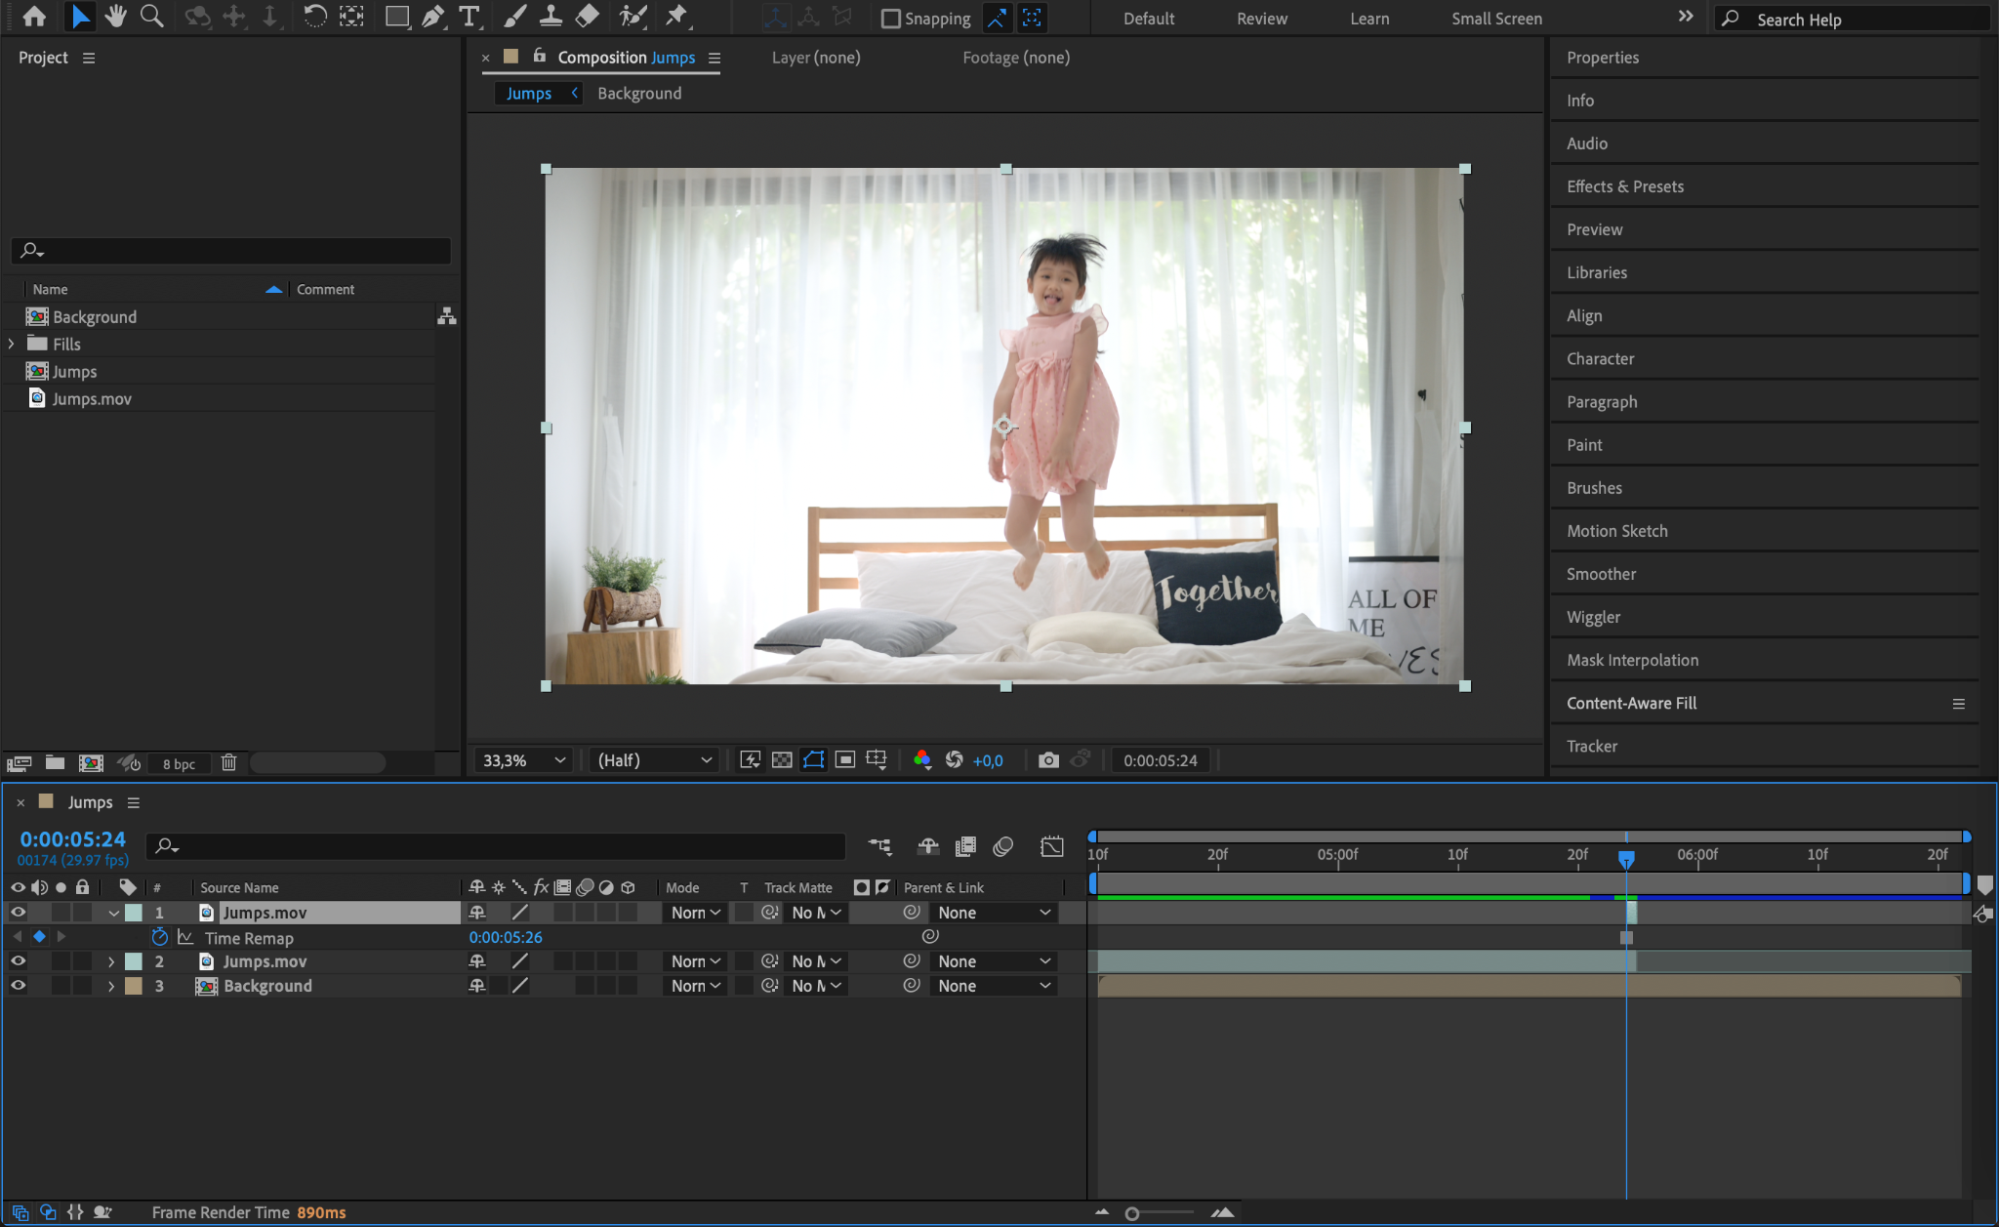
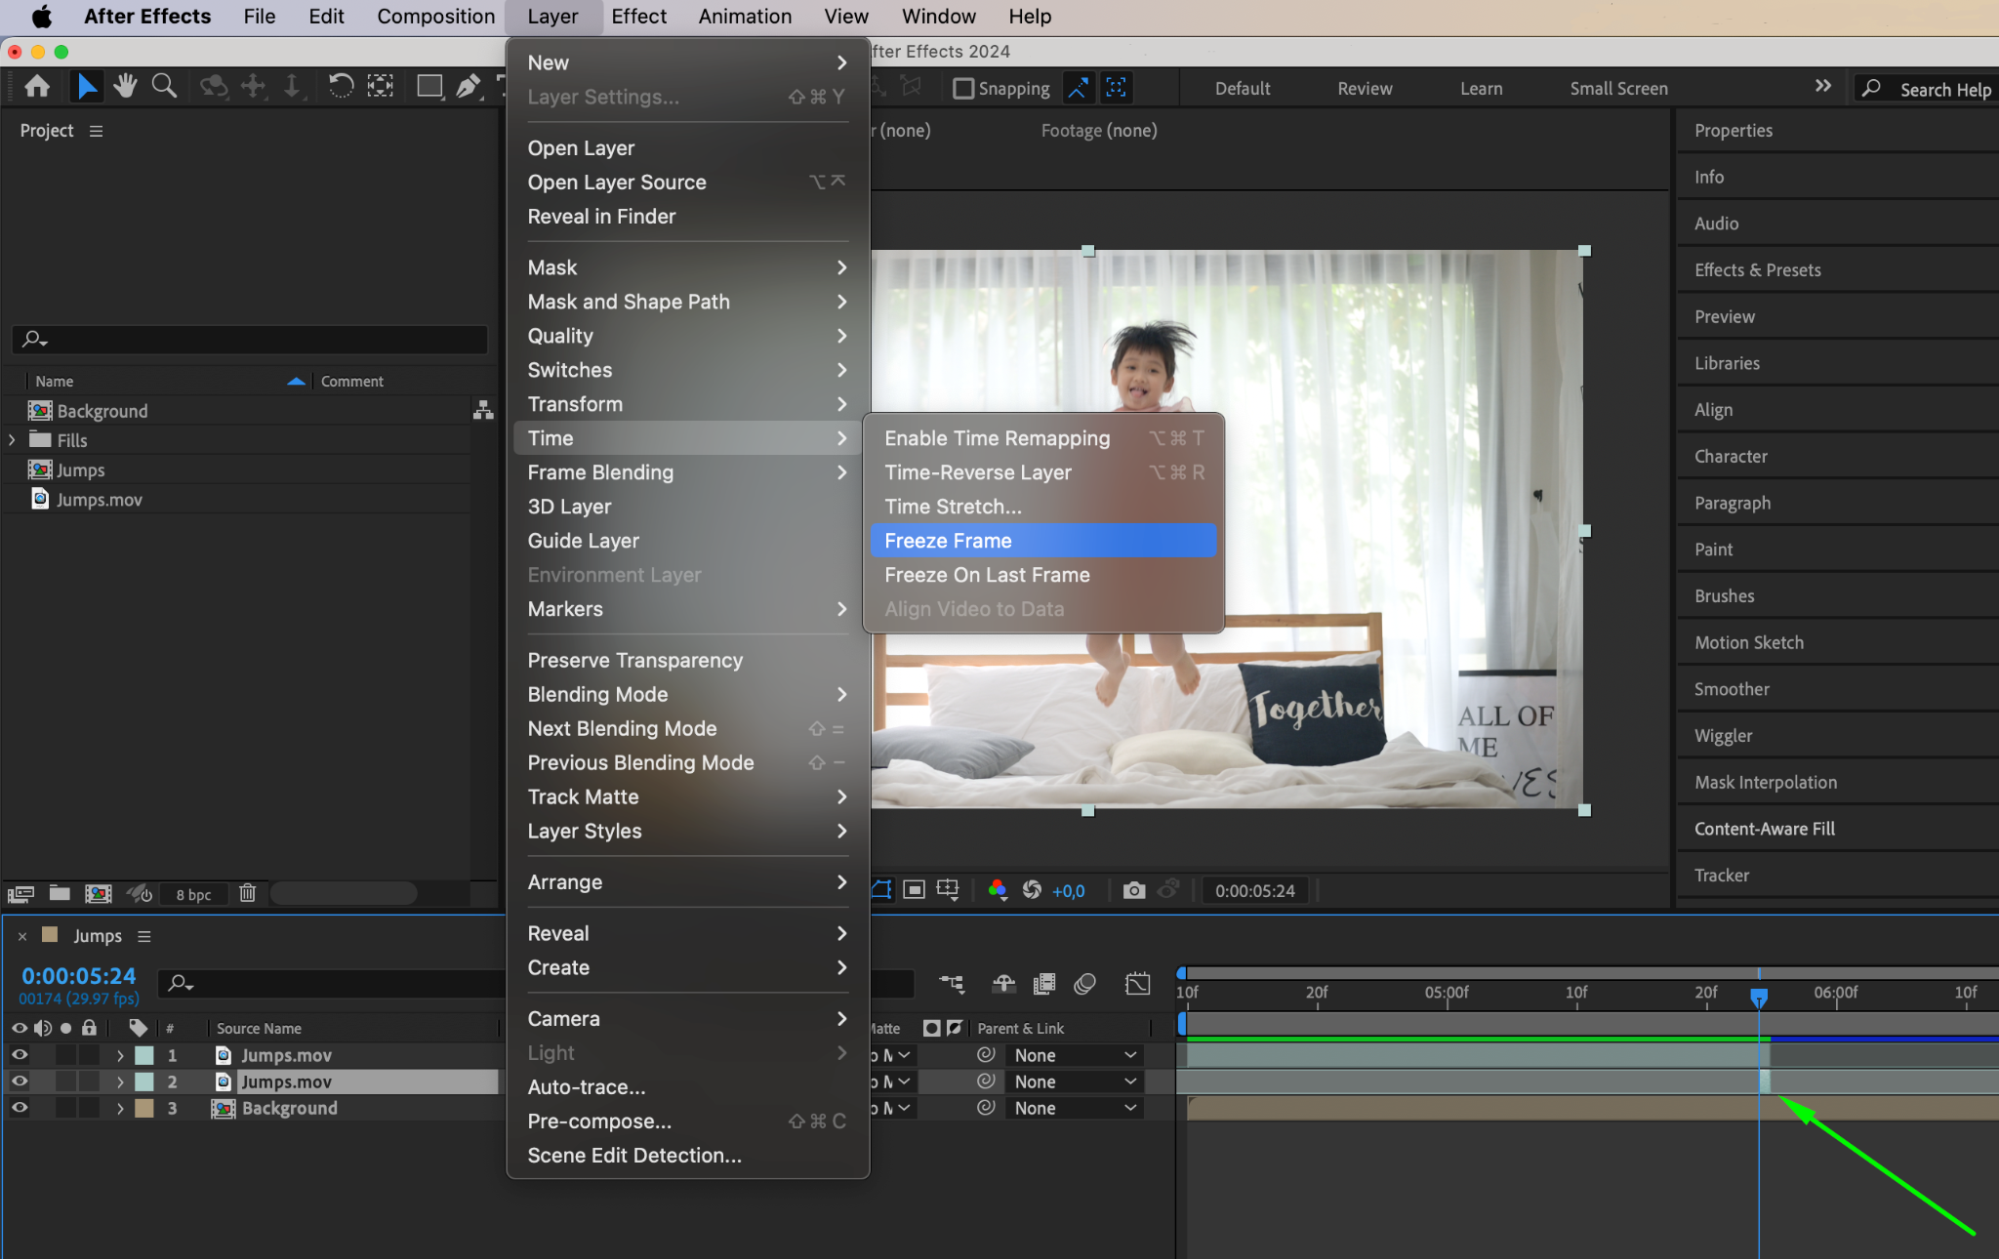
On the original layer, reduce the duration to a single frame. Then, go to Layer > Time > Freeze Frame to create a still image of the person in mid-jump. Drag this layer to the top of your timeline, and extend its duration to cover the remaining composition time by stretching it out in the timeline.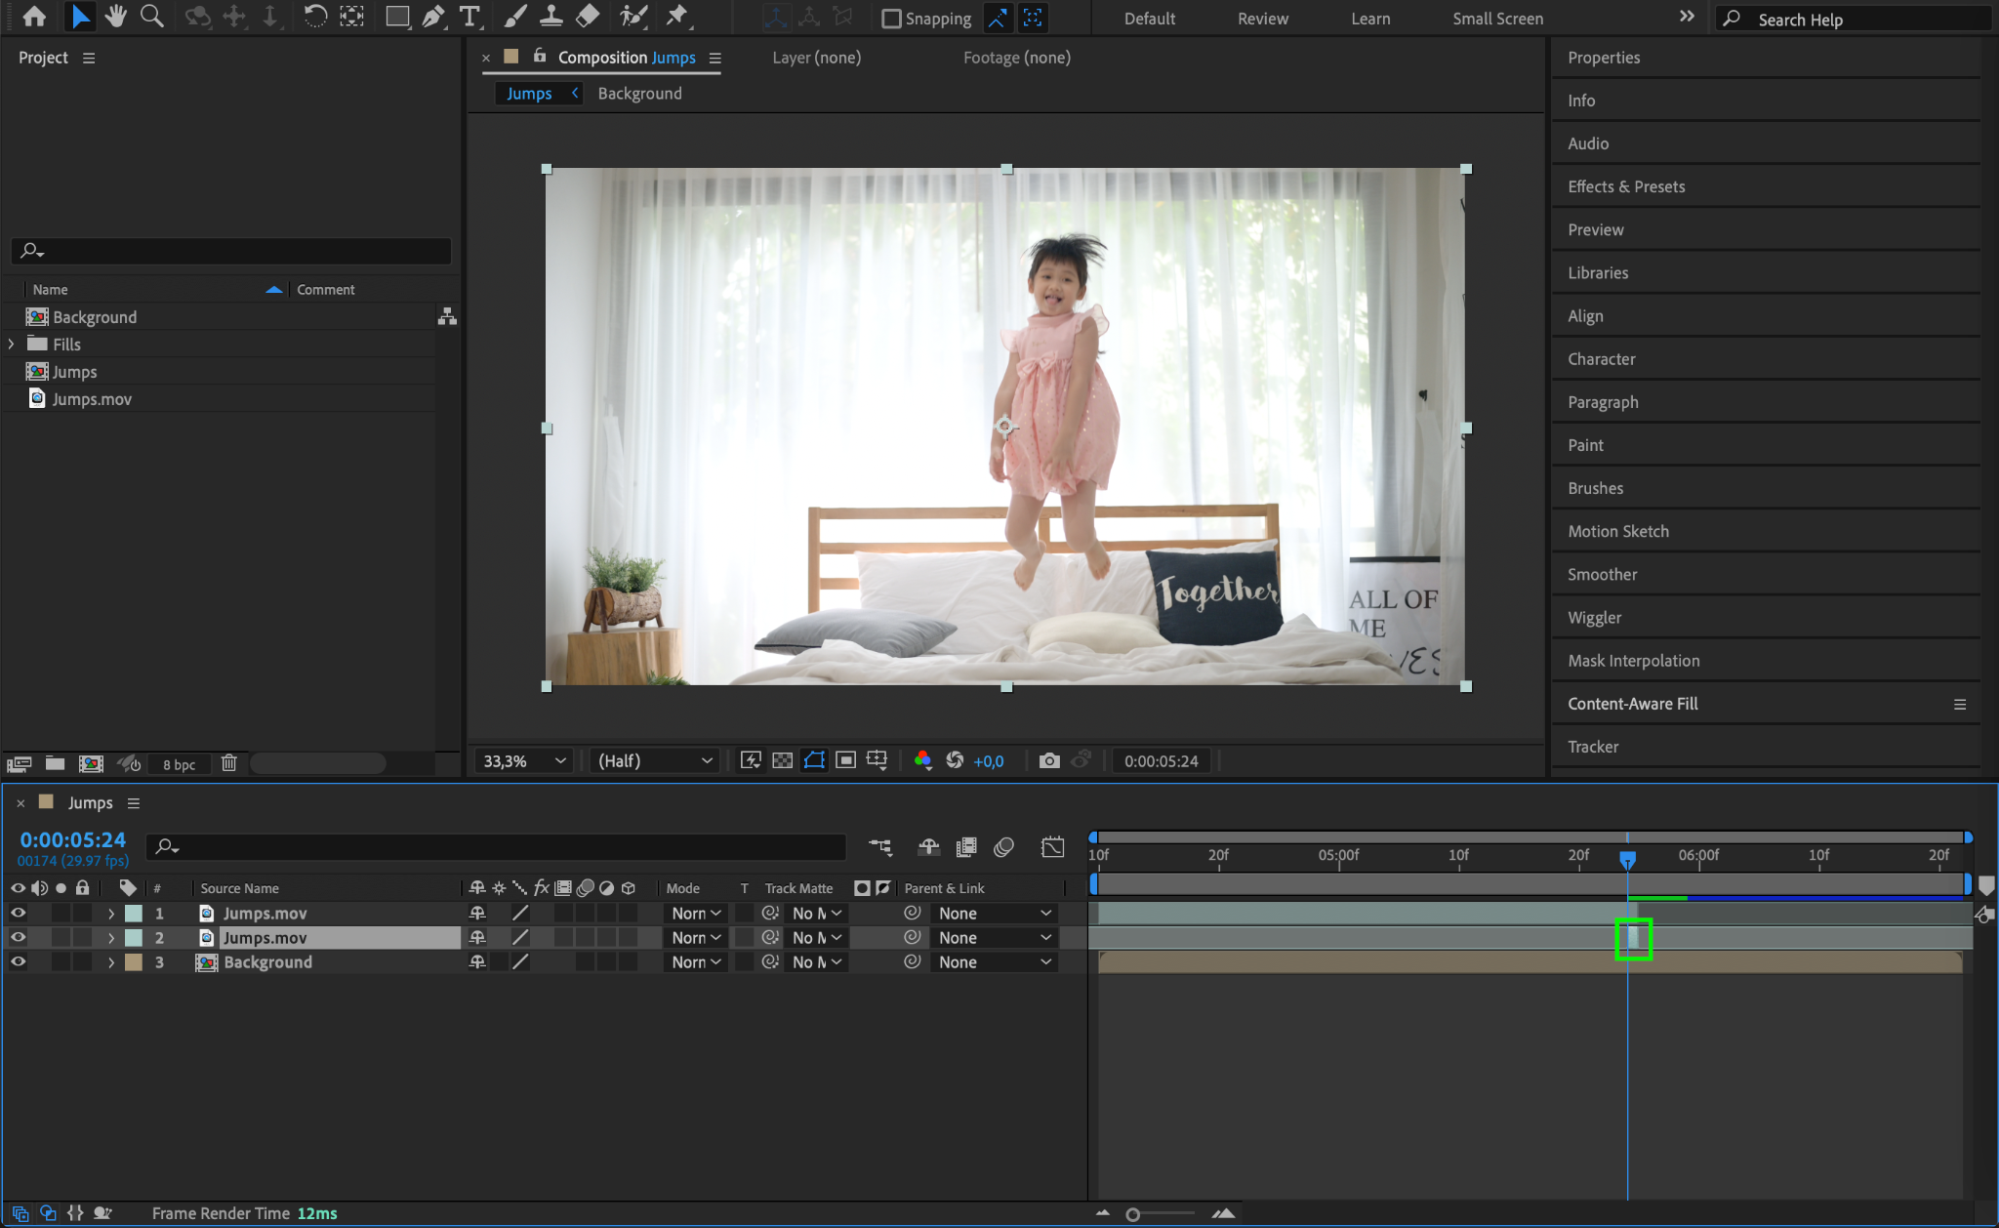
 Step 9: Create a Mask for the Flying Person
Use the Pen Tool (G) again to mask the person in the frozen frame. This mask will isolate the person from the background for the flying sequence. Set the Mask Mode to Add so that only the person is visible.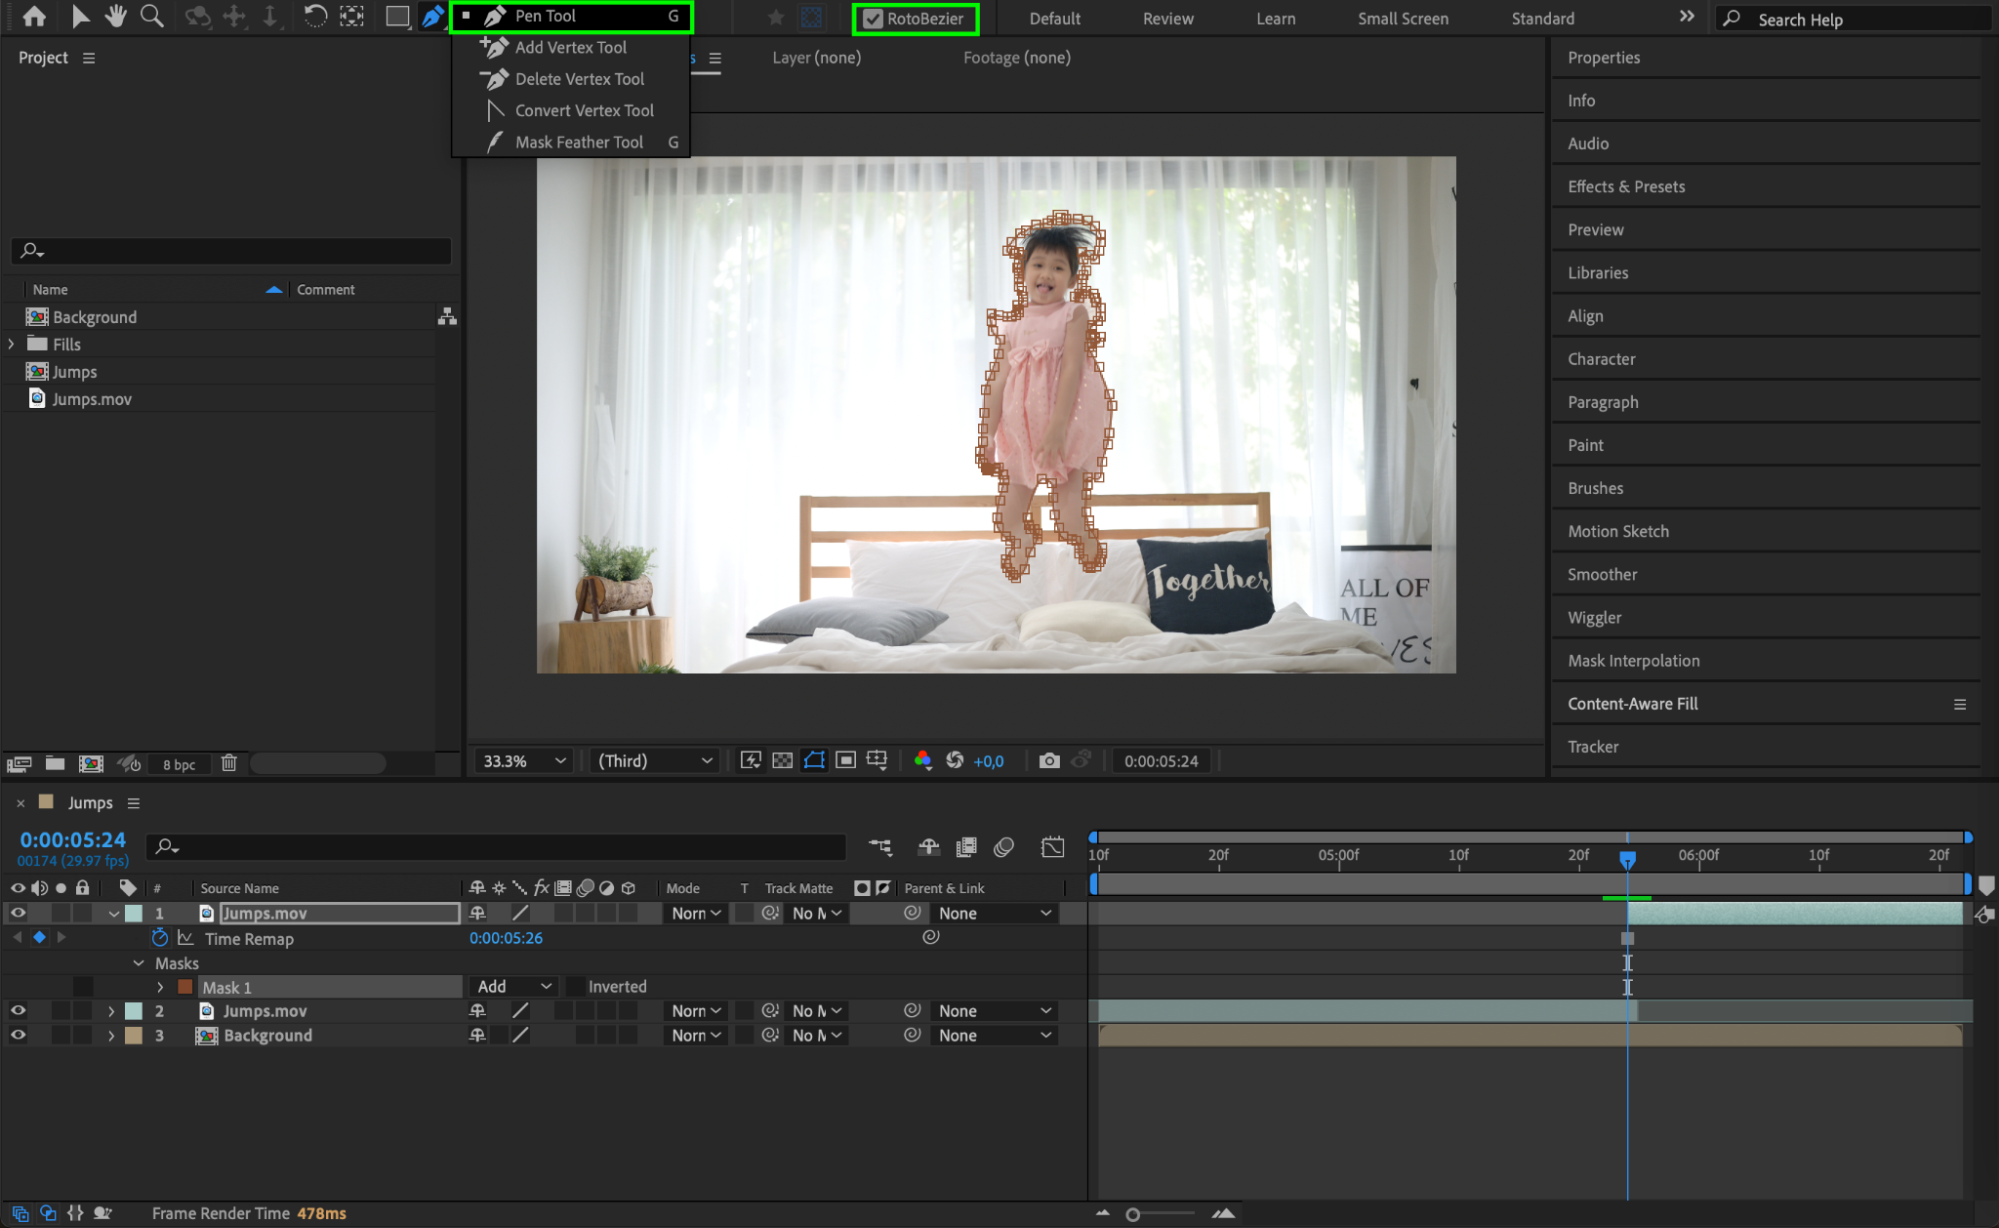 Step 10: Animate the Position
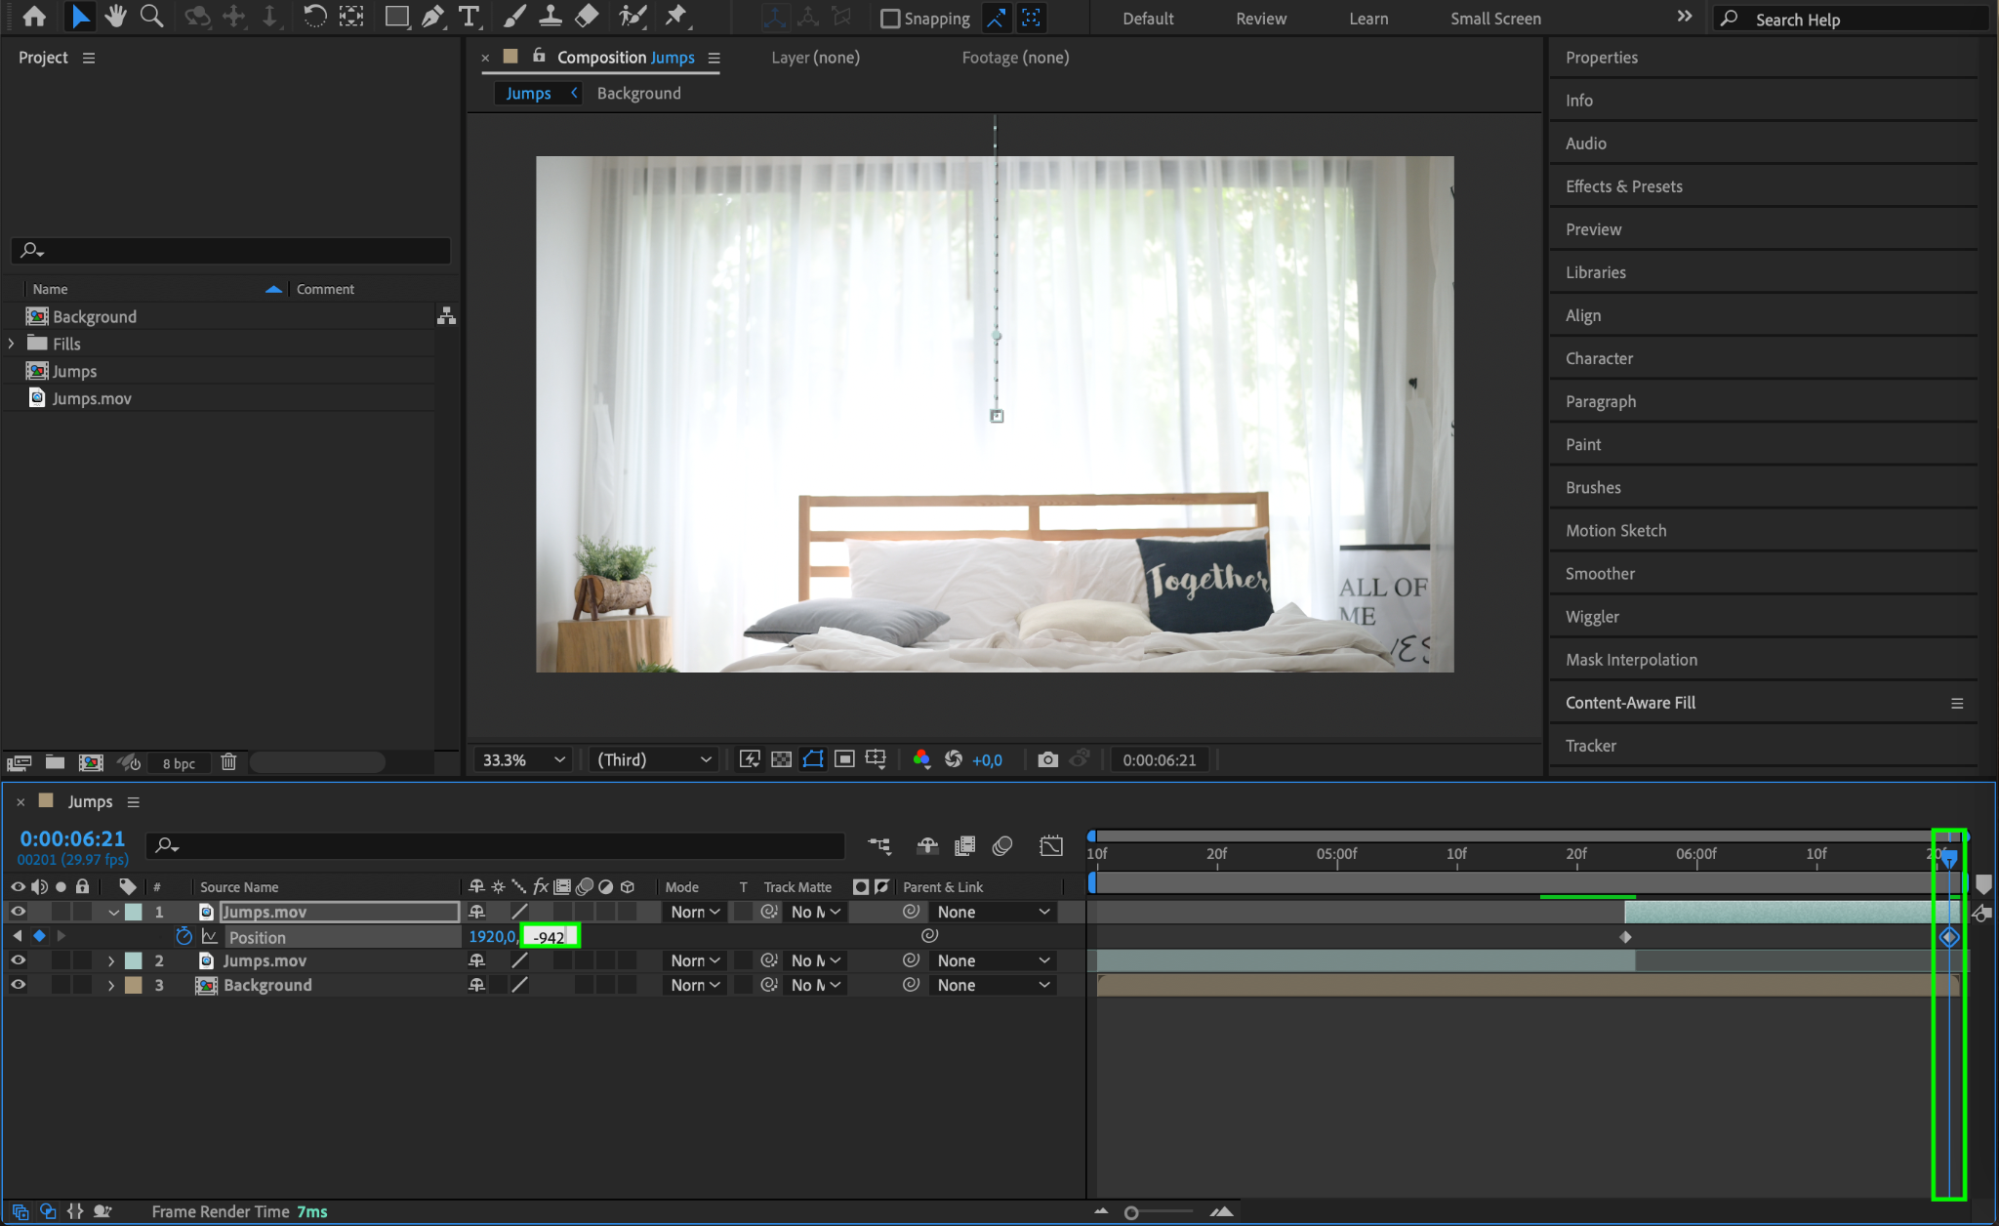
Press “P” on your keyboard to bring up the Position property of the frozen frame layer. Click the stopwatch icon to create the first keyframe at the beginning of the layer, where the person is находится в прыжке. Move the CTI to the end of the composition, and adjust the Position value so that the person moves upwards and off the screen. This creates the illusion of flight.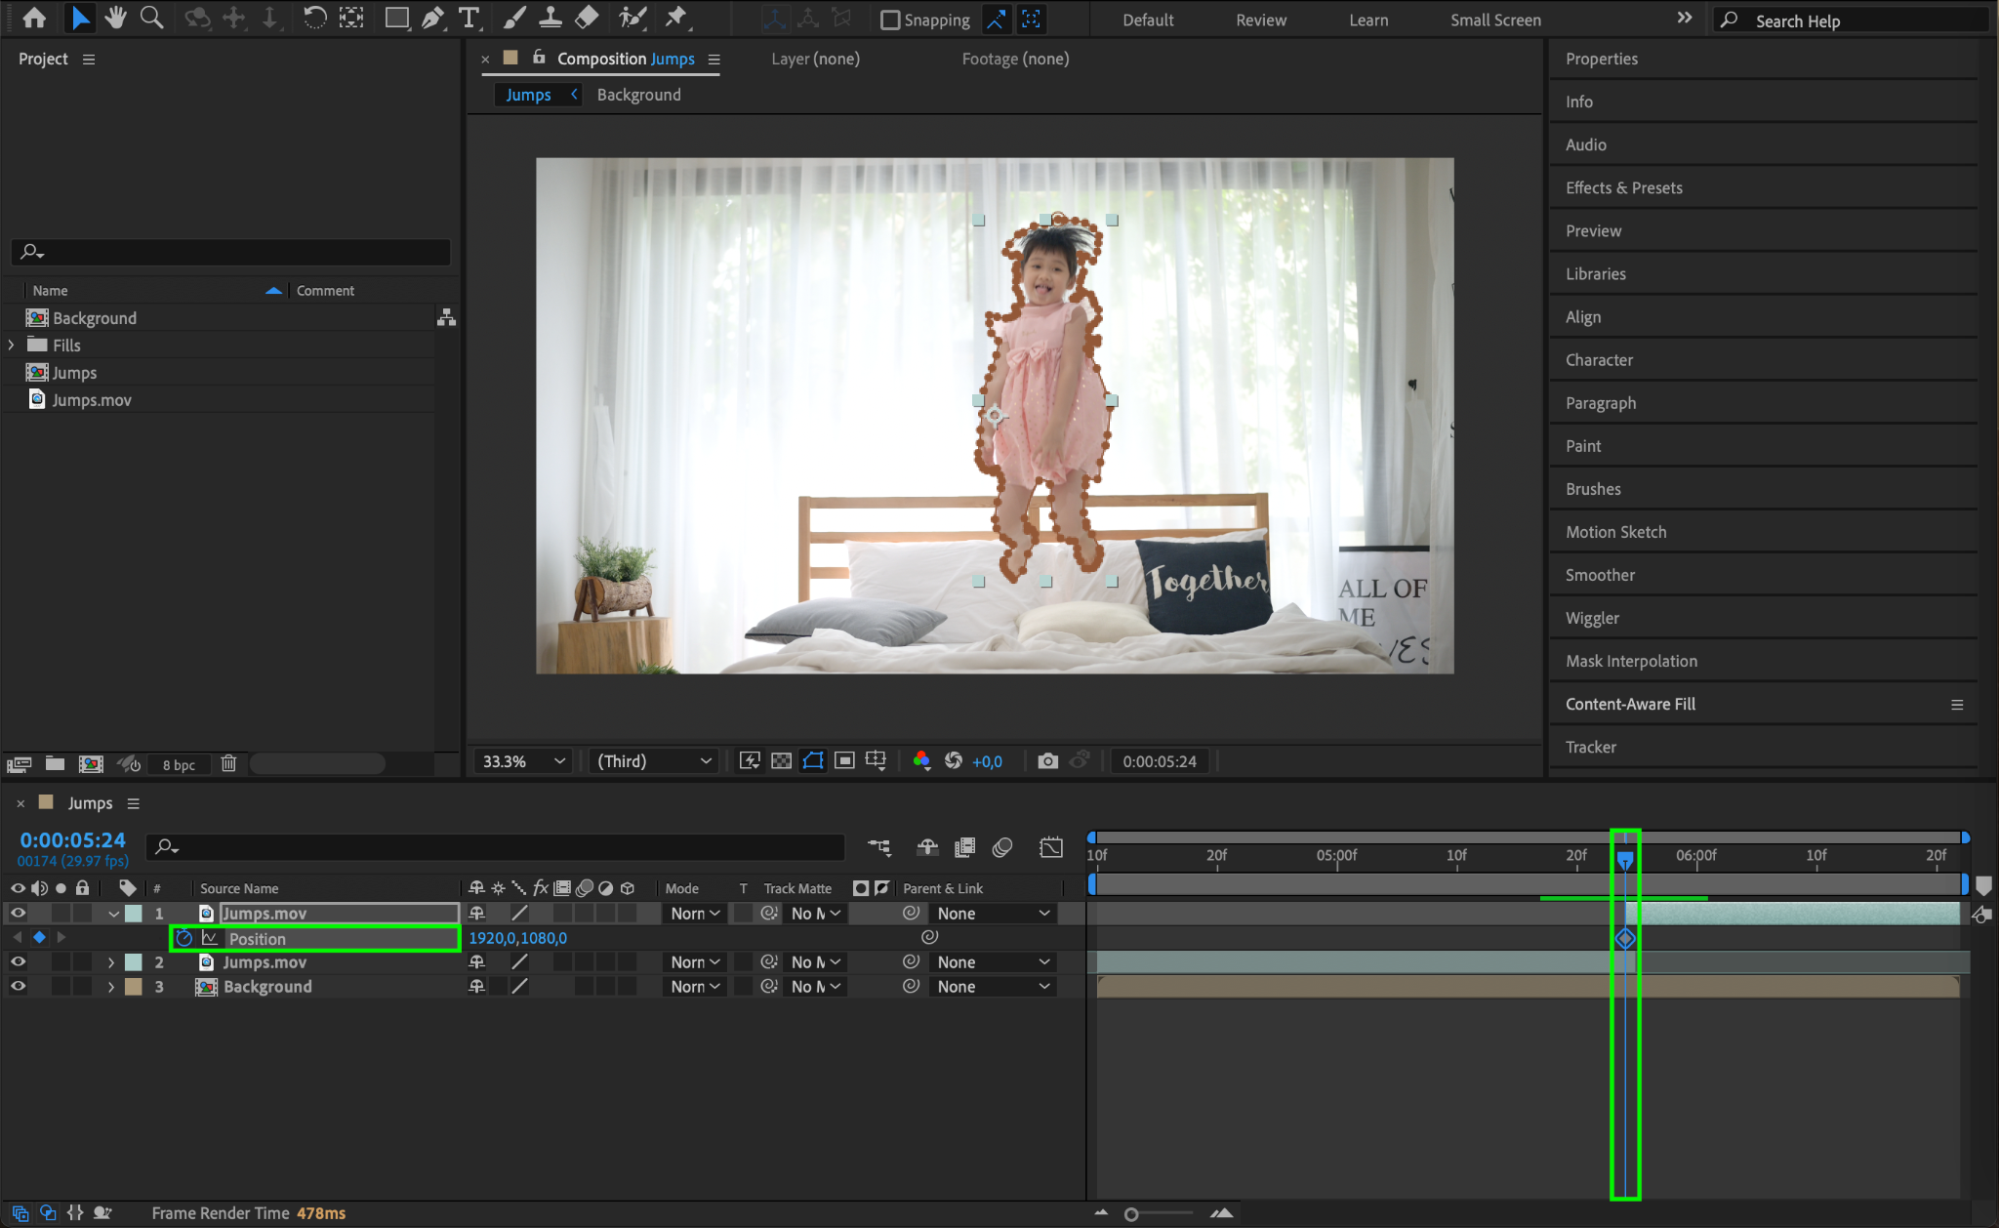
 Step 11: Add Directional Blur for Realism
To enhance the illusion of motion, apply the Directional Blur effect. Go to the Effects & Presets panel, search for Directional Blur, and drag it onto the flying person layer.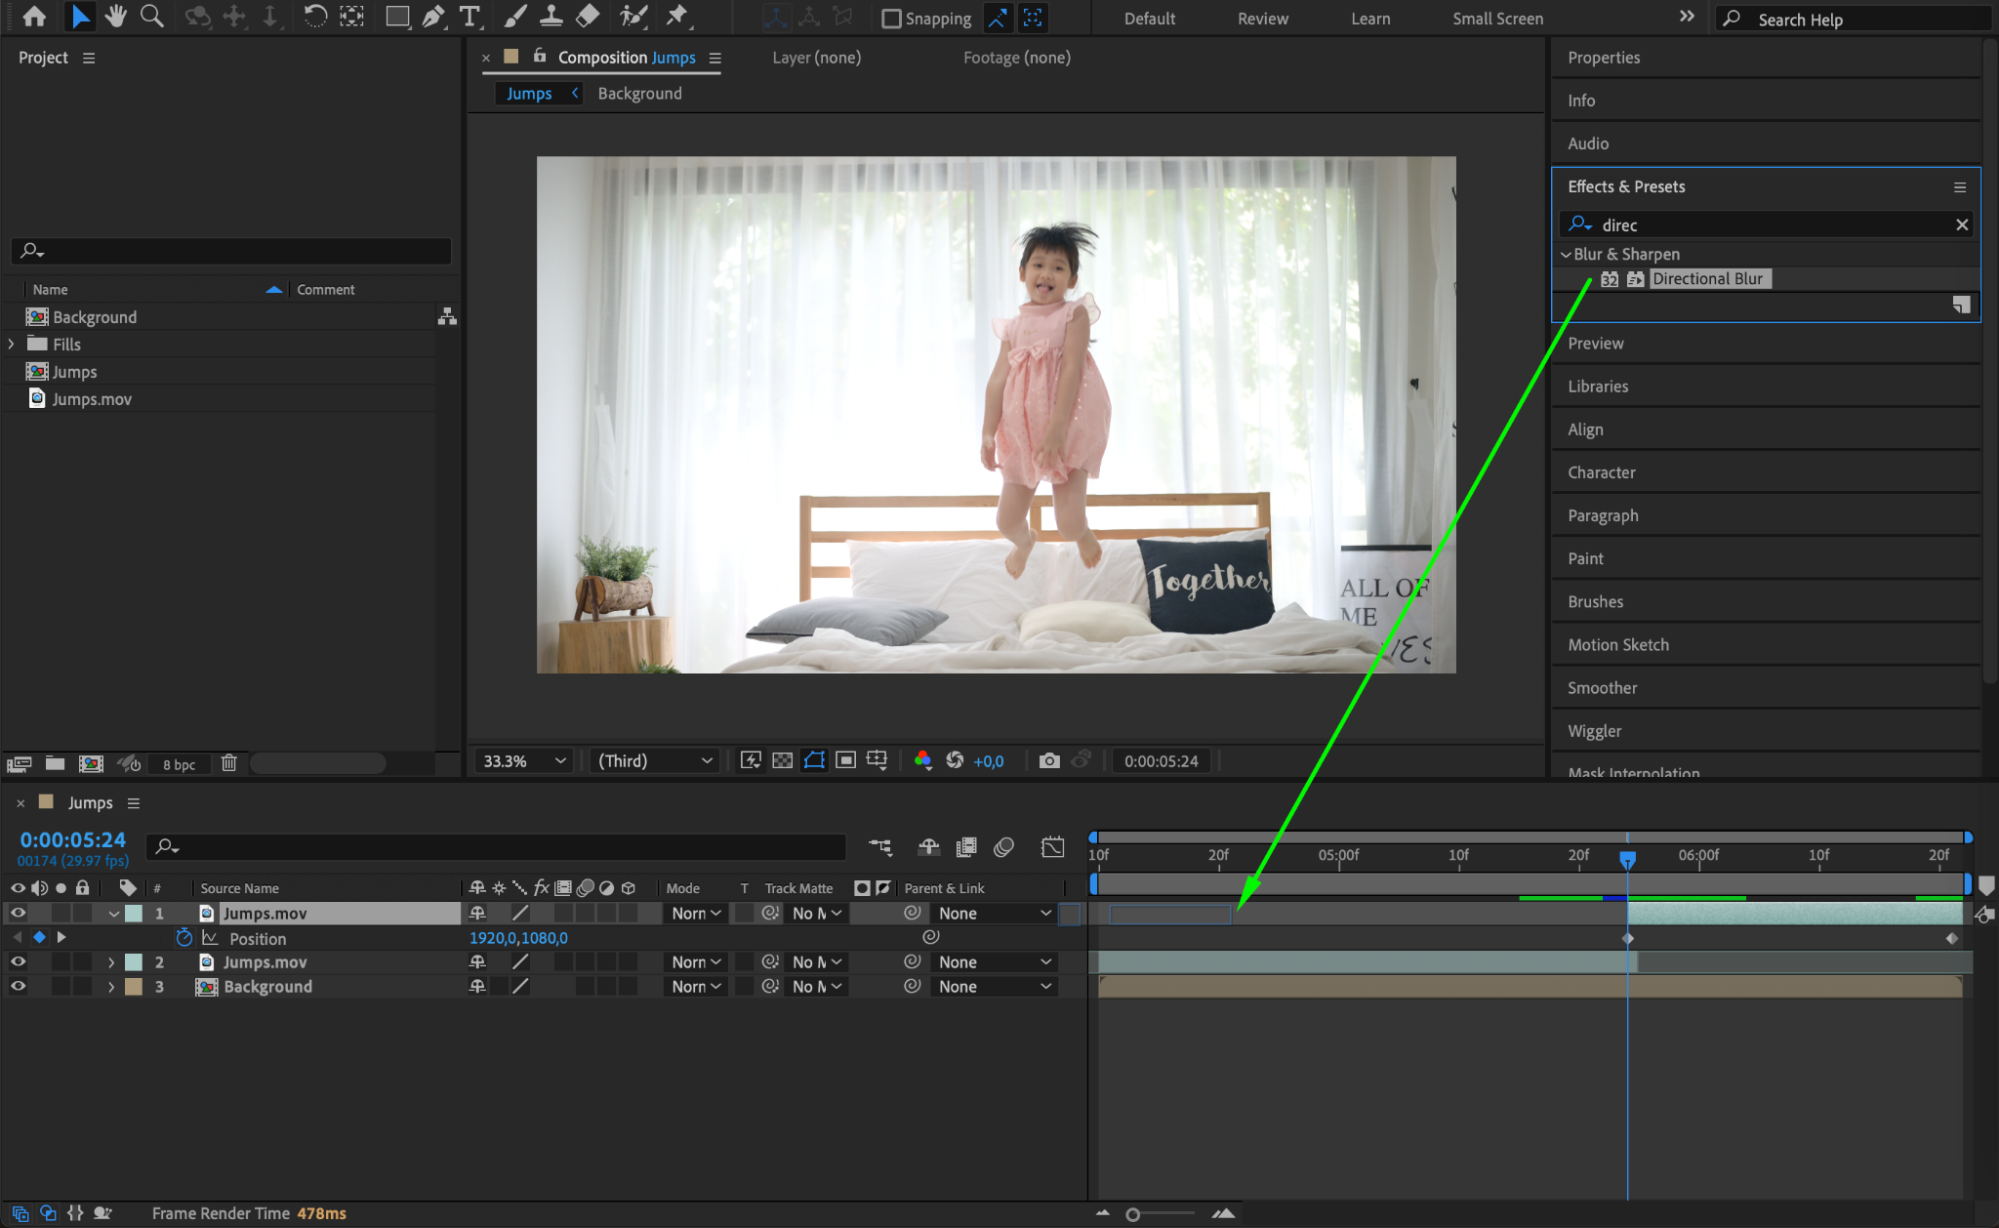 Step 12: Adjust Blur Settings
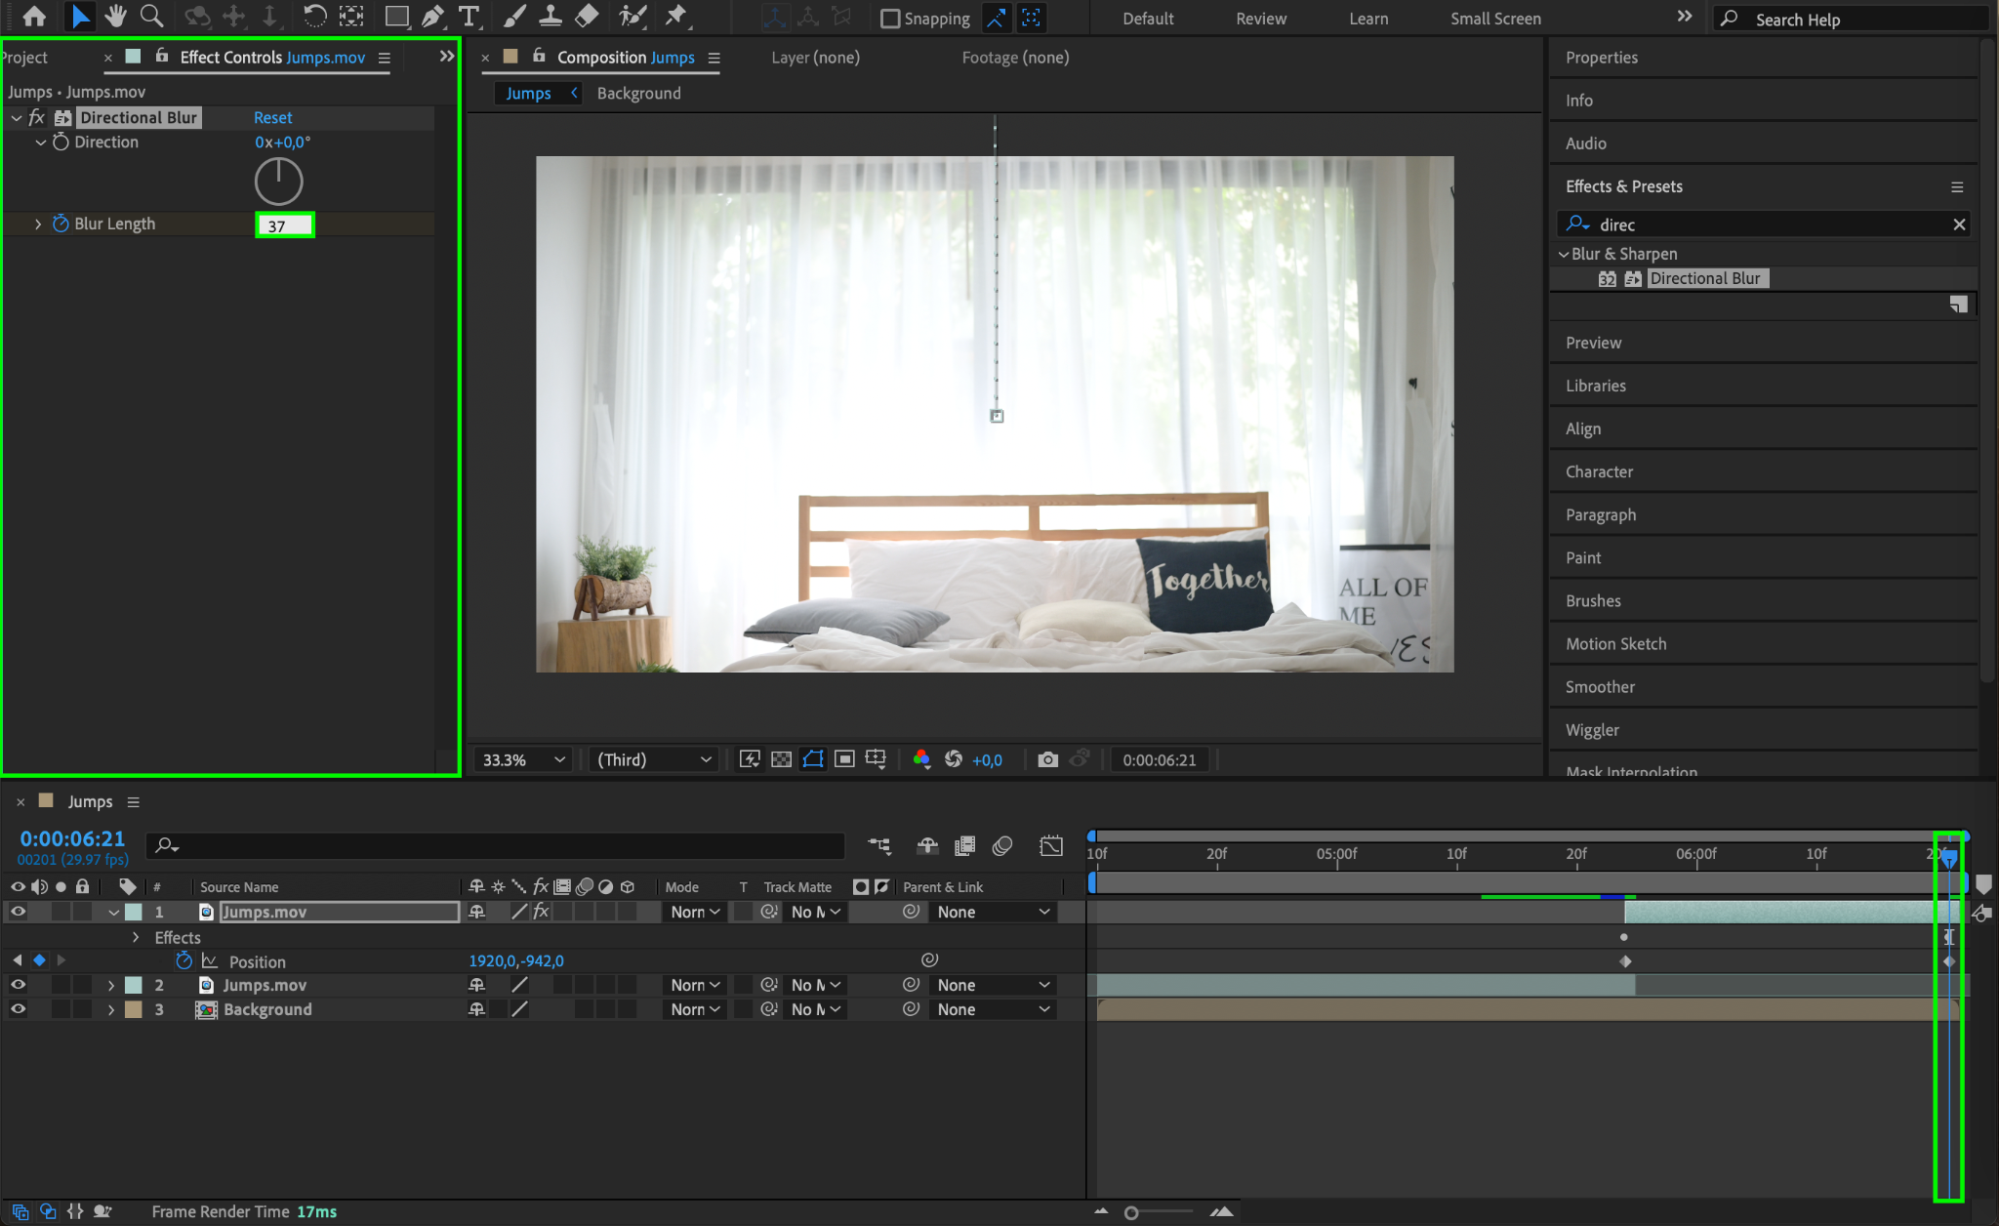
In the Effect Controls panel, set the Blur Length to 8.8 at the start of the flight sequence. Click the stopwatch icon to create a keyframe. Then, move the CTI to the end of the composition and increase the Blur Length to 37. This will create a dynamic motion blur as the person flies upwards, making the effect more realistic.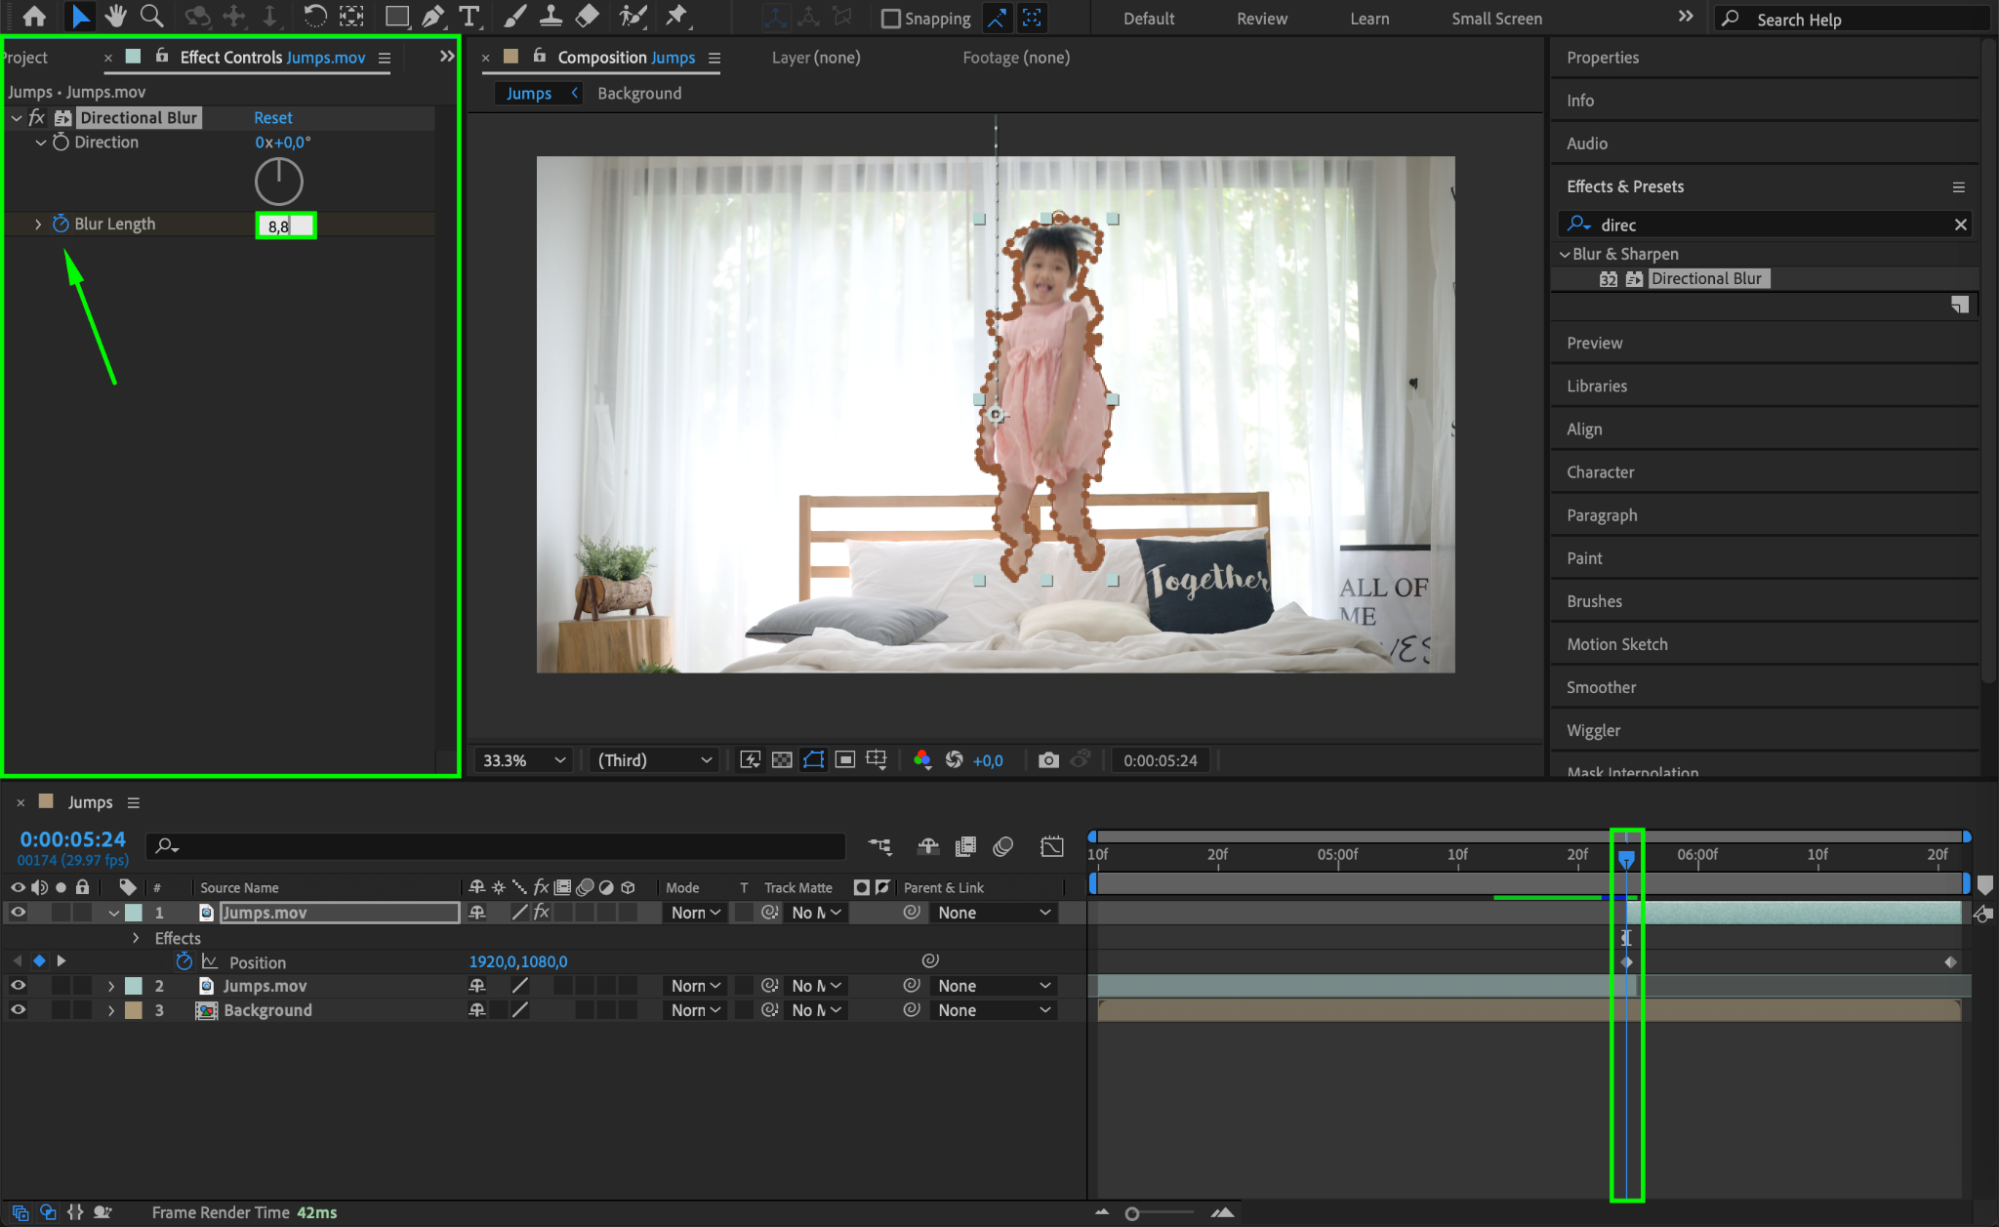
 Step 13: Preview and Refine
Hit Spacebar to preview your composition and ensure everything looks smooth. Make any adjustments as needed to the mask, keyframes, or blur settings. Once you’re satisfied with the effect, you can export your project.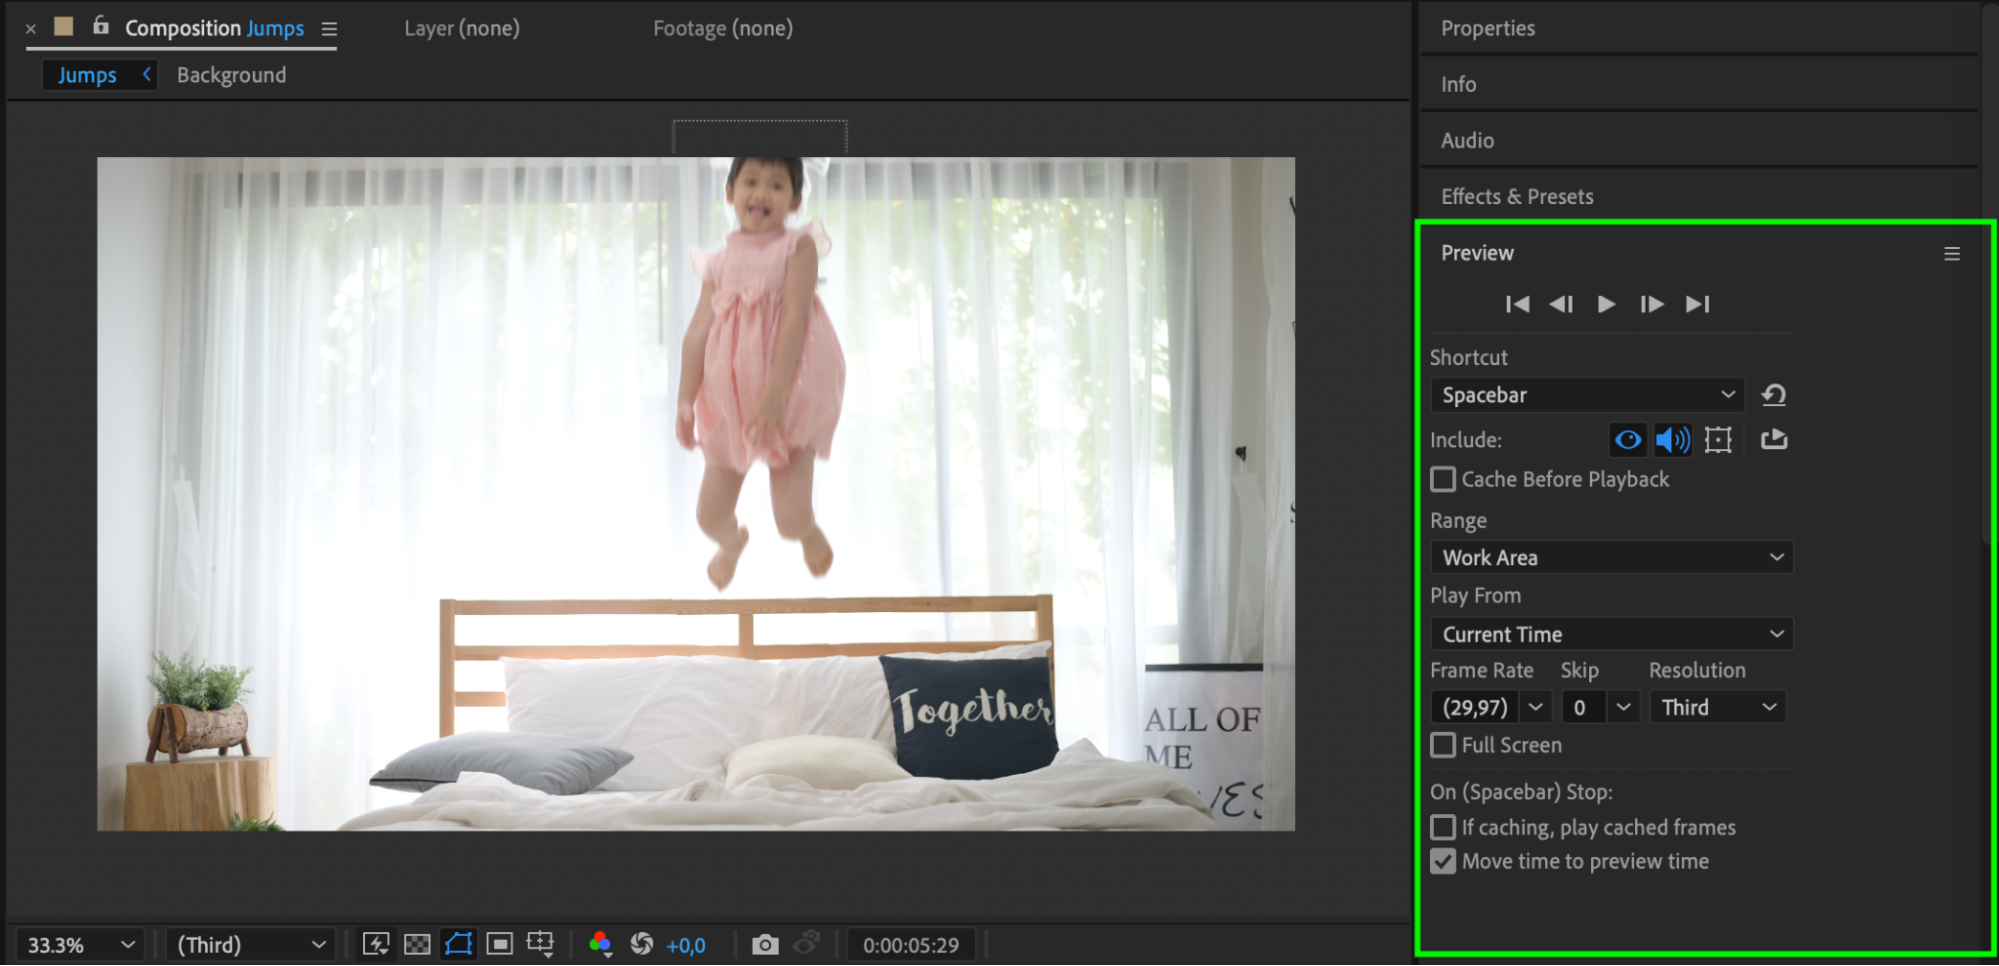
Conclusion
By following these steps, you can create the illusion of flight in After Effects. Whether you’re working on a short film, music video, or creative project, this effect can add a sense of wonder and excitement. Experiment with different settings to perfect the illusion, and soon your subjects will be soaring through the sky! Happy flying!


