Step-by-Step Guide to Making Someone Invisible in After Effects
Introduction: The Magic of Invisible Effects in After Effects
Making someone or something invisible in After Effects is a popular effect used in films, advertisements, and creative projects. By leveraging tools like the Roto Brush and Content-Aware Fill, you can seamlessly remove a subject from your footage. This guide walks you through the process step by step, ensuring a polished and professional result.
Get 10% off when you subscribe to our newsletter

Step 1: Import Your File and Add It to the Timeline
Begin by importing your video into After Effects. Go to File > Import > File, select your footage, and click Open. Once imported, drag the file to the timeline to create a new layer. This serves as your base layer for the effect.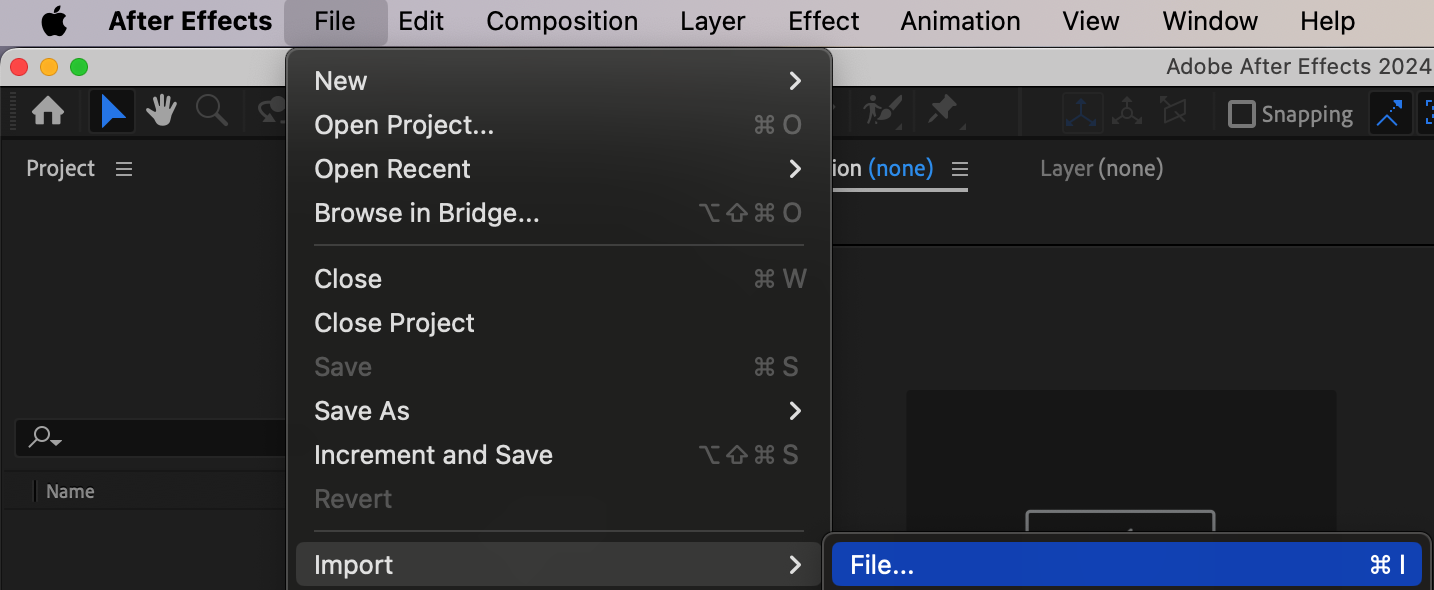
 Step 2: Duplicate the Layer
To prepare for isolating the subject, duplicate the layer by selecting it in the timeline and pressing “Ctrl/Cmd + D”. This creates a copy that you will use to apply different effects.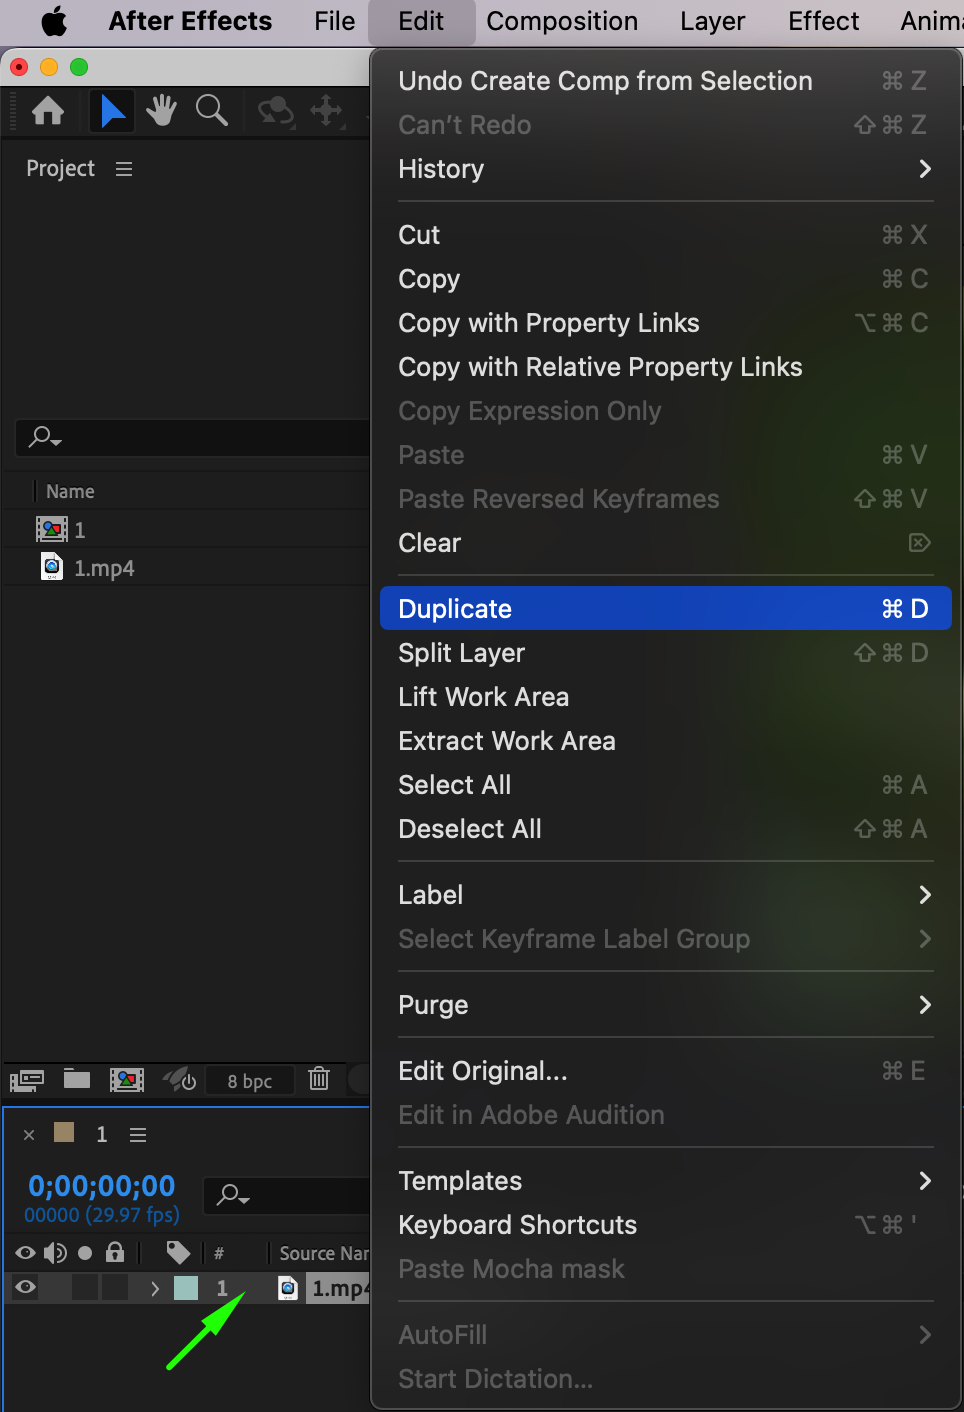 Step 3: Use the Roto Brush Tool
Select the top duplicate layer and activate the Roto Brush Tool by pressing “Alt/Option + W” or selecting it from the toolbar. Go to the first frame of your composition and begin outlining the subject (e.g., the person you want to make invisible). Adjust the selection as needed, ensuring the subject is fully isolated from the background.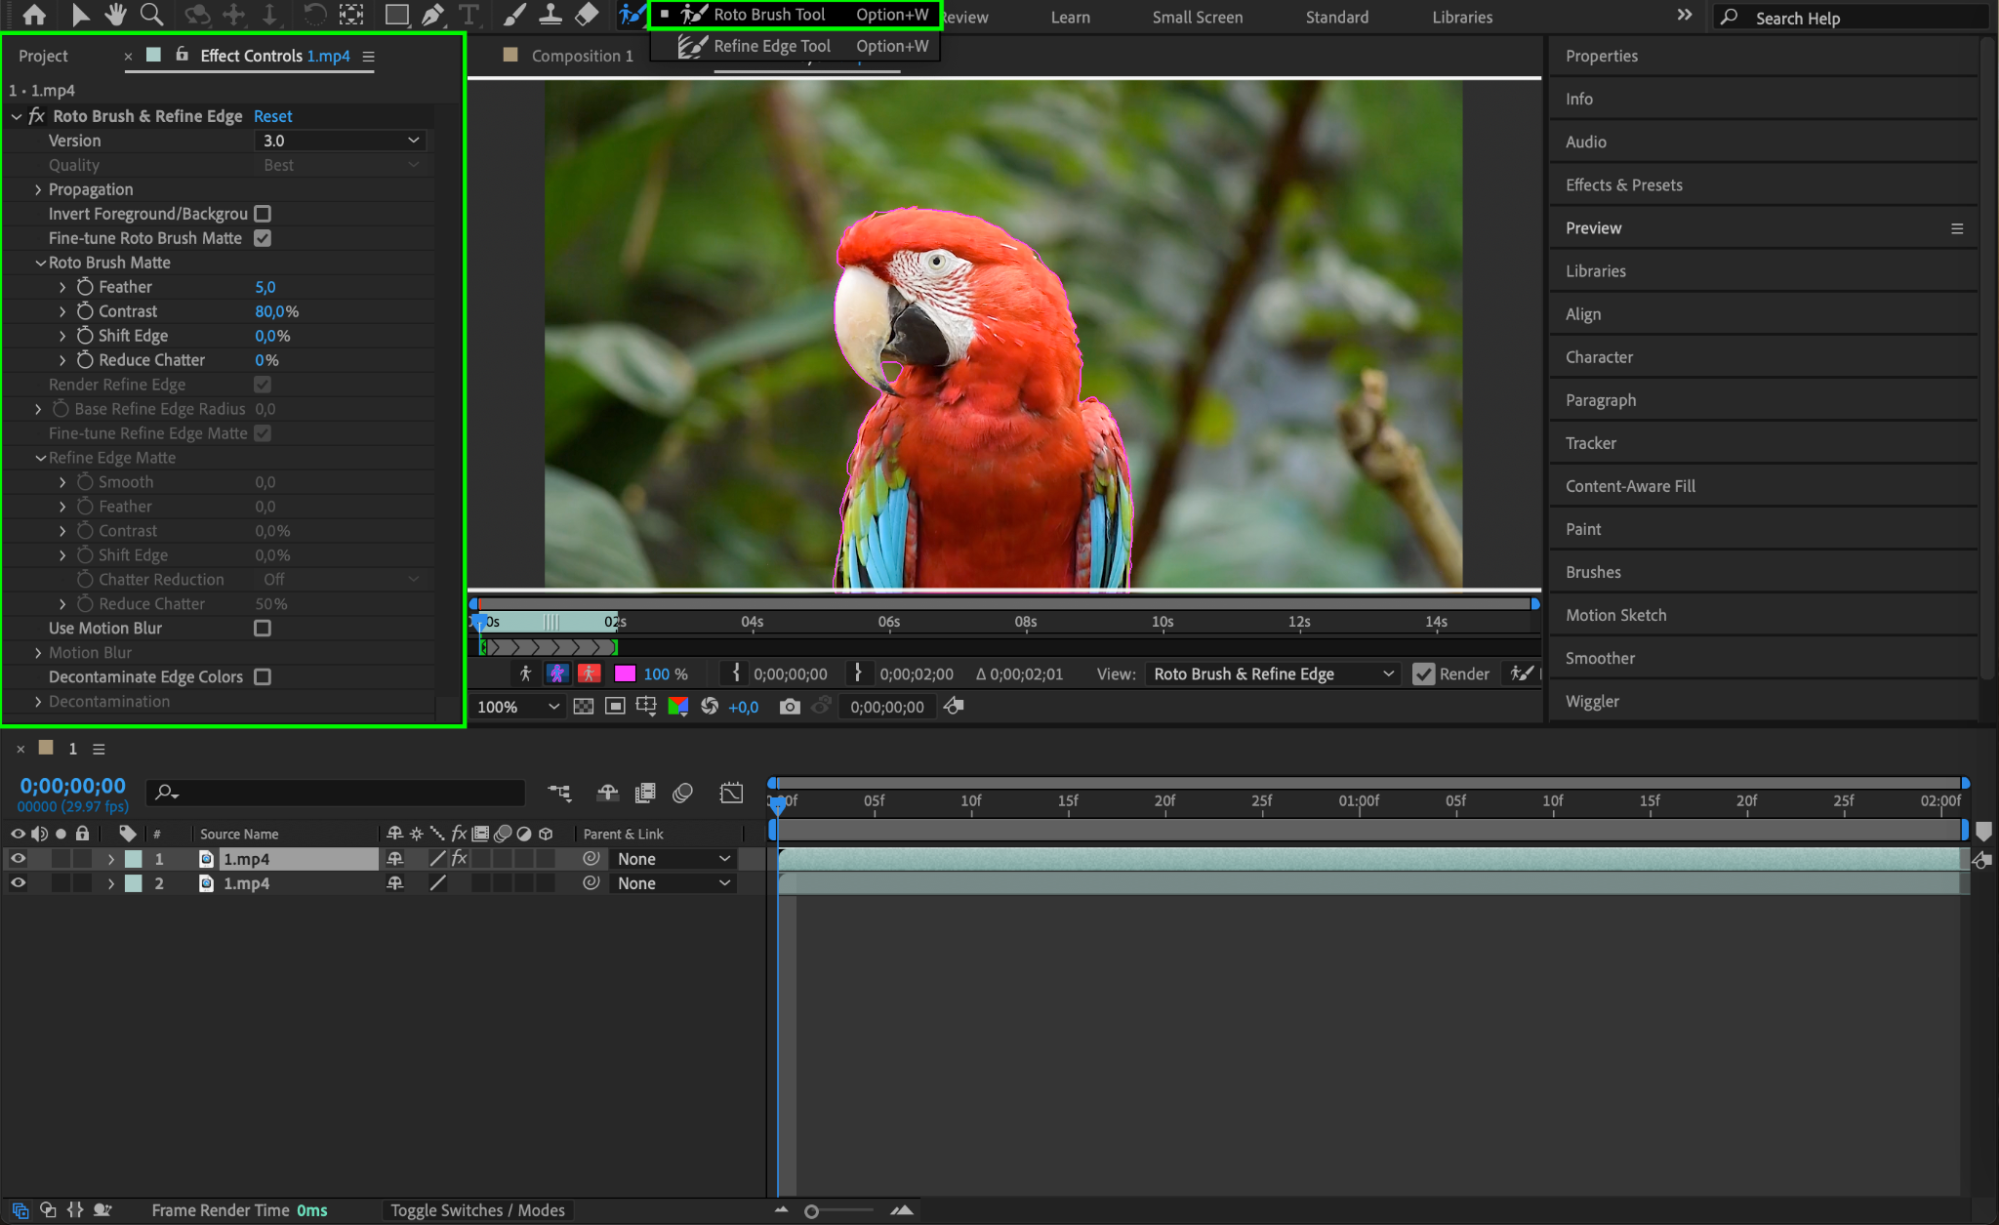 Step 4: Duplicate the Layer Again
After isolating the subject with the Roto Brush, duplicate this layer once more by pressing “Ctrl/Cmd + D”. You should now have three layers in your timeline: the original, the roto-masked copy, and a second duplicate for further adjustments.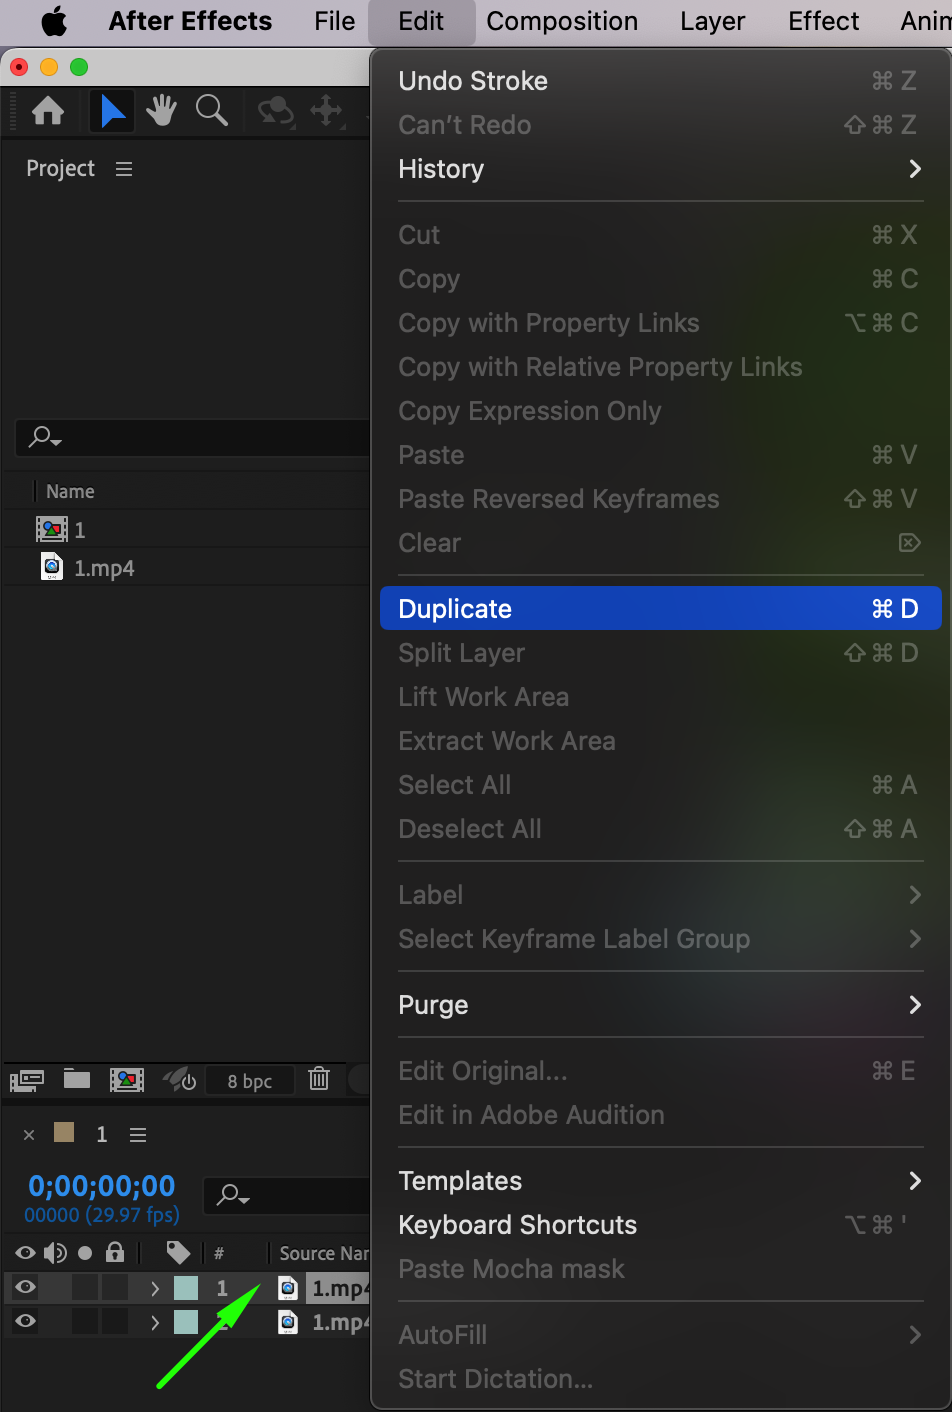 Step 5: Freeze the Foreground Mask
Select the middle layer and navigate to the Composition panel. Click the Freeze button to lock the roto mask on this layer. This ensures the mask remains consistent throughout the duration of the composition.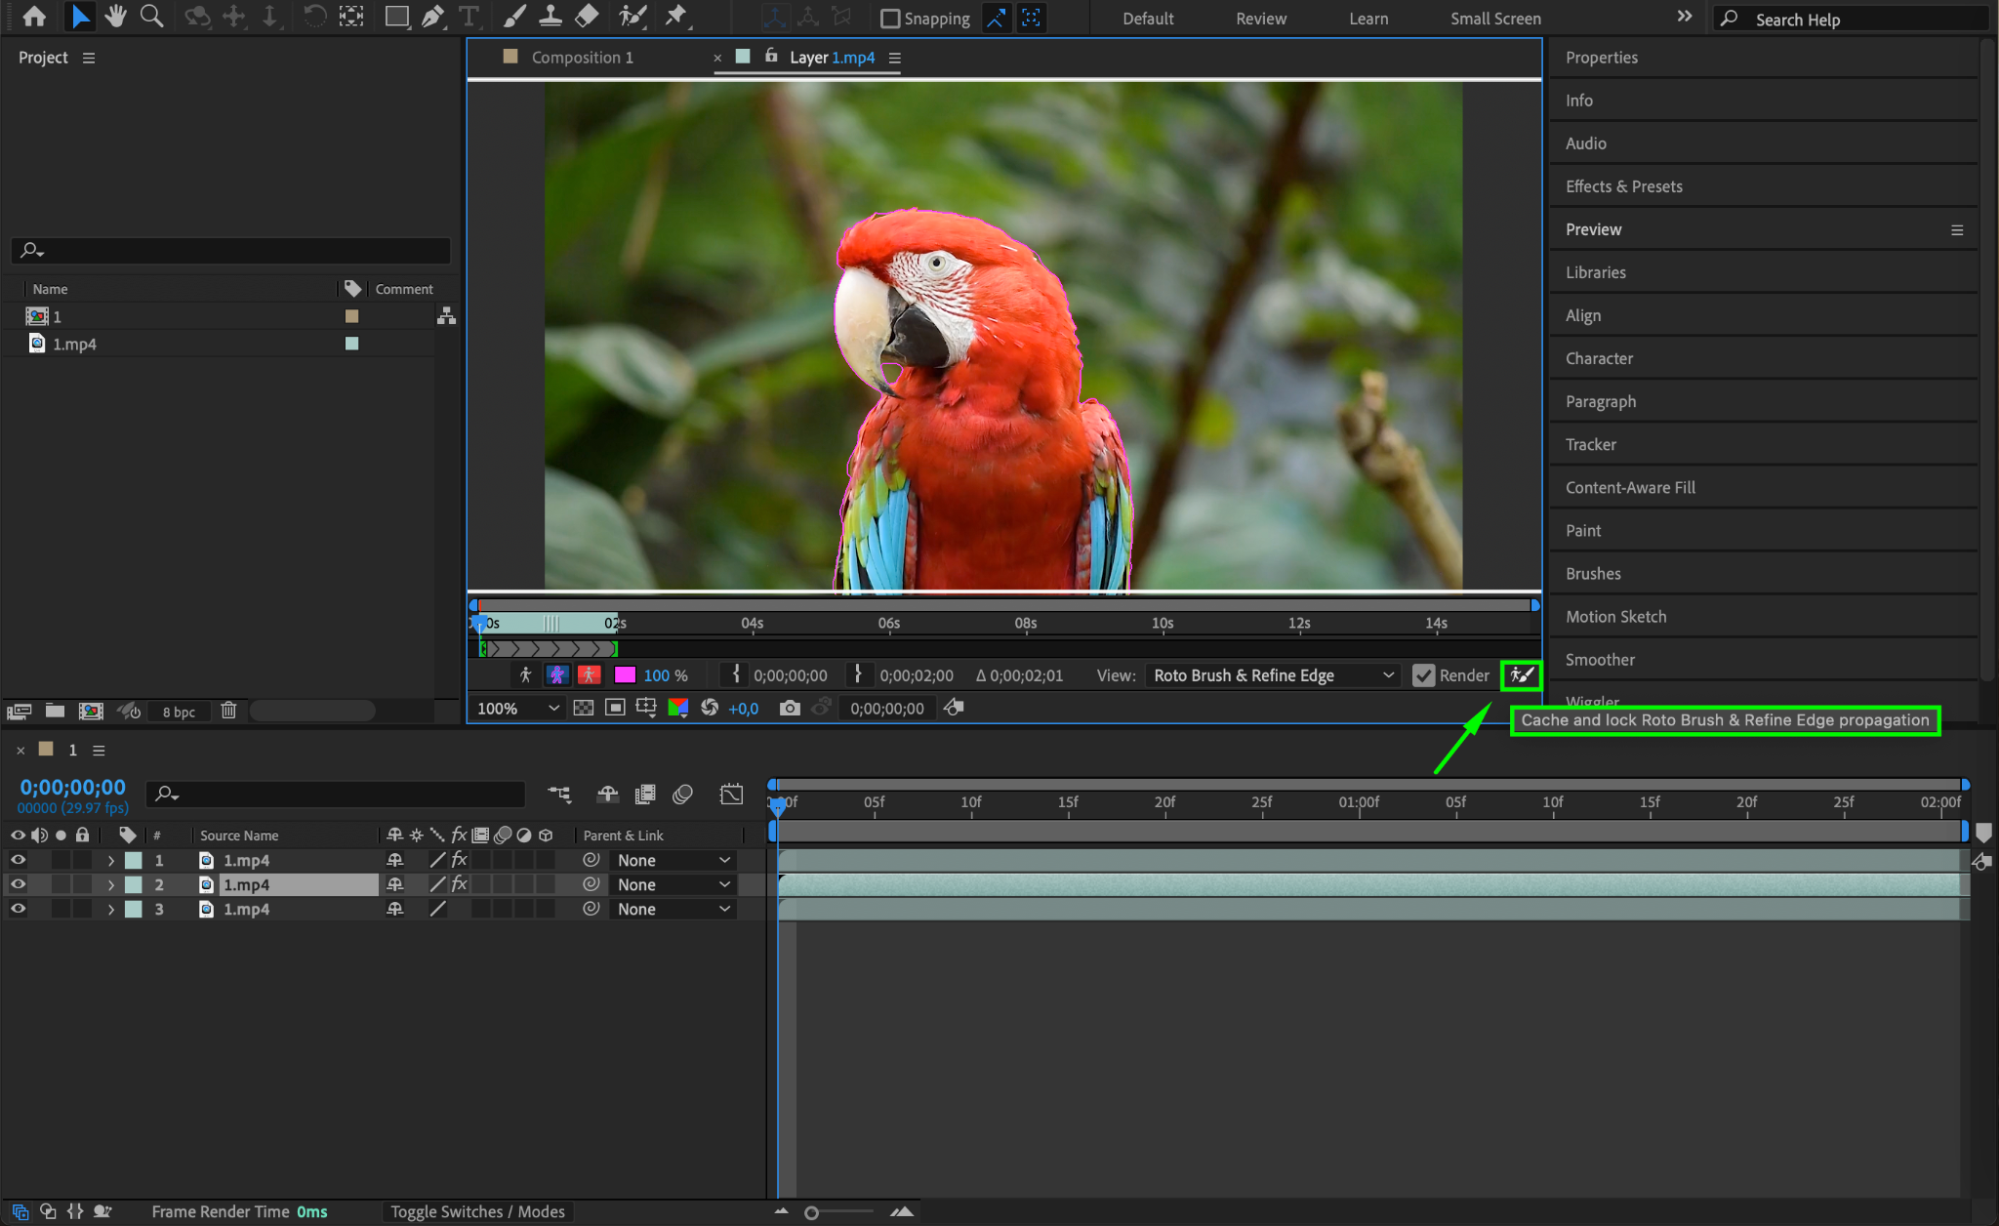 Step 6: Invert the Mask on the Top Layer
Select the top layer and go to the Effect Controls panel. Find the option to Invert Foreground/Background and enable it. Then click the Freeze button again to lock the inverted mask. This will create a separation between the subject and the background.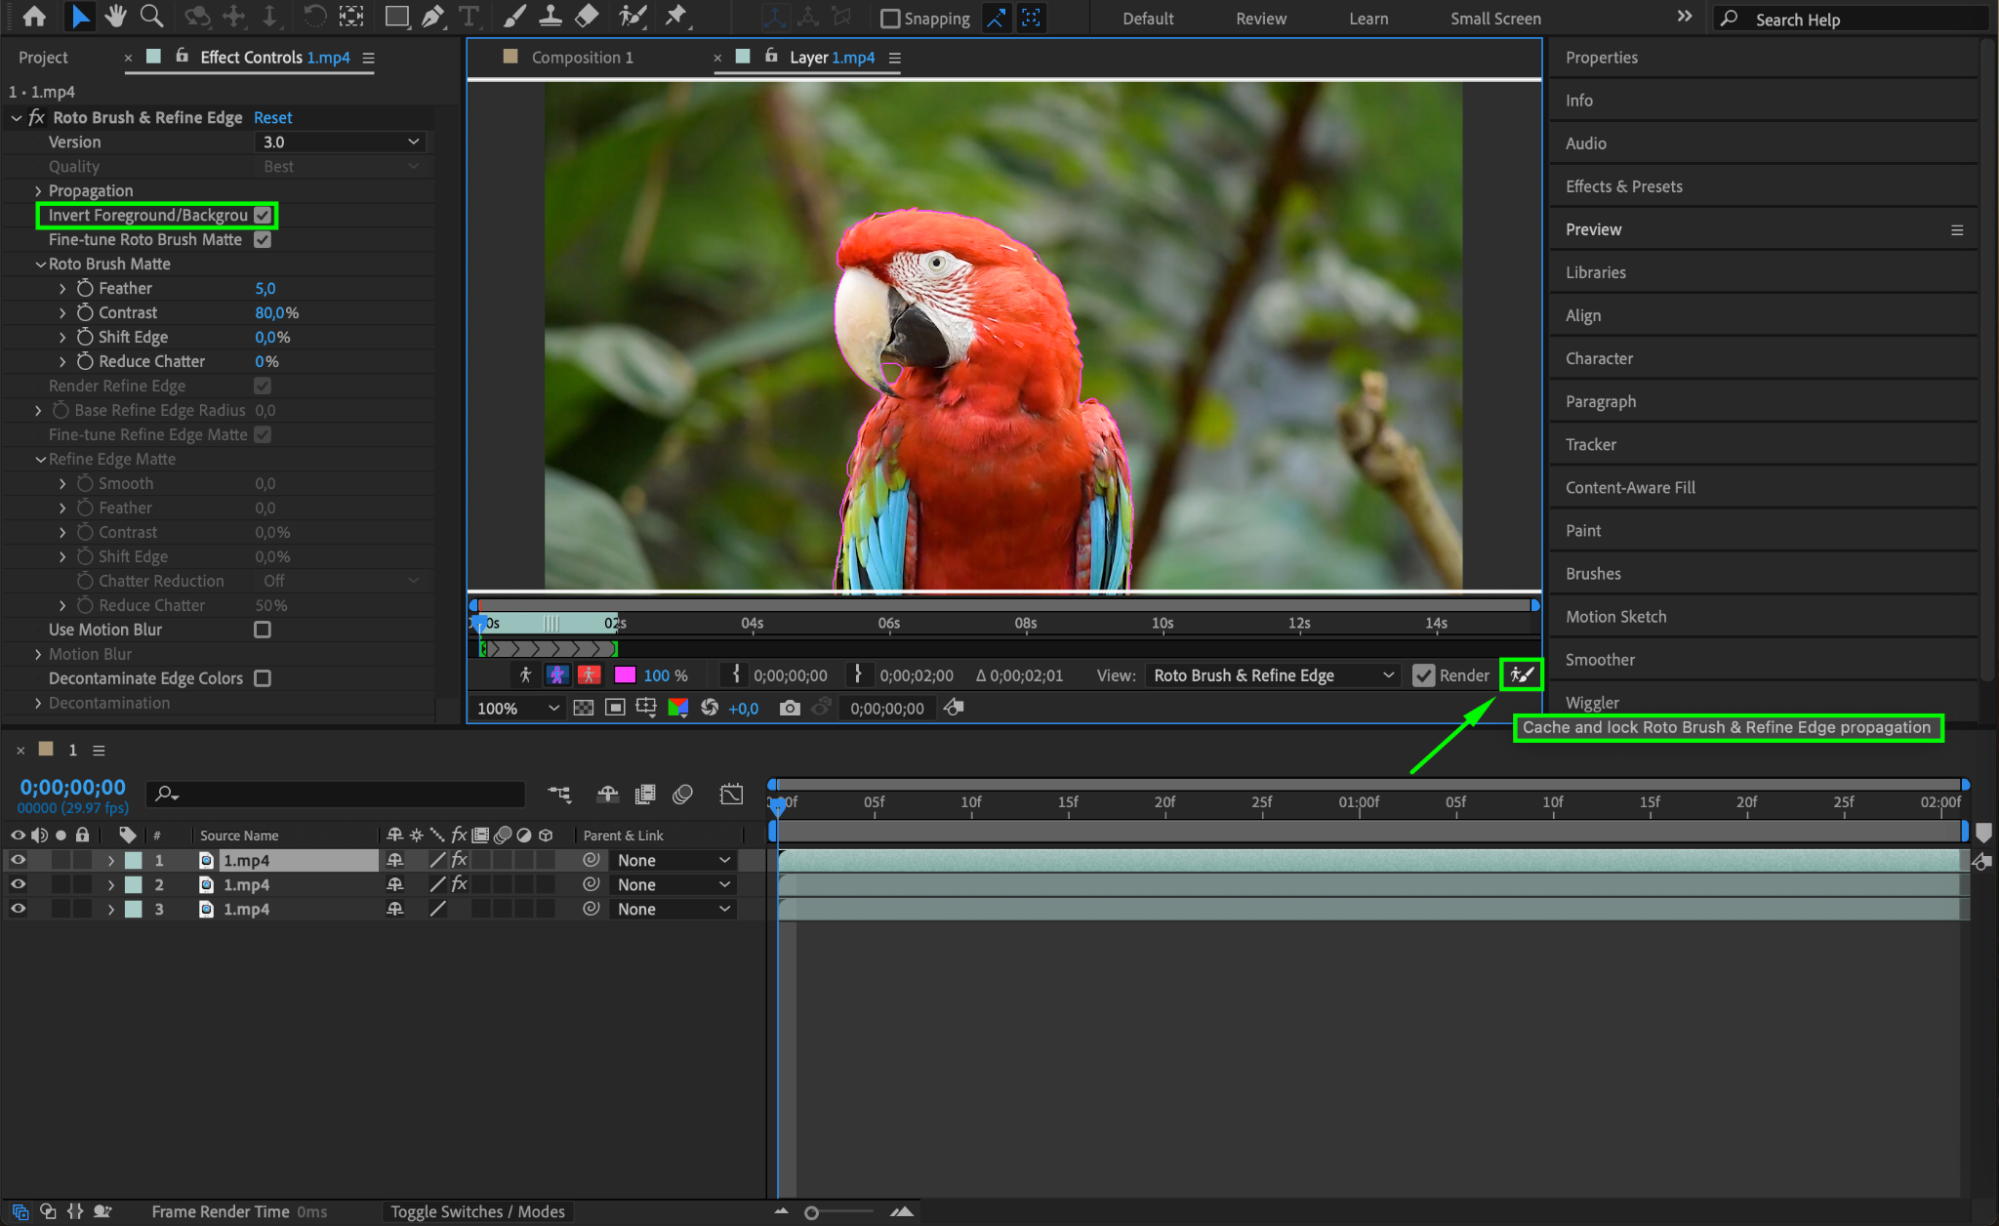 Step 7: Rename Layers for Clarity
To keep your workflow organized, rename the layers in the timeline:
Top Layer: Background
Middle Layer: Foreground
Bottom Layer: Original
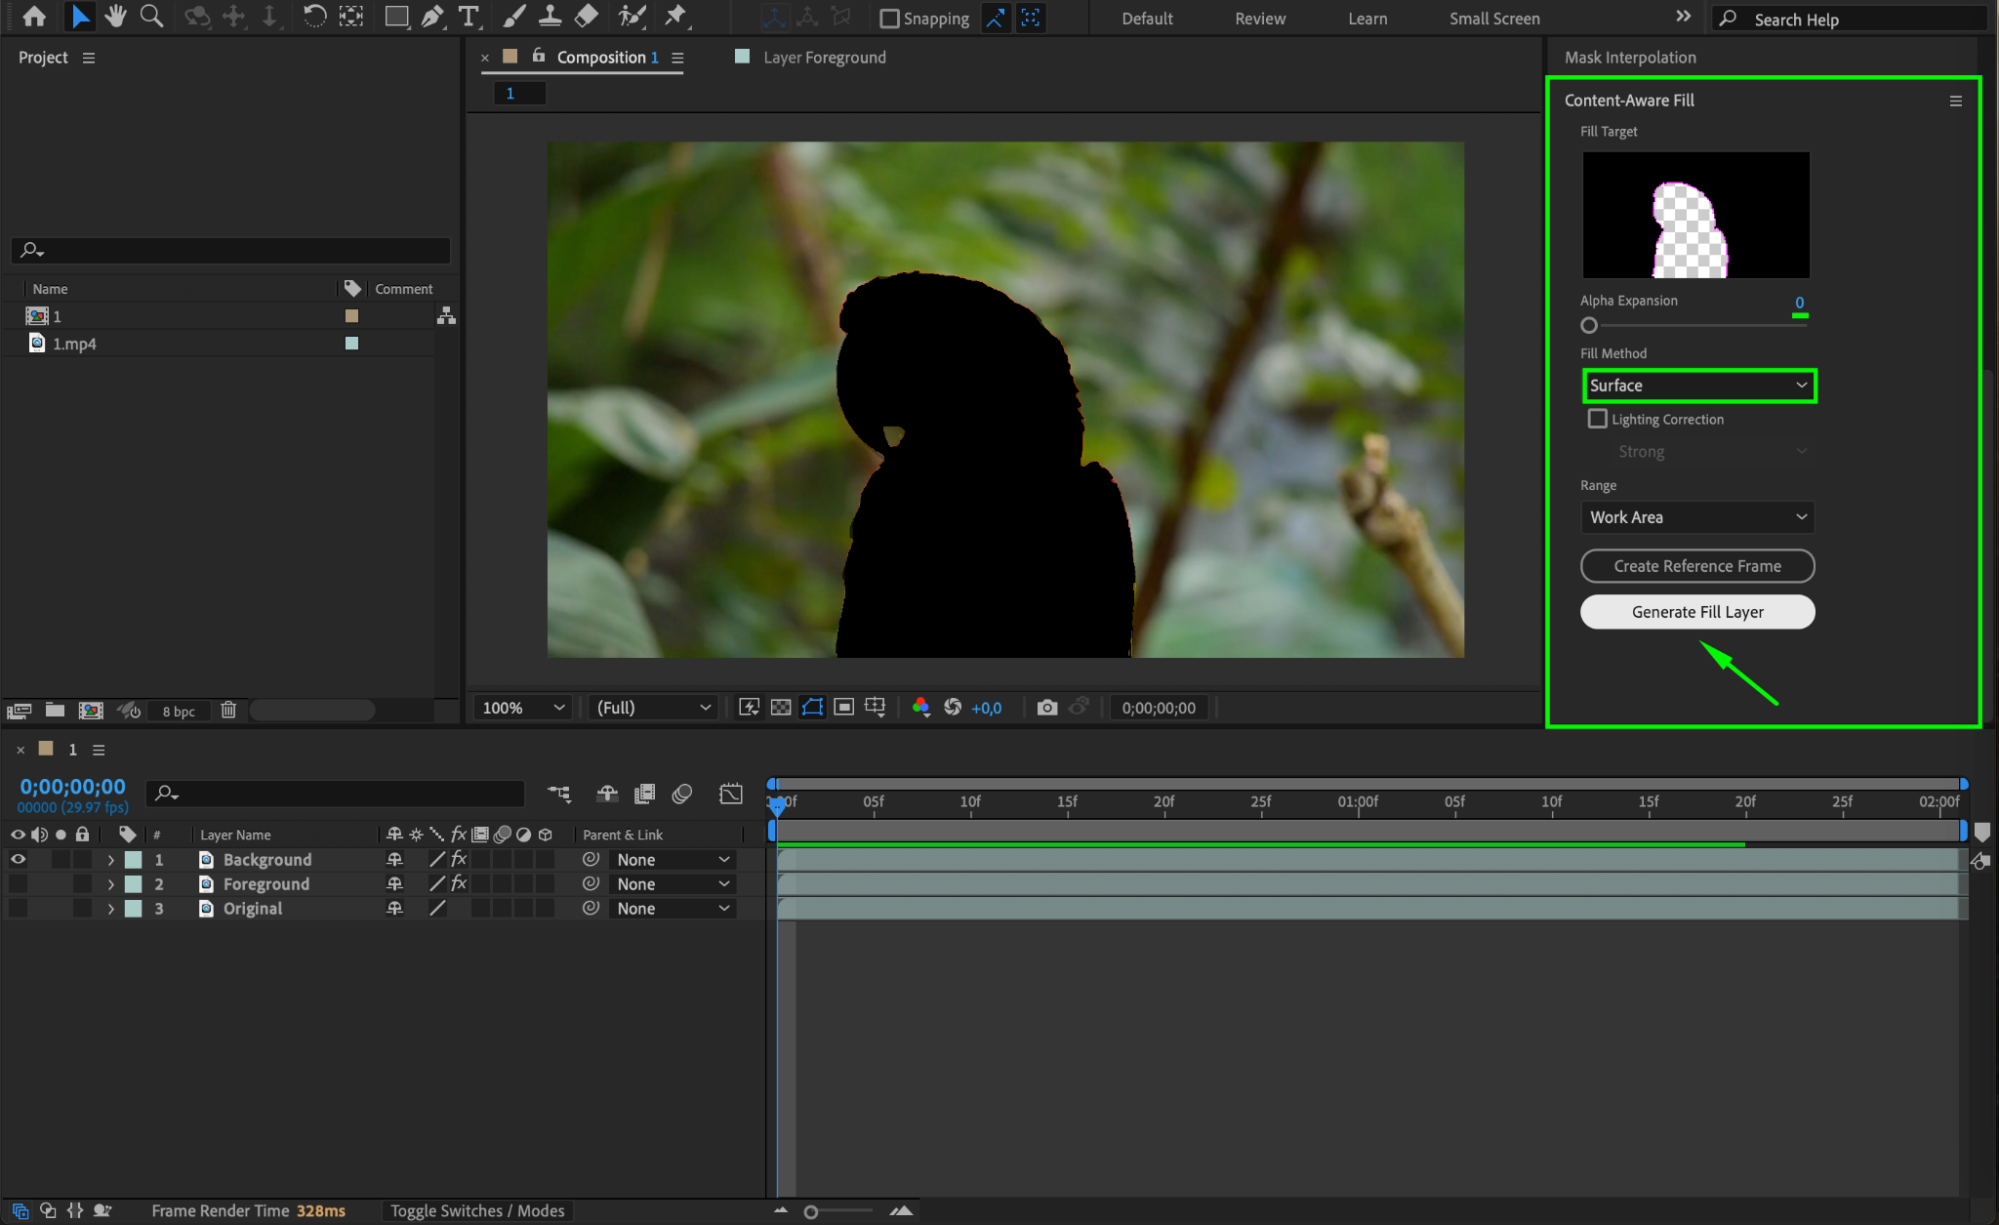
Make only the Background layer visible by disabling the eye icons on the other layers.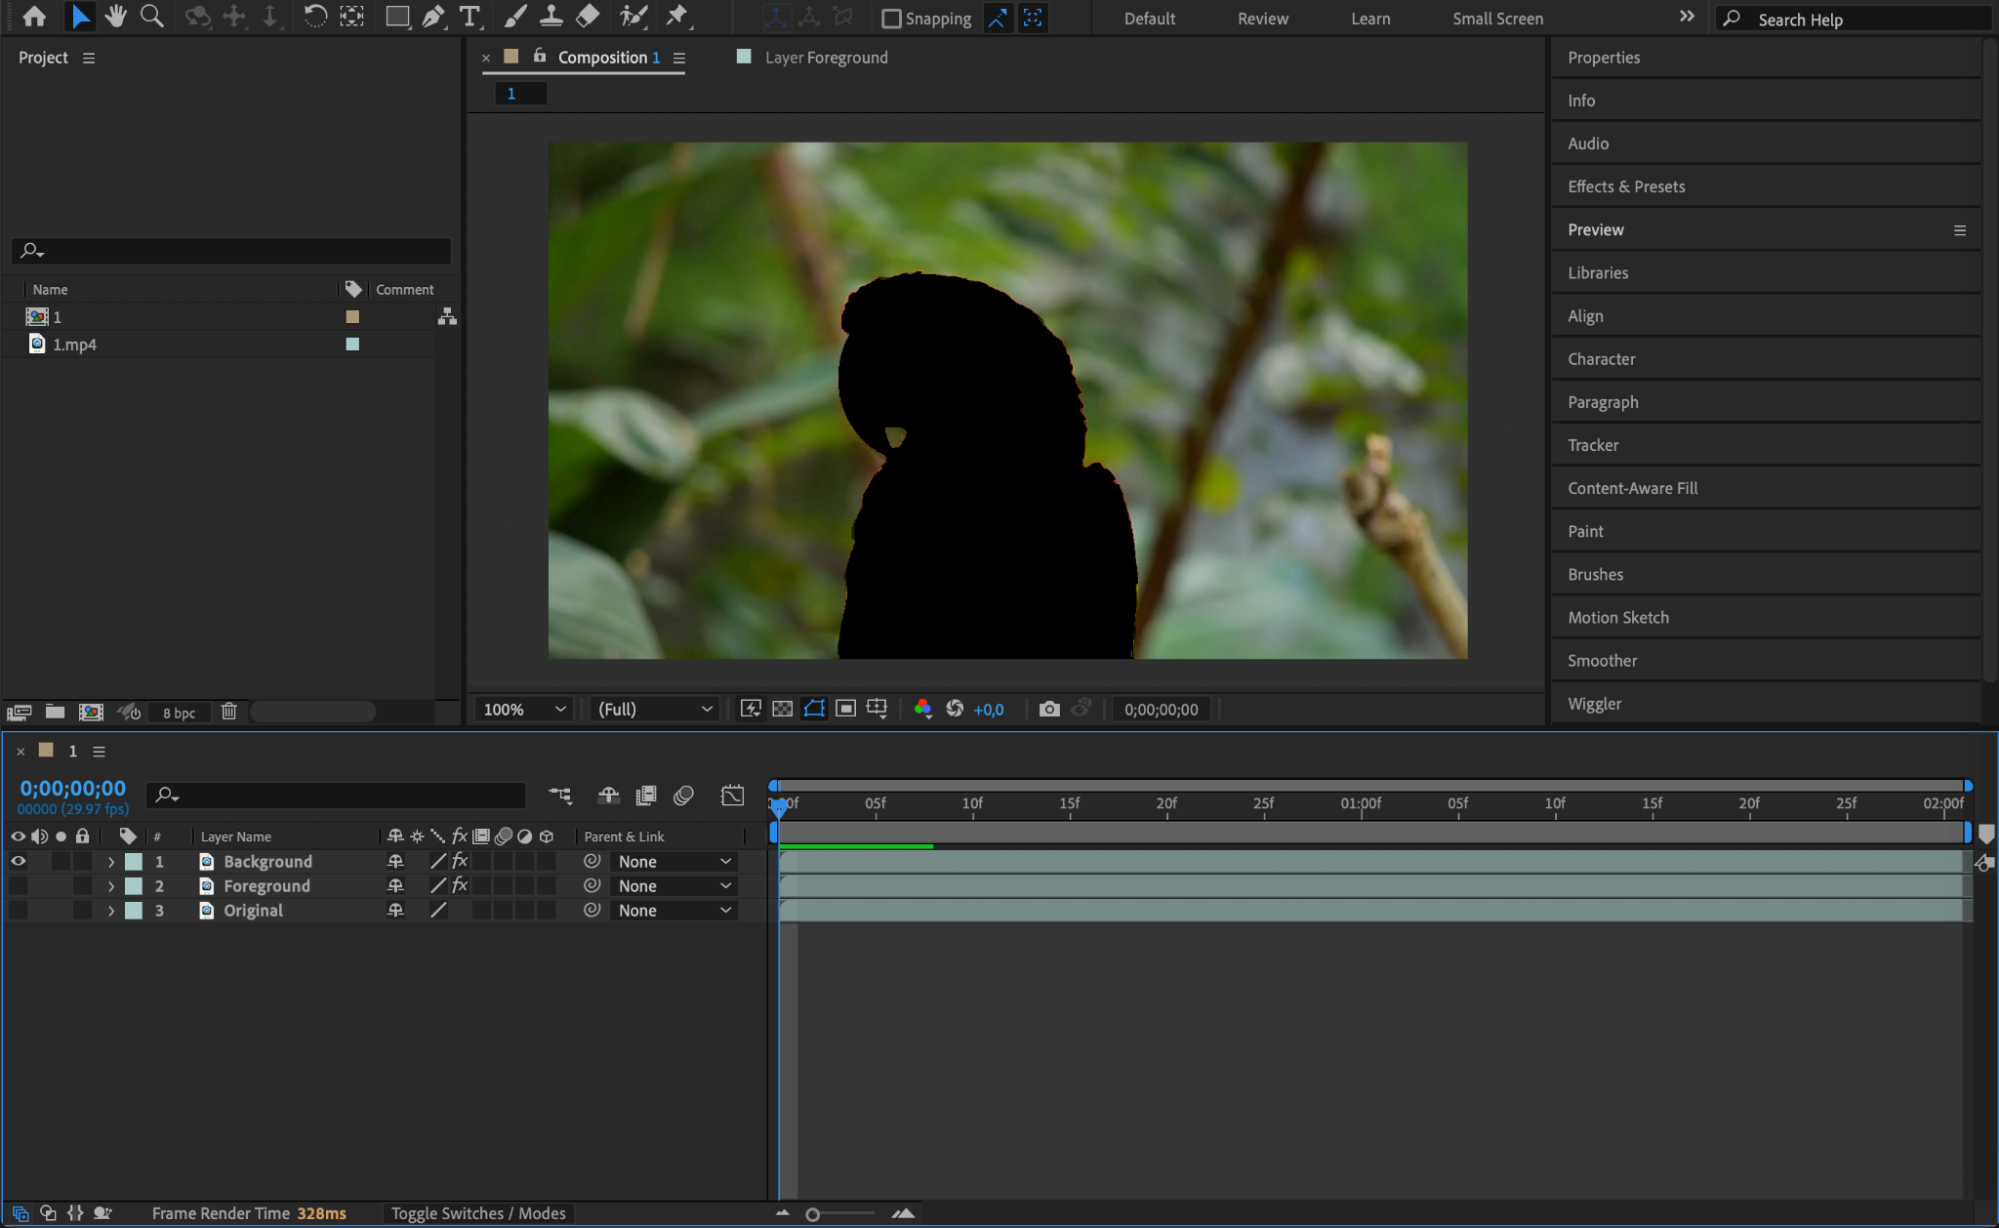 Step 8: Use Content-Aware Fill
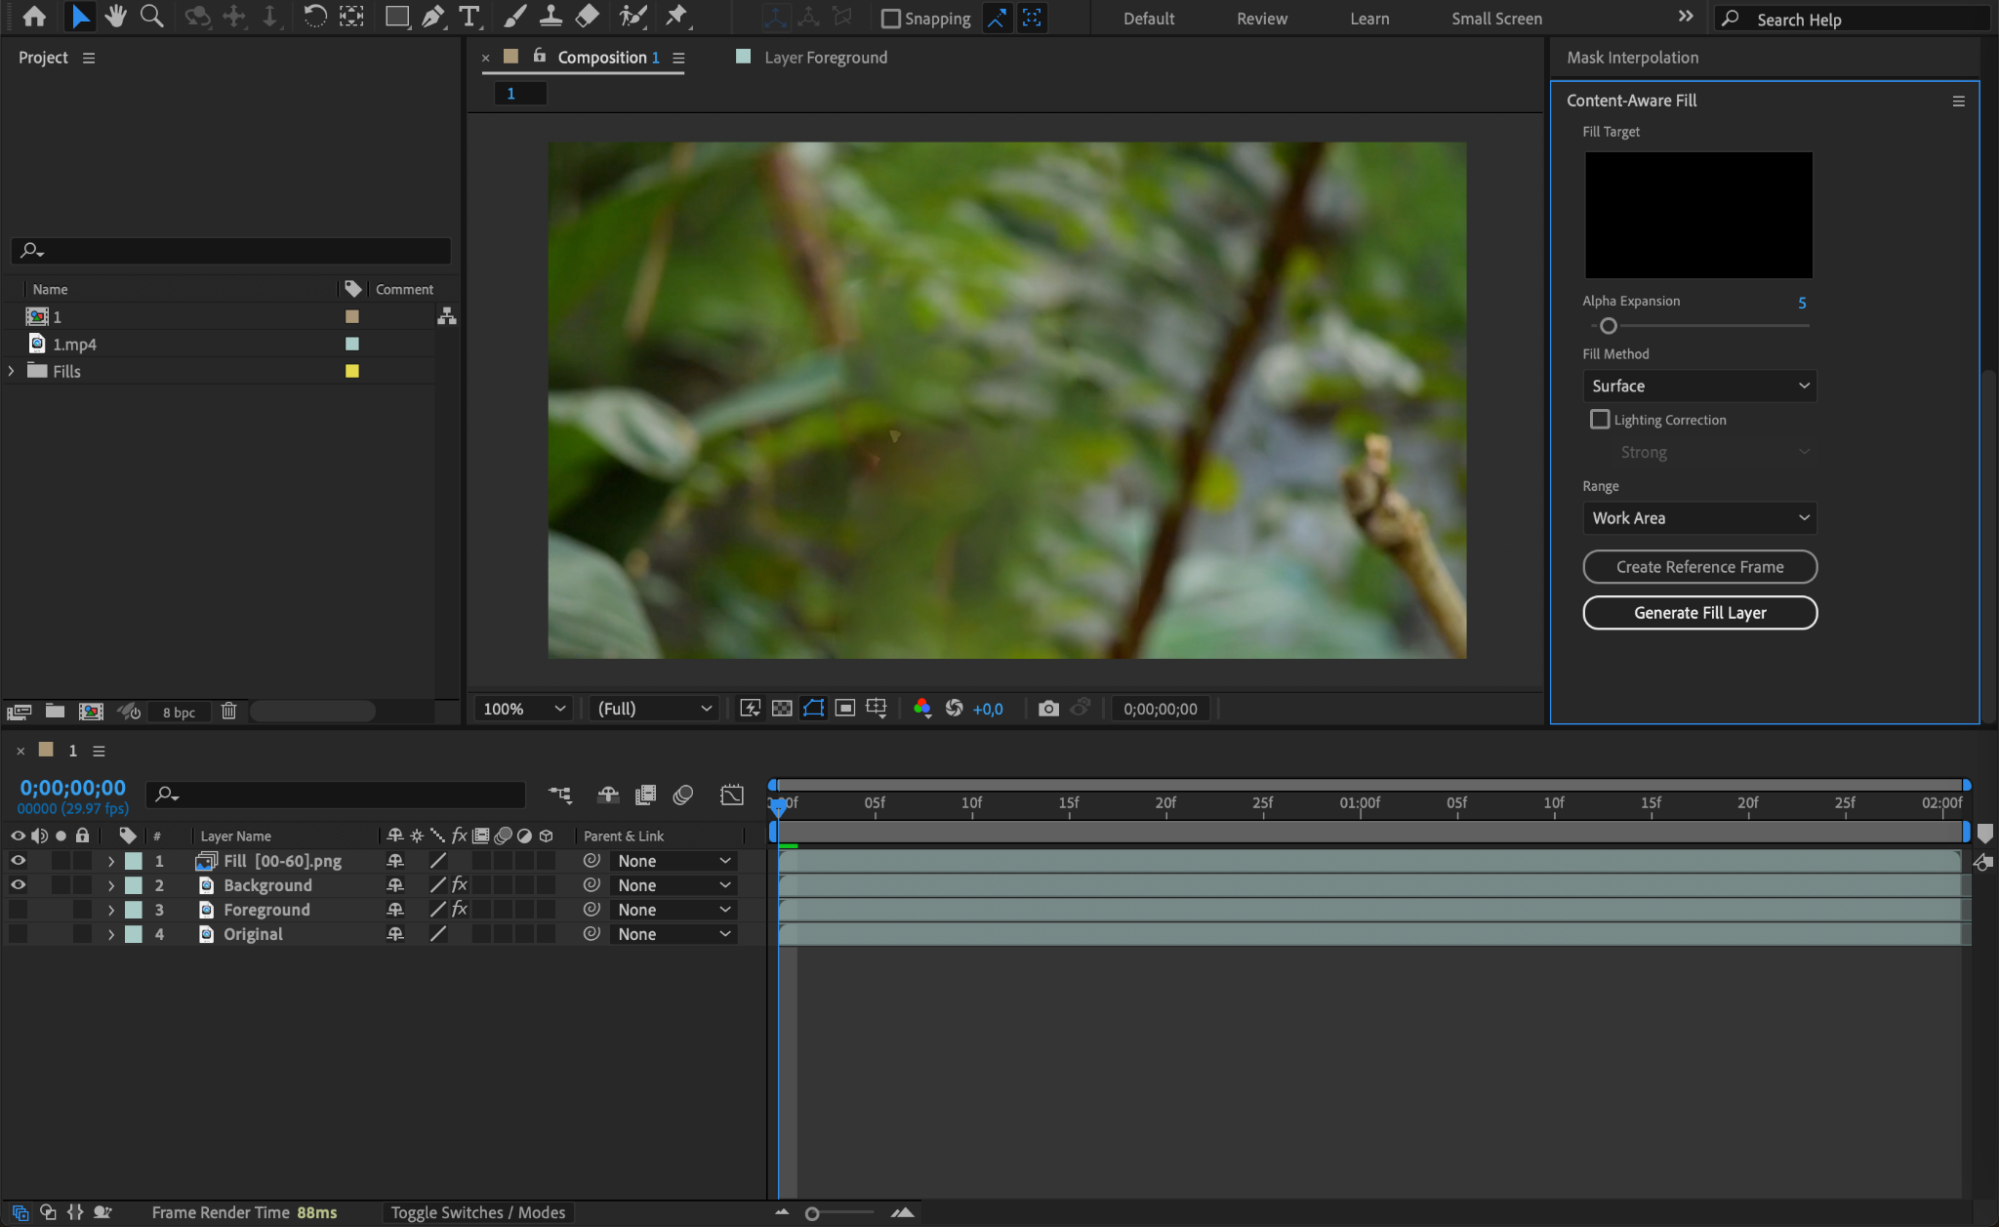
Go to Window > Content-Aware Fill to open the panel. In the Content-Aware Fill settings, choose Fill Method: Surface. Then, click Generate Fill Layer. This will analyze the scene and fill in the area where the subject was removed, creating a seamless background.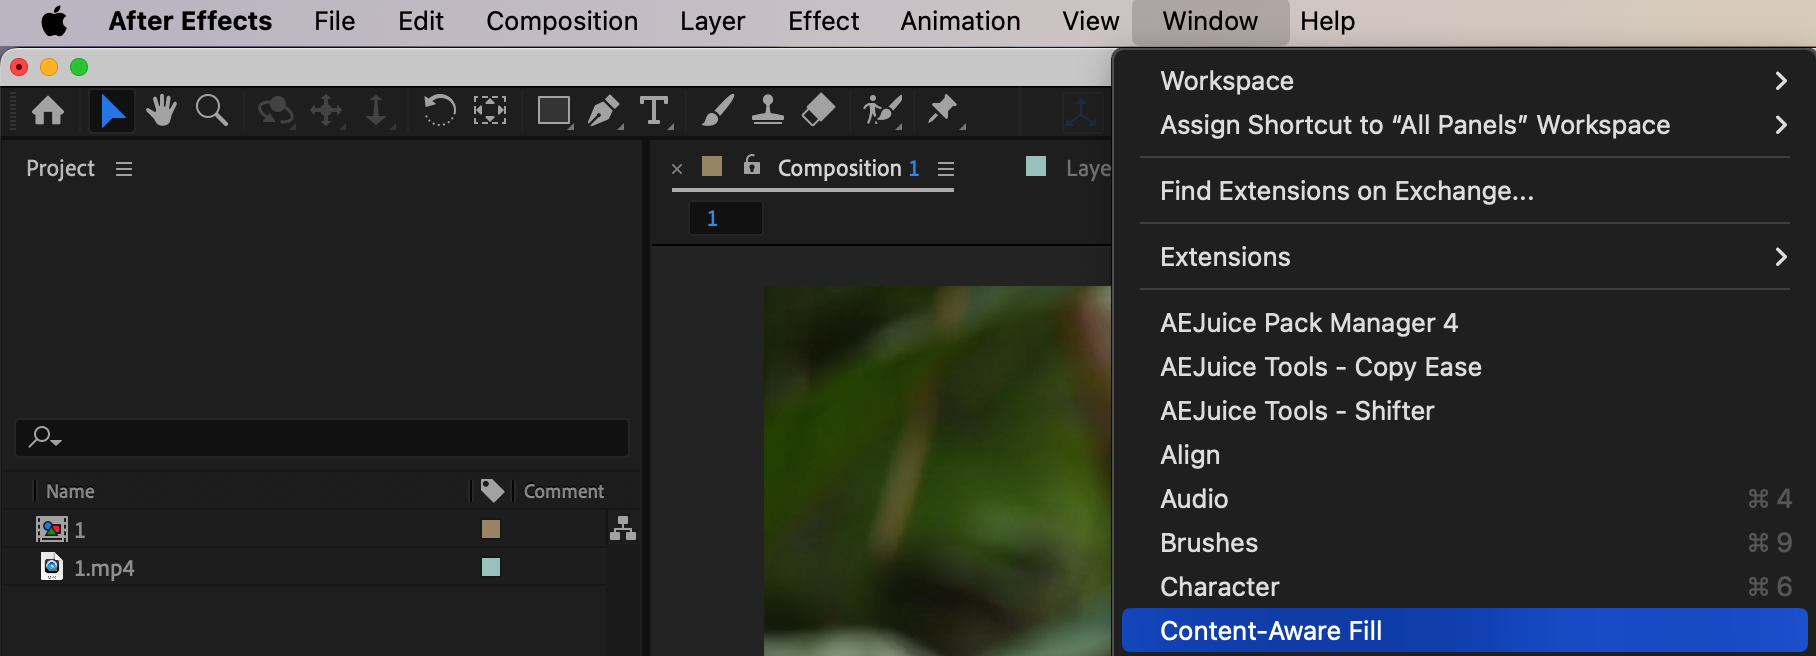
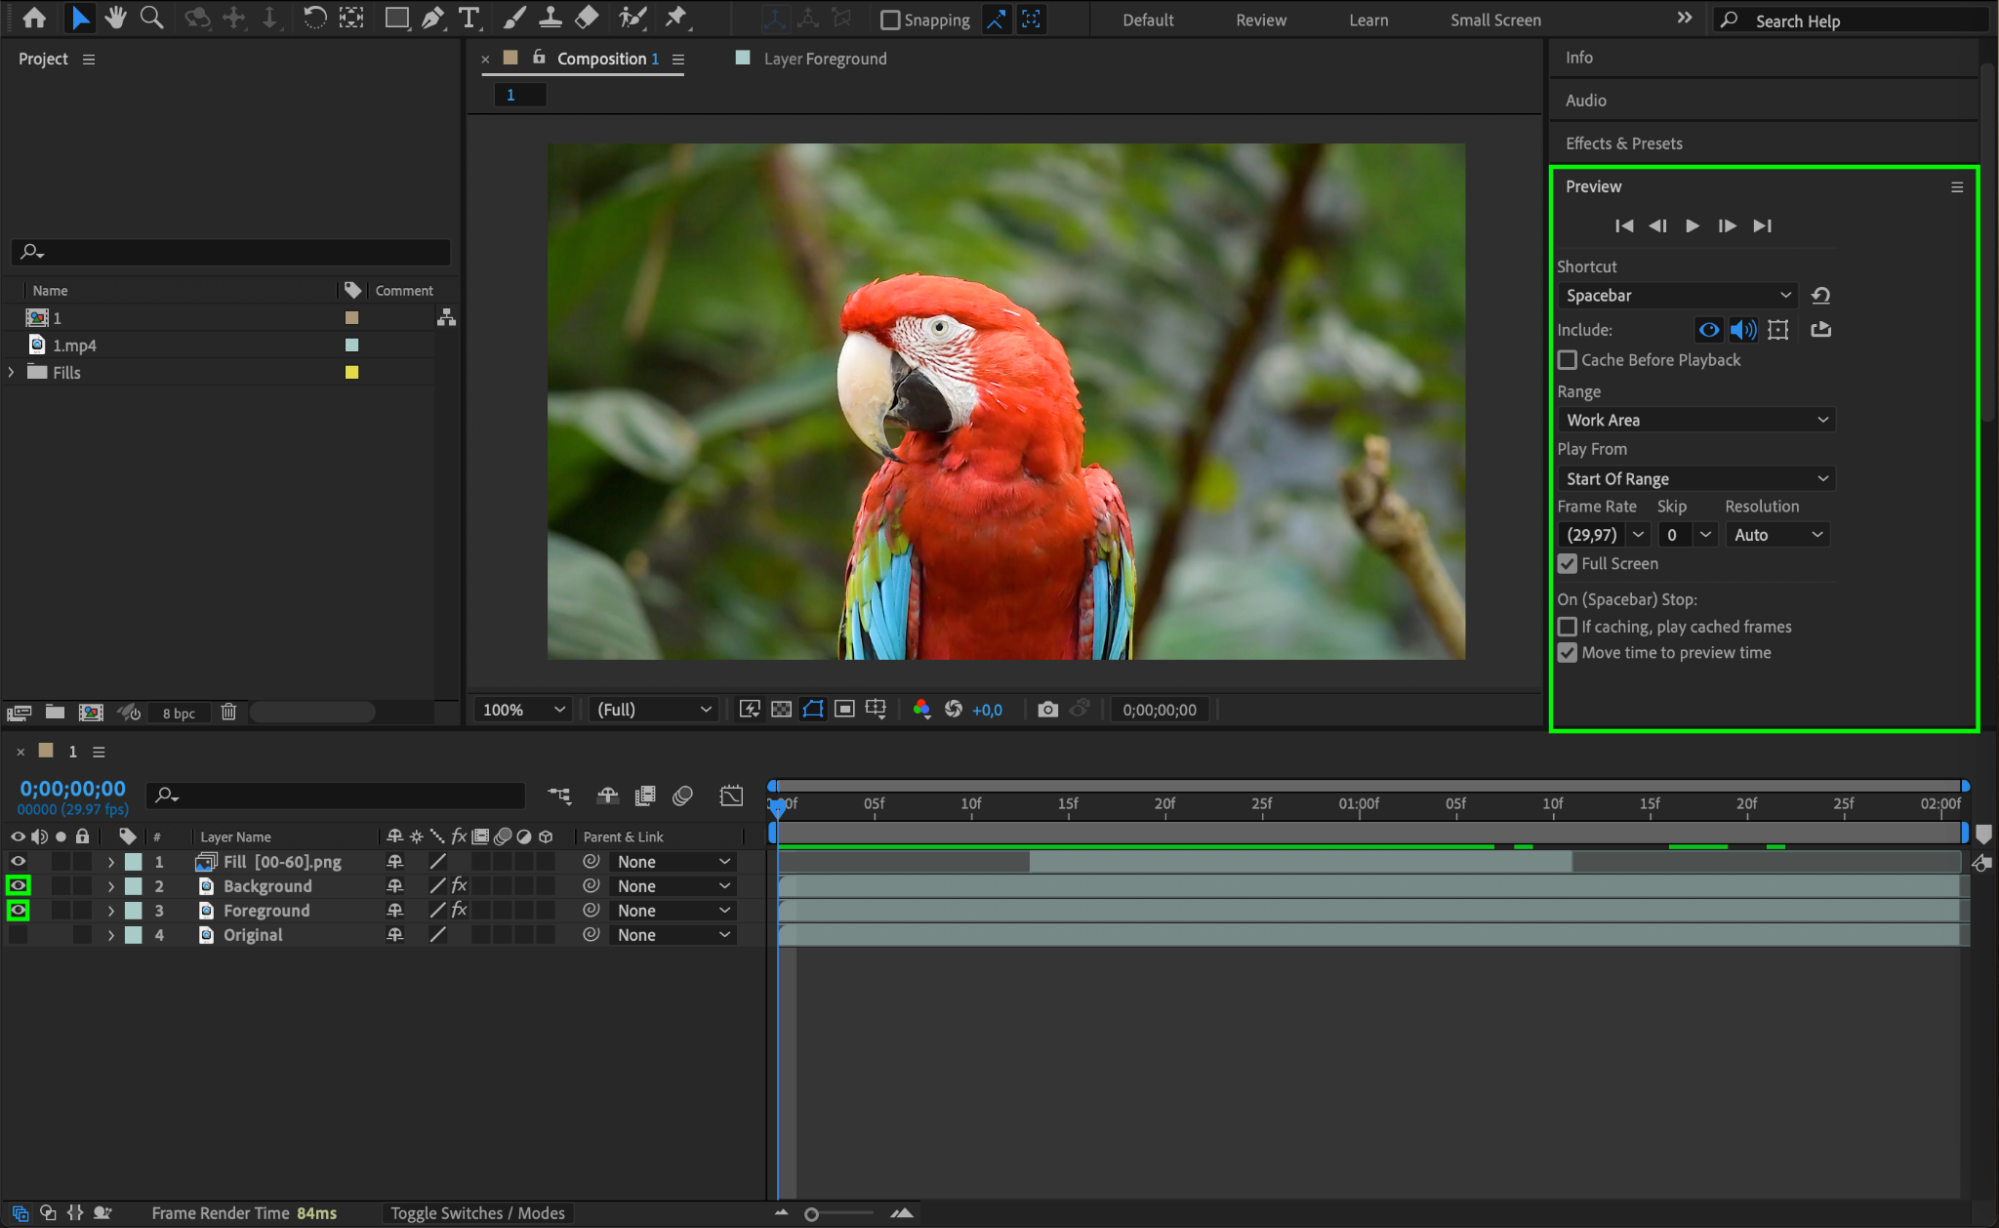
 Step 9: Adjust Foreground Layer and Preview the Effect
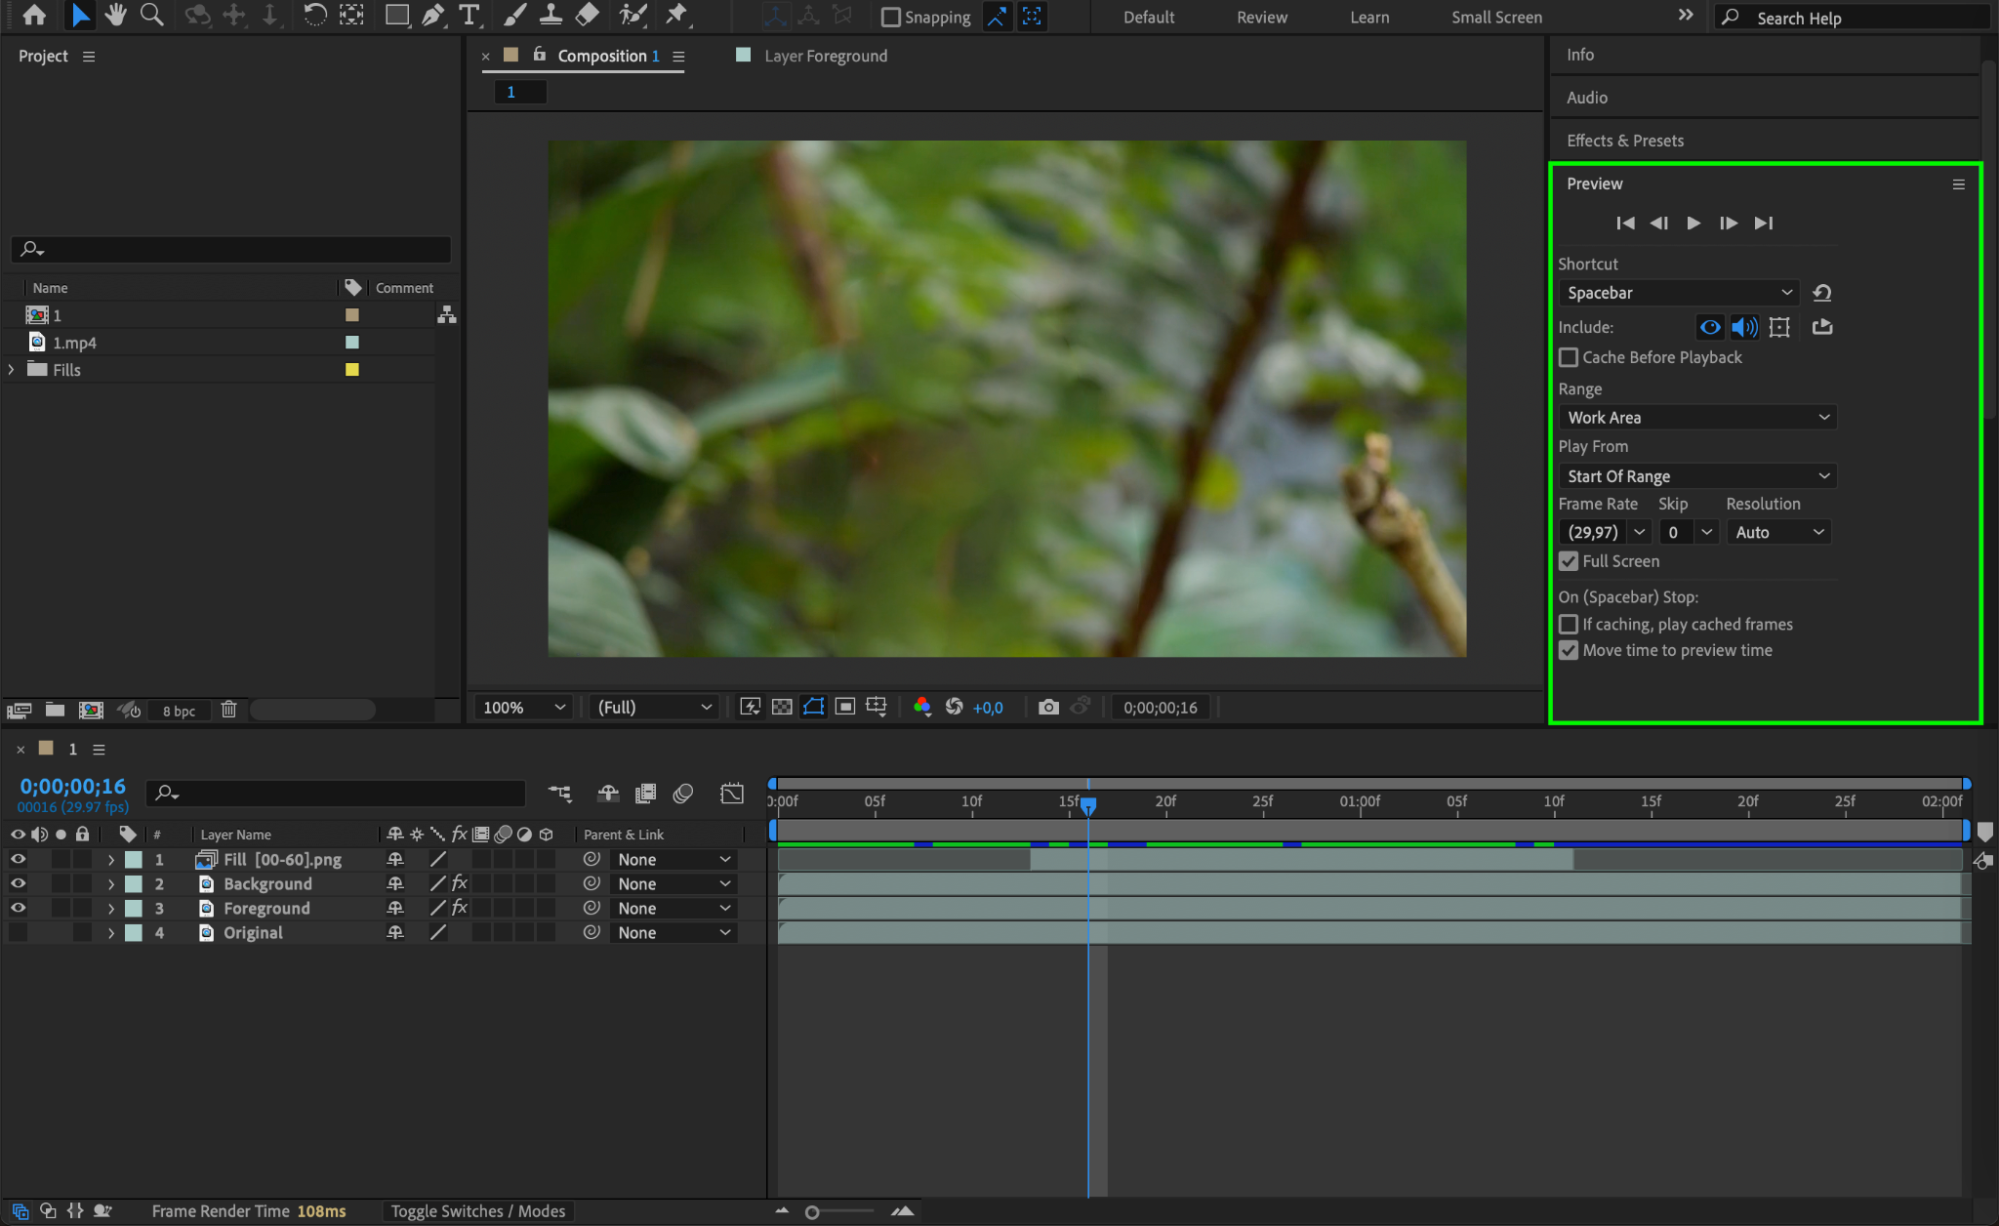
Make the Foreground layer visible again by enabling its eye icon. Adjust the Opacity or trim the layer’s duration to create a smooth transition, simulating the disappearance of the subject. Align the timing of the Fill Layer with the Foreground Layer to ensure a seamless effect. Afterward, preview the composition by pressing Spacebar to check if the disappearance looks natural. Refine any settings, such as mask paths or layer adjustments, if necessary.
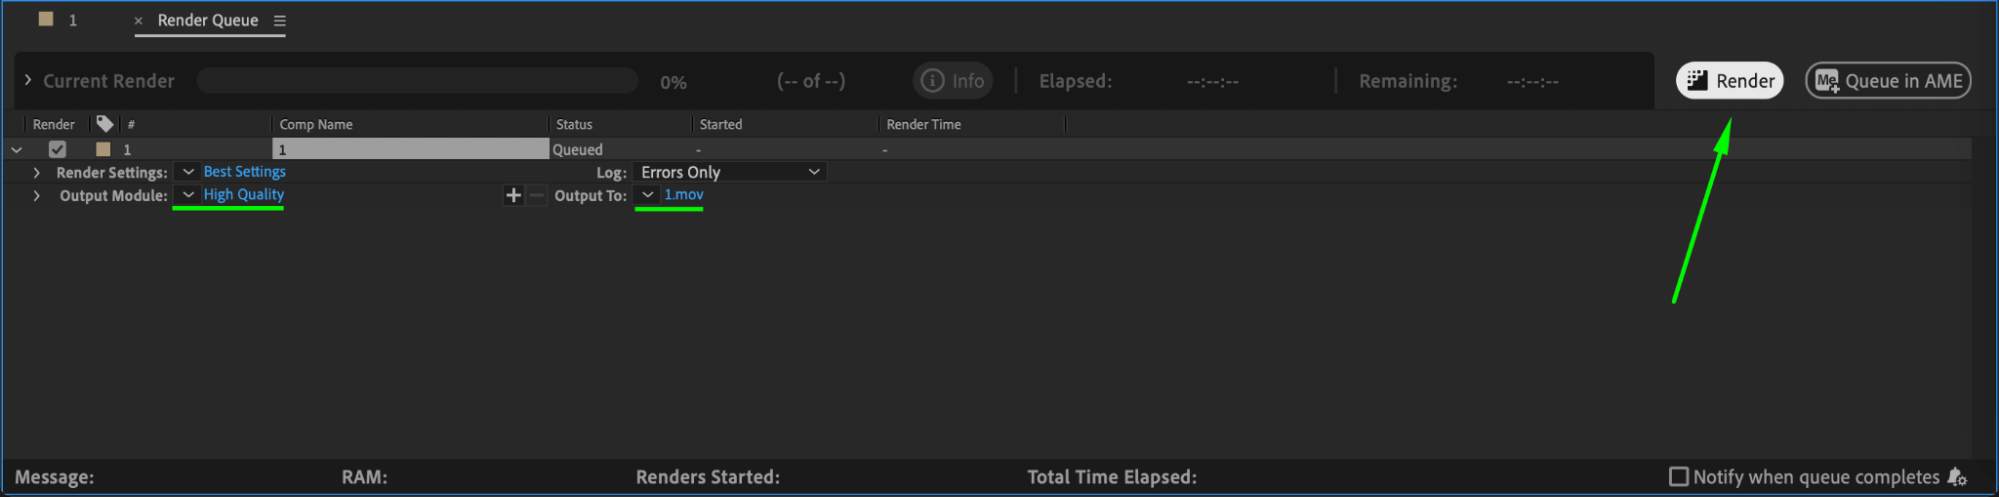
 Step 10: Render Your Final Composition
Once you’re satisfied with the result, render your project. Go to Composition > Add to Render Queue and select your desired output format and settings. Click Render to export your video, now with the invisible effect applied.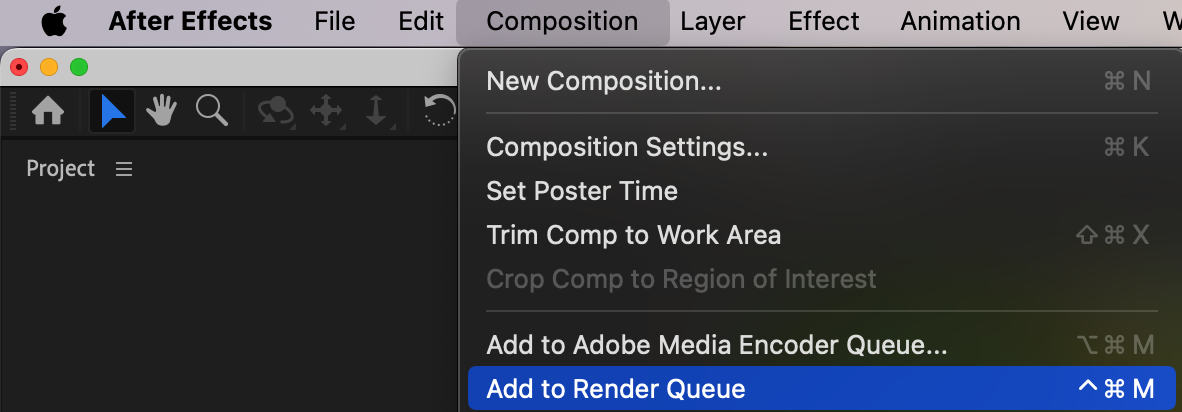
 Conclusion
Creating an invisible effect in After Effects is both fun and rewarding. By using tools like Roto Brush and Content-Aware Fill, you can achieve seamless results that look professional. Experiment with timing, masks, and transitions to make the effect even more convincing. With practice, this technique can add a creative and magical touch to your projects.
Our Bestsellers


