Creating Stunning Timelapse Videos in After Effects
Introduction: Transform Your Footage with After Effects Timelapse
Are you interested in making amazing timelapse videos that will captivate your audience? Well, look no further than Adobe After Effects! This powerful video editing software allows you to transform ordinary footage into stunning timelapses with just a few clicks. Whether you’re a seasoned video editor or a beginner looking to experiment with new techniques, After Effects has got you covered.
Get 10% off when you subscribe to our newsletter

In this step-by-step guide, we’ll walk you through the process of creating a timelapse in After Effects. Before we dive into the tutorial, it’s important that you have a clear idea of what you want to achieve with your timelapse. Are you looking to capture the movement of clouds, the bustle of a city, or the transformation of a landscape? Understanding your vision will help you make informed decisions throughout the editing process.
1. Import Video File:
Open After Effects and import the video file you want to turn into a timelapse. Click on “File” -> “Import” -> “File”, choose your video file, and click “Import”. 2. Create a New Composition:
Drag your video file from the “Project” panel to the “Timeline” panel. This will create a new composition corresponding to your video.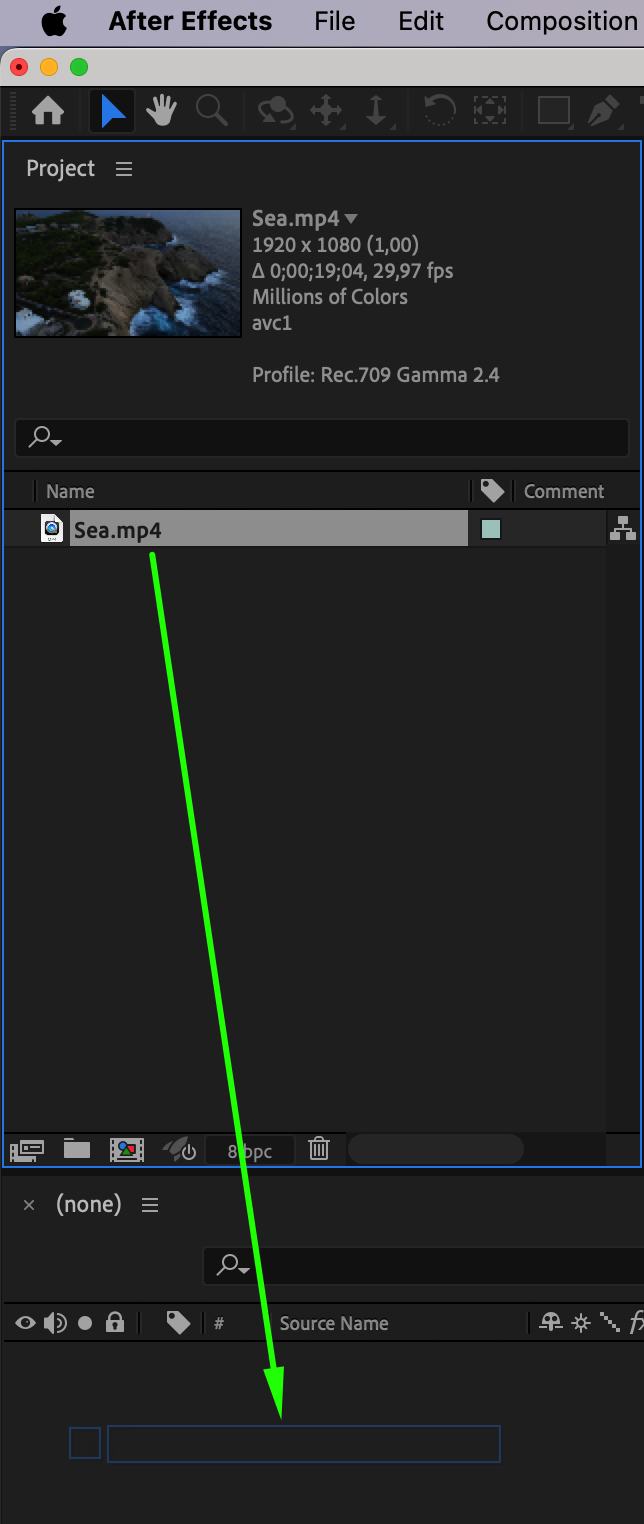 3. Speed Up the Video:
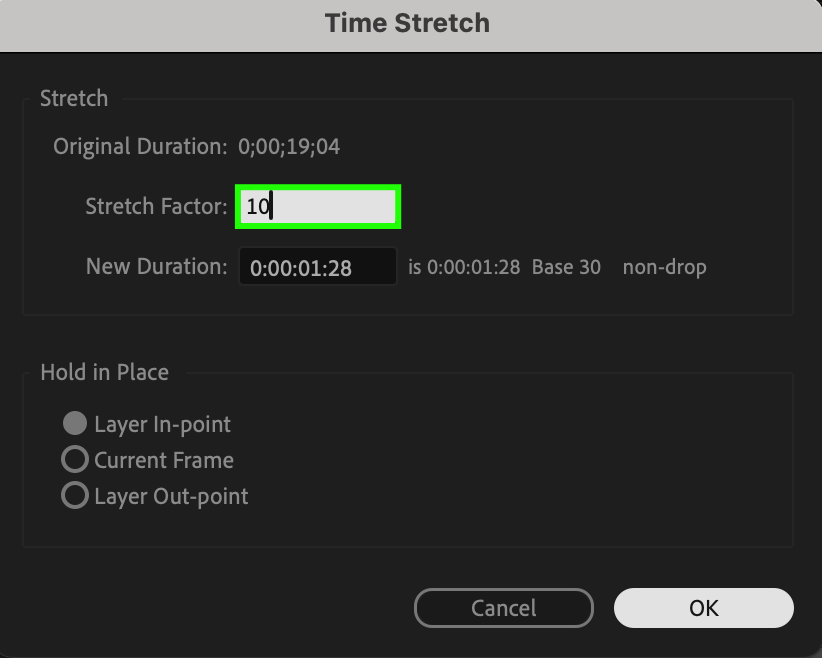
To create the timelapse effect, you need to speed up the playback of the video. Select your video file in the composition, then right-click and choose “Time” -> “Time Stretch”. Set the desired percentage of time acceleration. For example, to speed up by 10 times, set the value to “10%”.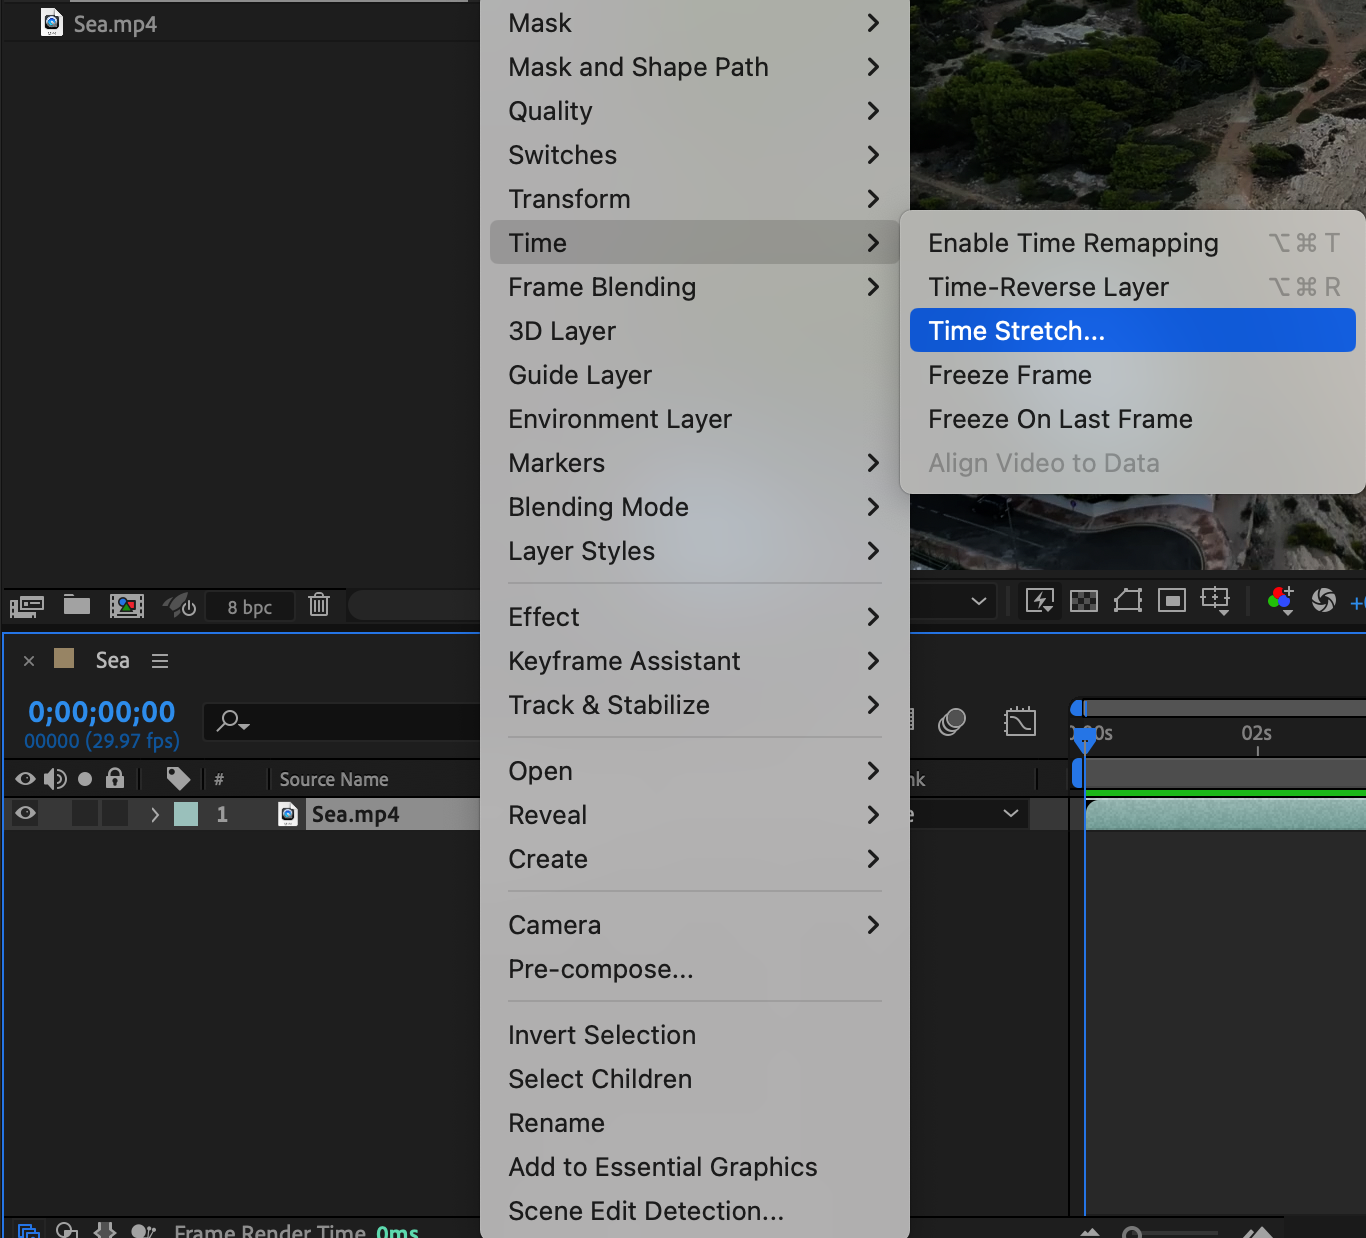
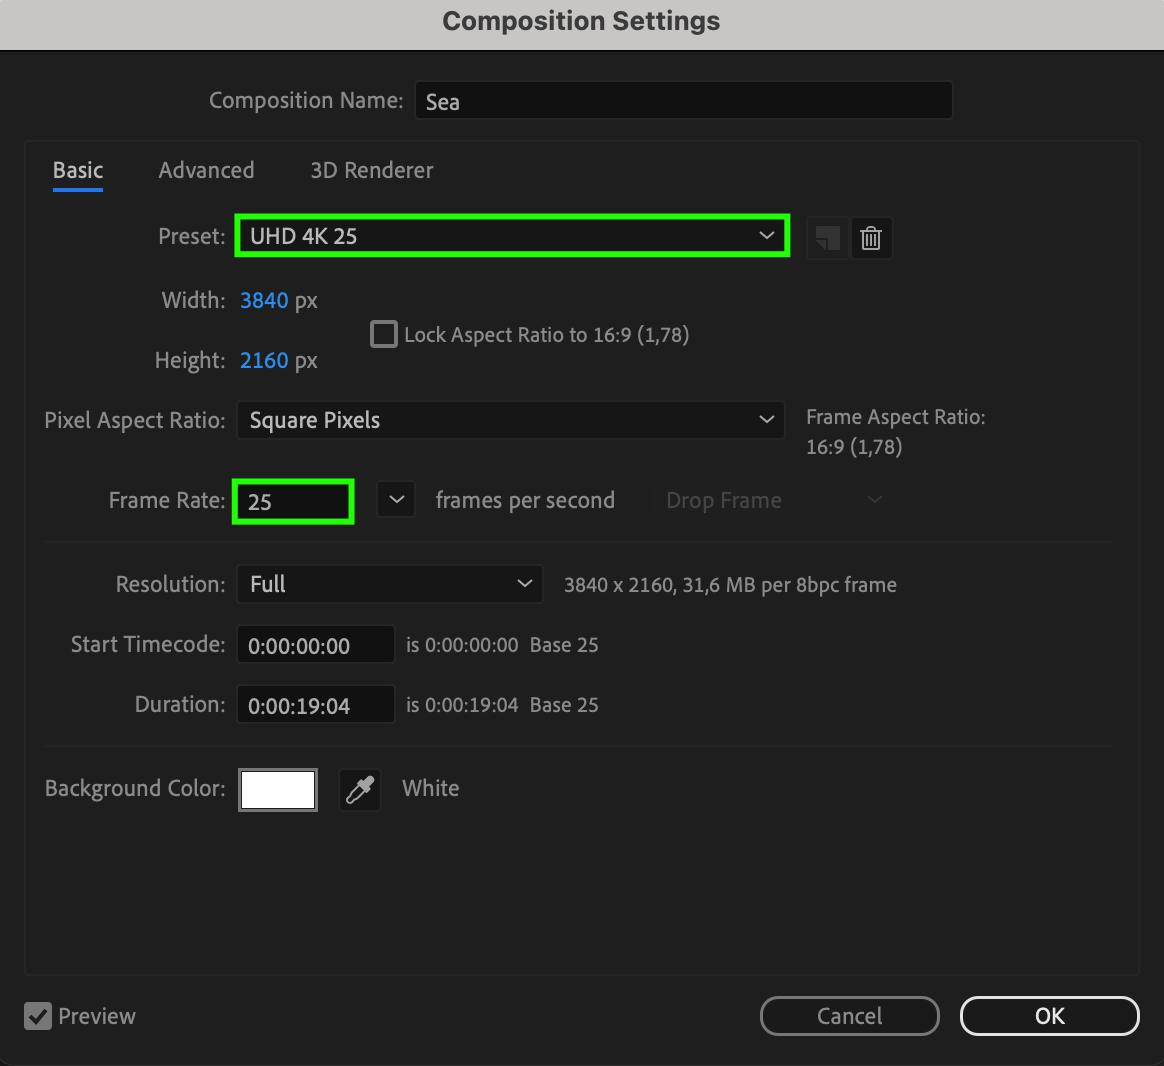
 4. Adjust Composition Settings:
Check the settings of your composition to ensure they match the required parameters. Typically, this includes HD (1920×1080) or 4K (3840×2160) resolution and a standard frame rate (24, 25, or 30 frames per second).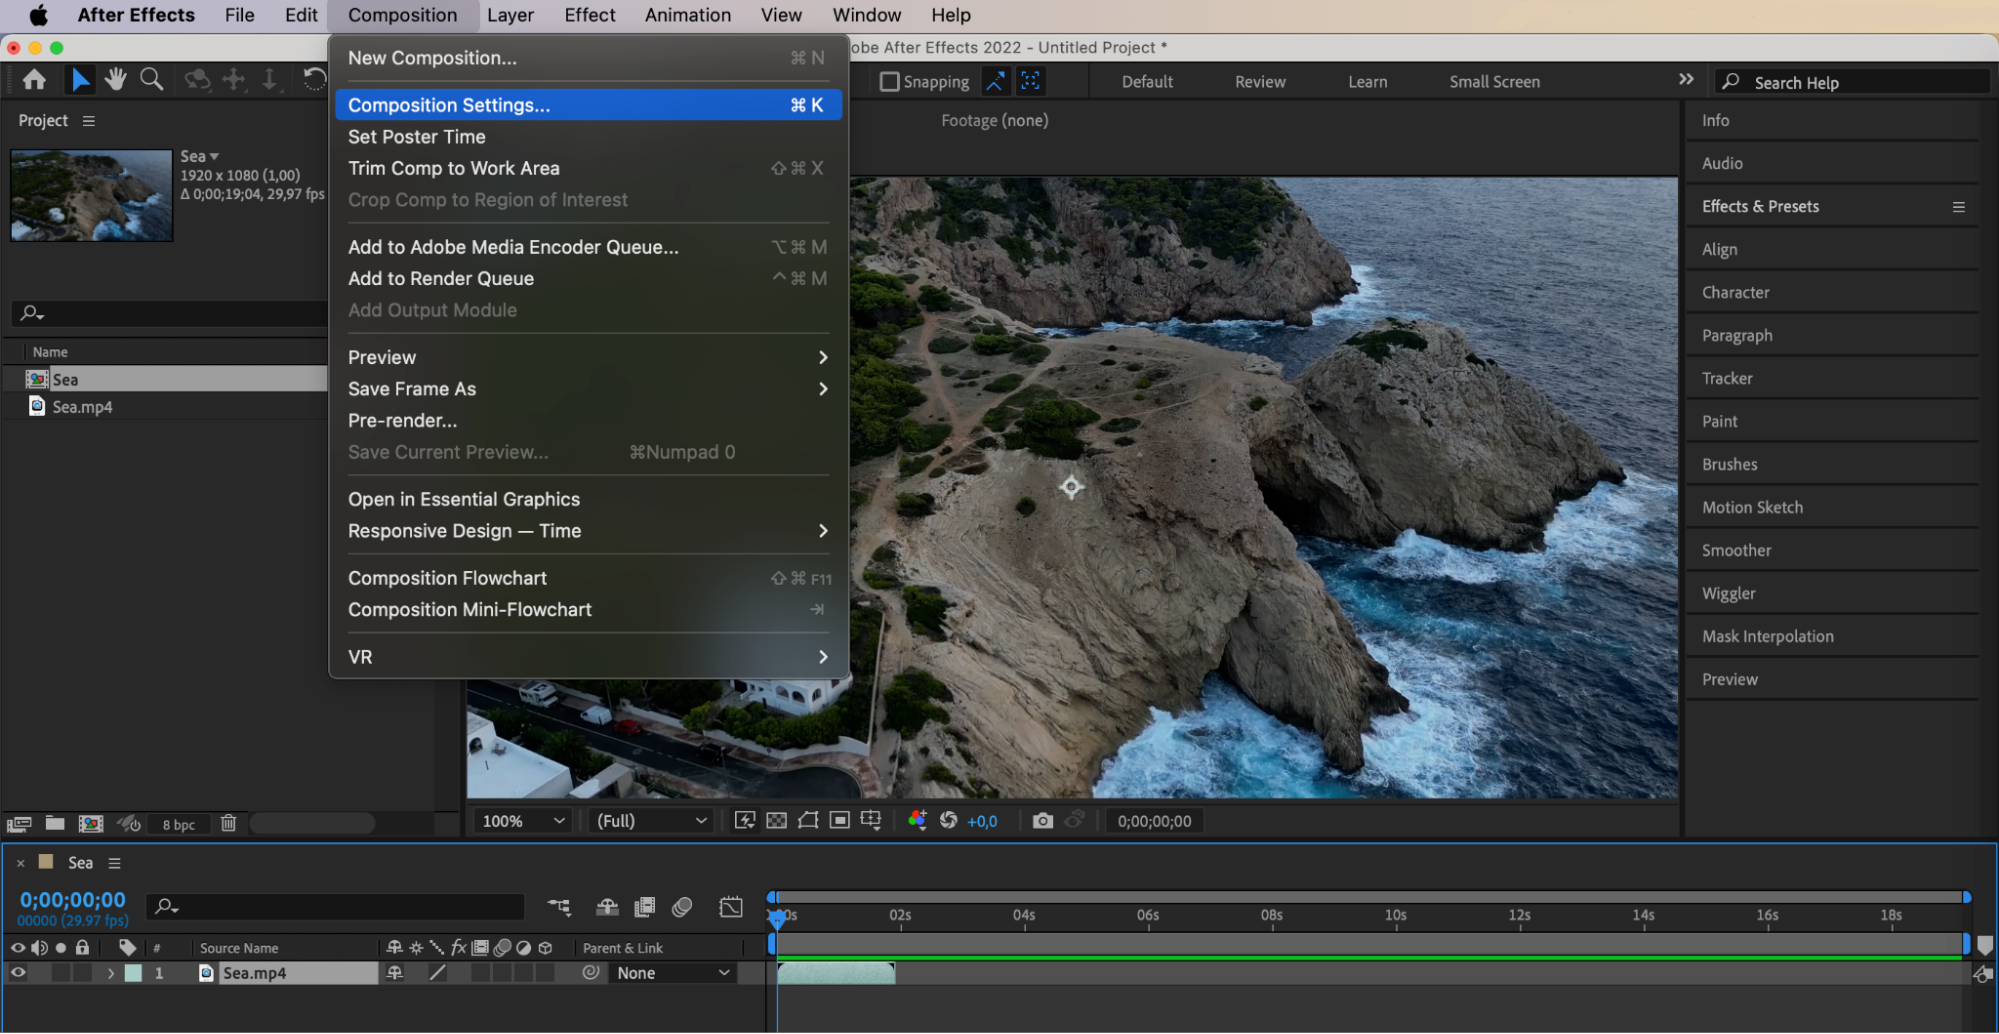
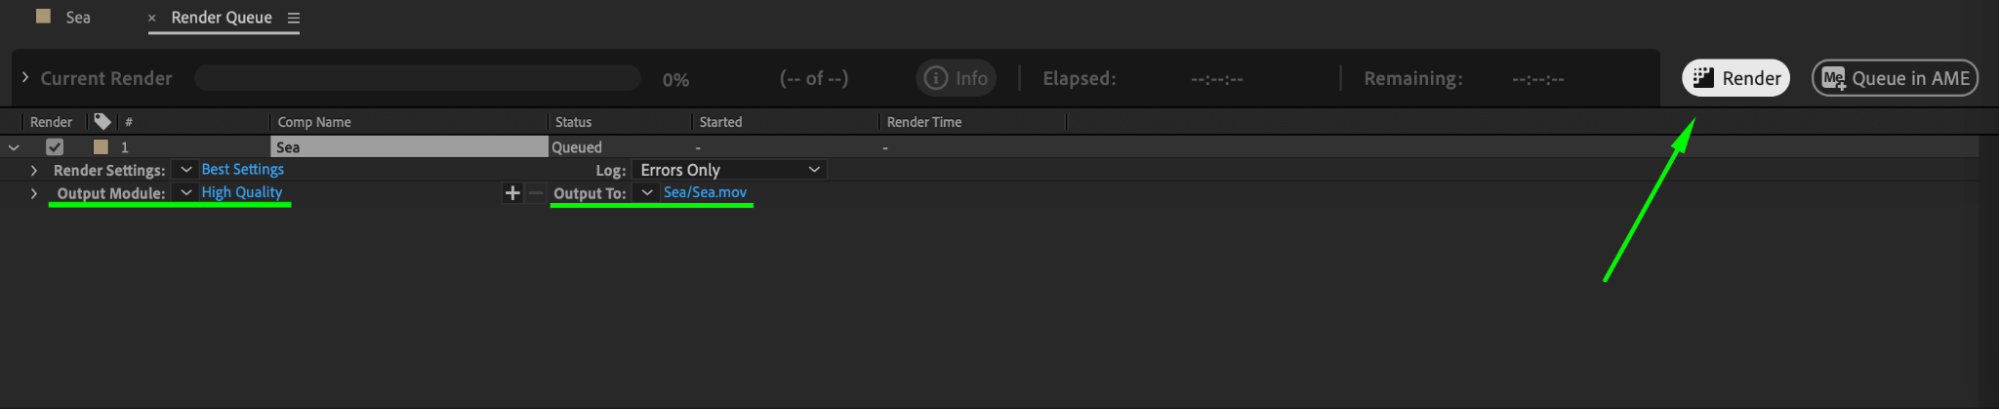
 5. Export the Video:
Once you’ve finished setting up your timelapse, click “Composition” -> “Add to Render Queue”. In the popup window, adjust the export settings such as file format, save location, and codec settings. Then click “Render” to create your timelapse.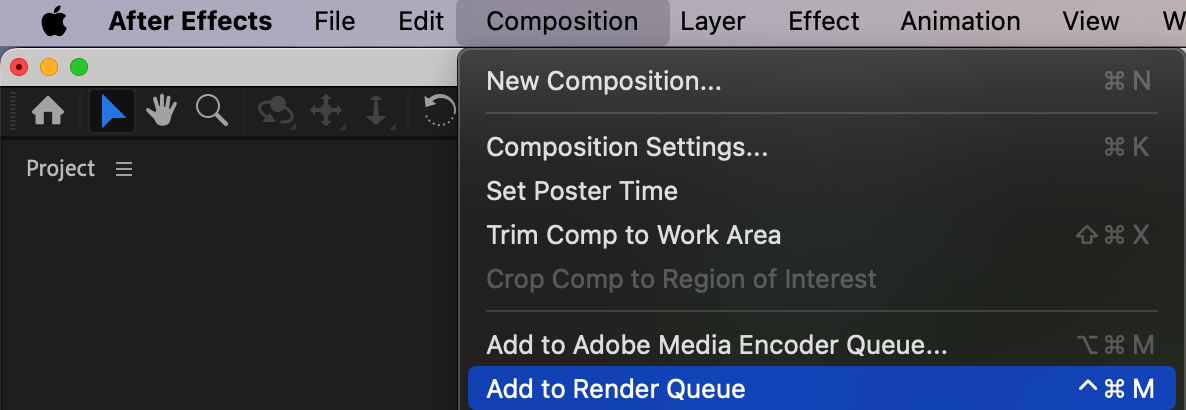
Conclusion
Creating a timelapse video in After Effects is a straightforward process that can yield impressive results with a bit of practice and experimentation. By following this guide, you can easily transform your ordinary footage into captivating timelapses that highlight the passage of time in a dynamic way. Remember to plan your shots carefully and adjust the settings to match your vision. With After Effects, the possibilities are endless, so don’t hesitate to explore and push your creative boundaries. Happy editing!
Our Bestsellers


