Step-by-Step Guide to Creating Title Cards in After Effects
Introduction to Title Card Creation in After Effects
Creating title cards in Adobe After Effects is an essential part of video production. These cards not only provide important information but also captivate the audience and set the tone for your content. In this guide, we will walk you through the process of making engaging and visually appealing title cards in After Effects.
Step 1: Create a New Composition
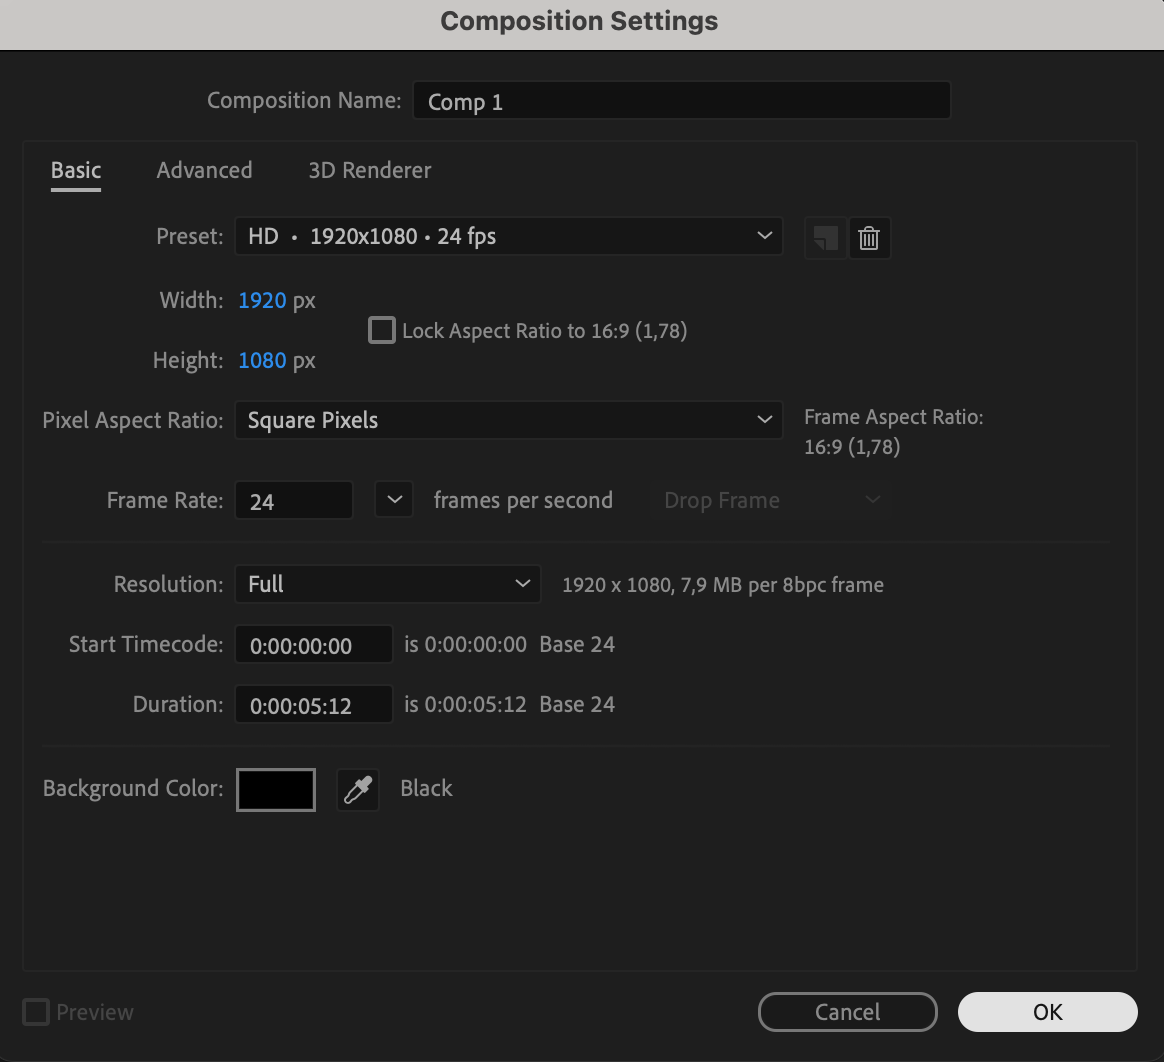
To start, open After Effects and create a new composition by selecting Composition > New Composition. Set the desired dimensions, frame rate, and duration for your title card. The composition settings should align with the overall resolution and format of your project. A well-set composition ensures that your title card will display correctly across all platforms.
 Step 2: Import and Arrange Your Assets
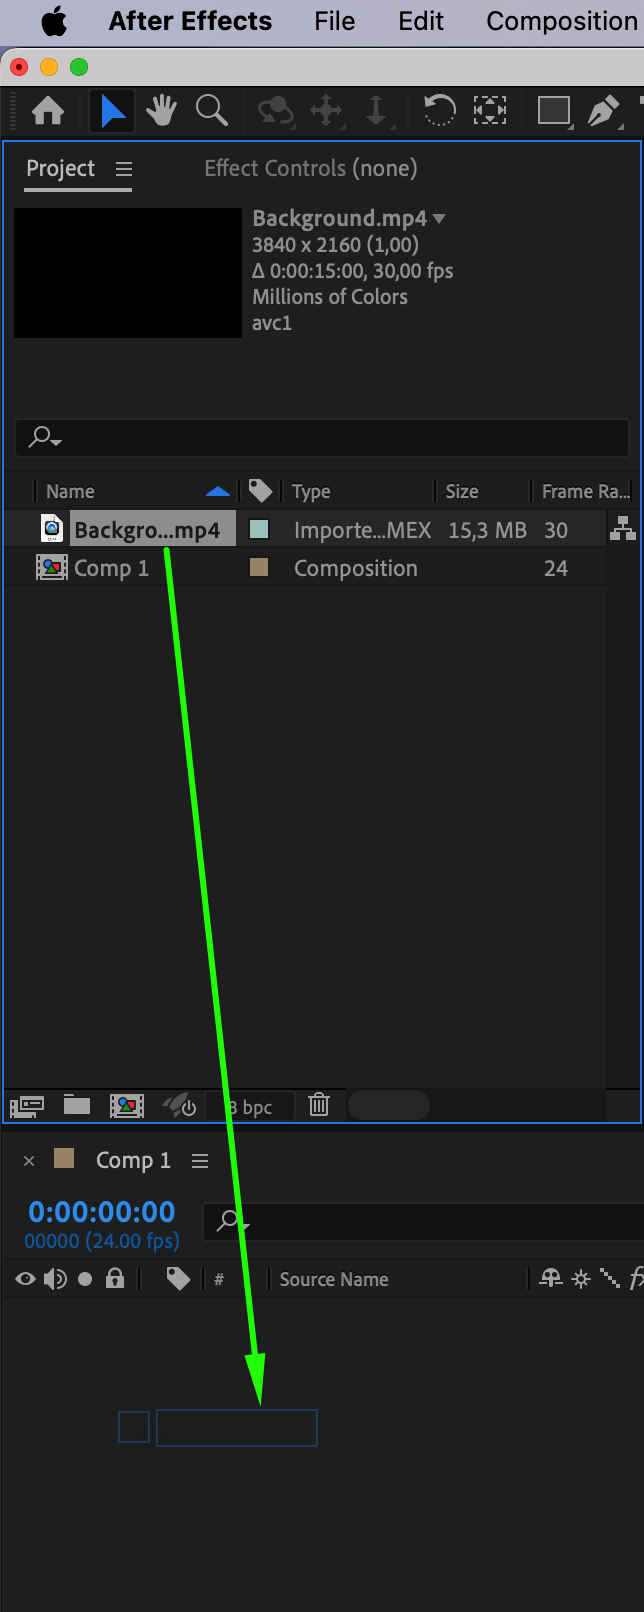
Next, import the assets you’ll need, such as background images or textures, by going to File > Import > File. Once imported, drag these assets onto the Timeline panel. Position and scale them as necessary to fit your composition. Properly arranging your background and other elements creates the foundation for your title card, giving it a polished and professional appearance.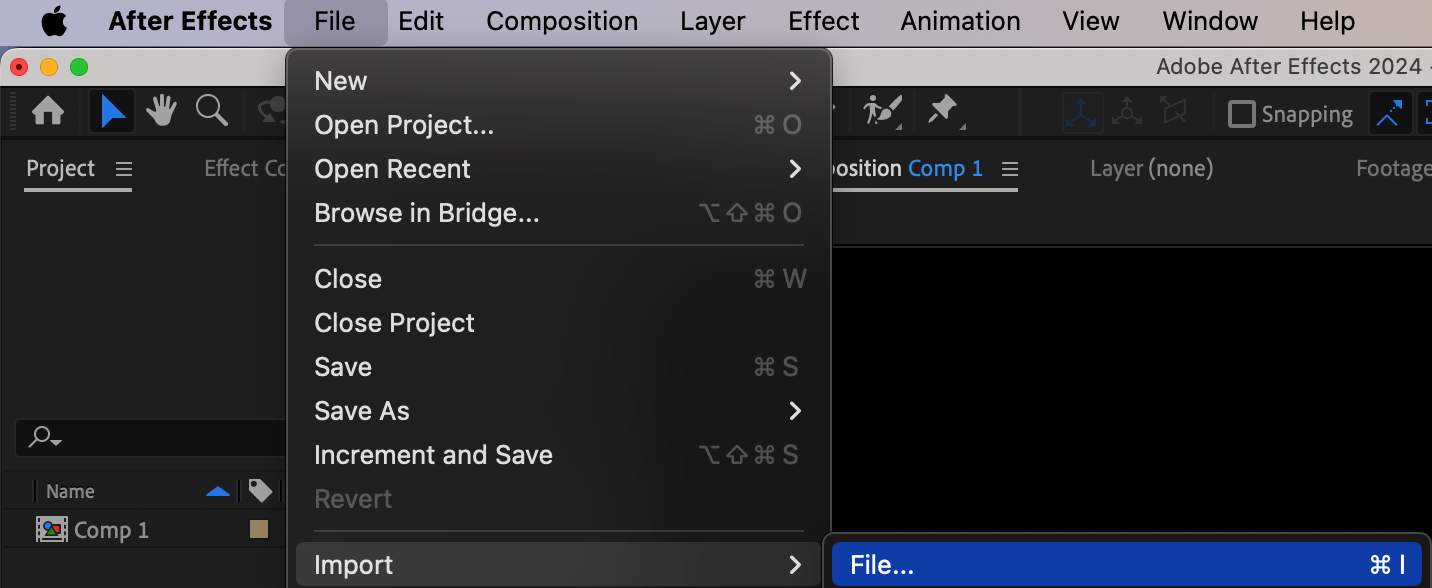
 Step 3: Design Your Text Using the Type Tool
Now it’s time to add the text to your title card. Select the Type Tool (Ctrl/Cmd + T) and click anywhere in the composition to start typing. Choose the appropriate typography that matches the tone and style of your video. Experiment with different fonts, sizes, and colors until you find the perfect combination. Keep in mind that simplicity and readability are key, especially if your text needs to be easily understood at a glance.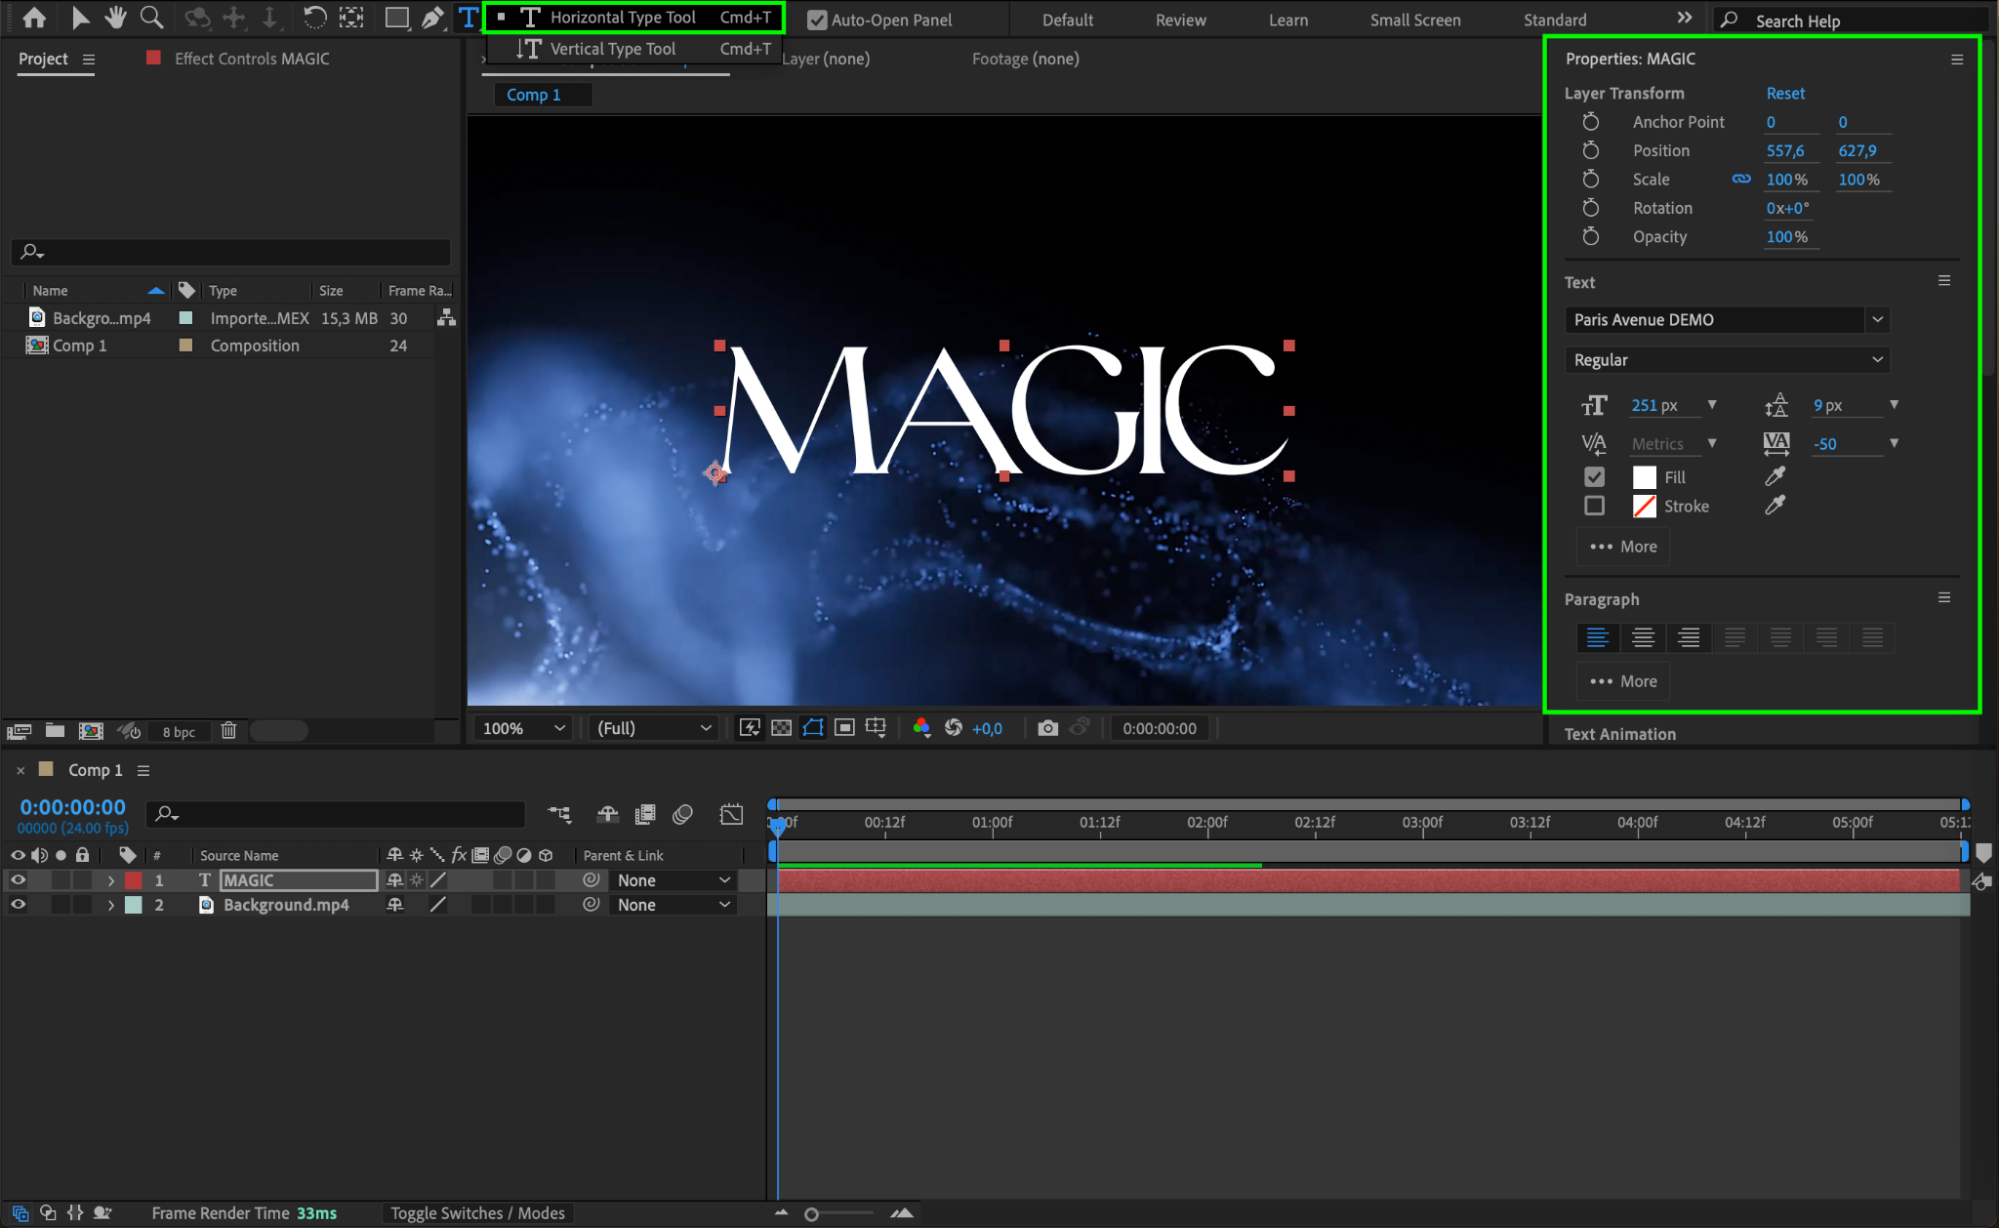 Step 4: Enhance Your Title Card with Graphics and Effects
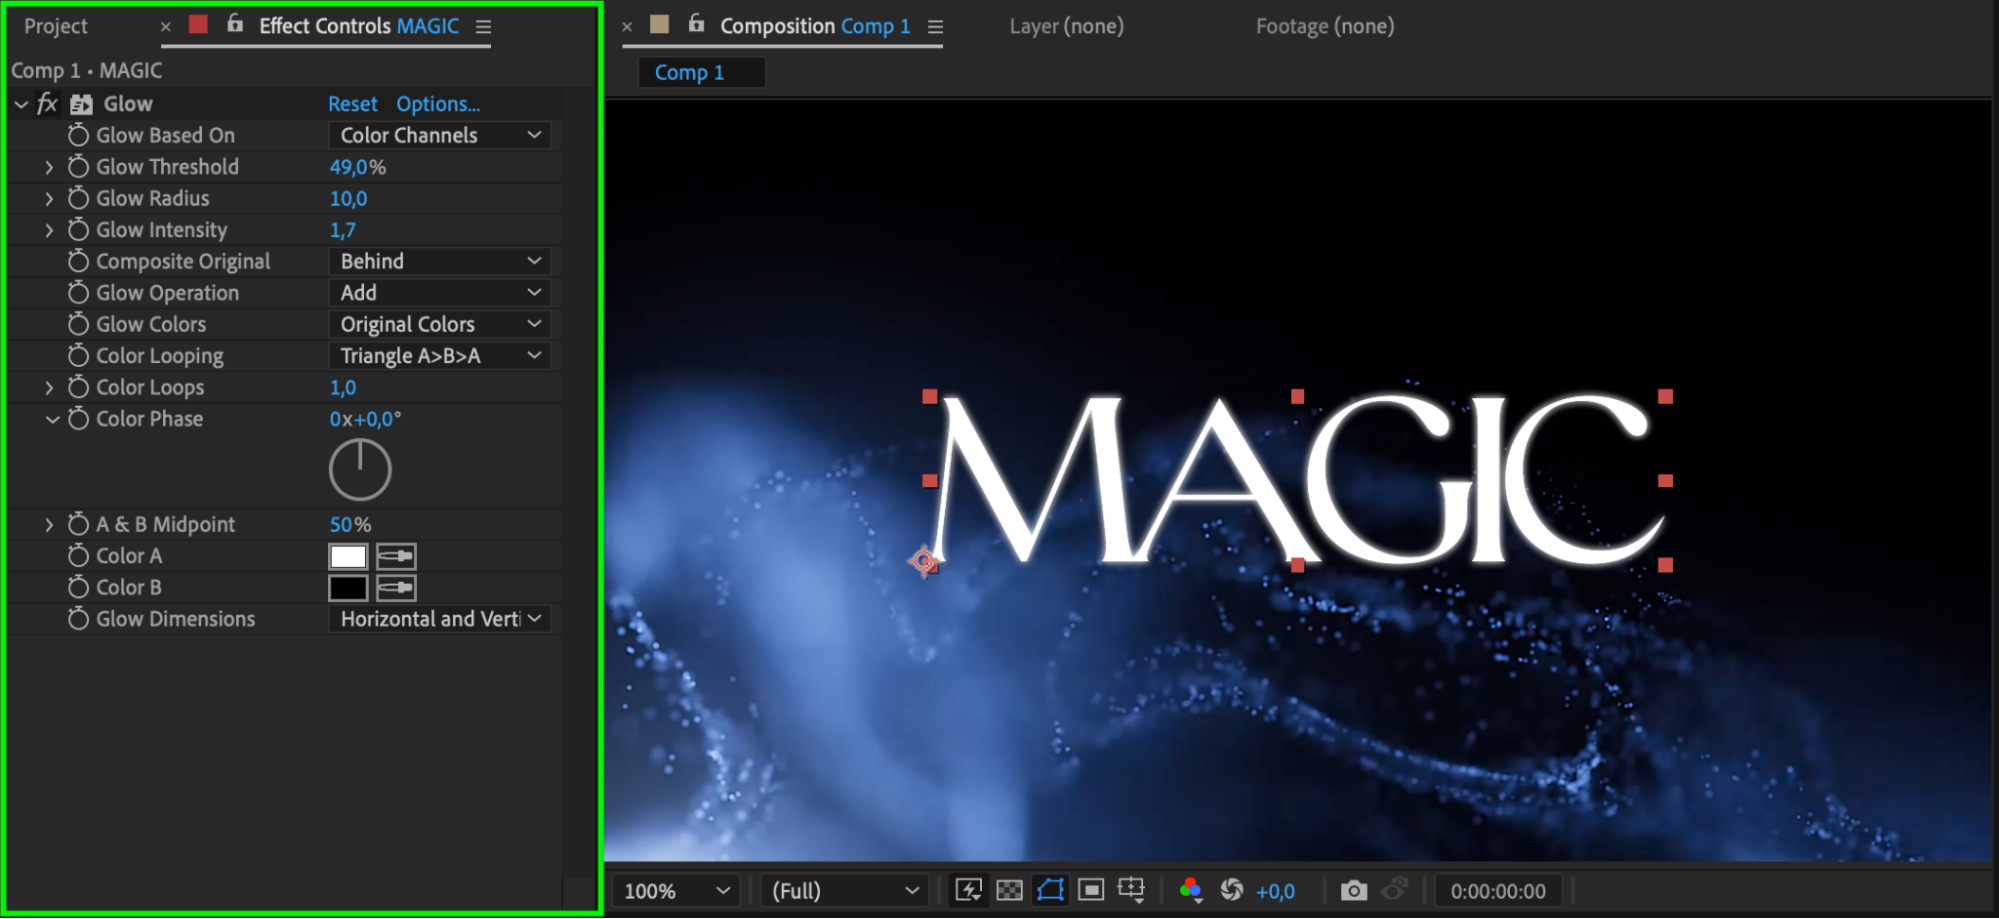
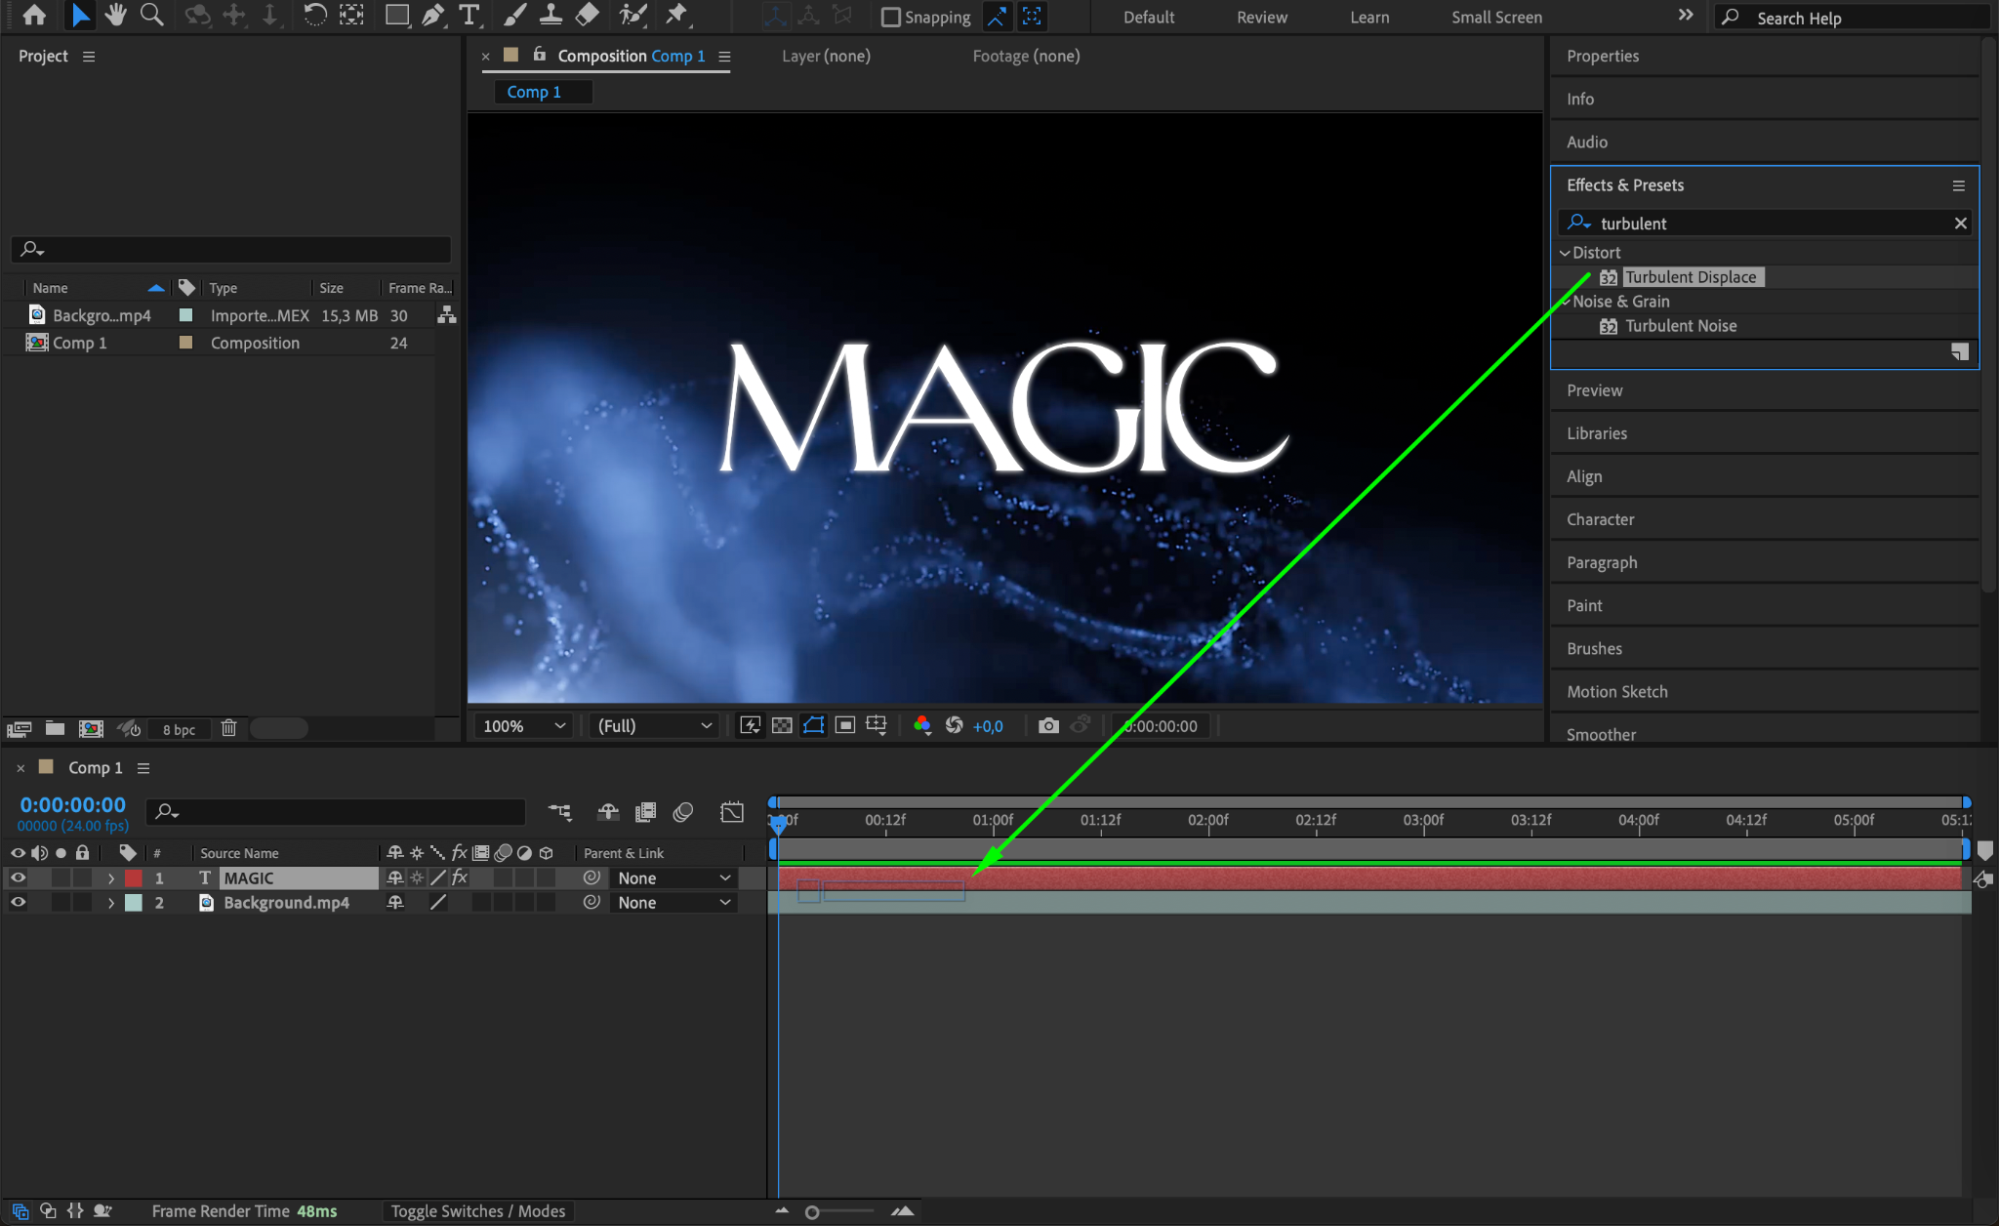
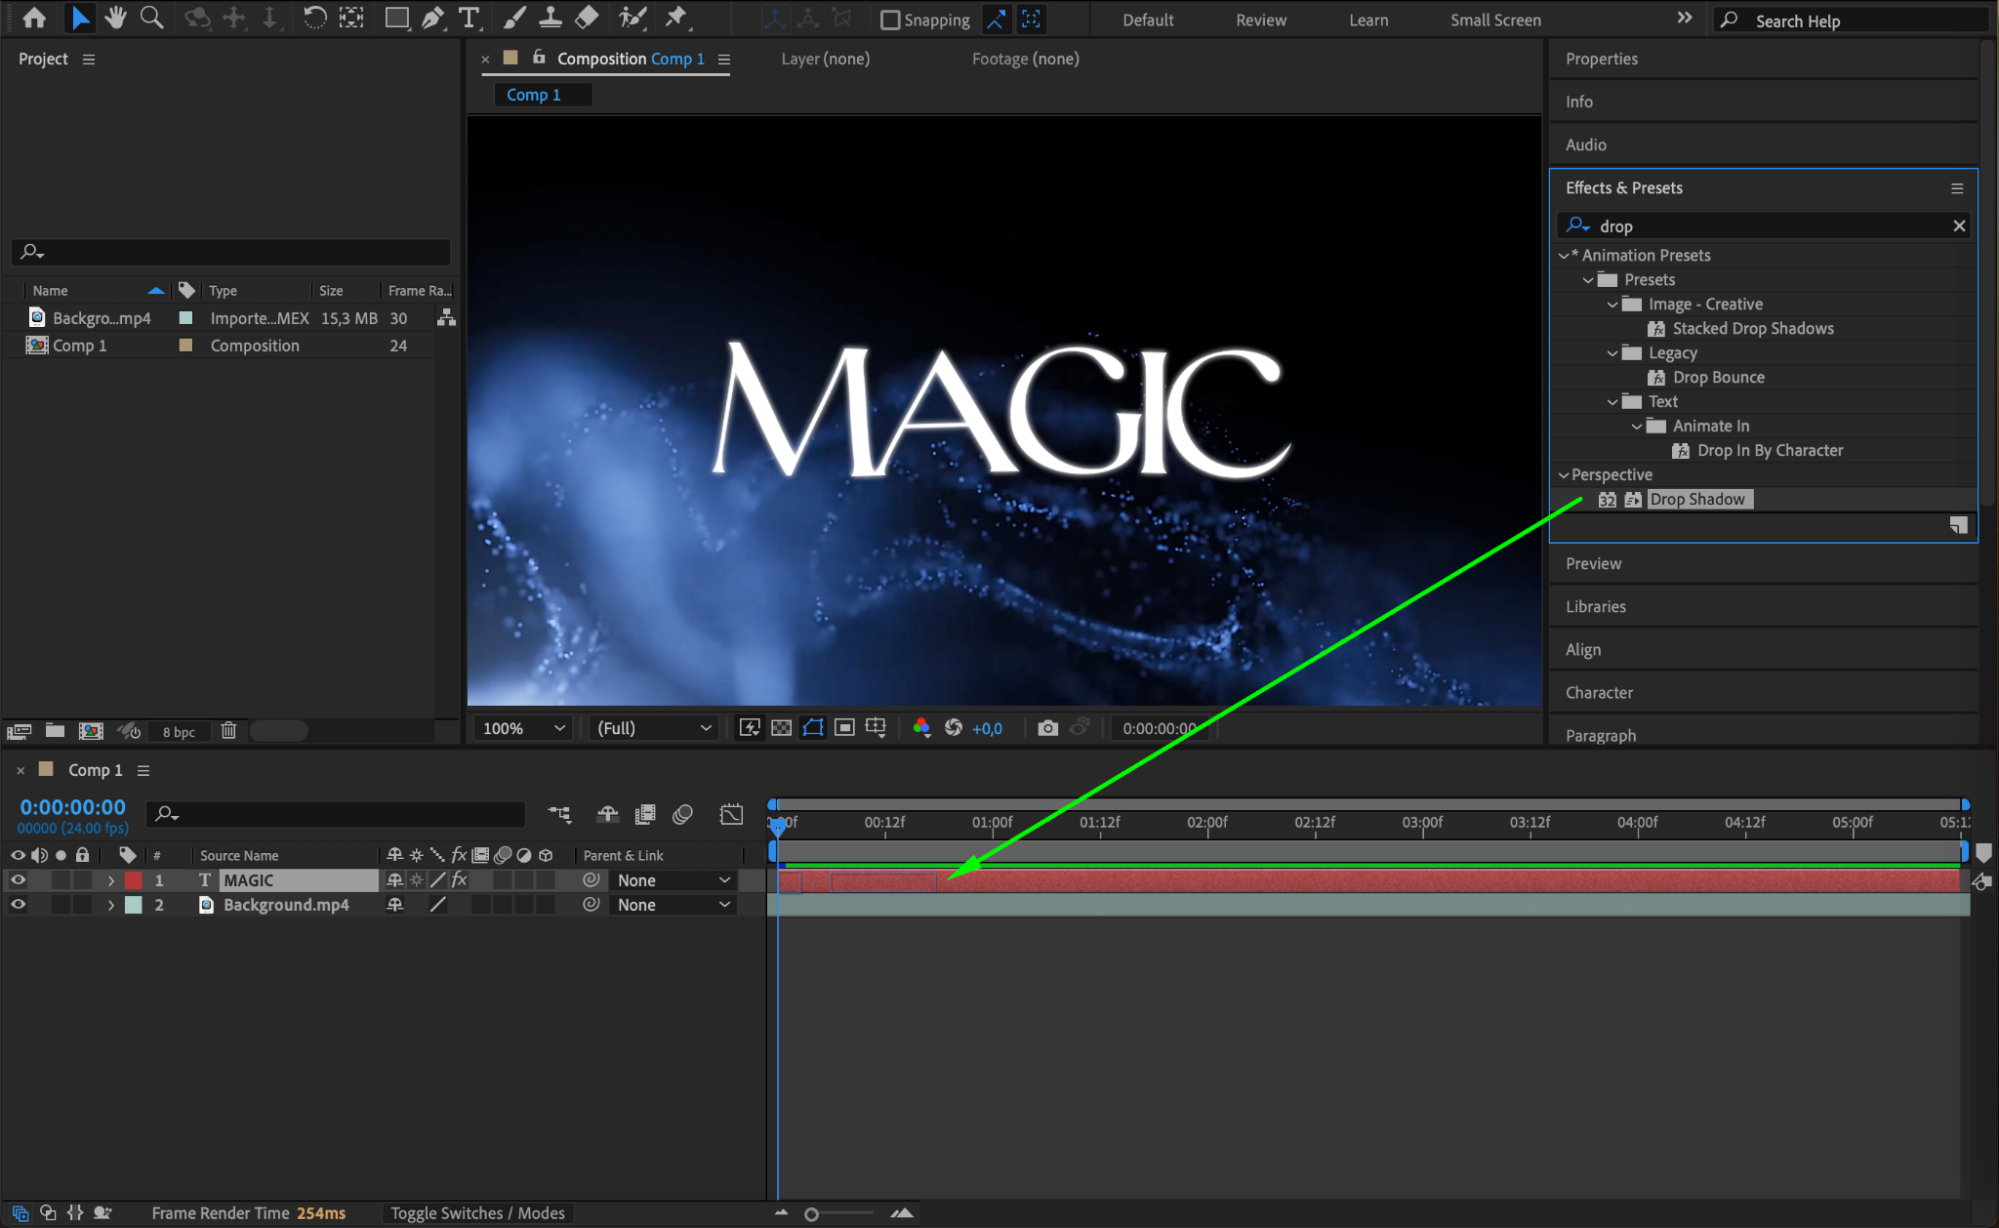
To further elevate your title card, you can add shapes, graphics, or visual effects. Use the Effects & Presets panel to explore options like shape layers, masks, gradients, and glow effects. These elements can add depth and visual interest to your title card. 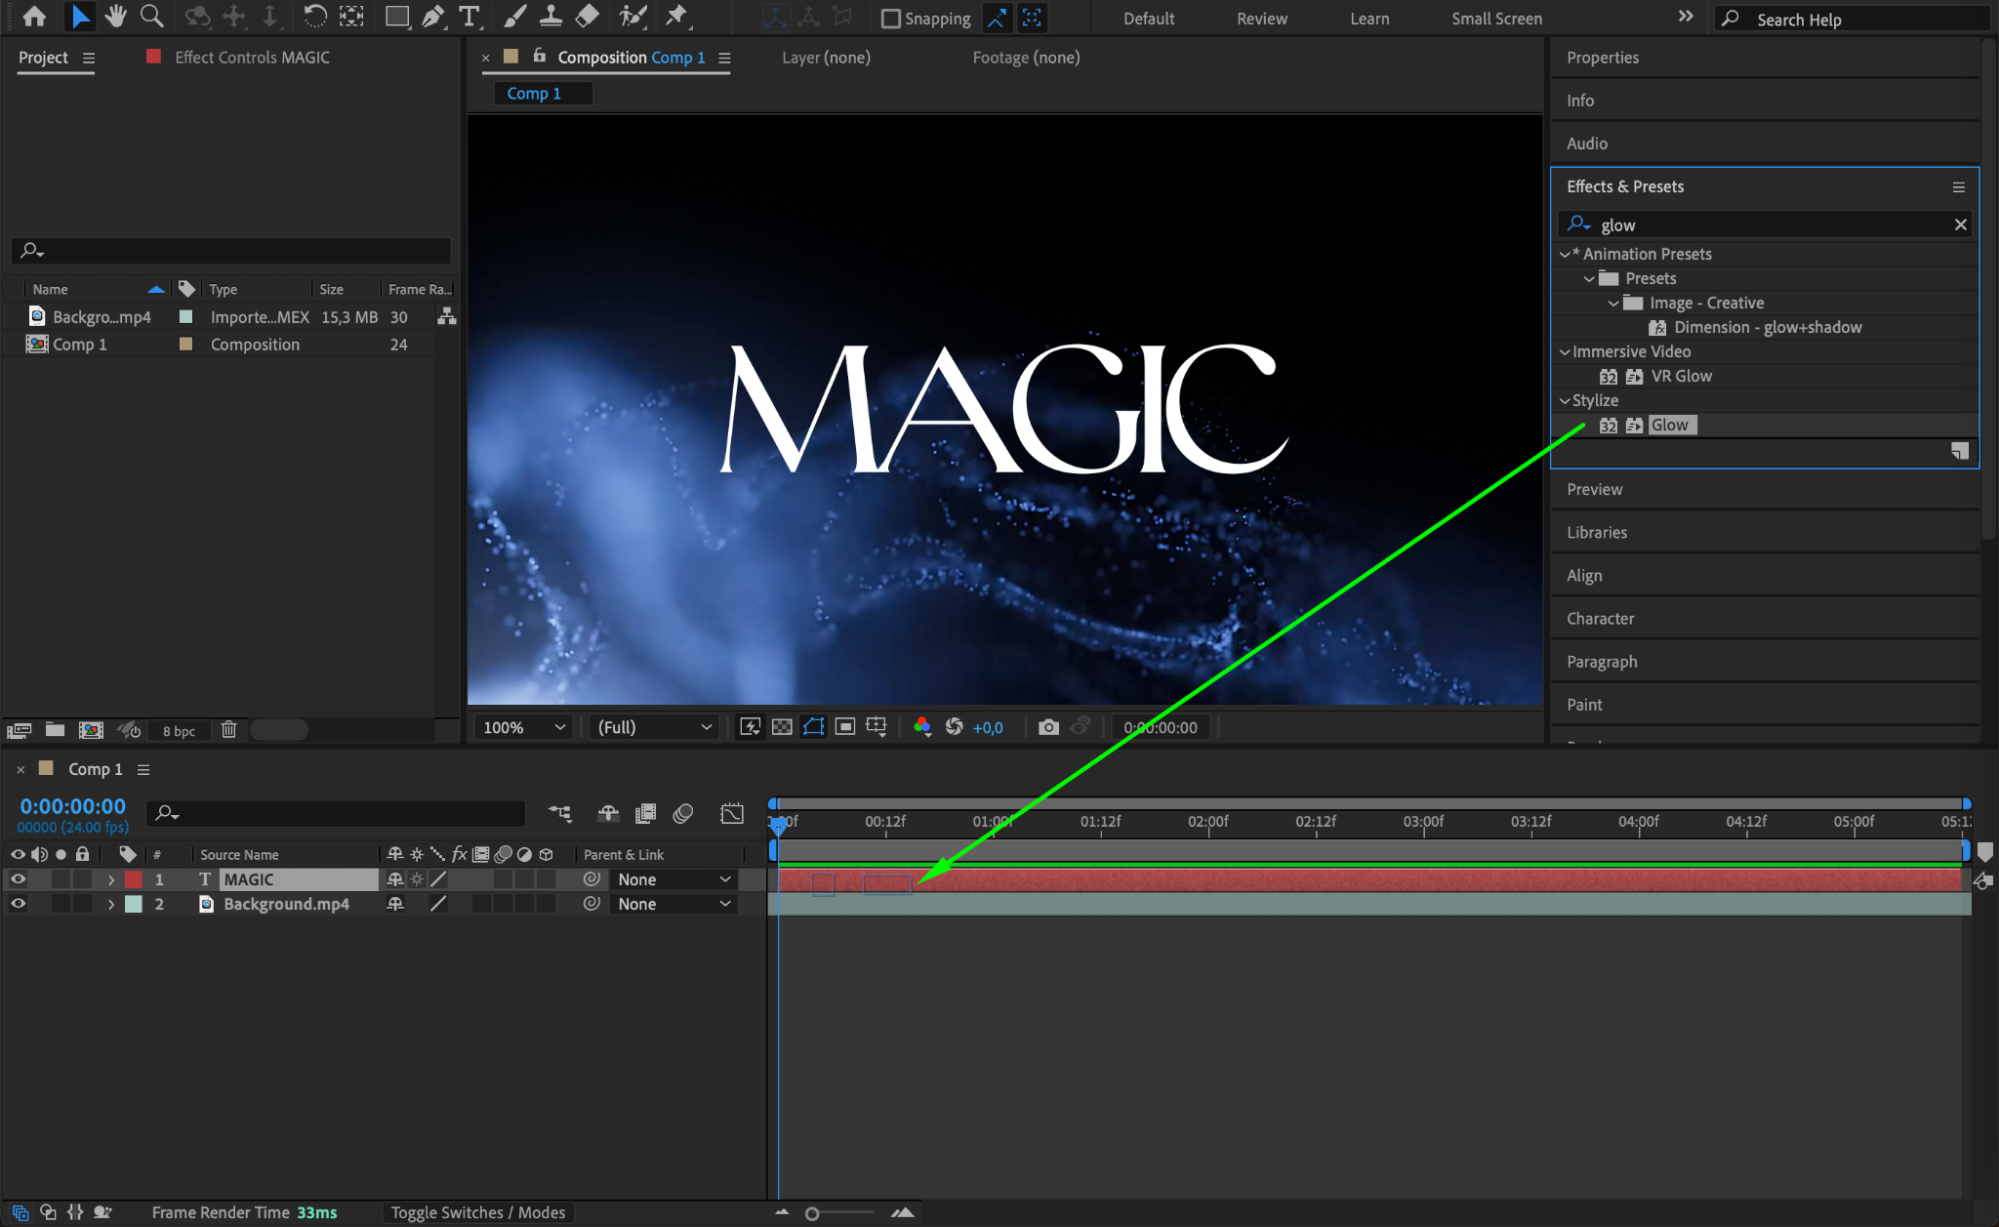

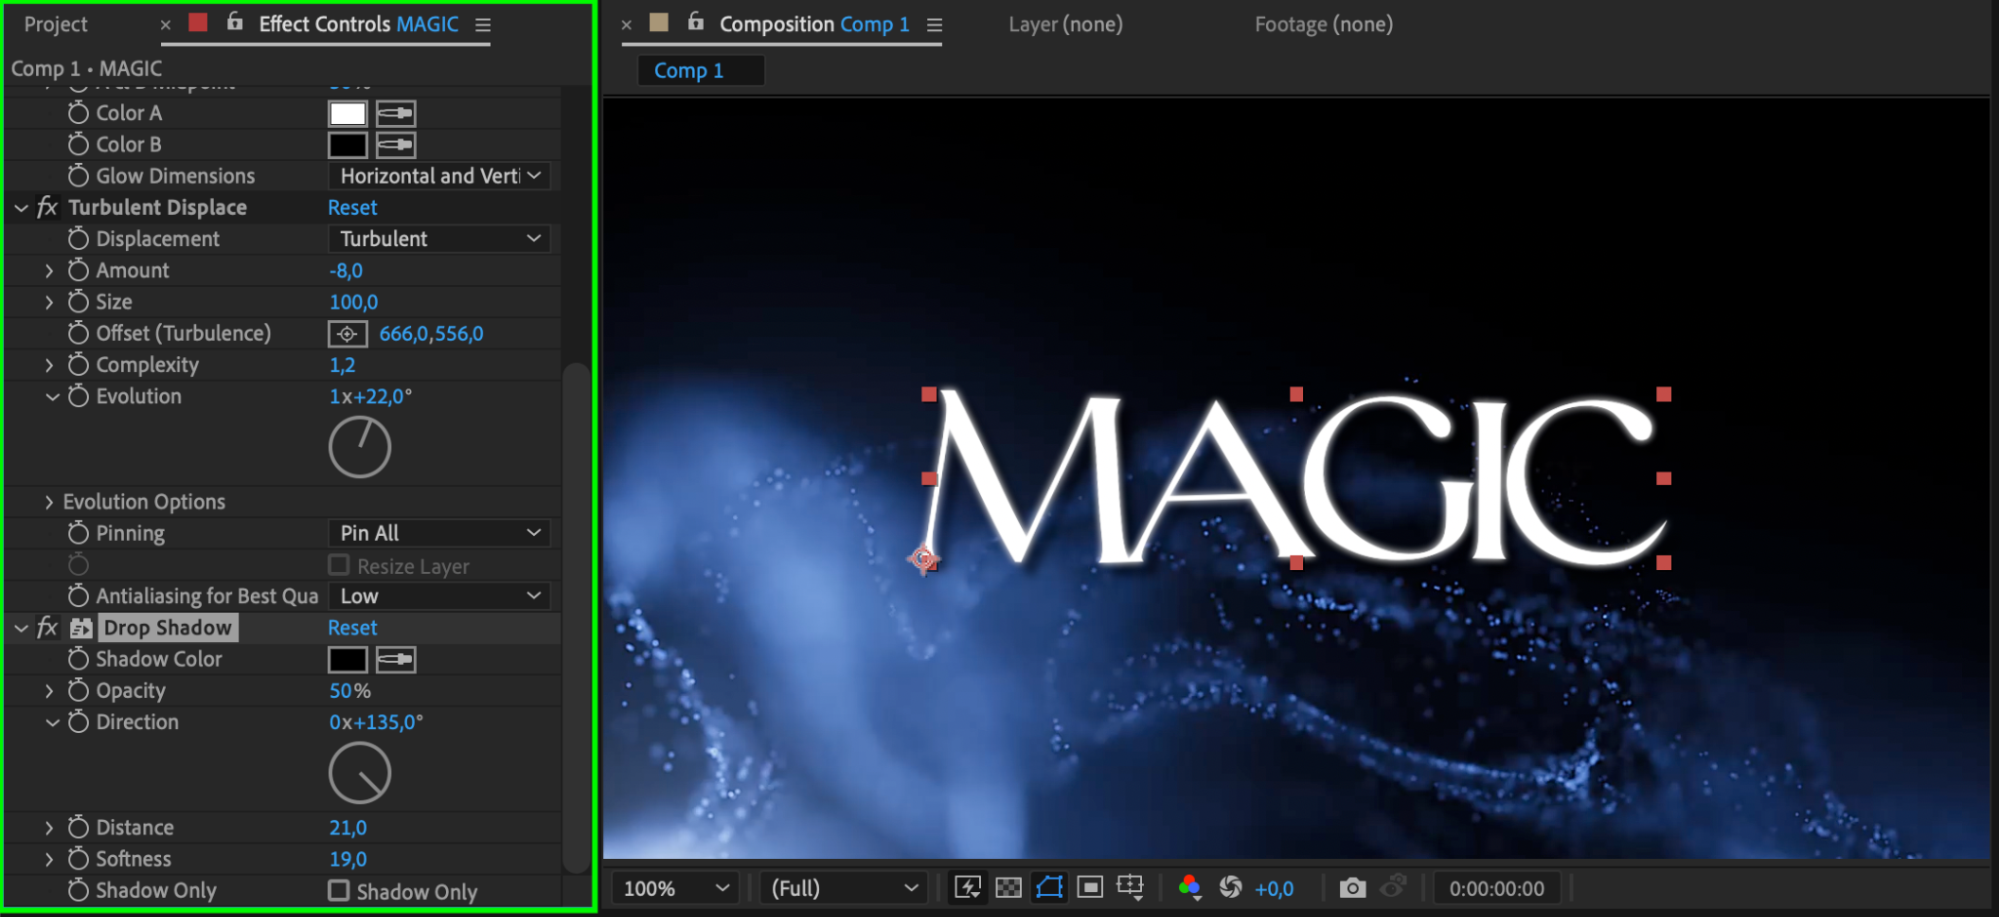 Step 5: Animate the Text for Dynamic Visuals
Get 10% off when you subscribe to our newsletter

Animating the text can make your title card more dynamic and engaging. After Effects offers a variety of text animation presets, which you can find under Effects & Presets > Animation Presets > Presets > Text > Animate In/Out. You can also manually animate the text by setting keyframes for properties like position, scale, rotation, and opacity. Consider using effects like sliding, fading, or bouncing text to create a lively and professional-looking title card.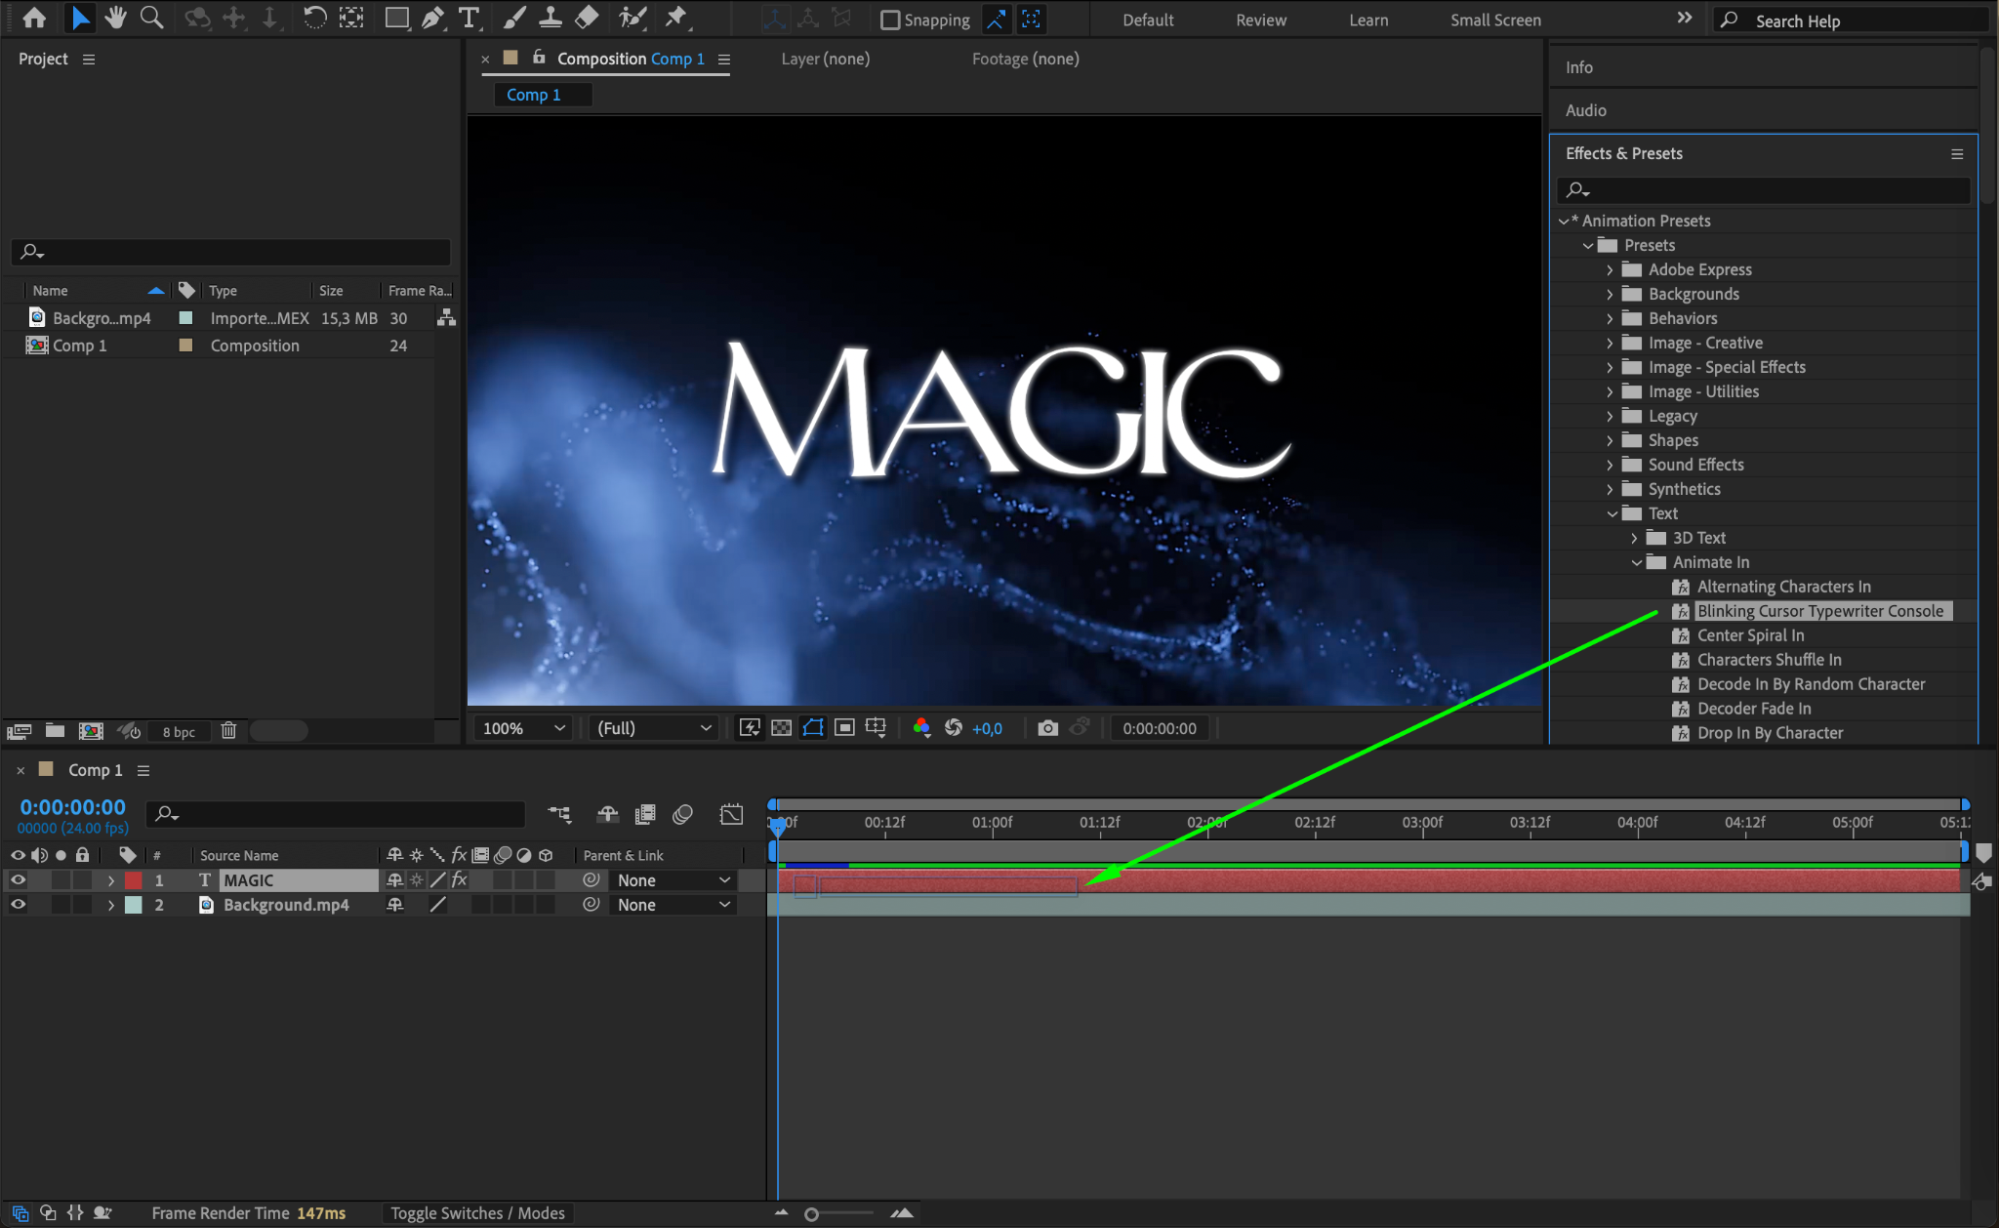
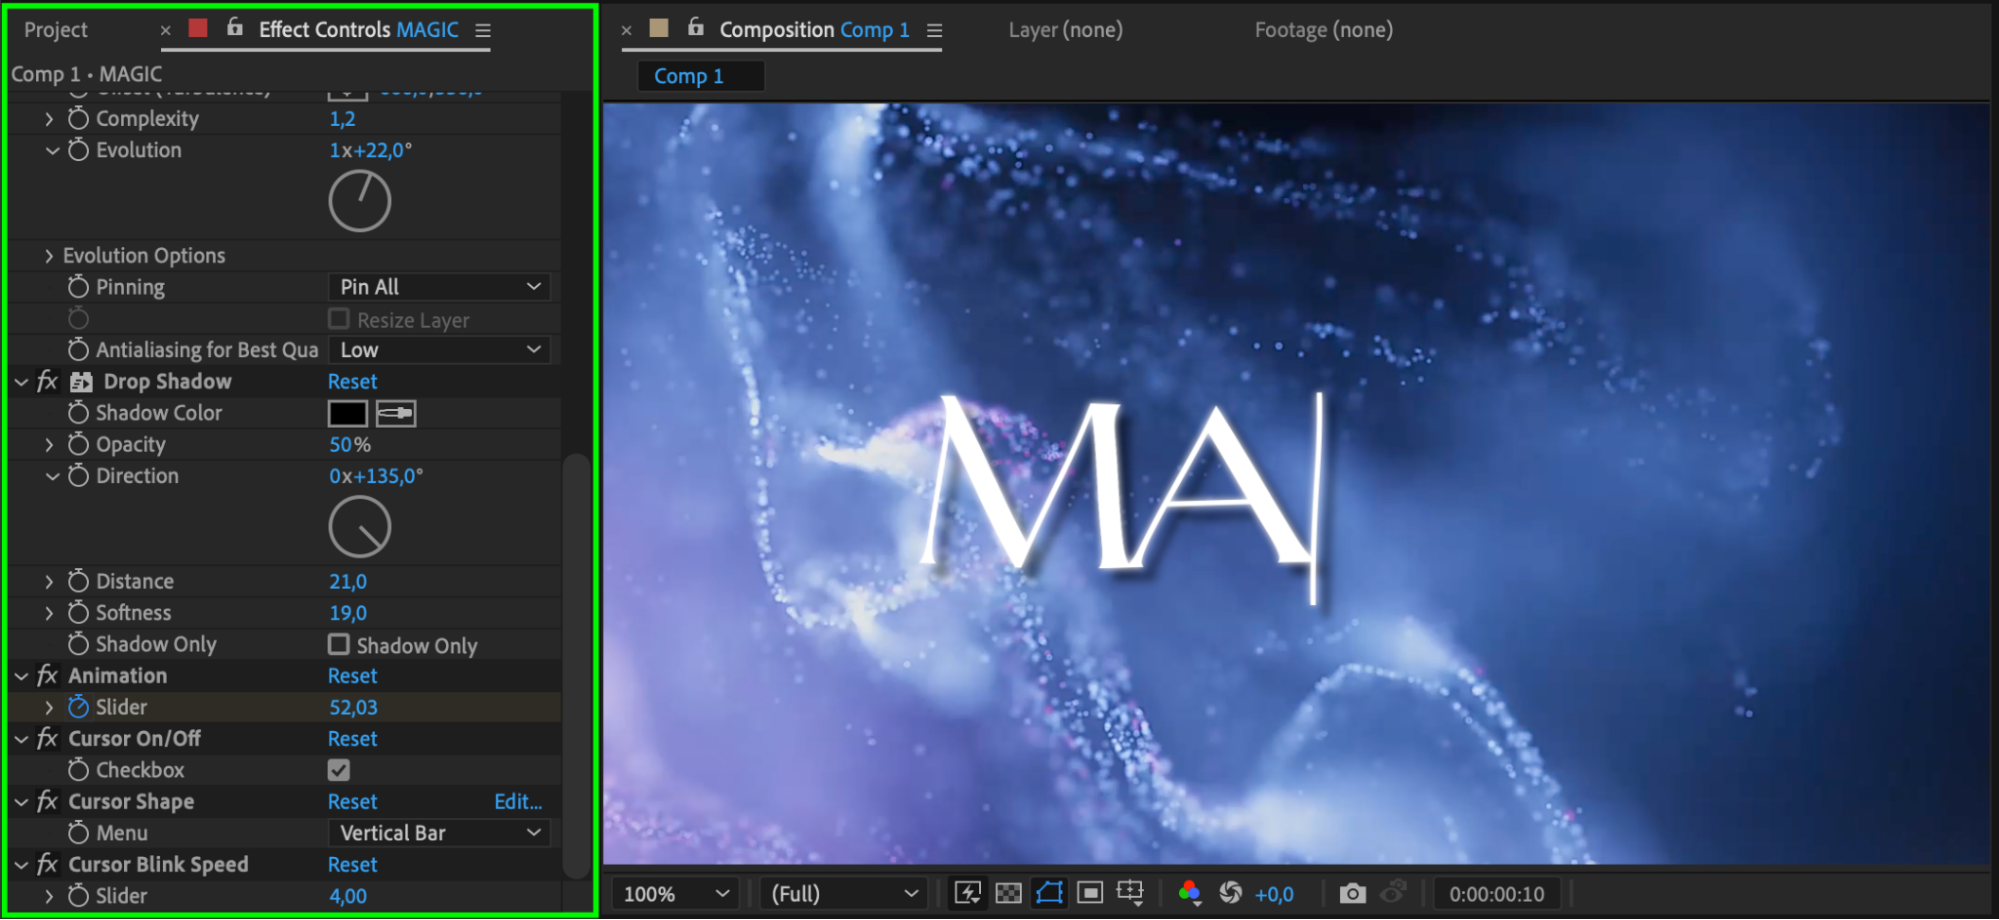 Step 6: Add Sound Effects for Greater Impact
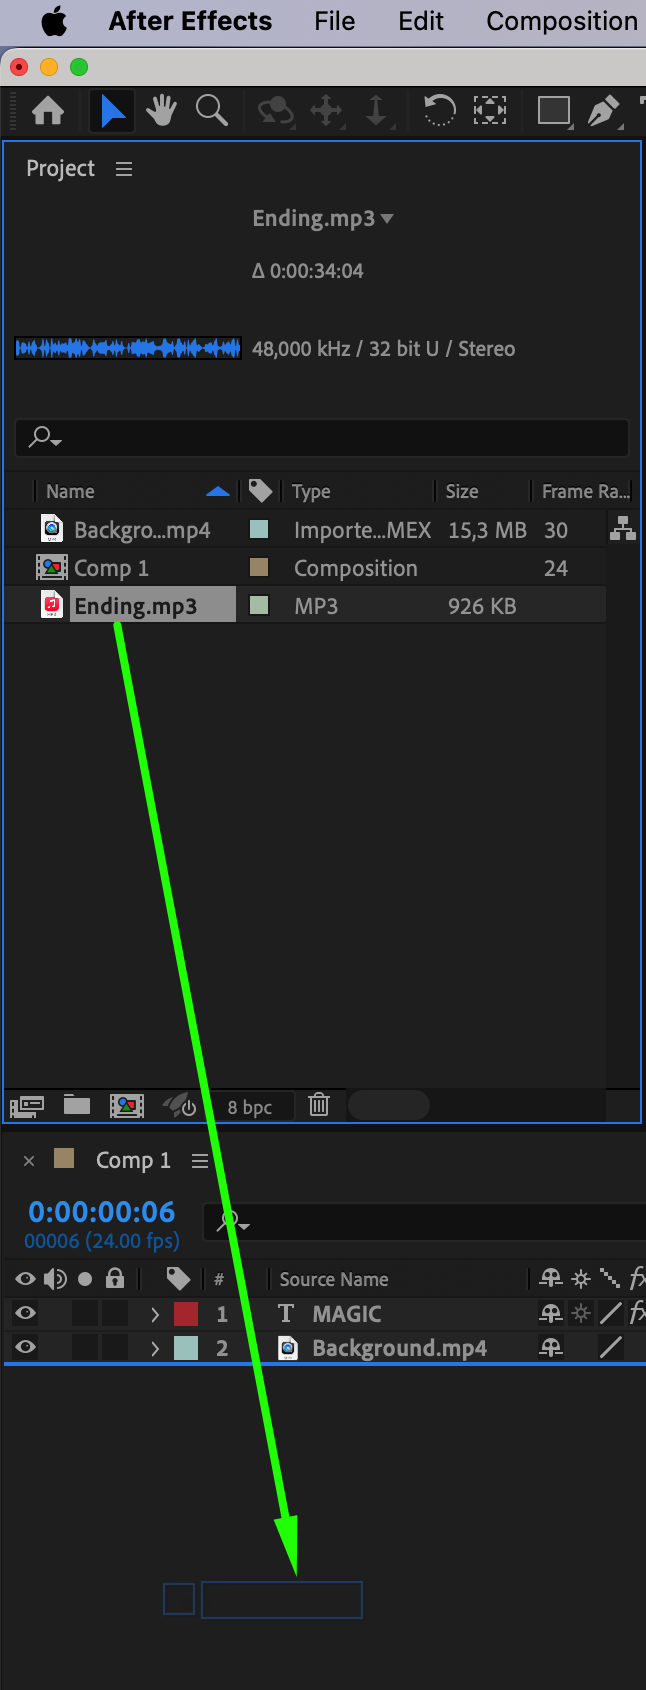
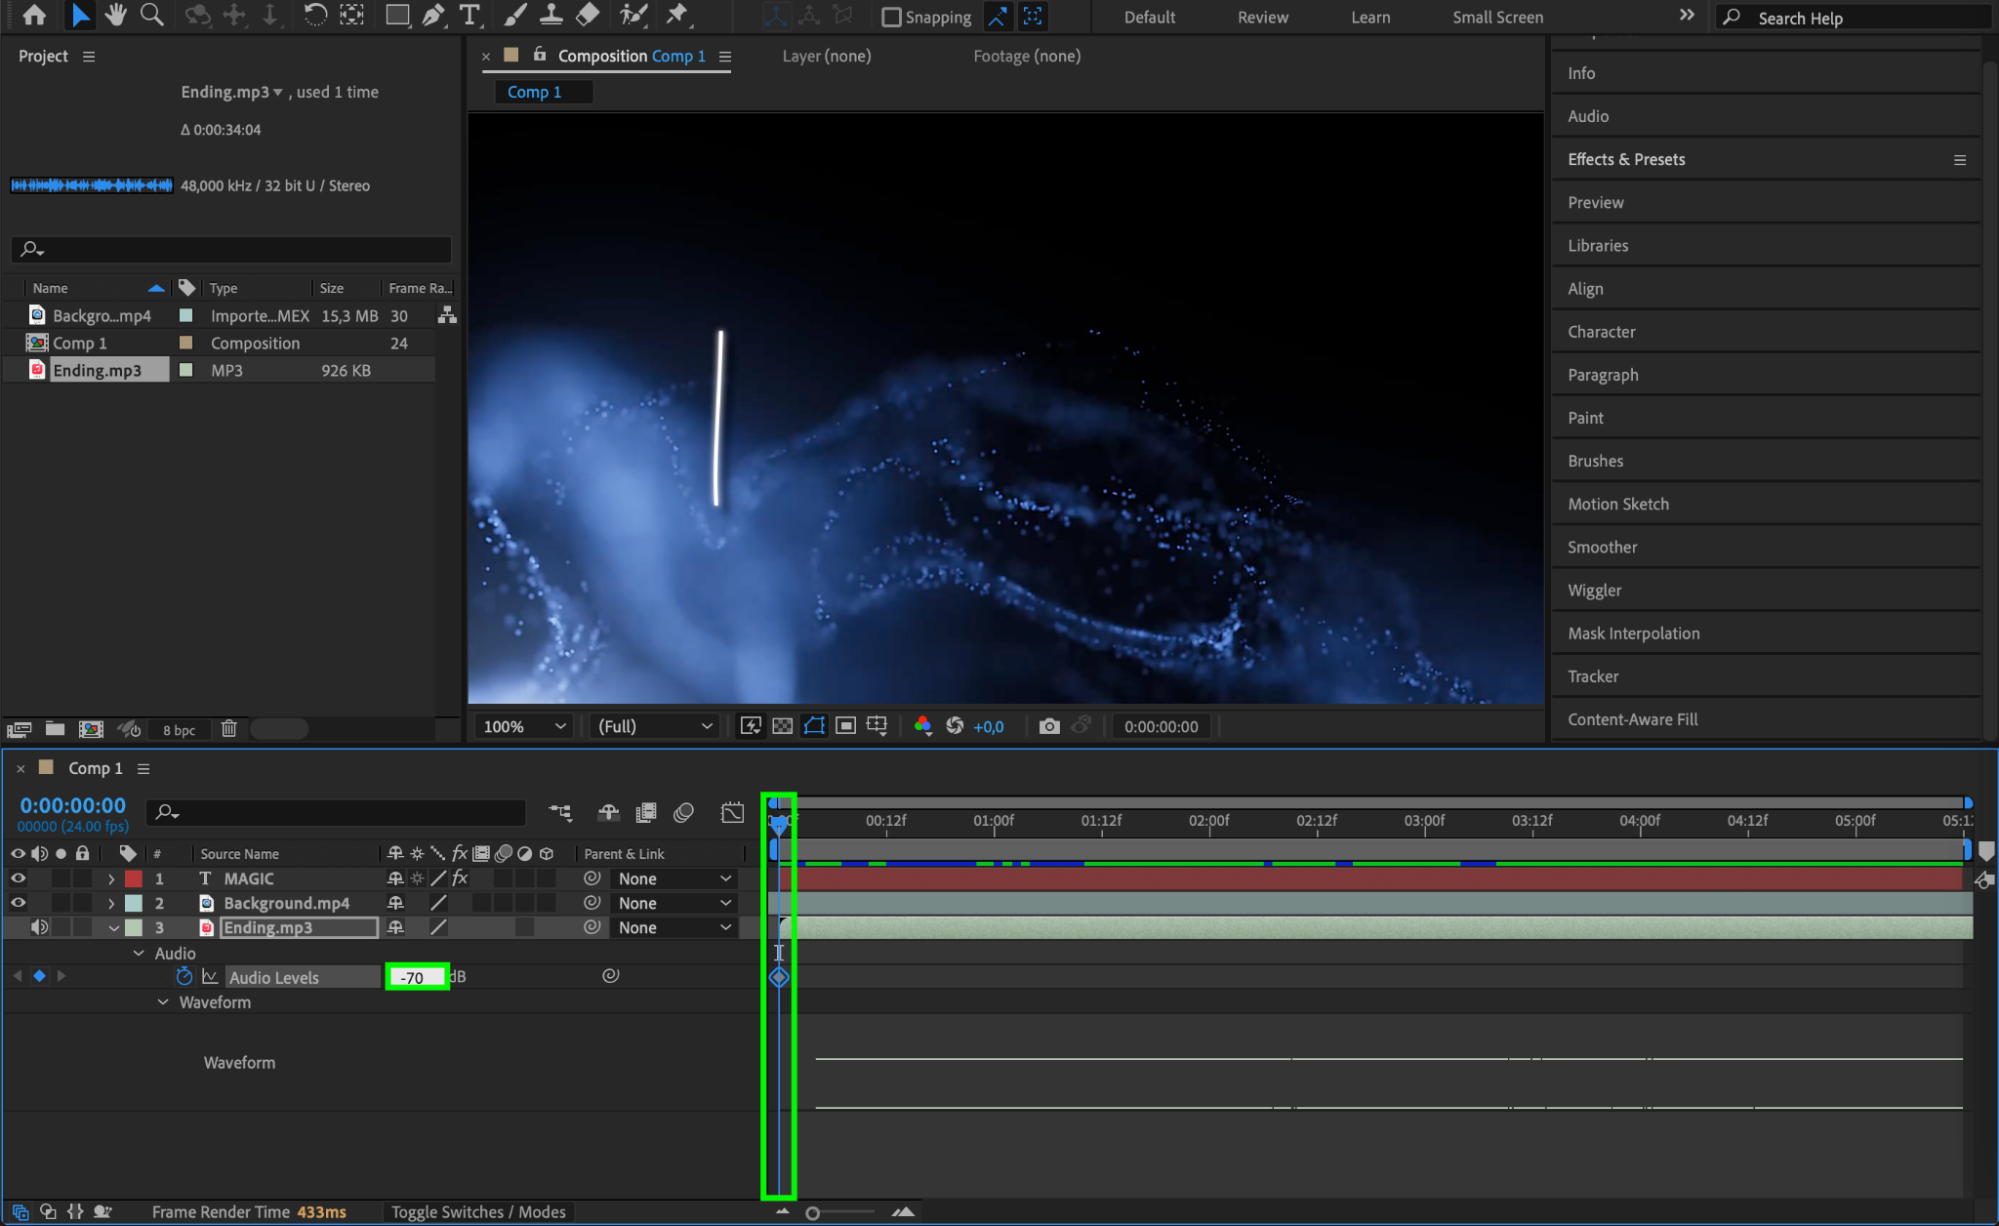
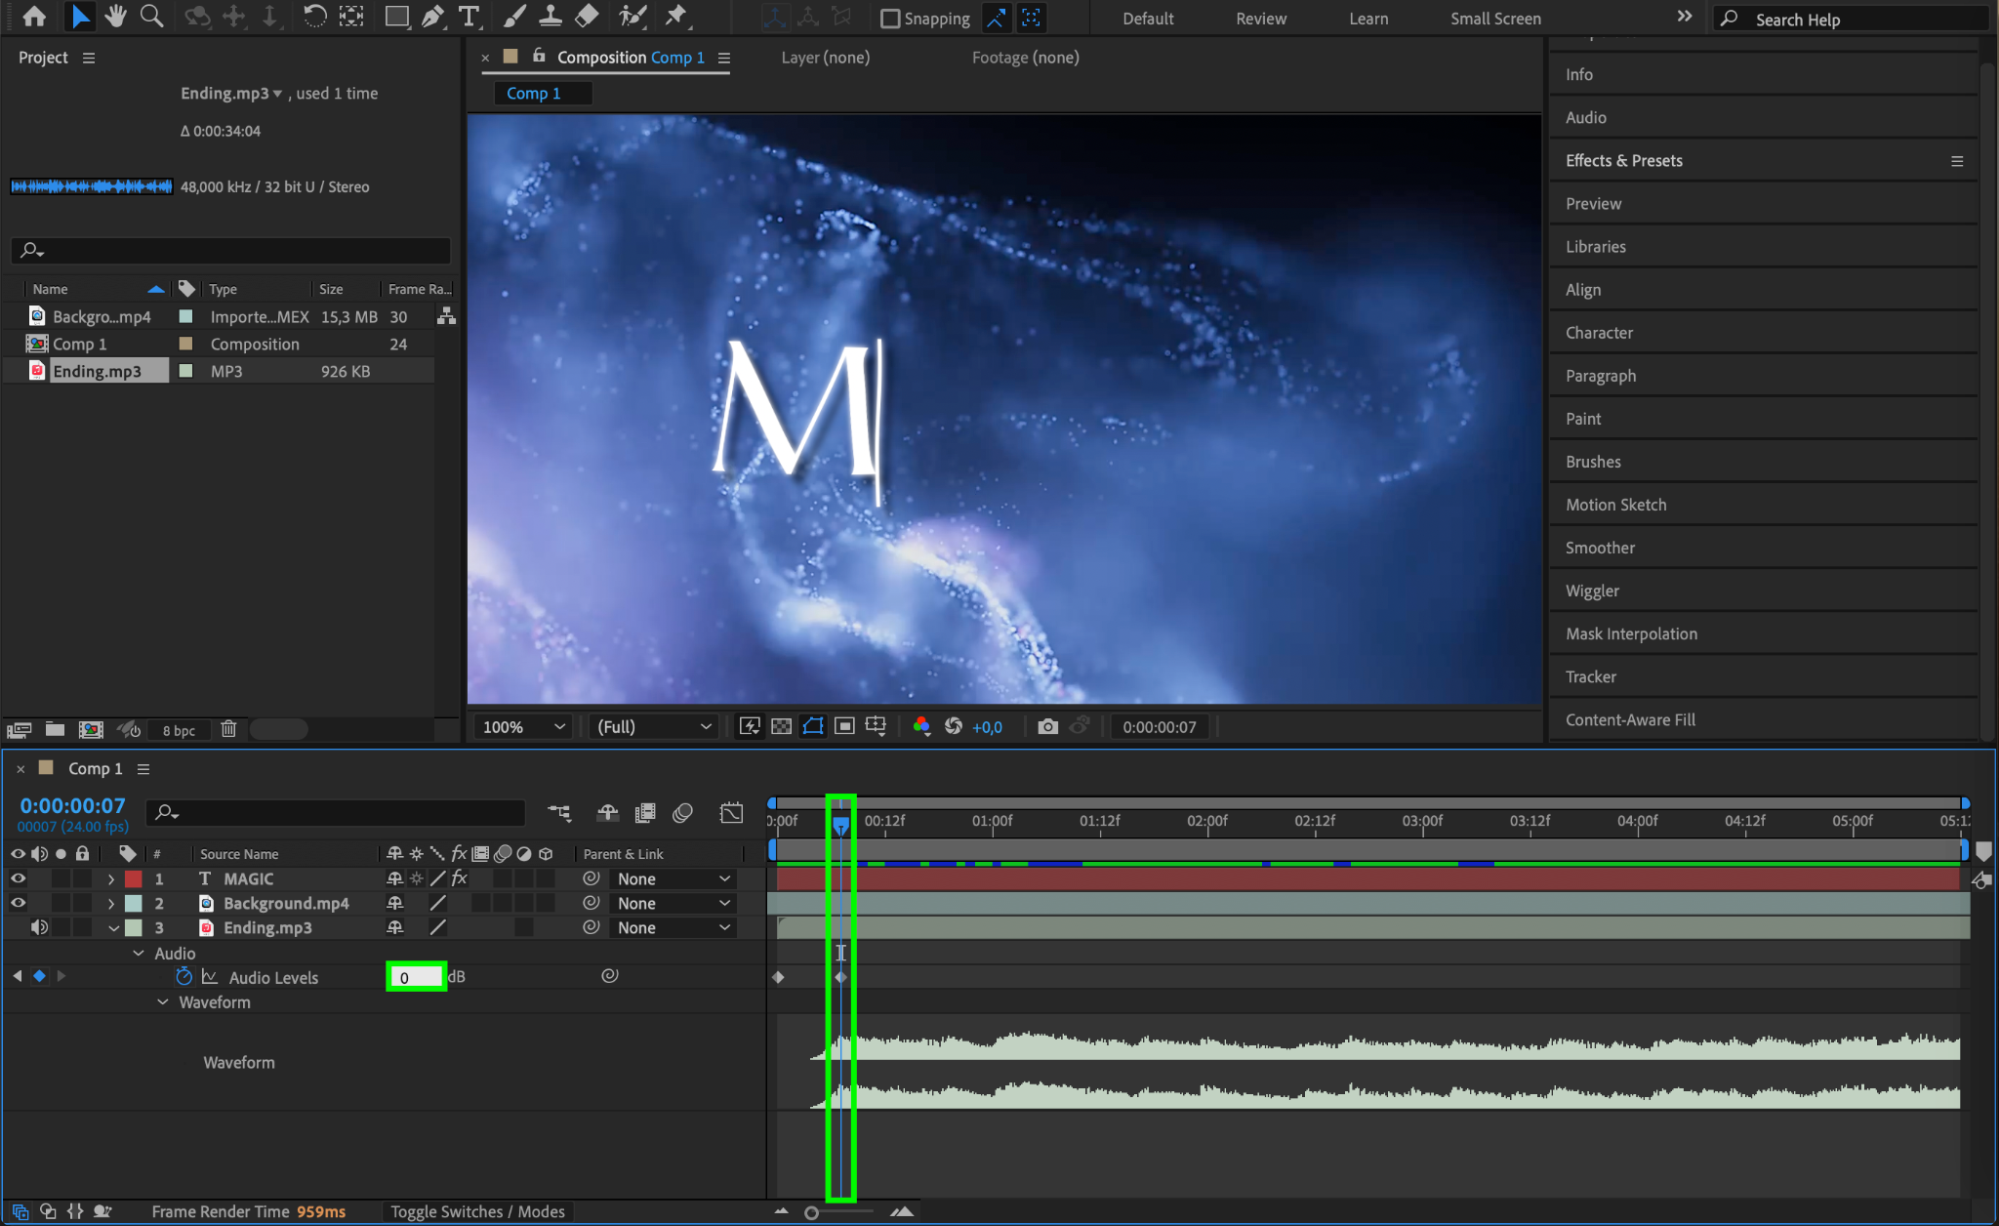
Sound effects can greatly enhance the impact of your title card. For instance, you can create
a fade-in effect by adjusting the Audio Levels property with keyframes. Adding subtle sound effects that align with your text animation can make the title card more immersive and help convey the intended mood or message of your video.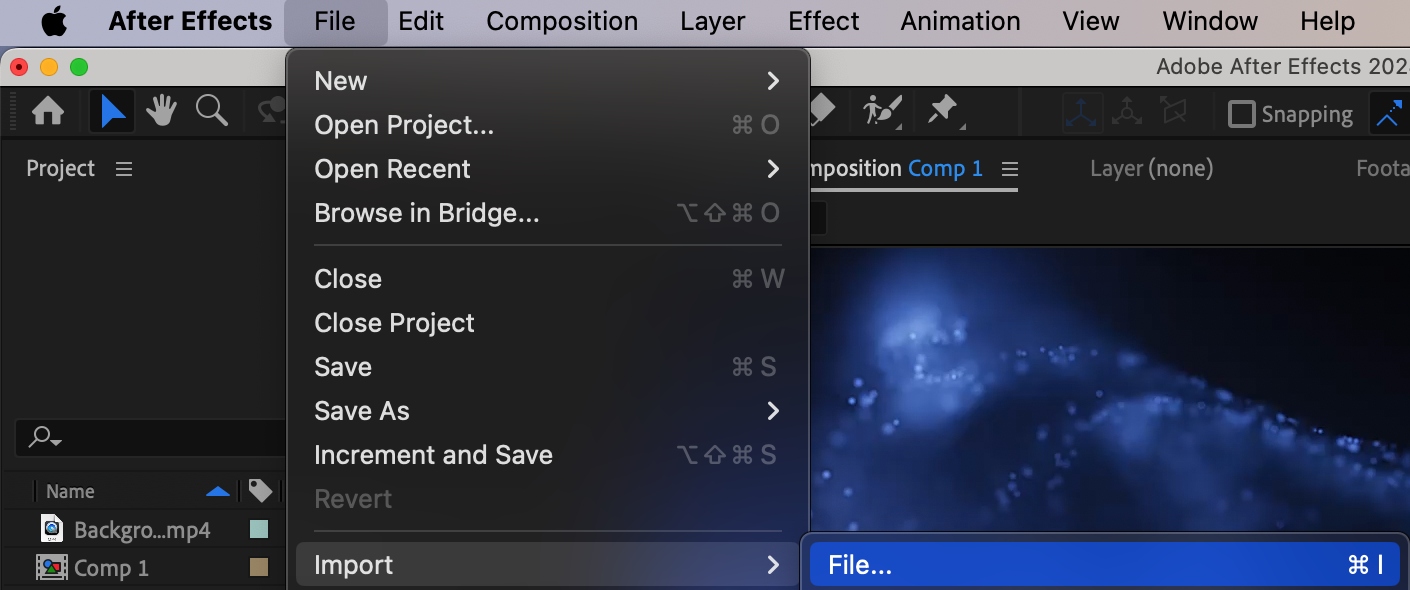
 Step 7: Preview and Refine Your Title Card
Before finalizing your title card, use the Preview function to play back your animation and make any necessary adjustments. Pay attention to the timing, transitions, and overall flow of the title card to ensure it aligns perfectly with your video’s theme and pacing. Previewing your work helps you spot any errors and fine-tune the animation for the best possible outcome.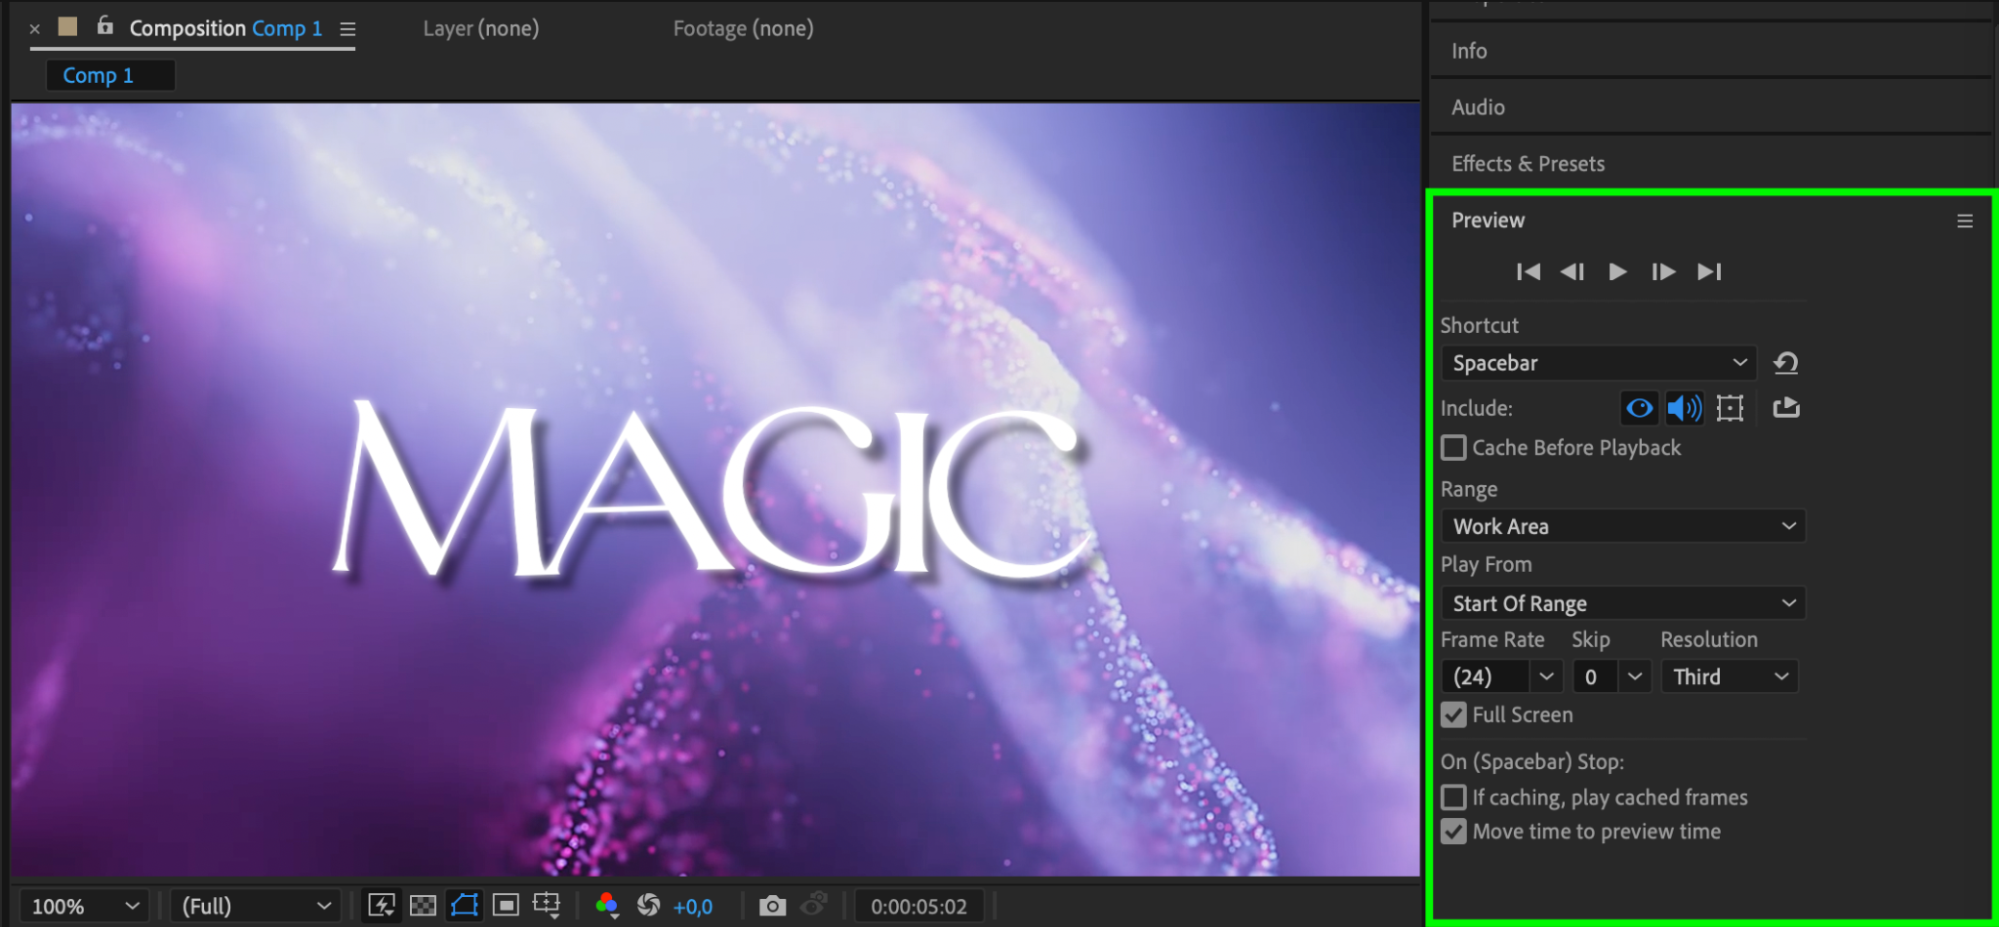
Conclusion
In conclusion, creating captivating title cards in After Effects requires a blend of creativity, design skills, and technical knowledge. By following the steps outlined in this guide, you’ll be able to produce visually stunning title cards that effectively communicate your video’s message and leave a lasting impression on your audience. So, dive in and explore the limitless possibilities that After Effects offers in designing your own unique title cards.


