Creating a Transparent Background in After Effects
Introduction
Have you ever wanted to remove the background from a video or image and make it transparent in After Effects? Whether you’re a video designer or editor, this is a useful skill to have. With After Effects’ powerful tools and features, you can easily create a transparent background to use in your projects. Let’s walk through the step-by-step process of making a transparent background in After Effects.
Step 1: Import Your Footage
Start by importing your video or image file into After Effects. You can do this by going to File > Import > File and selecting the file you want to work with. After Effects supports various formats like MP4, MOV, PNG, and JPEG. Once imported, your footage will appear in the Project panel.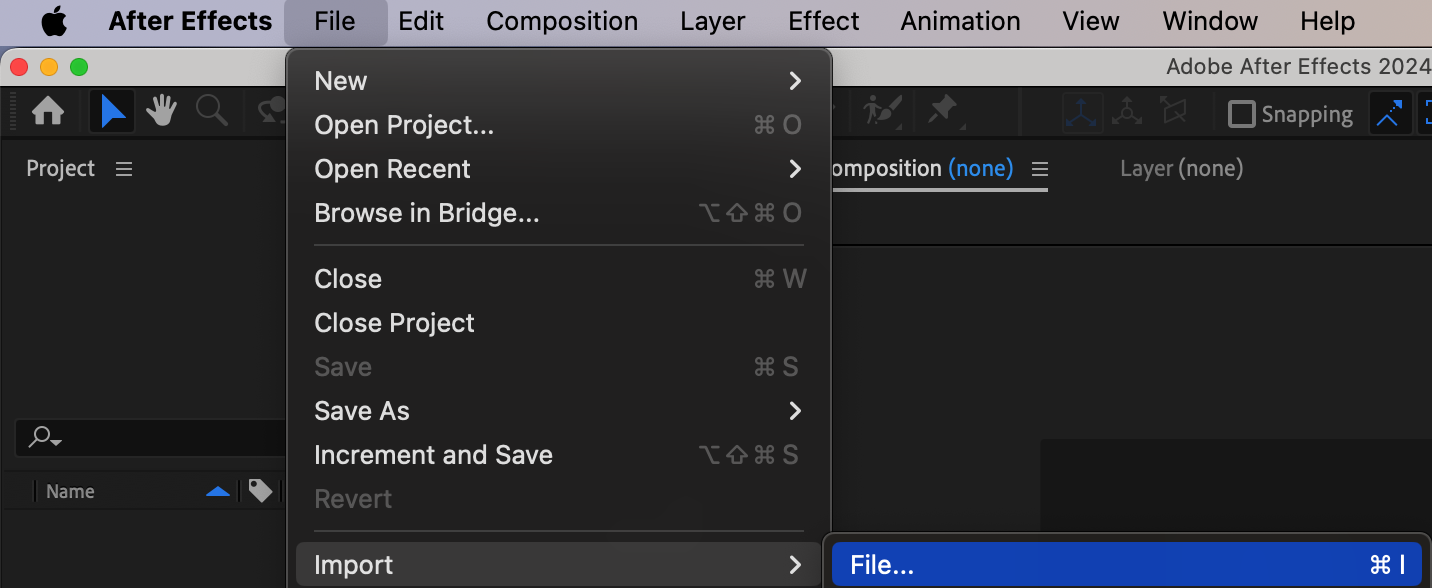 Step 2: Create a New Composition
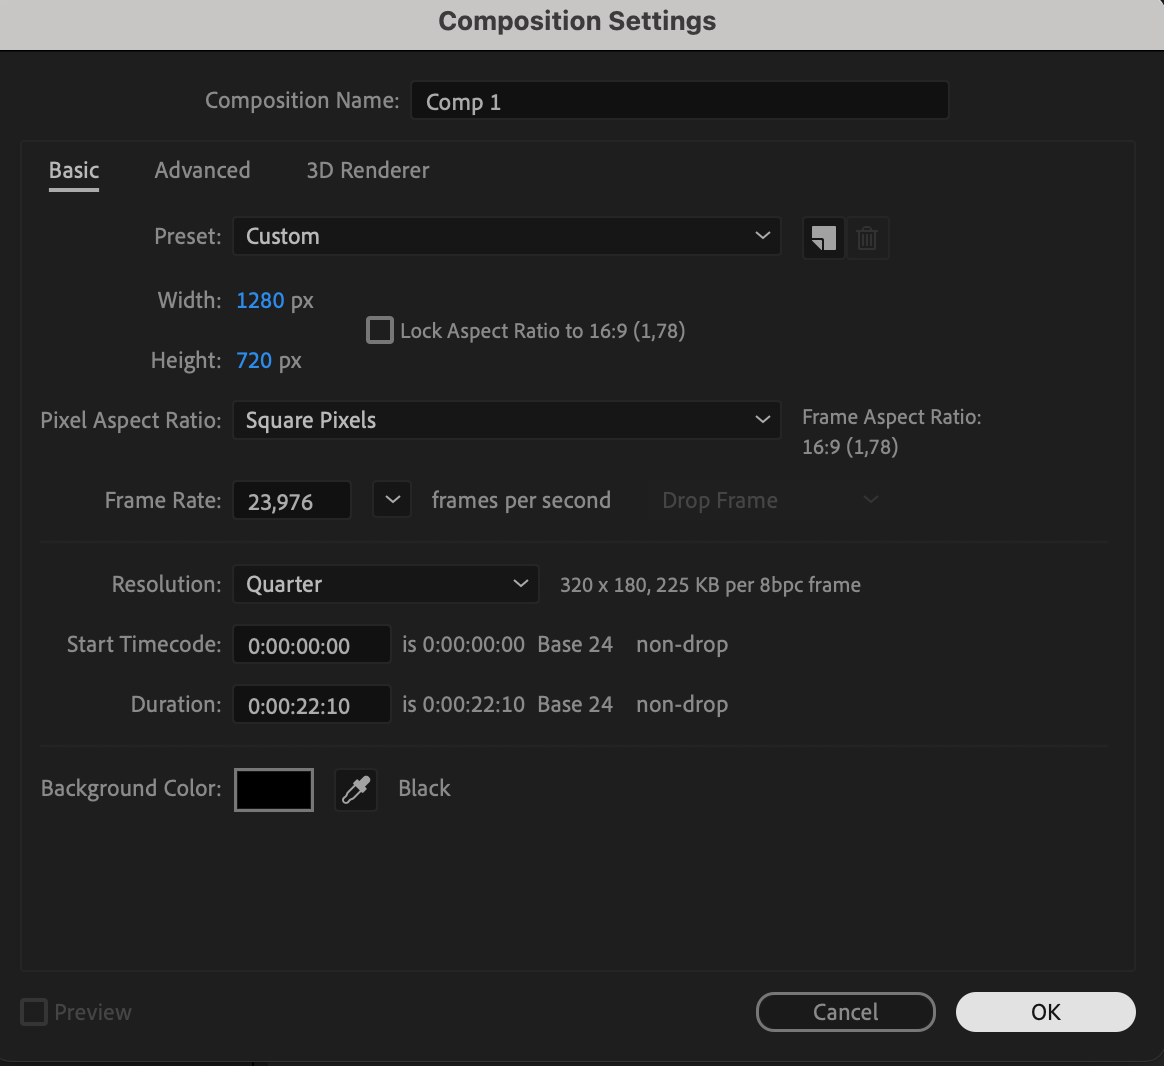
Next, create a new composition by clicking on Composition > New Composition. Here, you can define the settings for your composition, such as resolution, frame rate, and duration. Set the background color to black to make it easier to see the transparency later on.
 Step 3: Add your Footage to the Composition
Get 10% off when you subscribe to our newsletter

Drag and drop your imported footage into the composition timeline. You can also use the shortcut Ctrl/Cmd + I to add footage to the composition. The footage layer will appear in the timeline.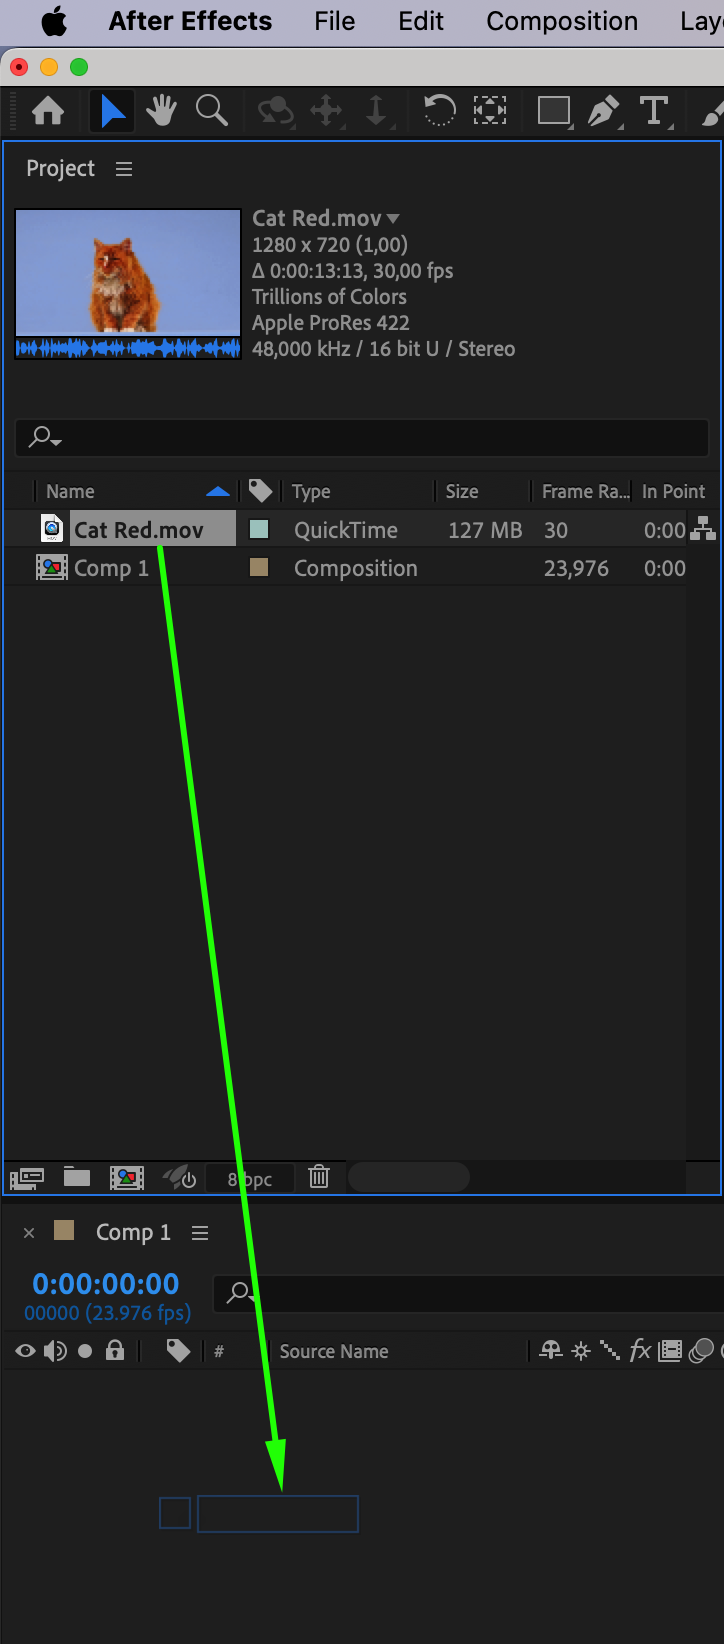 Step 4: Use the Roto Brush Tool
After Effects has a variety of tools for removing backgrounds, and one of the most versatile is the Roto Brush tool. Select the footage layer in the timeline and choose the Roto Brush Tool from the toolbar or use the shortcut “Alt/Option + W”. The Roto Brush panel will open, allowing you to start drawing strokes to define the foreground and background areas. Step 5: Define the Foreground with Roto Brush
Get 10% off when you subscribe to our newsletter

Using the Roto Brush tool, carefully paint over the areas you want to keep in the foreground. After Effects will use artificial intelligence to separate the foreground from the background based on the strokes you make. Adjust the selection in the Effect Controls panel to refine and perfect the area you’ve selected.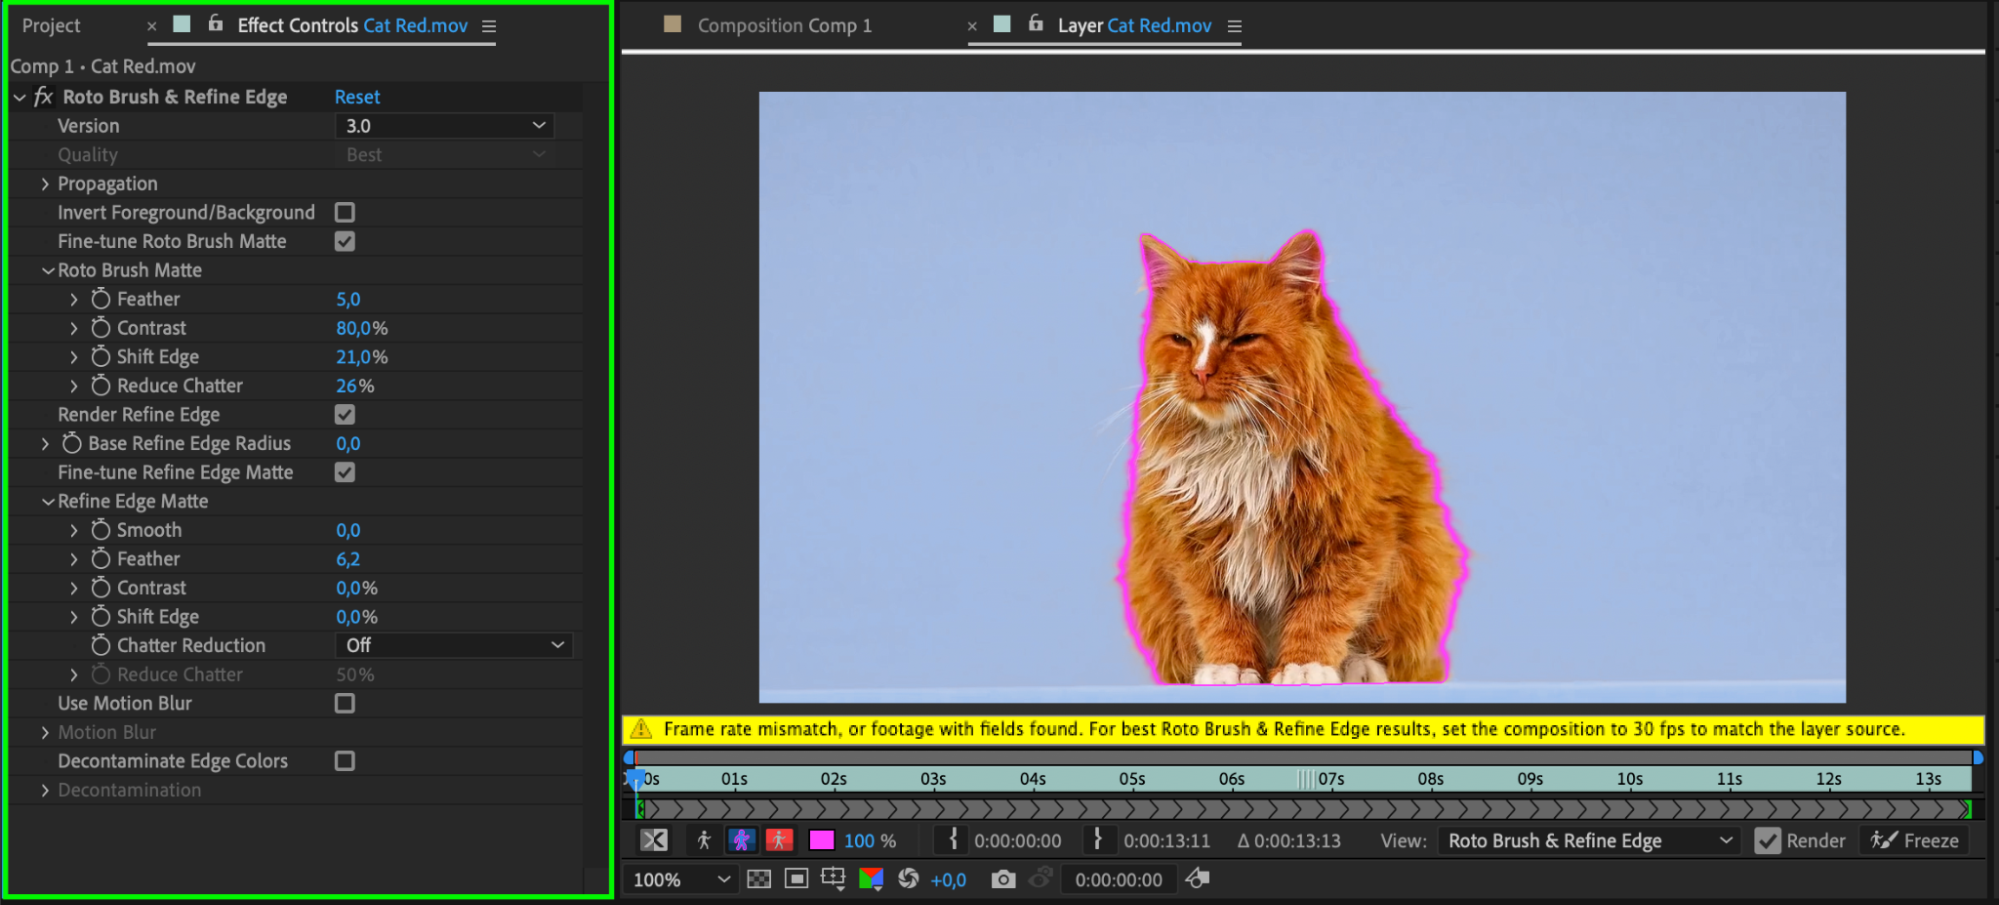
Step 6: Freeze the Roto Brush Selection
Once you’re satisfied with your Roto Brush selection, click on the “Freeze” button at the bottom of the Composition panel. This action locks the selection, preventing further changes and speeding up the preview process.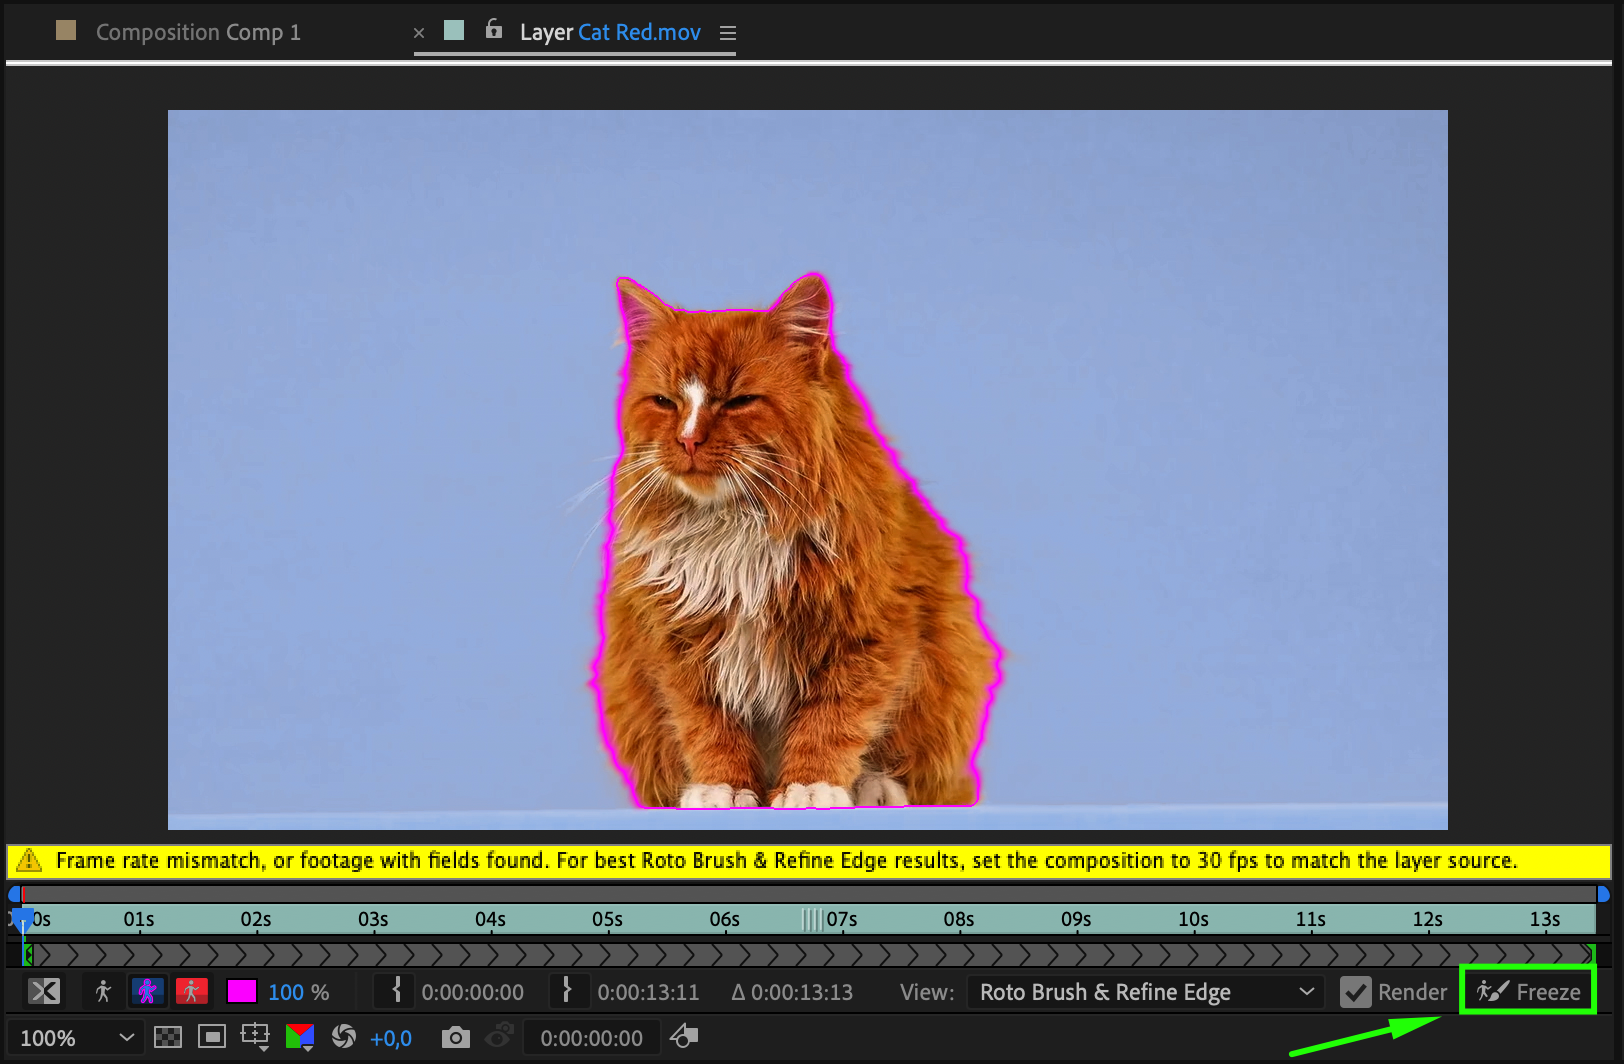 Step 7: Toggle Transparency Grid
To see the transparent areas of your composition, click on the “Toggle Transparency Grid” button at the bottom of the Composition panel. This will display the checkerboard grid, indicating transparency.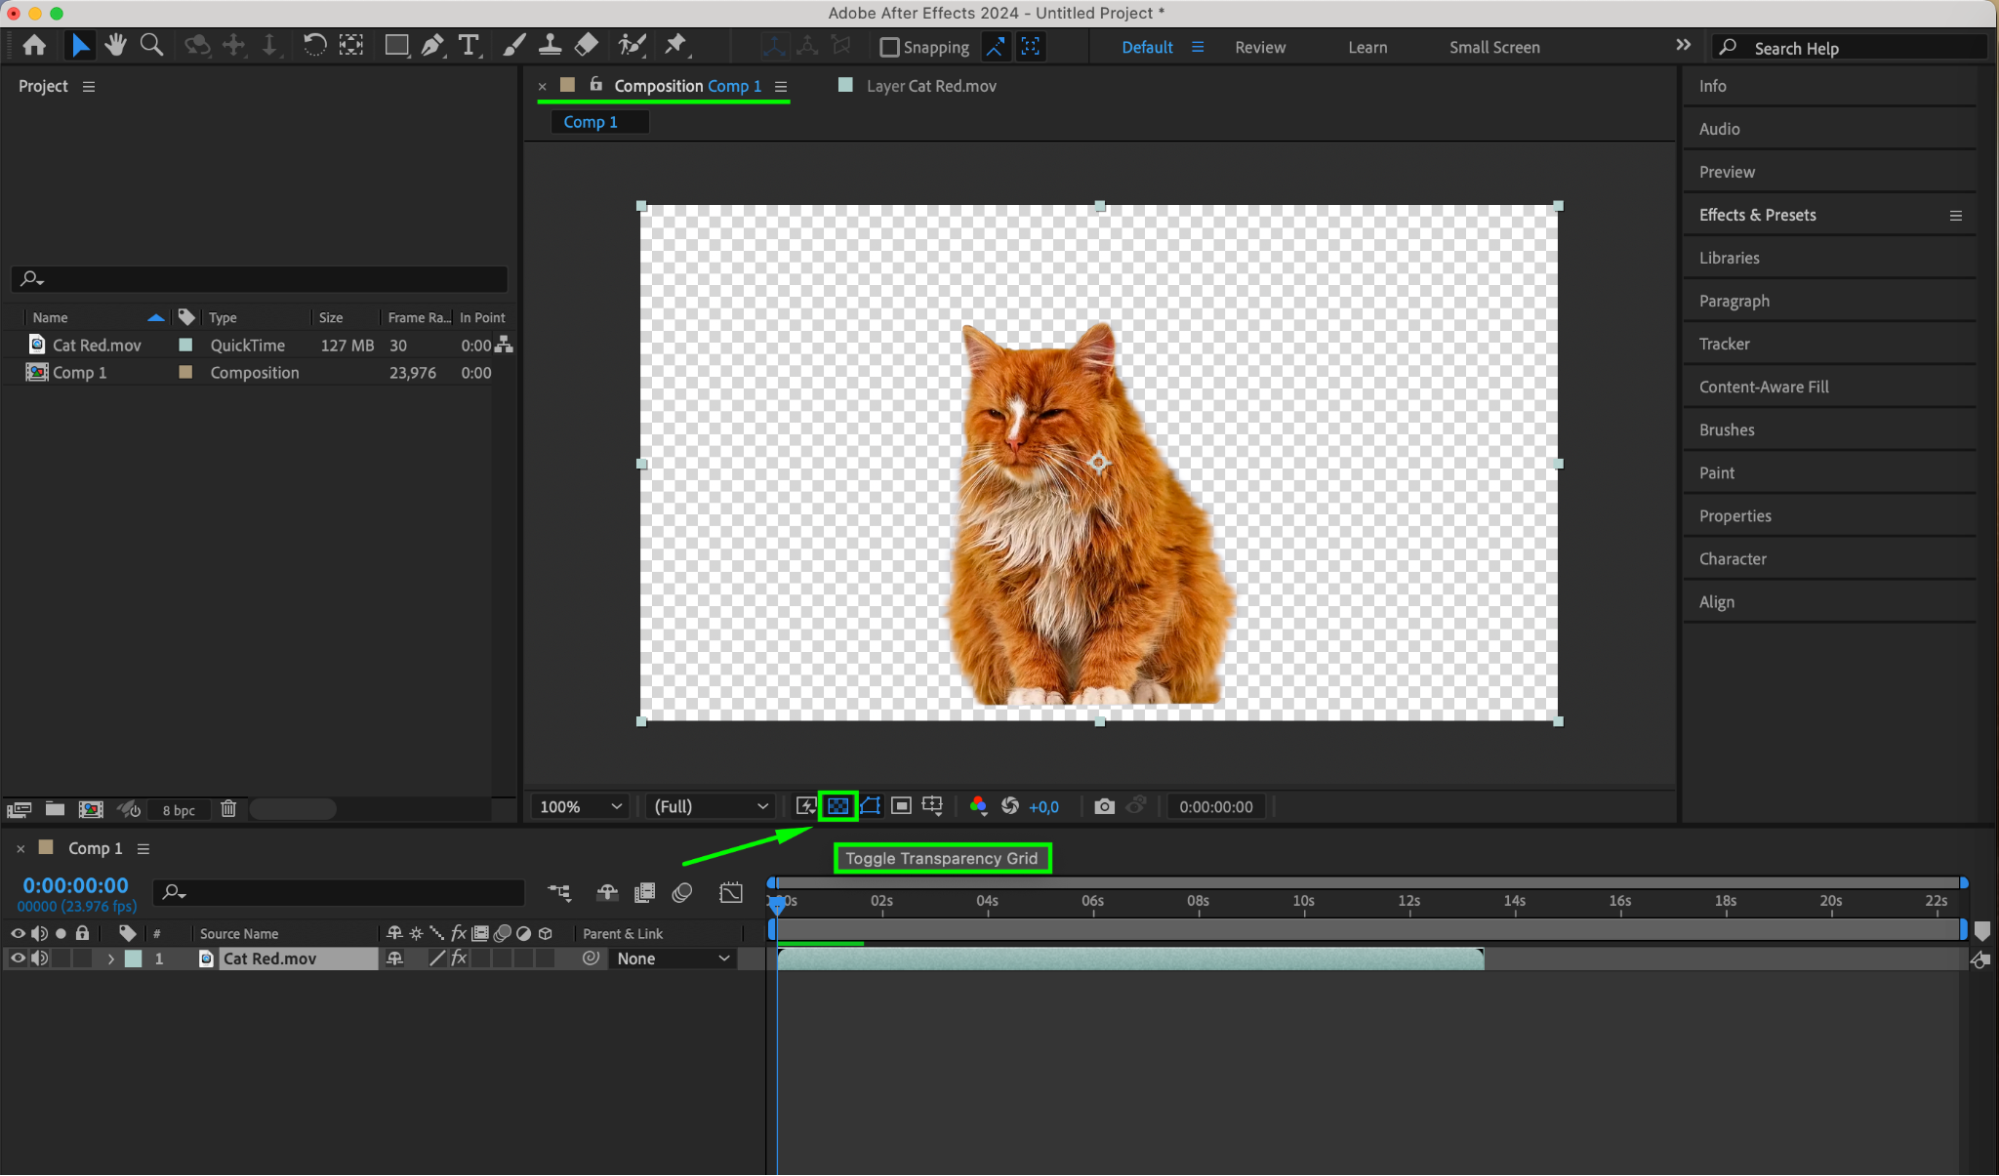 Step 8: Preview Your Composition
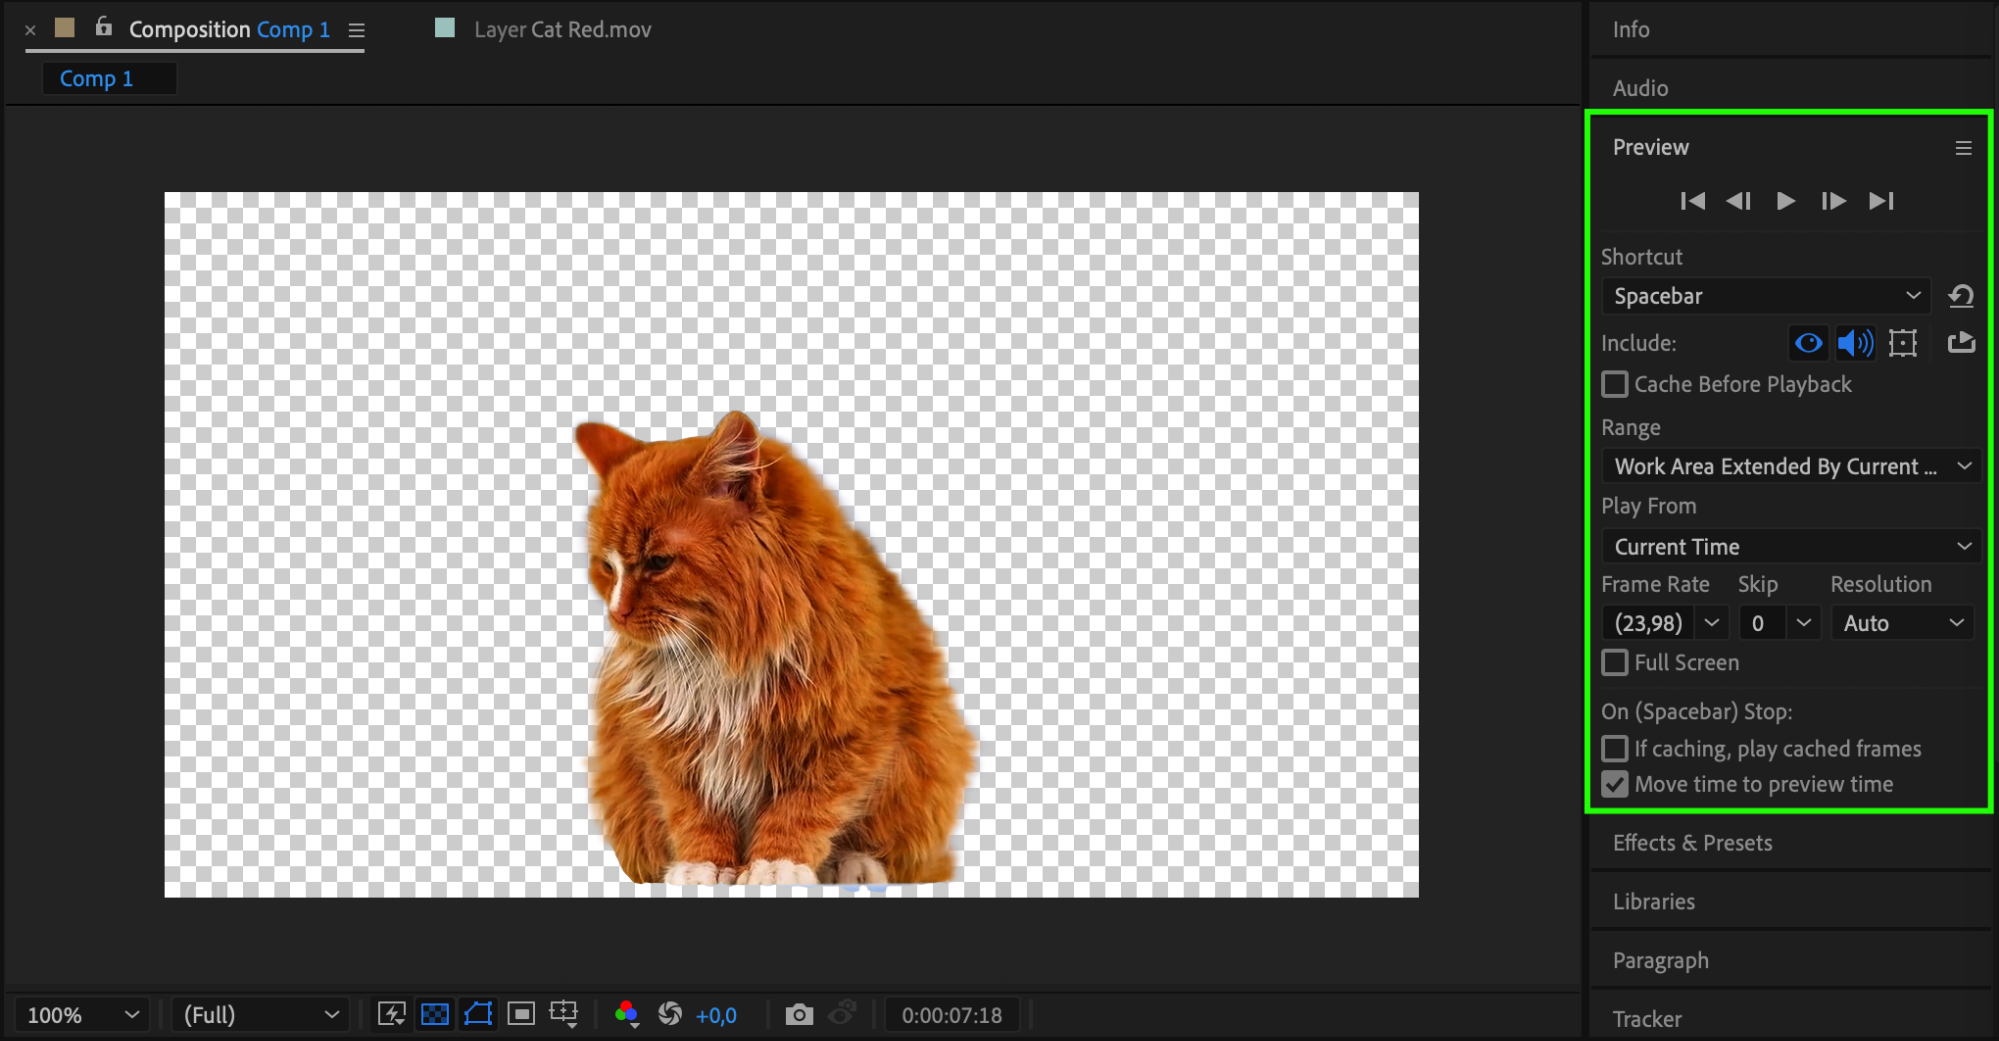
Press the Spacebar to preview the result. Make sure the background is fully transparent and that the edges of your subject look clean and natural. If necessary, make further adjustments using the Roto Brush tool.
Get 10% off when you subscribe to our newsletter

 Step 9: Output with an Alpha Channel
To render your composition with a transparent background, you need to output it with an alpha channel. Click on Composition > Add to Render Queue. In the Render Queue panel, click on the Output Module and choose a format that supports an alpha channel, such as QuickTime with the Animation codec or a PNG sequence. Enable the “RGB + Alpha” option to include the alpha channel in your output.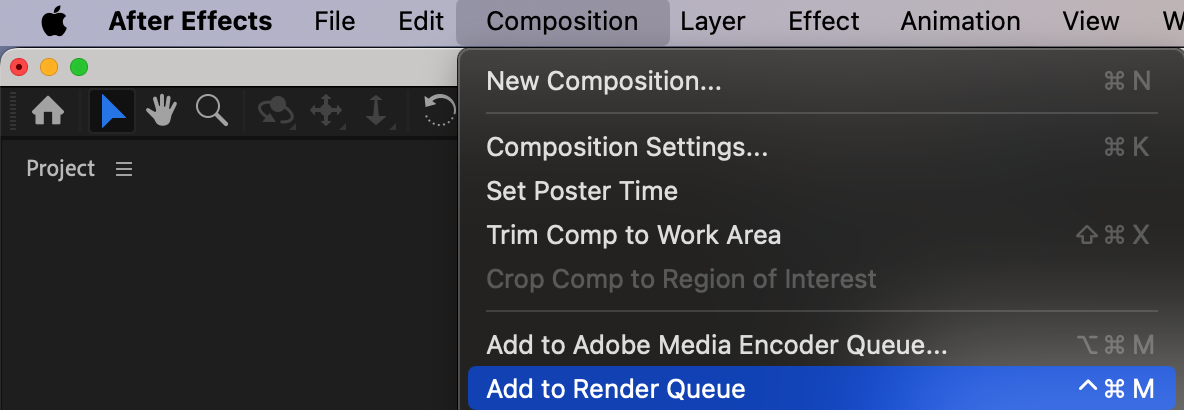
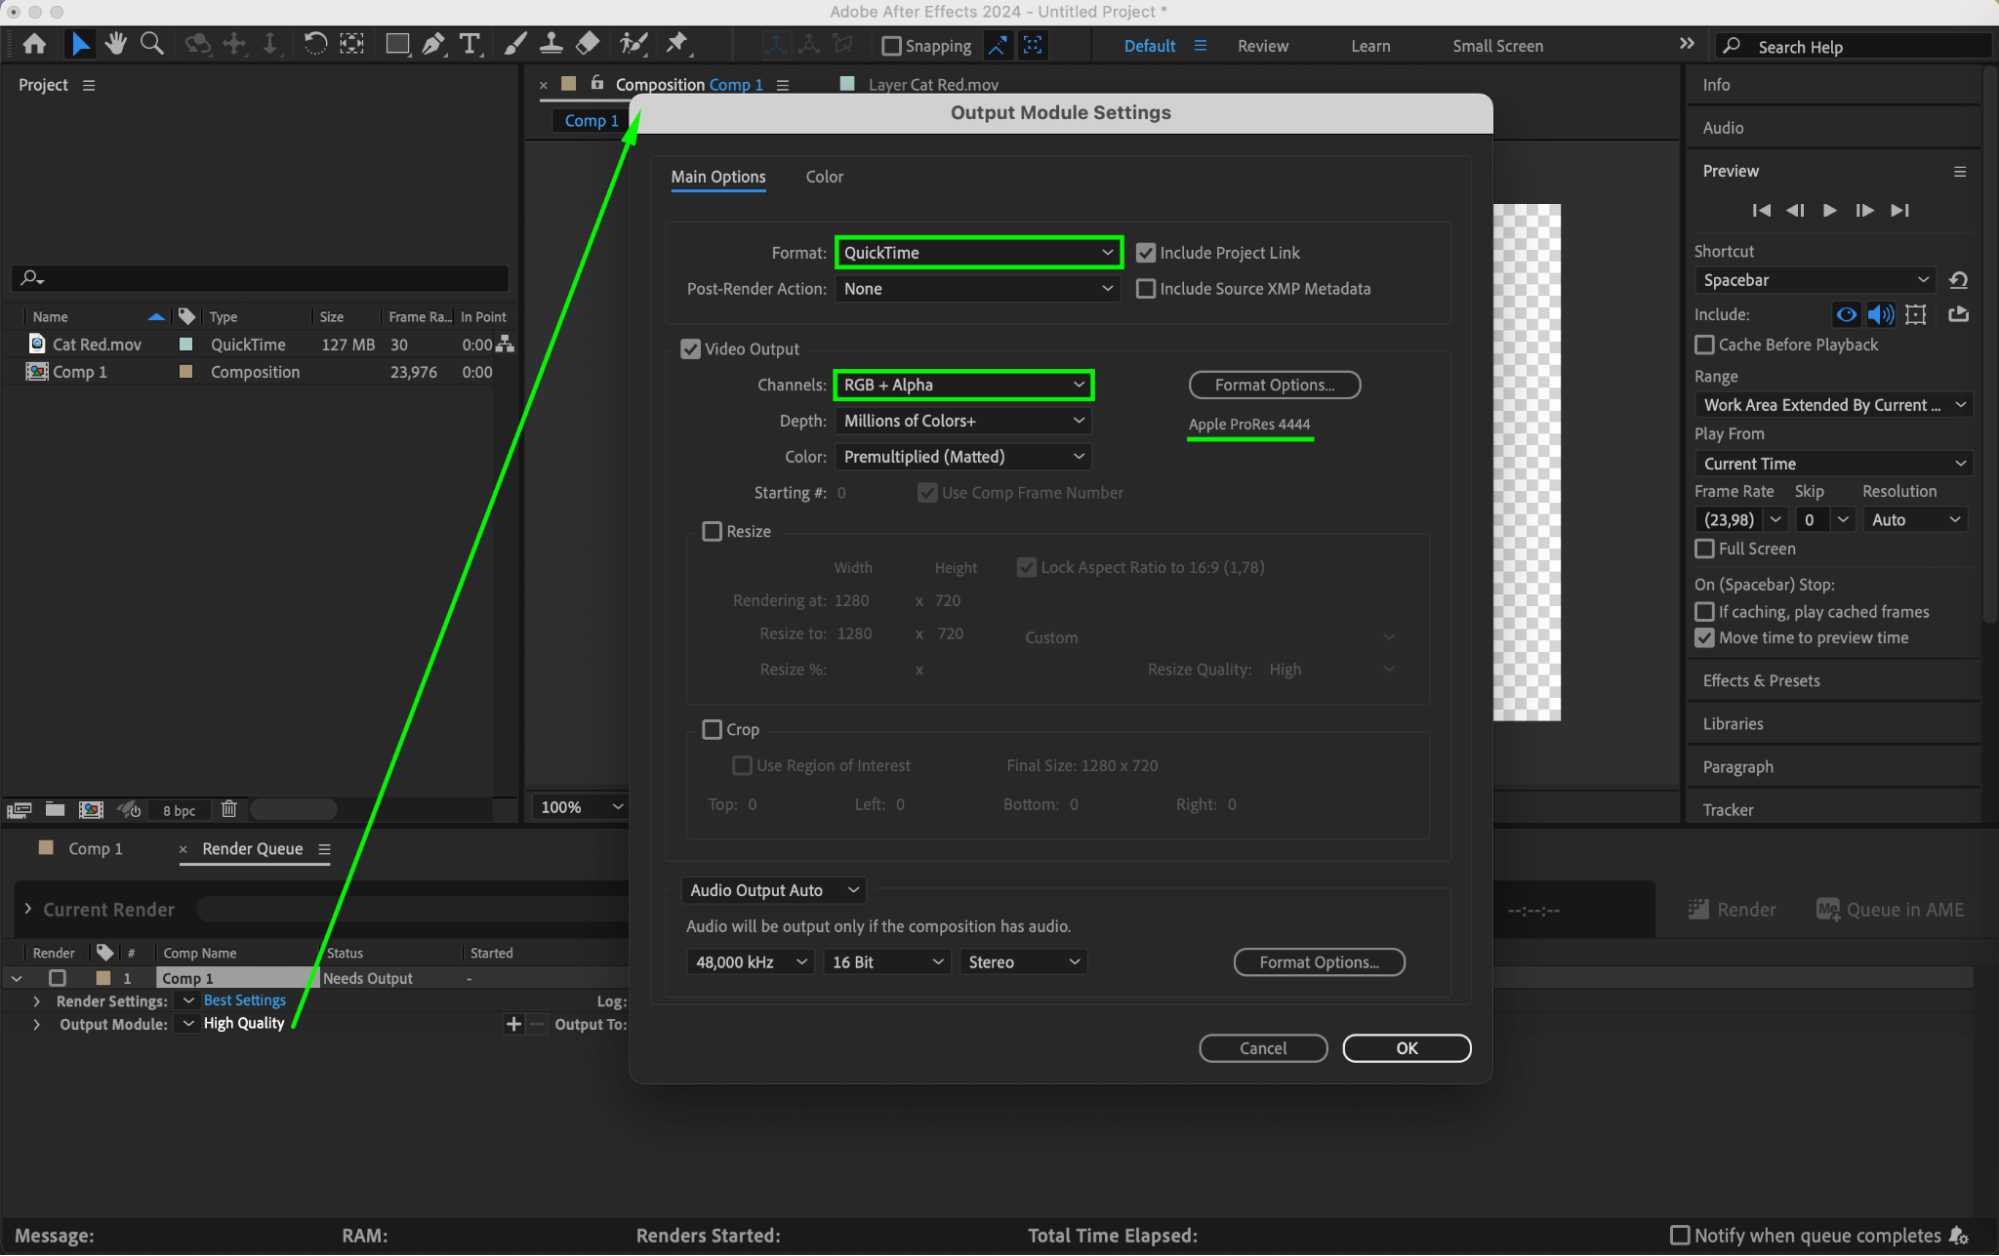 Step 10: Render and Export
In the Render Queue panel, select the desired output format and destination folder. Click on “Render” to start the rendering process. Once rendered, you will have a video file with a transparent background that you can use in any editing or compositing software.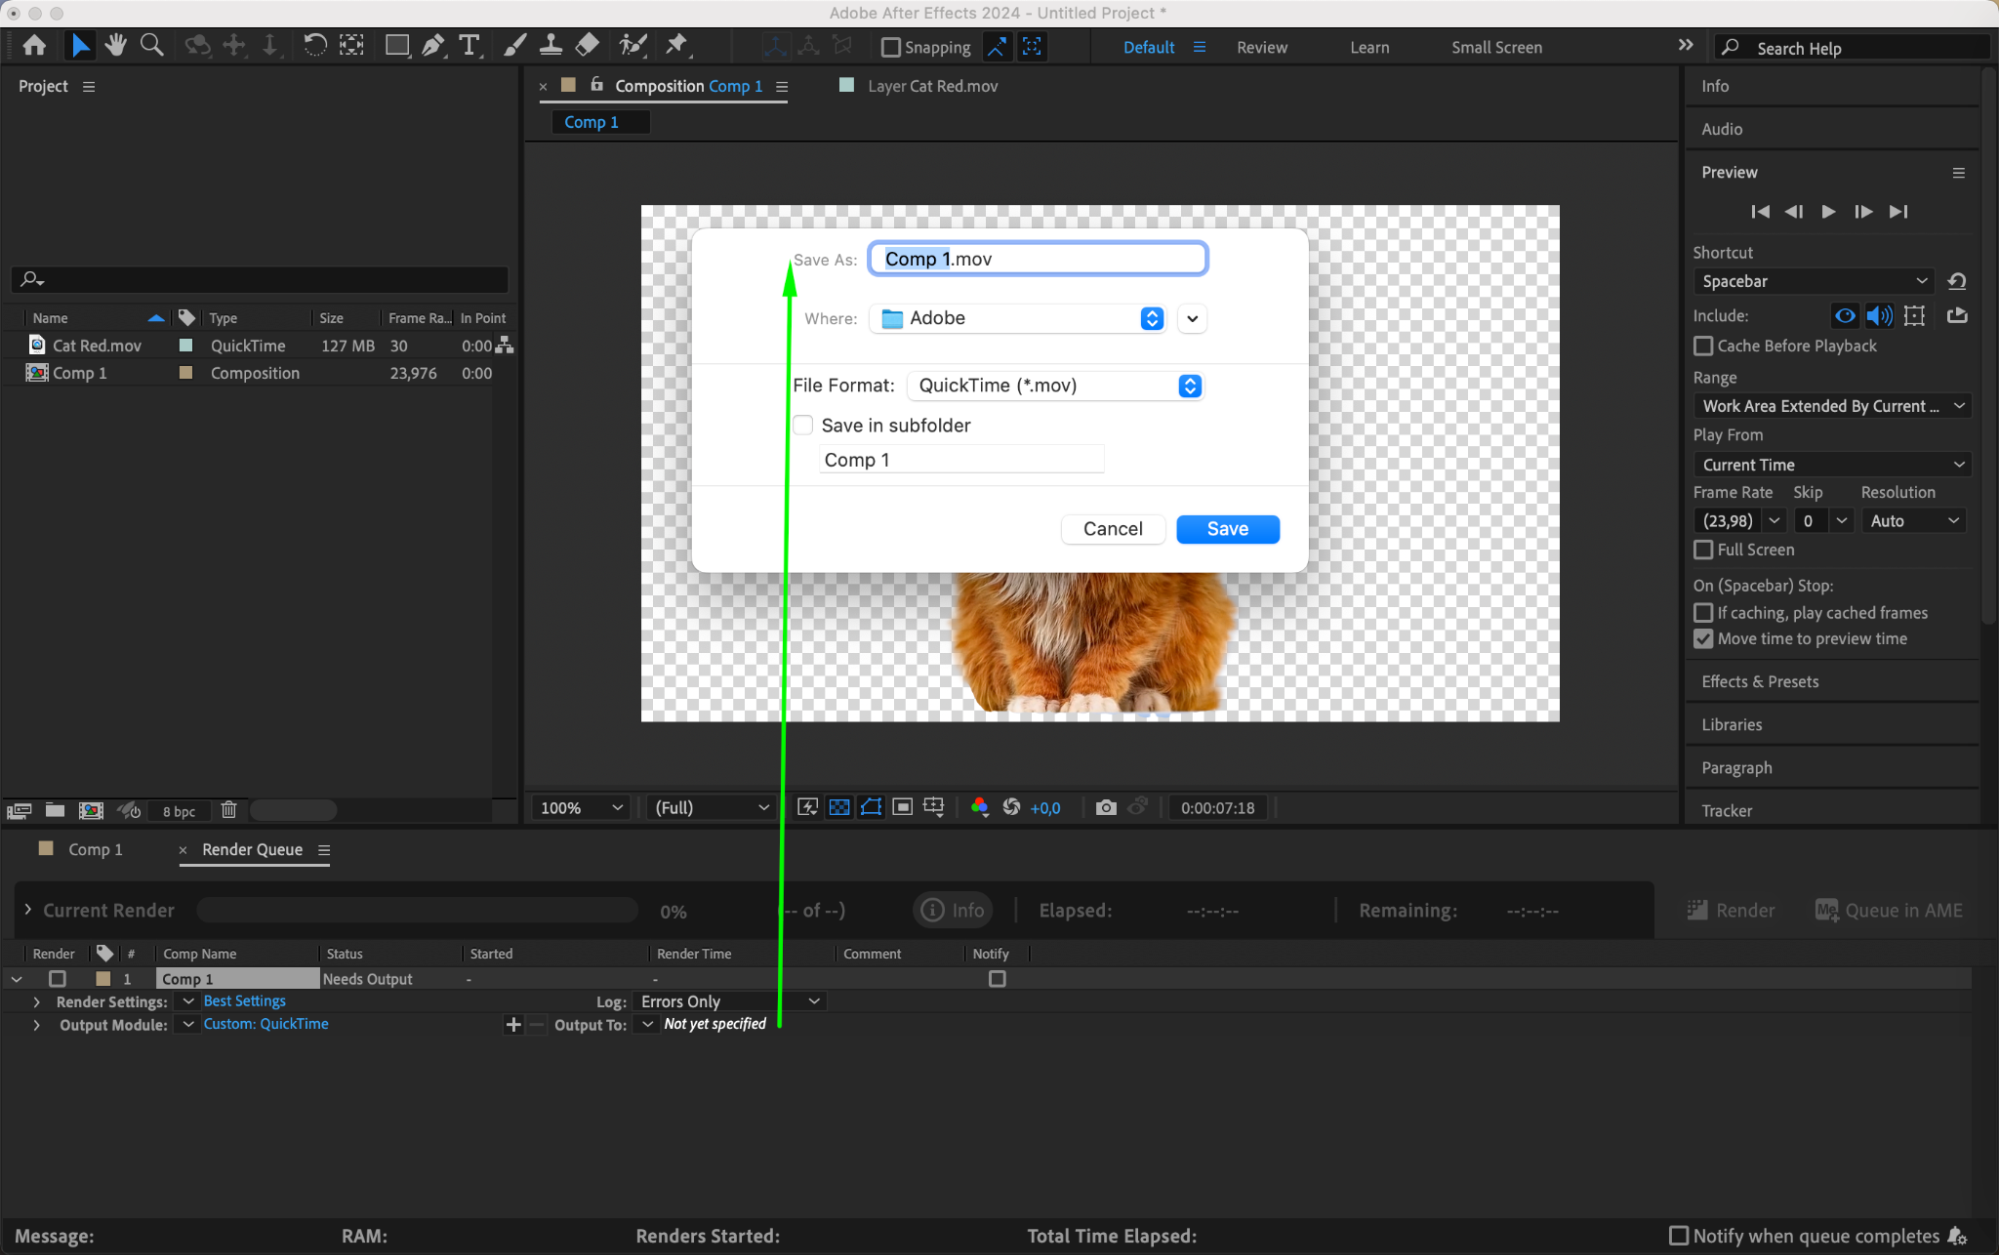
 Conclusion
Get 10% off when you subscribe to our newsletter

Creating a transparent background in After Effects opens up endless possibilities for your video and motion graphics projects. With the Roto Brush tool and other powerful features, you can easily remove backgrounds and achieve stunning visual effects. So give it a try and elevate your designs to the next level by mastering transparency in After Effects.


