Creating Triangle Animations in After Effects
Introduction: “Master the Art of Crafting Dynamic Triangle Animations in After Effects
Are you tired of the same old video animations? Adding geometric shapes, like triangles, can instantly give your projects a modern and dynamic look. In this tutorial, we’ll walk you through the process of creating a stylish triangle animation using After Effects’ powerful tools and features.
Creating a Triangle Animation in After Effects
Step 1: Setting Up the Composition
Create a new composition and adjust its parameters according to your project requirements.
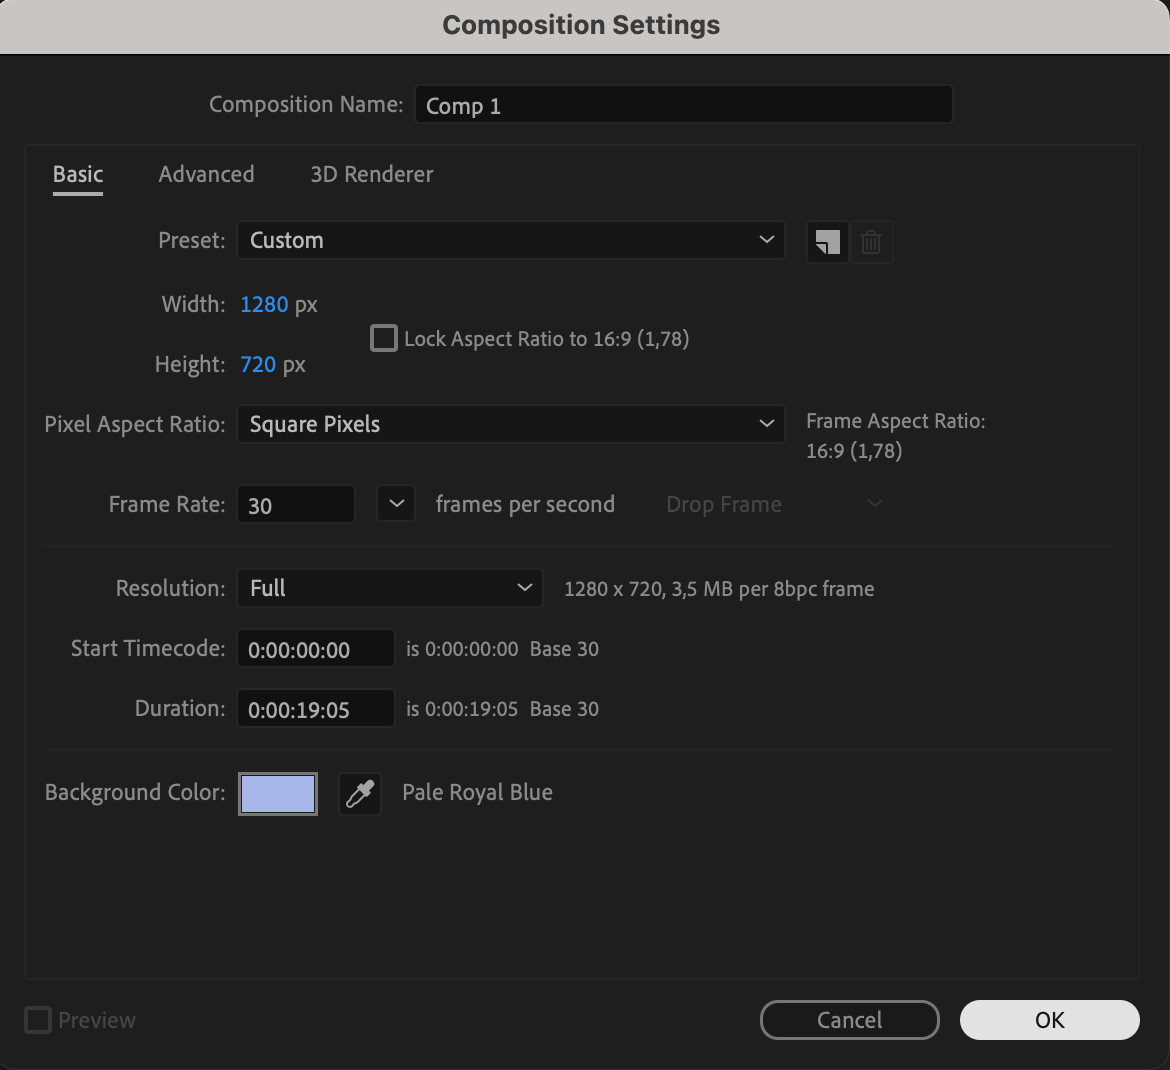 Step 2: Selecting the Rectangle Tool
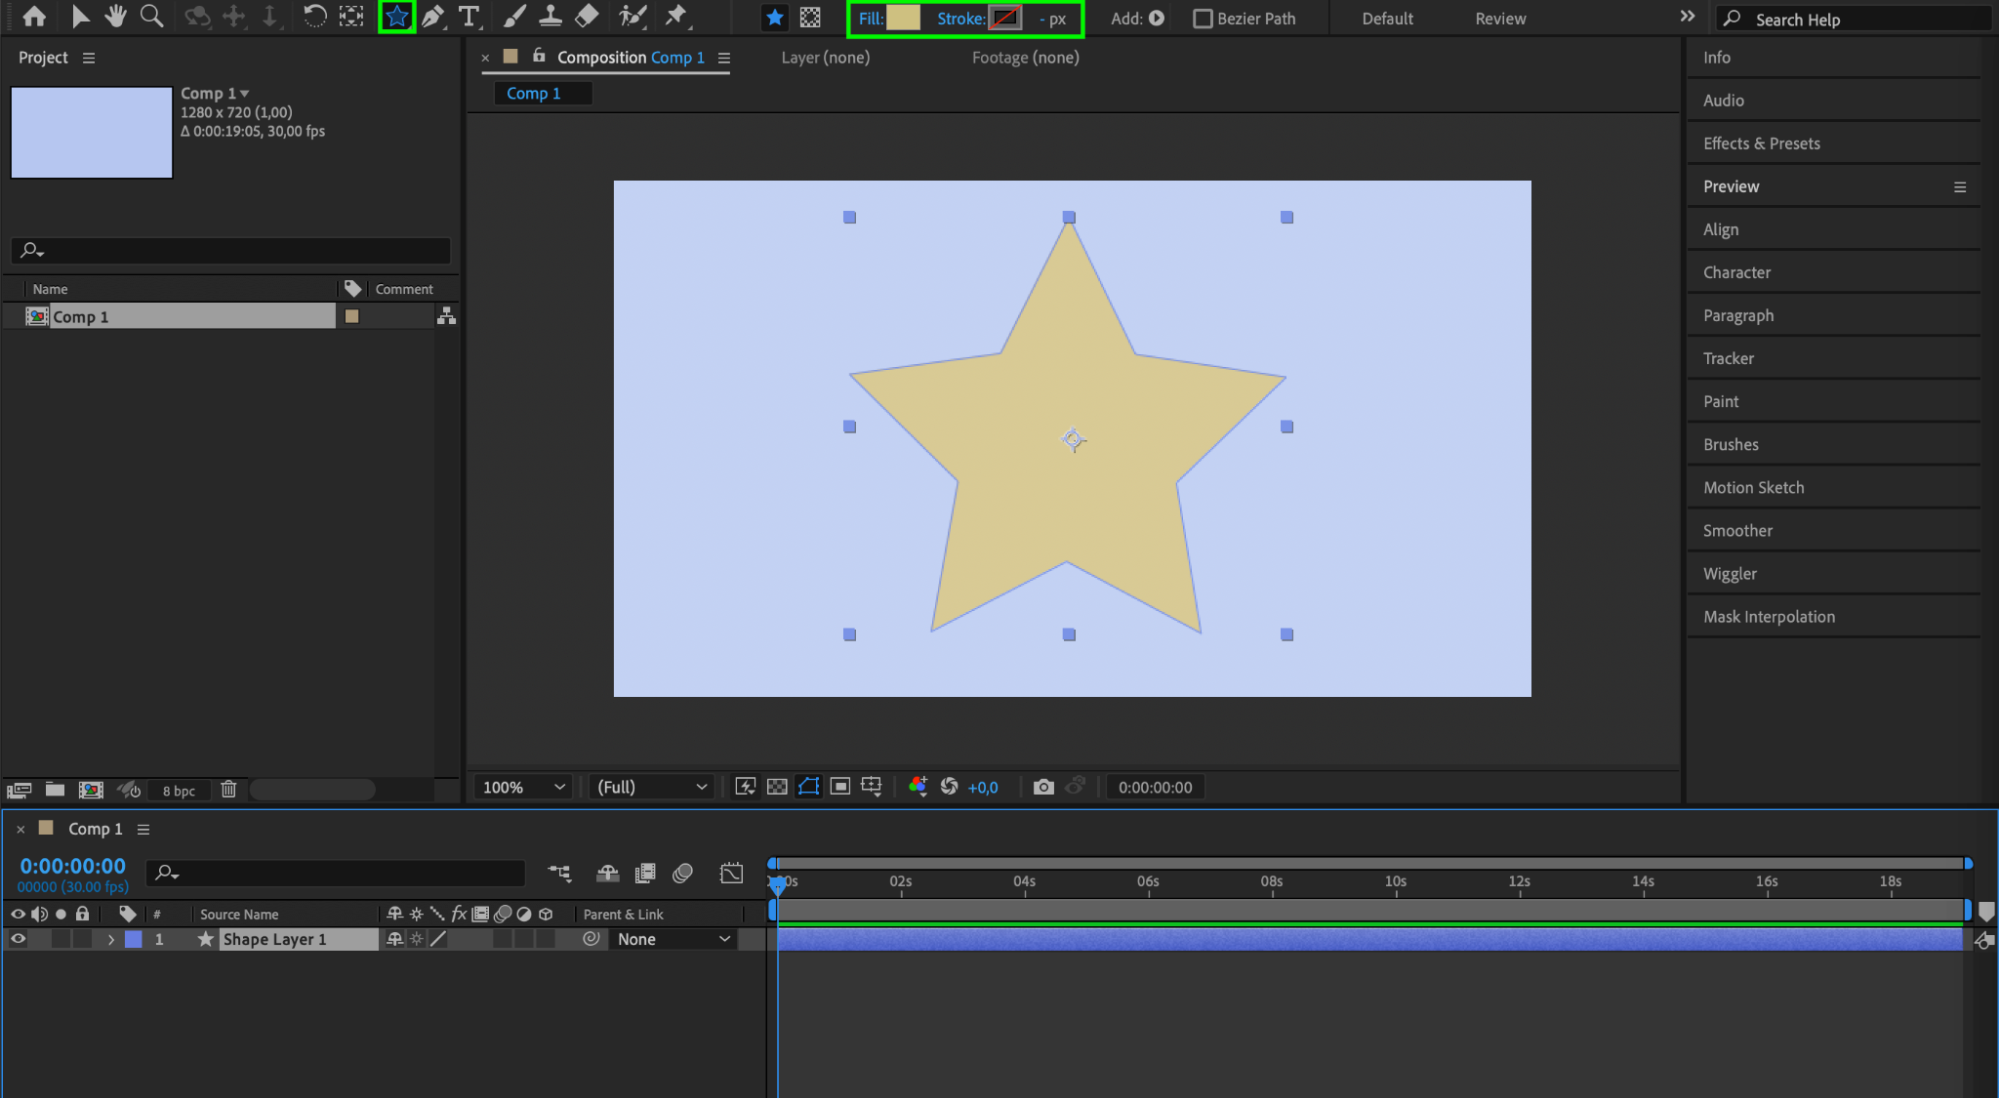
In the toolbar, select the Rectangle Tool (Q) and hold down the mouse button until the submenu appears.
Step 3: Choosing the Star Tool
From the submenu, choose the Star Tool and switch to the composition panel to create a shape.
Step 4: Adjusting Shape Properties
Expand the layer properties and navigate to Contents > Polystar 1 > Polystar Path 1. Find the “Points” parameter.
Step 5: Creating the Triangle Shape
Set the number of sides to 3 and adjust the size and position of the triangle as desired.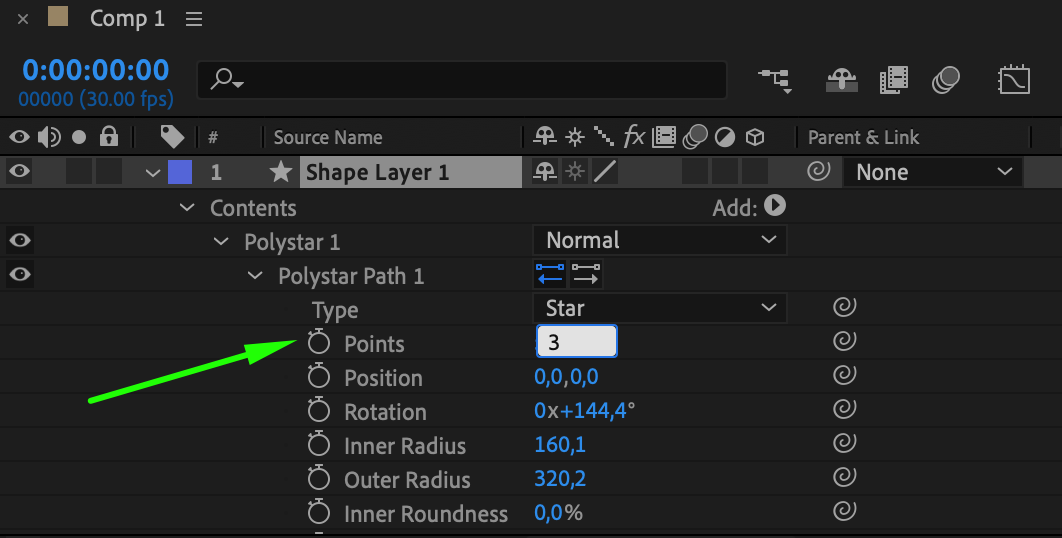
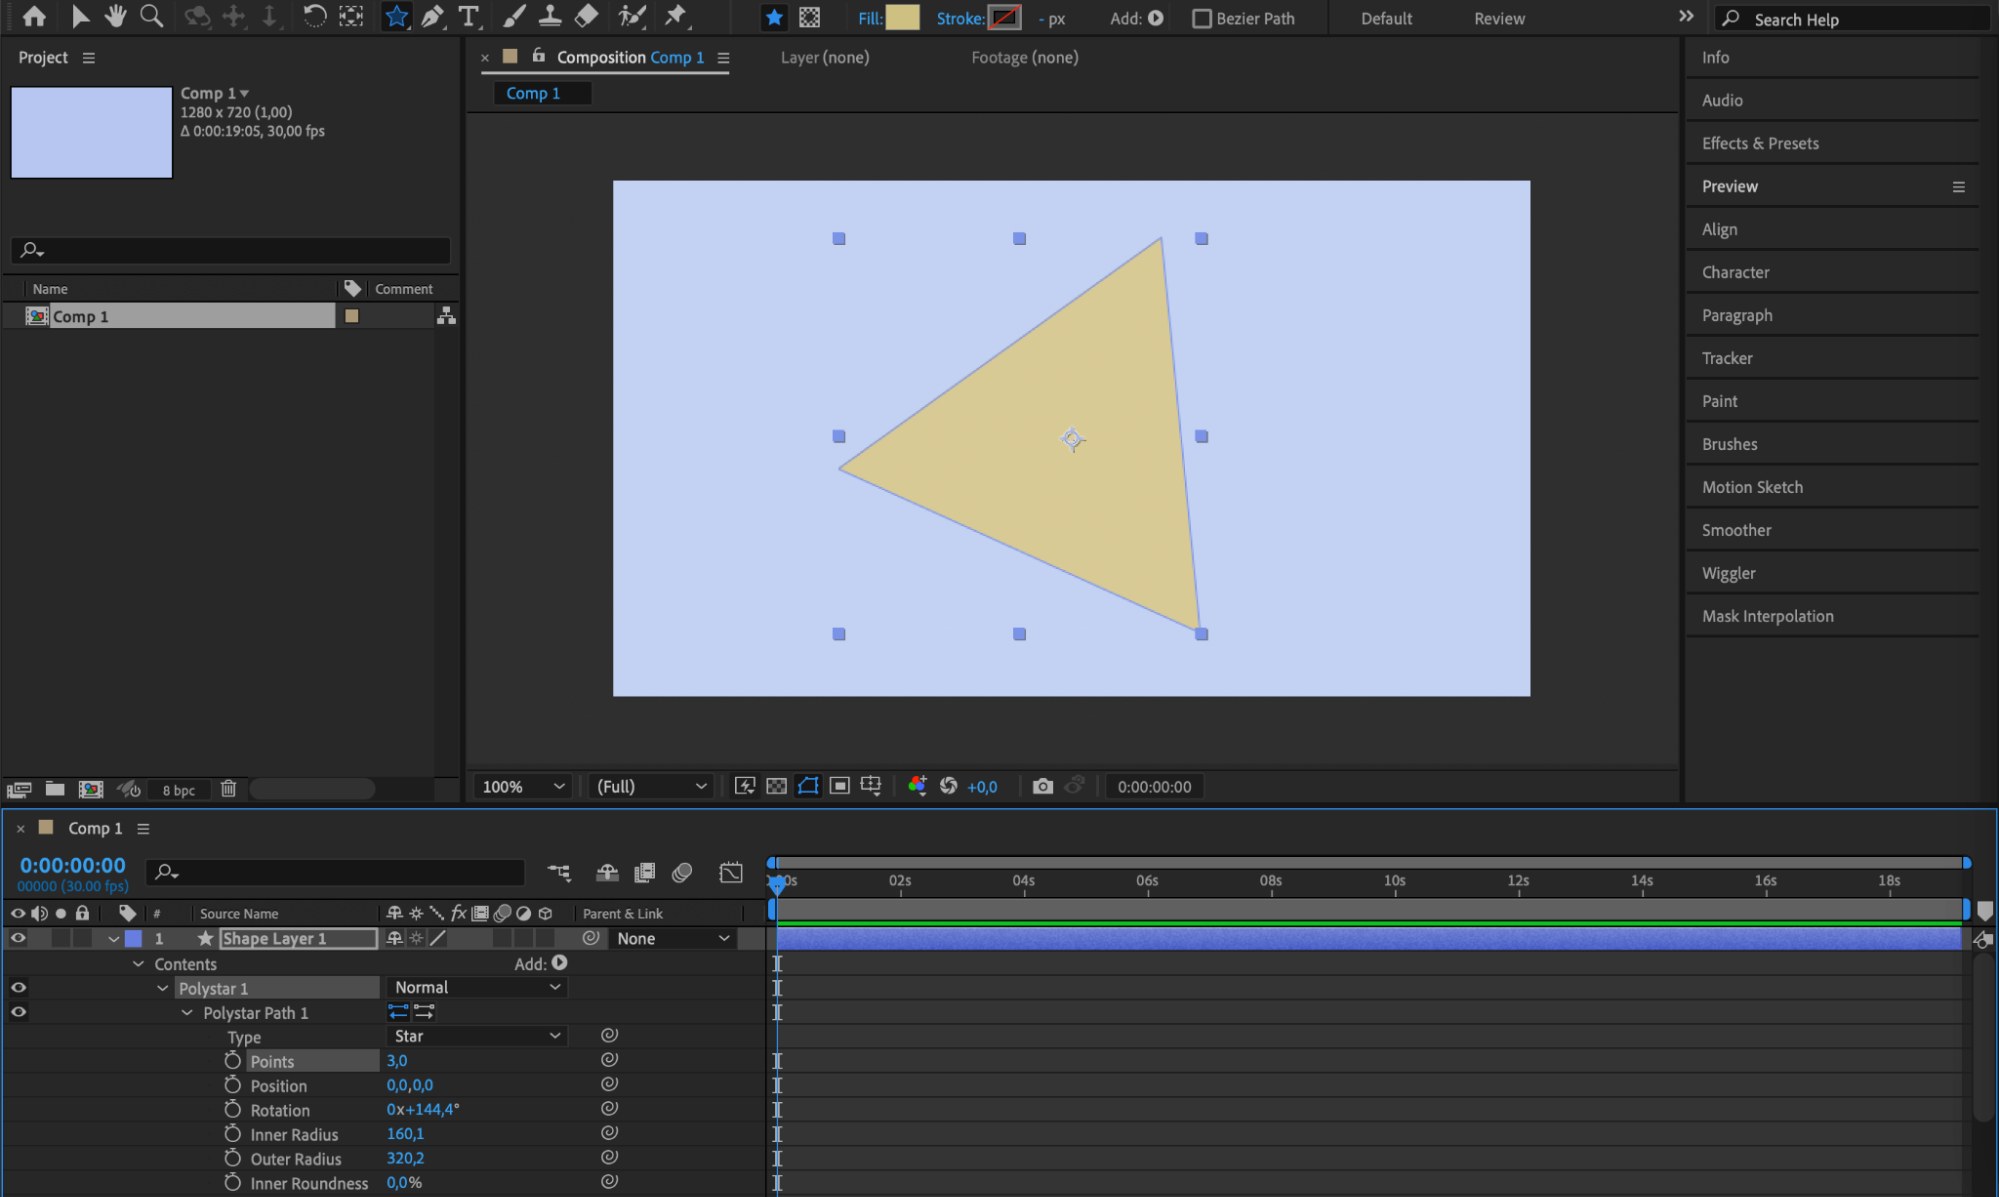
Step 6: Animating the Triangle
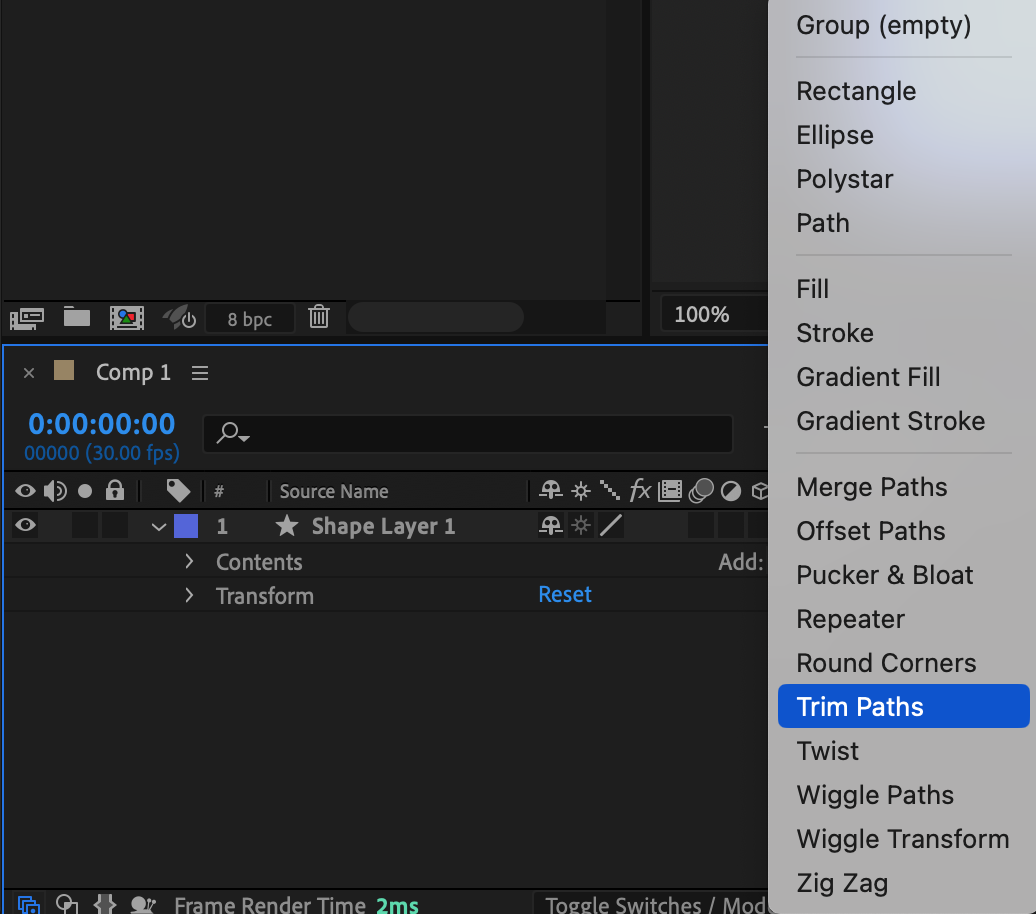
Select the triangle layer, go to the “Add” menu, and choose “Trim Paths” to create a control for animating the triangle’s path.
 Step 7: Setting Keyframes
Set keyframes at the start and end of the timeline. Manipulate the control points or adjust the “Start” and “End” values in the “Trim Paths” settings to modify the shape of the triangle.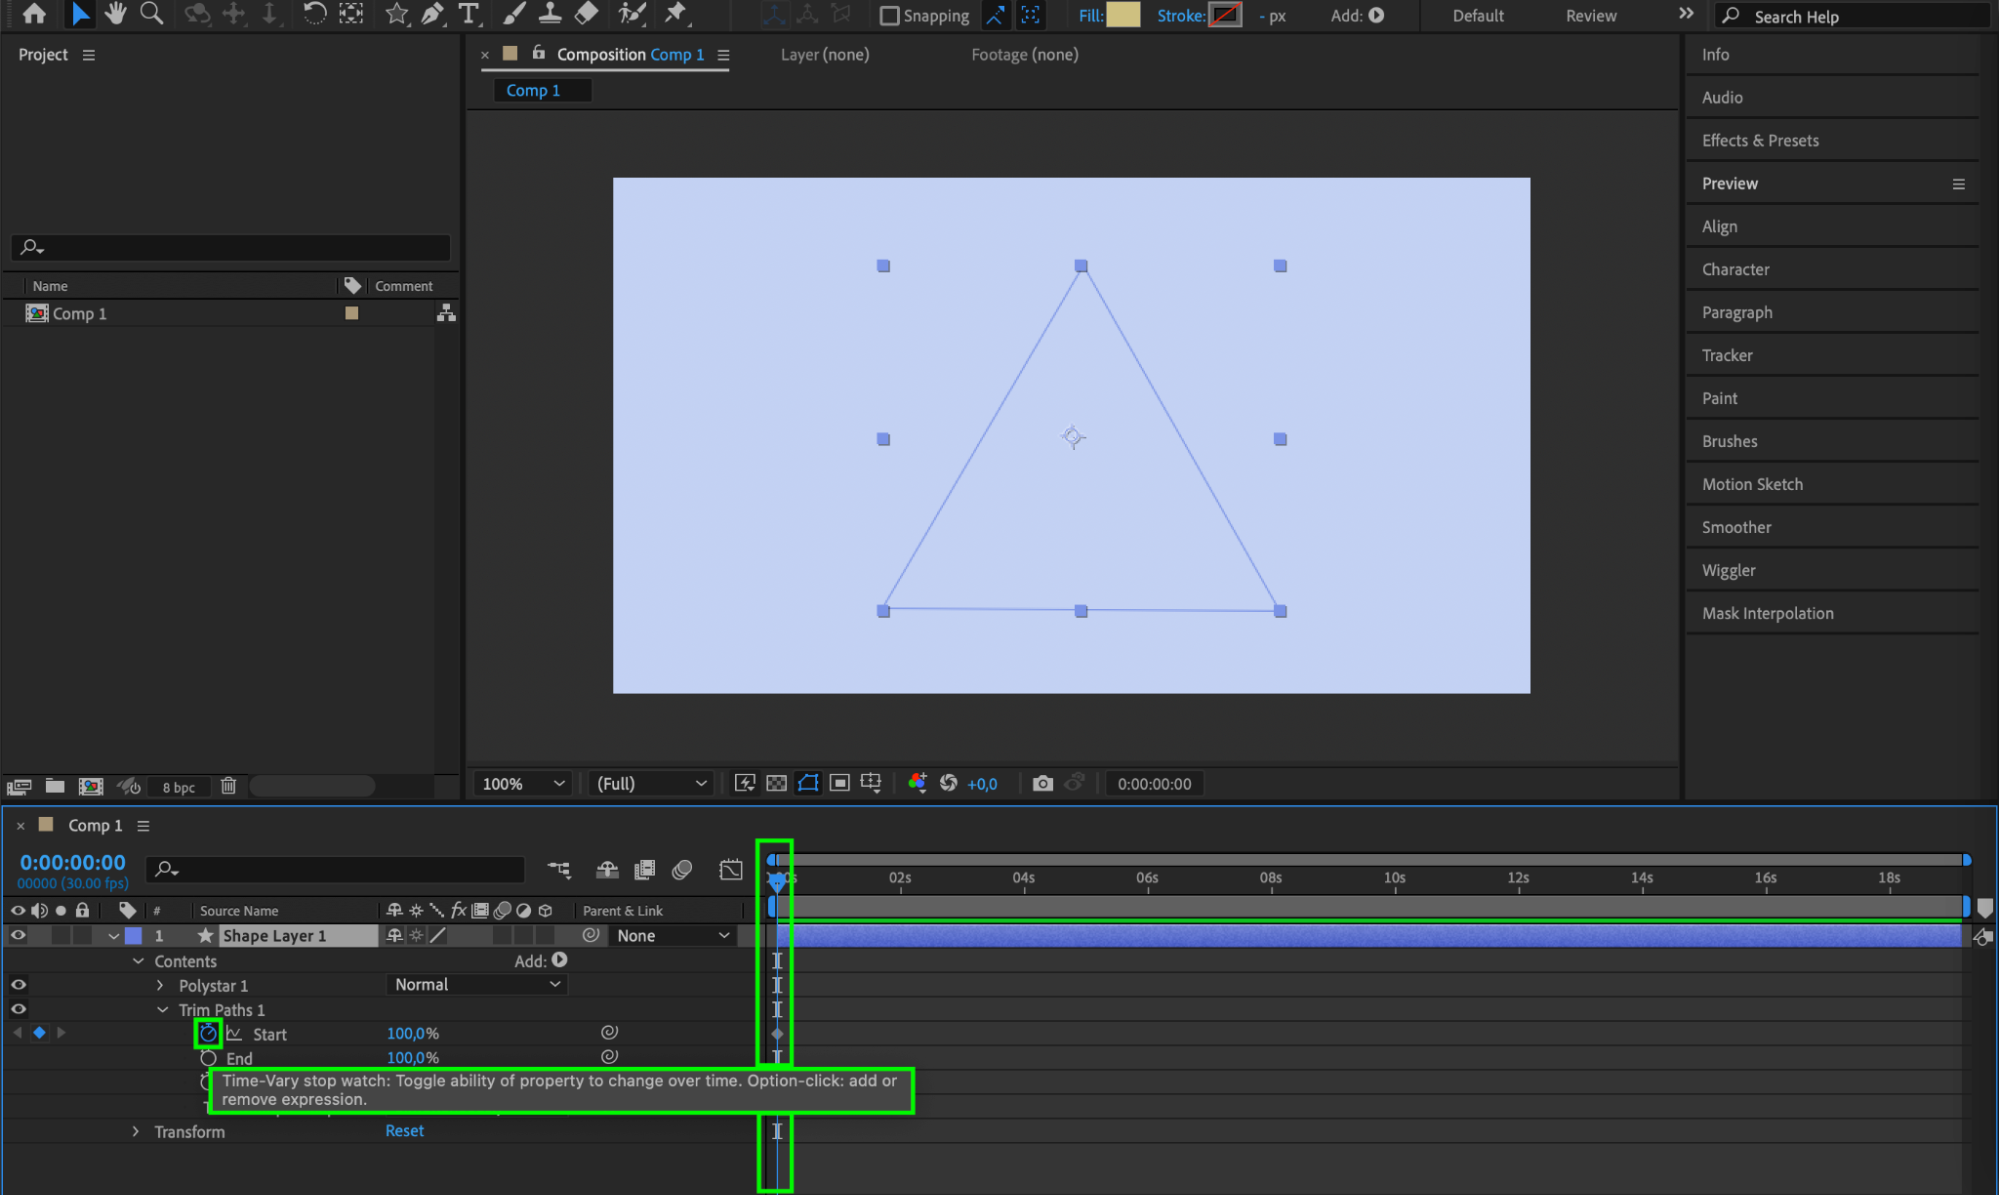
 Step 8: Adding Depth and Dimension
Enhance the triangle animation by applying effects like “Gradient Ramp” to create a gradient fill. Experiment with colors and blending modes for desired visual effects.
 Step 9: Applying Additional Effects
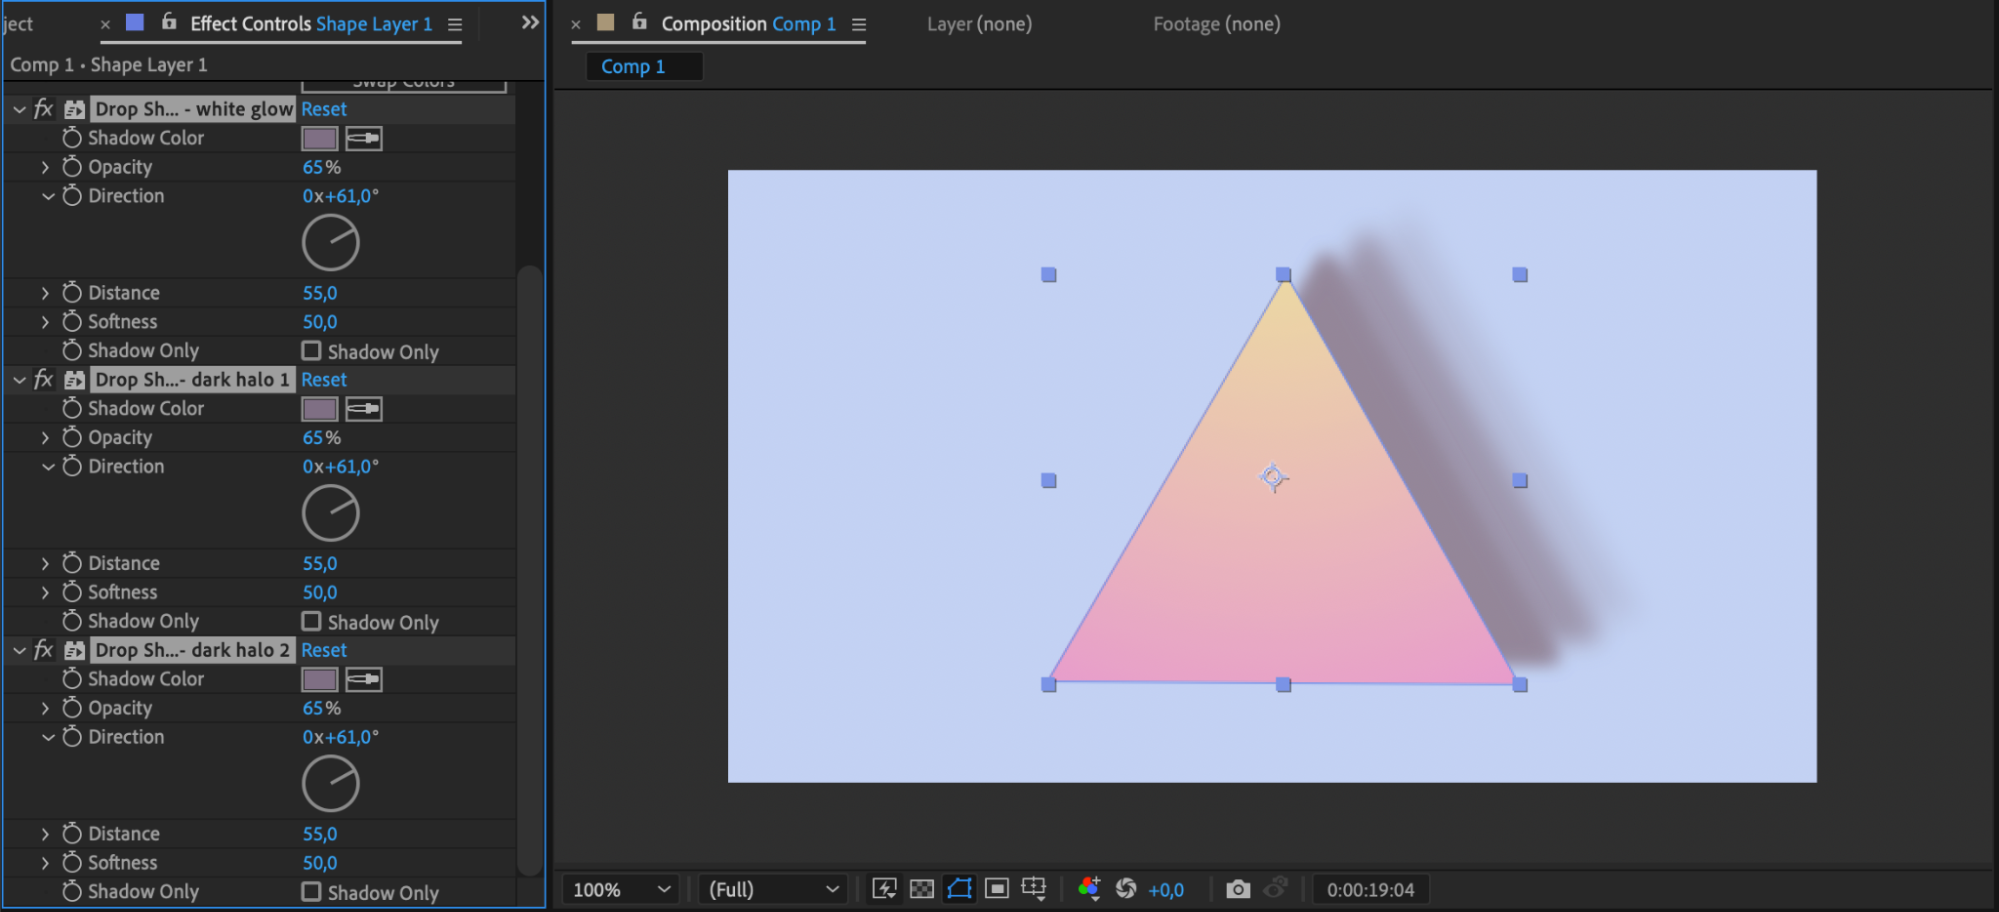
Explore options like drop shadows, glows, or textures to add depth and dimension to the triangle animation.
Step 10: Fine-tuning the Animation
Utilize the Transform section to edit various shape parameters and create animation using keyframes. Use the Easy Ease effect for smooth transitions.

Step 11: Exporting the Animation
Once satisfied, export the animation by selecting “Composition” > “Add to Render Queue” in After Effects. Set output settings and click “Render” to export your animation.

Conclusion
Congratulations! You’ve successfully learned how to create a stylish triangle animation in After Effects. By following these steps and unleashing your creativity, you can elevate the visual appeal of your videos and captivate your audience.
Remember to continuously experiment, customize, and fine-tune the animation until it matches your creative vision. With After Effects, the possibilities are endless. So, embrace your inner designer and explore the power of triangle animations in your projects!

