Adobe After Effects is a powerful software application that is commonly used by video professionals and designers to create compelling visual effects and motion graphics. One of the many useful features of After Effects is the ability to use masks to isolate and manipulate specific parts of a layer. Masks are essentially shapes you draw over your footage or graphic elements, and they allow you to hide or reveal different parts of the layer.
If you want to use masks in After Effects, here are some steps to follow:
1. Create a new project or load an existing one.
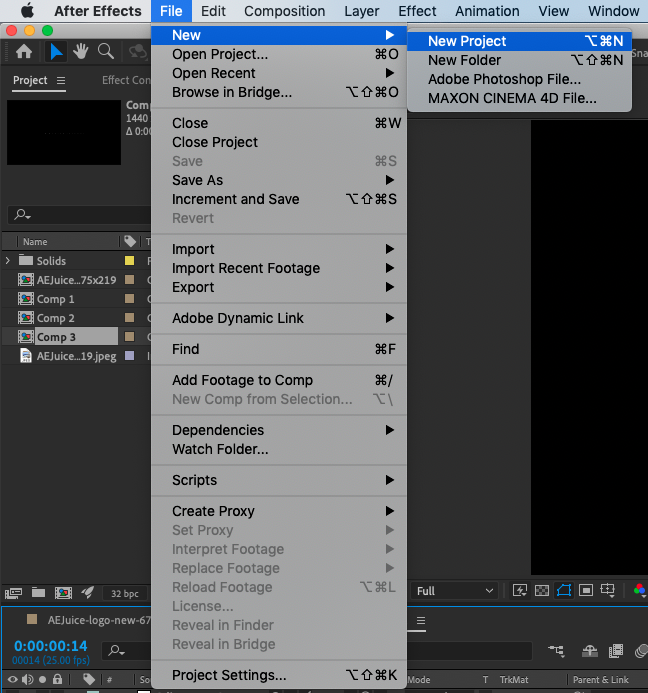
- To create a new project, go to File > New > New Project, or use the keyboard shortcut ALT + CTRL + N on Win or Option + CMD + N on Mac.
- To load an existing project, go to File > Open Project.., or use the keyboard shortcut CTRL + O on Win or CMD + O on Mac.
Get 10% off when you subscribe to our newsletter

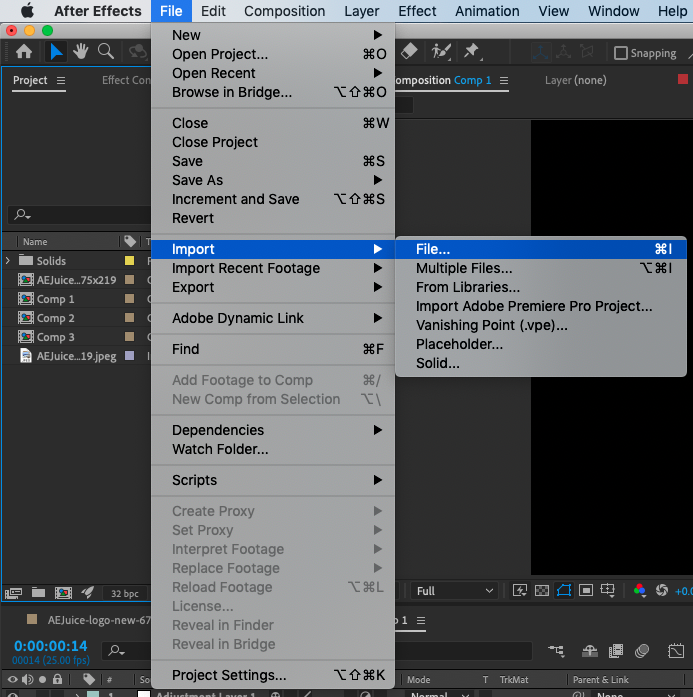
2. Import your media files into the project. You can do this by going to File > Import > File.., or by dragging and dropping the files into the Project window in the After Effects interface.
Get 10% off when you subscribe to our newsletter

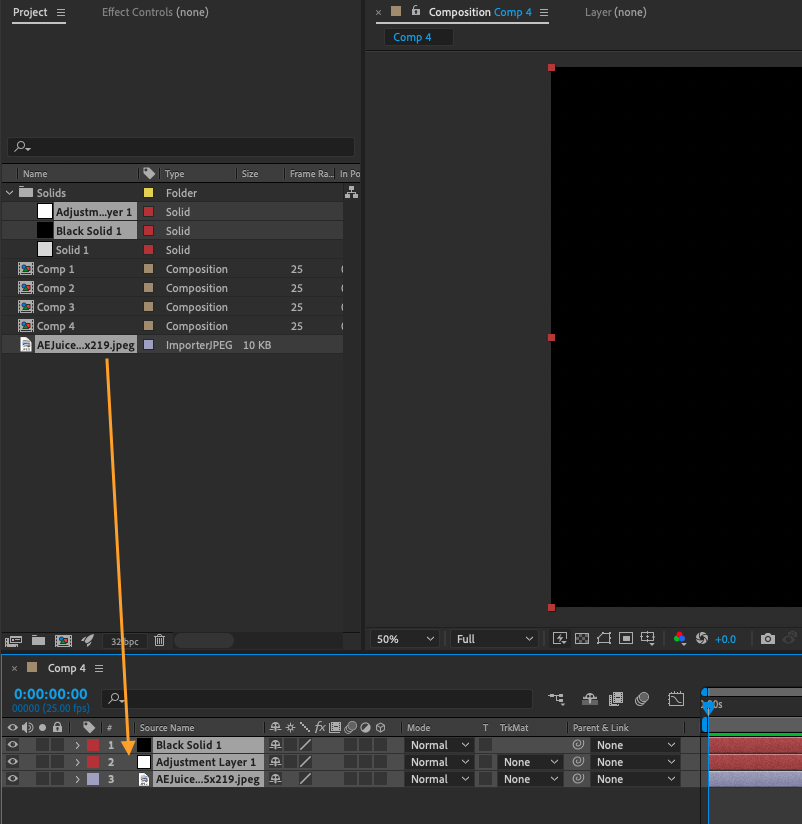
3. Add your files to the composition by dragging and dropping them from the Project tab into the Timeline, Composition, or Layer tab.
4. Select the layer that you want to apply the mask to in the timeline.
You can do this by clicking on the layer name in the timeline panel.
Get 10% off when you subscribe to our newsletter

5. Choose the shape tool that you want to use to create the mask.
You can access the shape tools by clicking on the Q key on your keyboard or by going to the toolbar and selecting the shape tool that you want to use (e.g. Rectangle Tool, Ellipse Tool, Pen Tool).

Get 10% off when you subscribe to our newsletter

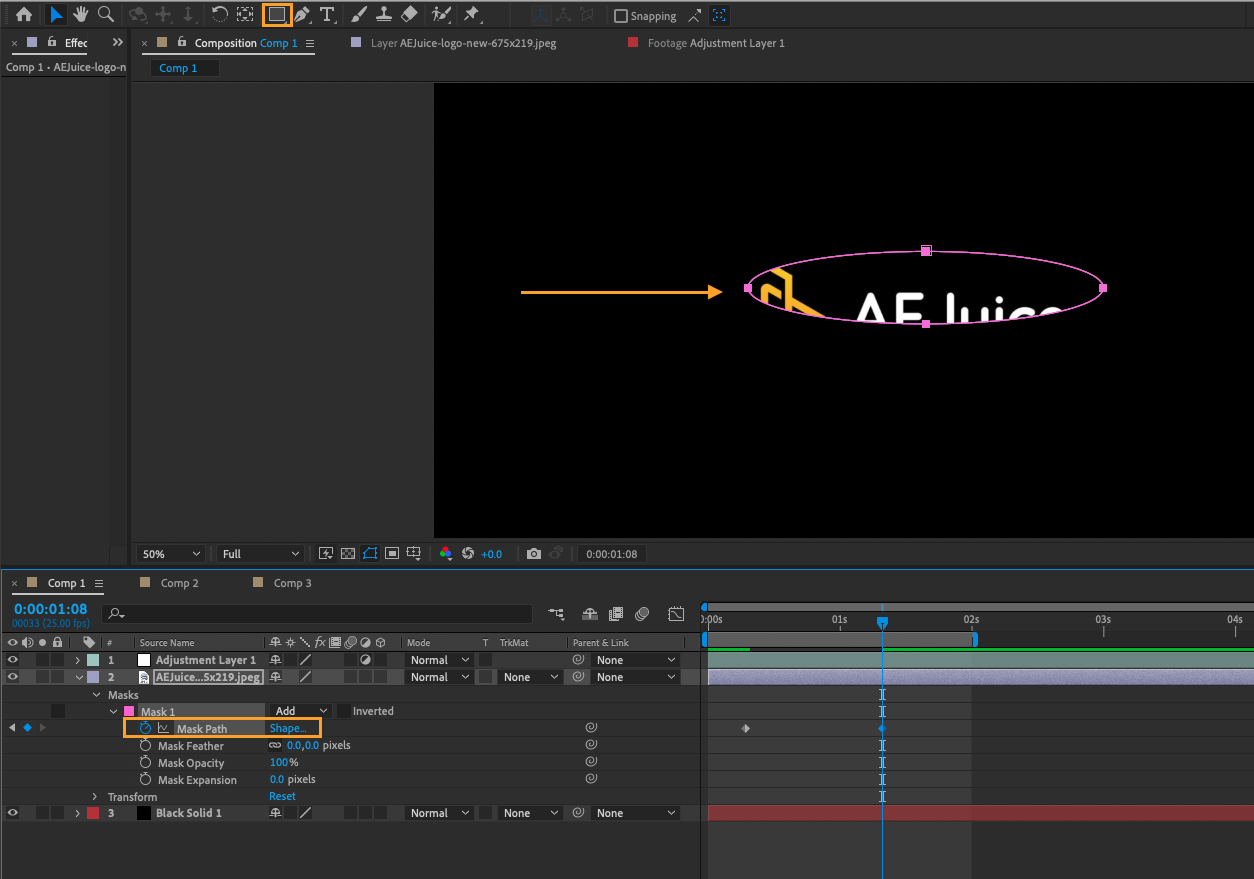
6. Create your mask in the viewport.
You can use the shape tools to draw a rectangle, or ellipse, or use the Pen tool to create a more organic shape. You can also use the selection tool to adjust the position, rotation, and size of the mask.
Get 10% off when you subscribe to our newsletter

7. Adjust the properties of the mask by selecting the mask in the timeline and going to the effect controls panel.
You can use the various options in the effect controls panel to modify the appearance and behaviour of the mask.
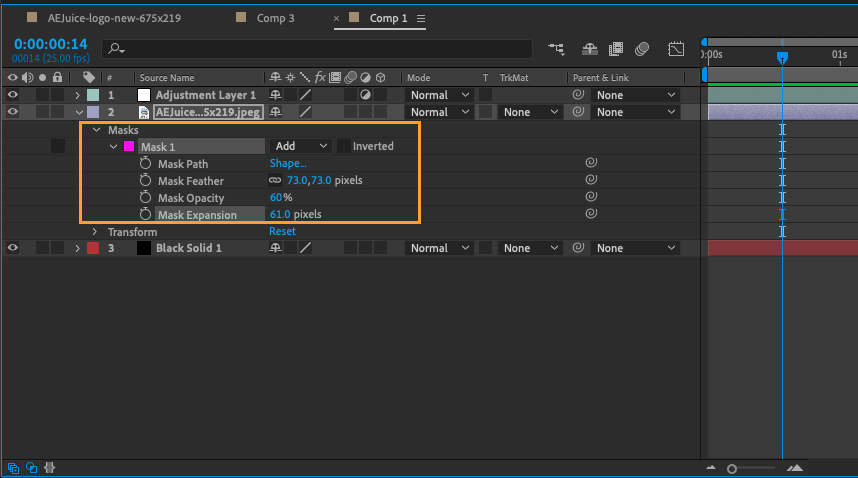
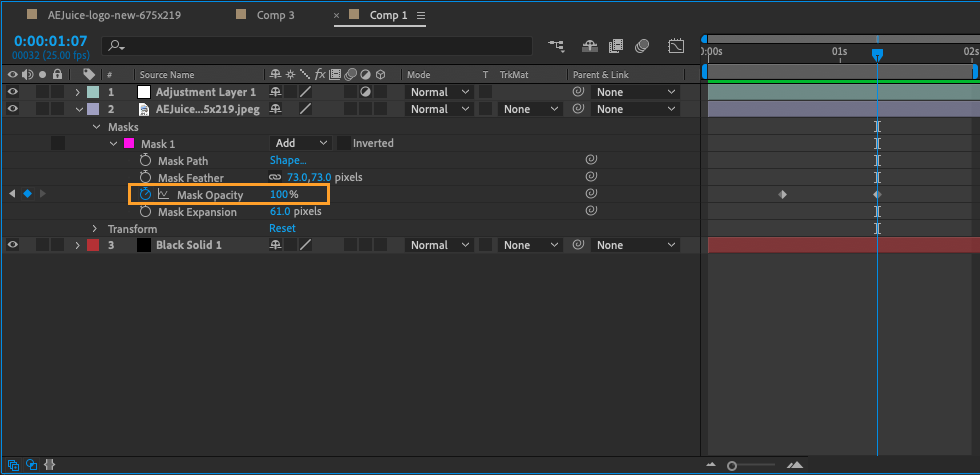
8. Animate the mask by going to the timeline and adding keyframes to the properties you want to change over time.
Get 10% off when you subscribe to our newsletter

Keyframes allow you to specify a specific value for a property at a specific point in time, and After Effects will automatically interpolate the values between keyframes.
I hope these steps help you to use masks in Adobe After Effects! If you have any further questions, please don’t hesitate to ask.
Get 10% off when you subscribe to our newsletter

There are a few more advanced masking techniques that you can try in Adobe After Effects to further enhance your compositions:
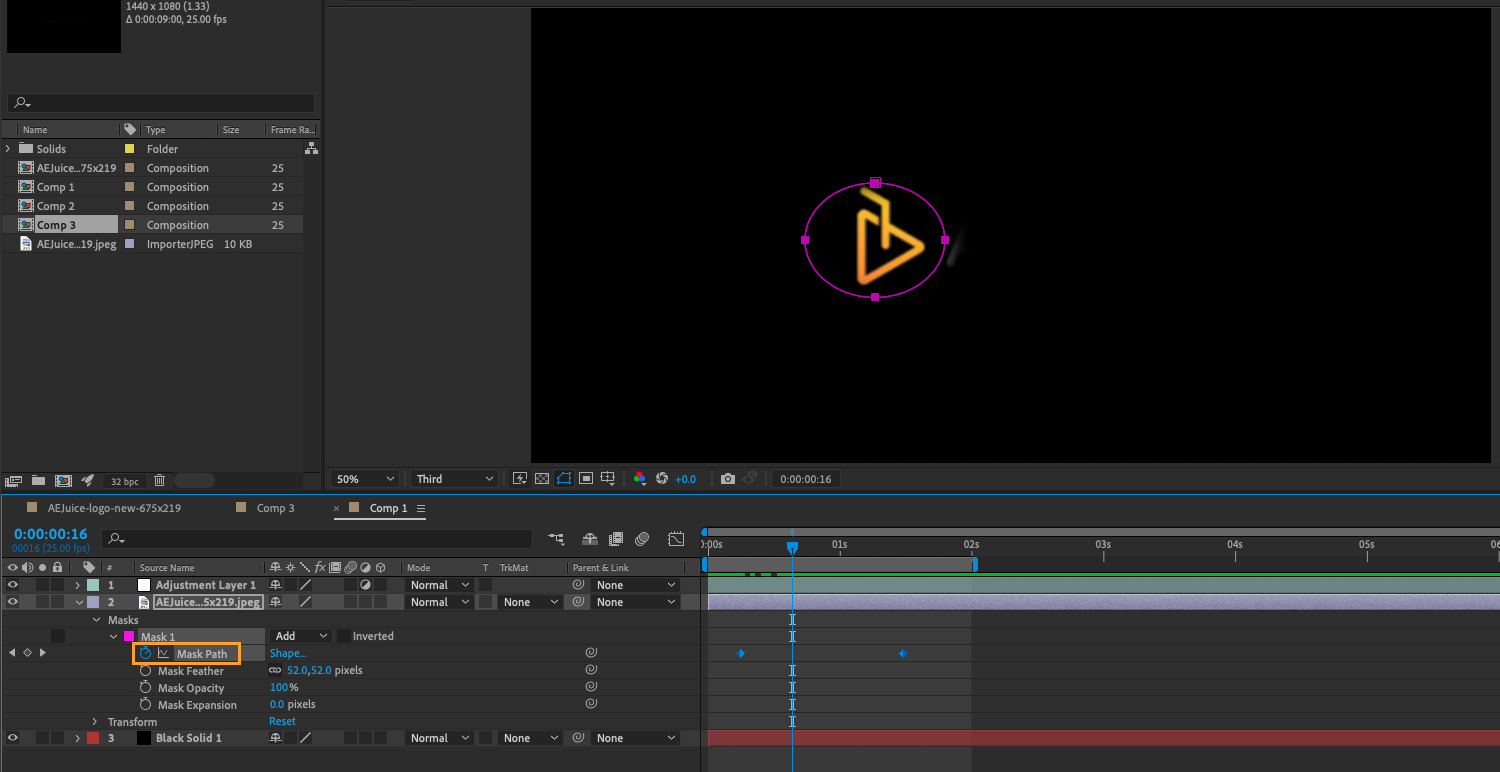
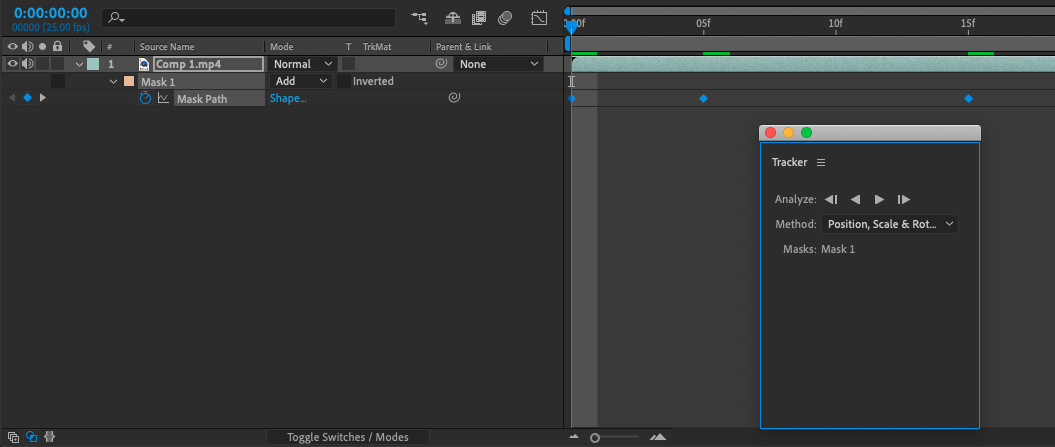
- Use the Mask Path property to animate your mask’s shape over time. This can be done by selecting the mask in the Timeline panel and then adding a keyframe to the Mask Path property in the Effect Controls panel. You can then adjust the shape of the mask at each keyframe to create complex masking animations.
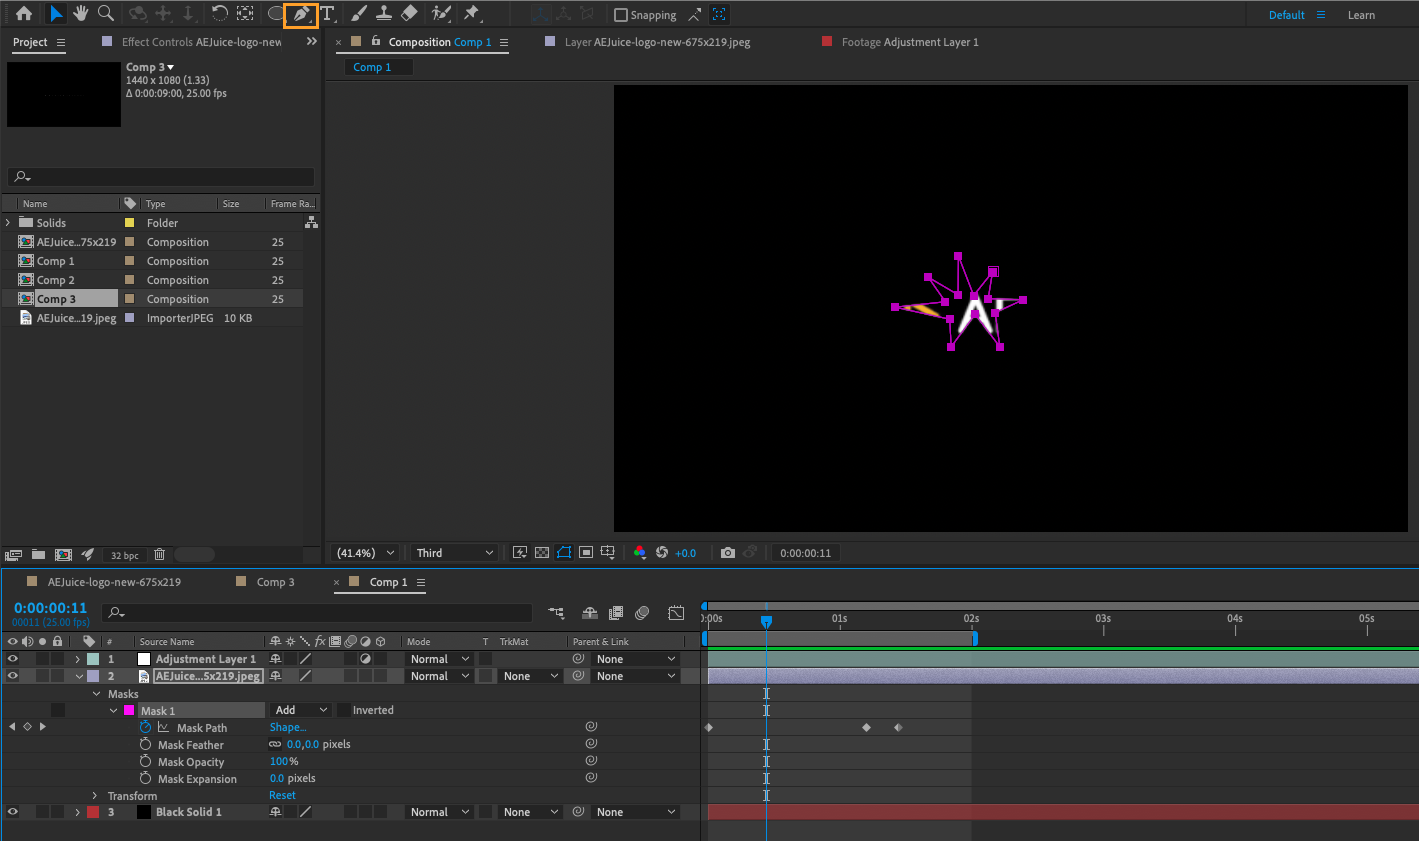
- Use the Pen tool to create custom mask shapes that are more precise and detailed than those created with the basic Mask Shape tools. This can be especially useful for masking objects with irregular or complex shapes.
Get 10% off when you subscribe to our newsletter

- Use the Mask Expansion feature to create a vignette effect around the edges of your composition. To do this, create a circular mask with the Ellipse tool and then use the Mask Expansion option to increase the size of the mask beyond the edges of the frame.
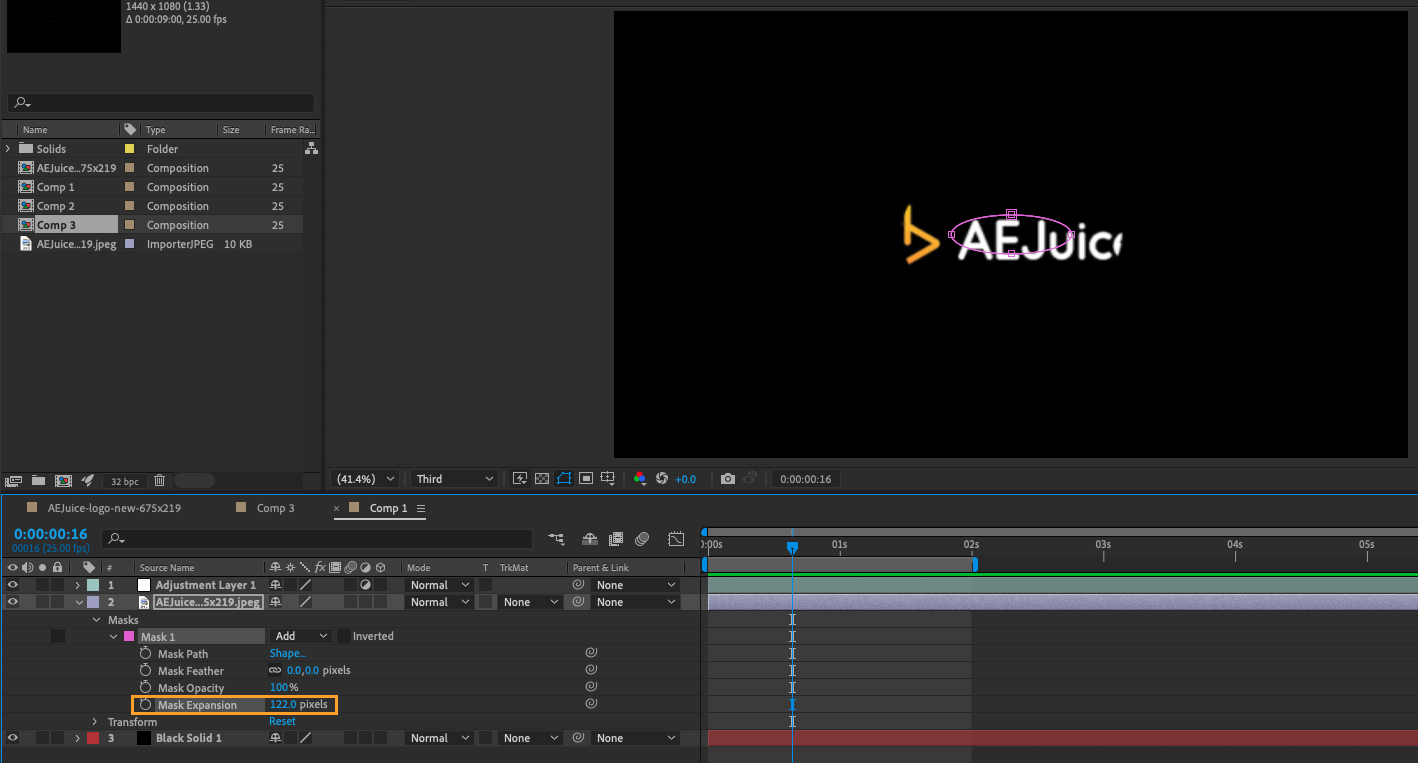
- Use the Mask Tracking feature to track the movement of multiple objects in your composition simultaneously. This can be done by creating a separate mask for each object and then using the Mask Tracking feature to follow the movement of each object independently.
Get 10% off when you subscribe to our newsletter

By mastering these advanced masking techniques, you can take your compositing skills in Adobe After Effects to a whole new level and create professional-quality visual effects and motion graphics.


