Mastering Morphing Transitions in After Effects
Unveiling the Step-by-Step Process of Morphing in After Effects
The process of morphing in After Effects unveils a realm of endless possibilities for creating captivating transitions and effects in motion graphics. In this article, you’ll learn how to craft smooth transitions between shapes using a detailed step-by-step guide.
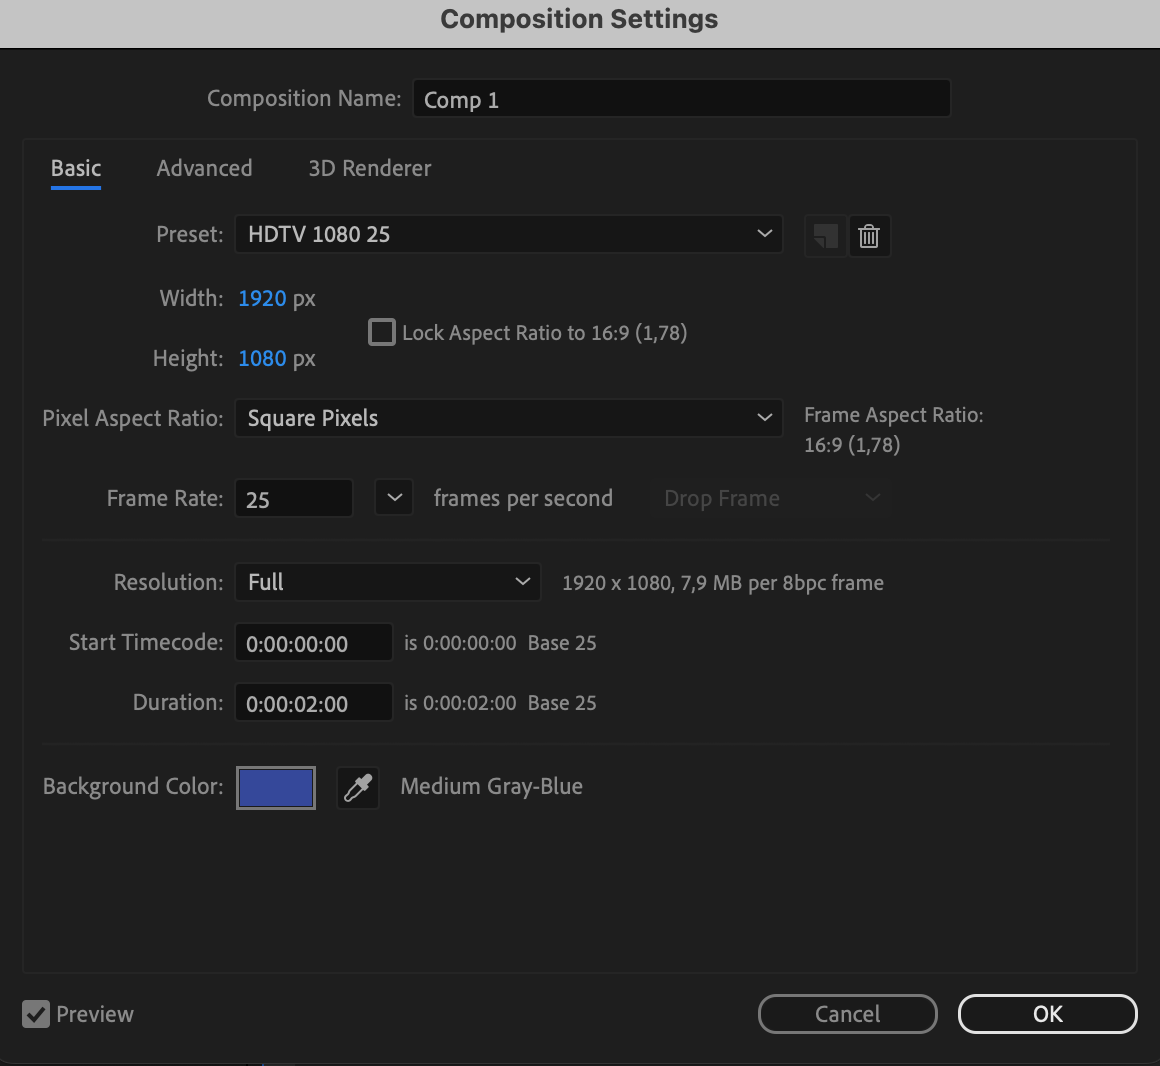
Step 1: Create a New Composition
Begin by creating a new composition and adjusting its parameters, including background color.
Get 10% off when you subscribe to our newsletter

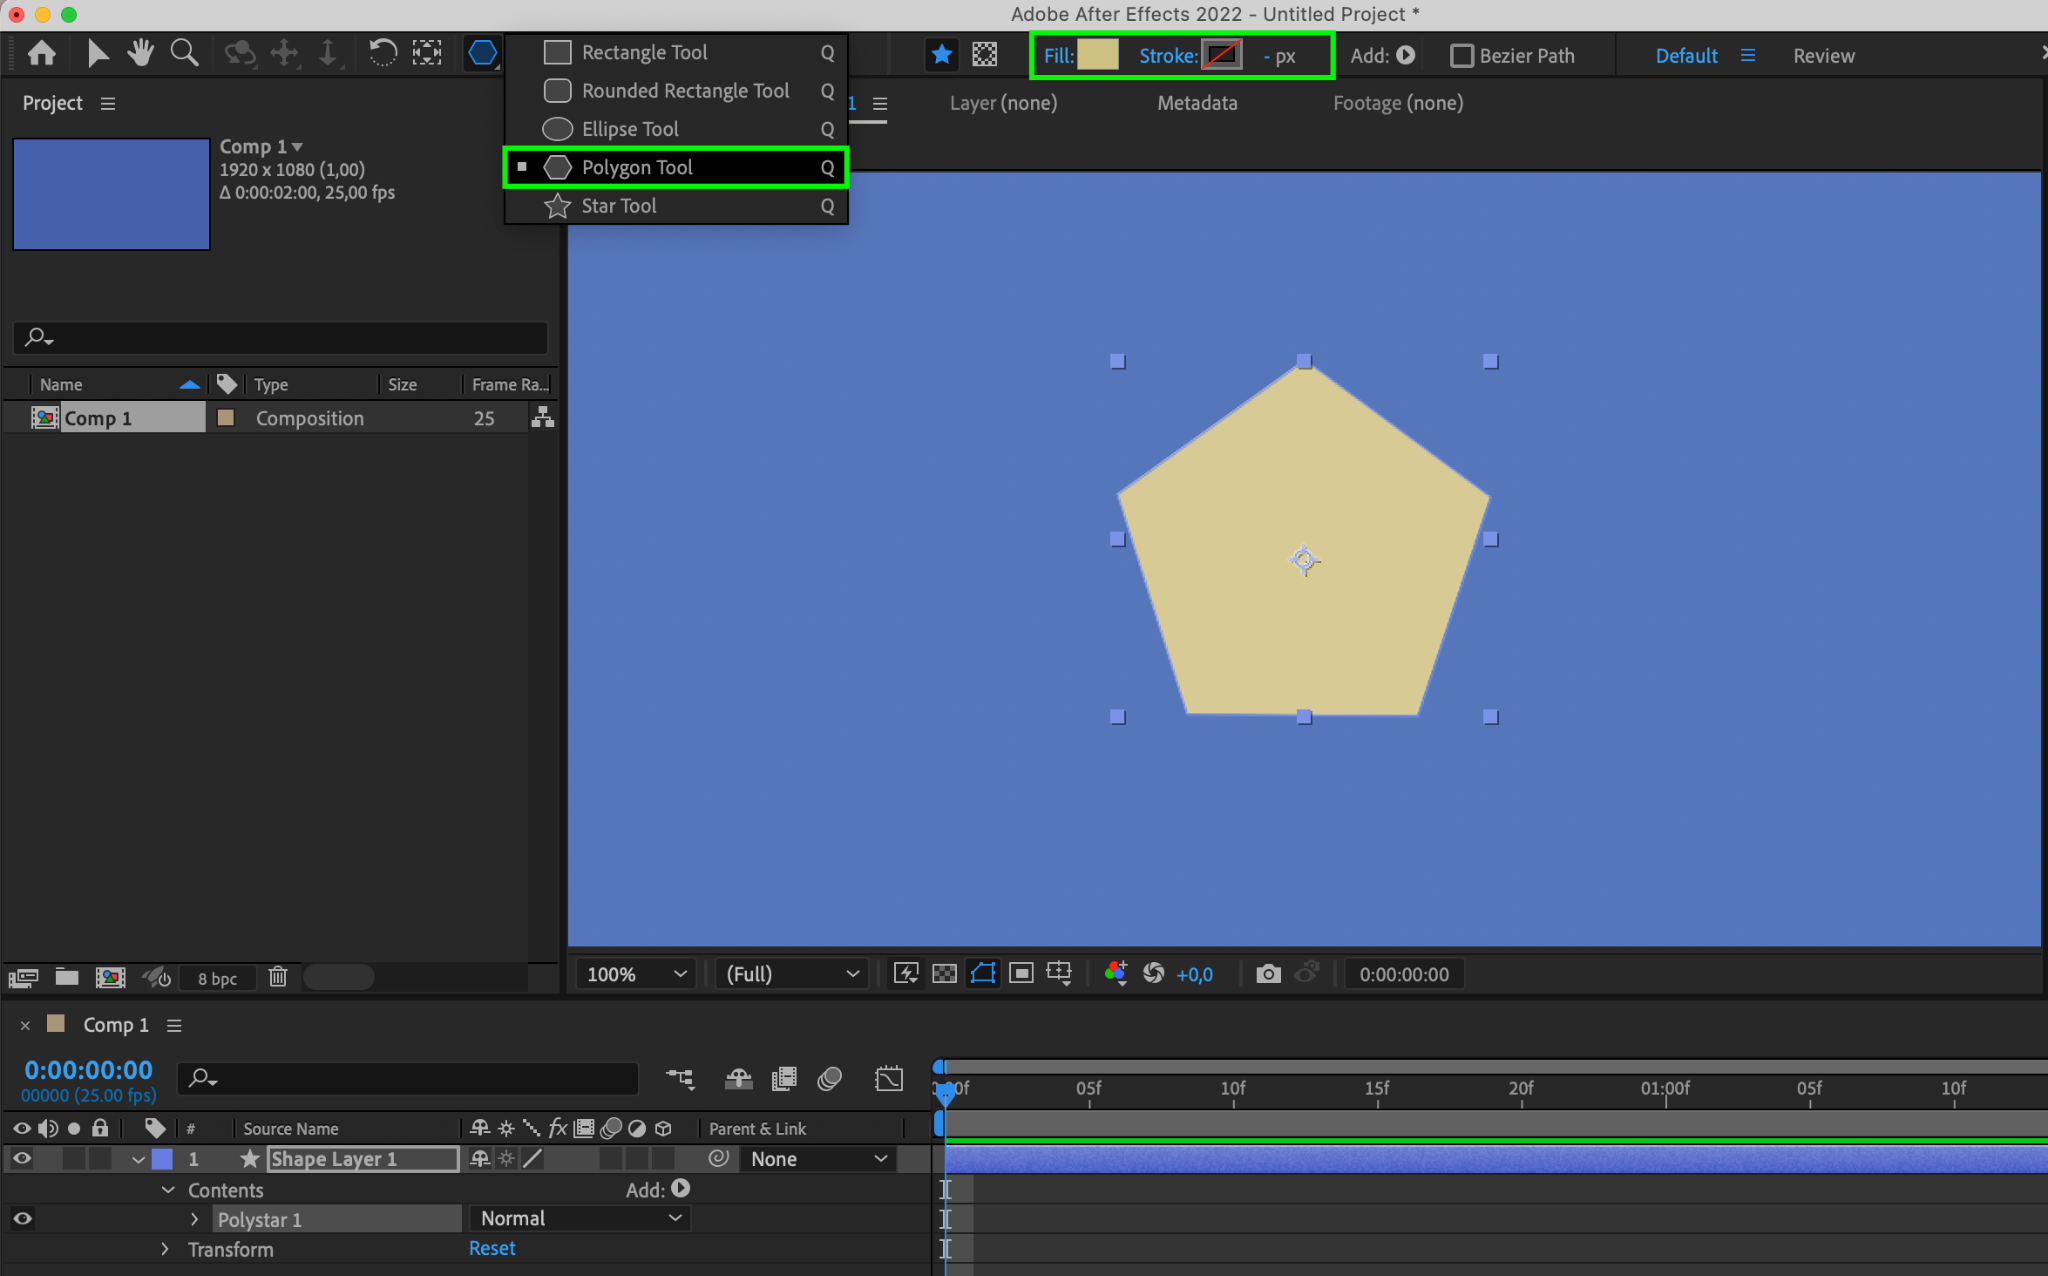
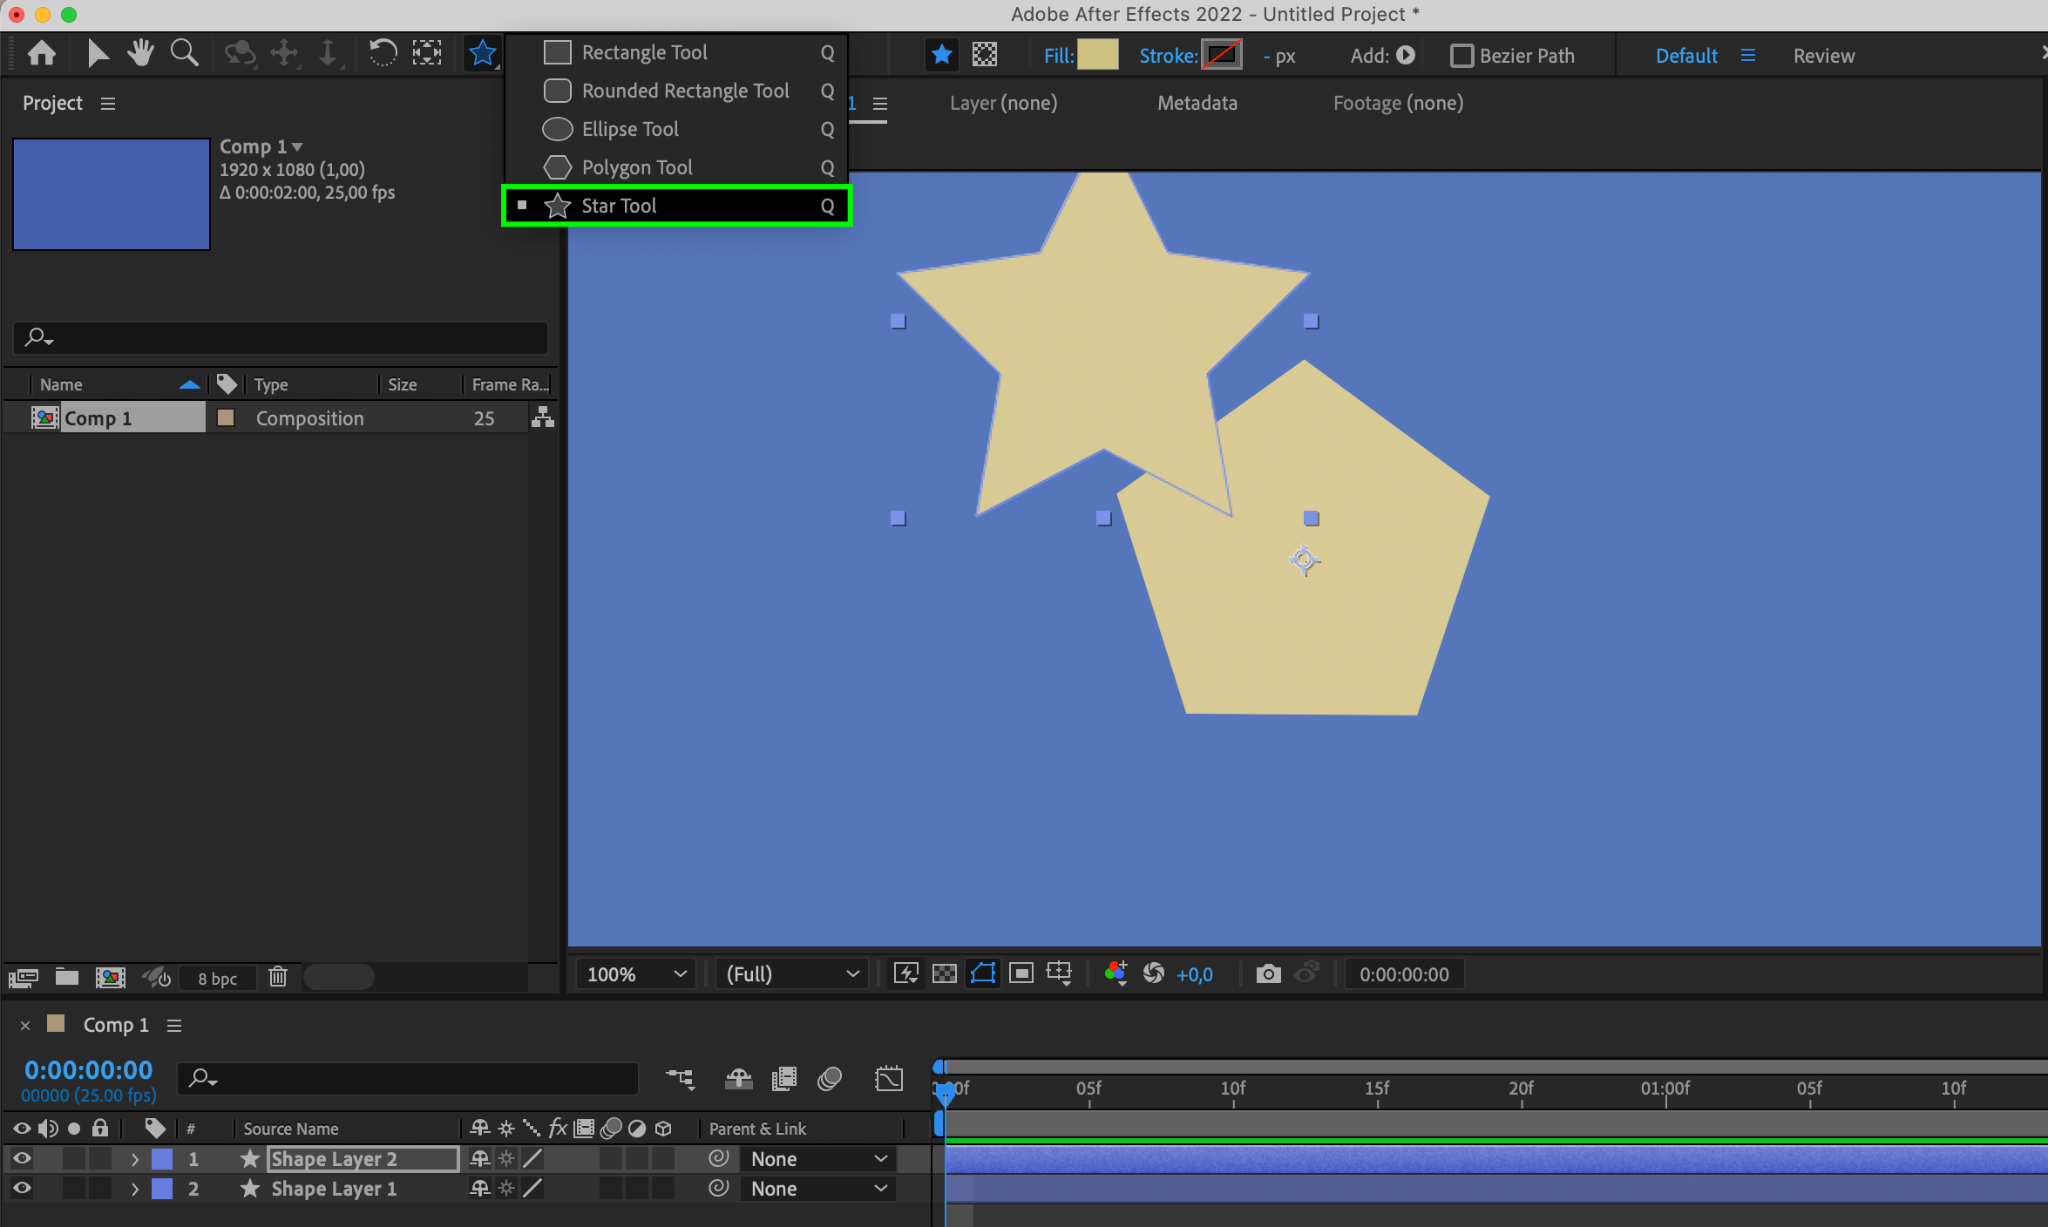
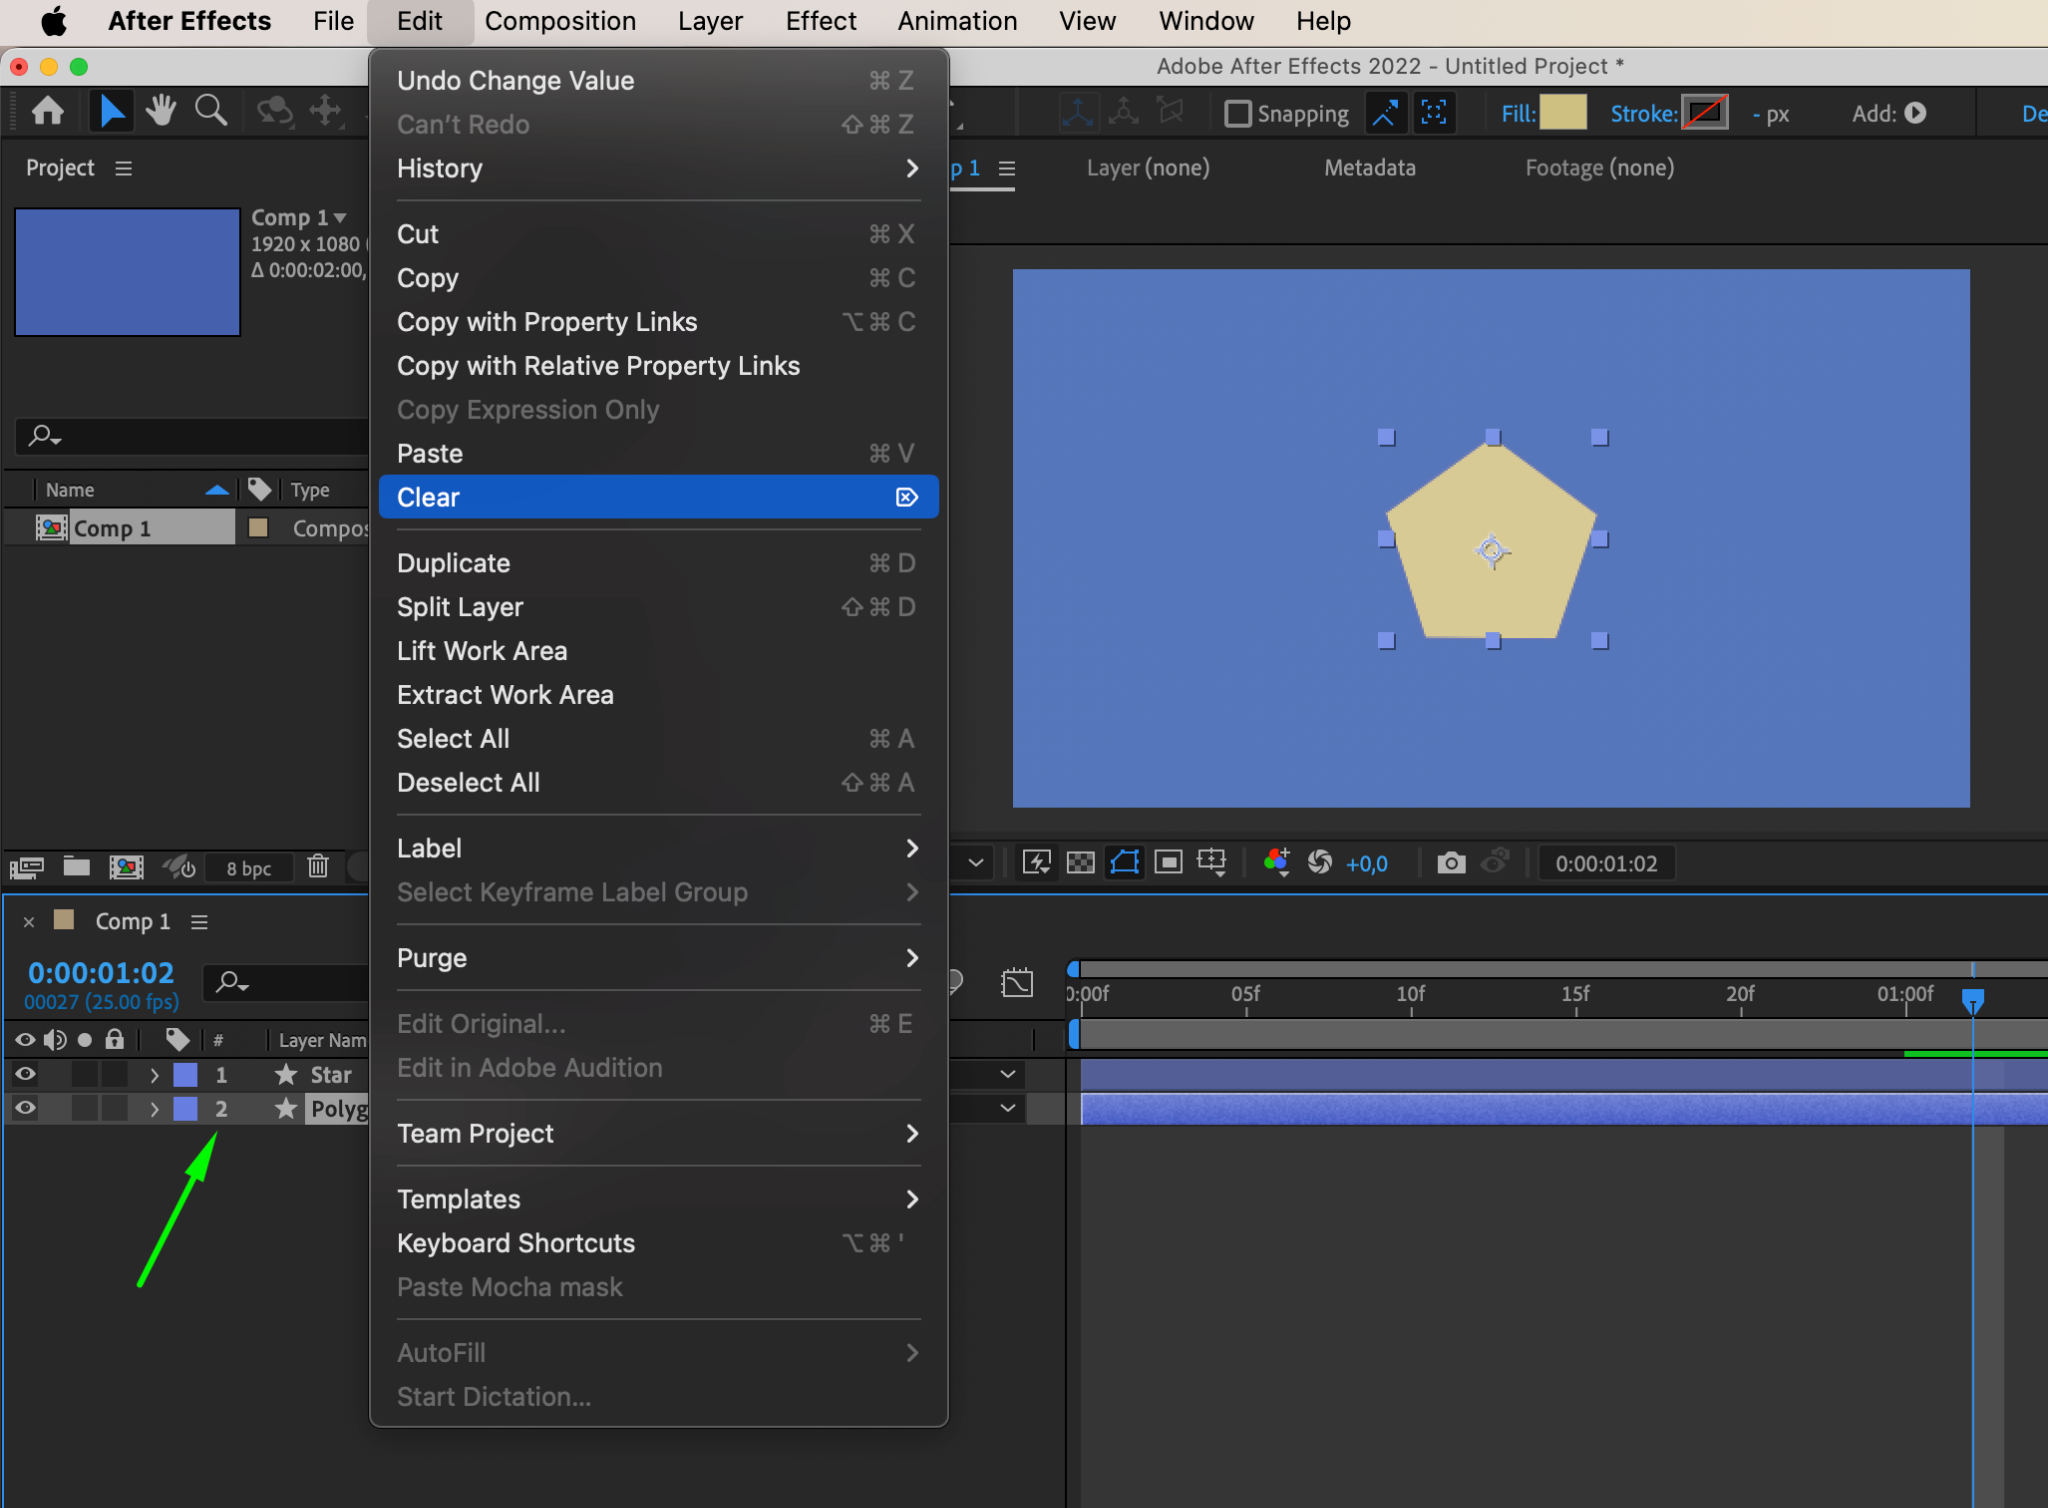
Step 2: Create Shape Layers
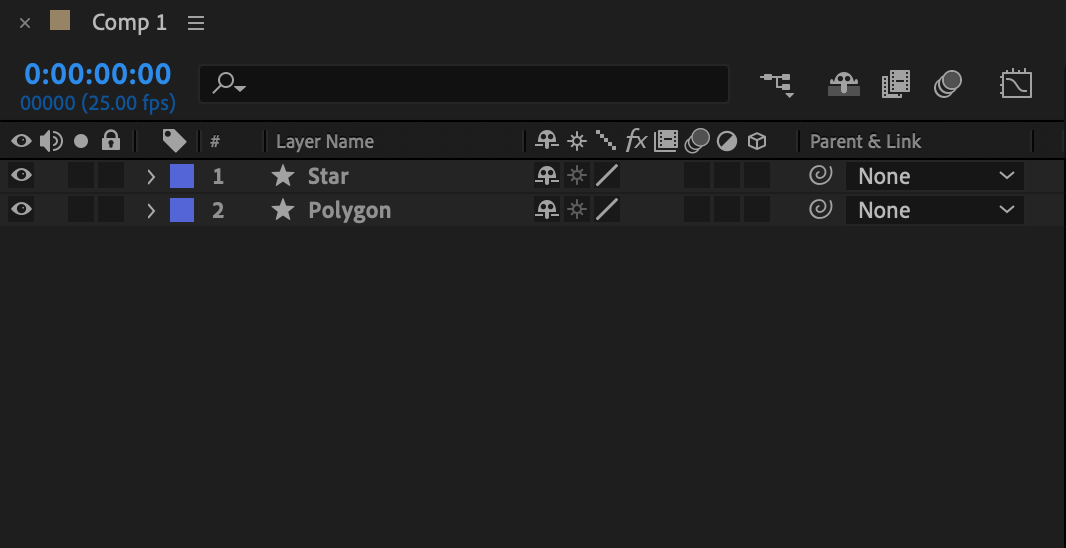
Utilize the Rectangle Tool/Star/Polygon/Ellipse or press the hotkey “Q” to create two shape layers, each representing the initial and final shapes you want to morph between.
Step 3: Arrange Shapes and Anchor Points
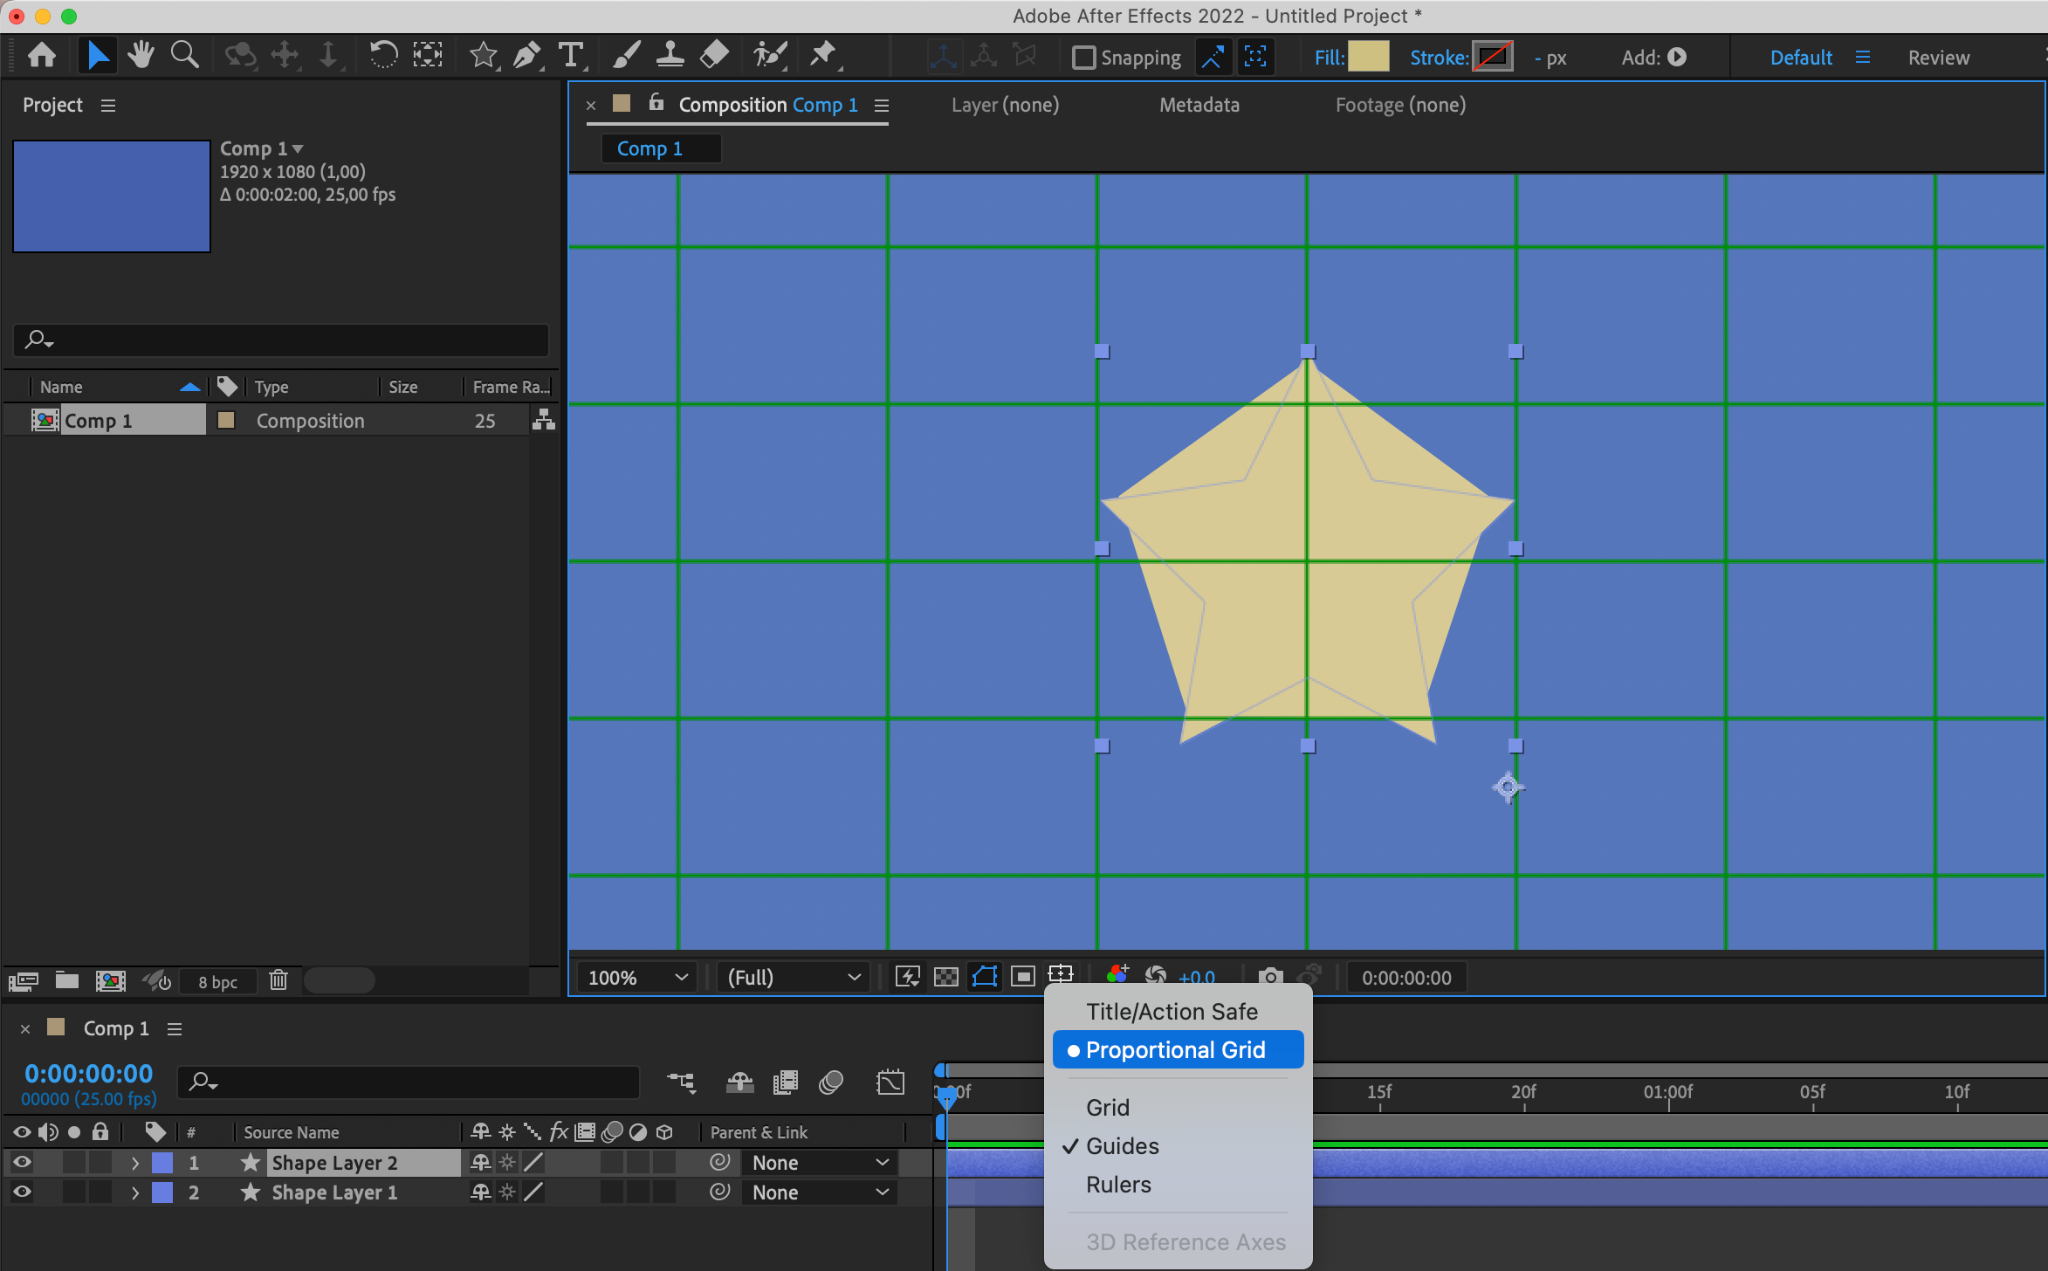
Use the Proportional Grid to evenly position the shapes on the composition panel. Use the Pan Behind (Anchor Point Tool) to place the anchor point in the center of each shape.

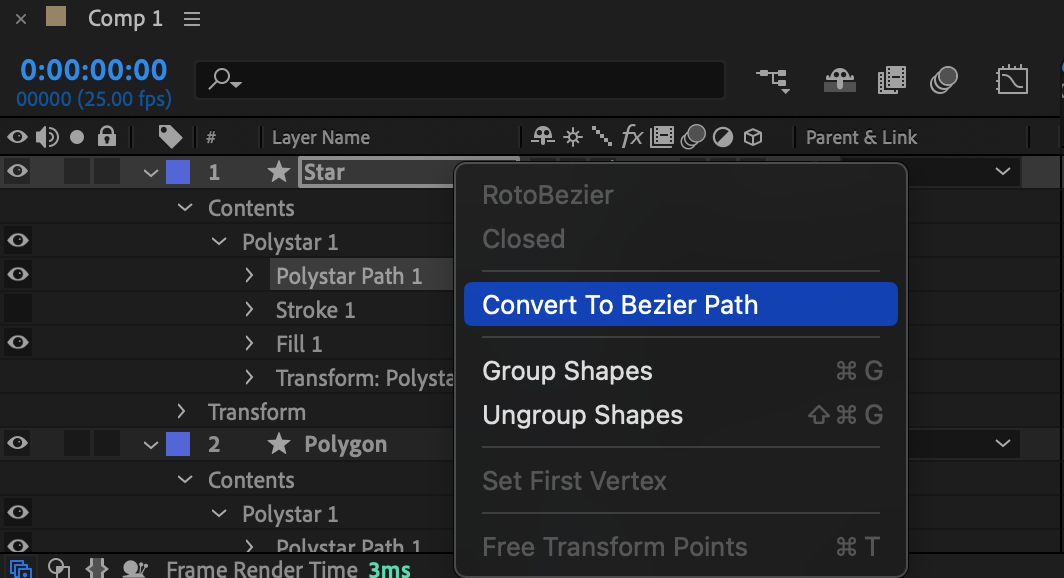
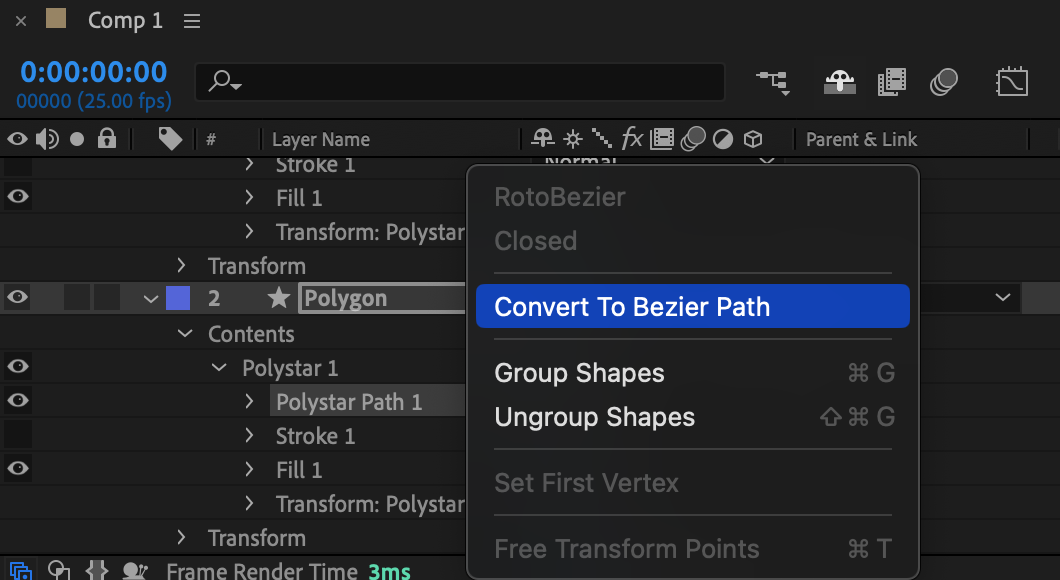
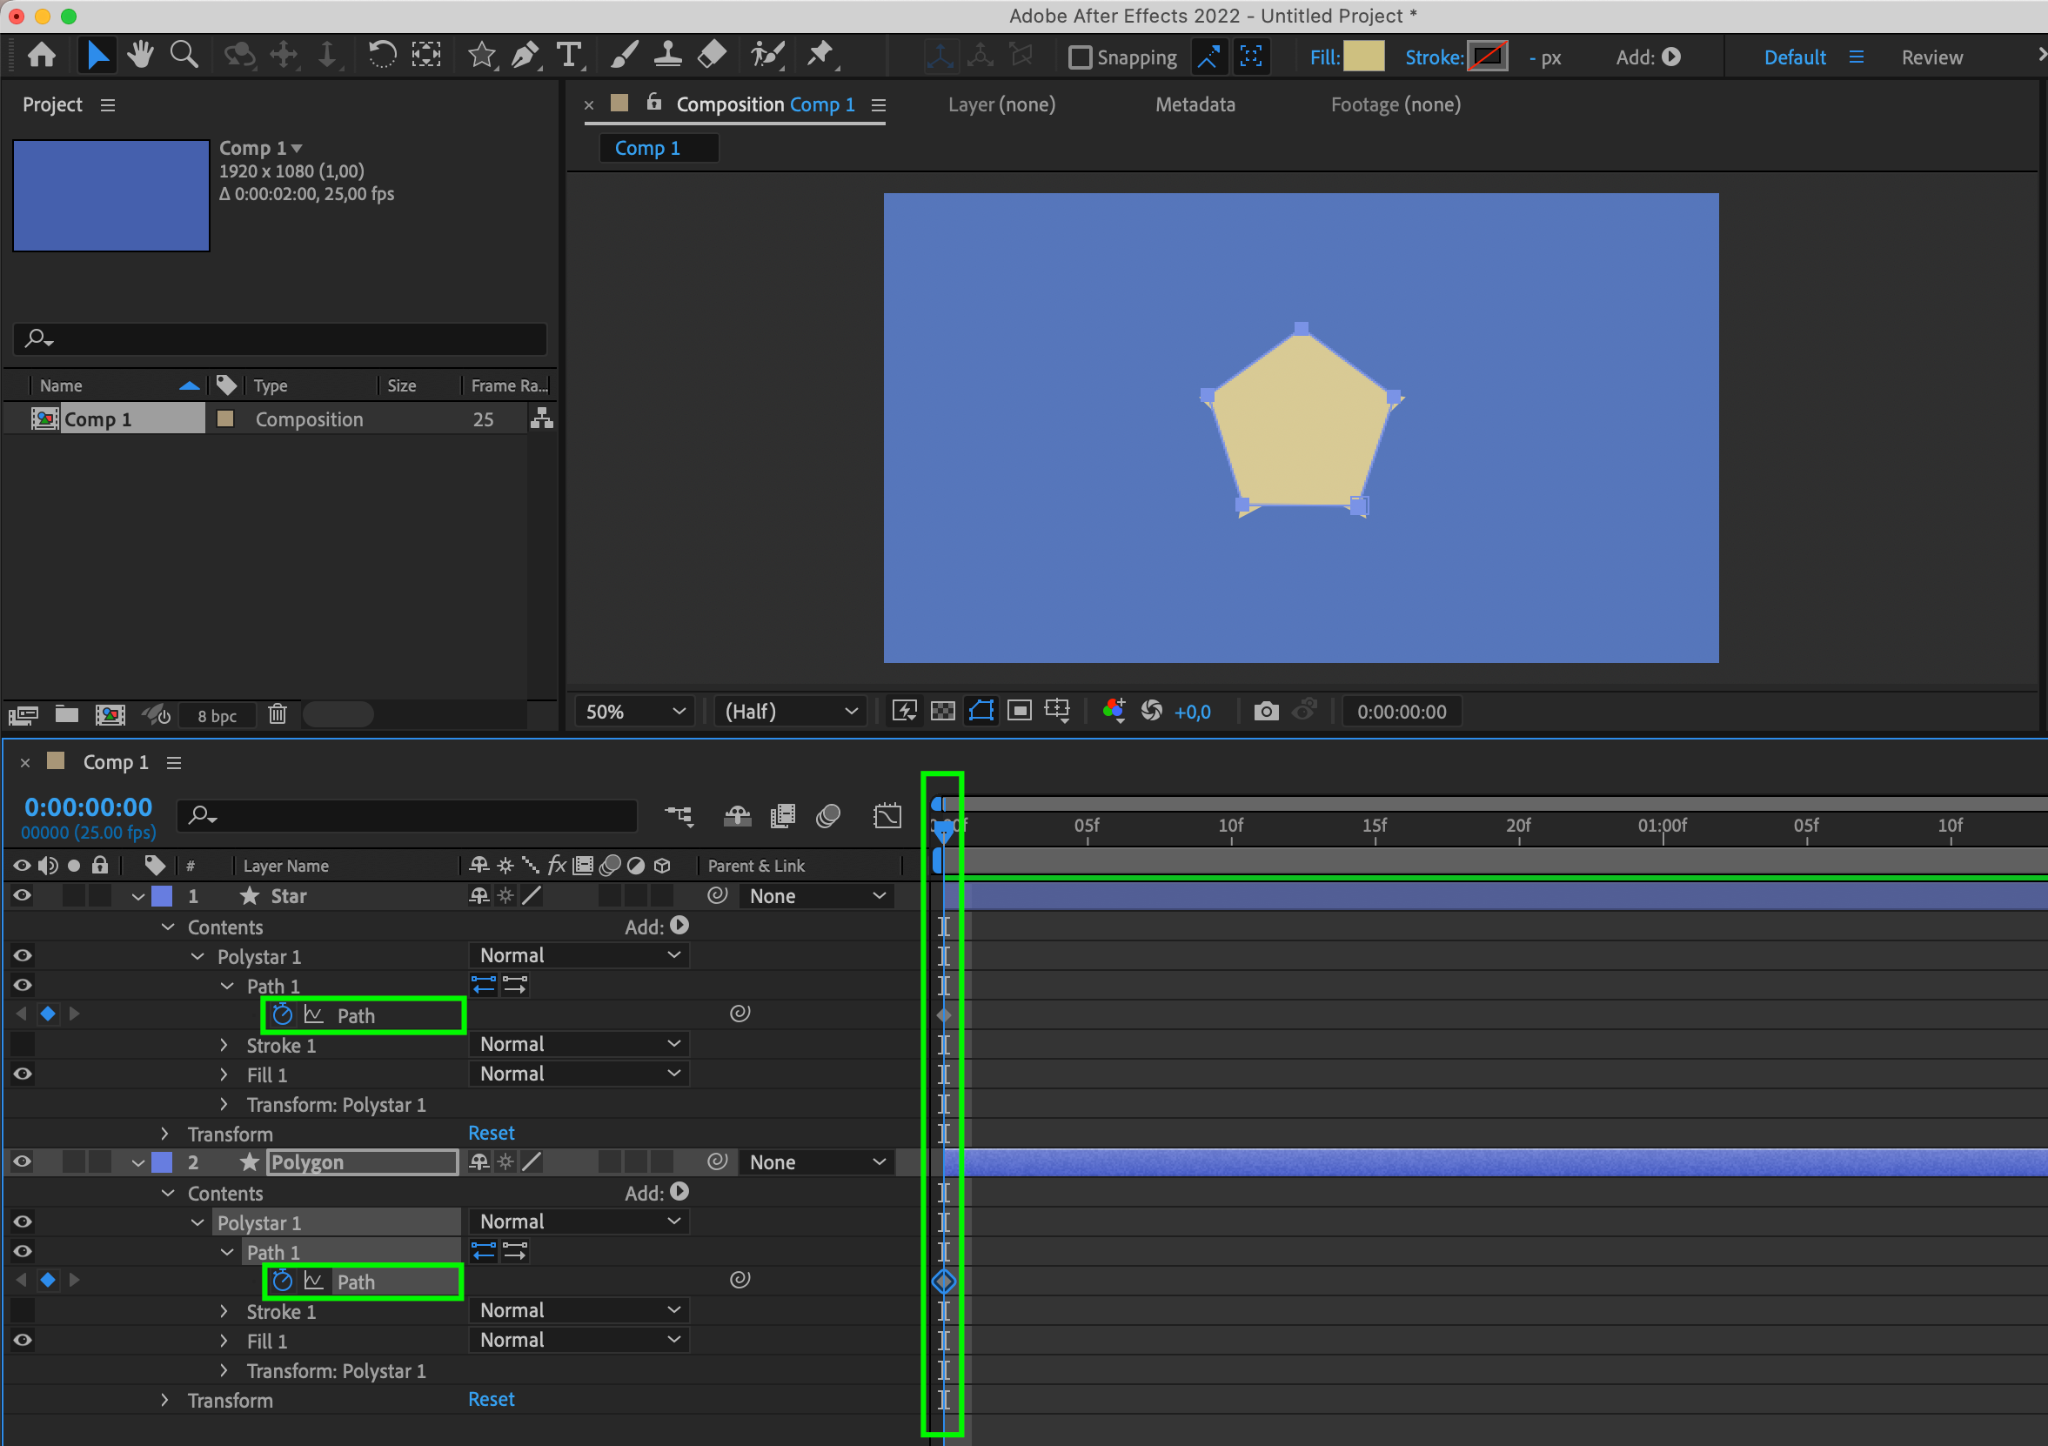
Step 4: Convert Shapes to Bezier Paths
Expand the properties of the shape layers and select Contents > Shape 1 > Shape Path 1. Right-click and choose “Convert to Bezier Path” from the submenu. Repeat this for the second shape layer.
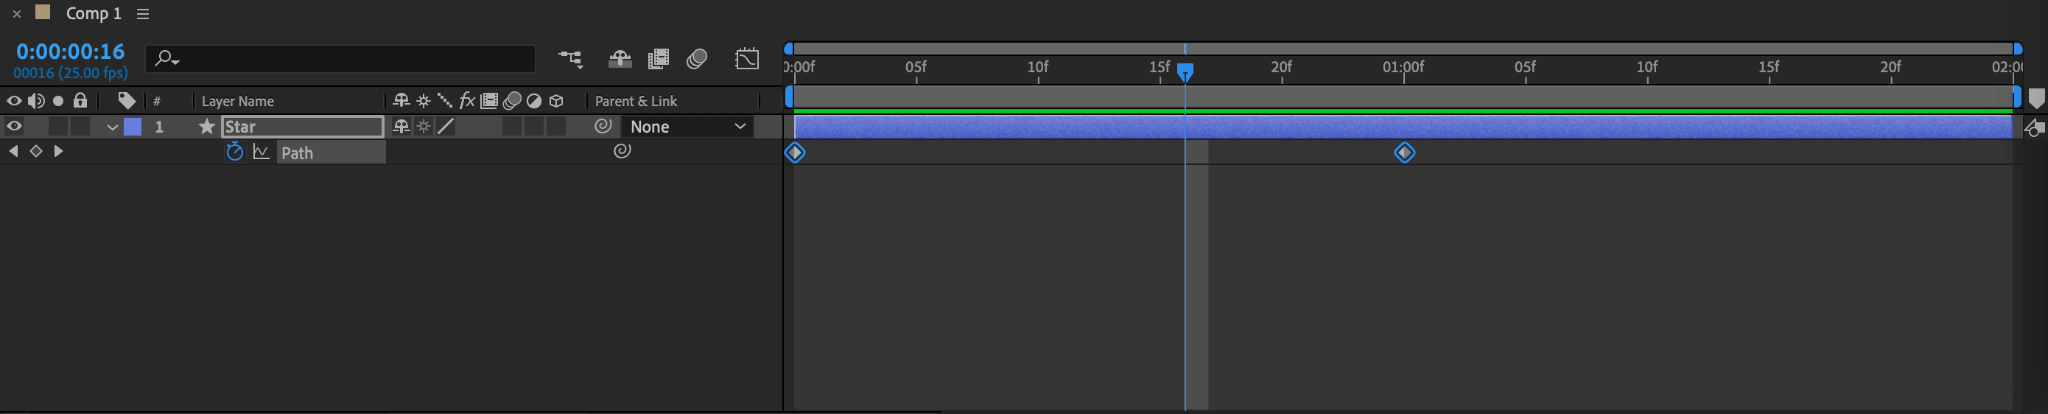
Step 5: Set Keyframes for Shape Paths
Position the Current Time Indicator at the beginning. Create keyframes for the Path properties of both shapes by clicking the stopwatch icon next to the property.
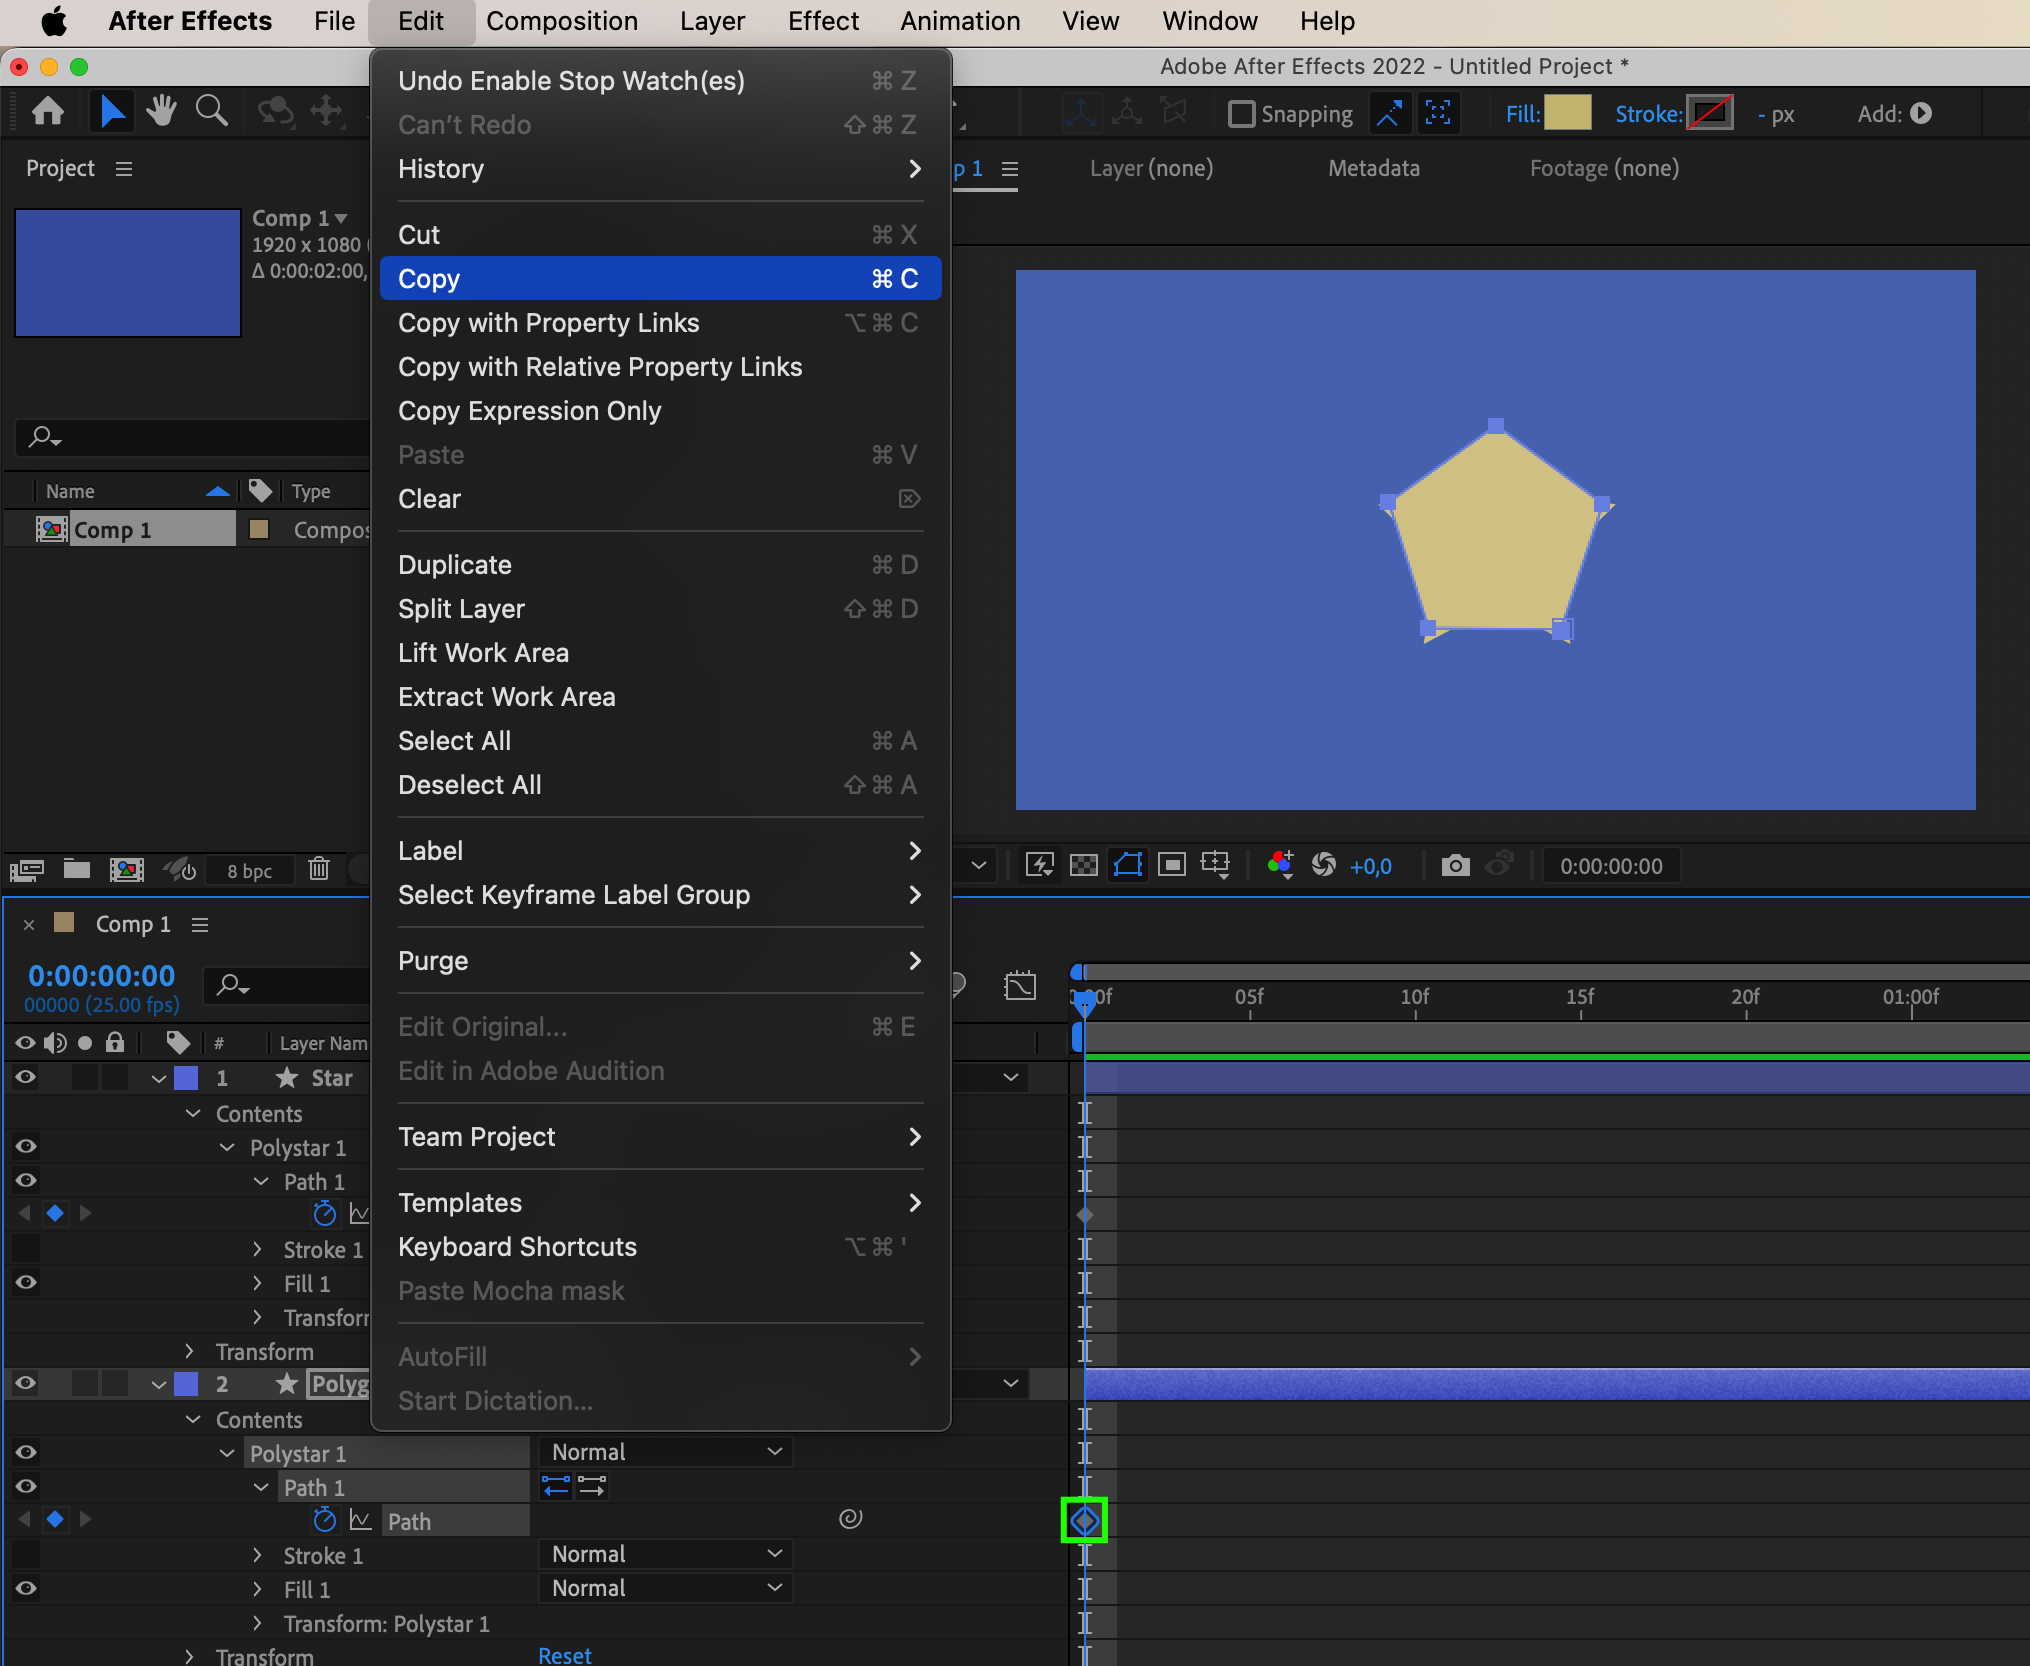
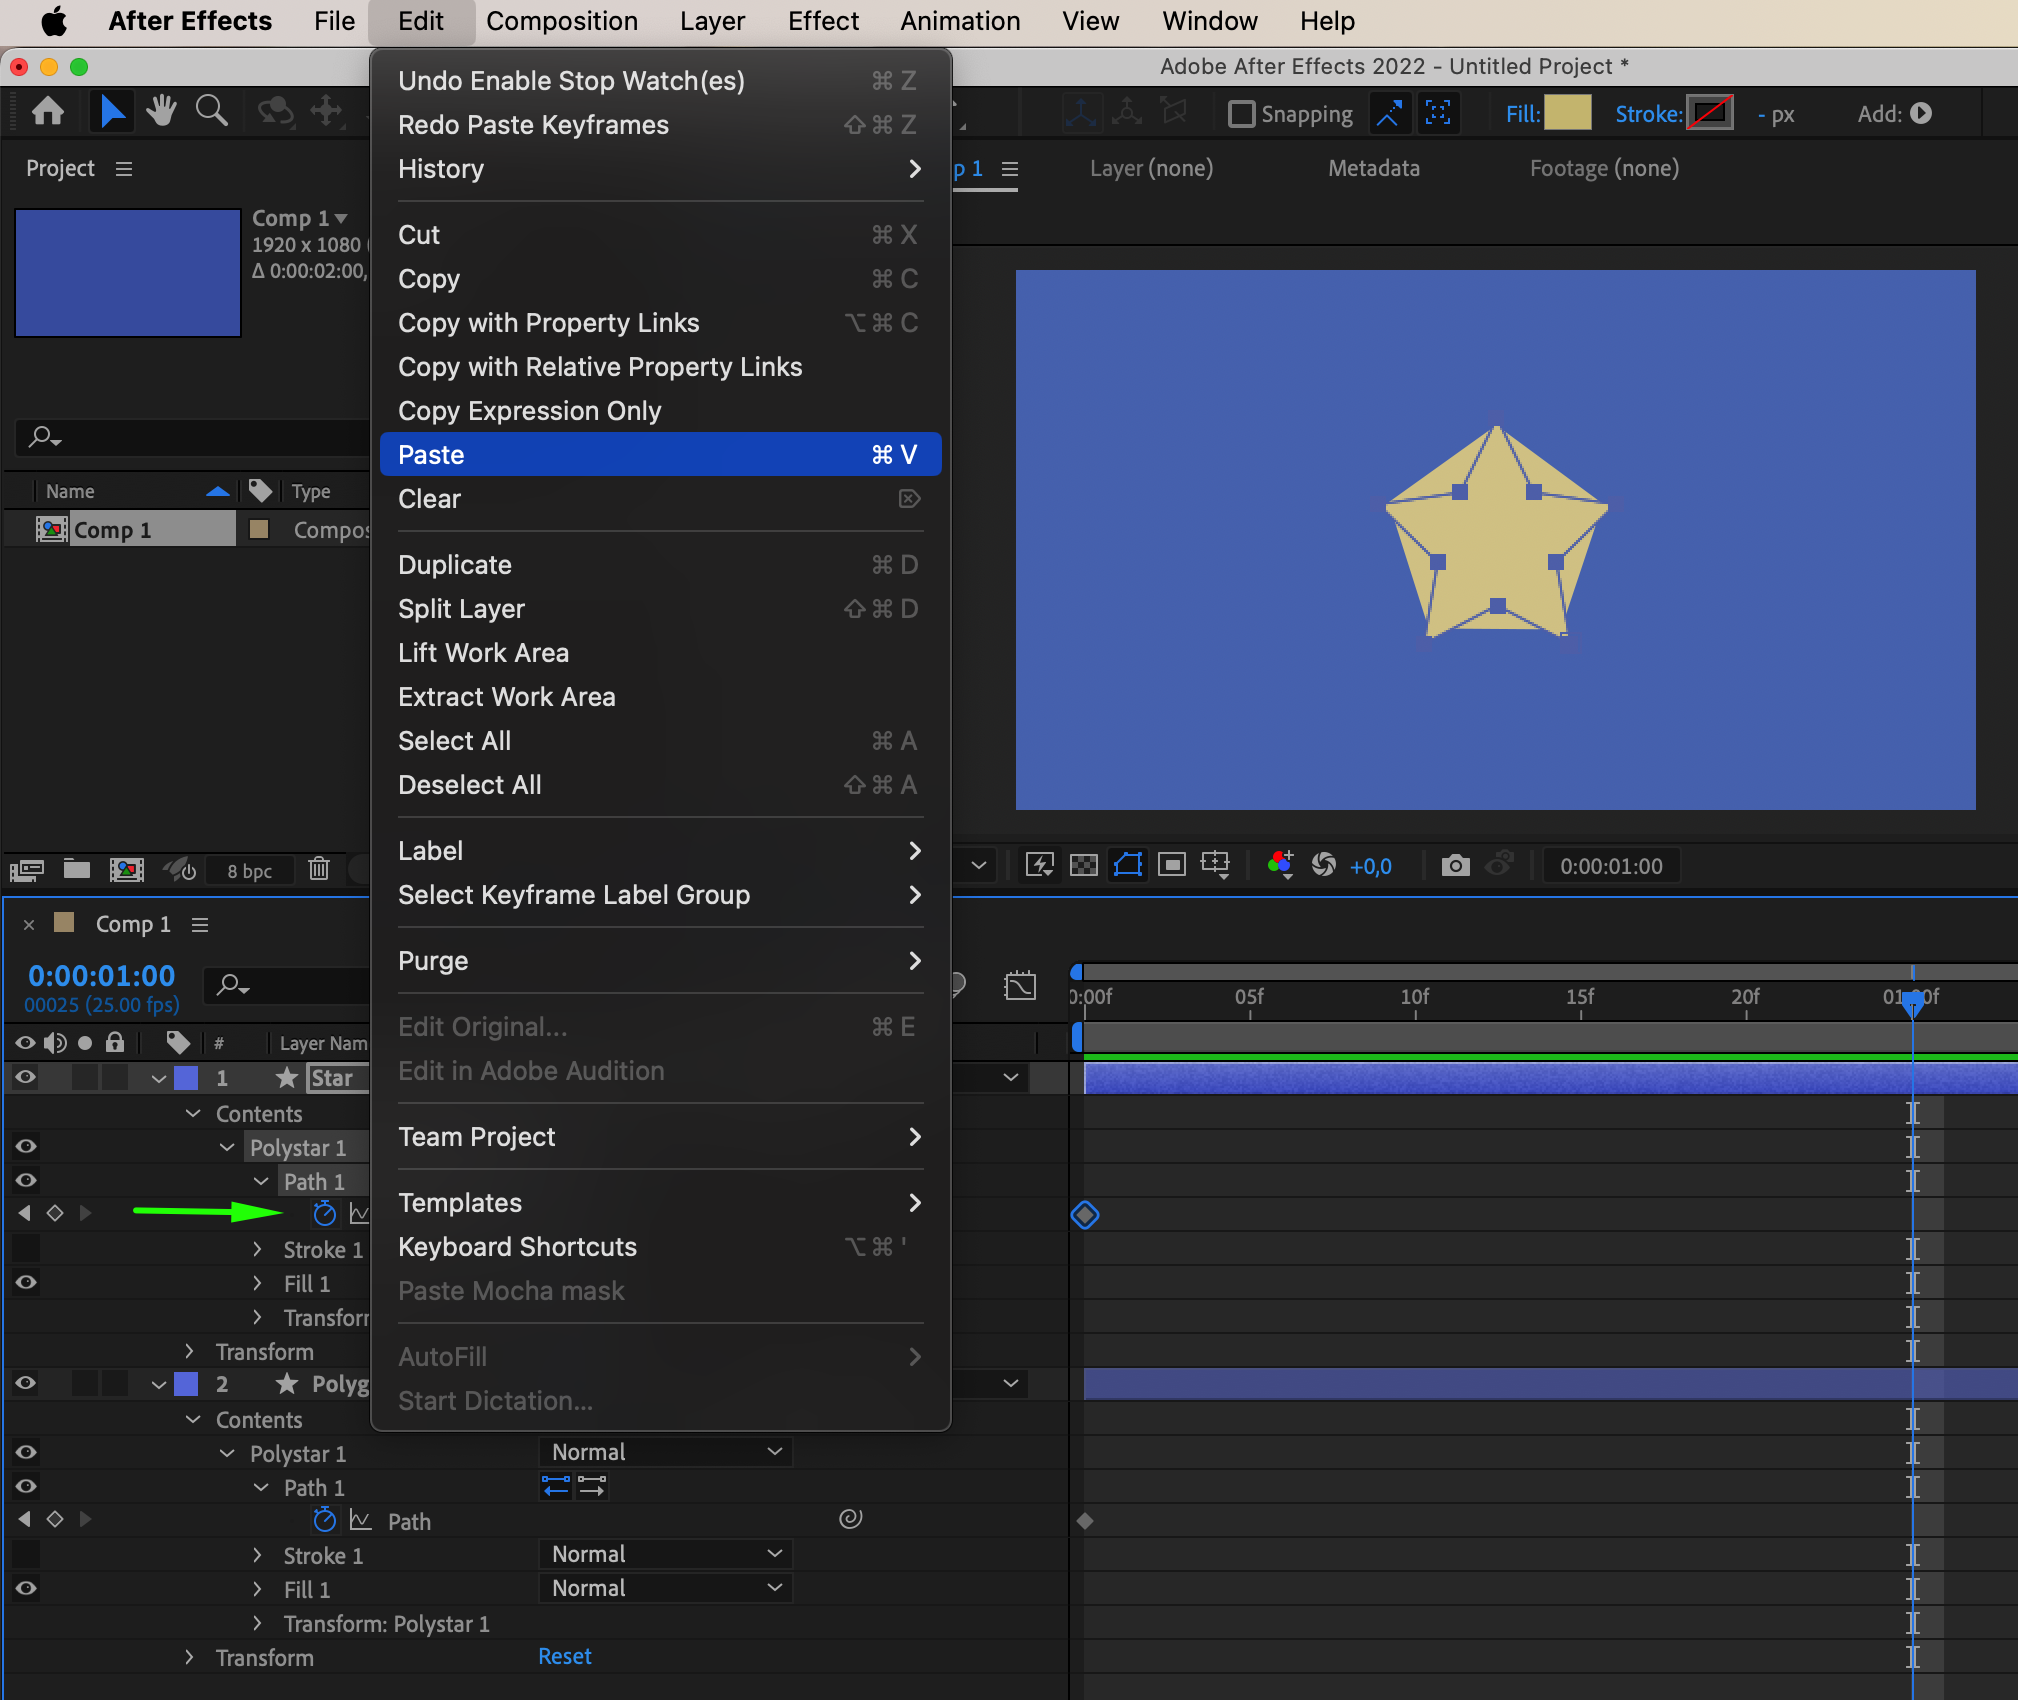
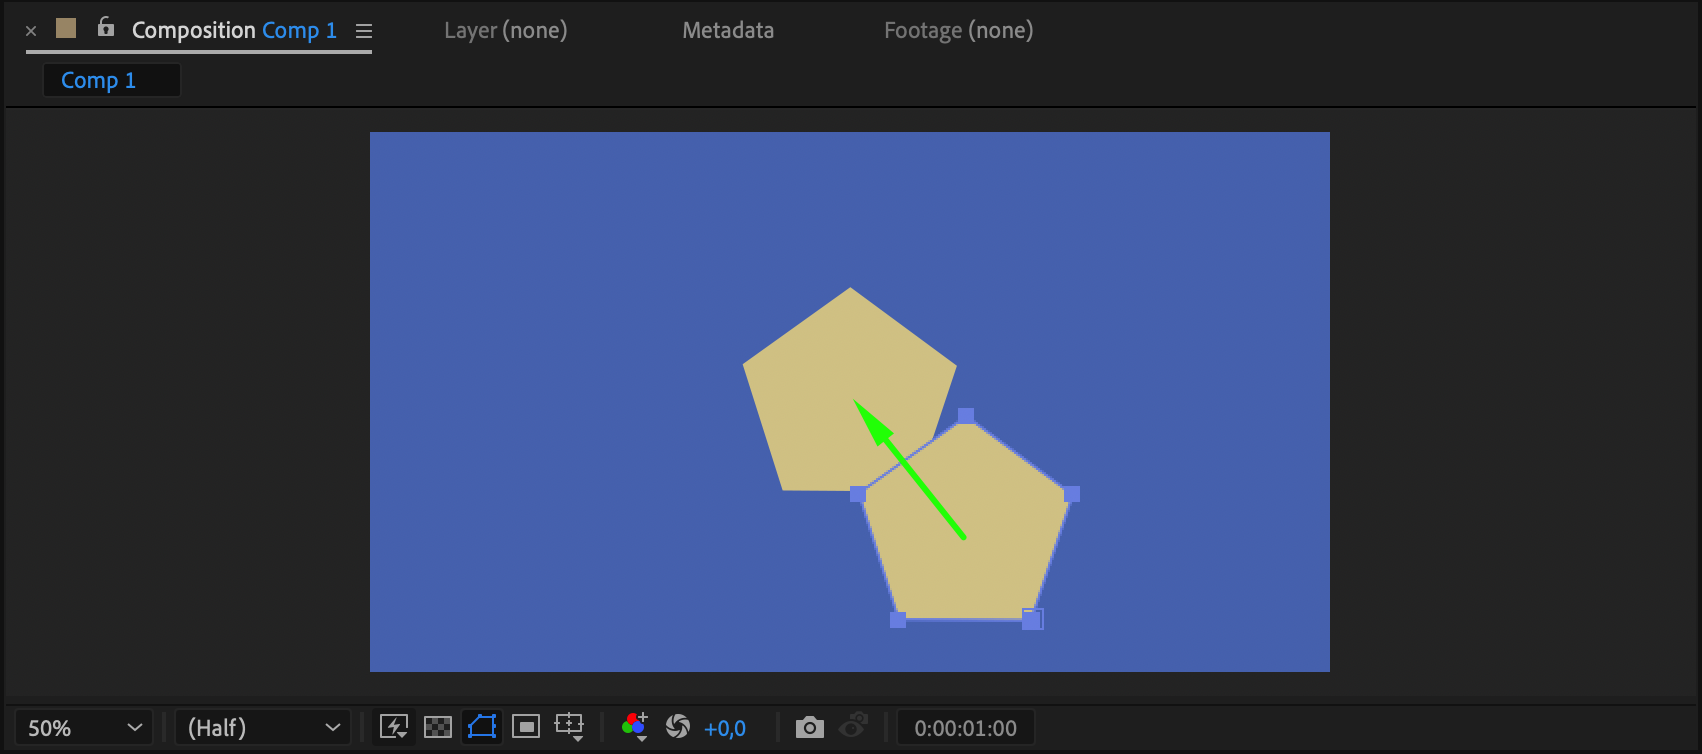
Step 6: Copy and Paste Keyframes
Copy the first keyframe of the second shape layer. Move the Current Time Indicator to the middle and paste the copied value for the Path property of the first shape layer.
Step 7: Delete the Second Shape Layer
Once the morphing is complete, delete the second shape layer.
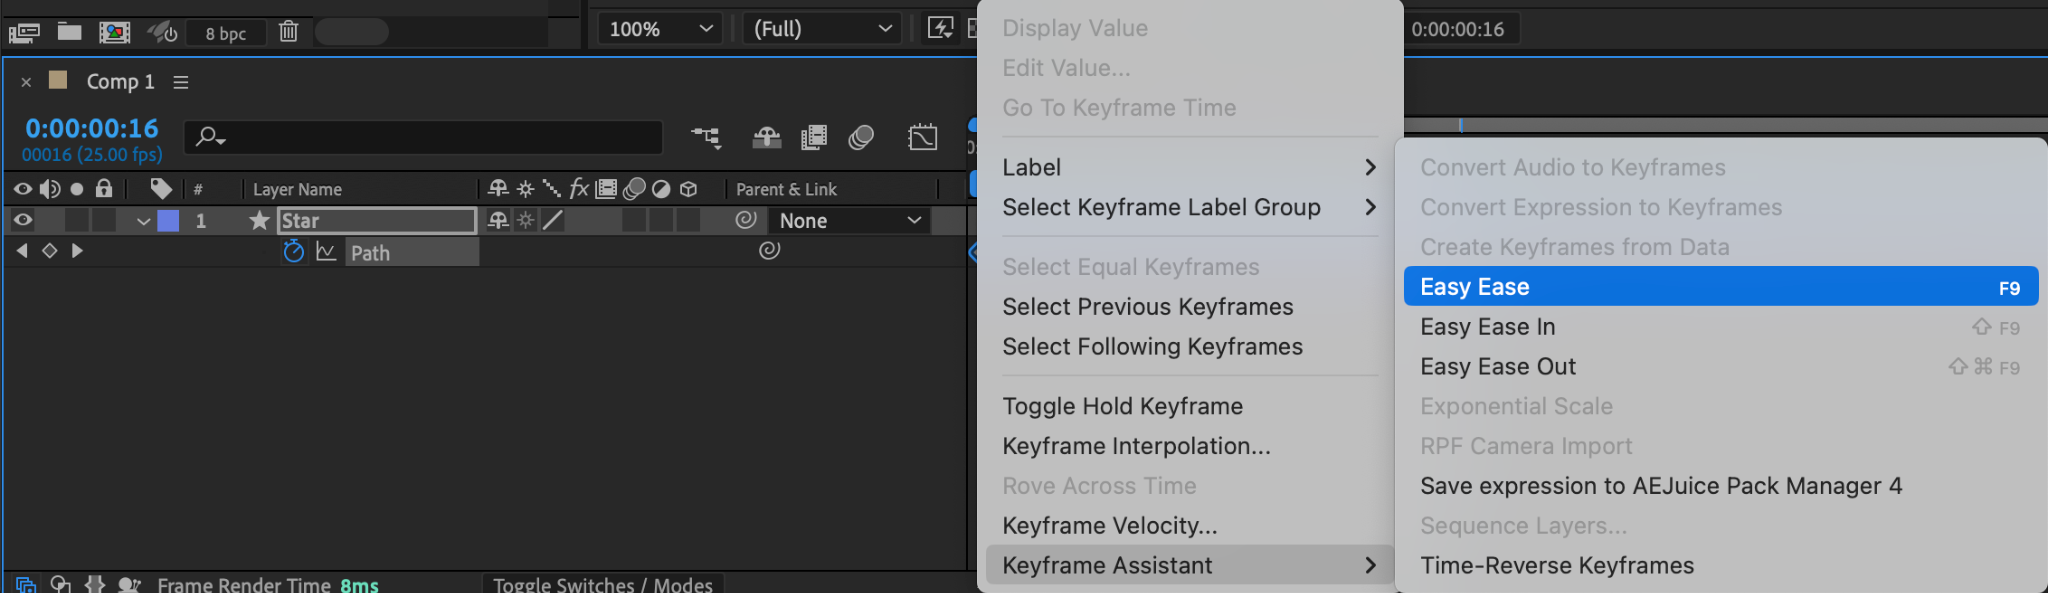
Step 8: Apply Easy Ease to Keyframes
Select all keyframes and apply Easy Ease to them to smooth out the animation transition.
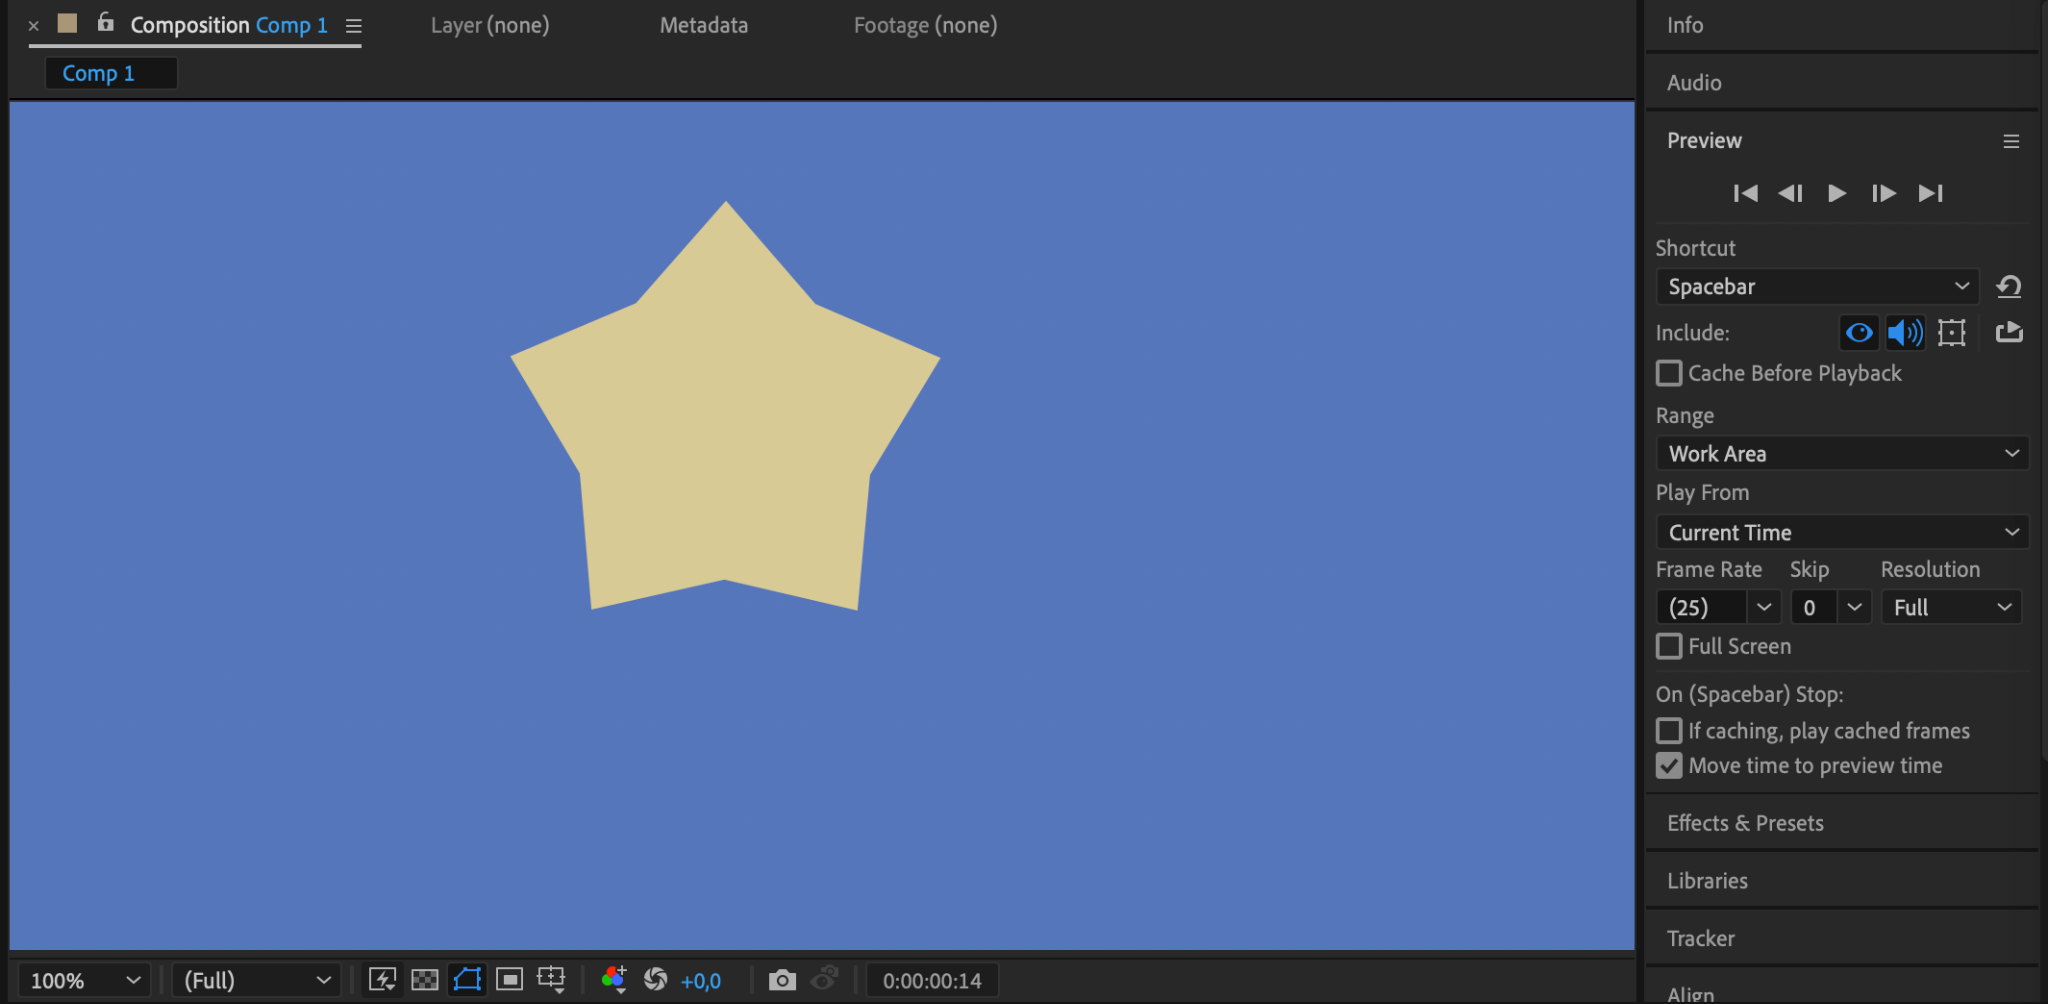
Step 9: Preview Your Morph
Preview your morphing animation to ensure it meets your expectations.
Conclusion
Mastering the skills of morphing in After Effects equips you with the tools to creatively realize your ideas and bring even the boldest projects to life. Don’t hesitate to experiment, explore new approaches, and refine your skills to craft unique and captivating animations that inspire and impress your audience.


