Introduction to Morphing Shapes in After Effects
Morphing shapes in After Effects can add a dynamic and fluid touch to your animations. Whether you’re transitioning between two distinct shapes or blending animations, learning to morph shapes is an essential skill for any motion graphics artist. In this guide, we’ll walk you through the step-by-step process of creating a smooth shape morph, from setting up your composition to applying keyframes and previewing your final animation.
Step 1: Create a New Composition
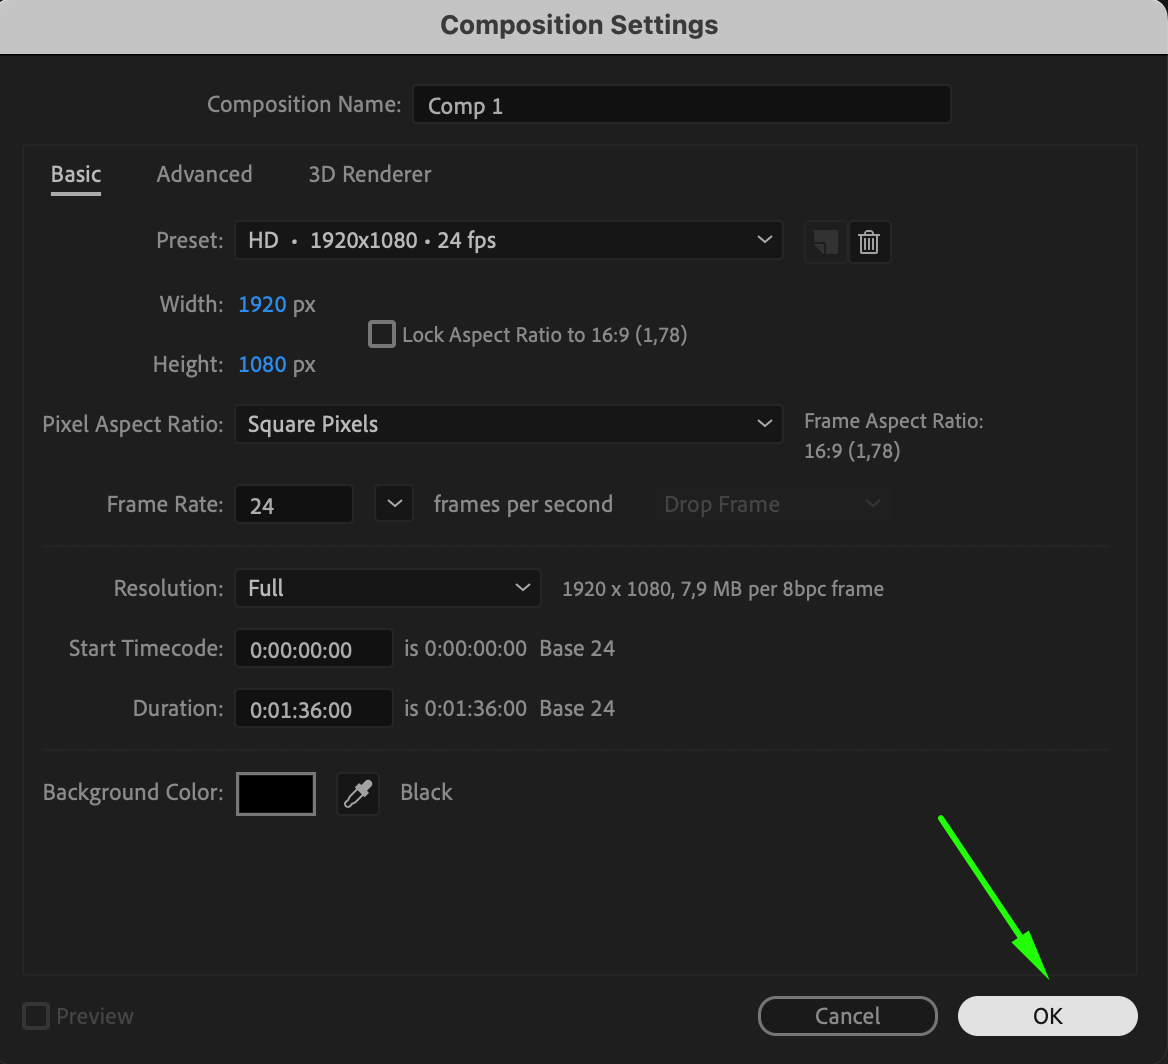
To begin, you’ll need to create a new composition. Go to Composition > New Composition, or use the shortcut “Ctrl/Cmd + N”. In the pop-up window, set your desired resolution, frame rate, and duration for the animation. Click OK to finalize the composition. This step lays the foundation for your morphing effect by defining the timeline and canvas.
 Step 2: Select the Shape Tool and Create Two Shapes
Next, select the Shape Tool (Q) from the toolbar. You can choose between different shape options such as ellipses, rectangles, or custom polygons. Create two distinct shapes on the composition panel – these will be the shapes you’ll morph between. Make sure each shape is on a separate layer for better control throughout the animation process.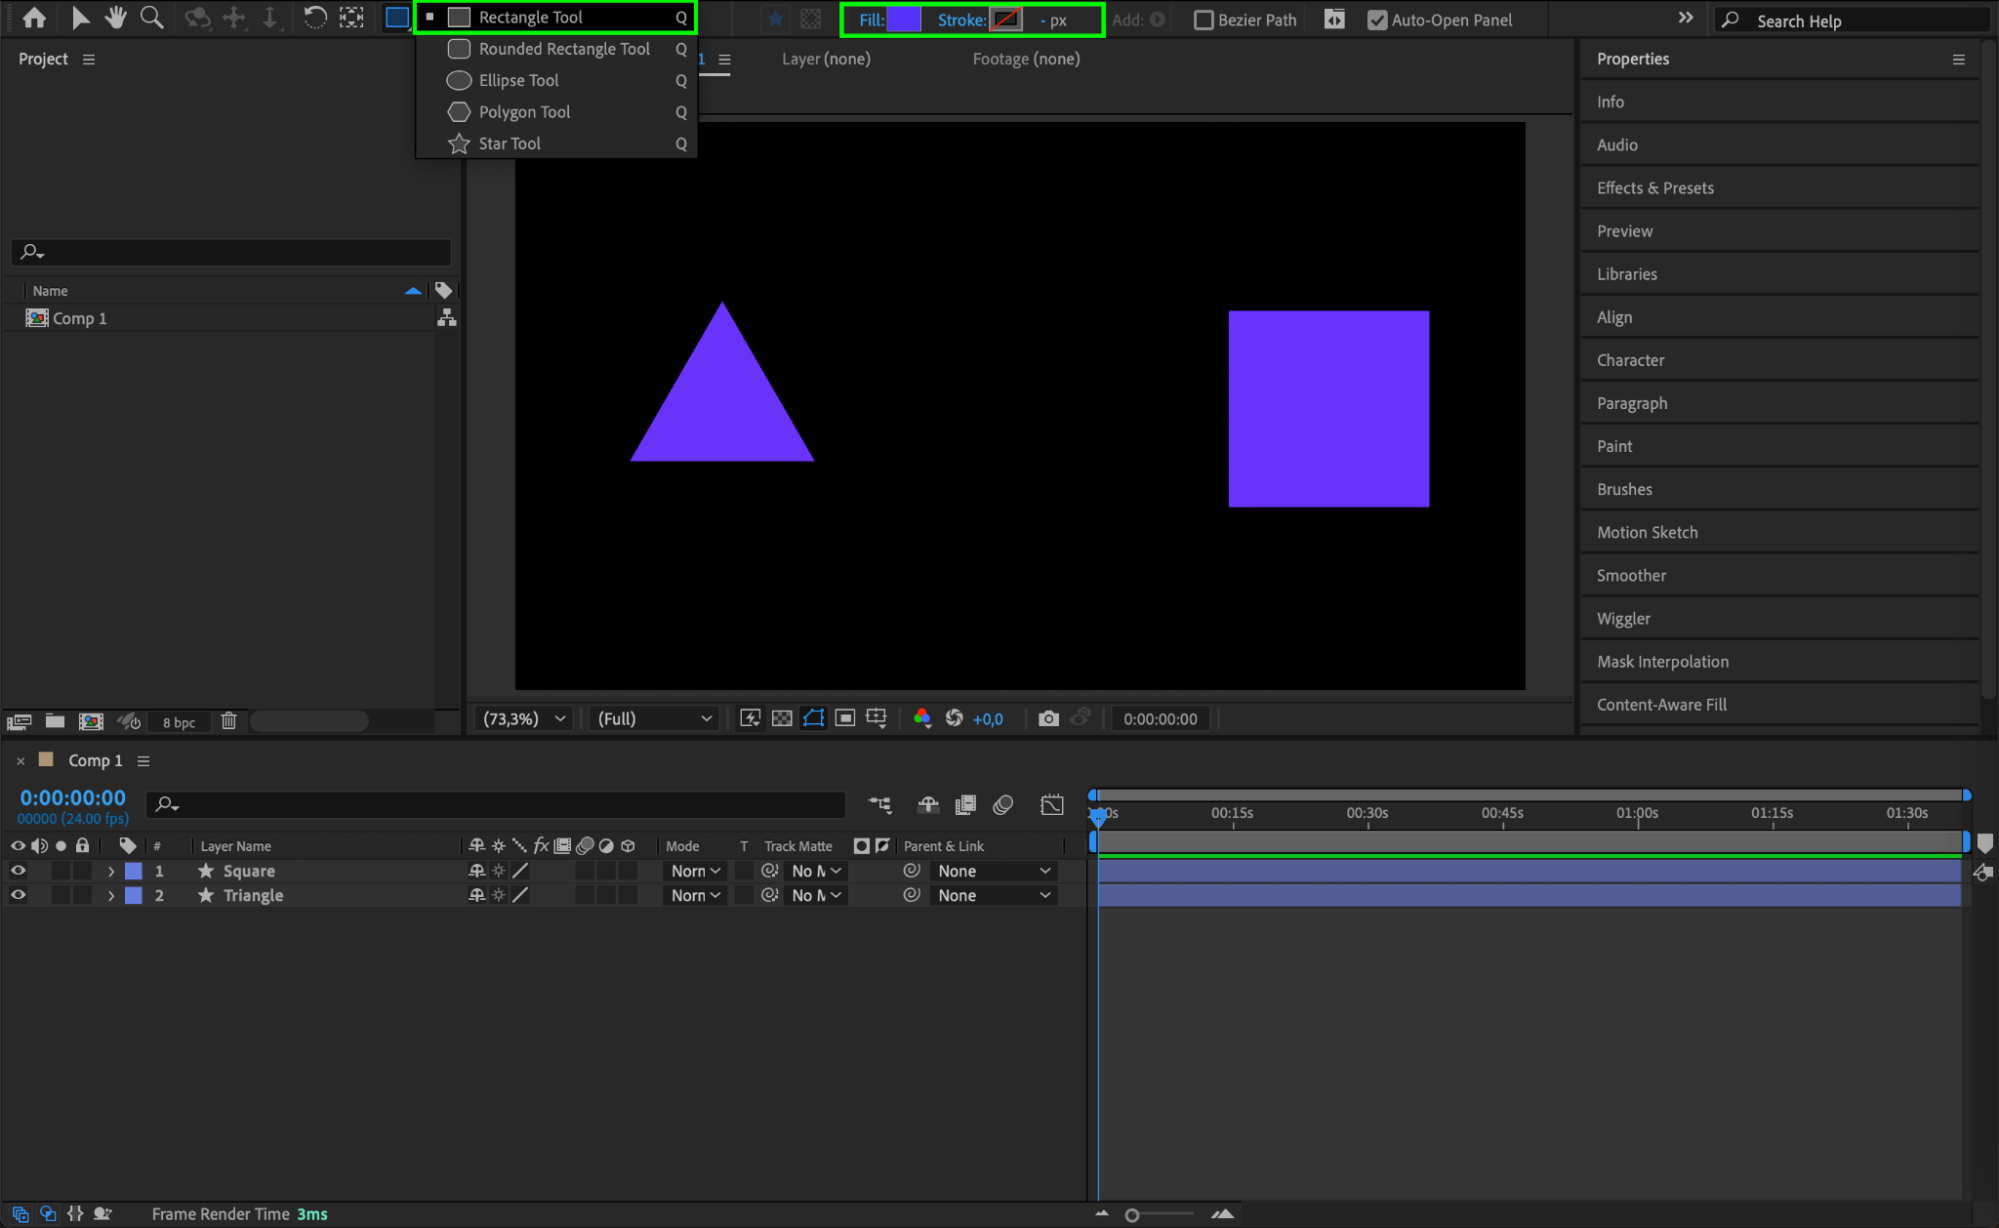 Step 3: Adjust Anchor Points Using the Pan Behind Tool
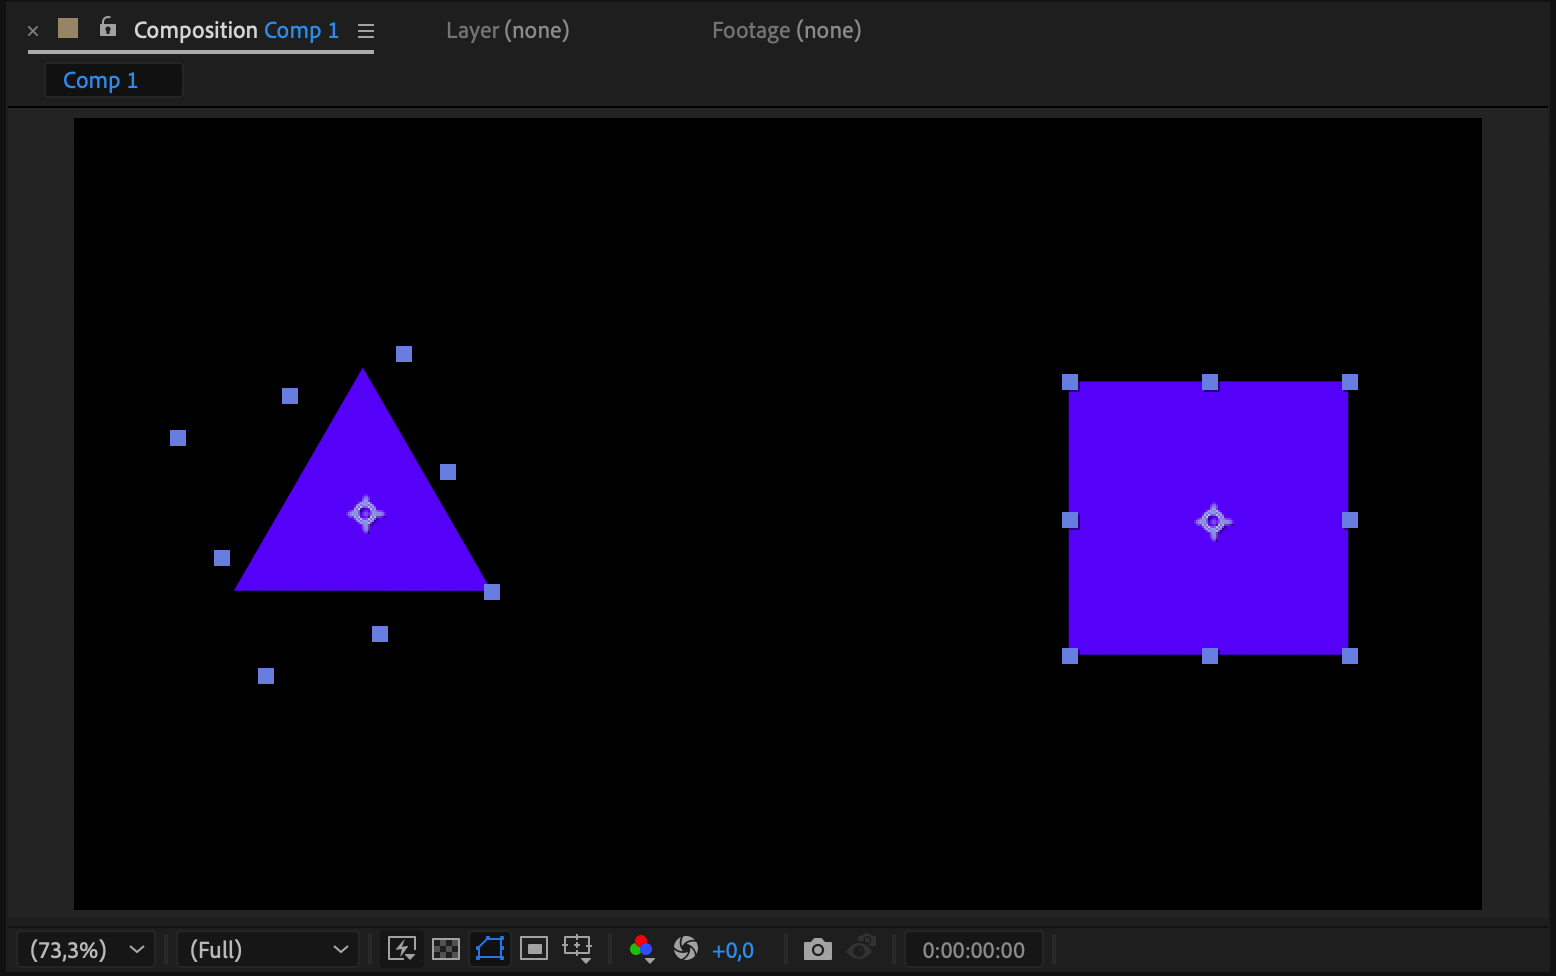
To ensure smooth morphing, you’ll want to set the anchor points of your shapes at their centers. Select the Pan Behind Tool (Y) from the toolbar, and click and drag the anchor point (the small crosshair in the center of the shape) to the center of each shape. Properly aligned anchor points are critical for ensuring a seamless transformation between shapes.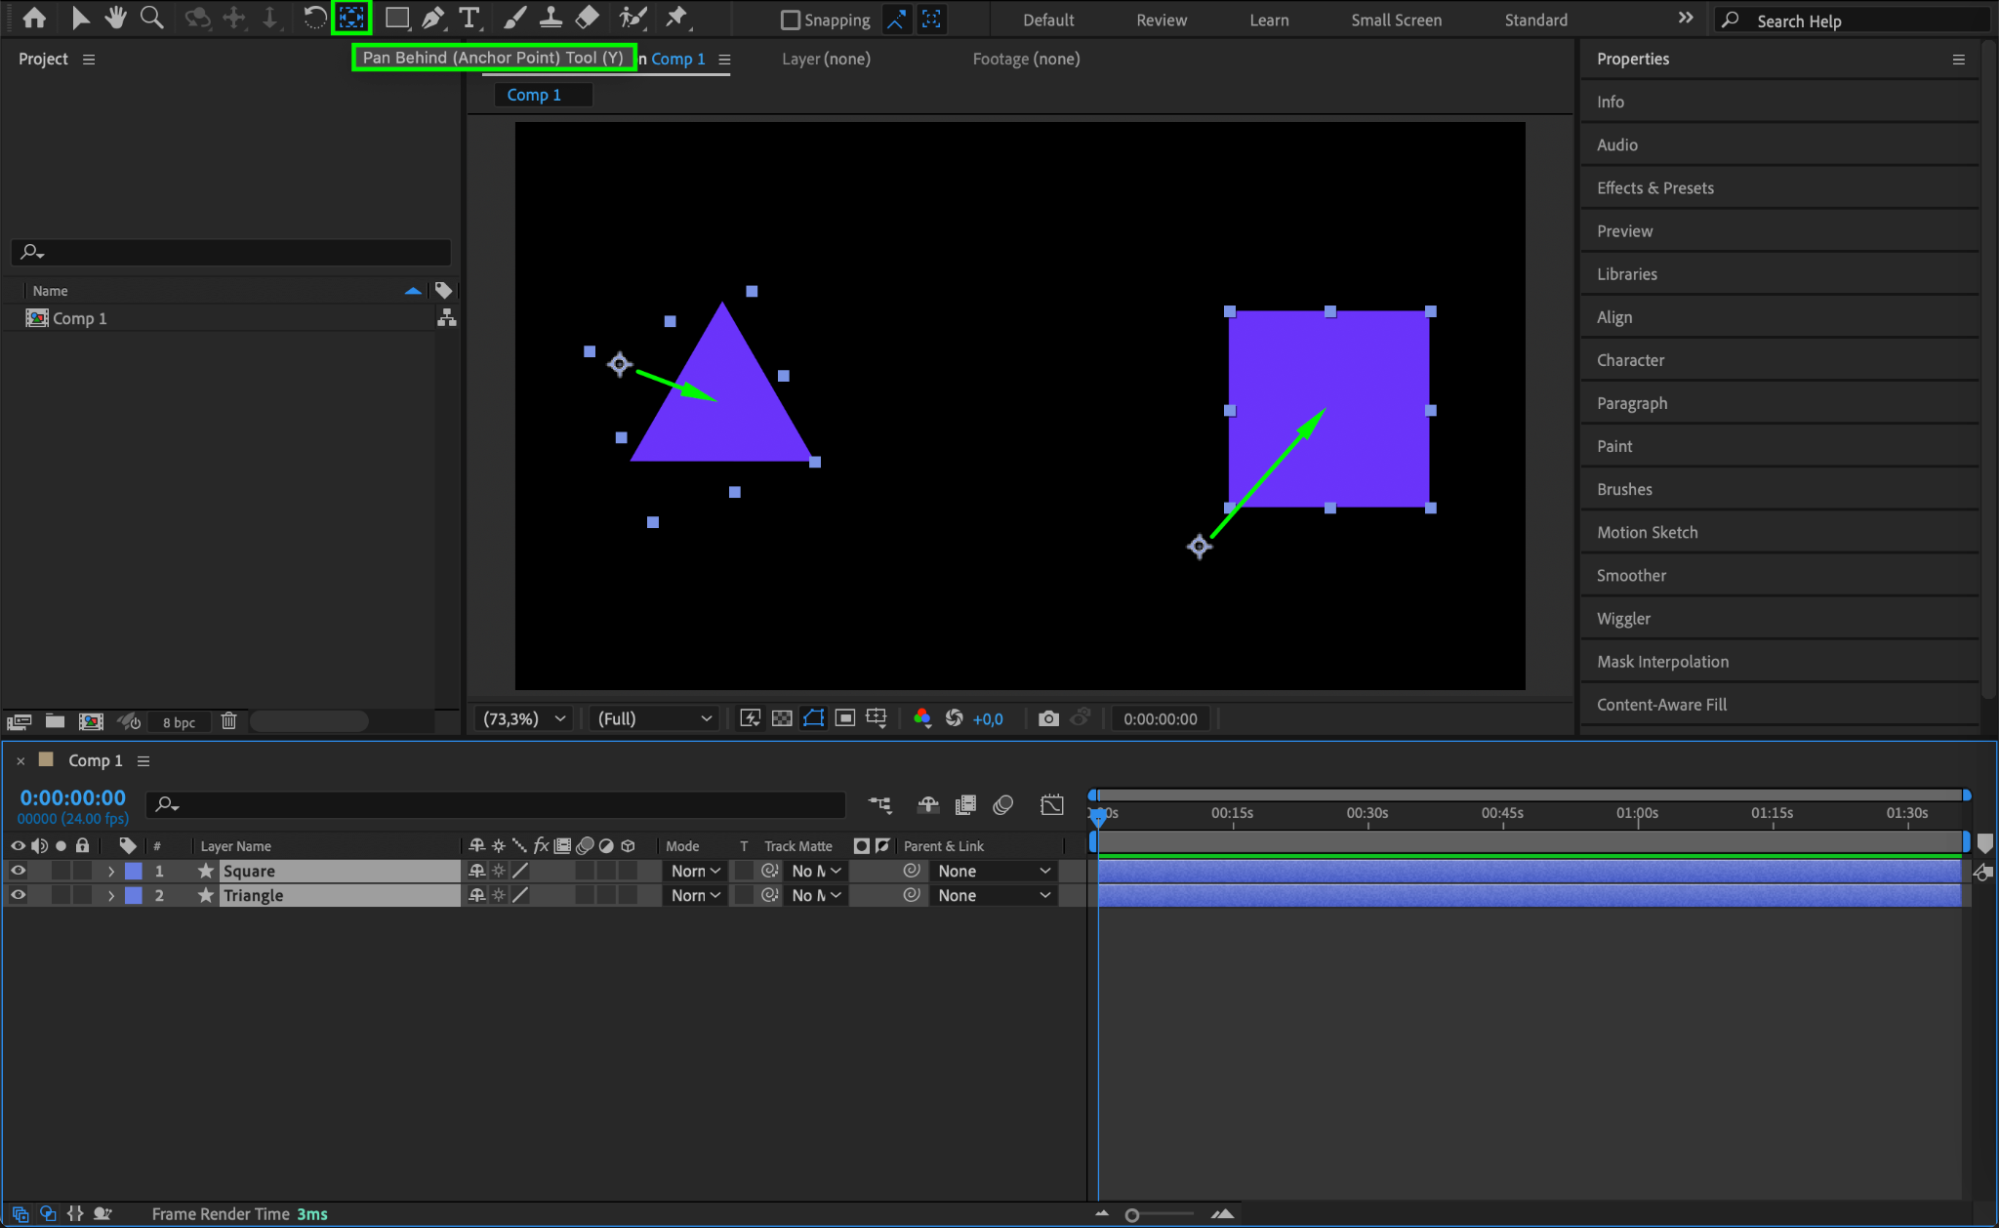
 Step 4: Animate the Position of the First Shape
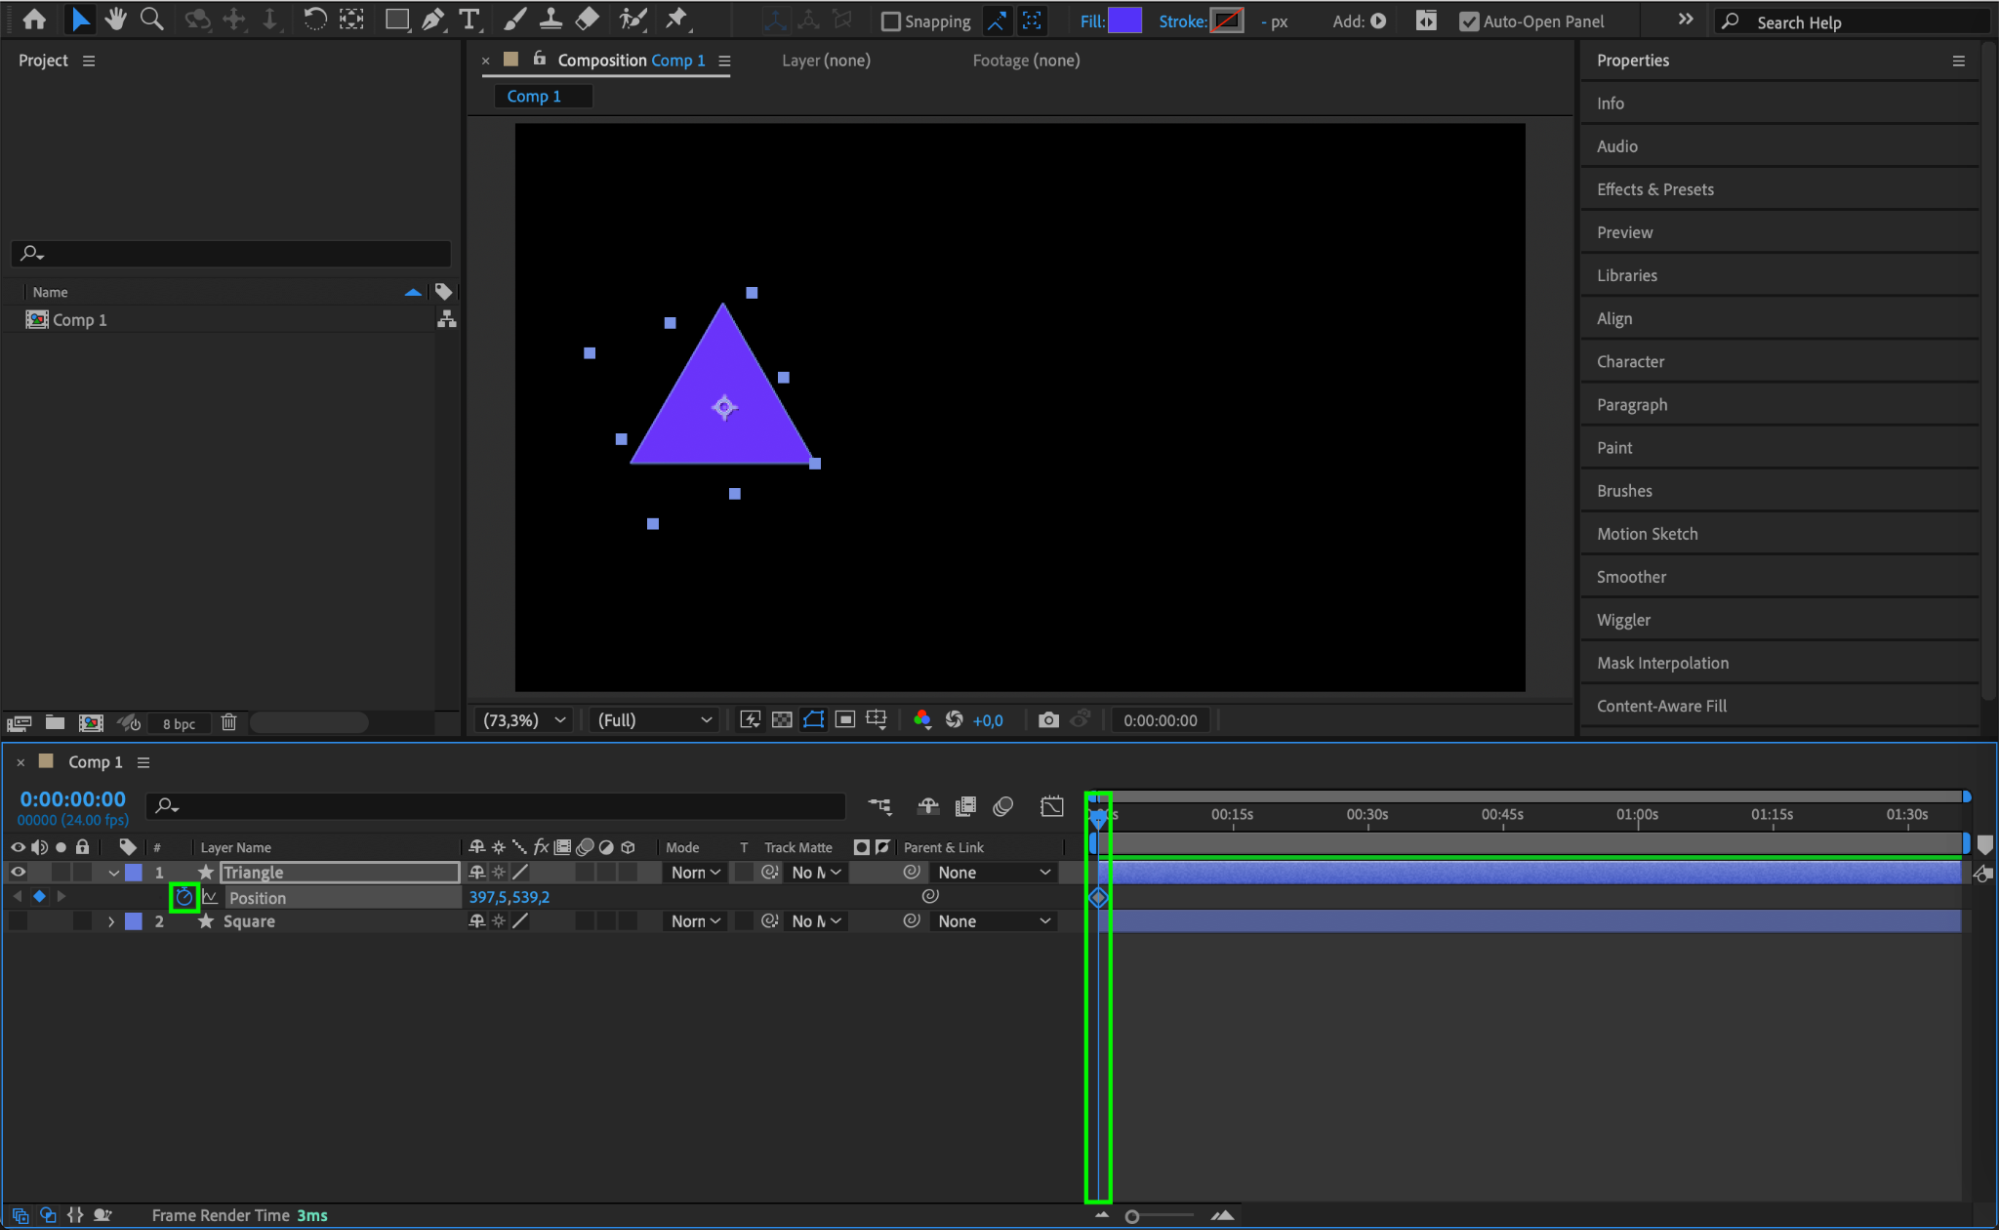
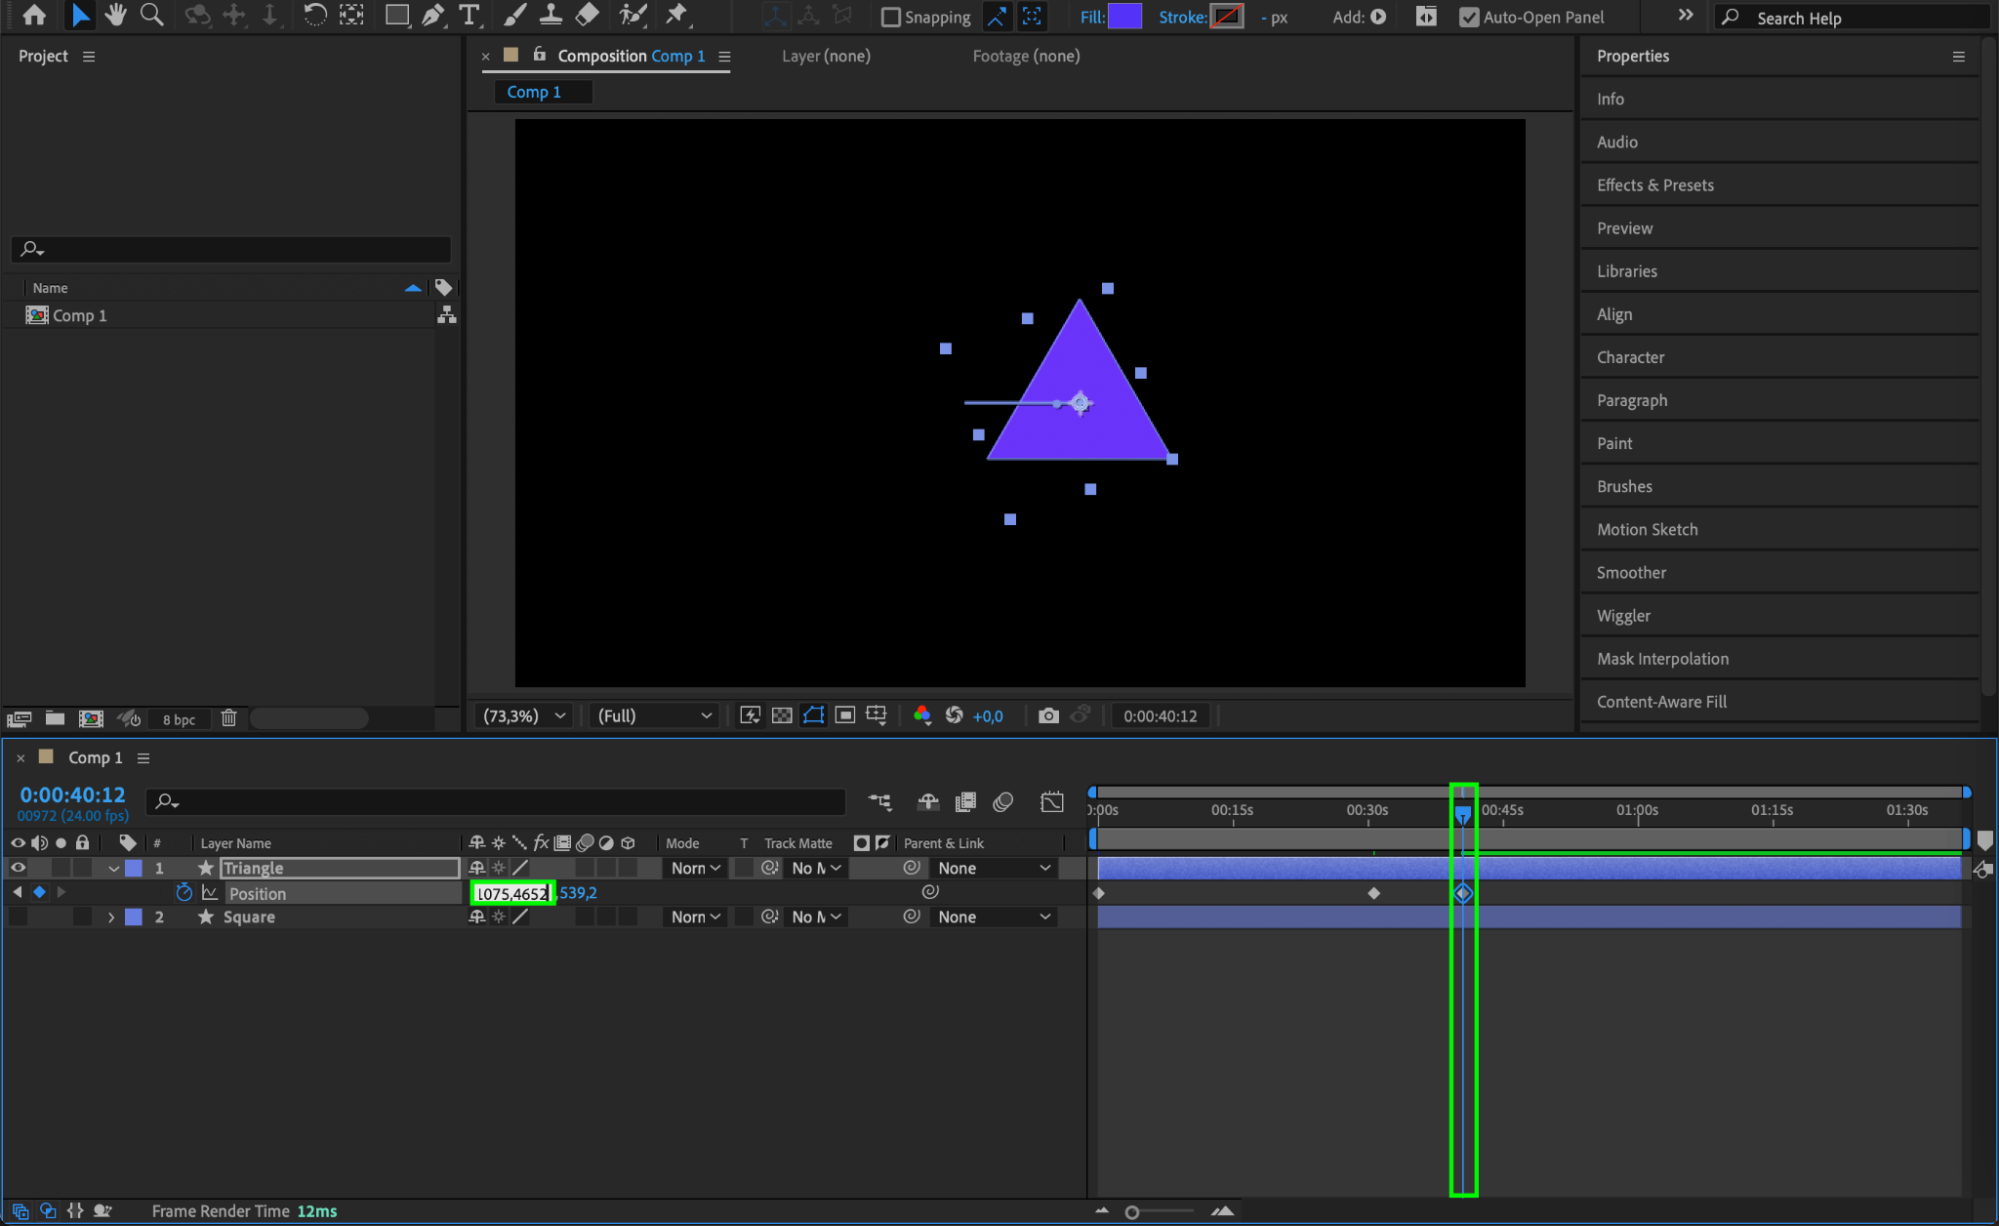
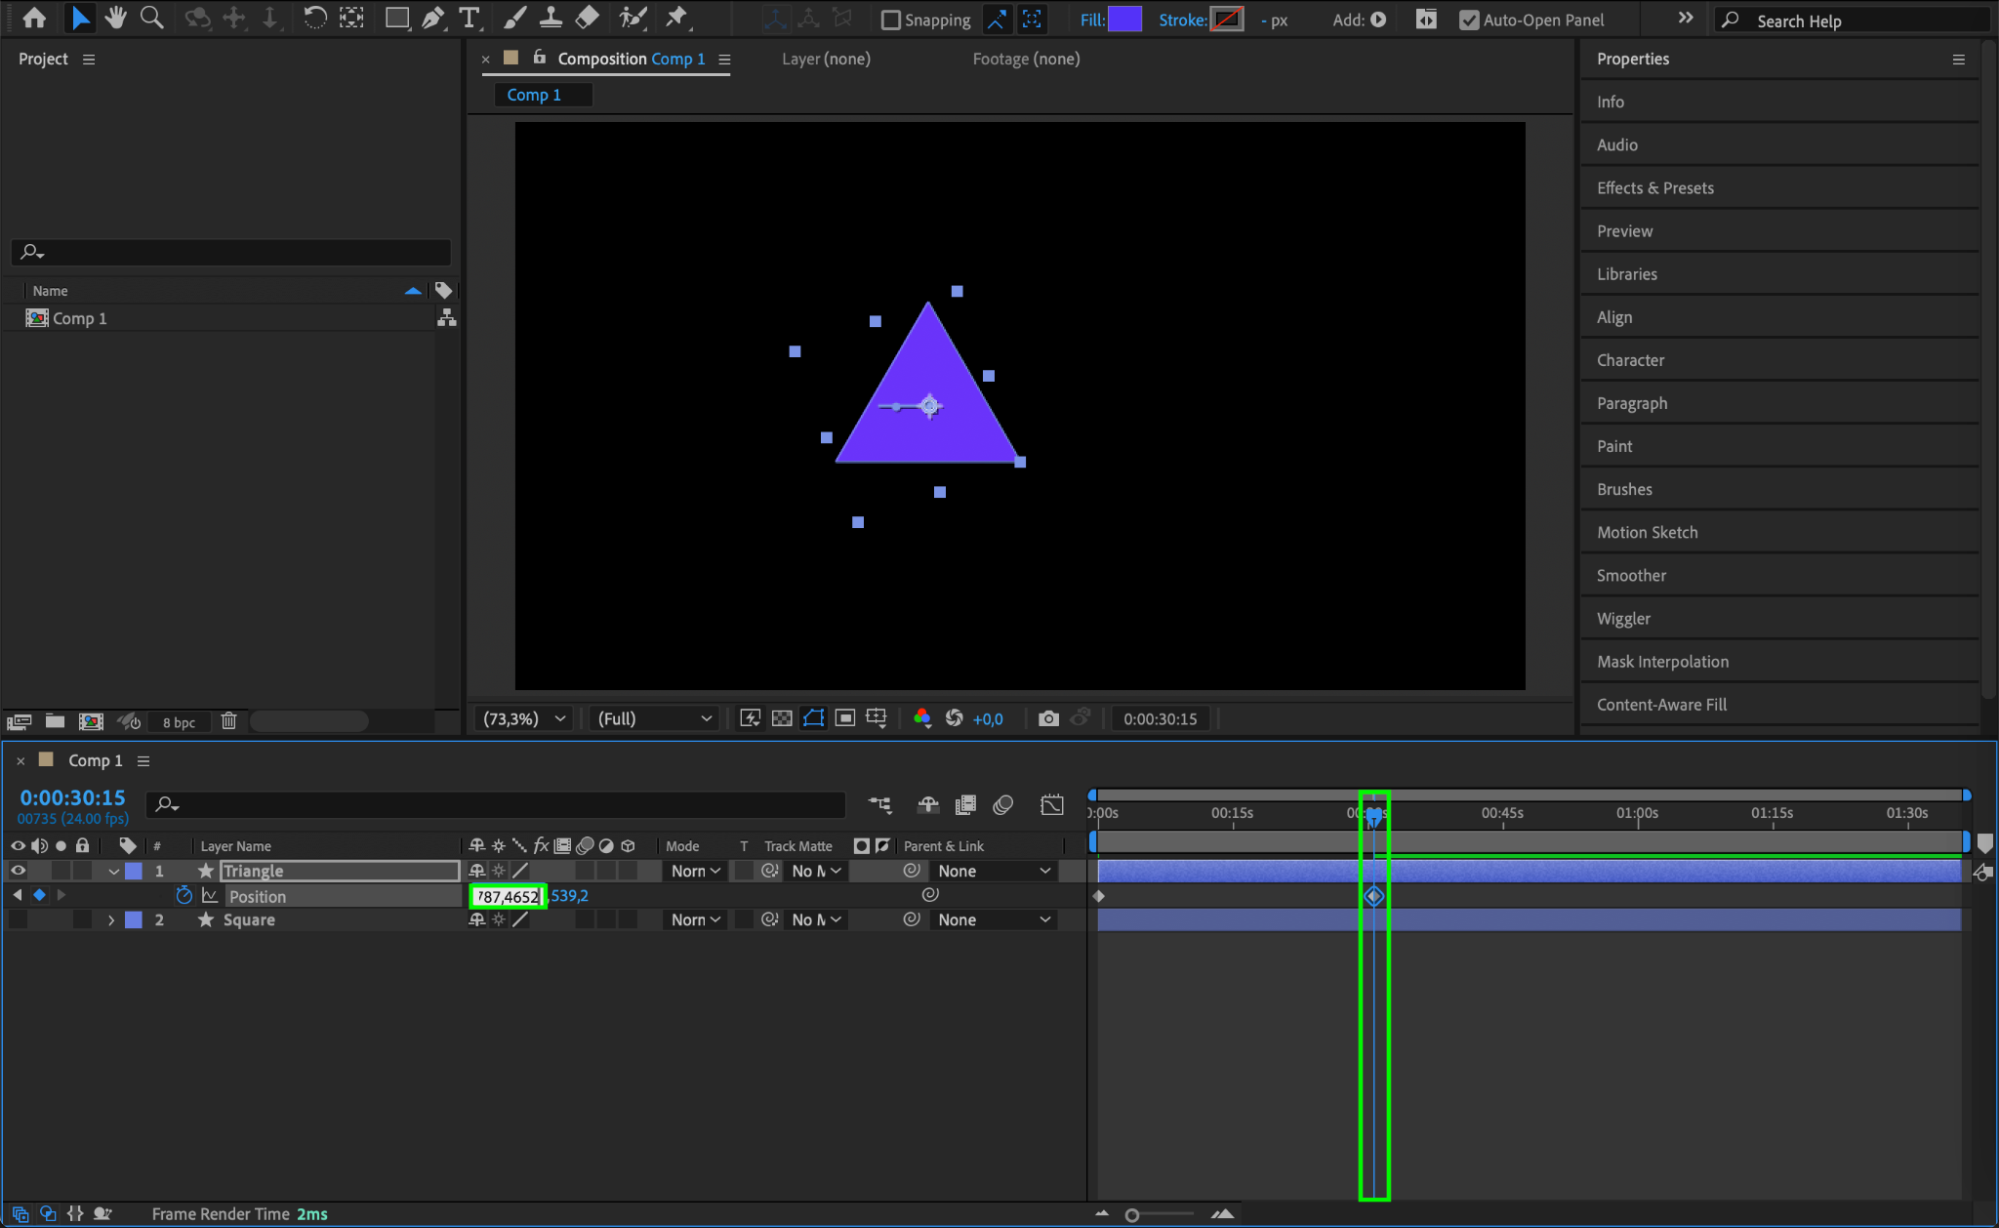
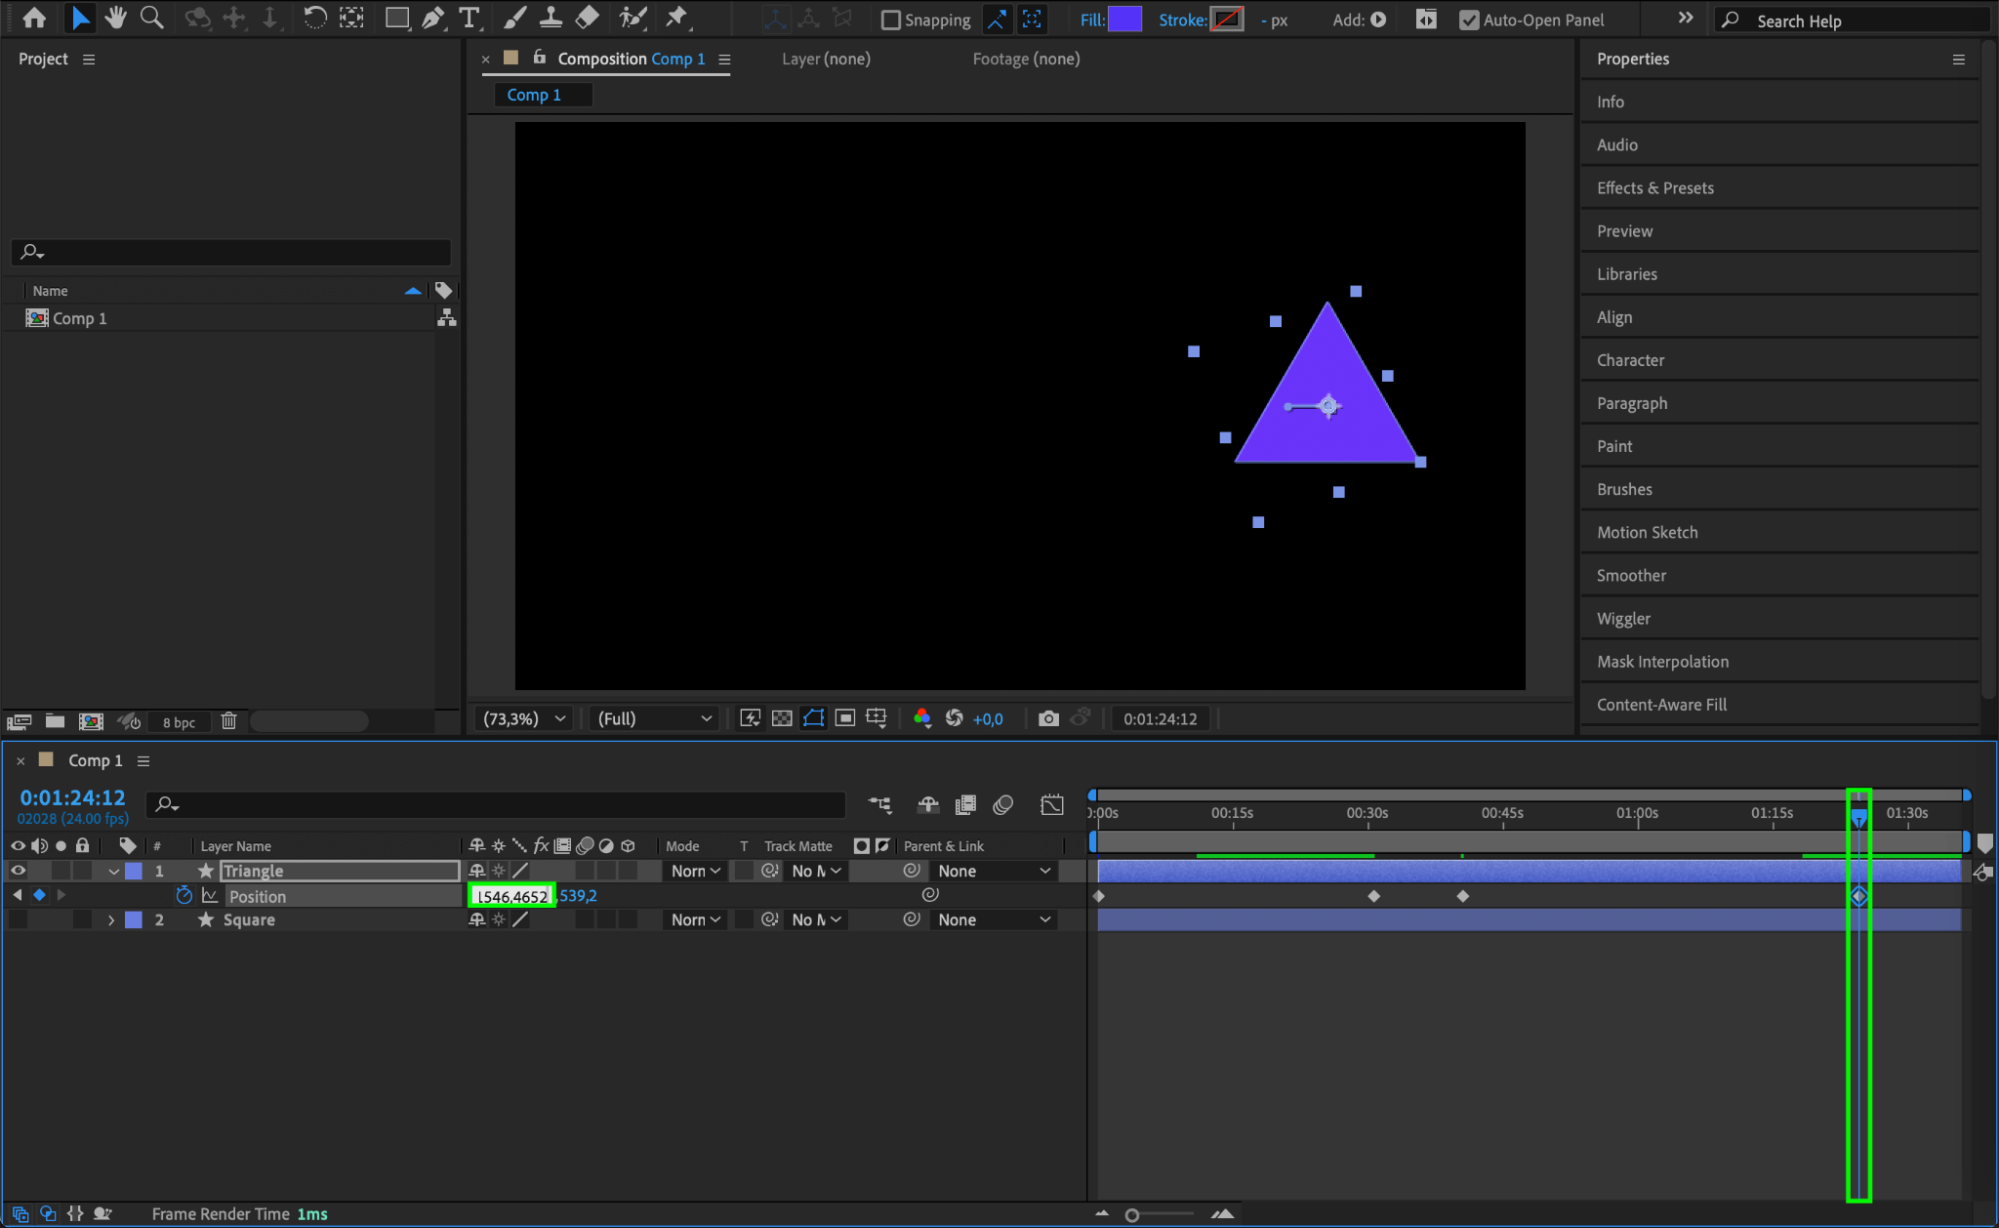
Now it’s time to animate the first shape. Hide the second shape by clicking the eye icon next to its layer in the timeline. Select the first shape and press “P” to reveal the position property. Create the first keyframe with the shape positioned at the left edge of the composition. Move forward in the timeline and add additional keyframes: the second keyframe where the shape moves toward the center, the third as it moves away from the center toward the right edge, and the fourth where the shape reaches the far-right edge. This simple motion will act as the base for your morphing effect.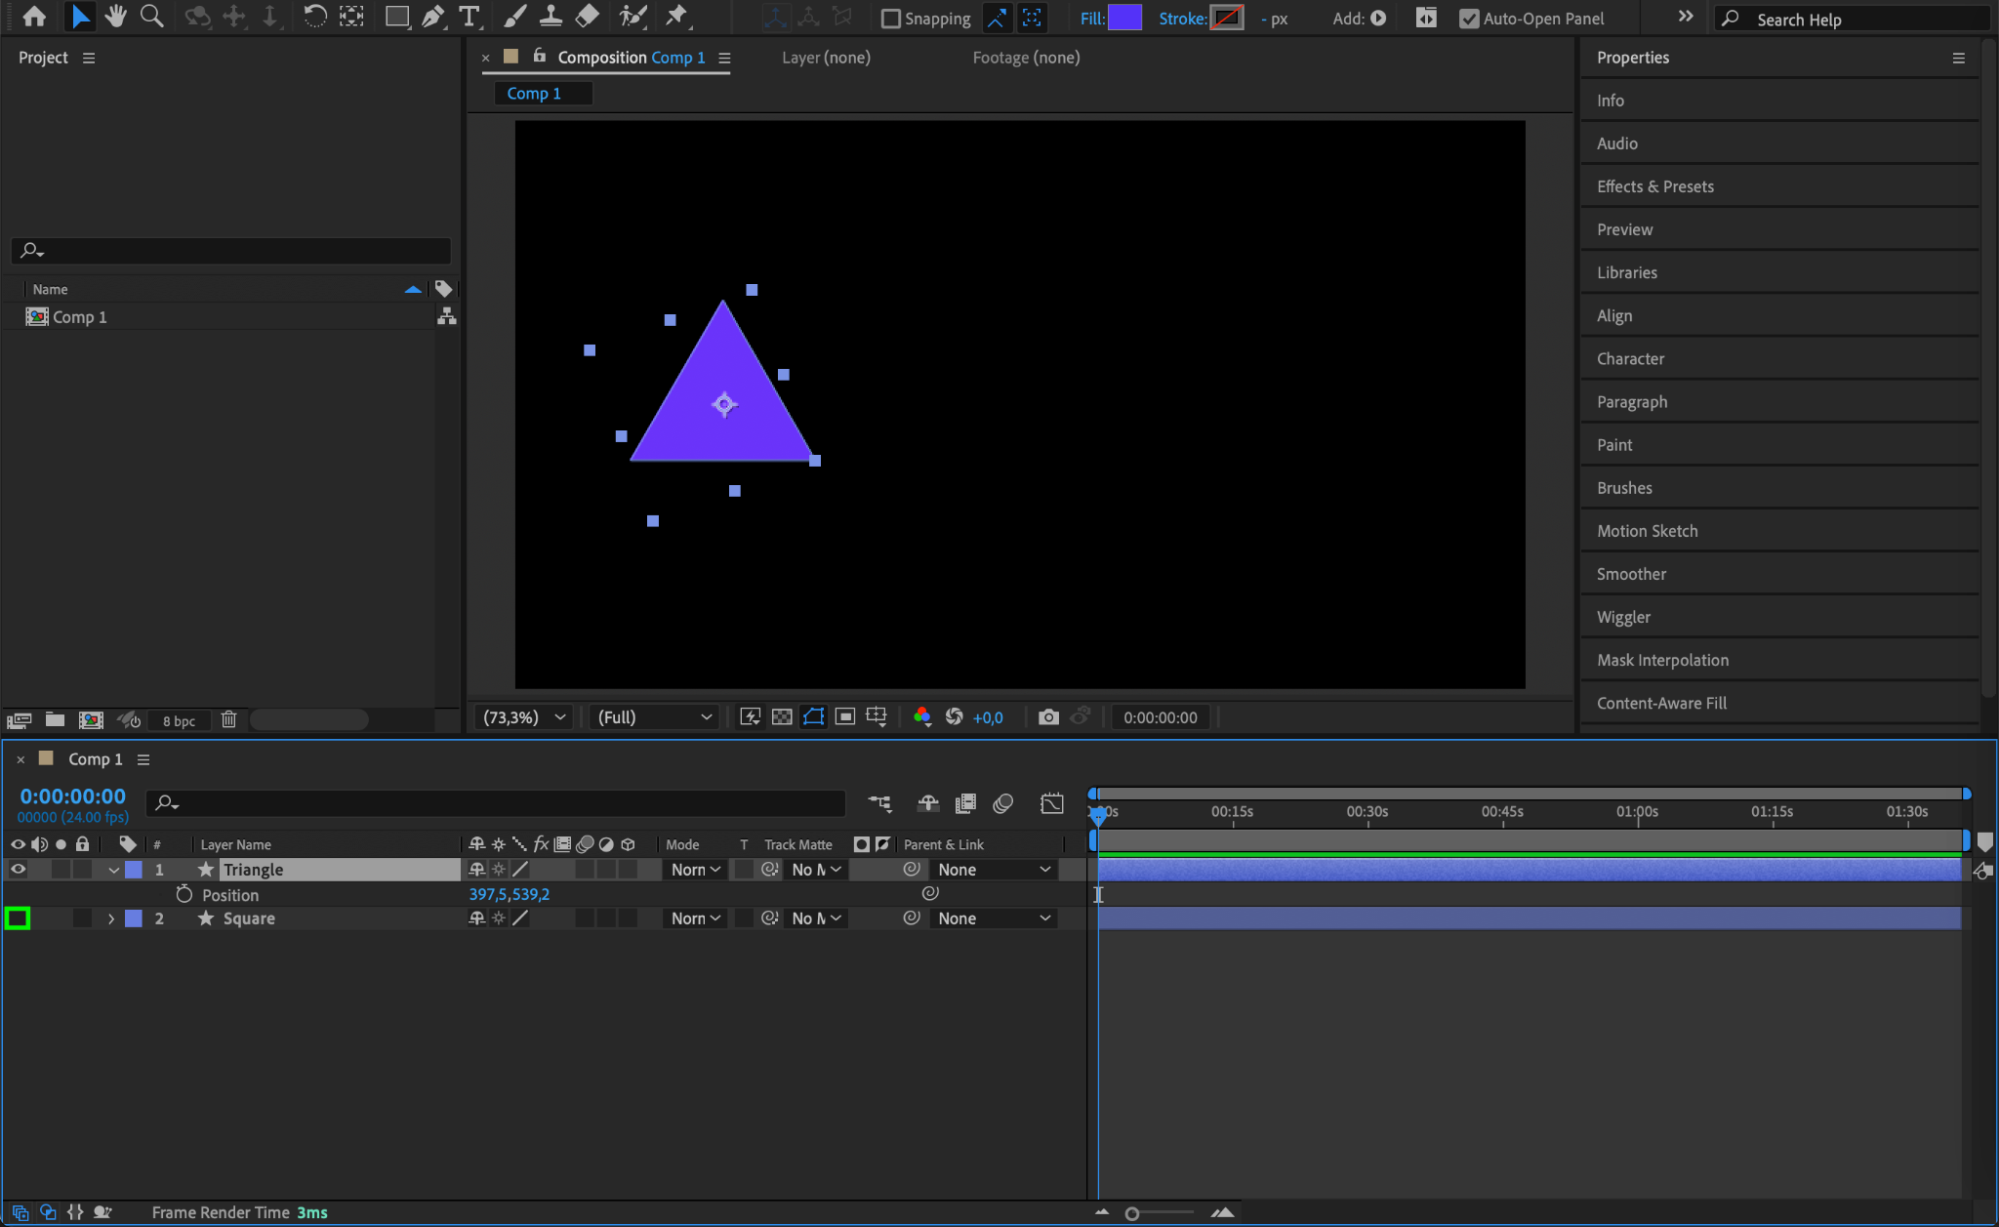
 Step 5: Apply Easy Ease to Keyframes Using Graph Editor
To smooth out the animation, select all the keyframes and apply Easy Ease by right-clicking and choosing Keyframe Assistant > Easy Ease, or press F9. For even finer control, use the Graph Editor to adjust the motion curves. A smoother curve creates a more natural flow, enhancing the overall animation.

 Step 6: Parent the Second Shape to the Animated Shape
Reveal the second shape by clicking its eye icon again, and make it a child layer of the first animated shape. To do this, use the Parent & Link dropdown in the timeline and select the animated shape as the parent. Parenting the second shape to the first allows it to follow the animation of the first shape smoothly, while keeping its own distinct properties.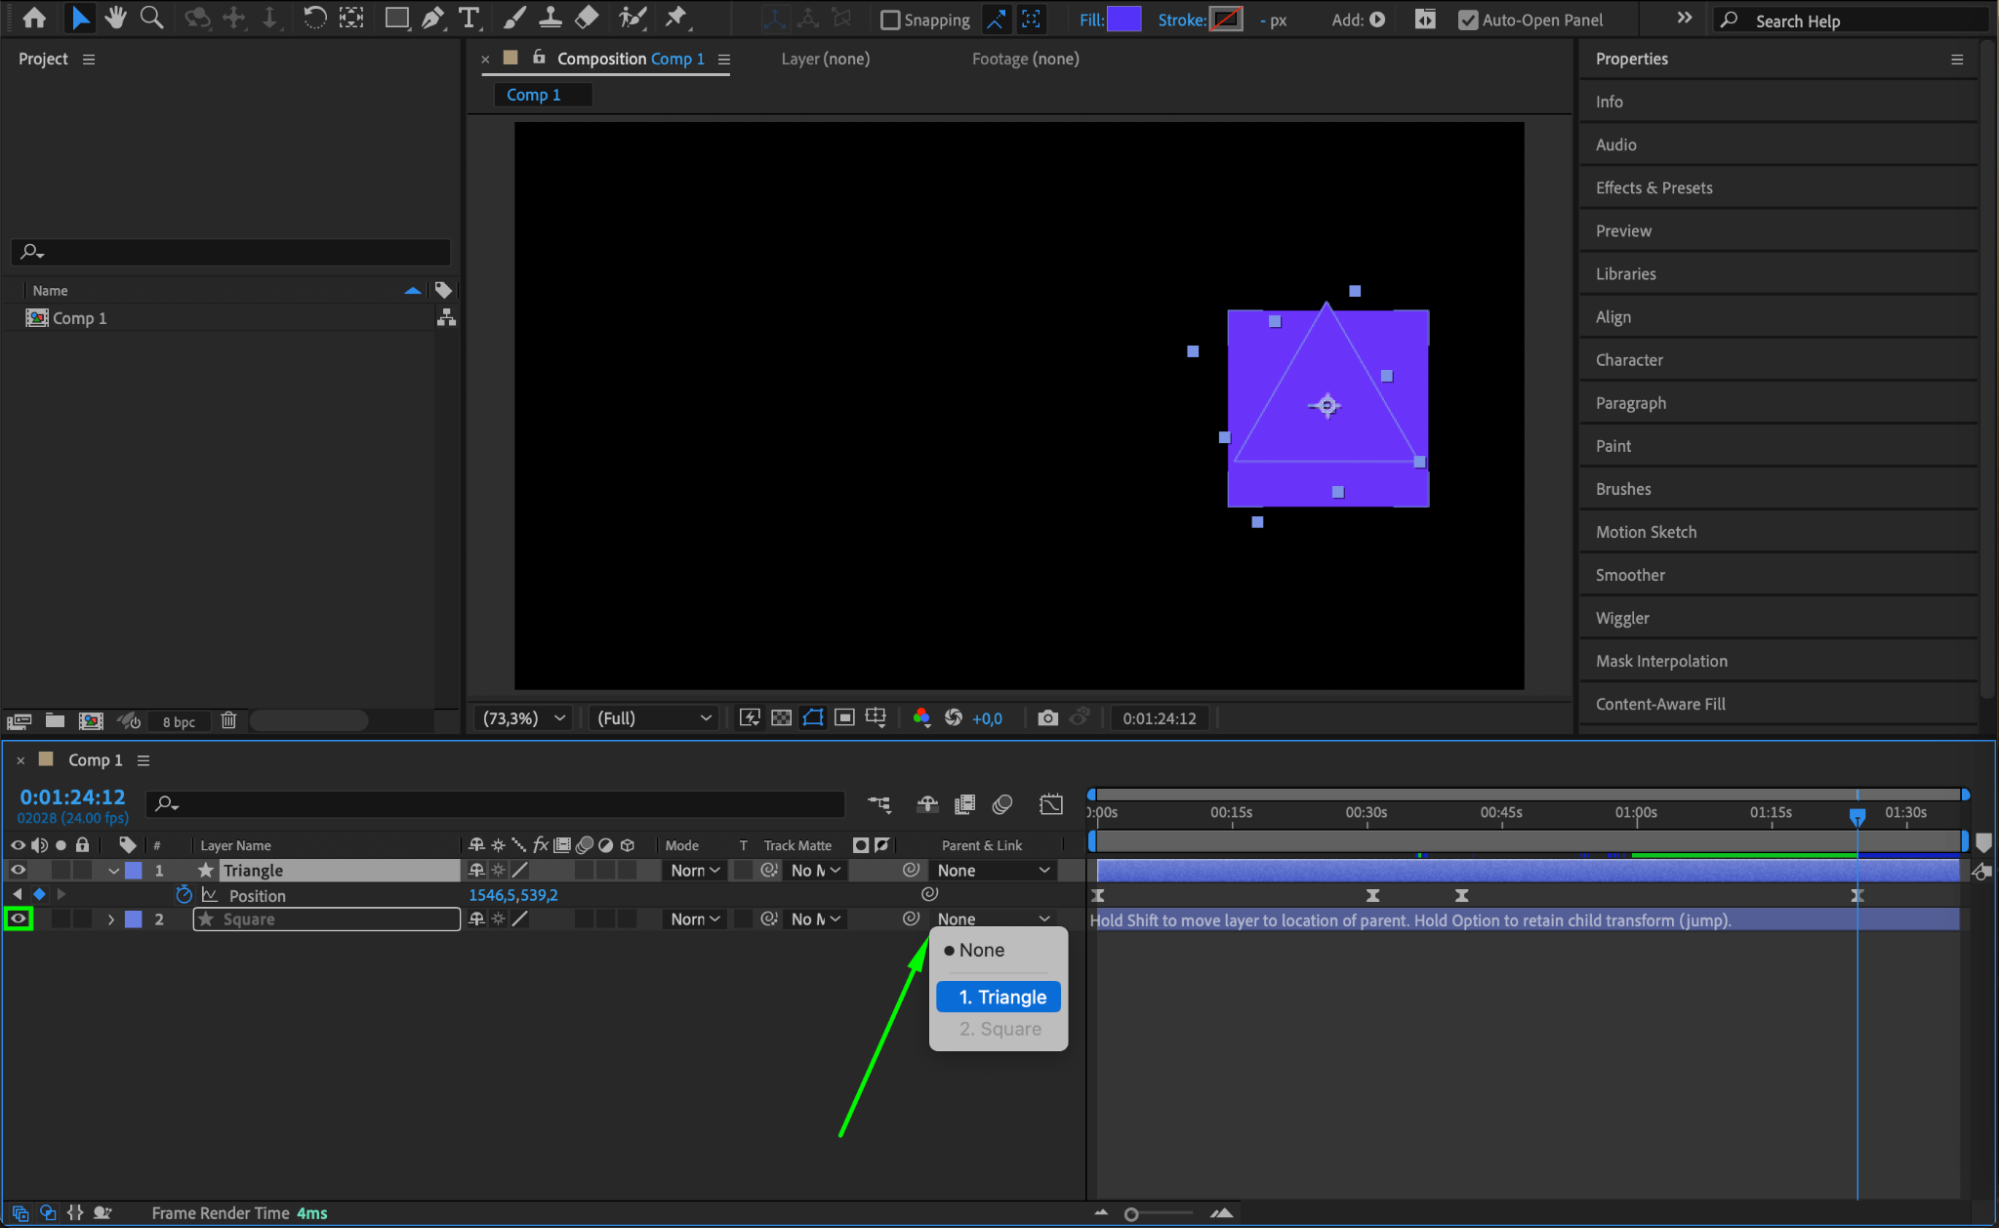 Step 7: Offset the Timing of the Second Shape
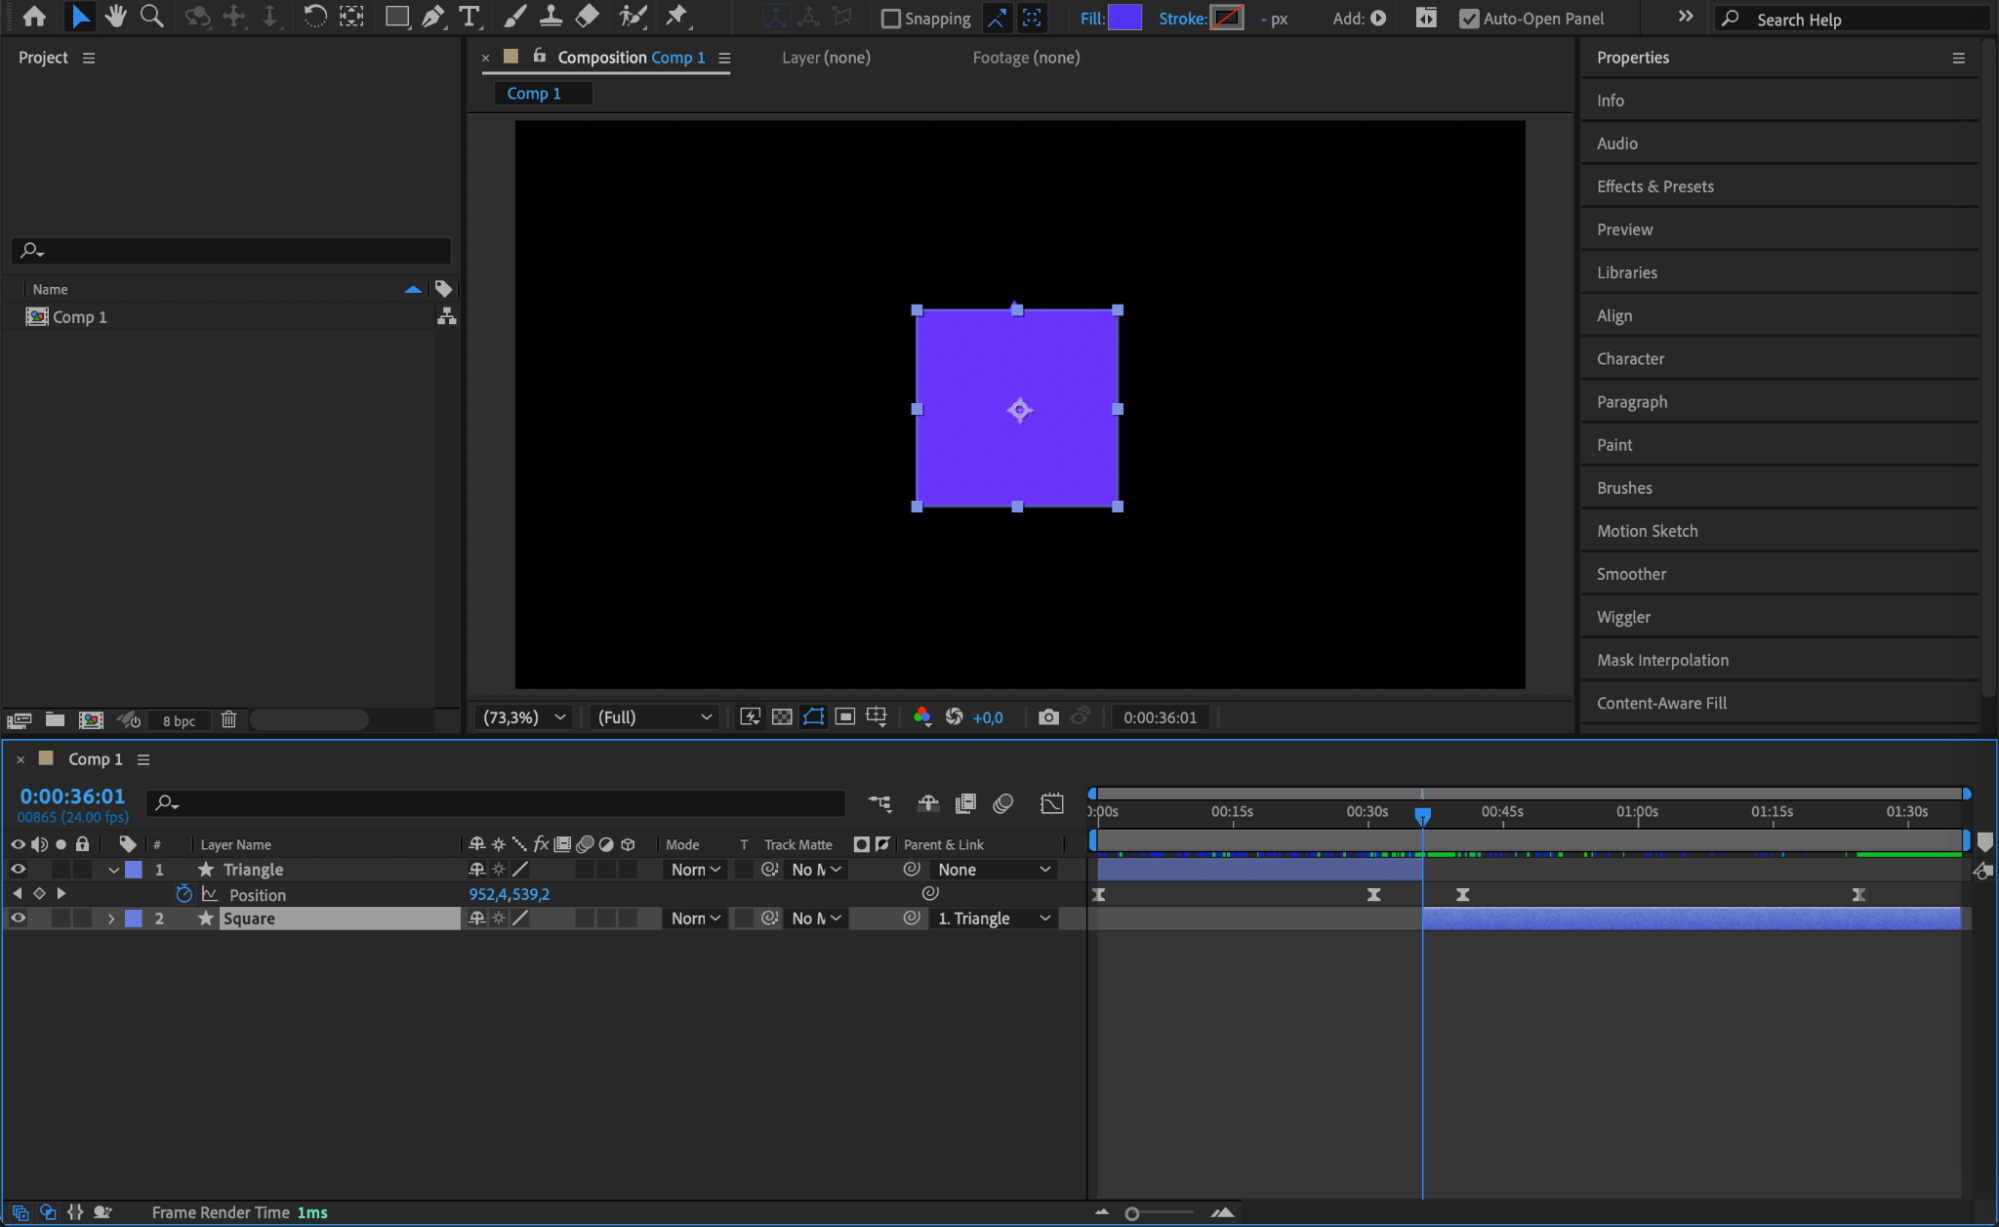
To create the morph effect, you’ll need to offset the timing of the second shape. Drag the end of the first shape’s layer in the timeline so that it ends between the second and third keyframes. Then, adjust the start of the second shape’s layer to begin at the same point – between the second and third keyframes. This timing overlap creates the illusion of one shape morphing into another as the animation progresses.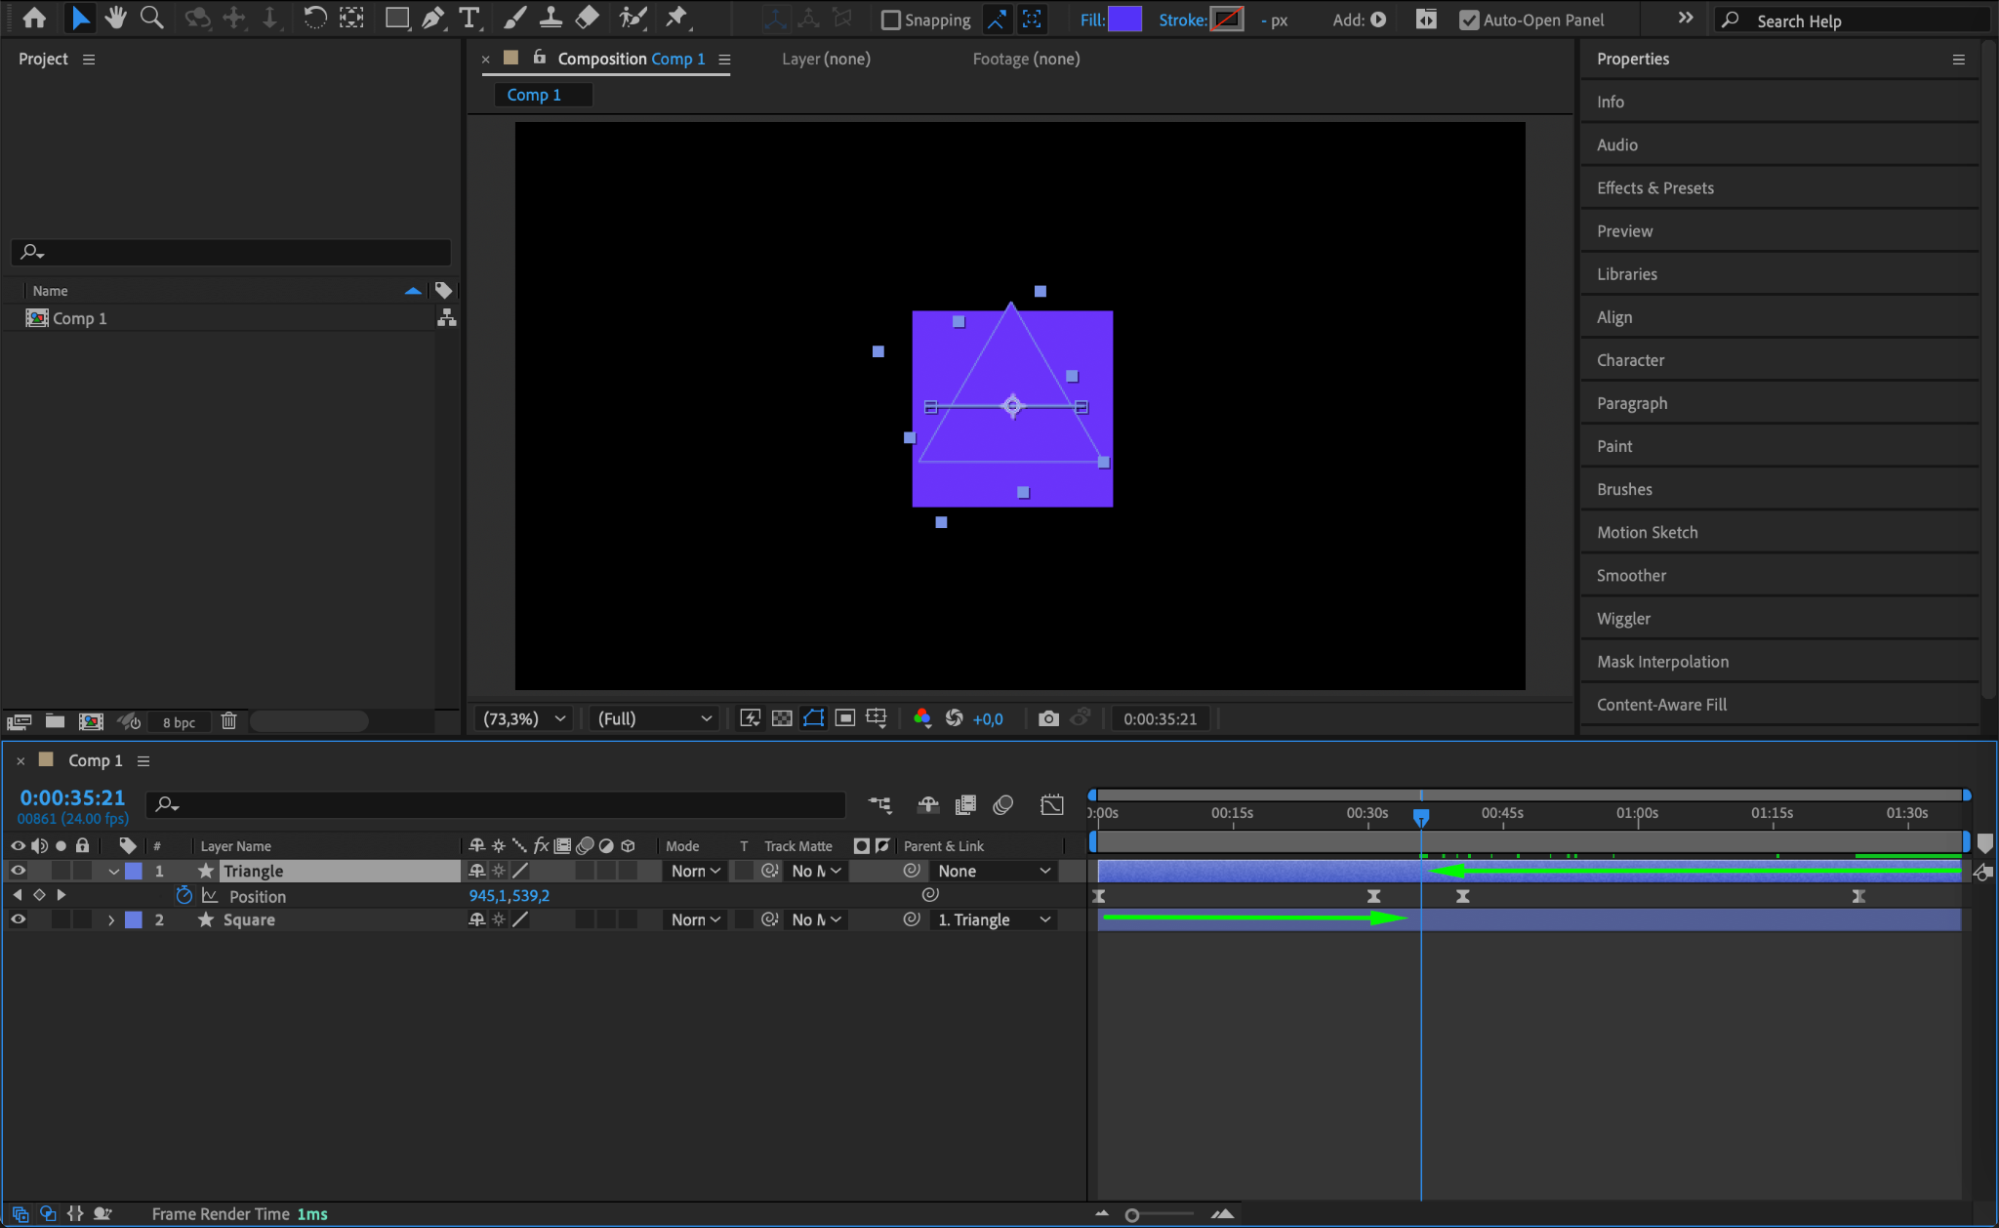
 Step 8: Preview Your Animation
Now that your keyframes and layers are set up, hit the spacebar to preview the animation. Watch how the shapes transform from one to the other and check for any adjustments needed. Fine-tune the keyframes or timing to achieve the smoothest morph possible.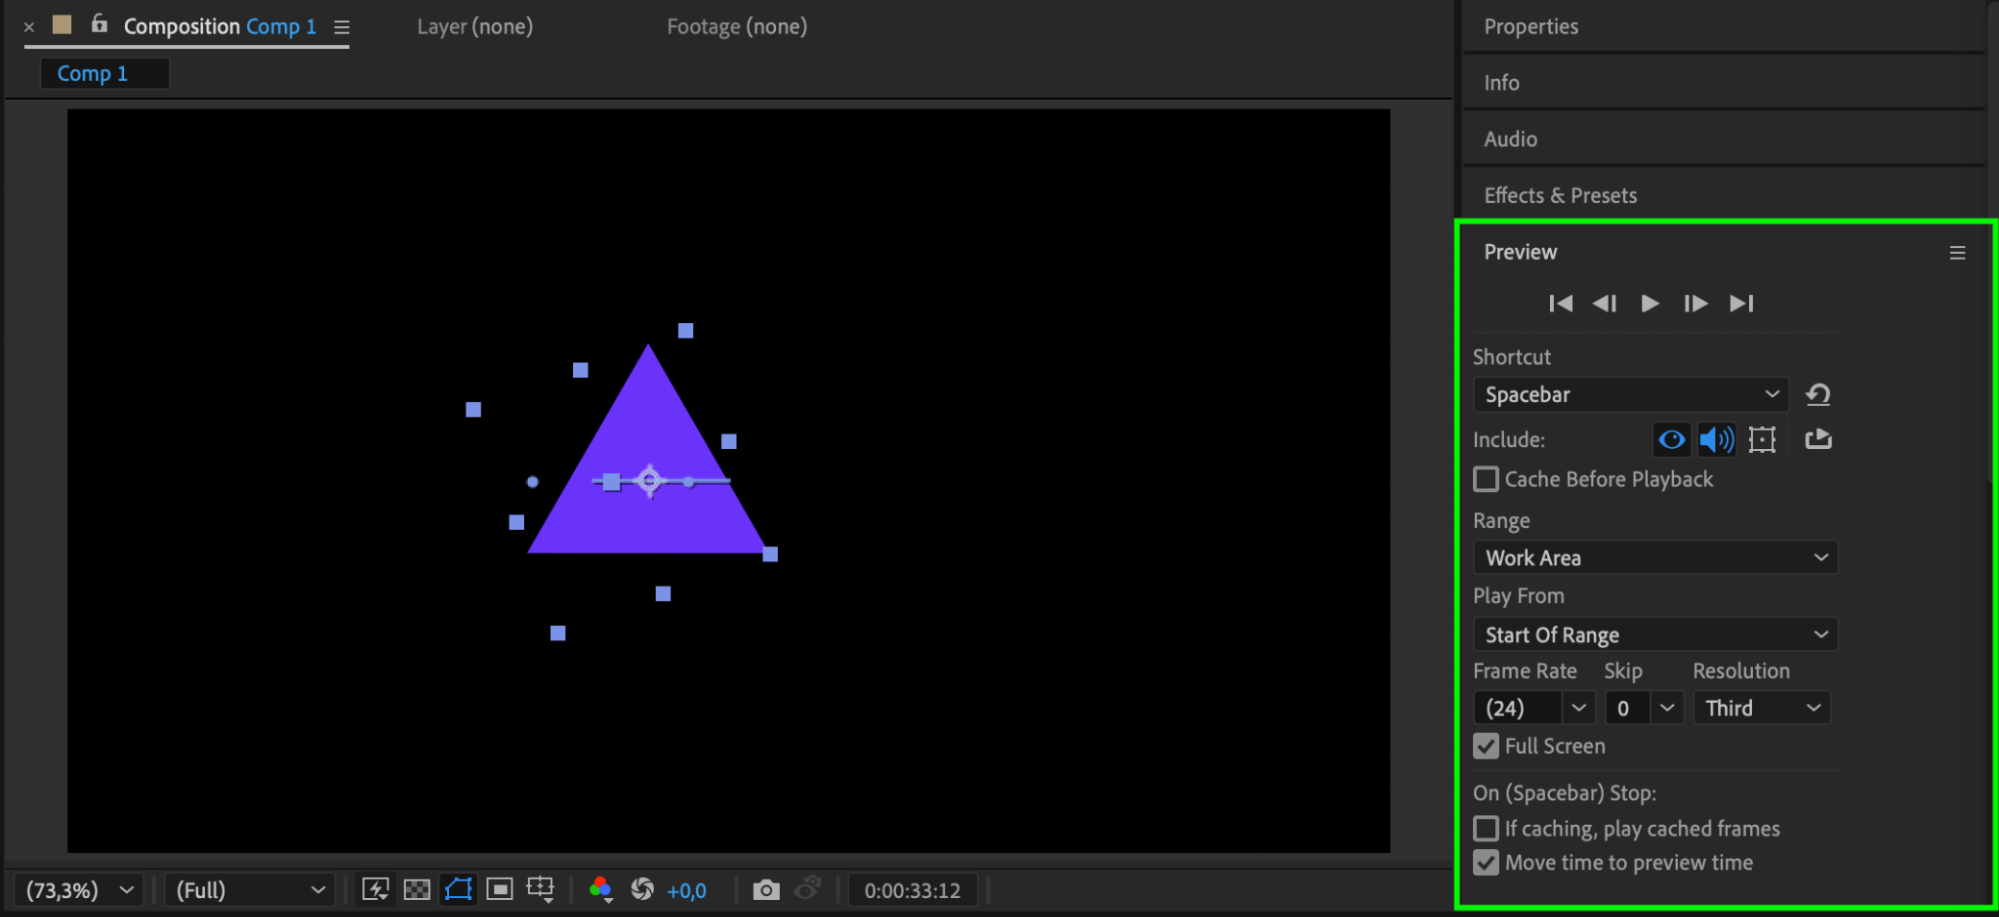
Conclusion
Morphing shapes in After Effects adds fluidity and sophistication to your animations. By following these steps – creating a composition, setting keyframes, parenting layers, and using Easy Ease – you can master the technique of morphing shapes. Experiment with different shapes and timings to enhance your projects and give your animations a professional edge. Happy animating!

