Mastering Reverse Video Playback in After Effects
Exploring Reverse Video Playback in After Effects
Have you ever wondered how to play a video backwards in After Effects? It’s a cool technique that can add a unique touch to your videos. In this detailed guide, we will walk you through the step-by-step process of mastering the reverse playback feature in After Effects. Whether you’re new to video editing or a seasoned pro, understanding how to play a video in reverse can take your skills to the next level.
Introduction: Exploring Reverse Playback in After Effects
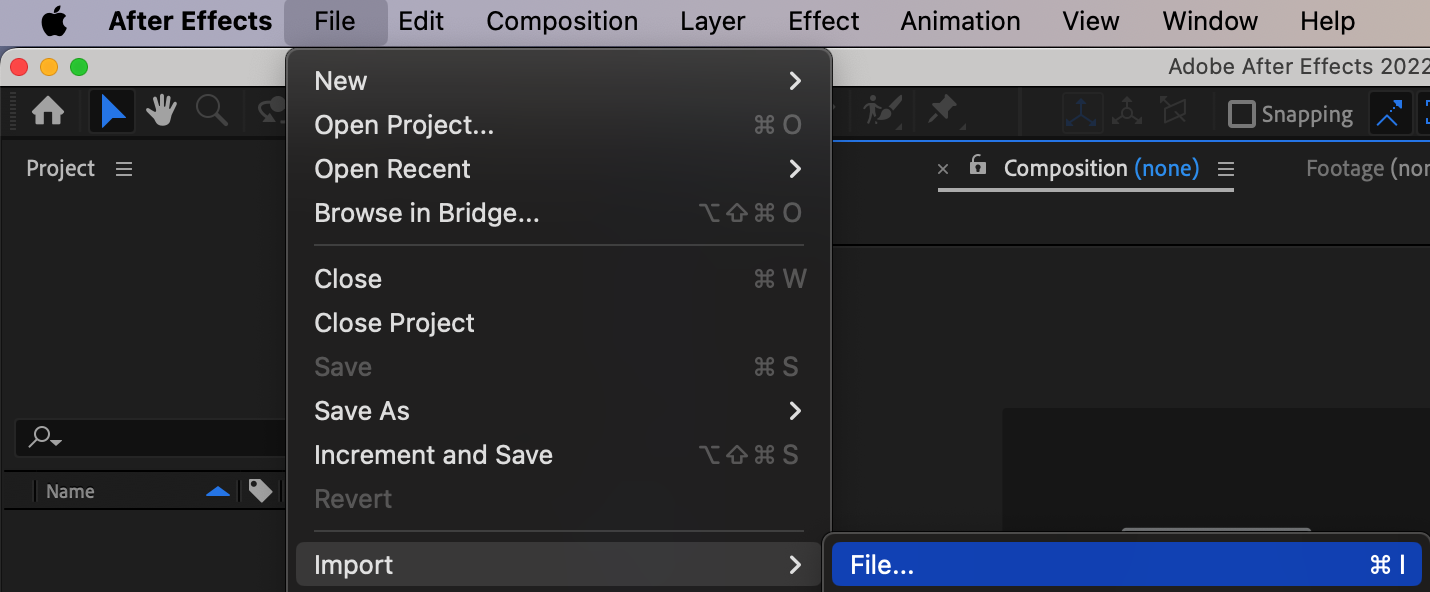
1. Import Your File: Use File > Import > File to import your video file.
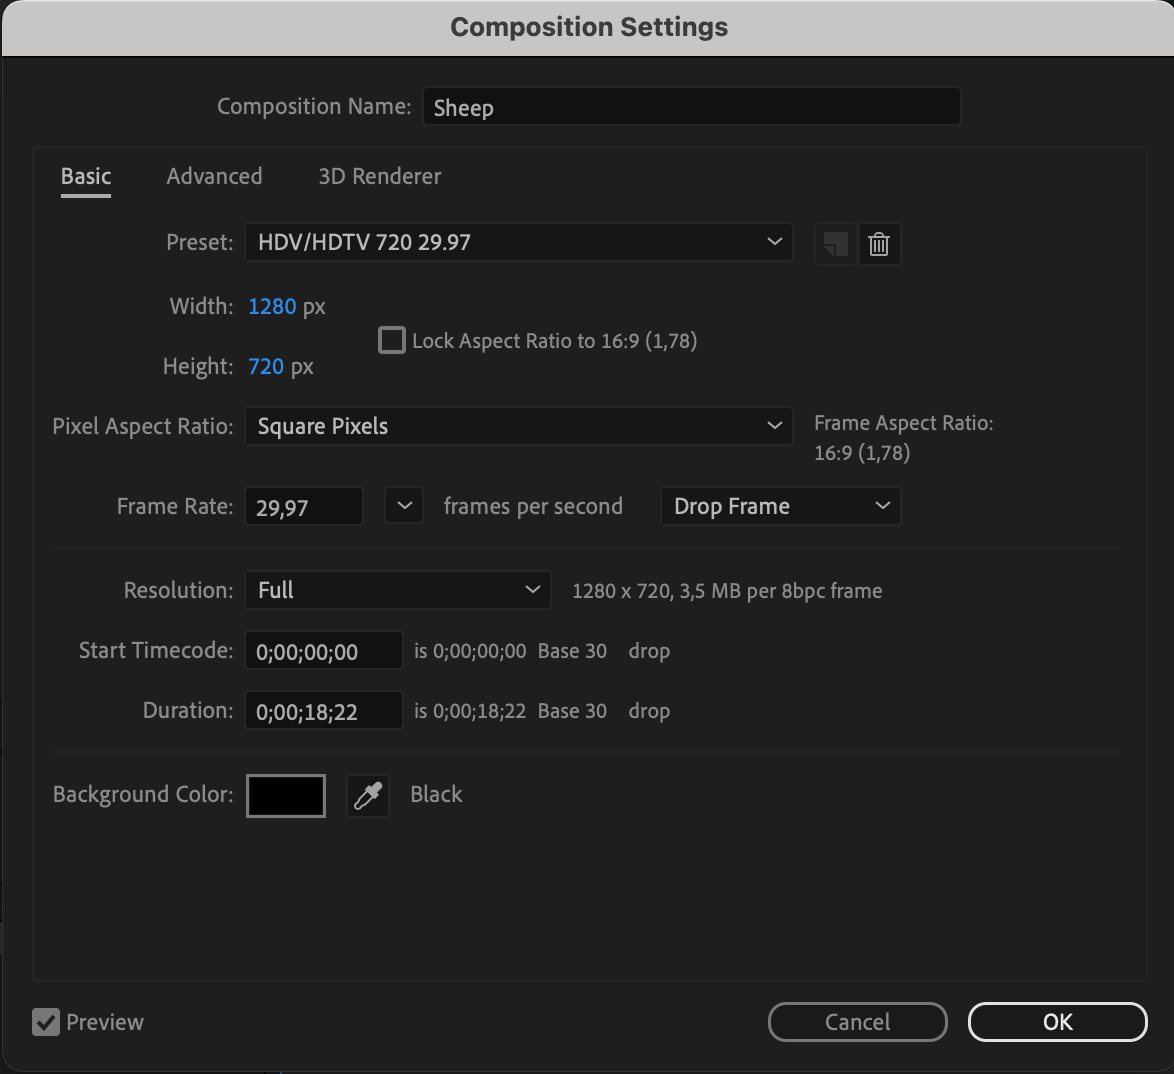
2. Create a New Composition: Set up a new composition and adjust the settings.

Get 10% off when you subscribe to our newsletter

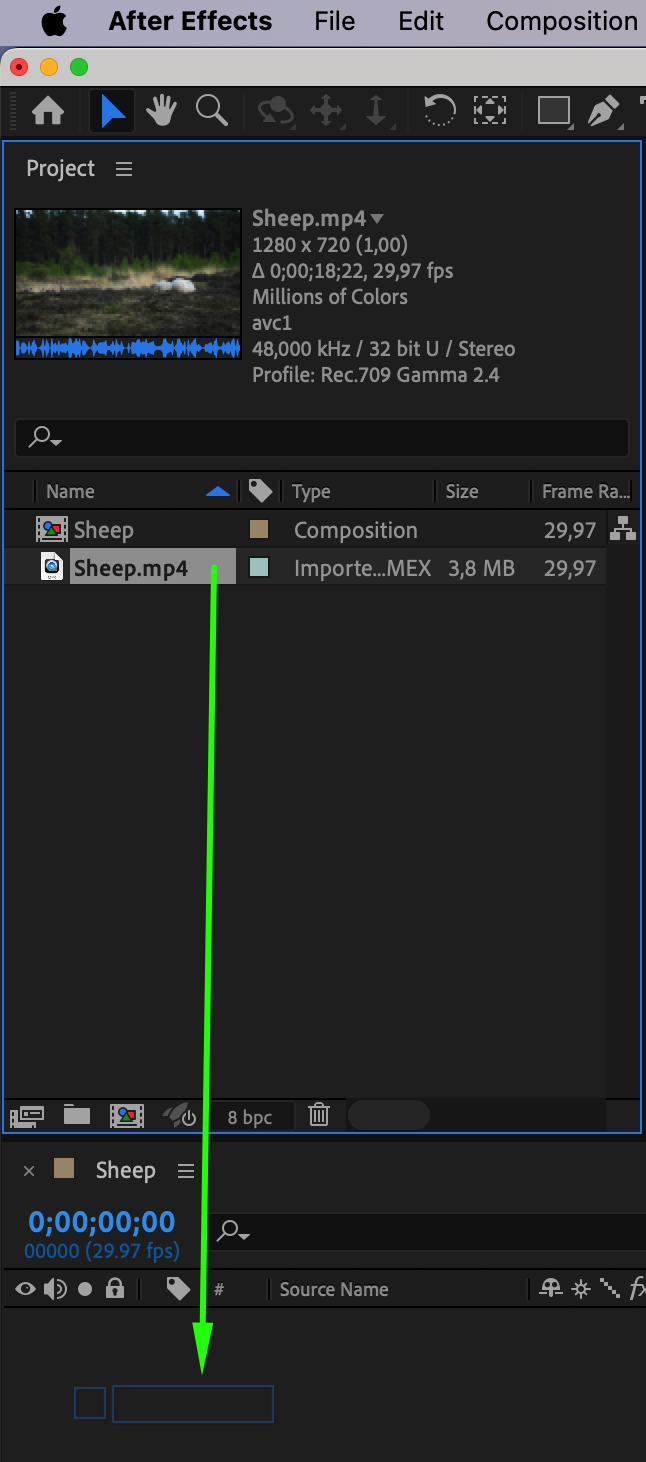
3. Add Your Video to the Composition Panel: Drag the imported file onto the composition panel.
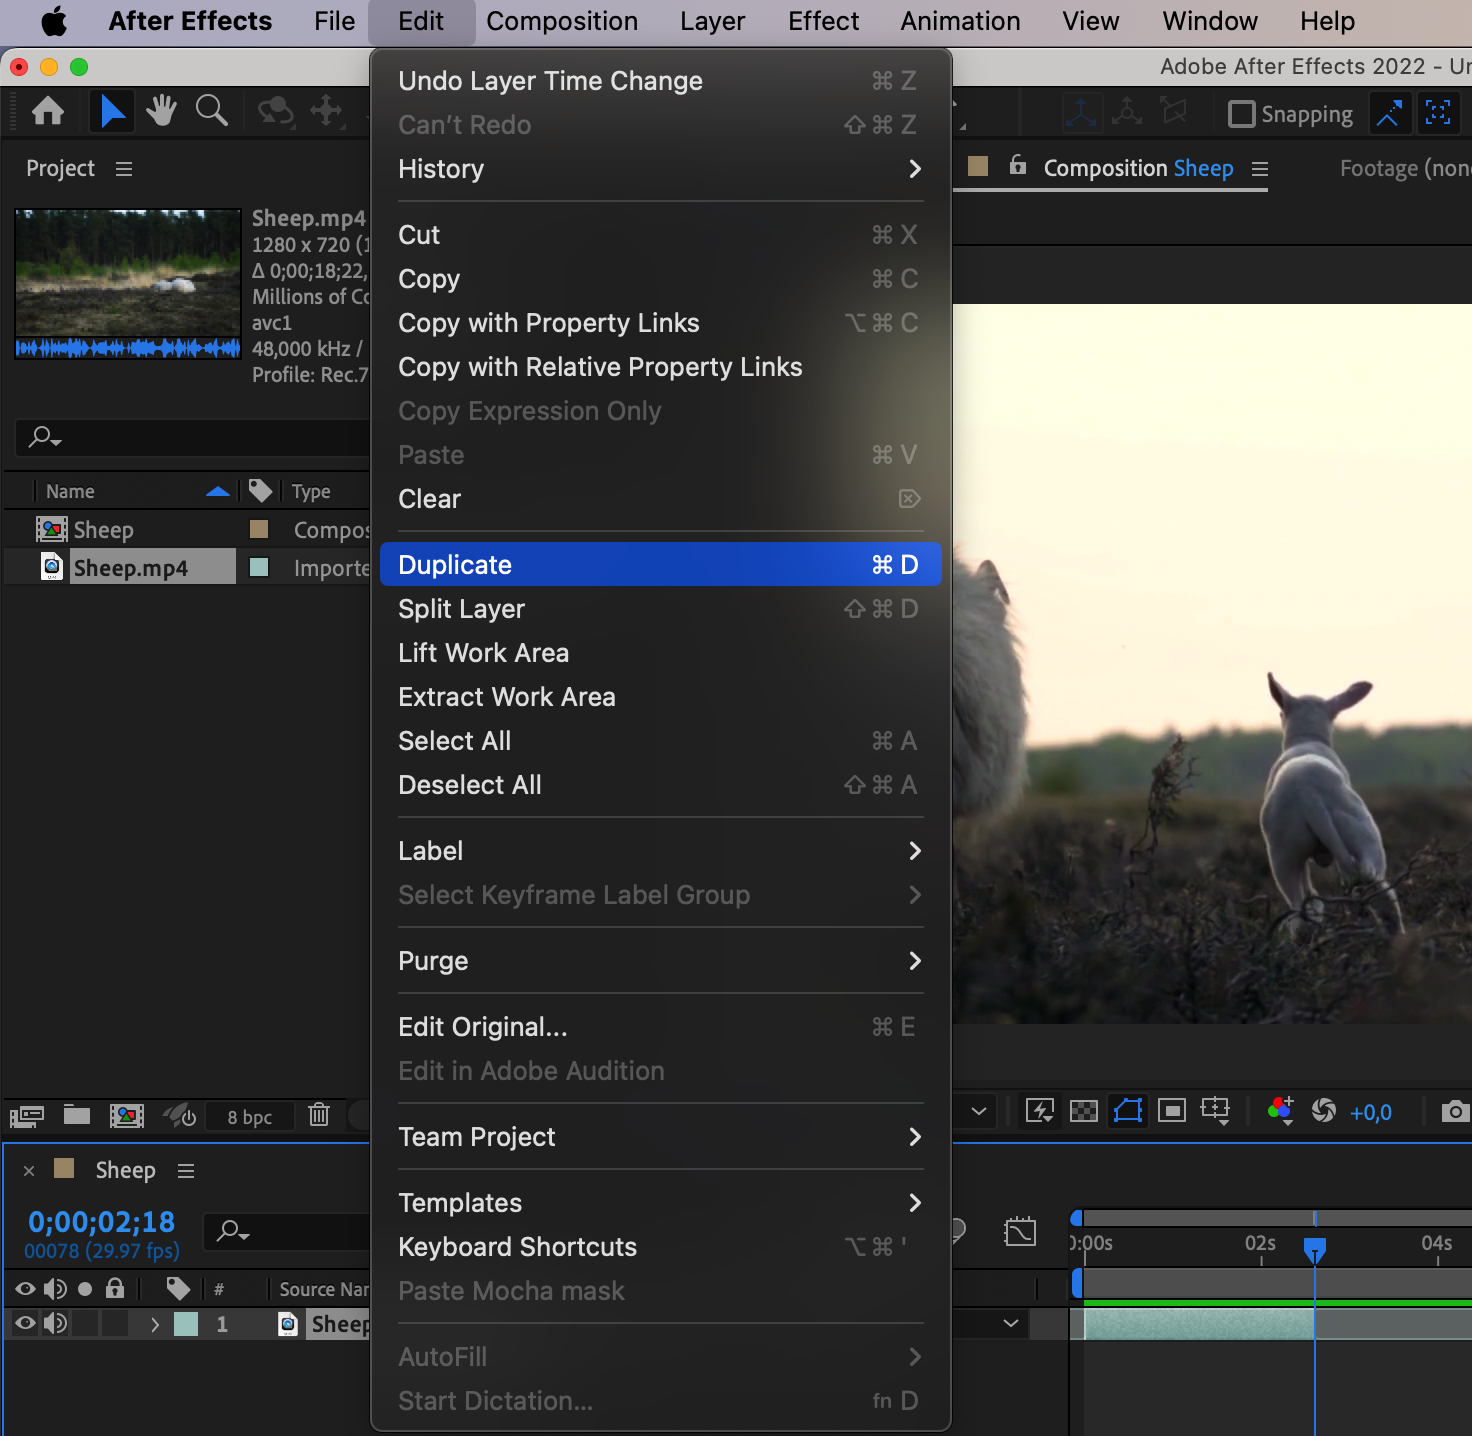
4. Duplicate Your Video Layer: Duplicate the layer using Edit > Duplicate (Ctrl/Cmd+D).
5. Reverse the Layer: Reverse the duplicated layer by going to Layer > Time > Reverse Layer.
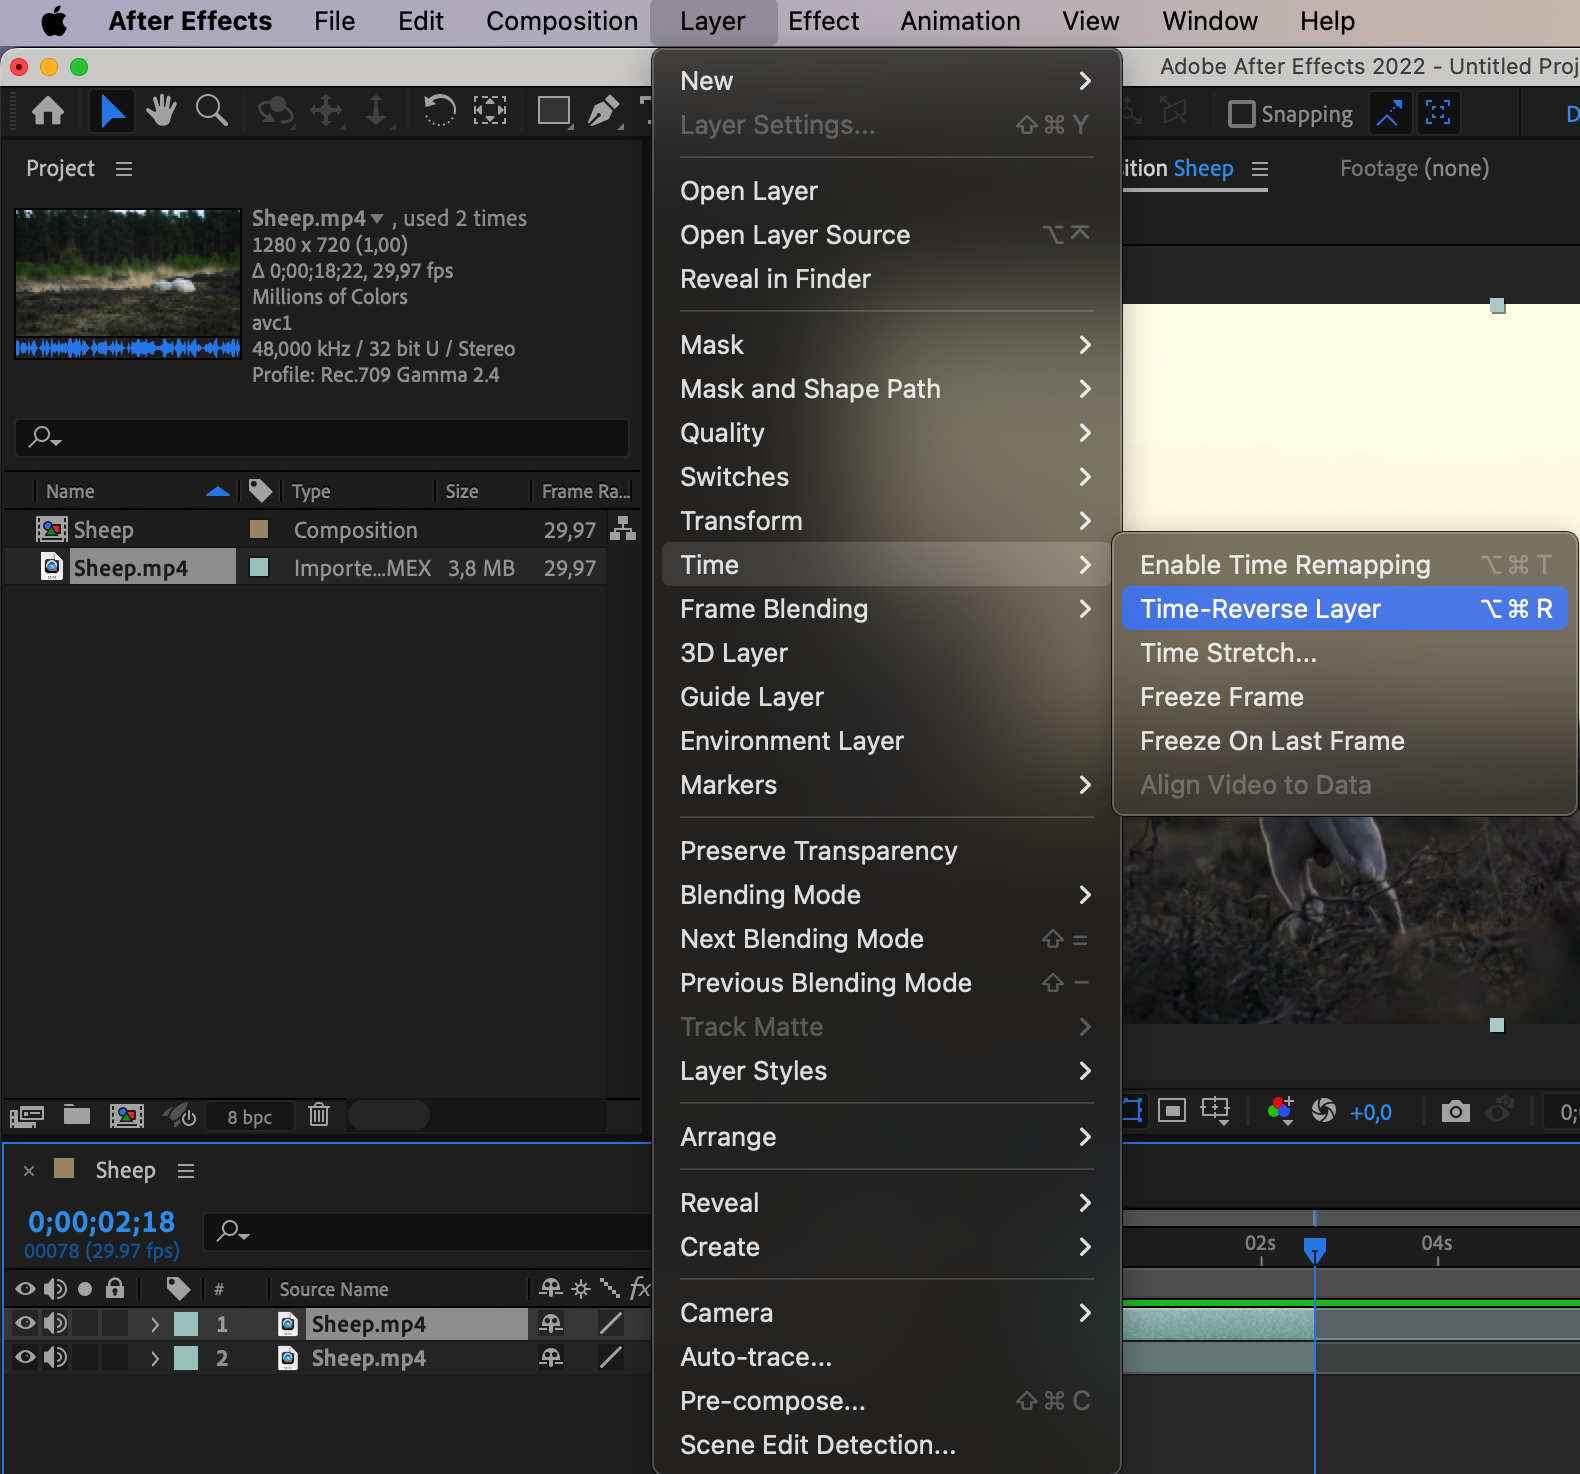
6. Position the Reversed Layer: Move the reversed layer to start immediately after the original one.


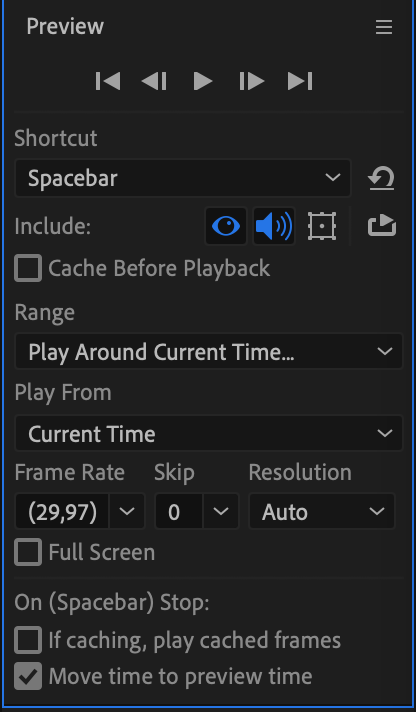
7. Preview Your Result: Use the preview feature to ensure the desired outcome.
Conclusion: Unleashing Creativity with Reverse Playback
Mastering reverse playback in After Effects empowers you to manipulate time and create captivating visual effects. Experiment with pacing, transitions, and effects to transform your videos into artistic masterpieces. Whether you’re a novice or a seasoned editor, incorporating reverse playback can breathe new life into your projects, captivating your audience in innovative ways.

