Previewing Techniques in Adobe After Effects
Navigating the Preview Process in After Effects
Adobe After Effects is one of the most popular tools for creating animation and special effects in the film and animation industry. Previewing projects in After Effects plays a key role in the process of creating and editing animation. In this article, we will discuss the steps for previewing projects in After Effects.
Get 10% off when you subscribe to our newsletter

1. Open After Effects
The first step is to launch the After Effects program and open the project you want to preview.
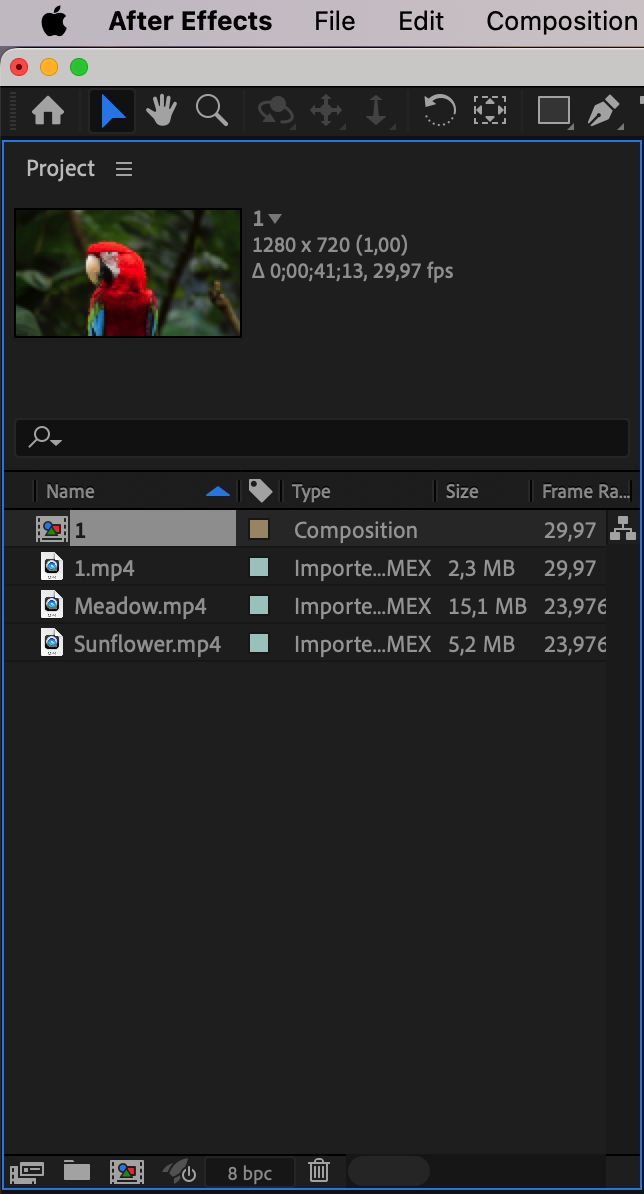
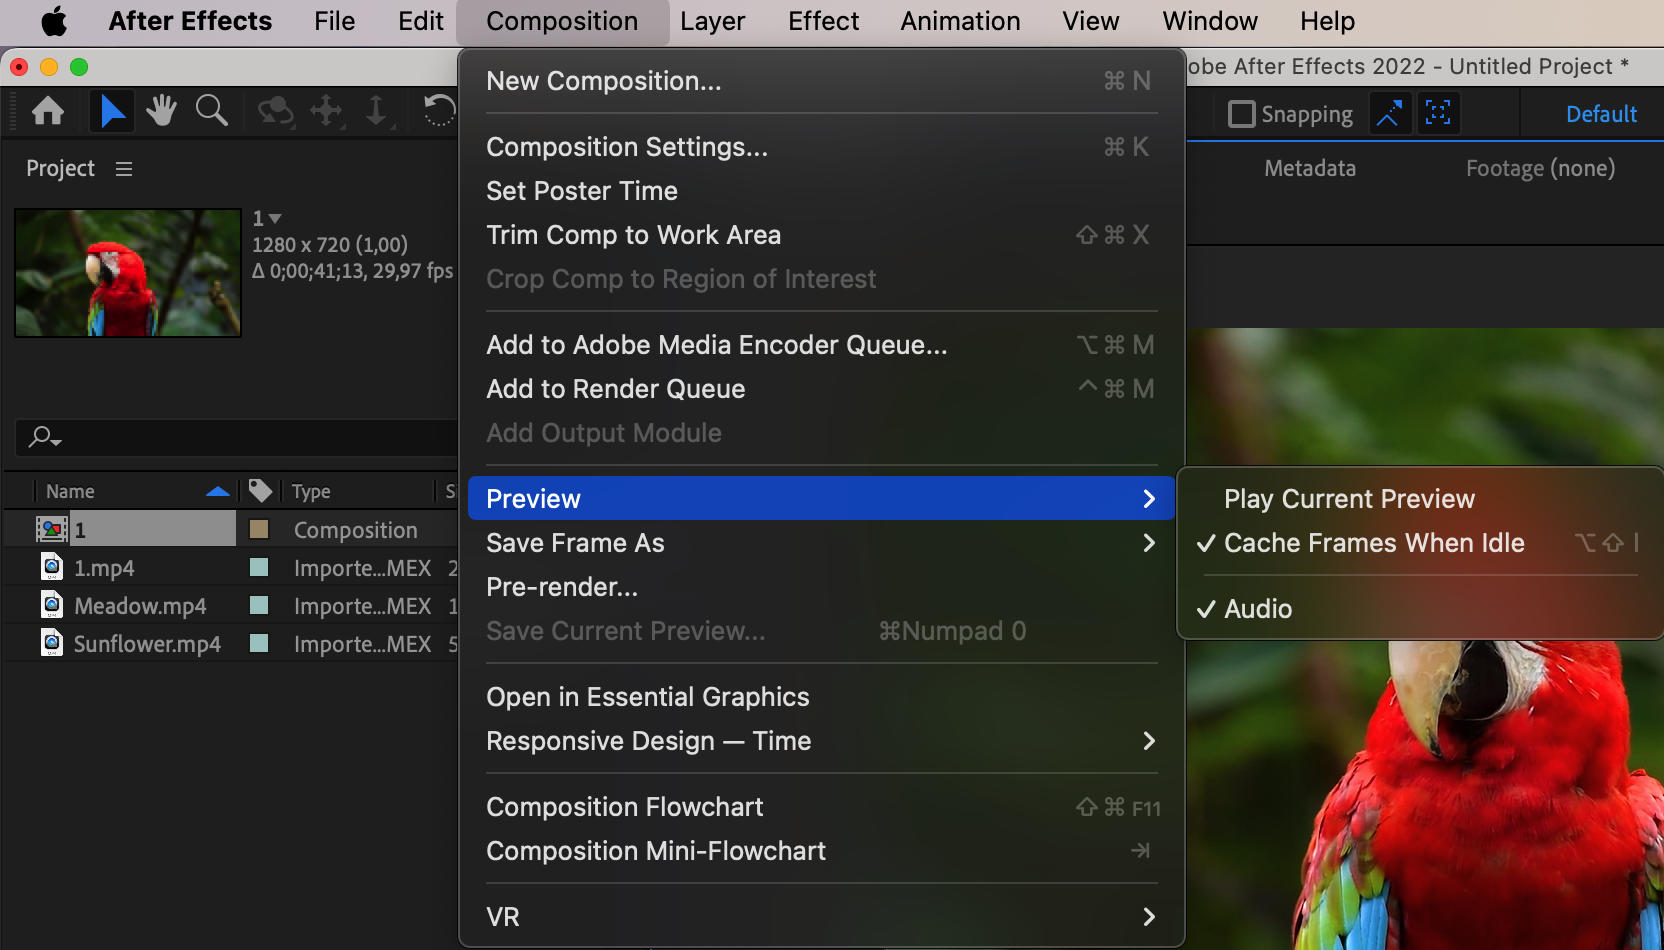
2. Set Up the Composition
Make sure the composition you want to preview is selected. If your project contains multiple compositions, choose the one you want to preview by clicking on it in the project panel.
Get 10% off when you subscribe to our newsletter
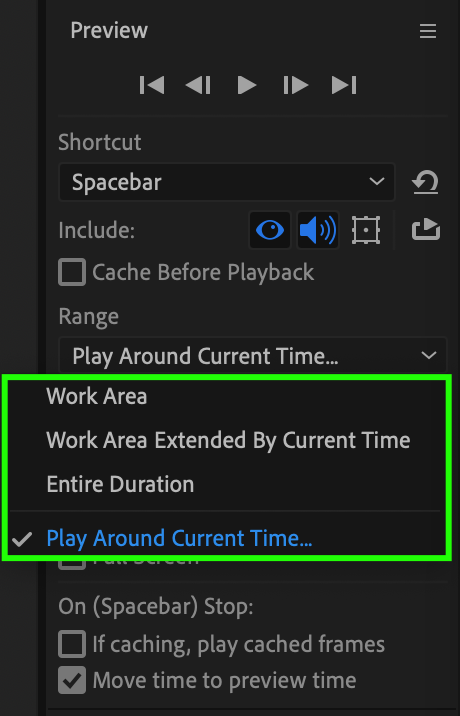
3. Adjust the Preview Area
Ensure that the preview area is in the correct position on the screen and displays the desired time range. If necessary, you can adjust the scale of the preview area using the zoom tools.

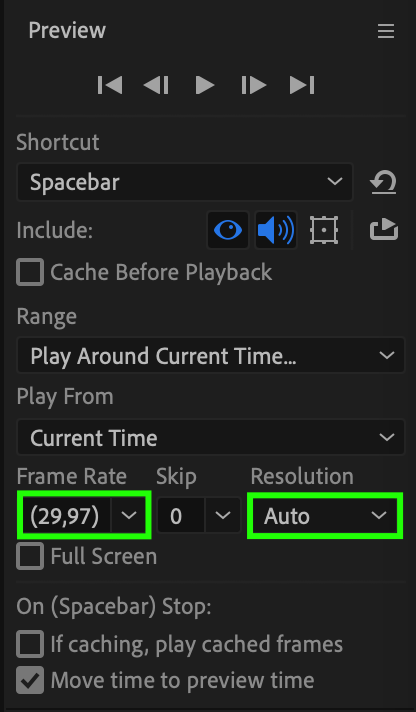
4. Adjust Preview Settings
In the Preview panel, you have the option to adjust the resolution and frame rate of the preview. It’s important to select the settings that are appropriate for the complexity of your project and the performance capabilities of your computer.
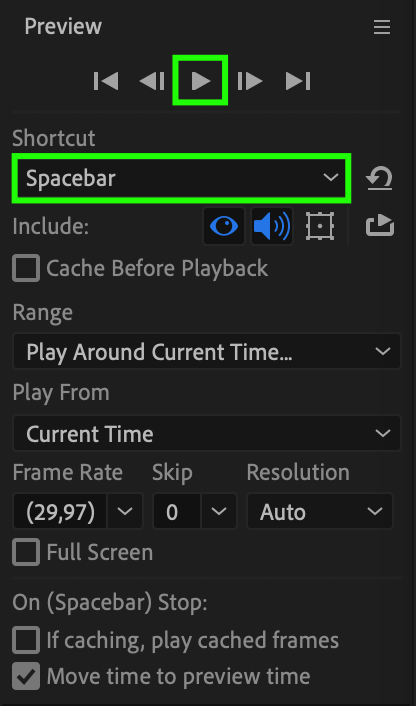
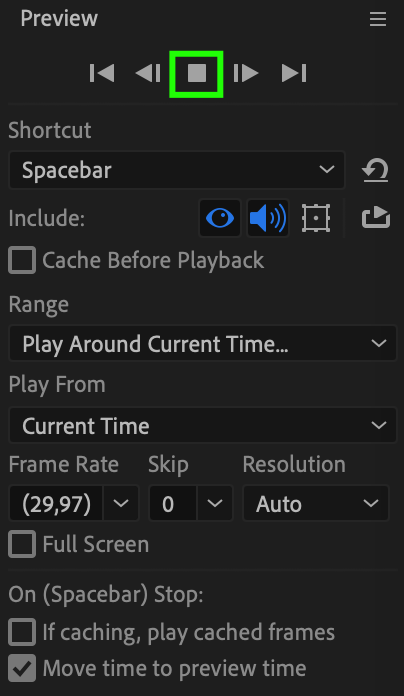
5. Start the Preview
To start the preview, press the “Spacebar” key on your keyboard or click the “Play” button in the control panel. Alternatively, you can select “Composition” from the top menu and then choose “Preview.”
6. Stop the Preview
To stop the preview, press the “Space” key again or click the “Stop” button in the control panel.
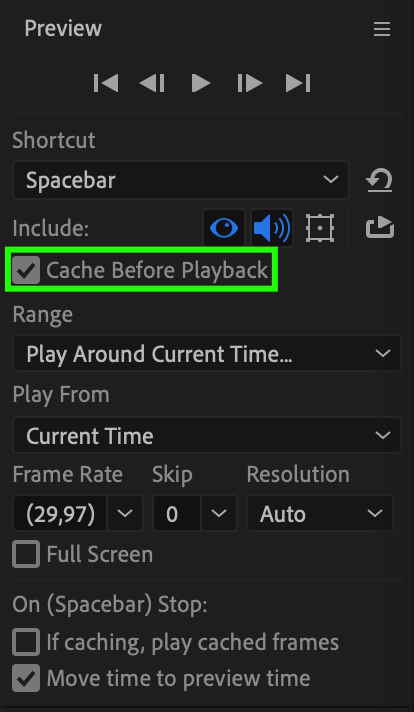
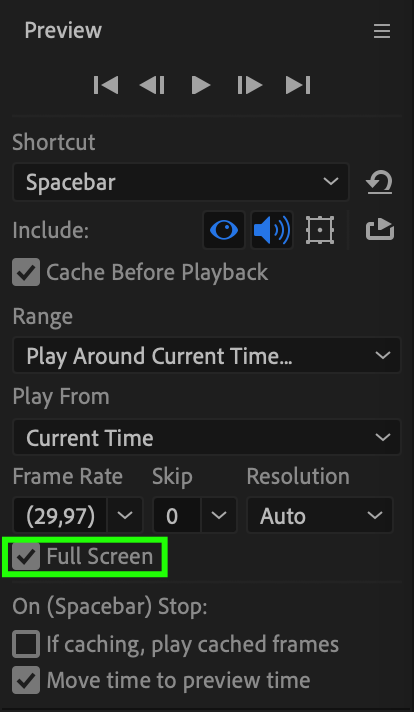
Additional Options and Features
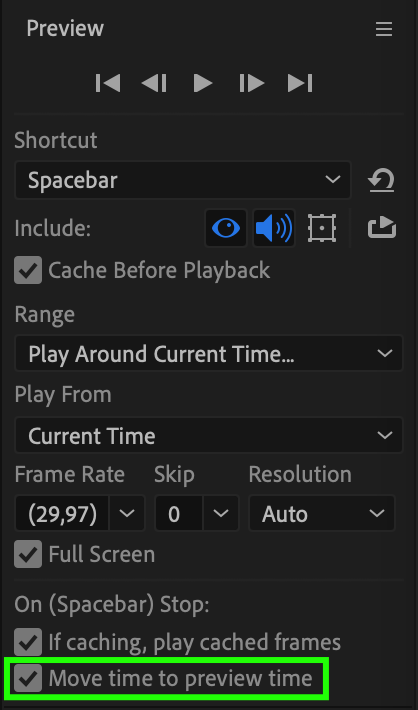
Cache before playback: Improves playback smoothness by caching project frames.
Full-screen mode: Allows you to switch to full-screen mode for better evaluation of your project.
If caching, play caching frames: This parameter determines whether cached frames should be played back during the caching process of new frames. This can be useful for continuous project viewing during caching.
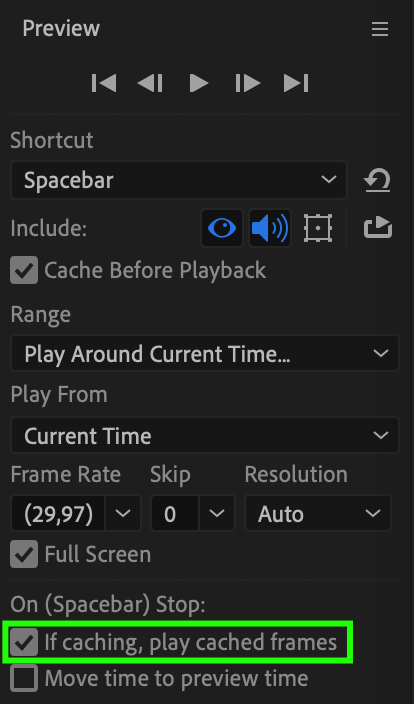
Move time to preview time: This parameter moves the current time to the time indicated by the preview time indicator. It’s convenient for quickly jumping to a specific moment in the project during previewing.
After completing the preview, you can continue working on your project and make any necessary changes.
Conclusion
Mastering the art of previewing in Adobe After Effects is crucial for refining your projects efficiently. By adjusting settings, such as resolution and frame rate, and utilizing additional features like caching, you can ensure smoother playback and better project evaluation. Don’t forget to explore options like full-screen mode and time adjustments for enhanced workflow. With these techniques at your disposal, you’ll be able to fine-tune your animations with confidence and precision.
Our Bestsellers


