Unleashing the Power of RAM Preview in After Effects
Introduction – “Harnessing the Speed: Elevate Your After Effects Workflow with Efficient RAM Previews”
Are you tired of waiting for your compositions to display accurately in After Effects?
Rendering times can be a significant hindrance to your productivity, especially when you’re working on large or complex projects. The good news is that there are ways to speed up your RAM preview and optimize your workflow.
In this article, we’ll explore various techniques to help you reduce rendering times and create faster and smoother previews in After Effects. By following these tips, you’ll be able to unleash the full potential of your creative vision without being held back by slow previews. So, let’s dive in and supercharge your After Effects experience!
Are you tired of waiting for your compositions to display accurately in After Effects? Rendering times can be a significant hindrance to your productivity, especially when you’re working on large or complex projects. The good news is that there are ways to speed up your RAM preview and optimize your workflow. In this article, we’ll explore various techniques to help you reduce rendering times and create faster and smoother previews in After Effects. By following these tips, you’ll be able to unleash the full potential of your creative vision without being held back by slow previews. So, let’s dive in and supercharge your After Effects experience!
Tips to Speed Up RAM Preview in After Effects
When working with After Effects, having a fast and seamless RAM preview is essential for a smooth workflow. Here are some practical tips to help you achieve faster RAM previews and expedite your creative process:
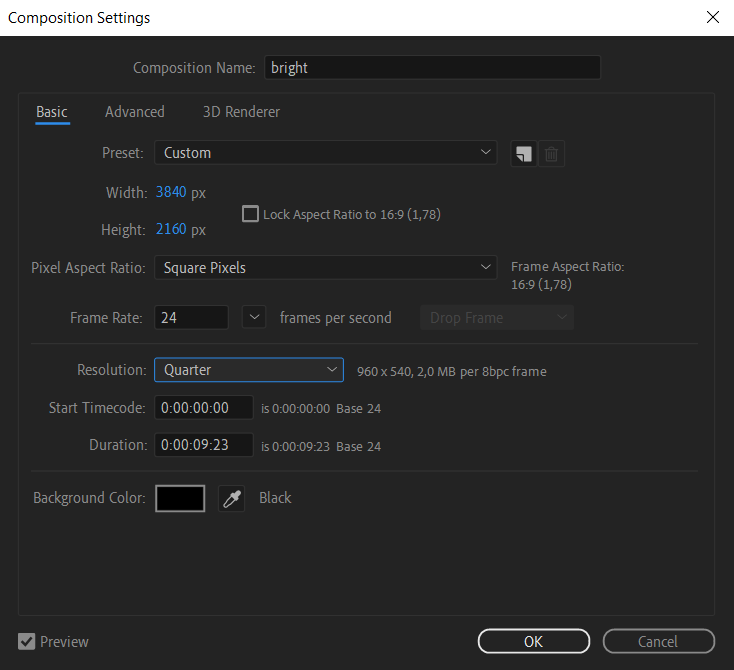
1. Adjust Resolution and Quality Settings: If you’re experiencing sluggish RAM previews, consider lowering the resolution and quality settings of your composition. Navigate to the Composition tab and select Composition Settings. Here, you can reduce the resolution to half or even a quarter, as well as lower the draft quality to accelerate preview rendering times.
2. Utilize the Region of Interest (ROI) Feature: To focus your RAM preview on specific areas of your composition and save time, utilize the Region of Interest feature. Simply select the area you want to preview by using the “B” key to activate the Region of Interest tool, and then press “Spacebar” to render only the selected region.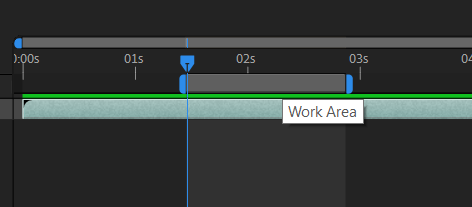
Get 10% off when you subscribe to our newsletter

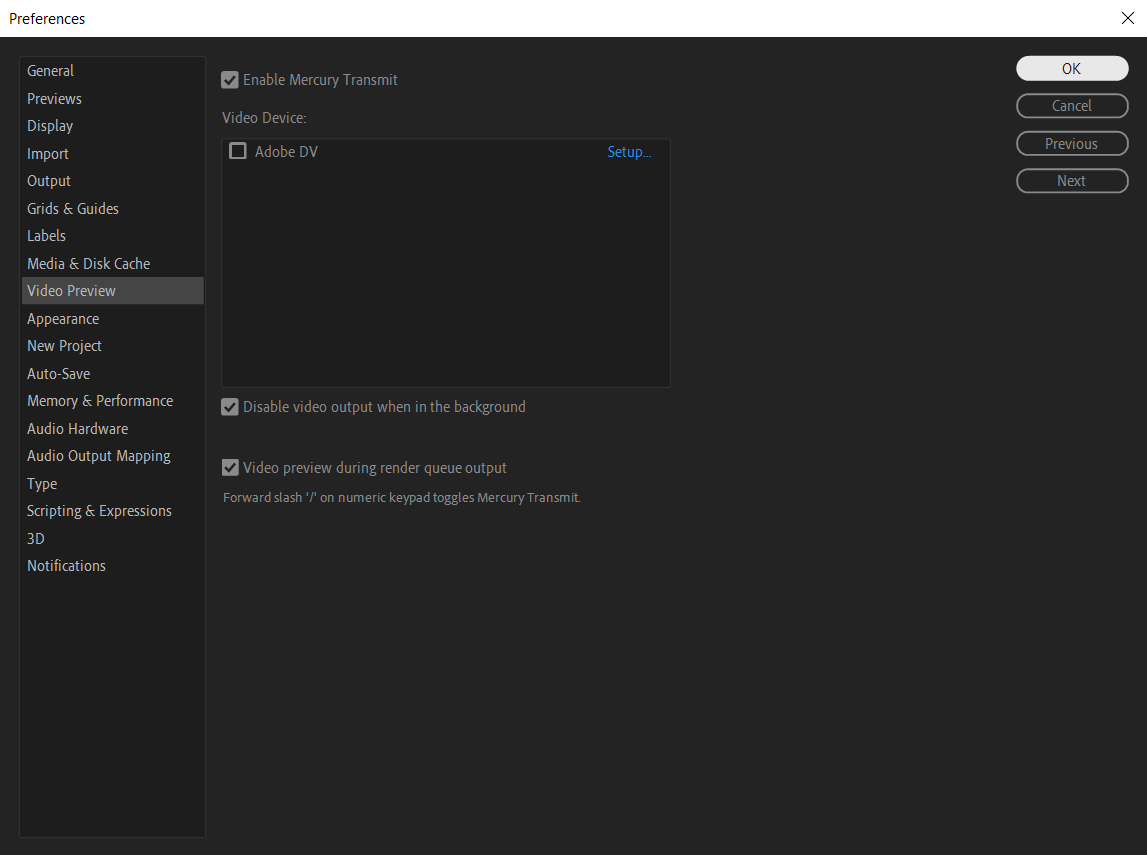
3. Enable or Disable the GPU Acceleration: Depending on your hardware capabilities, enabling or disabling the GPU acceleration option in After Effects preferences can make a noticeable difference in RAM preview performance. To access this setting, go to Edit > Preferences > Video Previews and select or deselect the “Enable Mercury Transmit” option.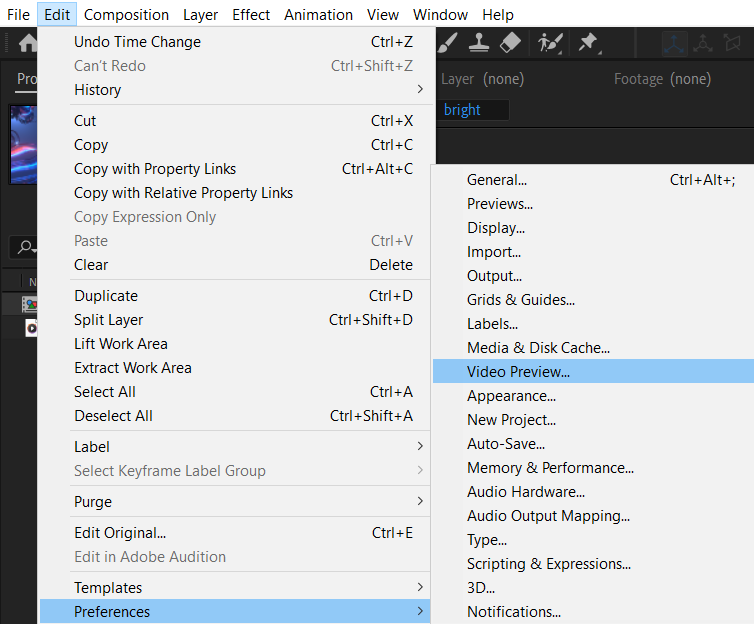
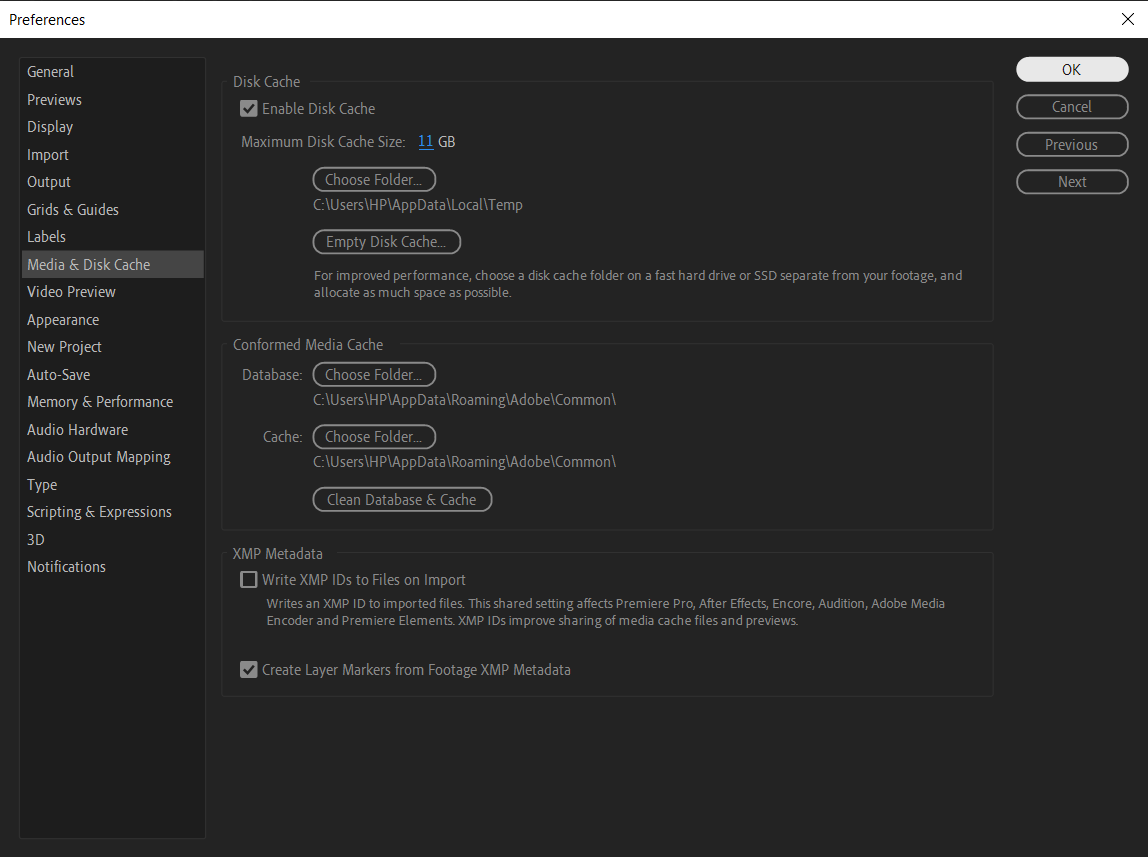
4. Optimize Disk Cache: After Effects allows you to set up a disk cache to store temporary files, which can significantly enhance RAM preview speed. To optimize disk cache, go to Edit > Preferences > Media & Disk Cache and set the “Maximum Disk Cache Size” to a size based on the available space on your hard drive.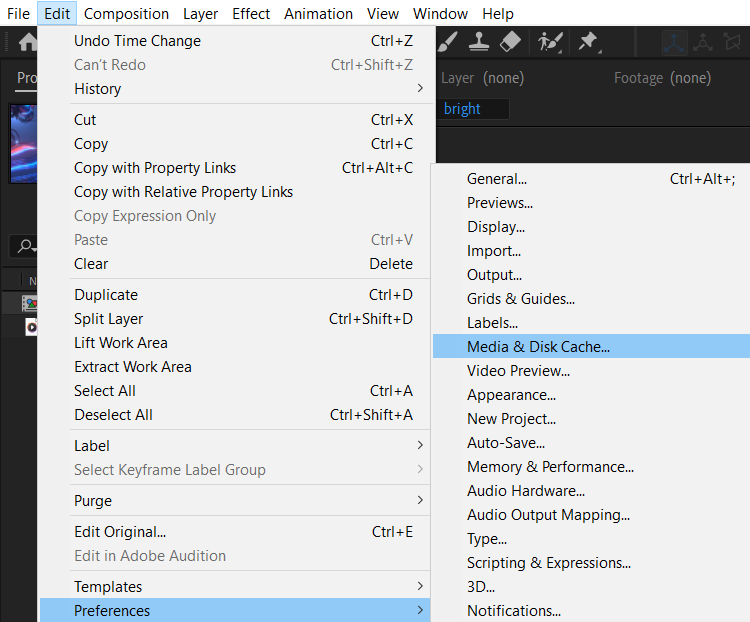
5. Utilize Proxies: Working with high-resolution footage can slow down your RAM previews. Creating proxies for your source files, such as using the Adobe Media Encoder to convert them into lower resolution or compressed formats, allows you to achieve faster rendering speeds without compromising quality during the preview stage.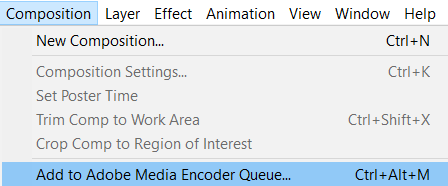
6. Trim Work Area: Another way to expedite RAM previews is by trimming the work area to focus only on the specific section you’re actively working on. Use the “B” and “N” keys to set the work area’s beginning and end points, respectively. This way, After Effects will only render the selected area, saving time and system resources.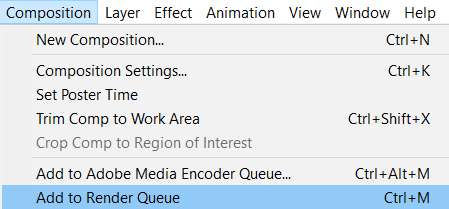
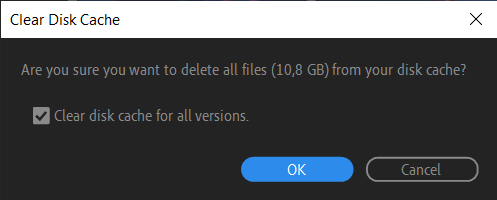
7. Clear Cache and Purge Memory: Over time, After Effects accumulates cached data that can consume considerable resources and hinder RAM preview performance. Regularly clear the cache and purge memory by going to Edit > Purge > All Memory & Disk Cache. This will free up system resources, ensuring optimal RAM preview speeds.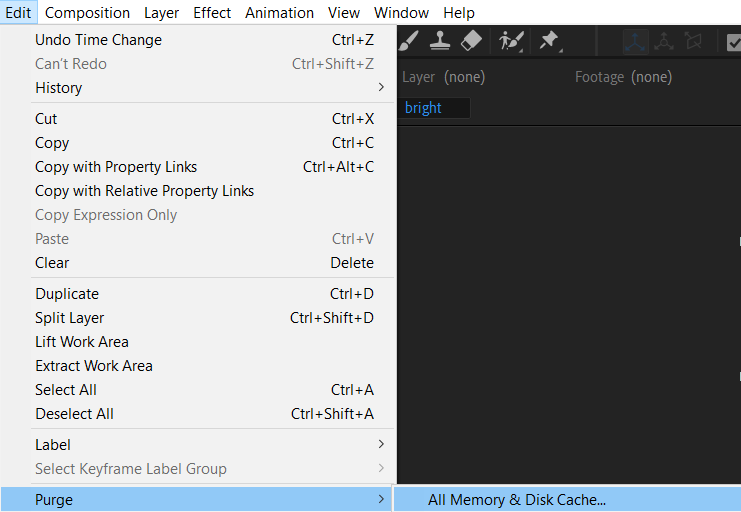
By implementing these tips, you’ll be able to turbocharge your RAM preview in After Effects and work more efficiently on your creative projects. Experiment with different settings, shortcuts, and techniques to find the optimal configuration that suits your workflow and hardware capabilities. So, go ahead and take control of your RAM preview to unlock your creative potential in After Effects!
Conclusion
In the fast-paced world of motion graphics and visual effects, time is of the essence. By implementing the tips and techniques outlined in this article, you can significantly improve the speed and efficiency of your RAM previews in After Effects. From adjusting resolution and quality settings to utilizing the region of interest feature and enabling GPU acceleration, each guideline offers a unique way to optimize your workflow.
Additionally, by leveraging proxies, optimizing your disk cache, and trimming the work area, you can streamline the preview process and achieve faster render times. And let’s not forget the power of clearing cache and purging memory to ensure optimal performance.
Remember, every second counts when it comes to working on complex projects in After Effects. By making these adjustments, you’ll be able to spend less time waiting for previews and more time bringing your creative vision to life.
Now it’s time to put these strategies into action. Start experimenting with different settings, shortcuts, and techniques to find the ideal configuration that suits your workflow and hardware capabilities. With faster RAM previews, you’ll experience smoother editing, more efficient iterations, and ultimately, a more productive creative process.
So, go ahead and supercharge your After Effects experience. With improved RAM preview speed, the only limit is your imagination. Happy editing!


