A Comprehensive Guide to Reducing Video File Size in After Effects
Introduction: Optimize Your Video Size in After Effects
Have you ever encountered large video files in After Effects that caused slow playback or made sharing difficult? Don’t worry! After Effects offers multiple ways to reduce the size of your videos without compromising too much on quality. In this guide, we will explore several techniques to shrink file sizes while maintaining an optimal balance between size and visual fidelity. Let’s jump right in and learn how to reduce the size of your videos efficiently!
Get 10% off when you subscribe to our newsletter

Step 1: Adjust Composition Settings
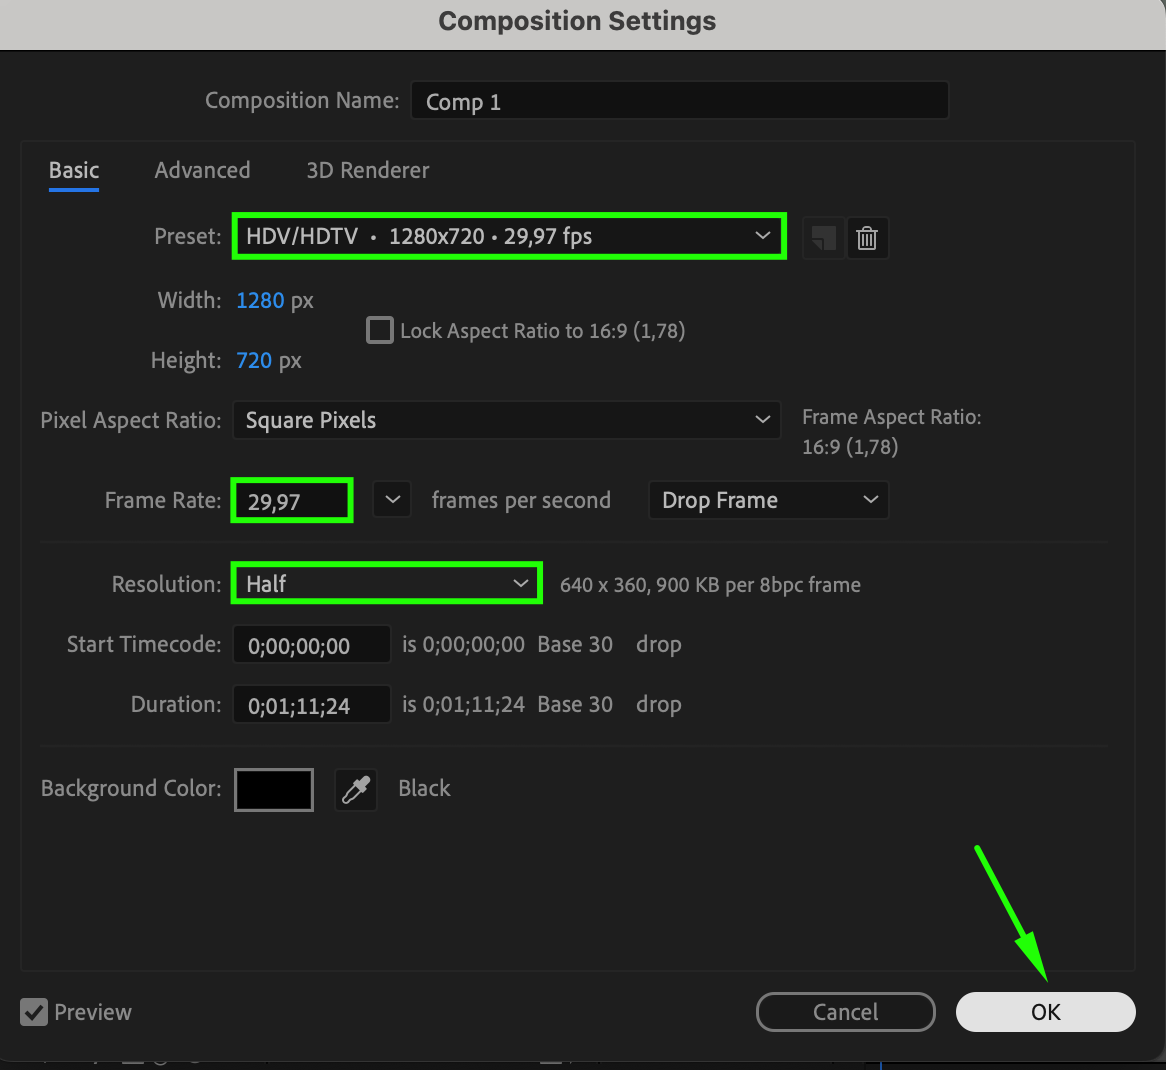
The first step in reducing video file size is to optimize your composition settings. Go to the Composition menu and select Composition Settings. In the dialog box that appears, you can adjust the resolution, frame rate, and preset to match your output needs. Reducing the resolution or frame rate, when suitable for your project, can significantly decrease the file size. For instance, if your video doesn’t require high frame rates, lowering it from 60fps to 30fps can make a noticeable difference in file size without impacting the overall quality.
 Step 2: Trim Excess Footage
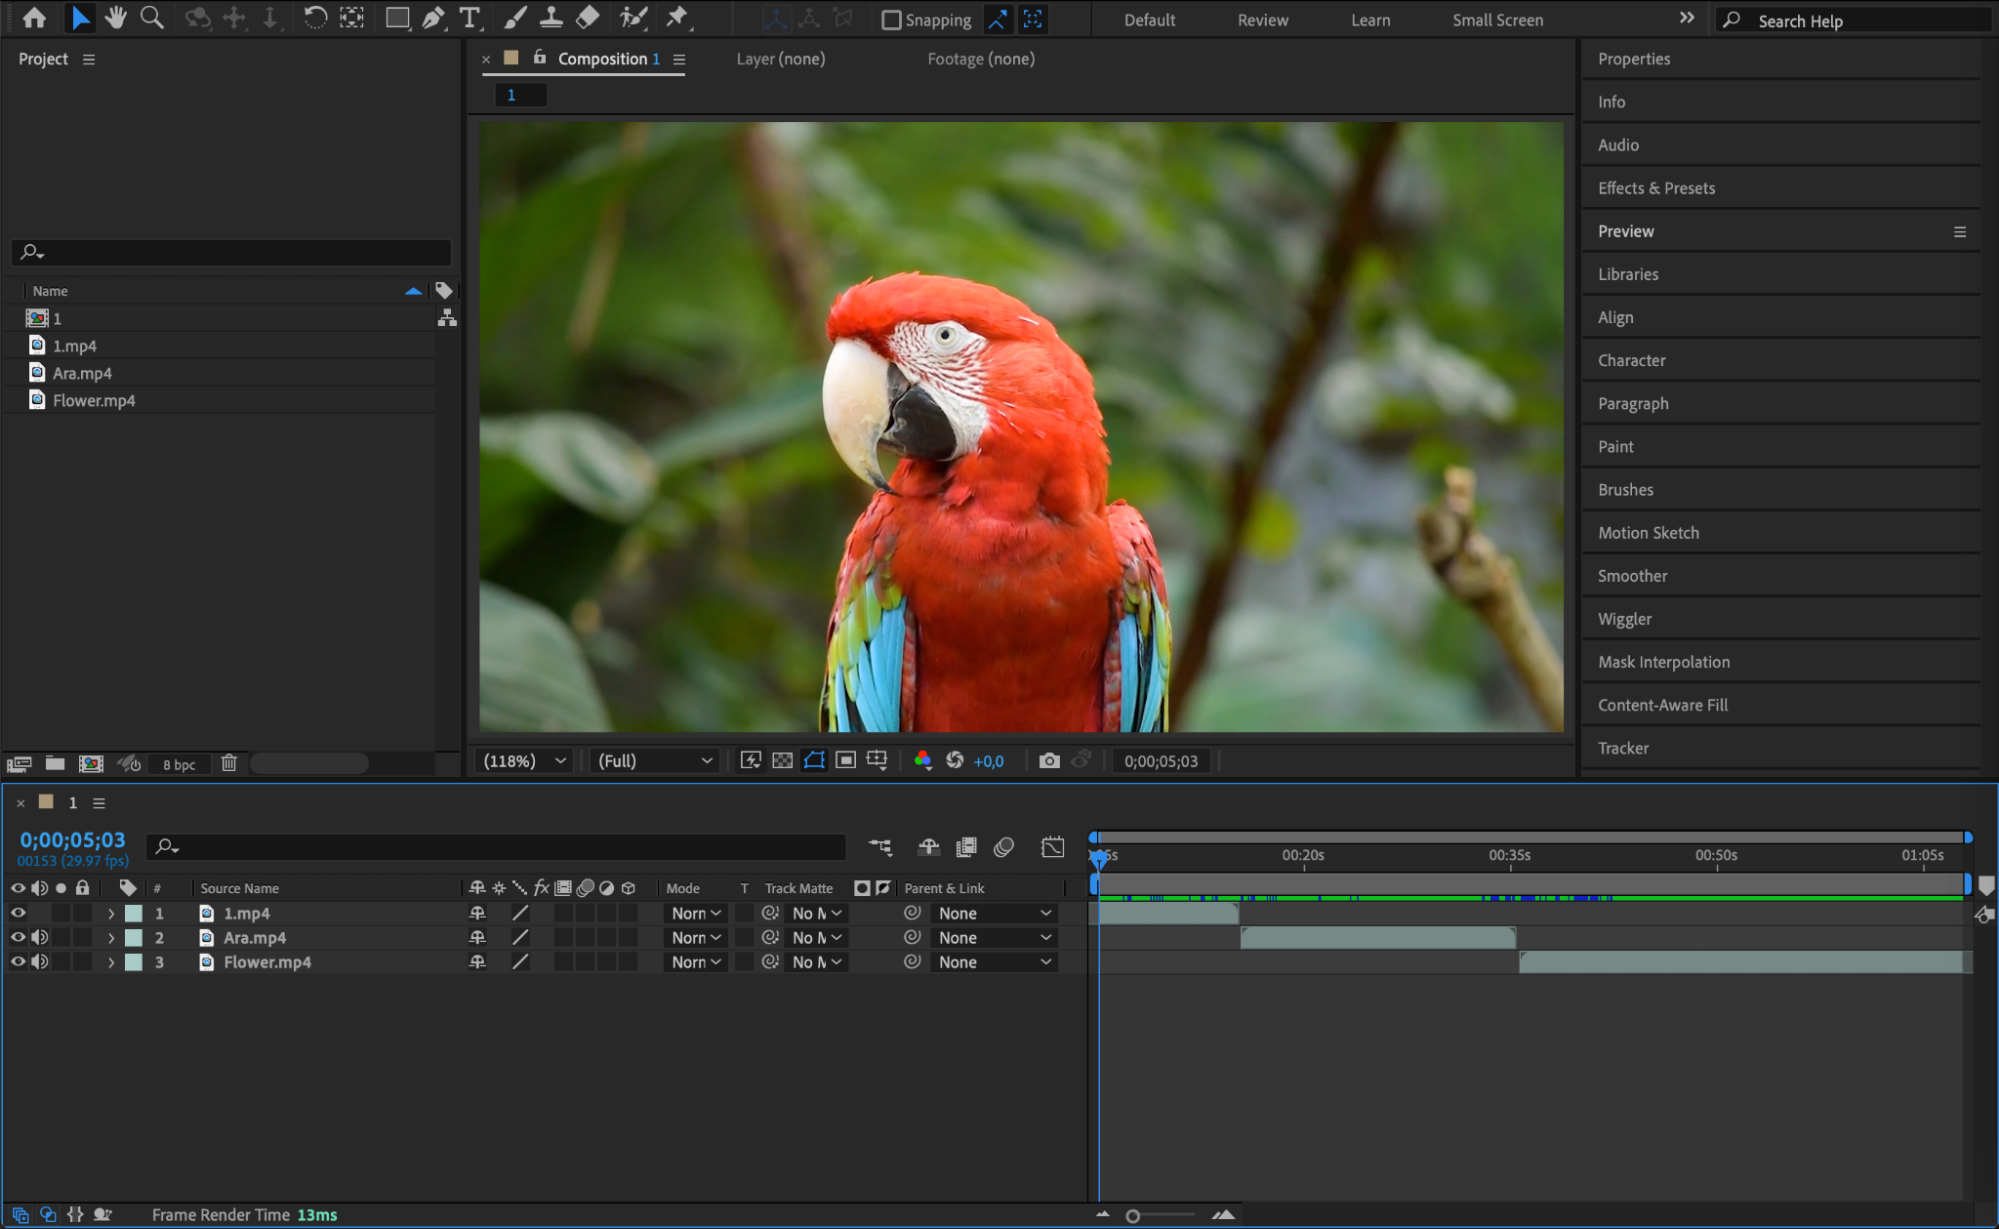
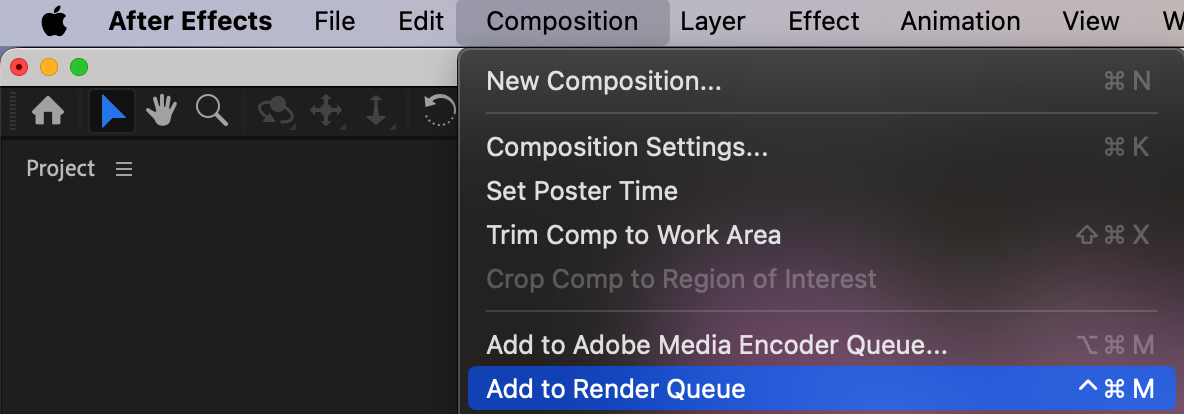
If your video contains unnecessary content or excess footage, trimming it is a simple but effective way to reduce file size. You can use the Work Area feature to set the start and end points of your composition and remove any extra footage. To trim, go to Composition > Trim Comp to Work Area. This will ensure that After Effects only renders the section you need, minimizing the file size by removing irrelevant content.


Step 3: Use Proxy Files
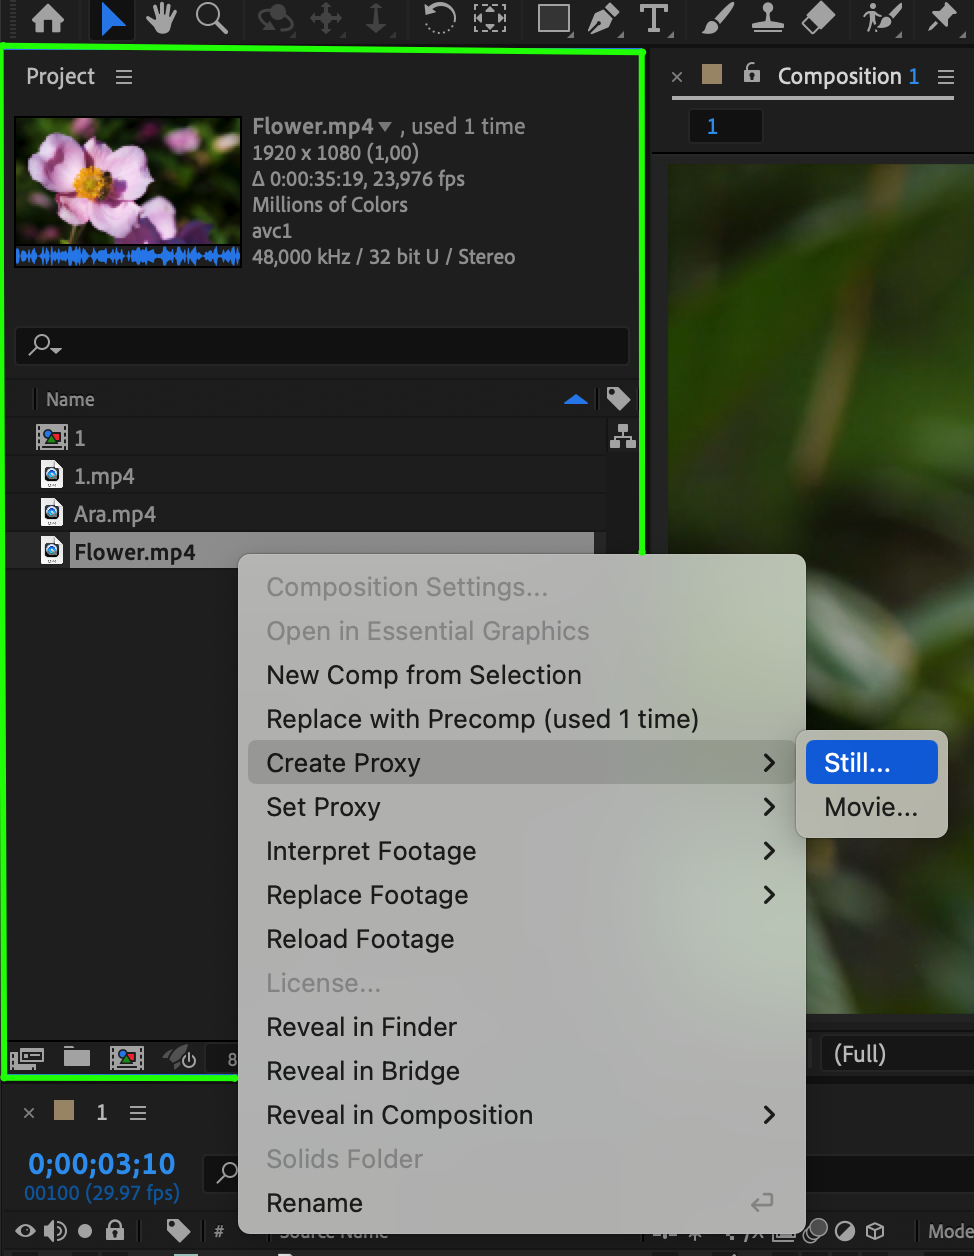
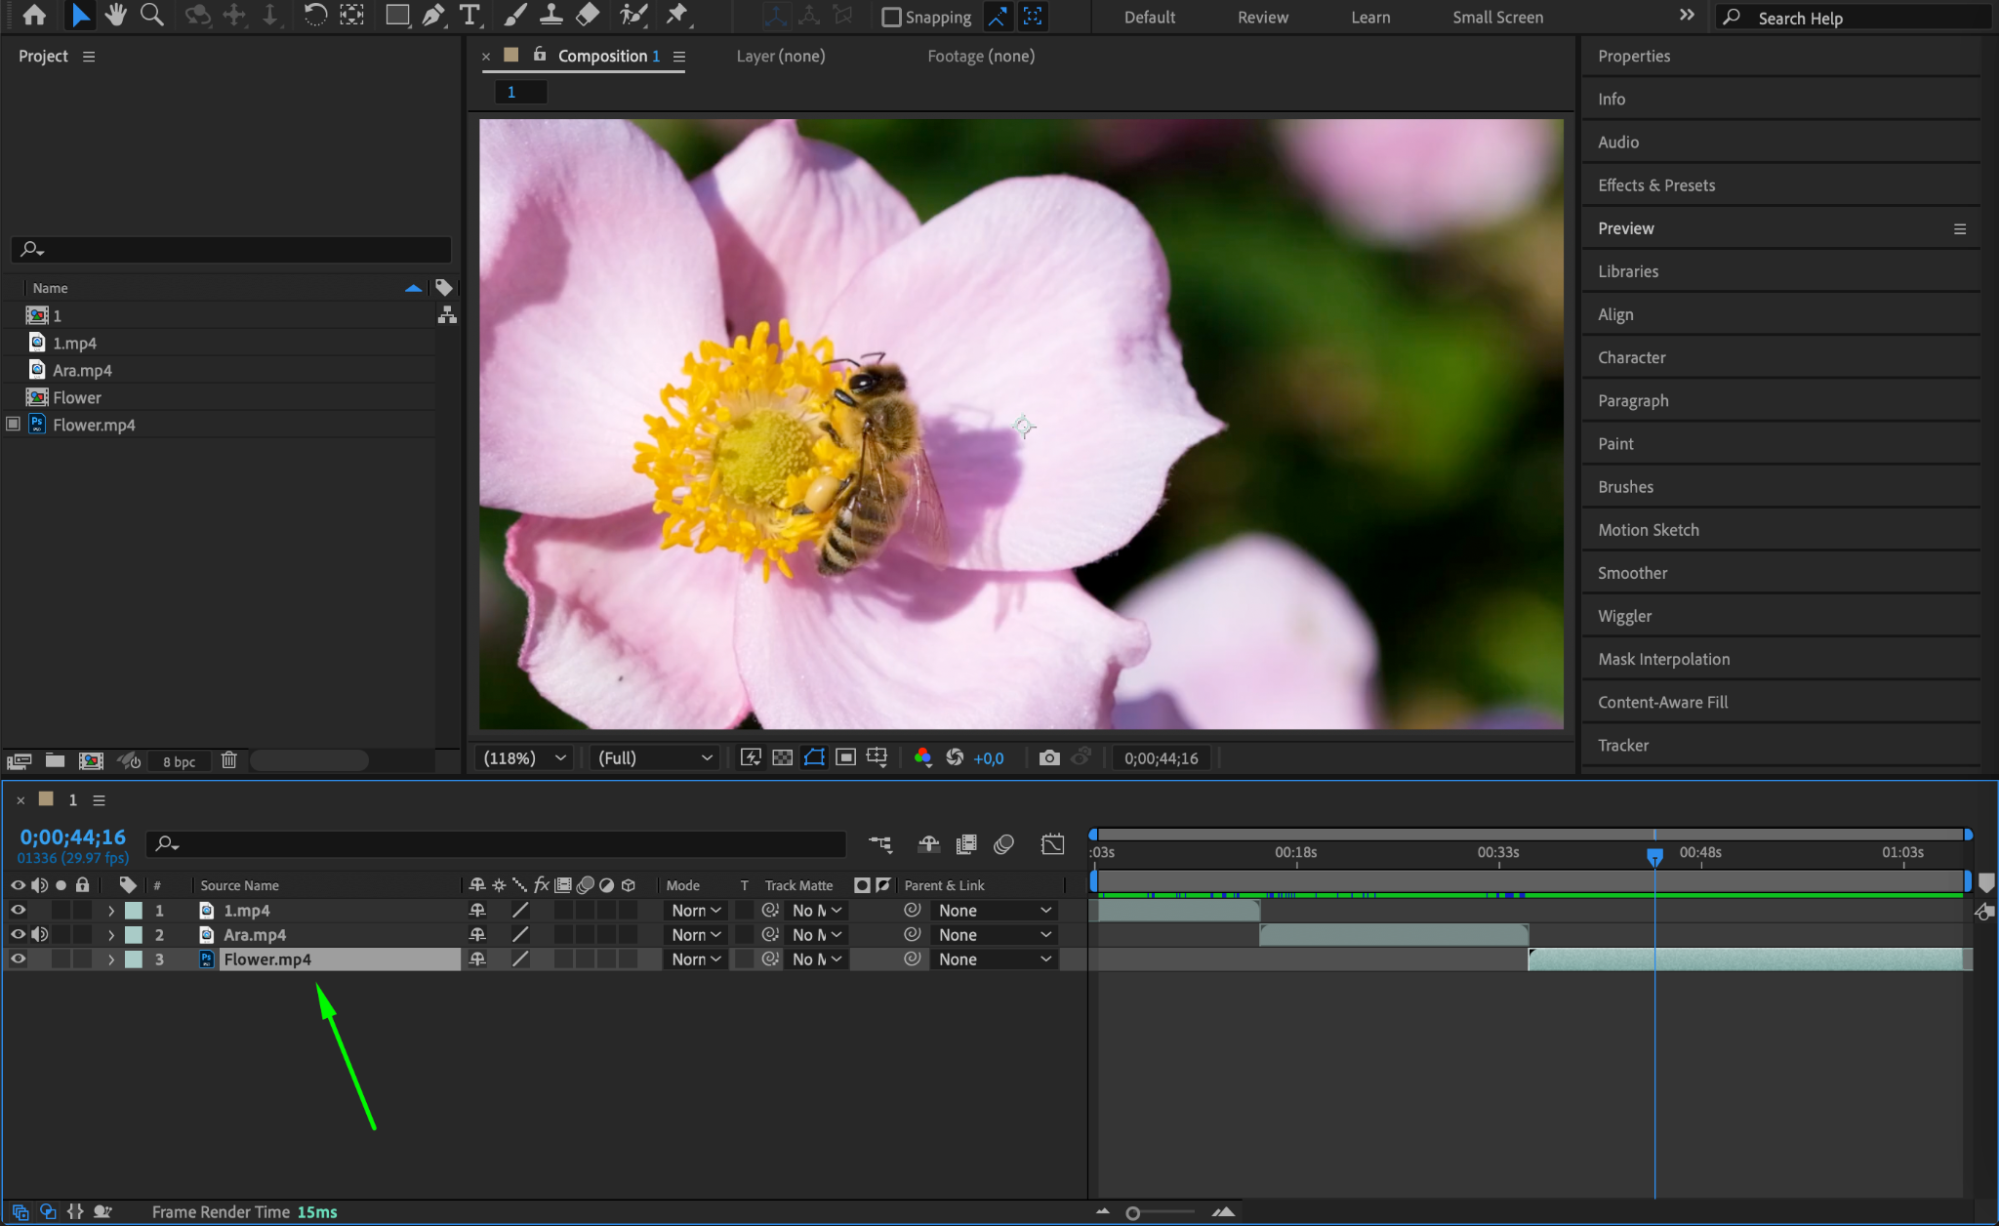
Working with high-resolution footage can slow down your workflow and inflate project file sizes. To counter this, enable Proxy Preview. Proxies allow you to use lower-resolution versions of your footage during editing, easing the burden on your system. To create a proxy, right-click on your footage in the Project Panel and select Create Proxy. This generates a smaller version of the file for editing, and you can switch back to the full resolution for the final render.

Step 4: Optimize Output Settings
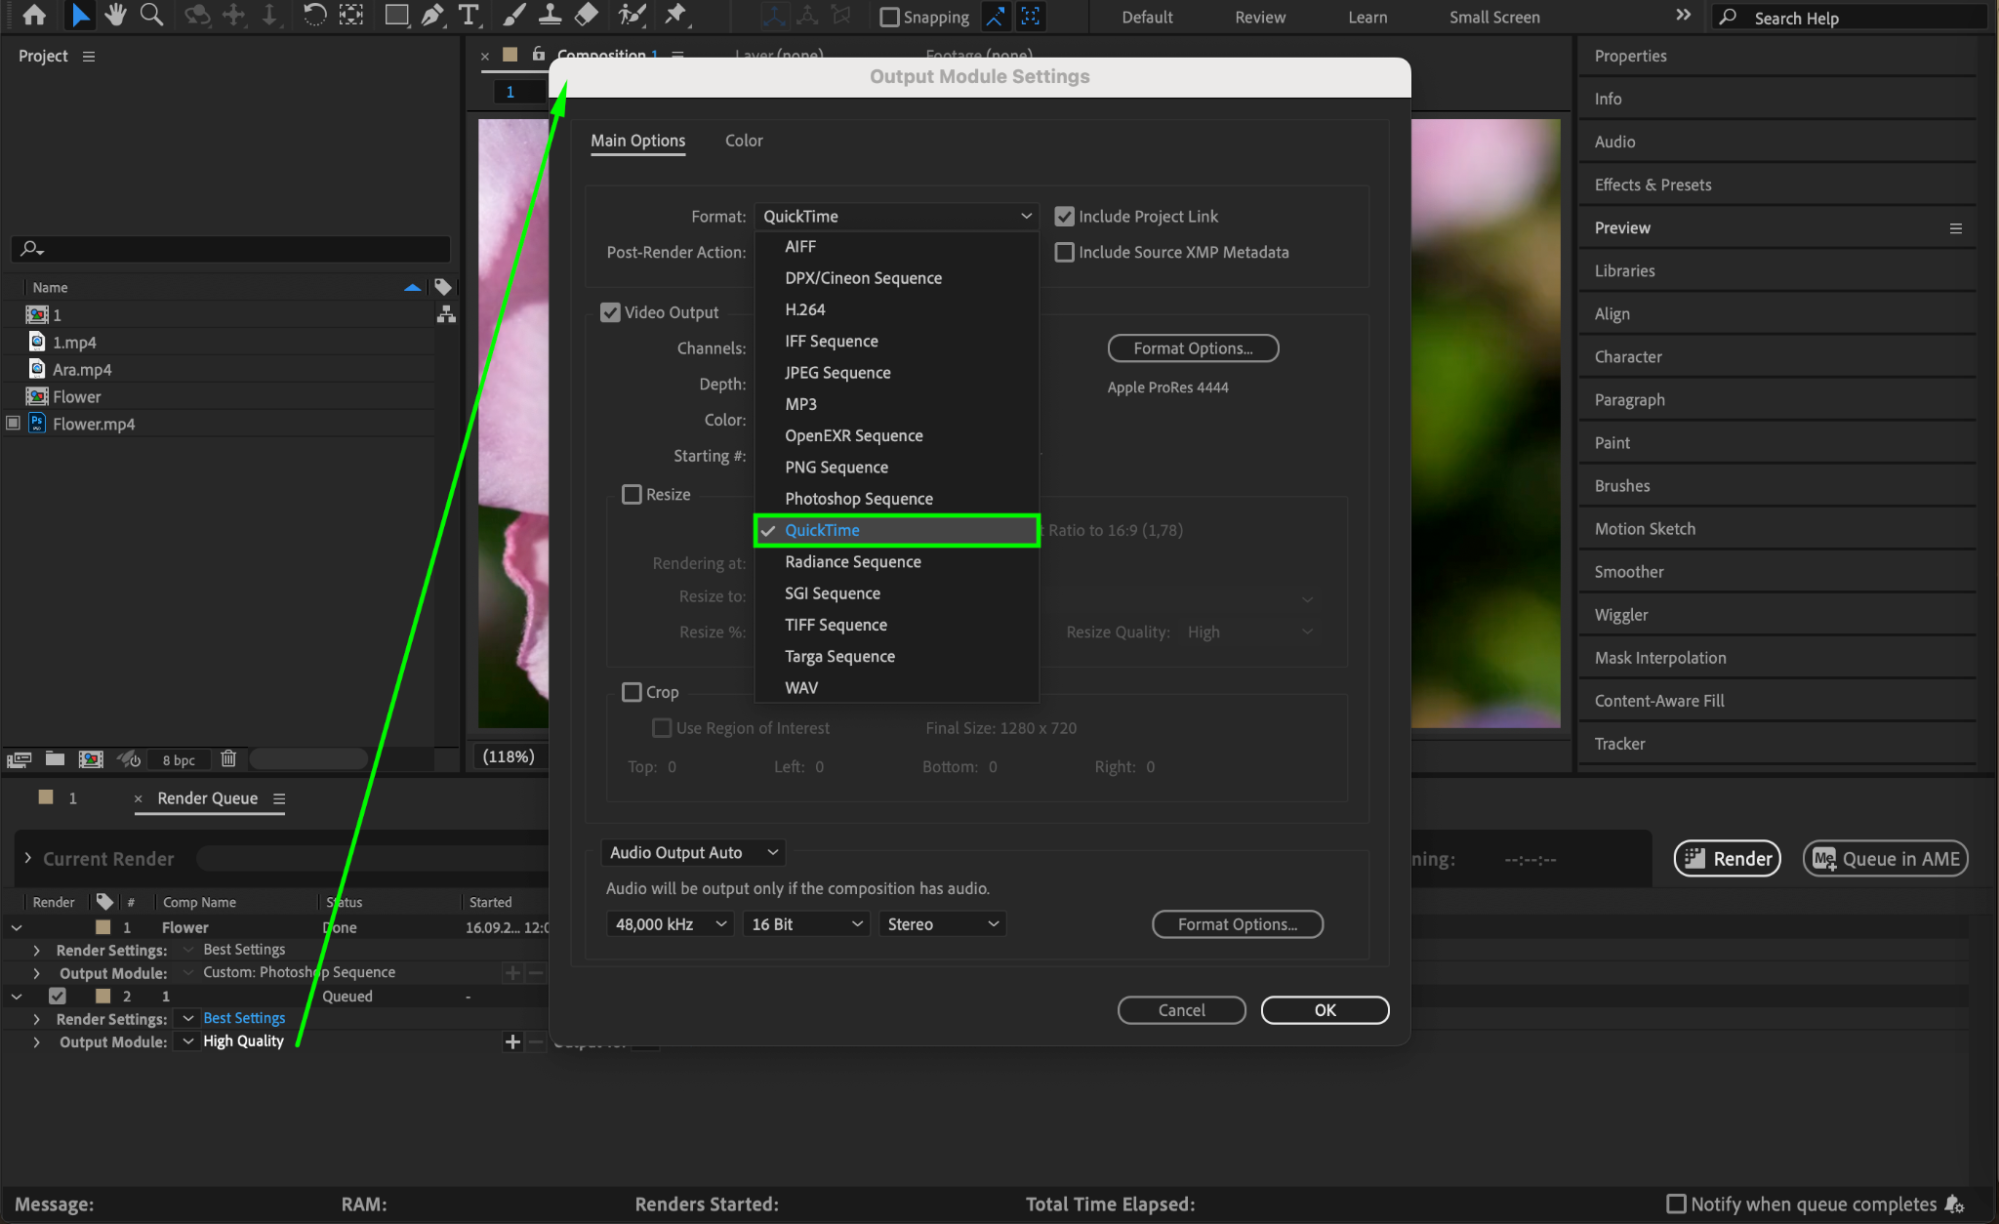
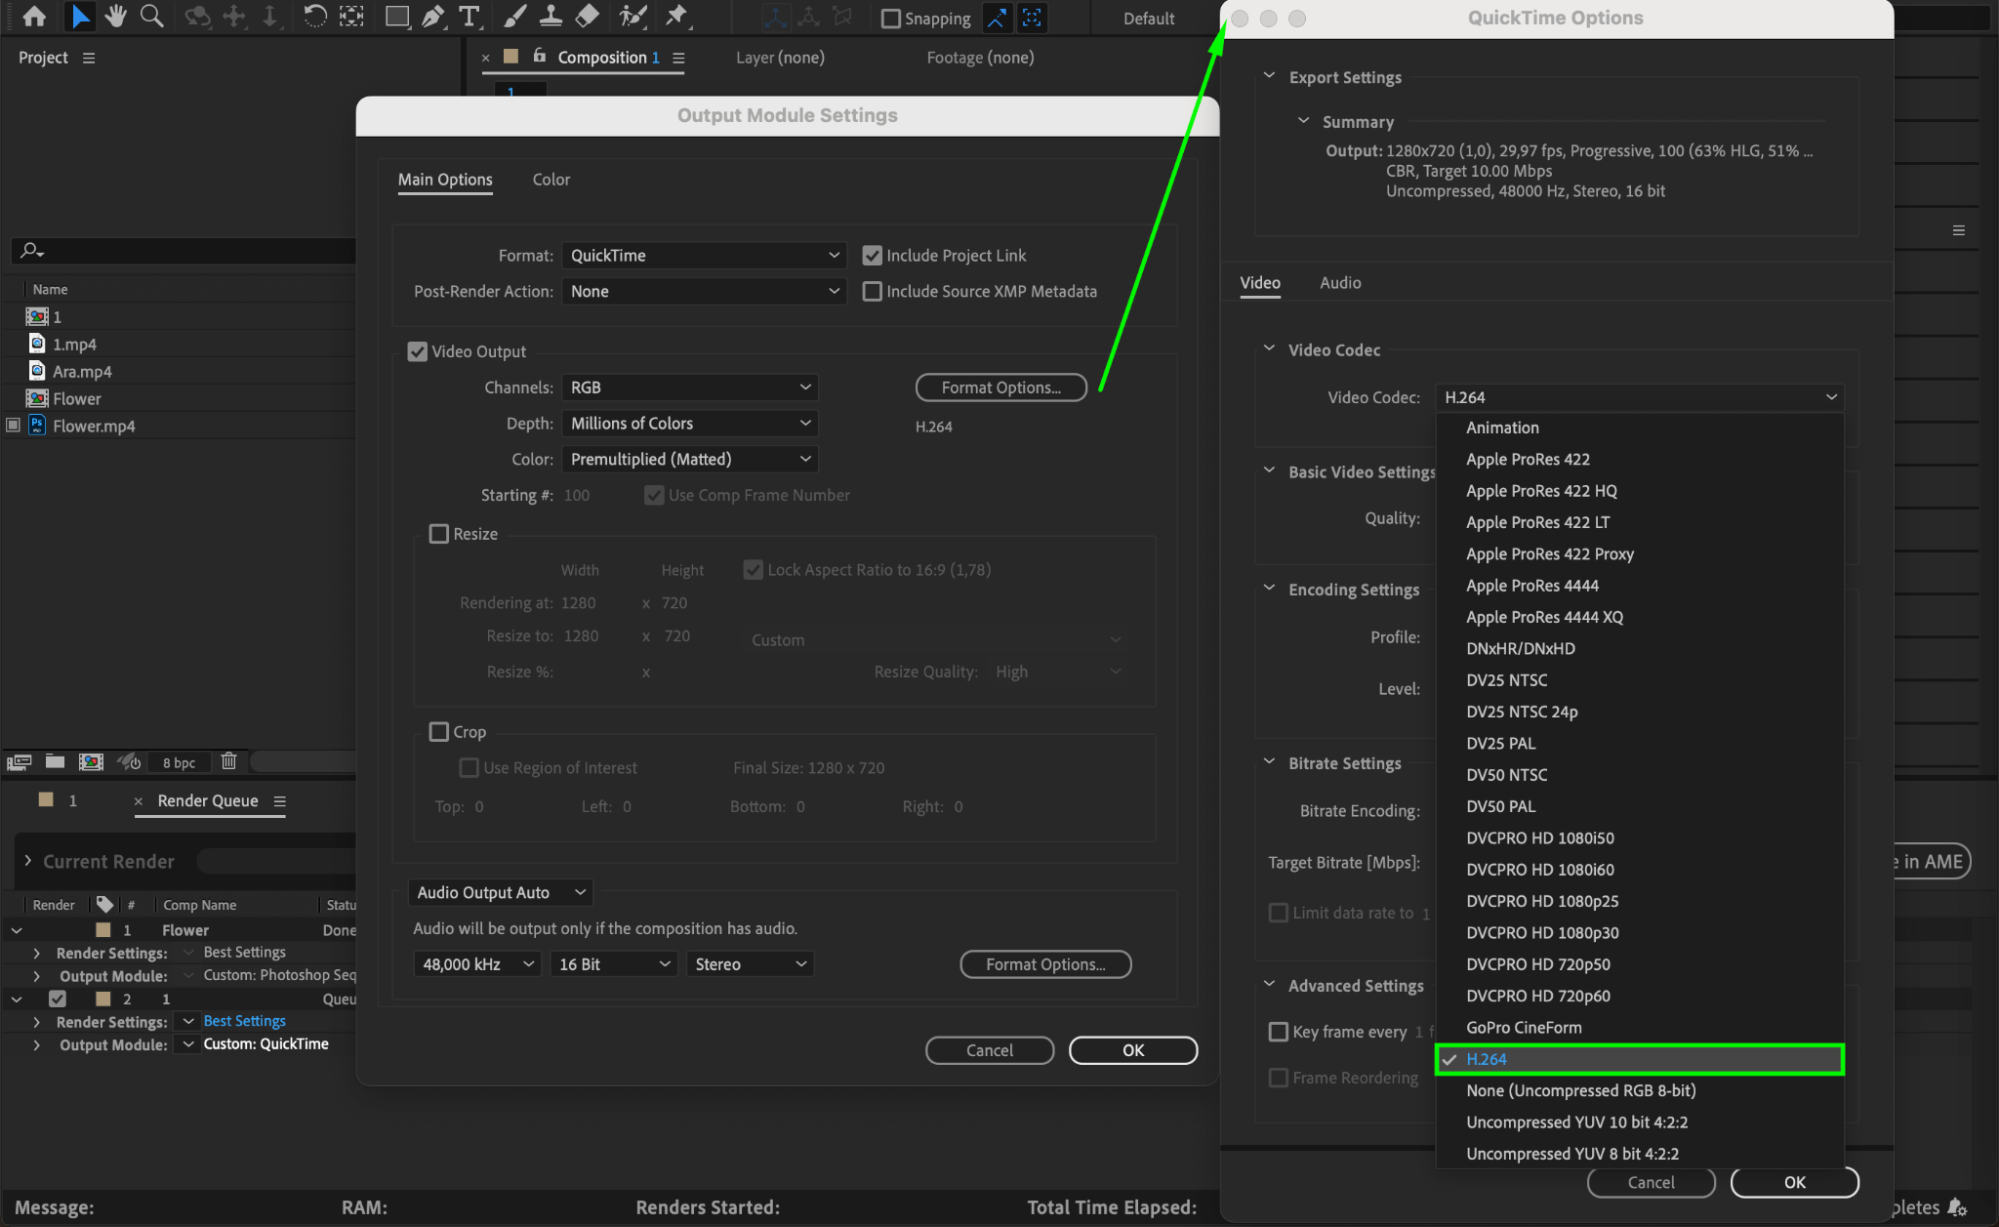
In the Render Queue panel, you have options to reduce file size by selecting the appropriate format and codec. For example, you can choose QuickTime as the format and H.264 as the codec, which offers a good balance between quality and compression. Adjusting the bitrate and using lower-quality settings for less critical videos can further reduce file size. It’s important to experiment with different formats and compression settings to find the best balance that fits your project’s requirements, ensuring that file size is minimized without sacrificing too much quality.

Step 5: Leverage Third-Party Compression Plugins
In addition to After Effects’ built-in tools, you can further optimize your video file size with third-party plugins and scripts. These plugins provide more advanced compression options and batch processing capabilities. Popular plugins like Video Compressor offer additional features that help reduce file size while maintaining video quality. They are particularly useful for projects requiring multiple file exports, as they provide streamlined compression workflows.
Conclusion
By following these steps, you can efficiently reduce video file sizes in After Effects without sacrificing too much quality. Whether it’s through trimming excess footage, using proxy files, optimizing output settings, or leveraging third-party plugins, there’s always a method that fits your needs. Proper optimization not only improves playback and sharing capabilities but also saves storage space, making your workflow more efficient. Keep experimenting with different settings until you find the perfect balance between file size and video quality. Happy editing!


