Removing the Background of a Video in After Effects: A Step-by-Step Guide
Getting Started with Background Removal in After Effects
Do you need to remove the background from a video in After Effects? Whether you’re working on a professional project or a personal one, this guide will help you through the process. Removing backgrounds can be challenging, but with the right tools and techniques, you can achieve a clean and polished result. In this tutorial, we will show you how to use the Roto Brush Tool and other features in After Effects to isolate your subject and replace the background.
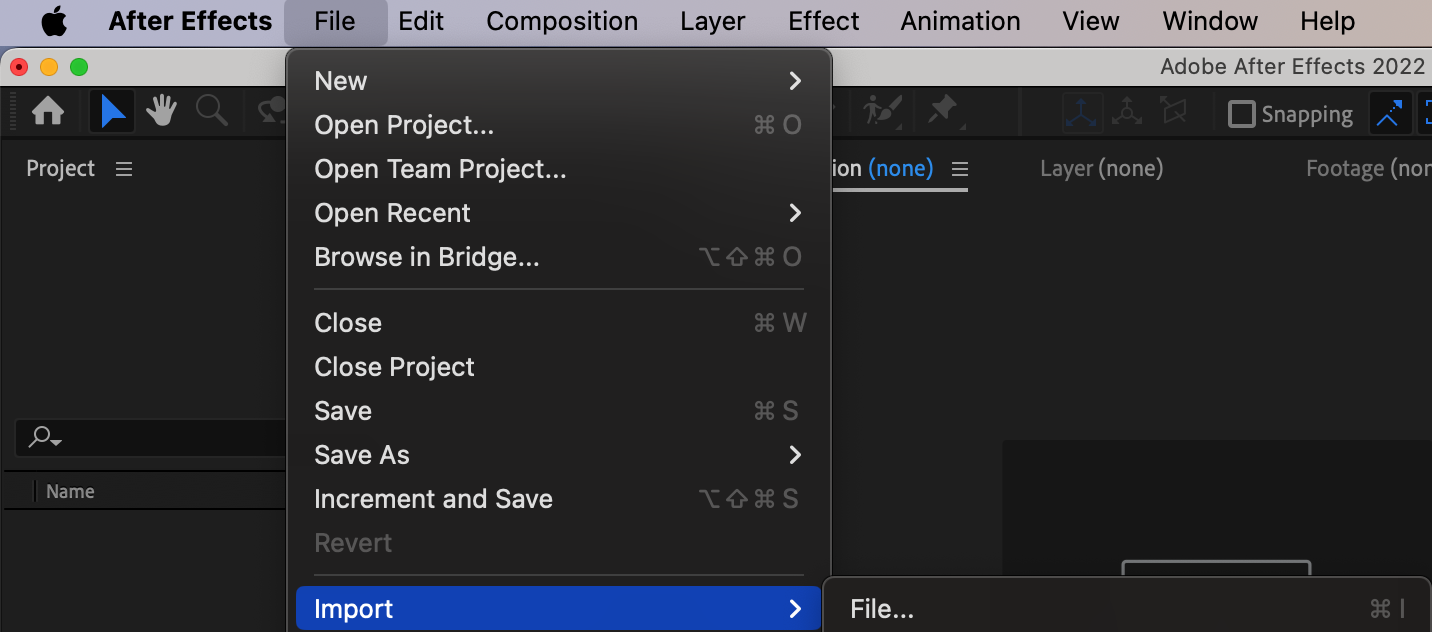
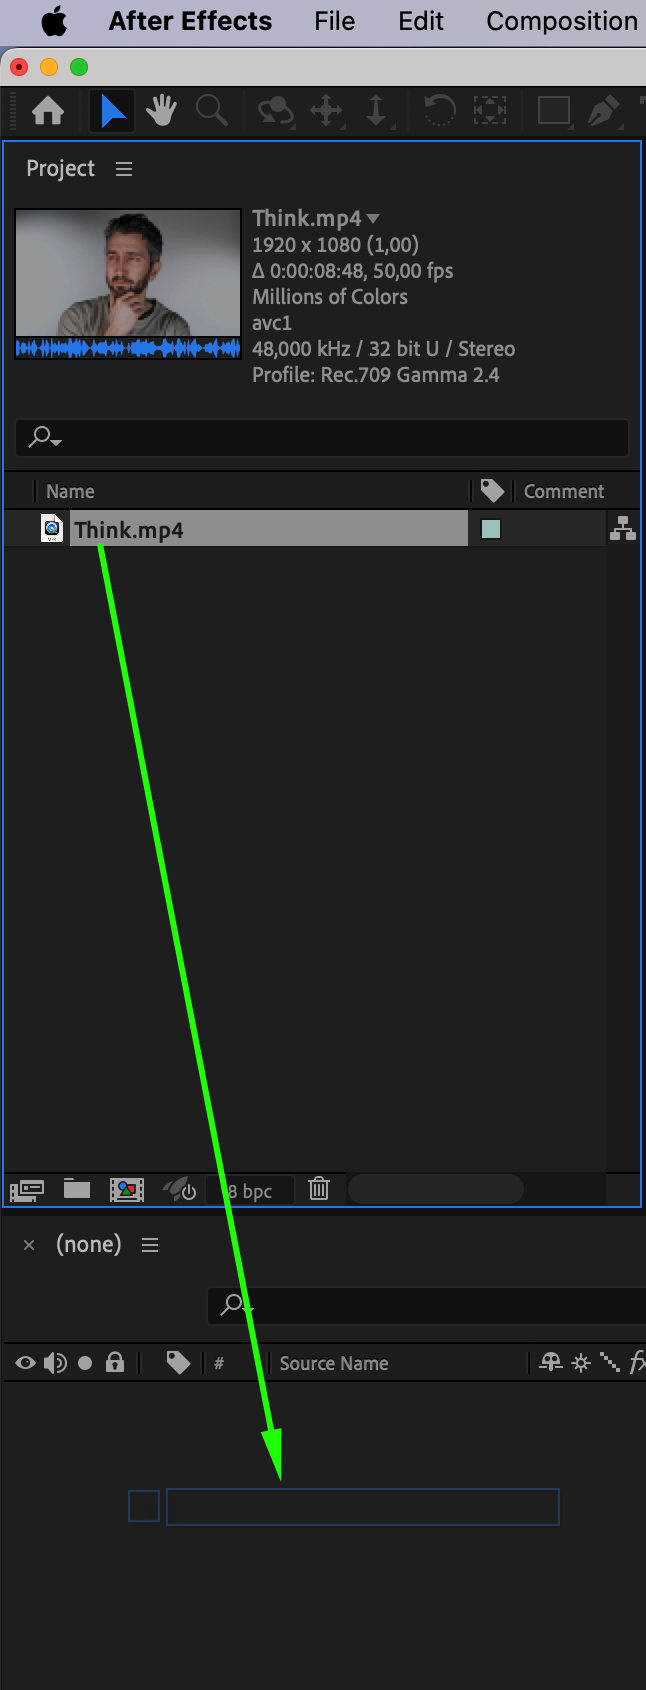
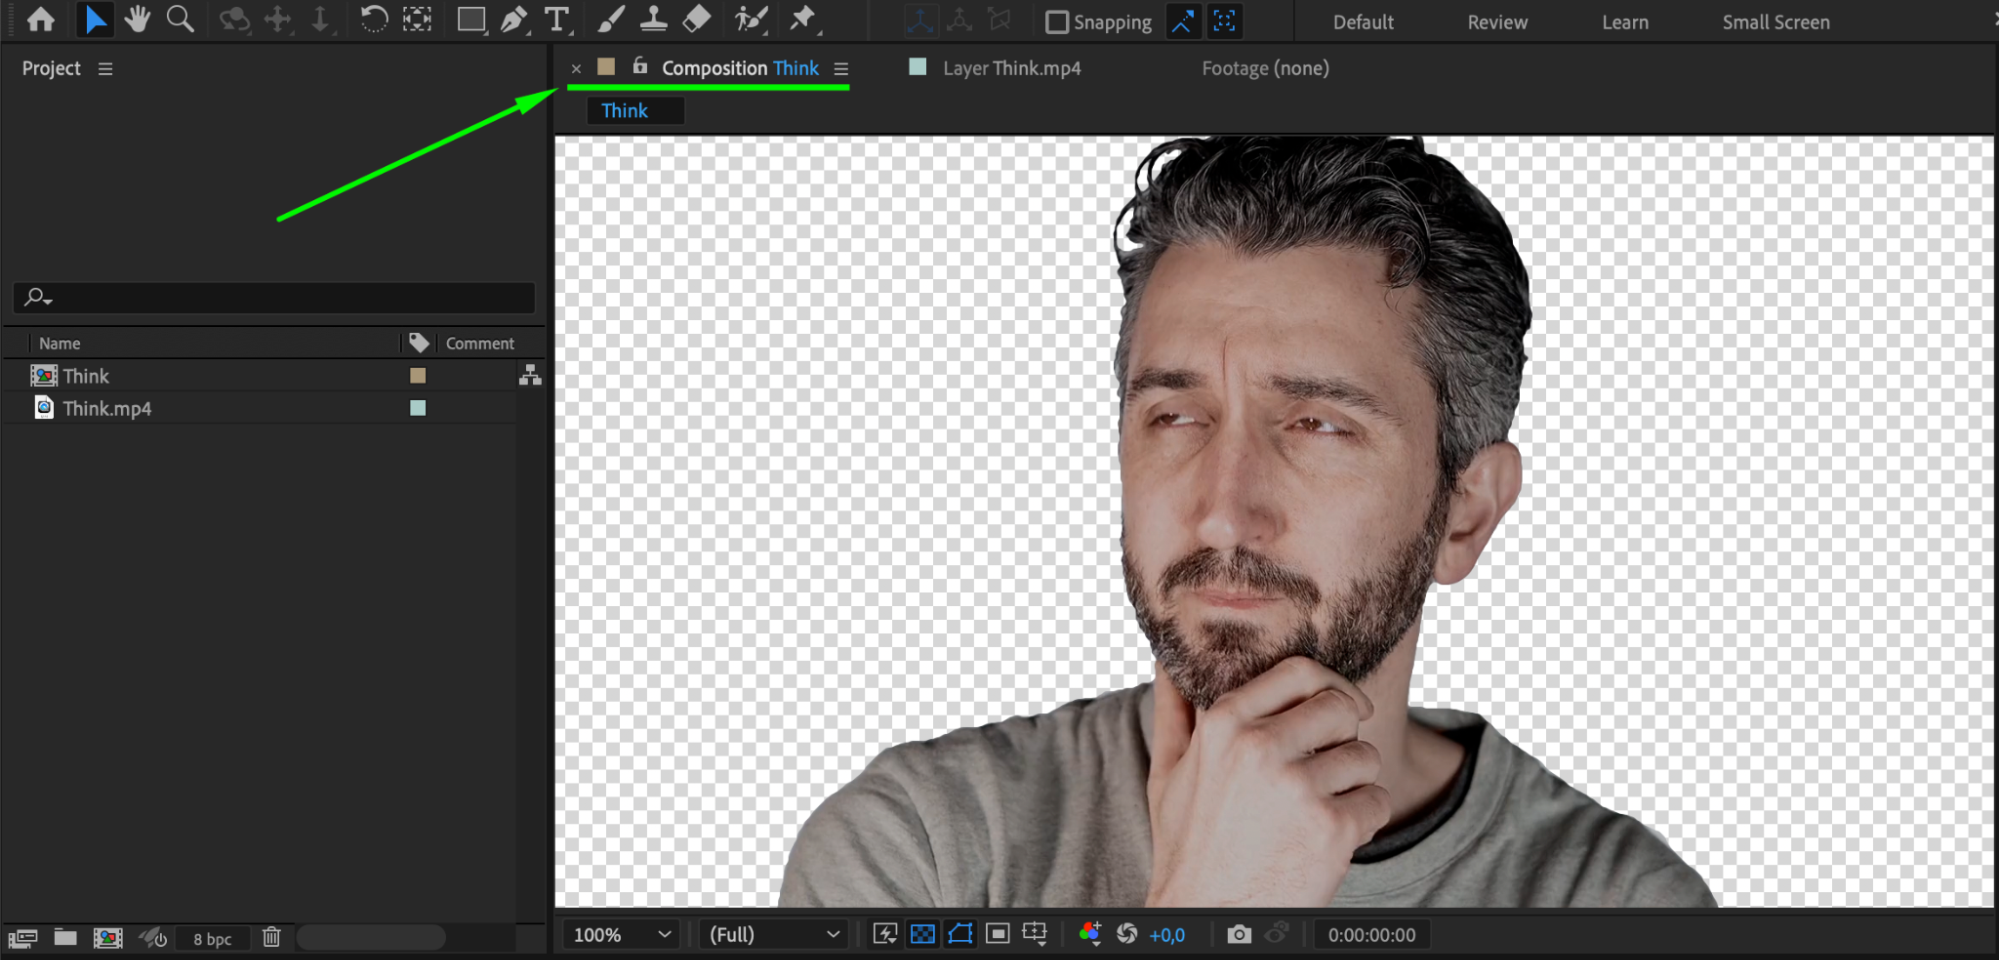
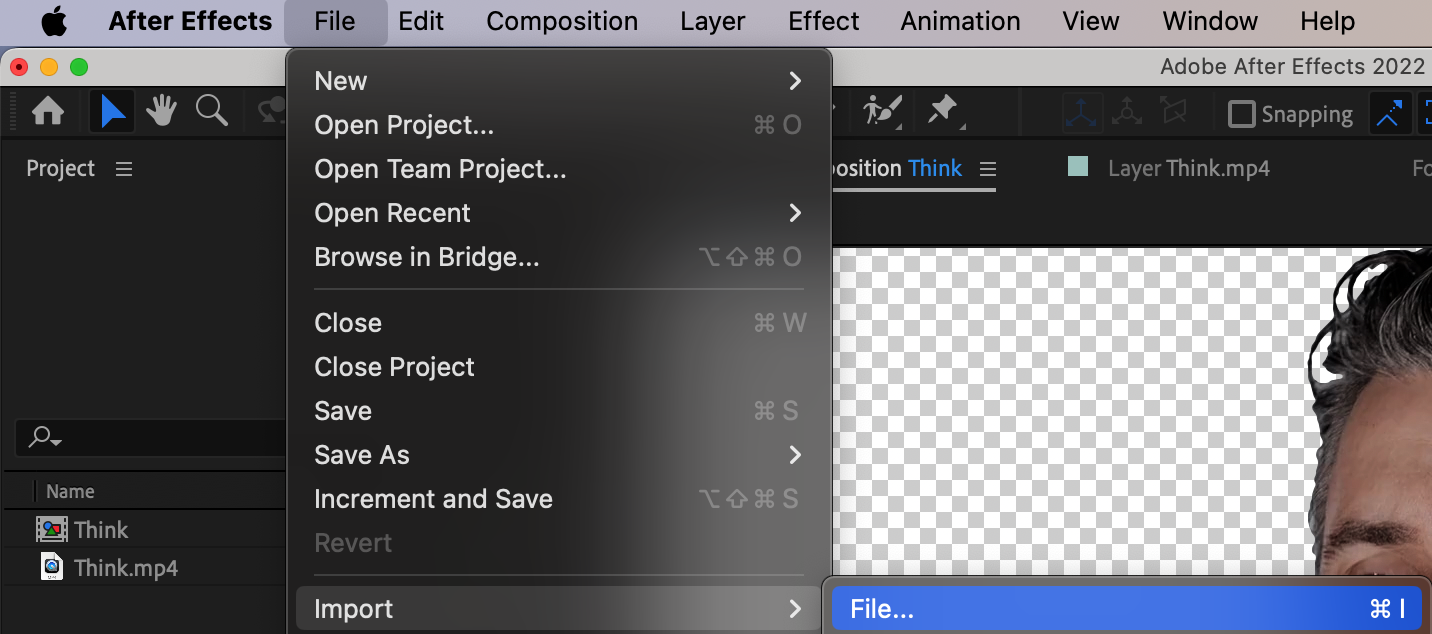
Step 1: Import Your File and Add It to the Timeline
Begin by importing your video file into After Effects. Drag and drop the file onto the timeline panel.
Get 10% off when you subscribe to our newsletter

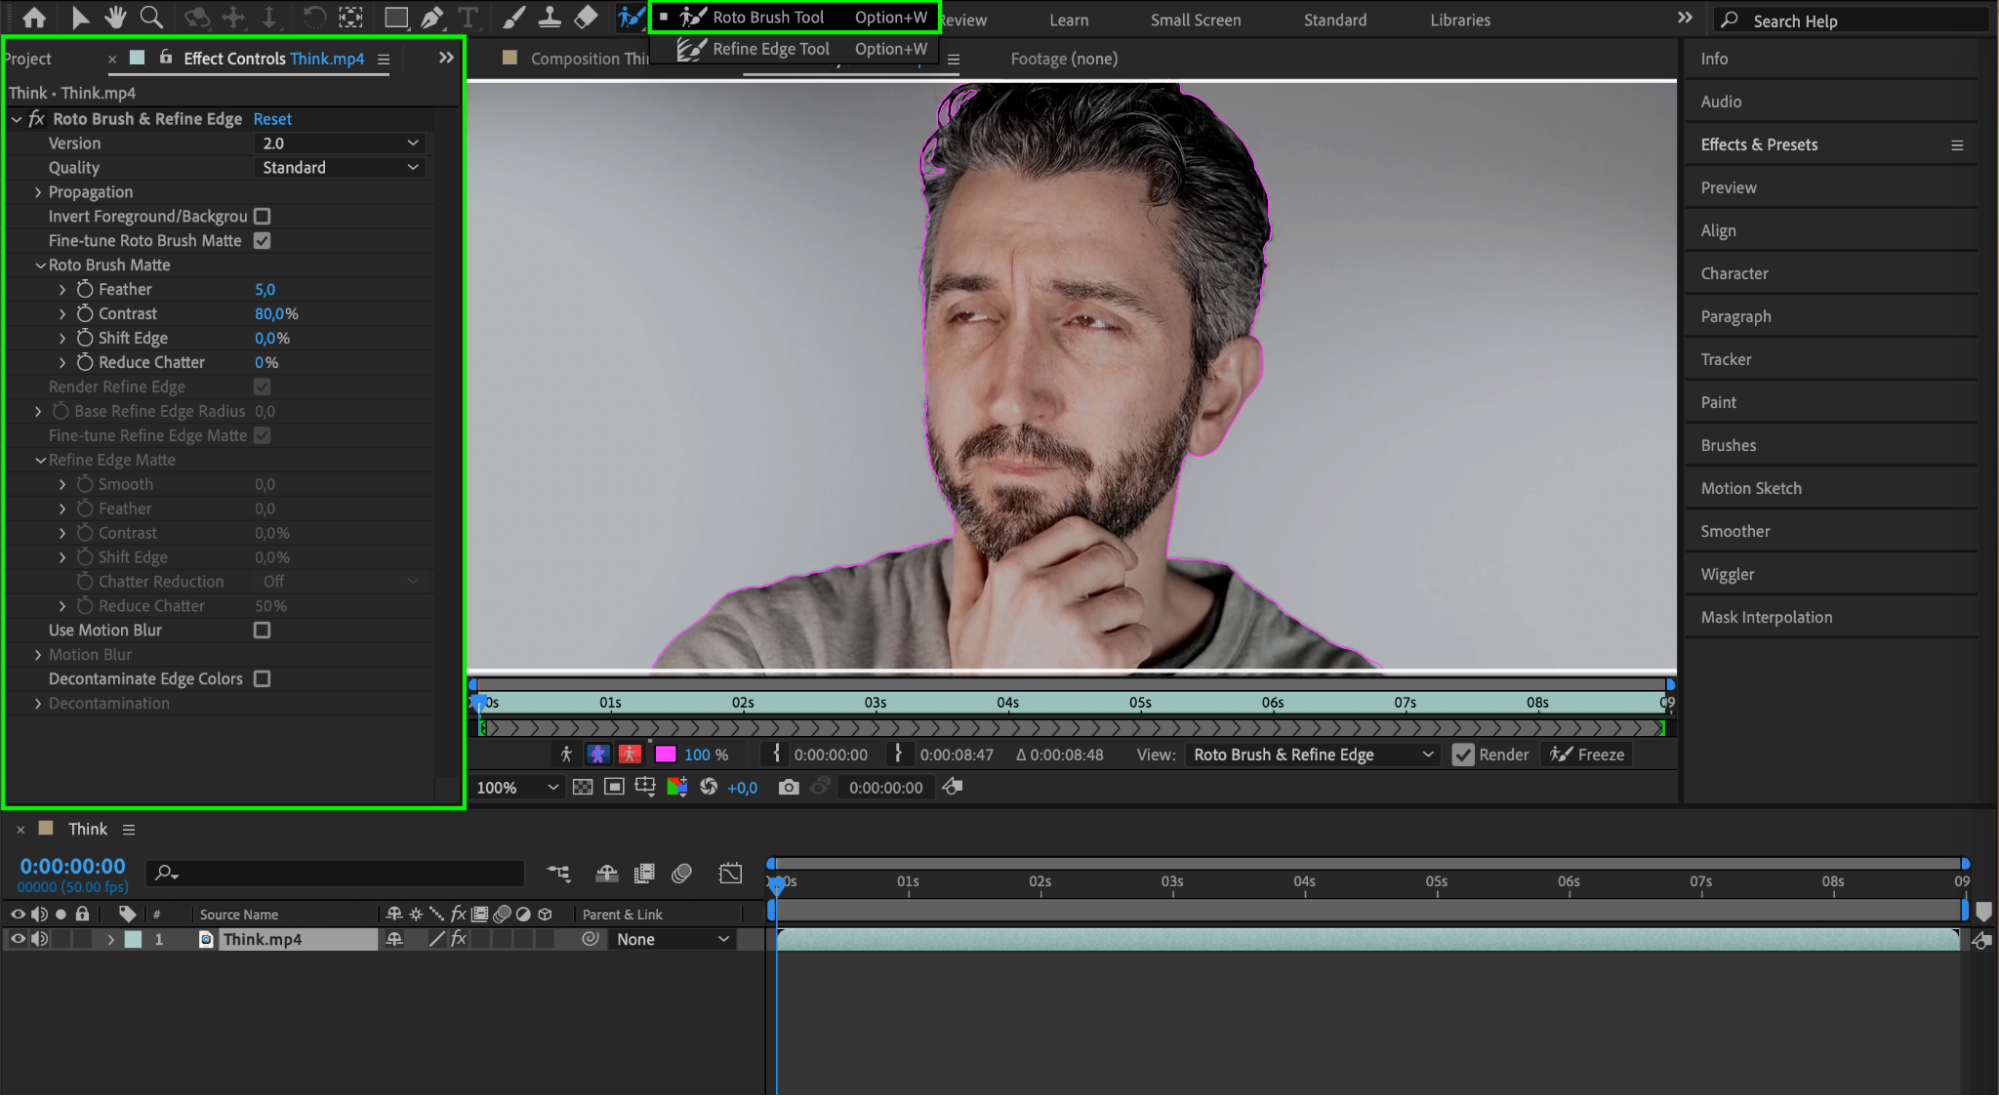
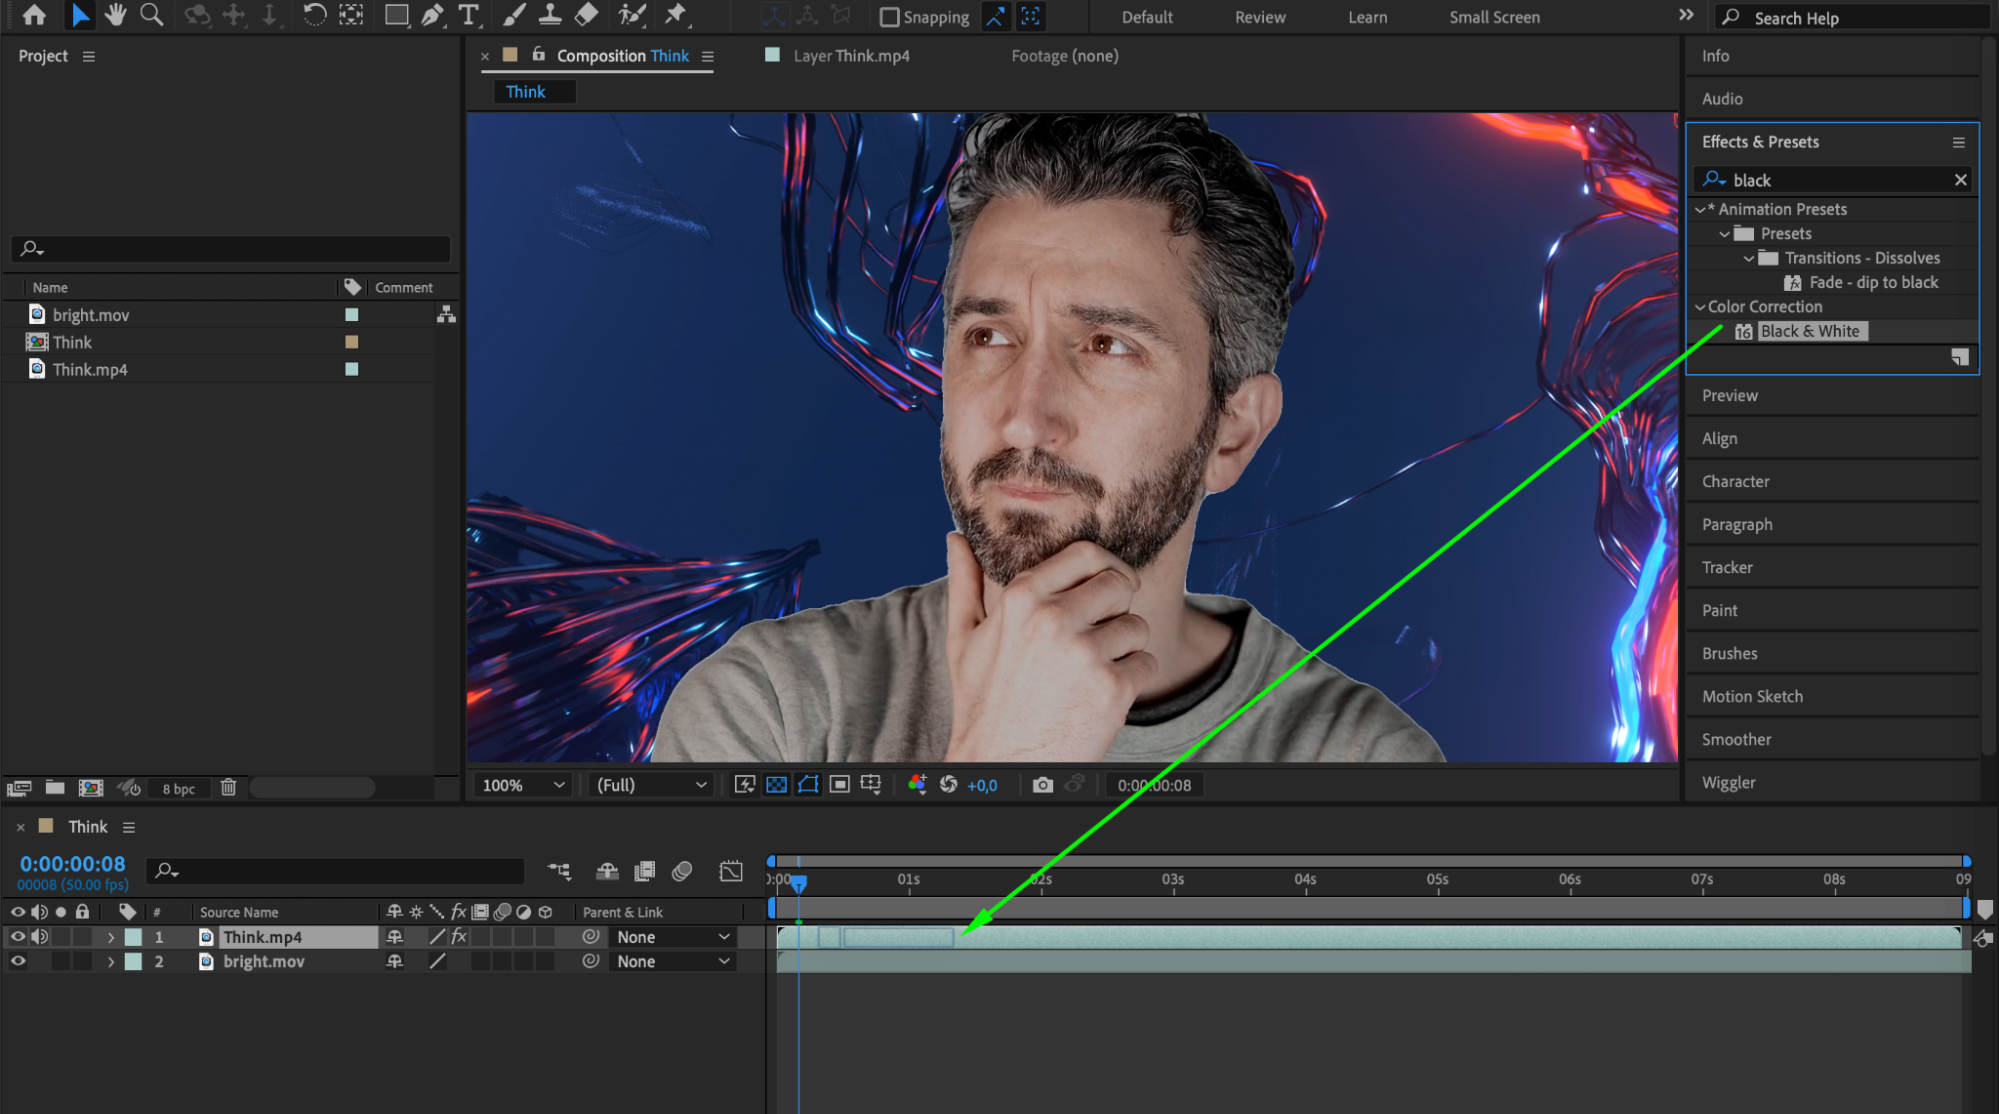
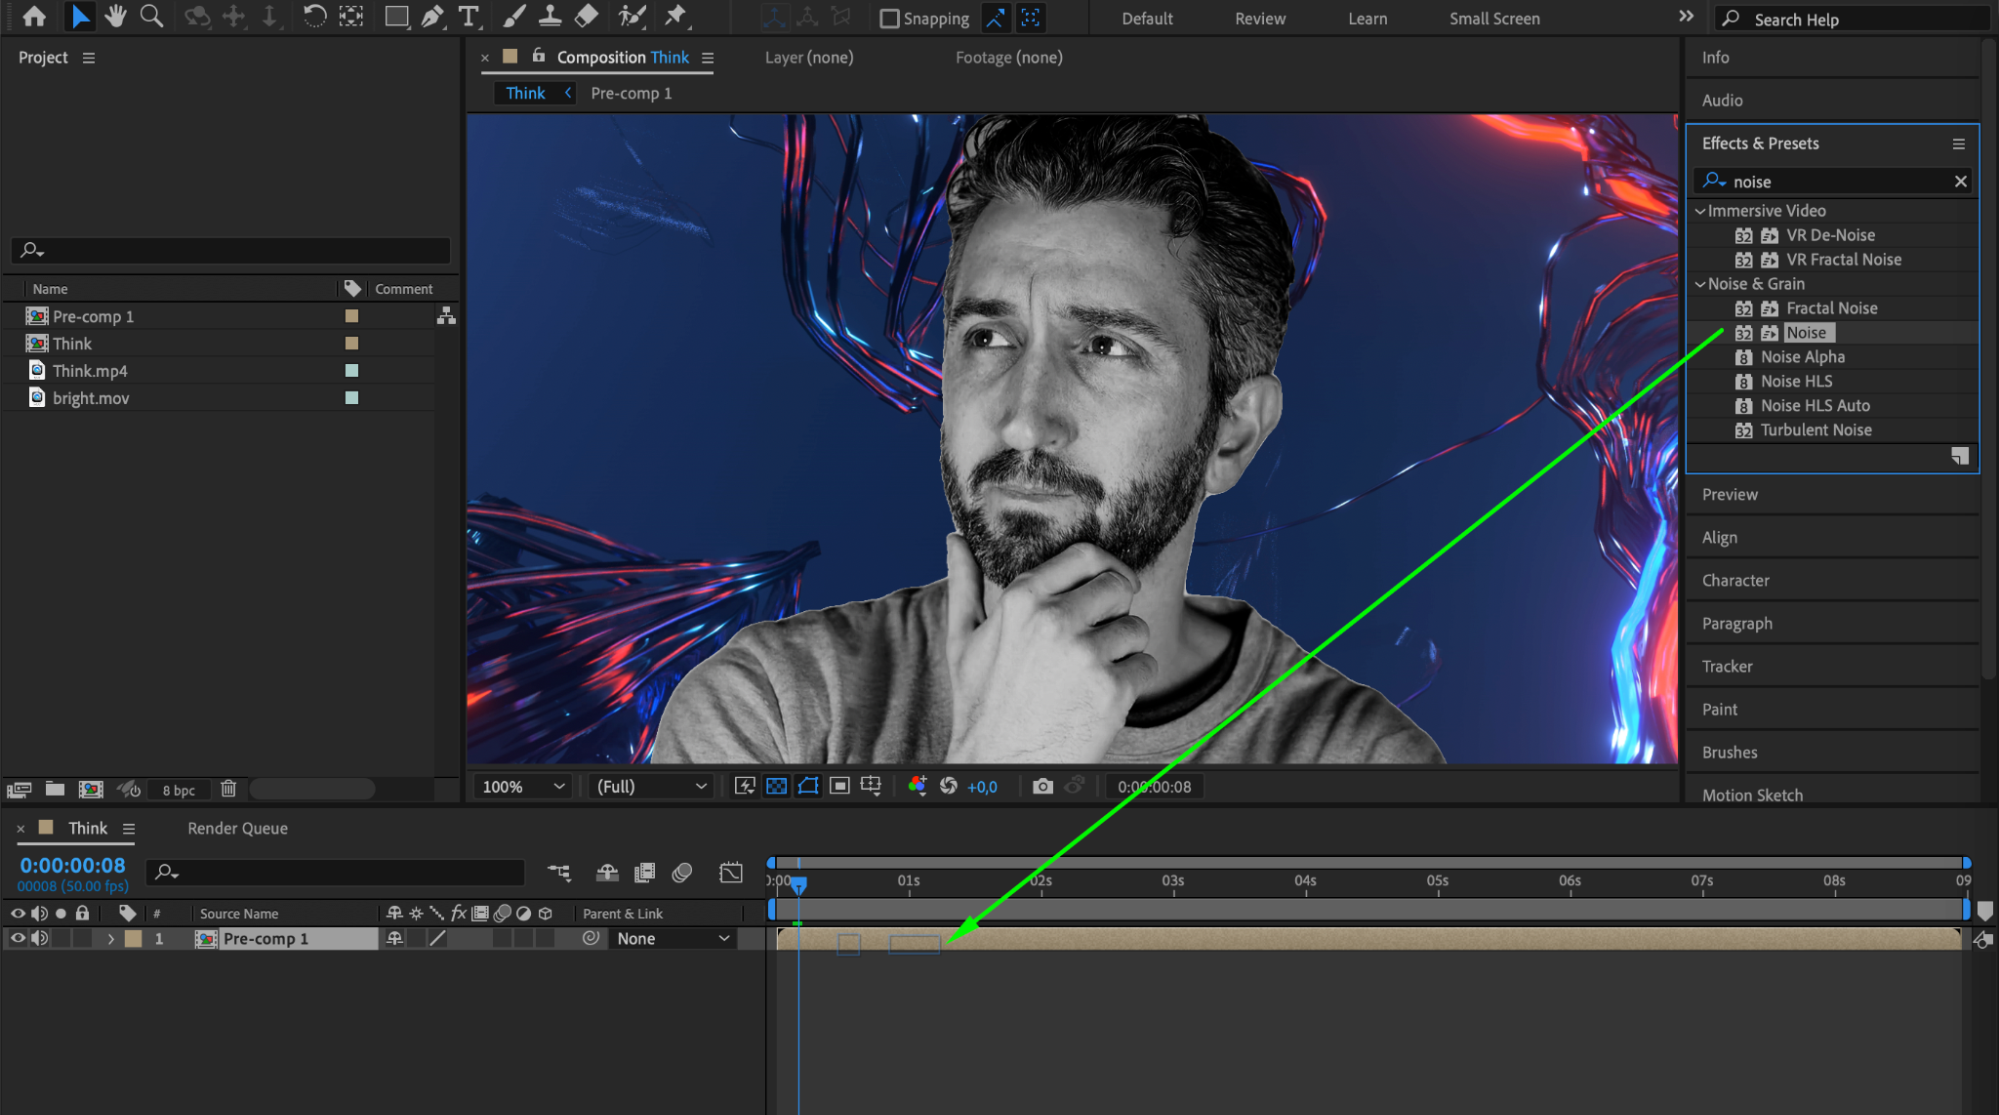
Step 2: Use the Roto Brush Tool to Select Your Subject
Select the Roto Brush Tool by pressing Alt/Option + W. Use the left mouse button to start selecting the subject you want to keep, leaving the background unselected. To remove areas from the selection, hold down the Alt/Option key and click. Fine-tune the selection frame by frame, using the Effect Controls panel to adjust settings such as Feather, Contrast, Shift Edge, and Reduce Chatter.
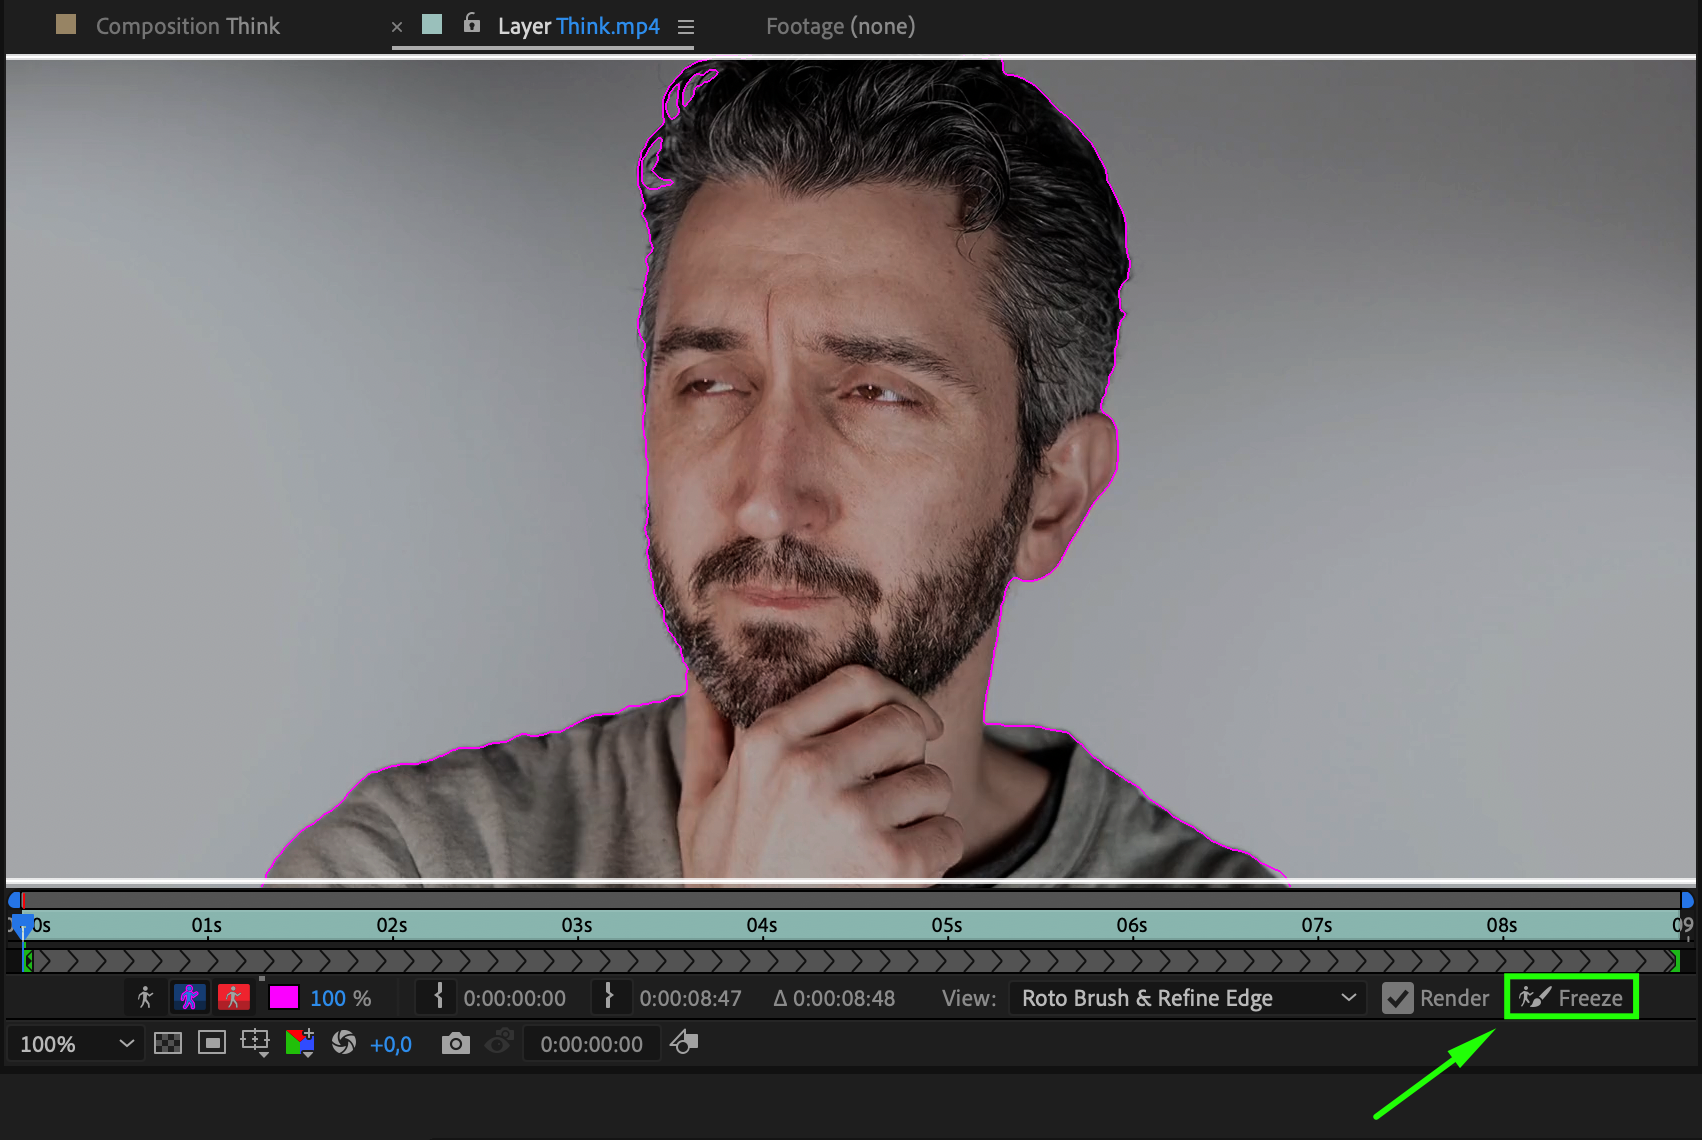
Step 3: Freeze Your Selection
Once you have refined your selection, click the “Freeze” button located at the bottom right of the composition panel. This will lock your selection and remove the background.
Get 10% off when you subscribe to our newsletter
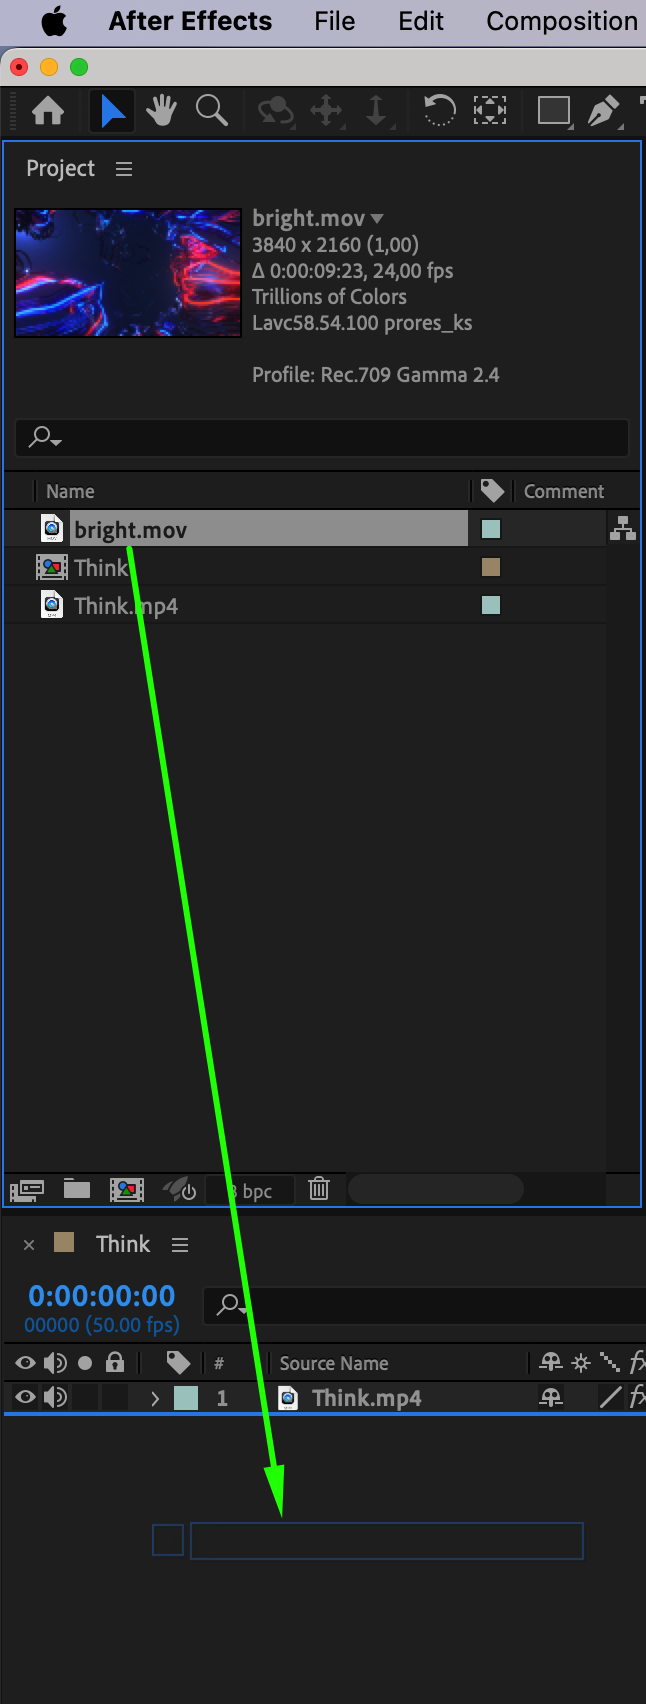
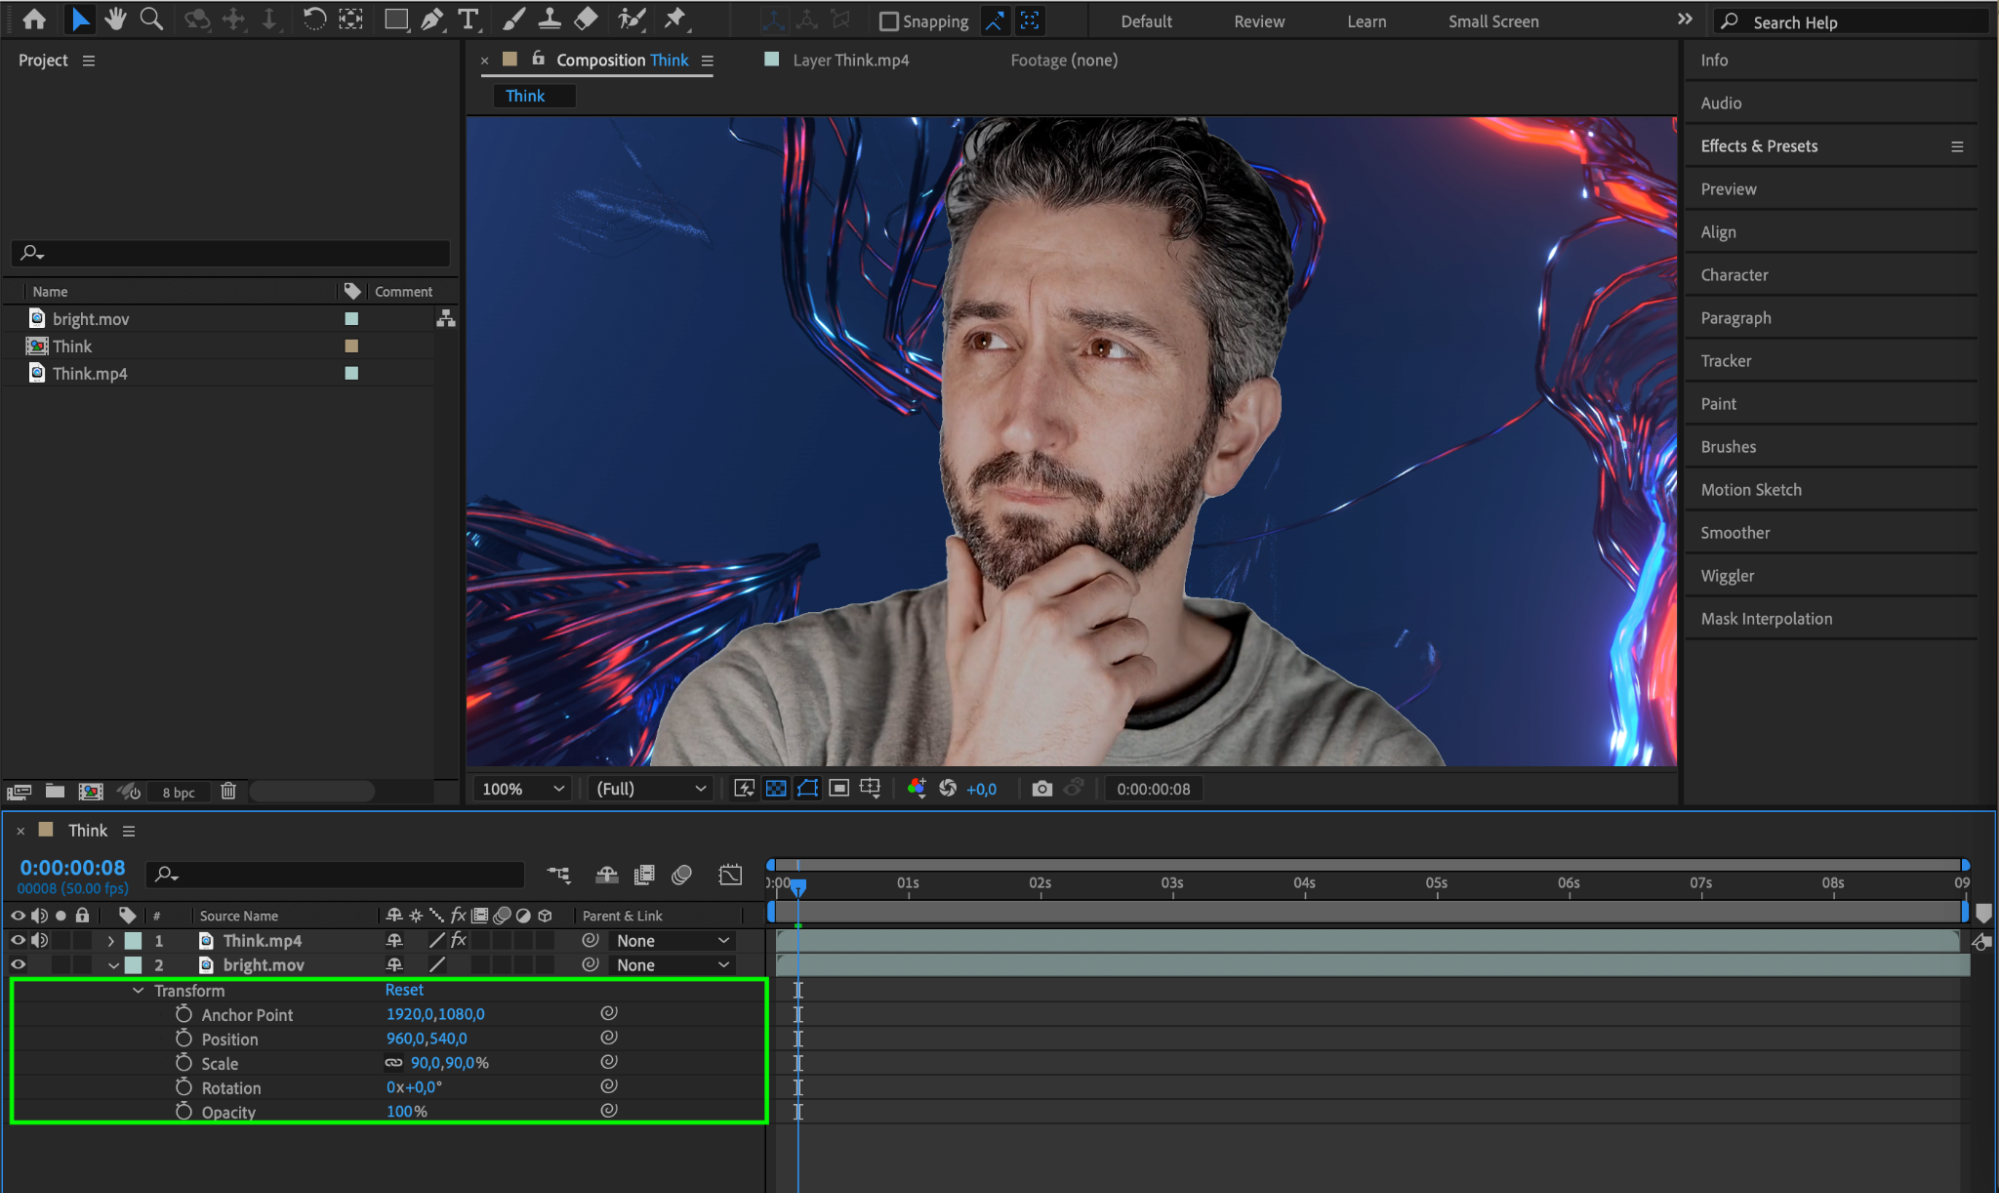
Step 4: Add a New Background
You can now set your desired background color using the composition settings or import a new background and place it on the timeline. Use the Transform panel to adjust the background’s appearance and fit it properly behind your subject.
Get 10% off when you subscribe to our newsletter
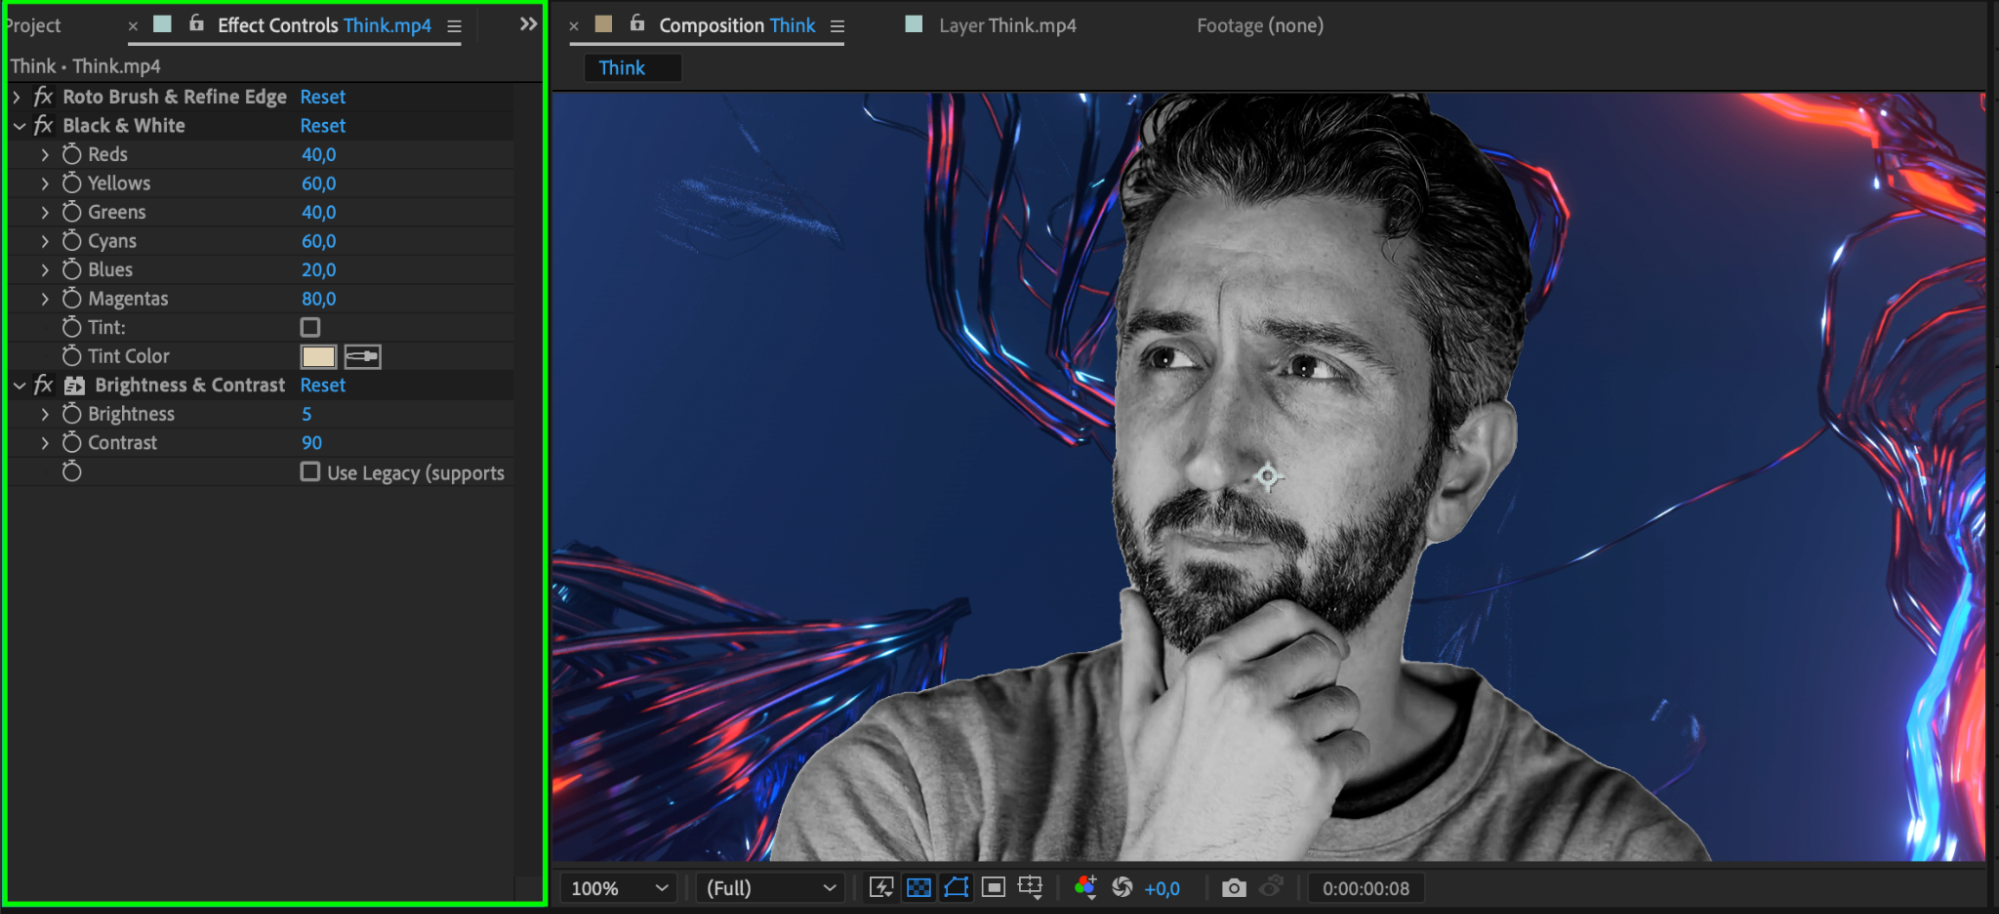
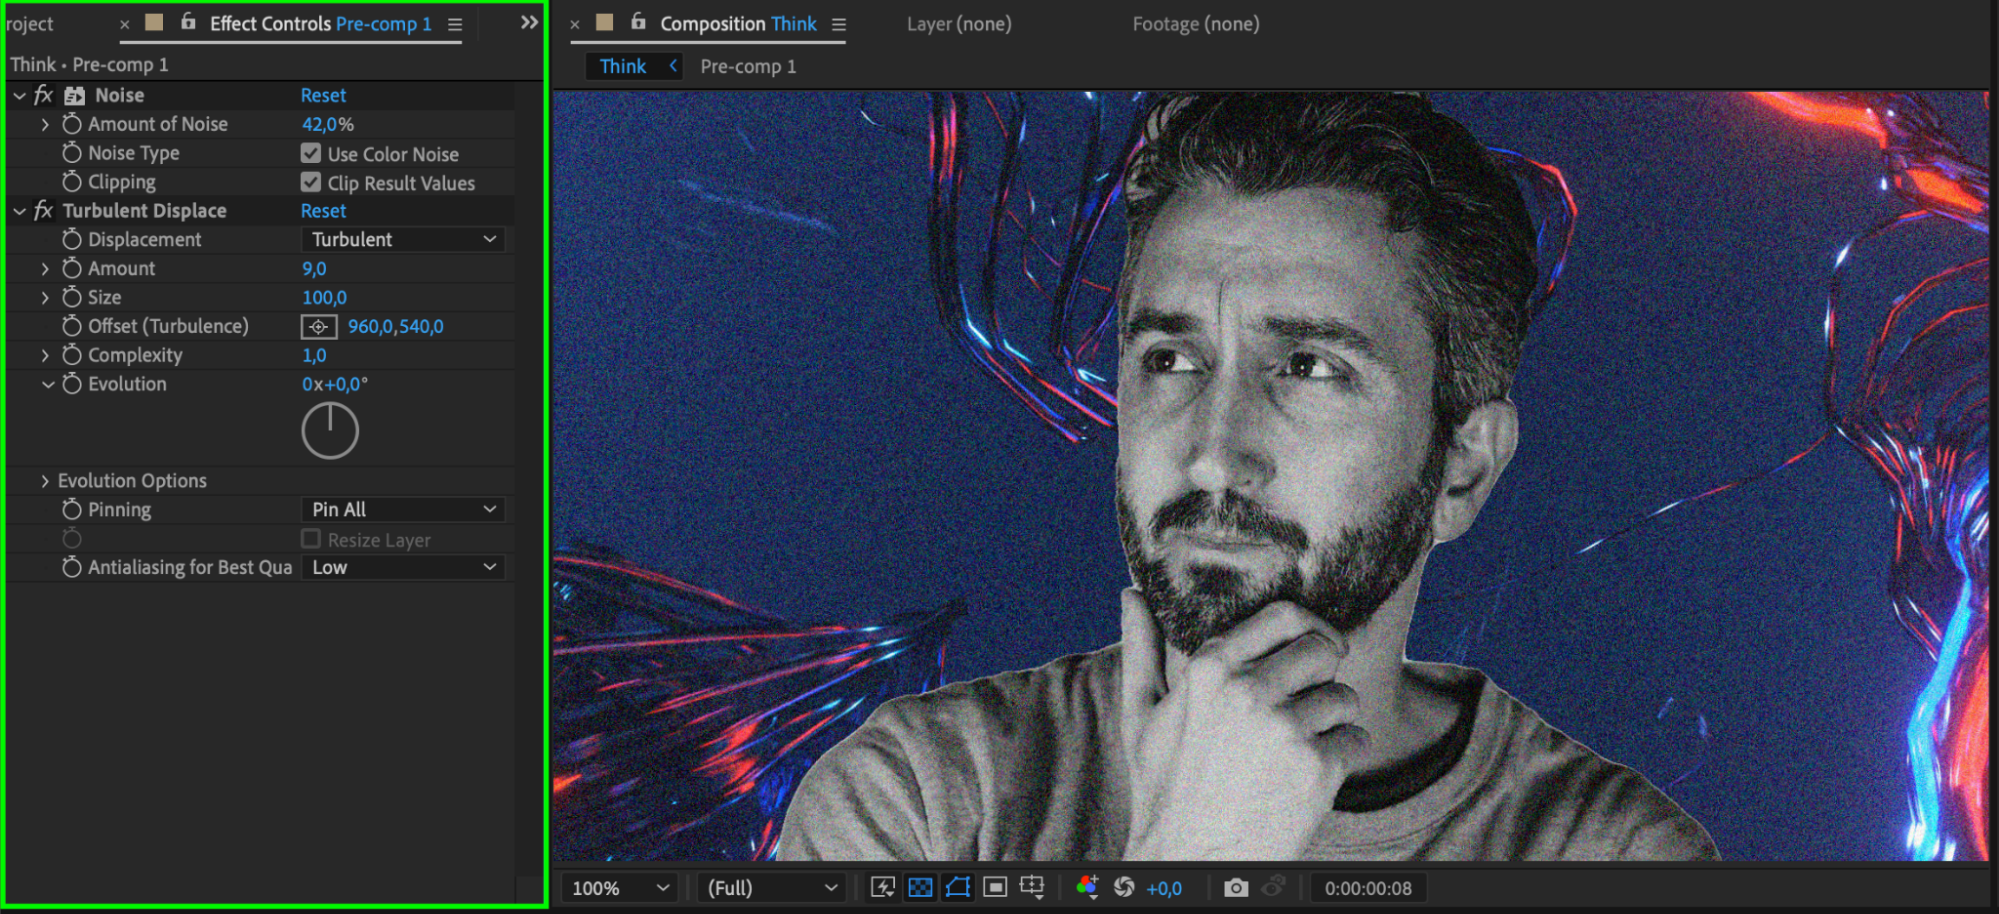
Step 5: Adjust the Cut-Out Object
Use the Effects and Presets panel to refine the appearance of your cut-out object.
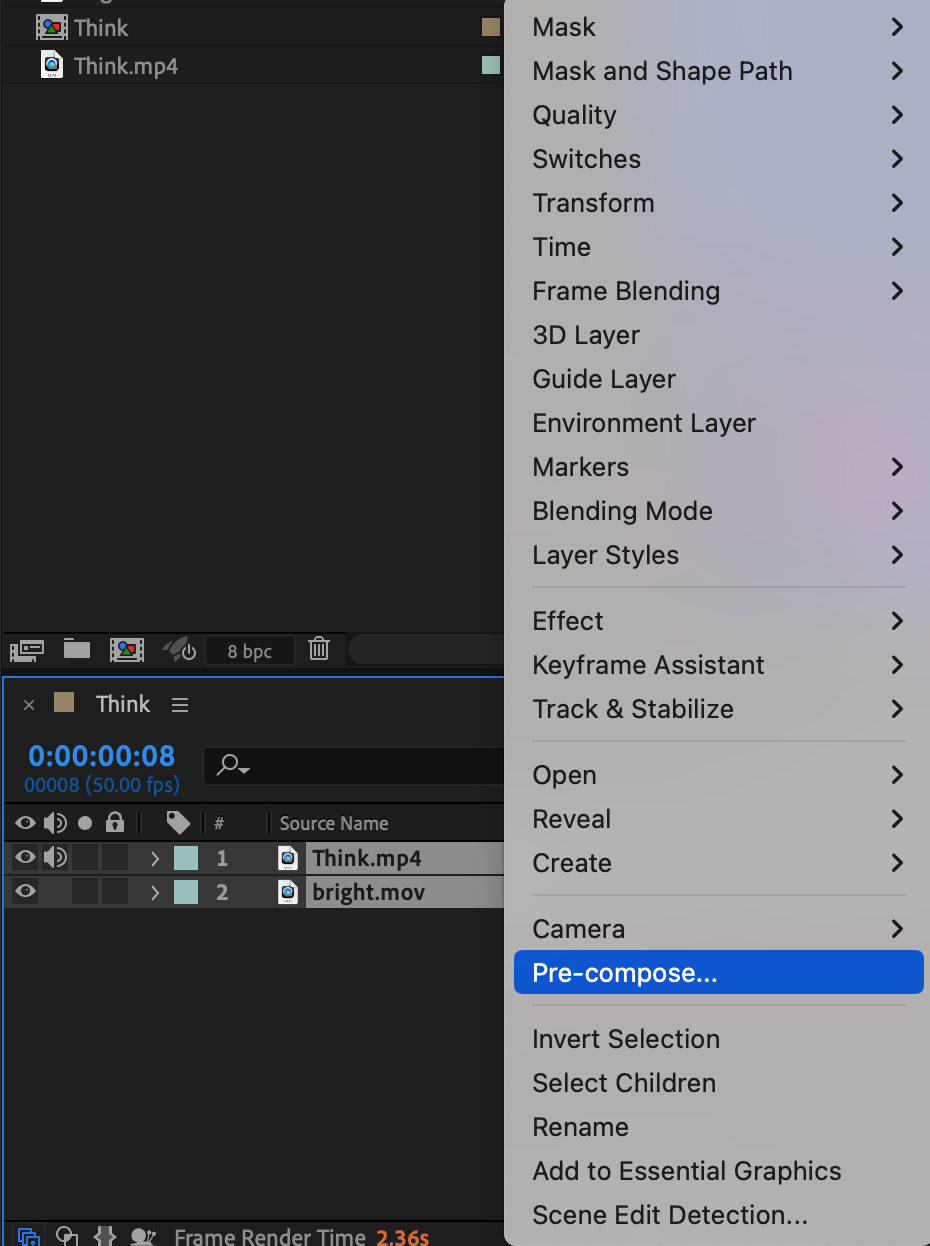
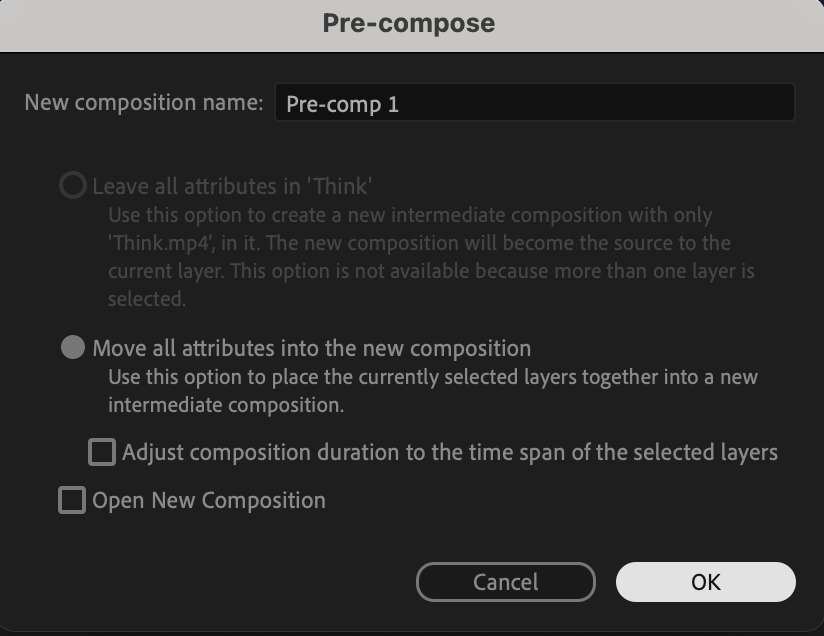
Step 6: Create a Pre-Composition for Consistency
To maintain a consistent style across your entire project, create a pre-composition by selecting the layer with your cut-out object and background, and then right-clicking to choose “Pre-compose.” Apply effects to the pre-composition for a unified look.
Get 10% off when you subscribe to our newsletter
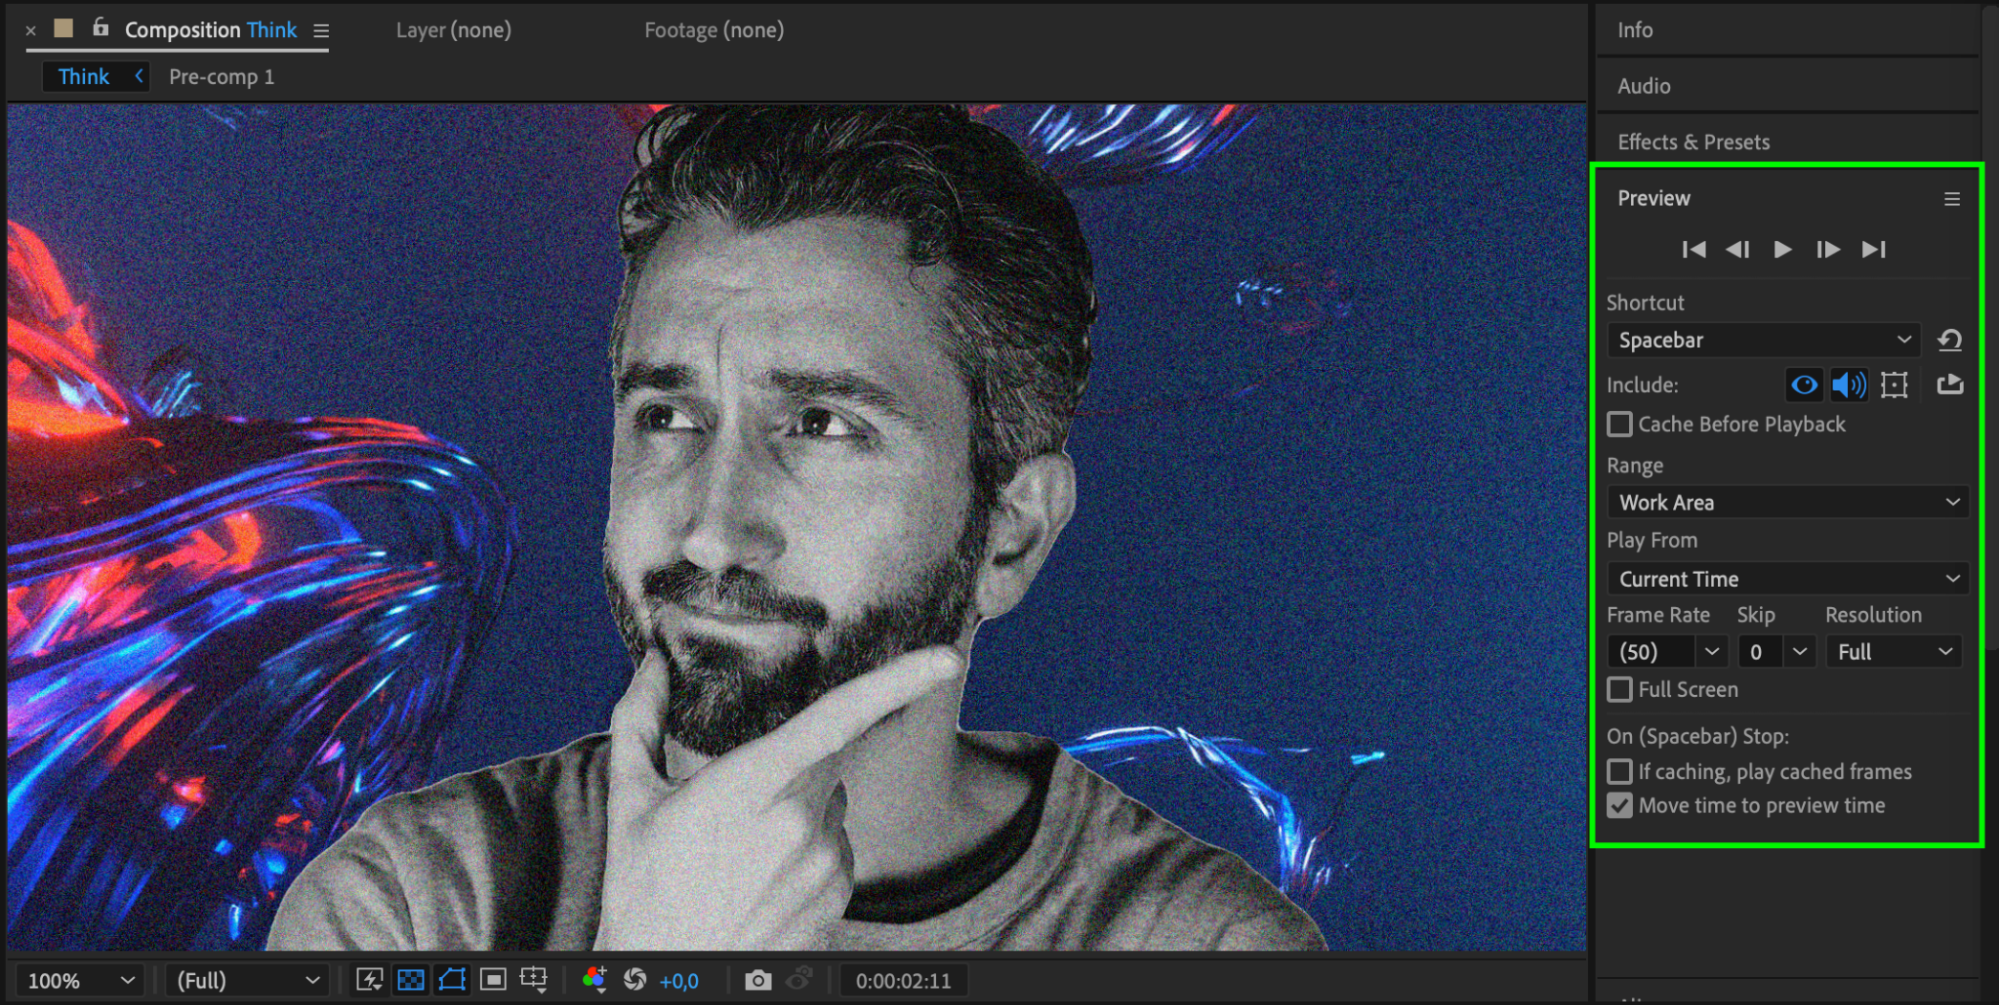
Step 7: Preview Your Work
Use the preview feature to watch your composition and ensure that everything looks as intended. Make any necessary adjustments to the timing, effects, or background.
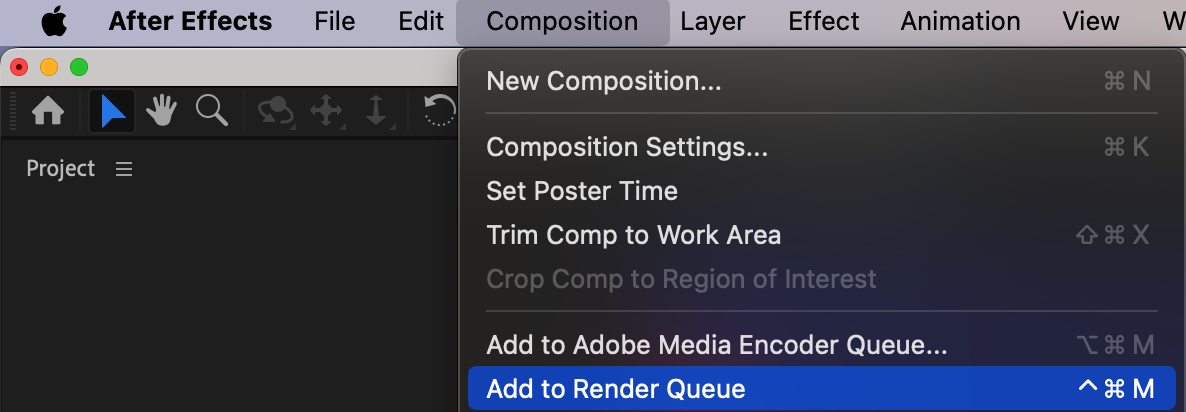
Step 8: Render Your Final Video
Once you are satisfied with the result, render your video. Go to the “Composition” menu, select “Add to Render Queue,” and configure your output settings. Choose your desired file format and render your composition to produce the final video.

Conclusion
Removing the background from a video in After Effects can enhance the quality and creativity of your projects. By following this step-by-step guide, you can effectively use the Roto Brush Tool and other After Effects features to isolate your subject and replace the background. With practice and experimentation, you’ll be able to achieve professional results and bring your creative visions to life.
Our Bestsellers


