Removing Strokes in After Effects: A Step-by-Step Guide
Introduction: Enhancing Your Videos by Removing Strokes
Removing strokes in After Effects can greatly improve the visual appeal of your videos. Strokes are commonly used to outline or highlight objects, text, or shapes, but there may be times when you want to remove them to achieve a different aesthetic or to clean up your footage. In this step-by-step guide, we will show you how to easily remove strokes in After Effects and take your video editing skills to the next level.
Method 1: Removing Stroke from Shapes
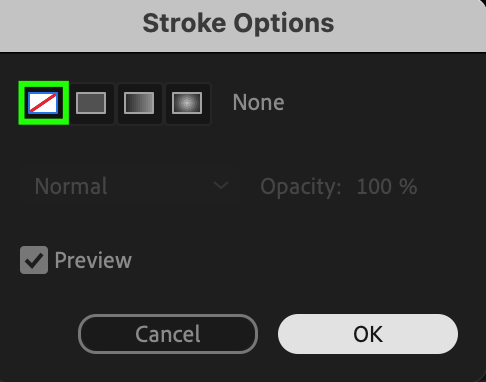
Select the shape layer you want to edit. Above the composition panel, locate the “Stroke” option where you can change the color and thickness of the stroke. Click on the word “Stroke” to open the stroke options window. Select the crossed-out rectangle icon to remove the stroke. Click “OK” to apply the changes.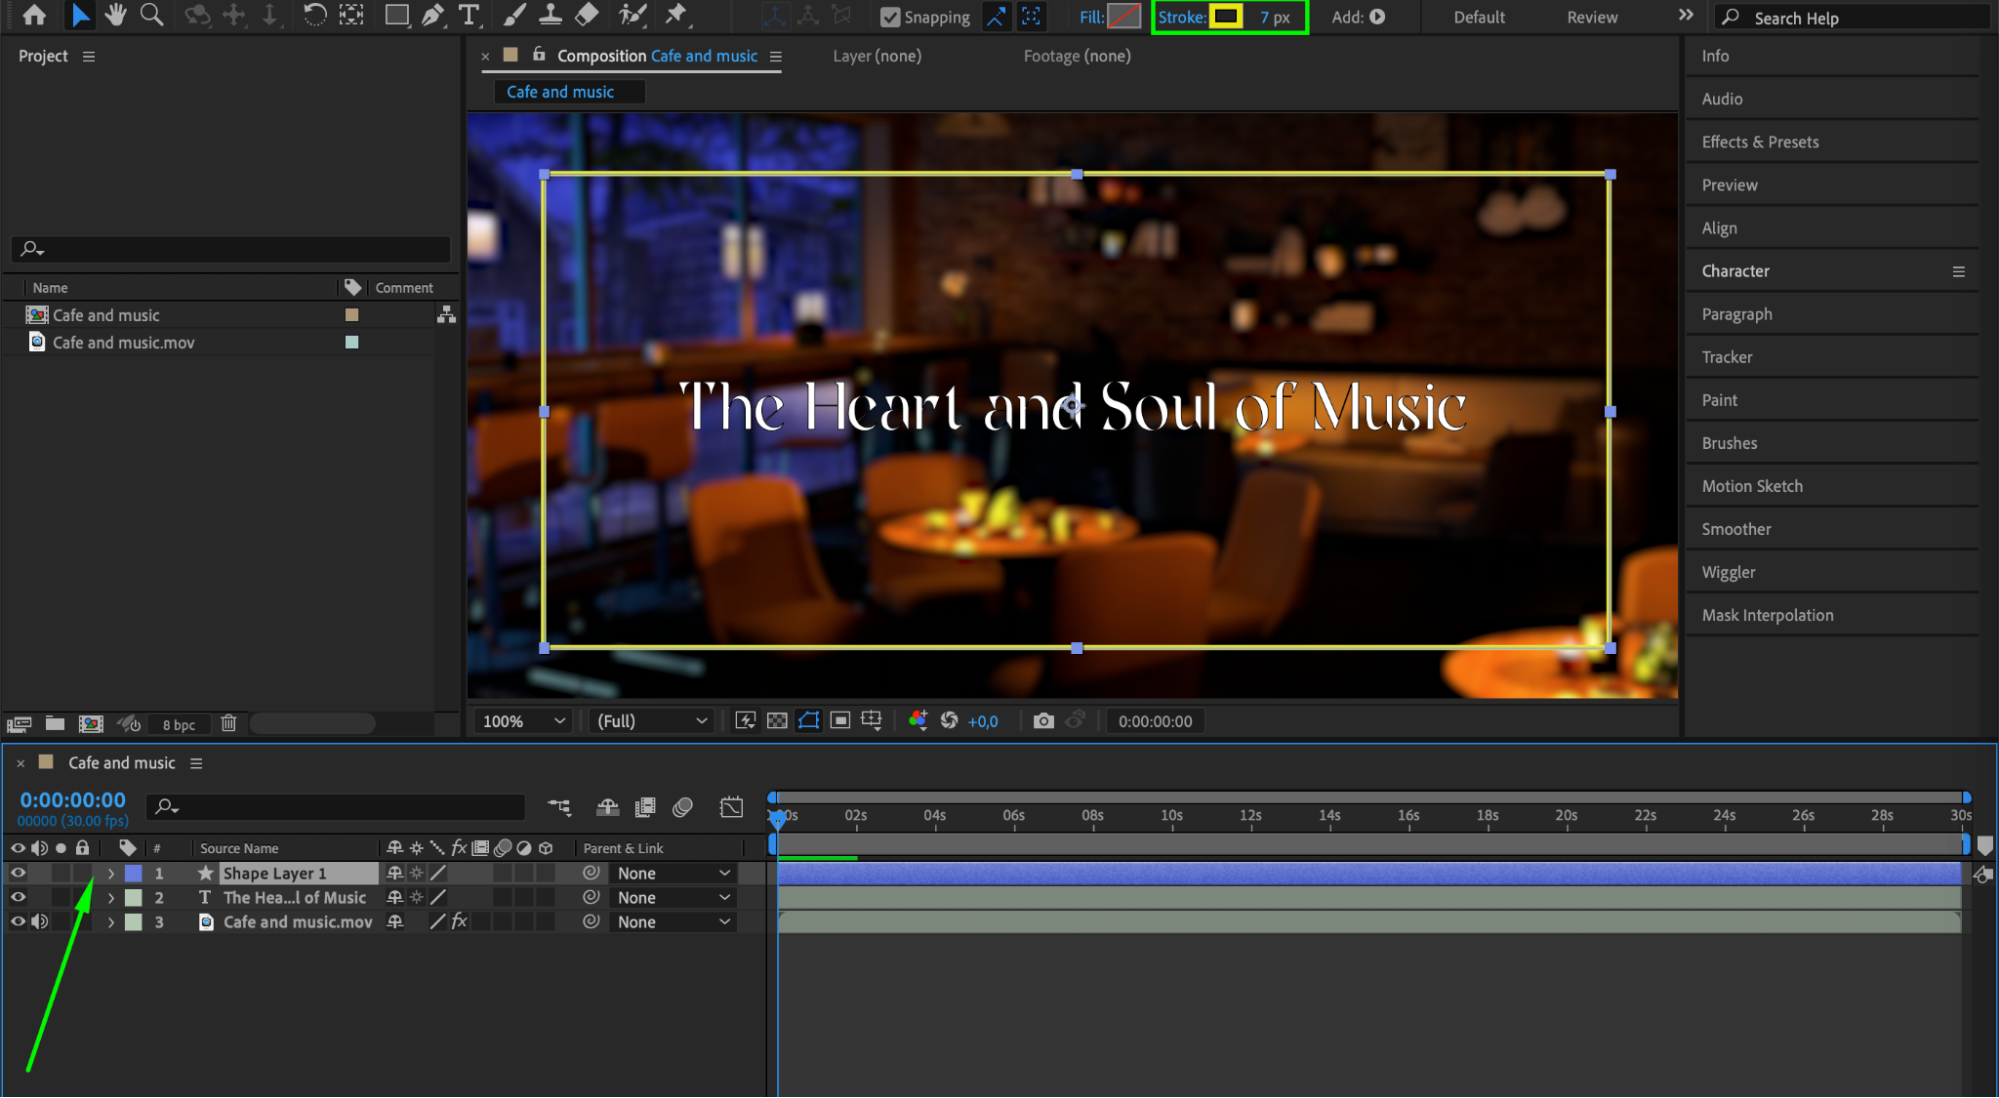
 Method 2: Removing Stroke from Text
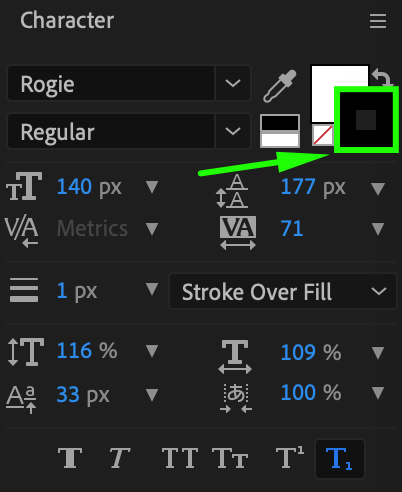
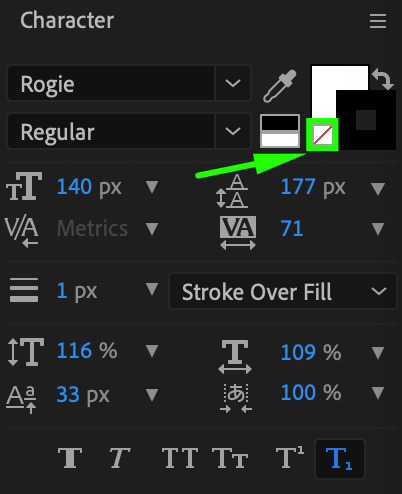
Select the text layer you want to edit. Open the Character panel by going to “Window” > “Character” if it’s not already visible. Find the two large colored squares stacked on top of each other. The bottom square represents the stroke color. Click on the bottom square to select it. Without opening the Text Color window, click on the small white crossed-out square to the left of it to remove the stroke.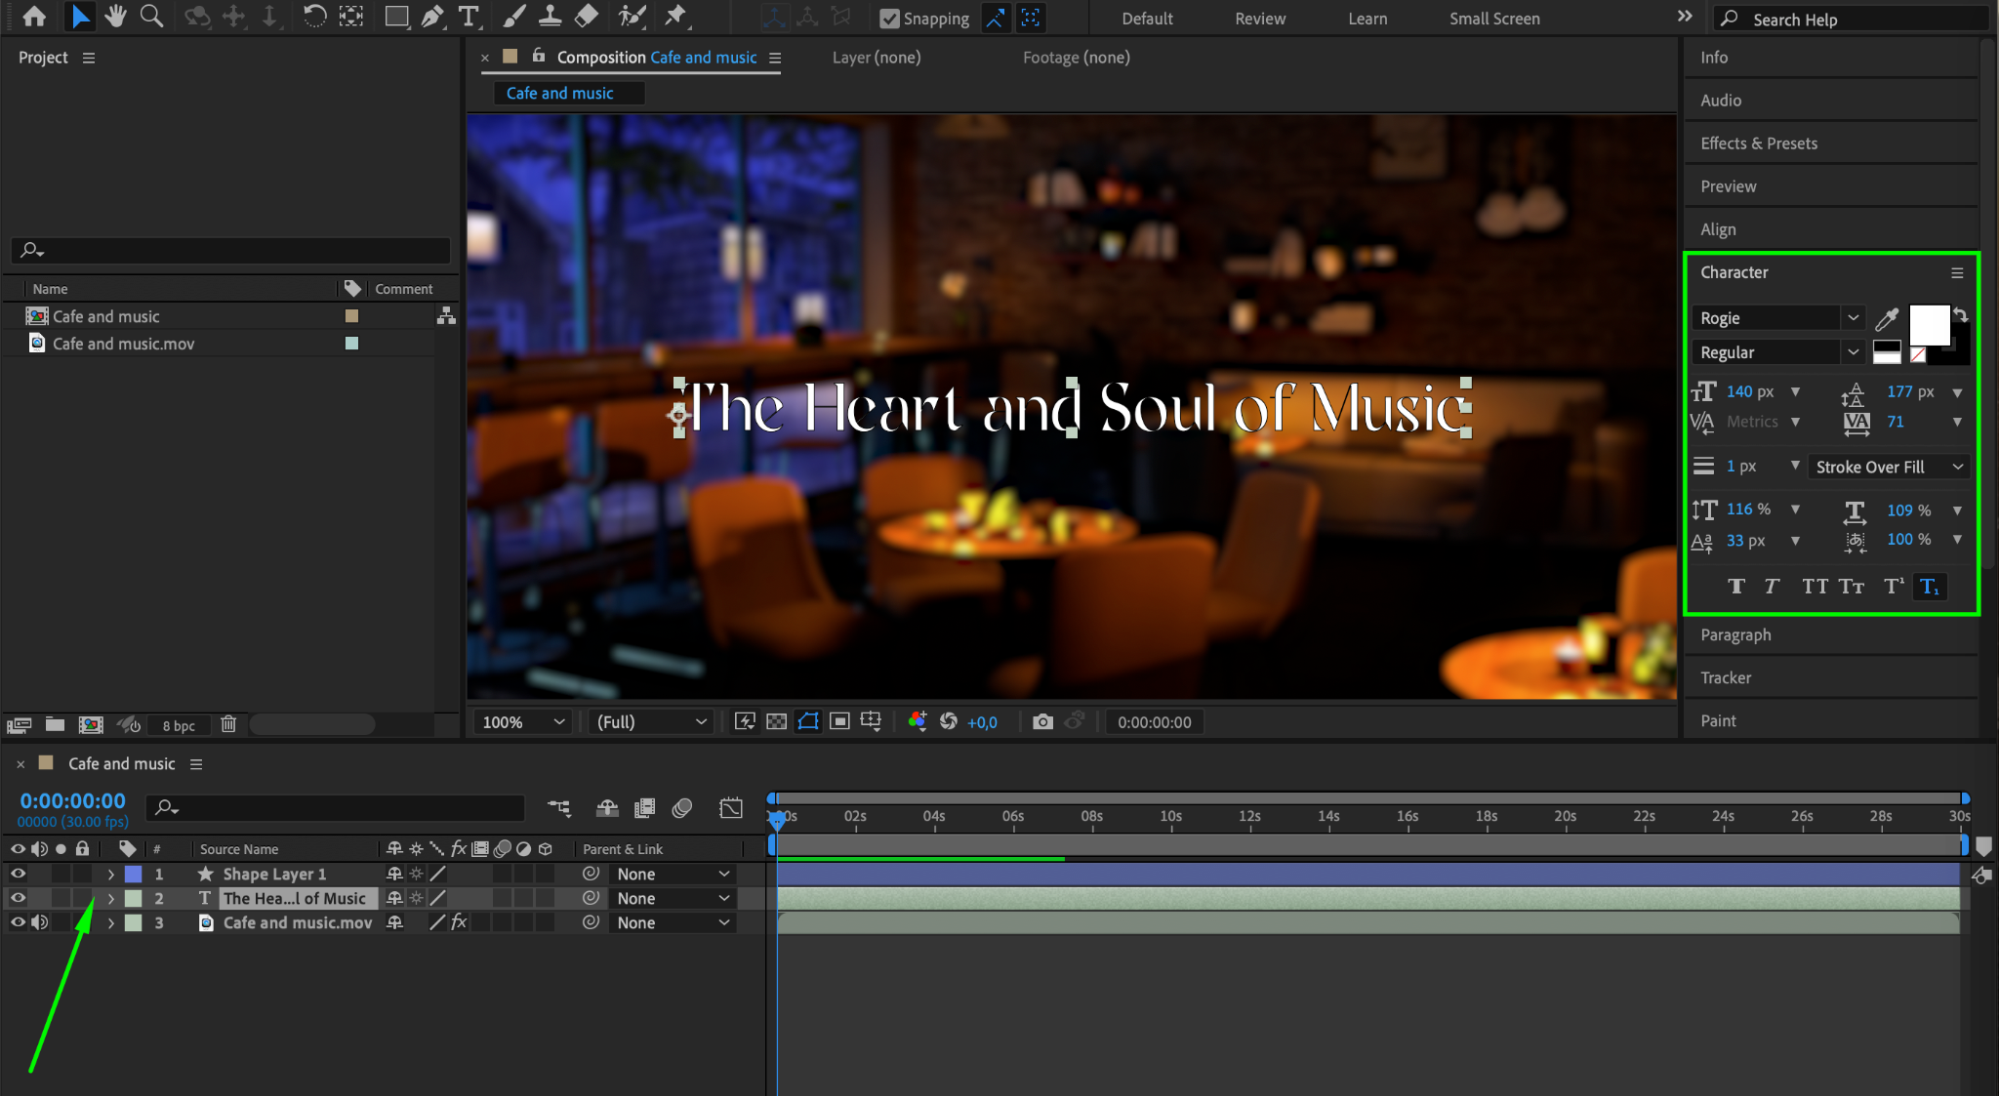
 Method 3: Removing Stroke from a Separate Layer
Select the stroke layer you want to edit. Expand the layer to reveal the “Transform” properties, or press the shortcut “T” to open the Opacity property. Set the Opacity value to 0 to make the stroke disappear. Use keyframes if you want to create an effect where the stroke gradually fades out.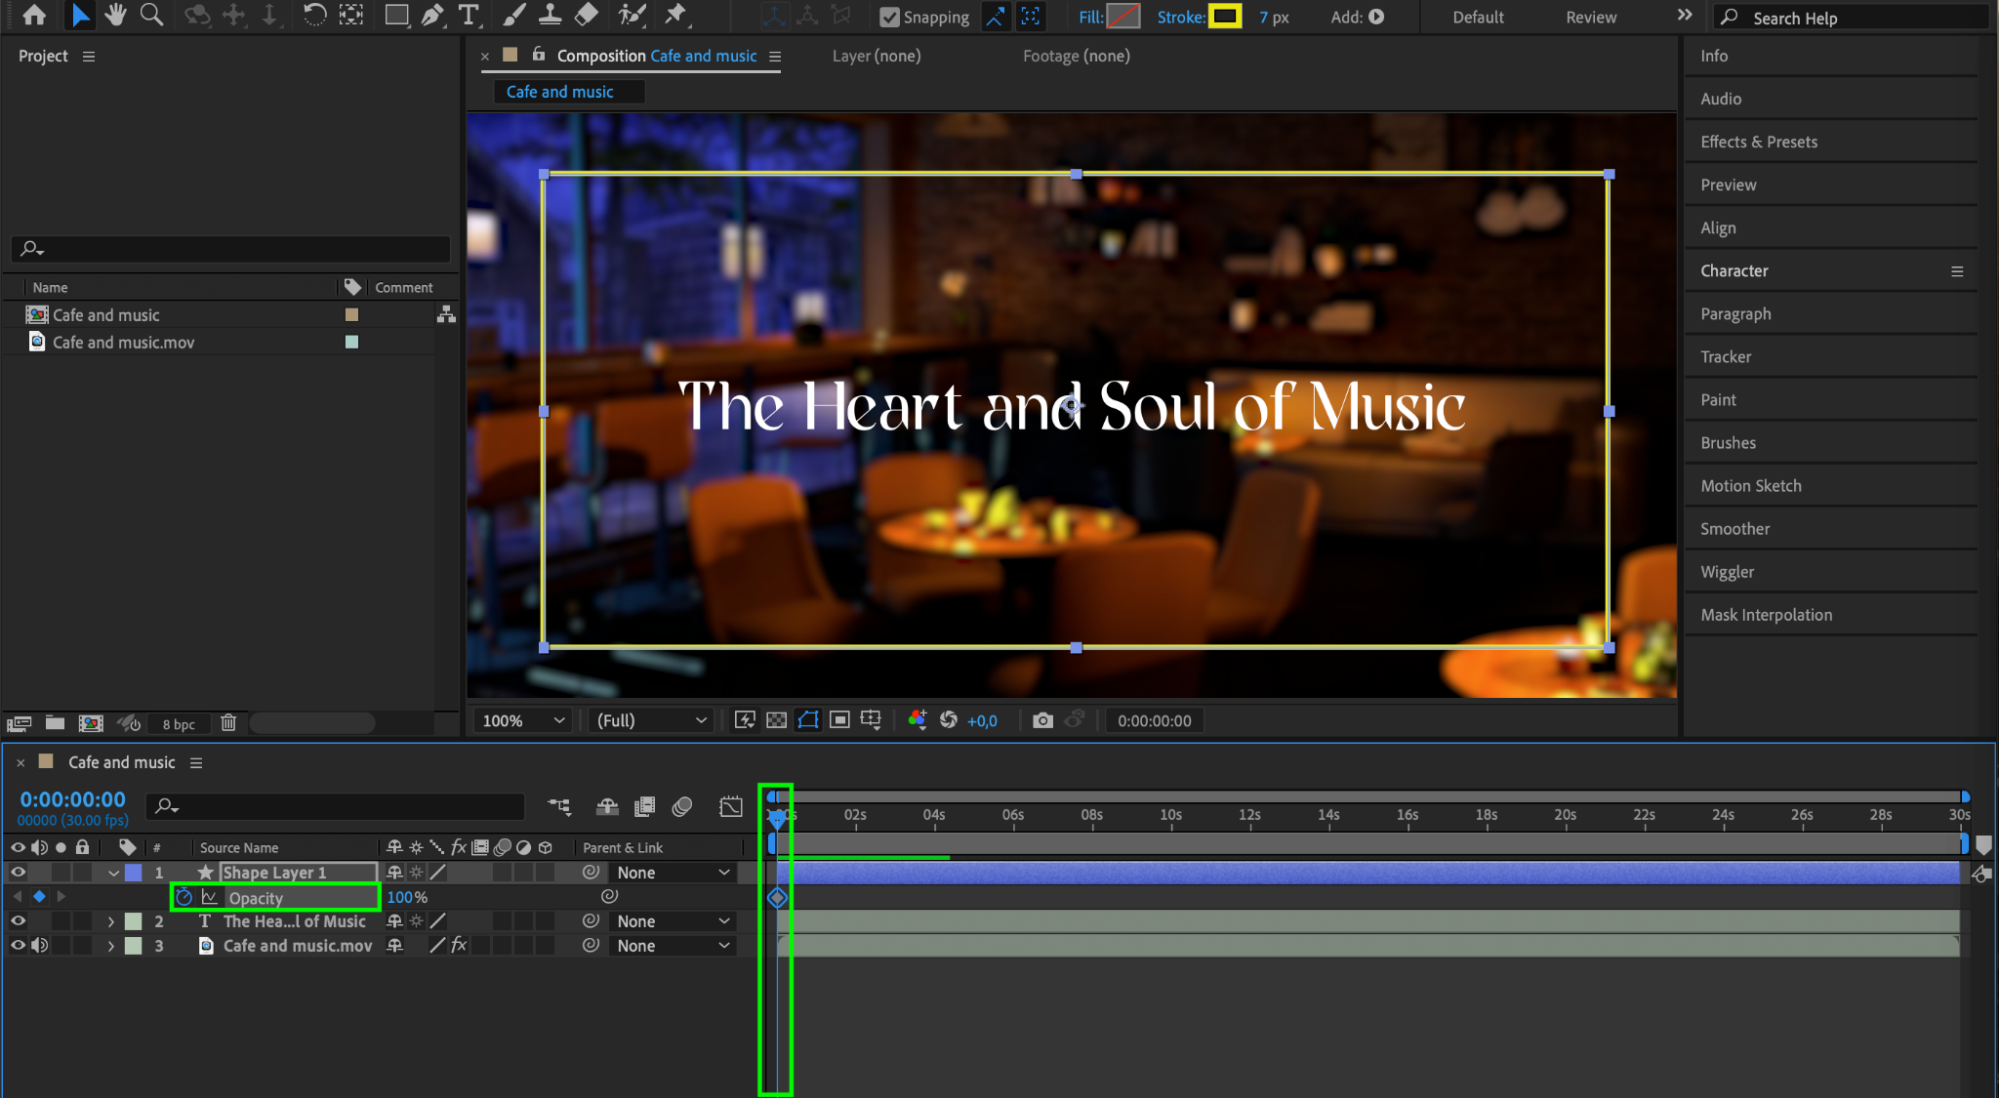

Get 10% off when you subscribe to our newsletter

Conclusion
By following these methods, you can efficiently remove strokes from your compositions in After Effects. Whether you are dealing with shapes, text, or separate layers, mastering these techniques will help you achieve a cleaner and more professional look for your videos. Experiment with these steps and see how they can enhance your projects. Happy editing!


