How to Render 1080p Videos in After Effects
Introduction to 1080p Rendering
Rendering 1080p videos in After Effects may seem daunting, but with this guide, you’ll master the process effortlessly. So, let’s dive in and explore the step-by-step process.
Firstly, it’s important to understand what 1080p resolution means. Essentially, it refers to the Full HD format with a pixel resolution of 1920 x 1080. This resolution provides excellent clarity and detail, making it the standard for video content across various platforms. Now, let’s move on to the rendering process.
Step 1: Check Project Settings
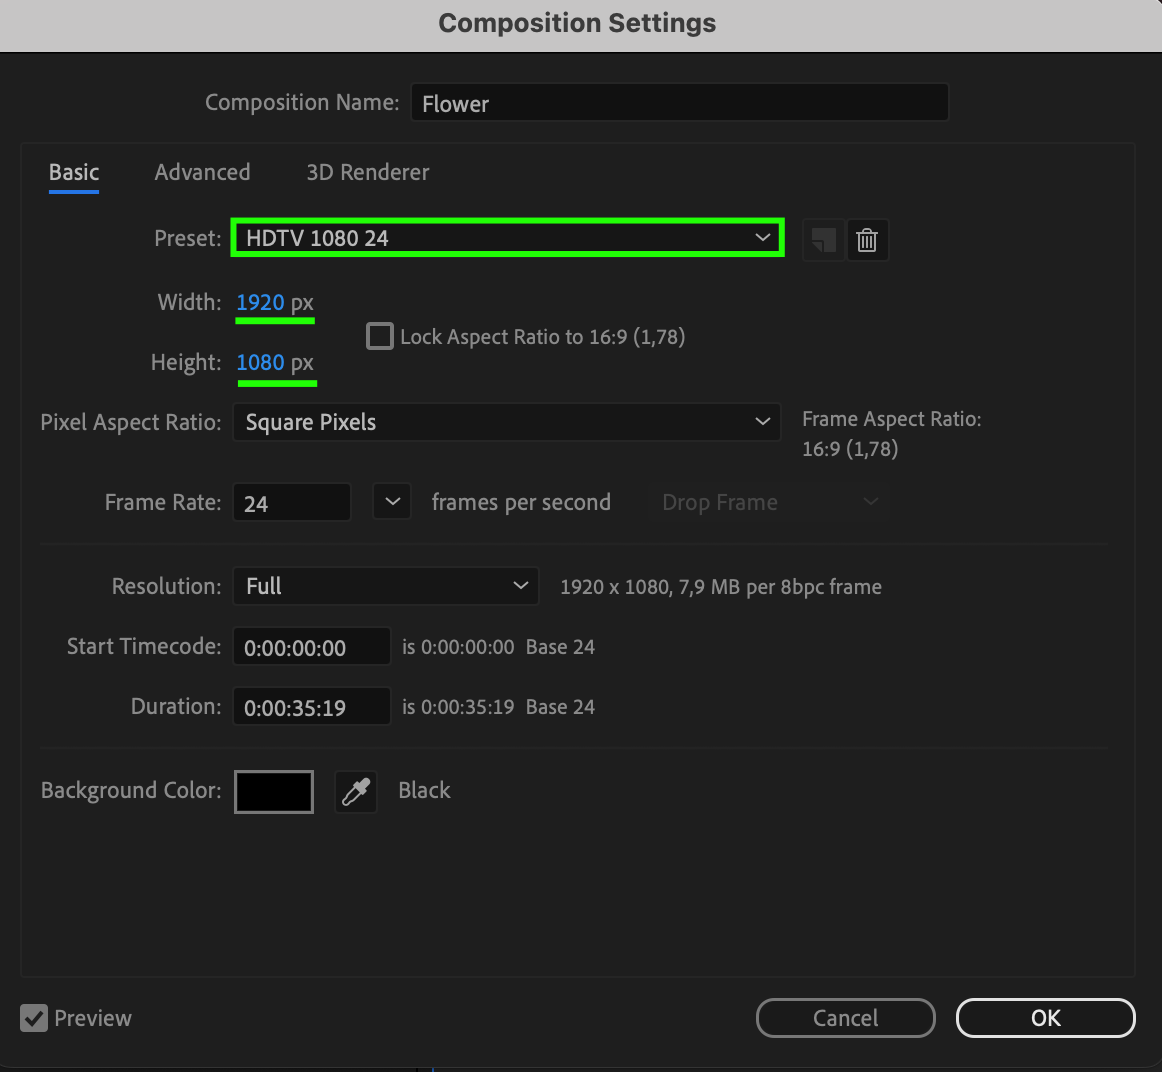
Make sure your project settings are set to 1080p resolution. You can do this by going to the “Composition” menu and selecting “Composition Settings.” In the pop-up window, adjust the width and height to 1920 x 1080 pixels.
 Step 2: Adjust Composition Duration
Get 10% off when you subscribe to our newsletter

Review the duration of your composition. Click on the composition in the project panel, go to “Composition,” and then select “Composition Settings.” Here, you can adjust the duration of your composition as needed.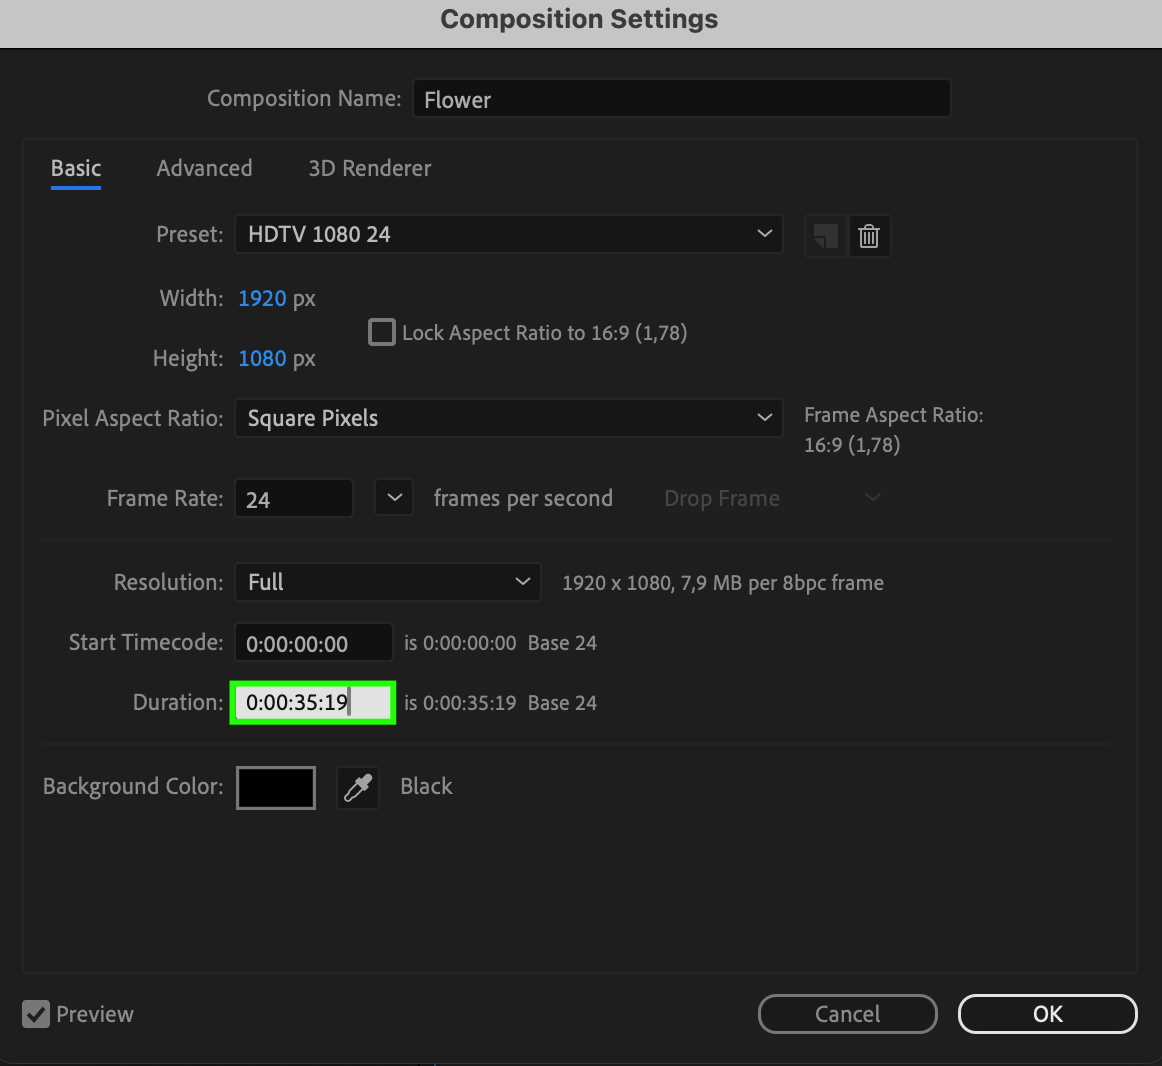 Step 3: Add to Render Queue
Navigate to “Composition” and select “Add to Render Queue.”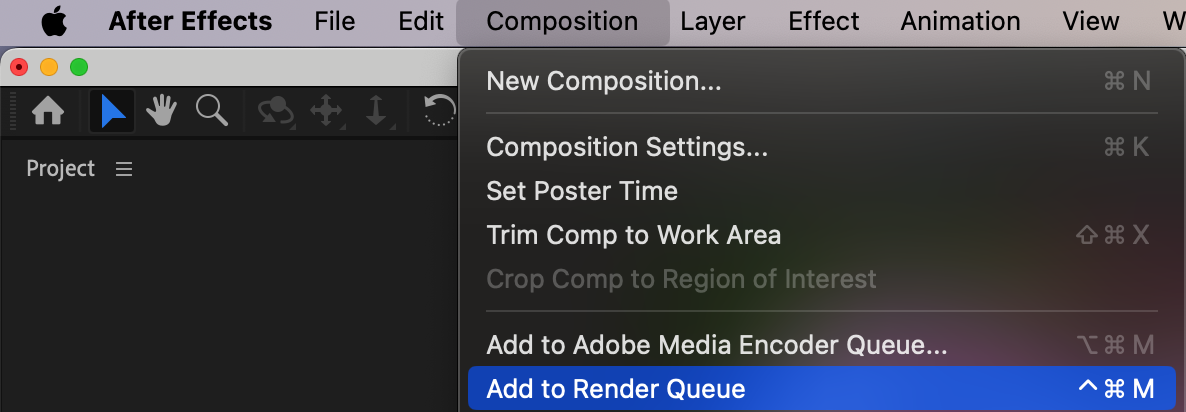
Step 4: Choose the Right Codec
Selecting the appropriate codec is crucial for preserving video quality during rendering. Options like H.264, QuickTime, or MPEG-4 offer versatility. Navigate to the “Output Module” within the “Render Queue” panel, and click “High Quality” to access codec choices”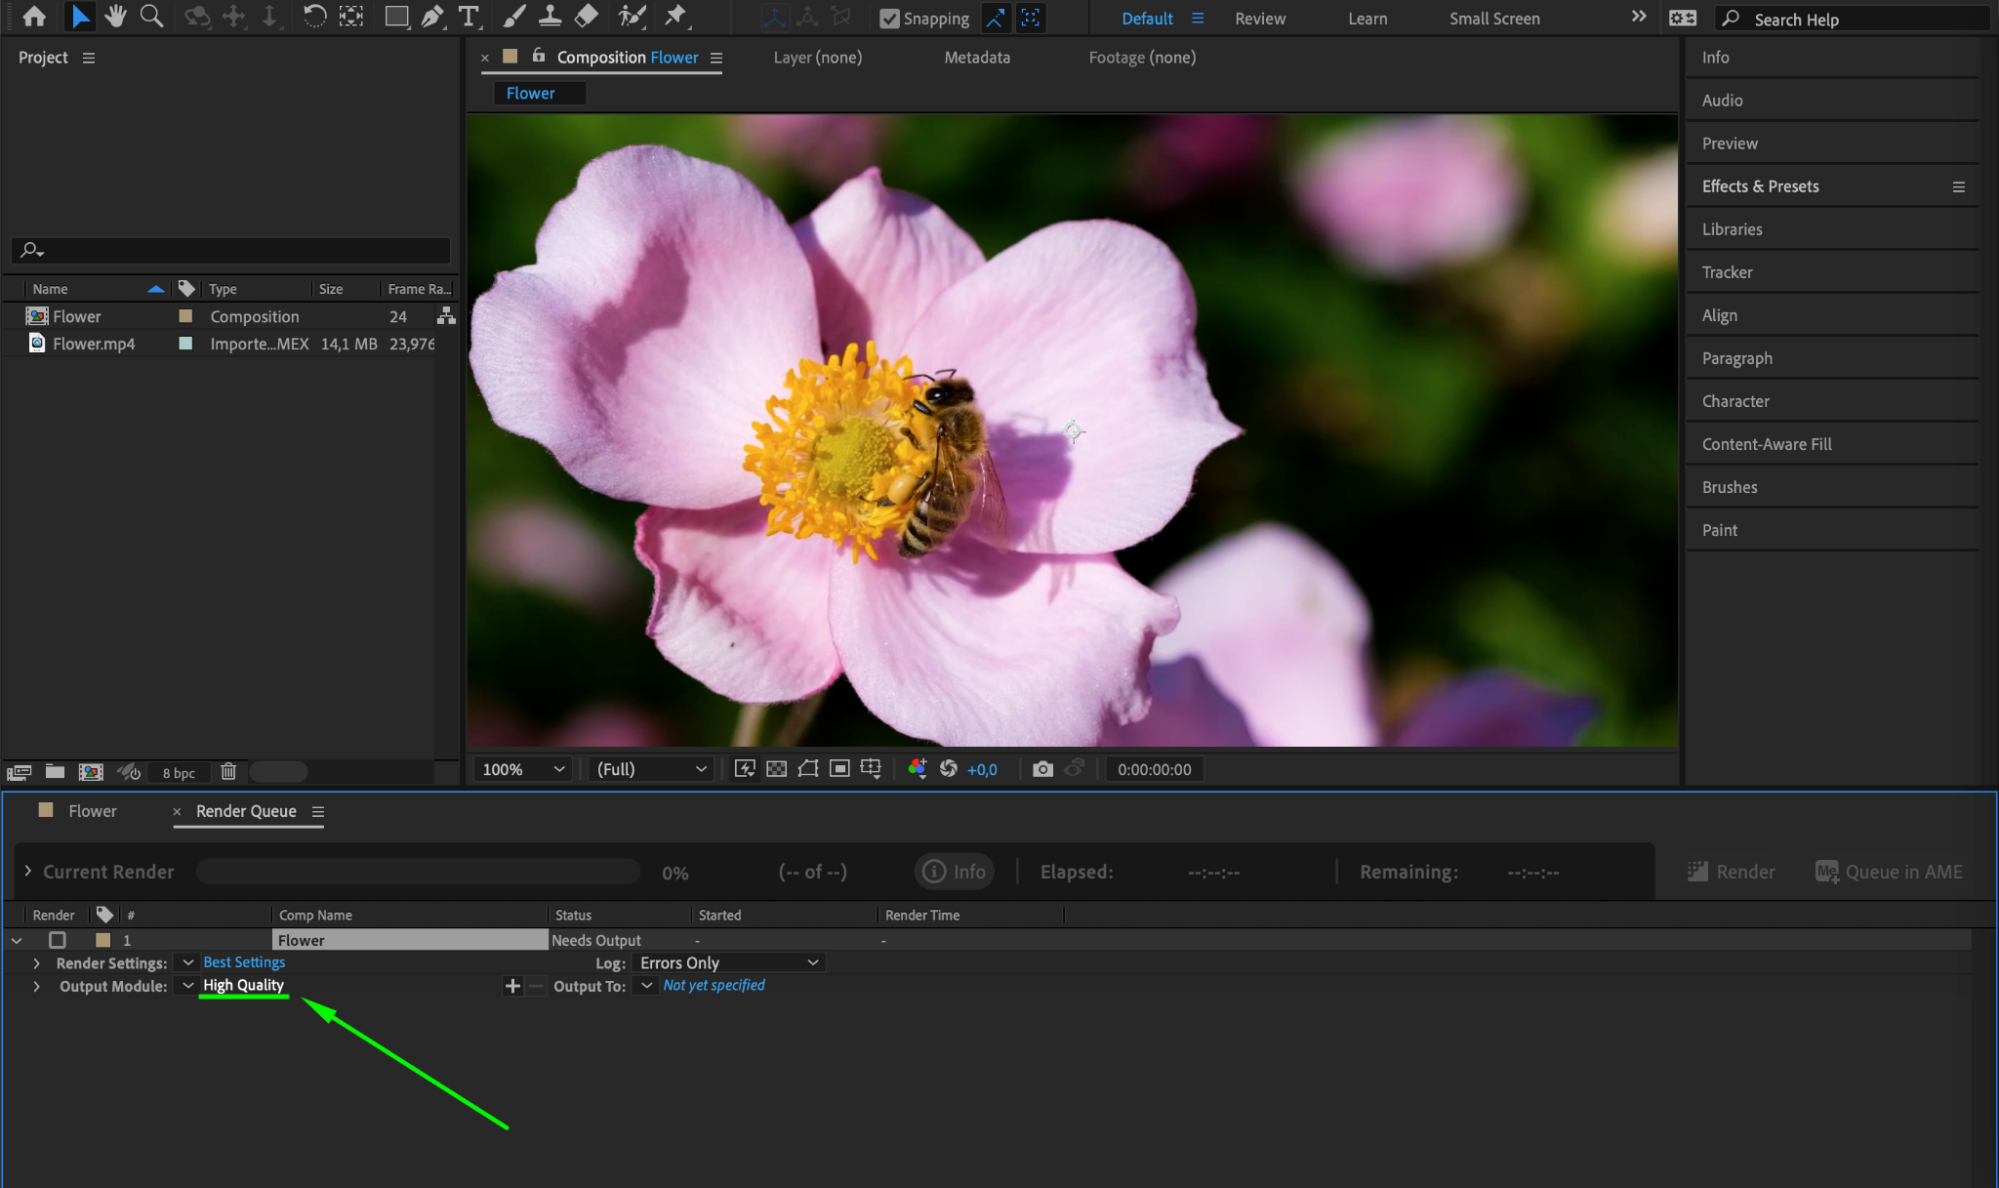
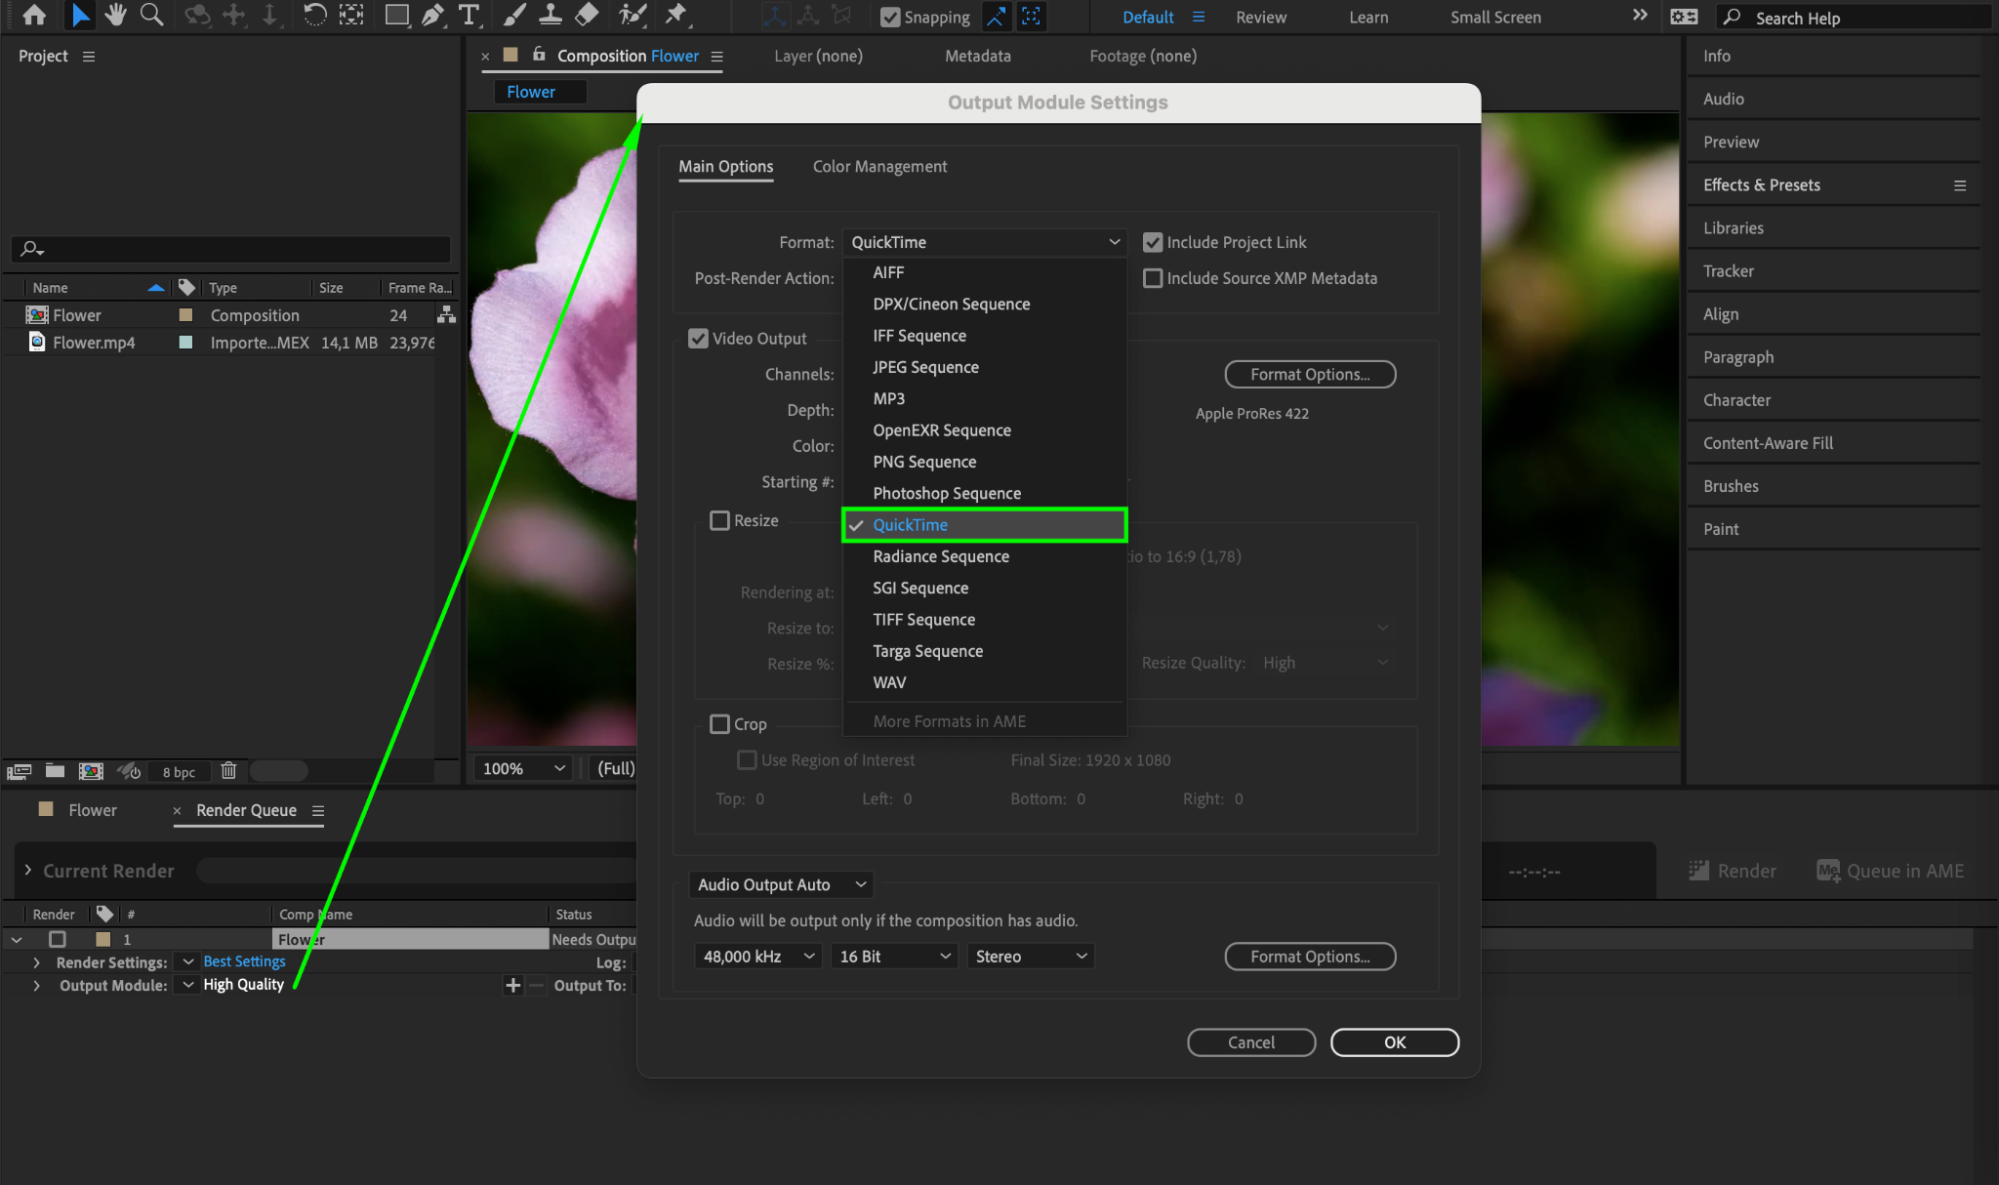
Step 5: Configure Render Settings
Within the Render Settings tab, customize output parameters for your video. Match the codec to the selected format from the previous step. Adjust quality and bitrate settings to suit your preferences or project requirements.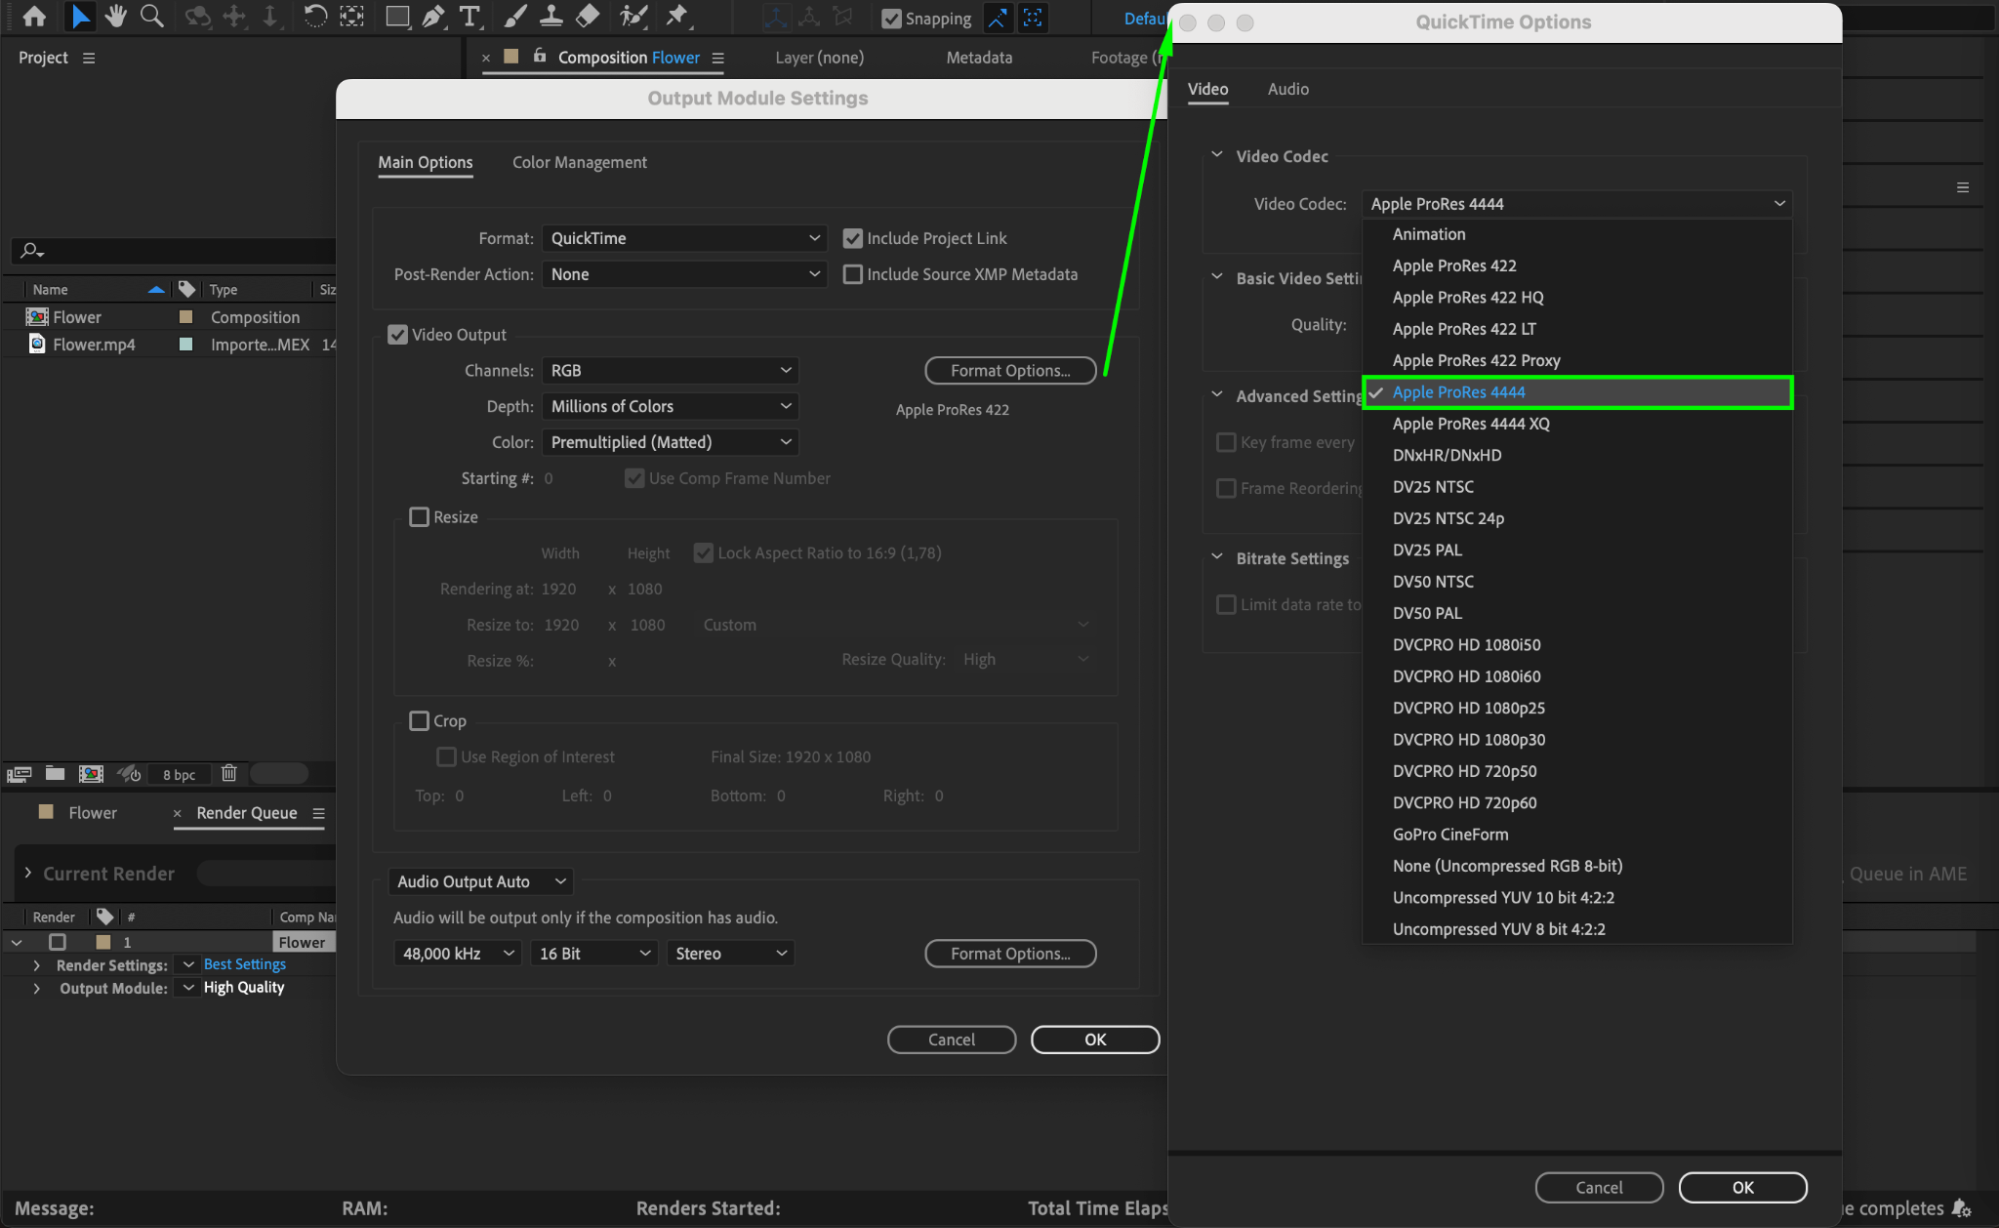
Step 6: Set the Output Location
Specify where you want to save your rendered video. Click on the “Output To” option in the Render Queue panel, choose the desired destination folder, and give your file a name.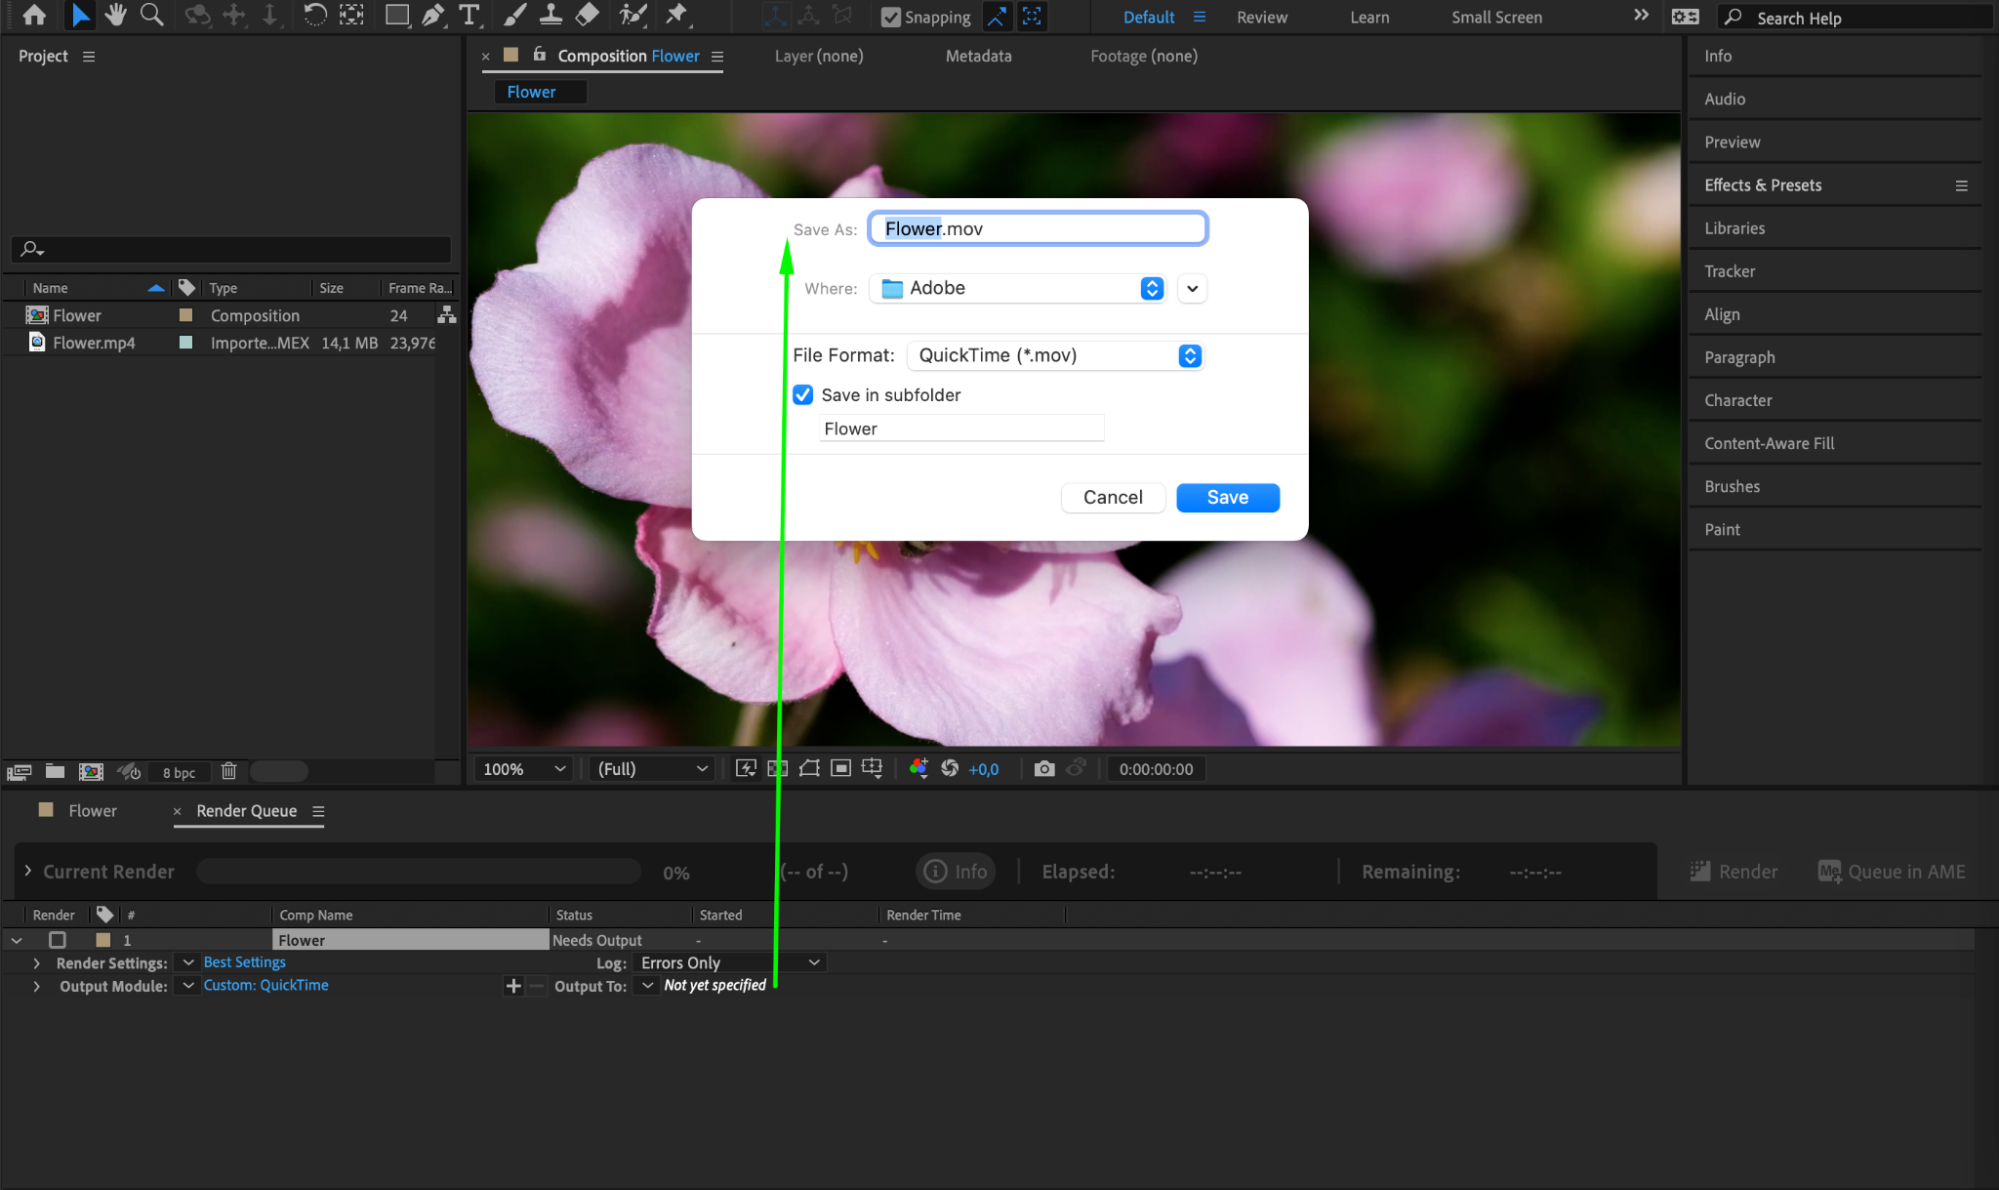
Step 7: Start the Rendering Process
With all the settings configured, it’s time to render your project. Click on the “Render” button in the Render Queue panel, and After Effects will start processing your composition based on the chosen settings. You can monitor the progress in the Render Queue panel and make any necessary adjustments if needed. Step 8: Check the Final Render
Once the rendering process is complete, navigate to the output location specified in Step 5 and open your rendered video. Review it thoroughly to ensure it meets your expectations in terms of quality, visual effects, and overall appearance.
Conclusion
Congratulations! You’ve successfully rendered your After Effects project in 1080p resolution. Now you can share your masterpiece on various platforms, impress clients, or captivate your audience with stunning visuals.
Remember to experiment with different settings and techniques to further enhance your video rendering skills. With After Effects’ powerful capabilities and your creative vision, you can create remarkable videos that leave a lasting impact on your viewers.
So, don’t be afraid to explore and practice different techniques. Happy rendering!


