How to Render After Effects Projects using Media Encoder
Introduction to Rendering with Adobe Media Encoder
Tired of waiting for your After Effects projects to render? Learn how to save time and optimize your workflow by rendering them with Adobe Media Encoder. Rendering is the process of creating a final output file from your project, combining all effects, animations, and settings into a playable video format. Let’s dive into the steps:
Step 1: Install After Effects and Media Encoder
Ensure both After Effects and Media Encoder are installed on your computer.
Step 2: Send the Project to Adobe Media Encoder
Open your project in After Effects and navigate to the “Composition” menu to choose “Add to Adobe Media Encoder Queue”. Step 3: Customize Export Settings
Get 10% off when you subscribe to our newsletter

Once your project opens in Media Encoder, click on the format of your file to open the Export Settings window.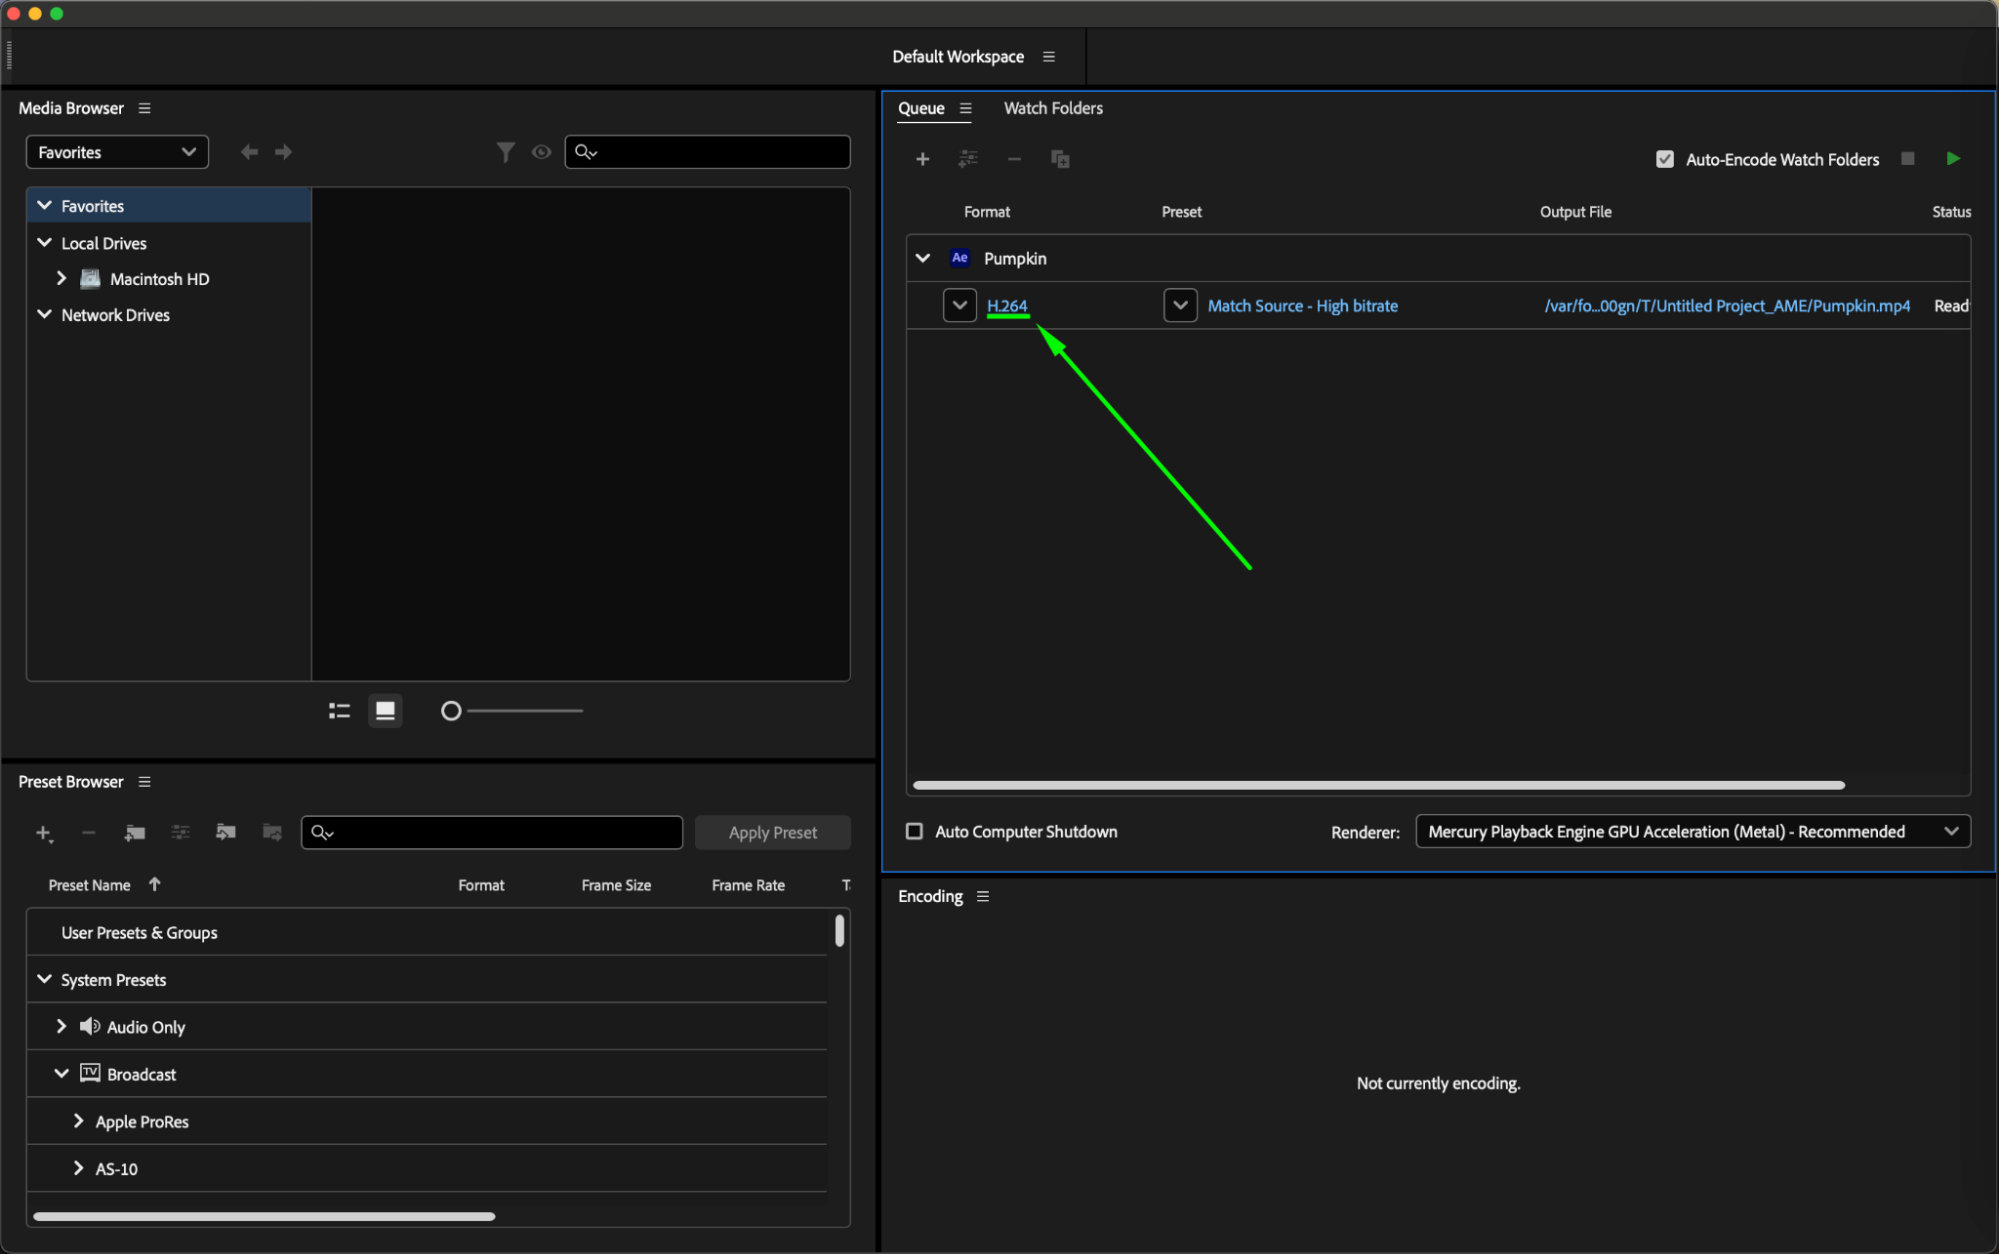 Step 4: Choose the Right Format
Select the appropriate format for your video, considering the intended use and quality requirements.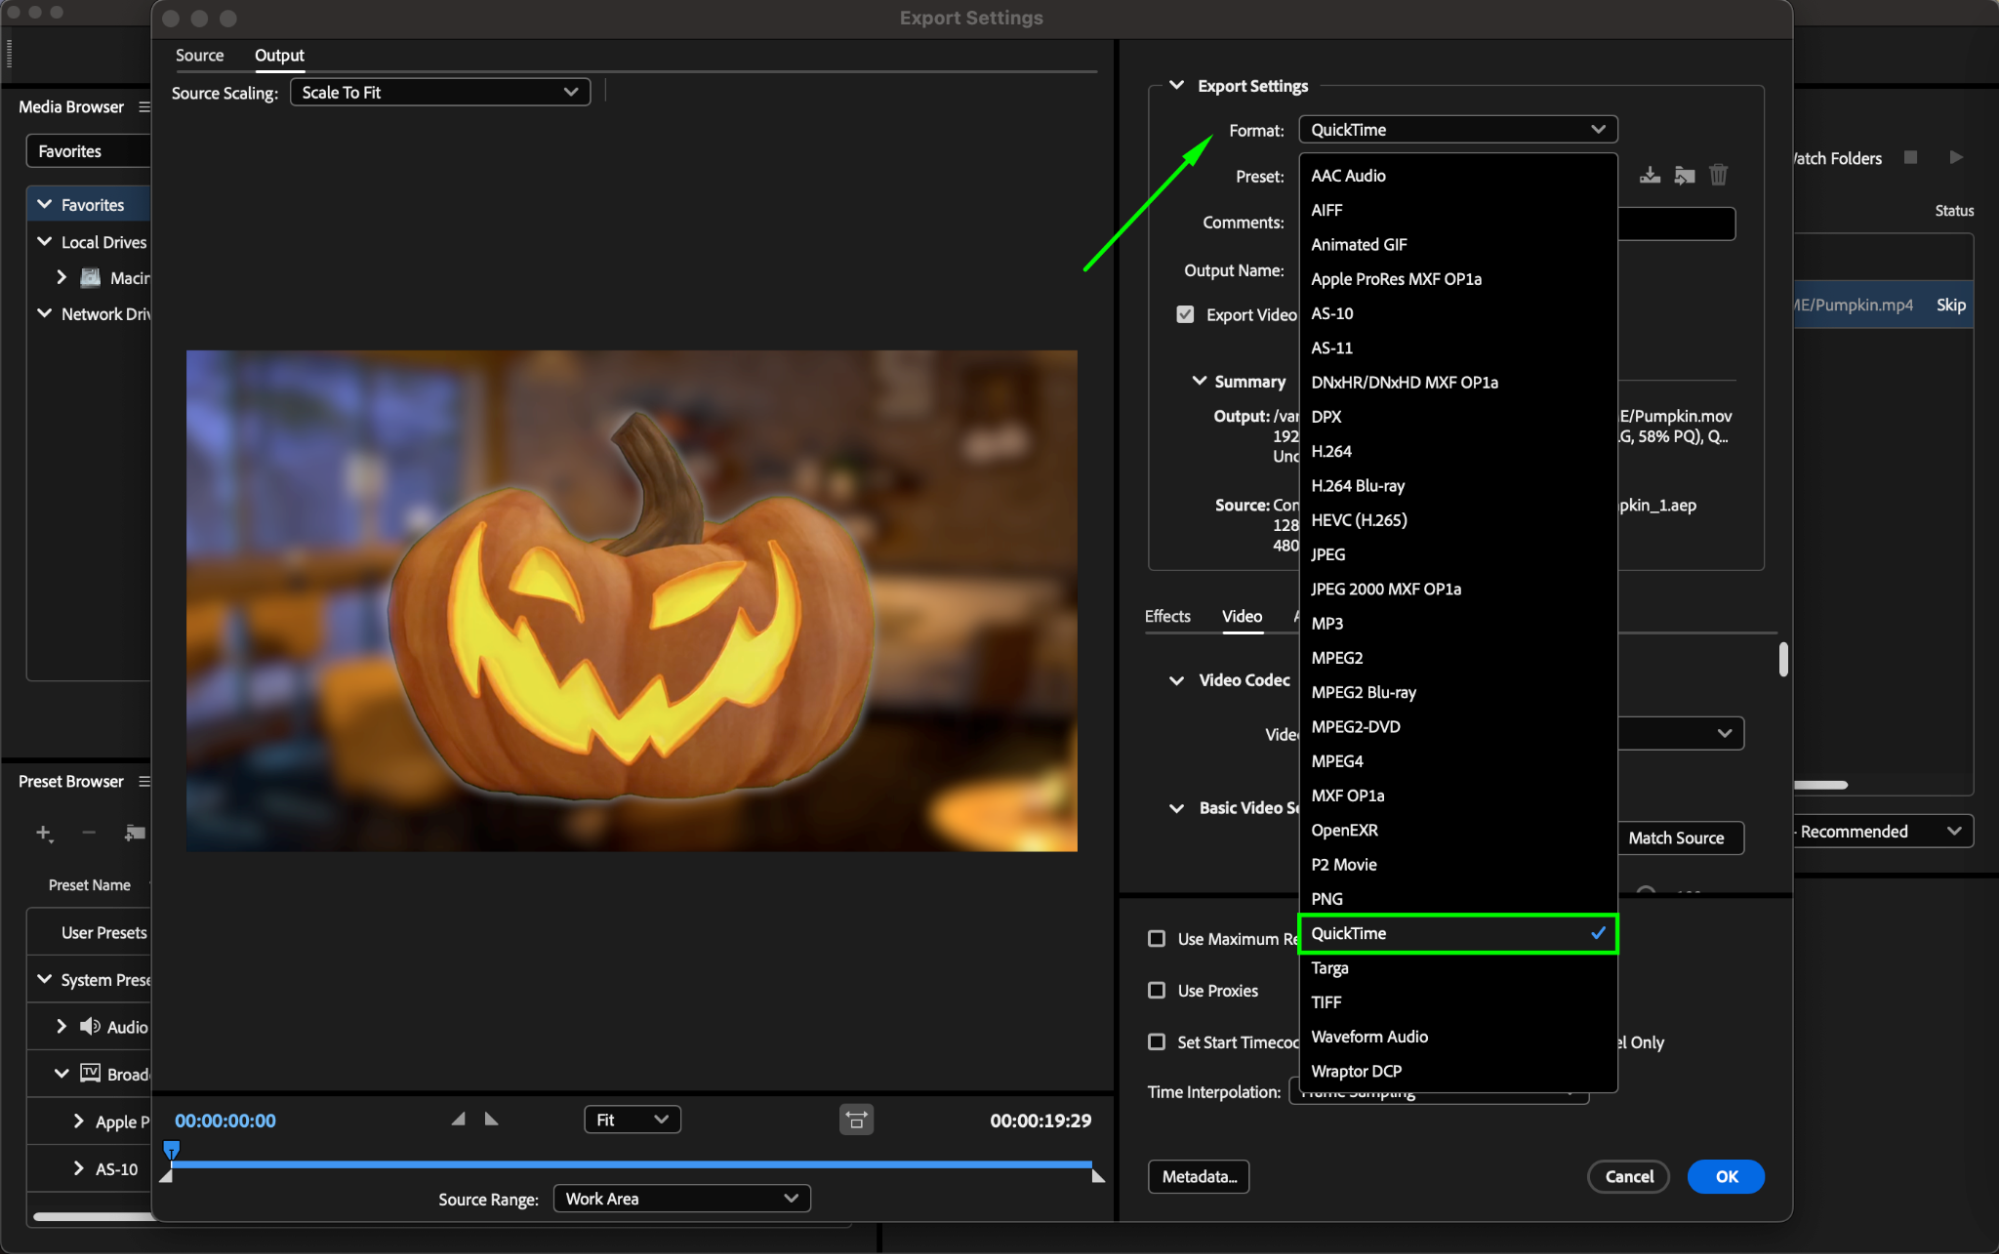 Step 5: Select Preset
Choose a suitable preset that aligns with your project’s specifications and output needs.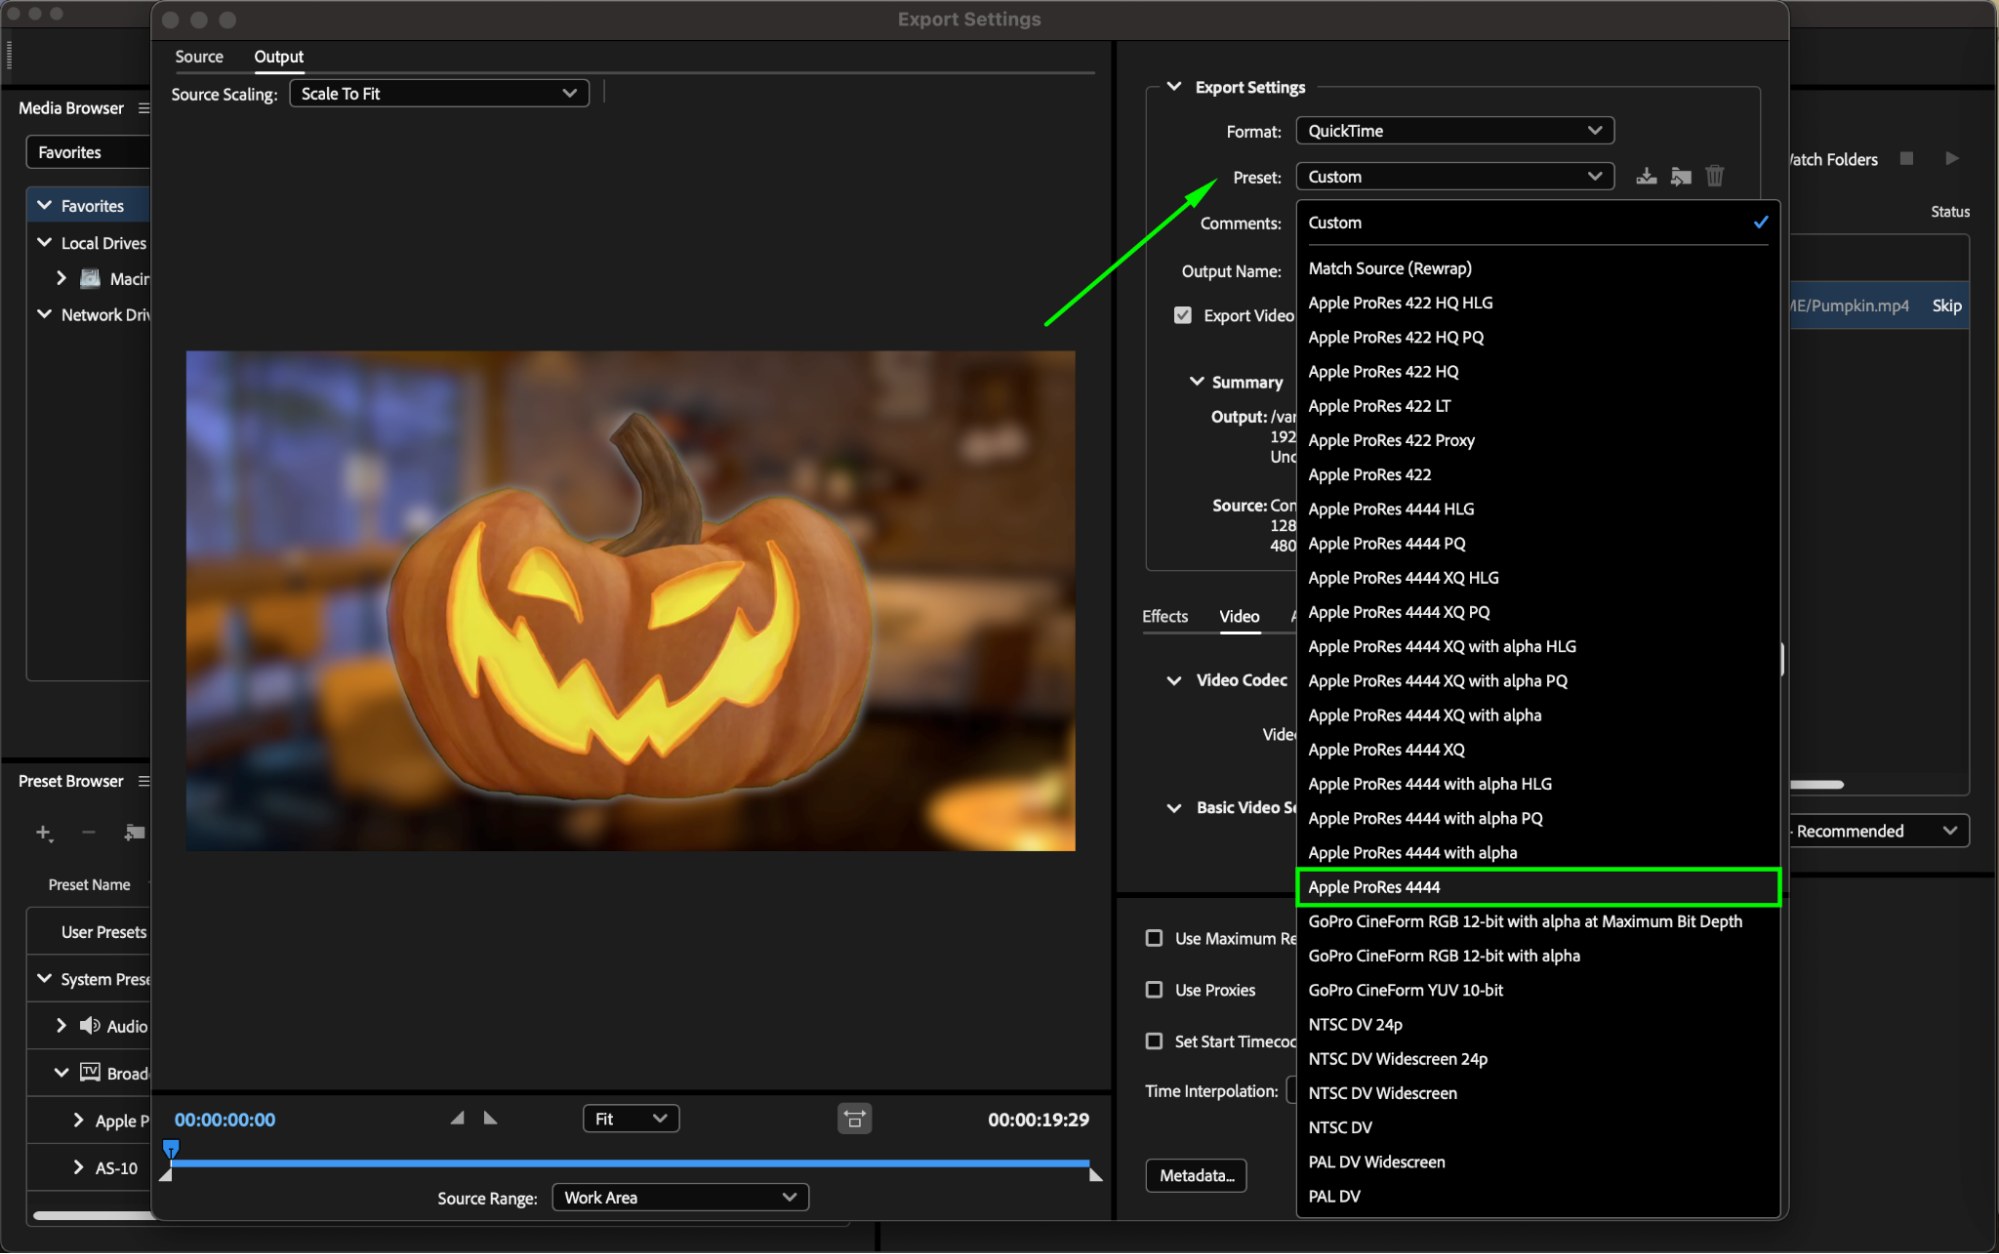 Step 6: Set Output Destination
Click on the project name to choose the location and file name for saving your rendered output.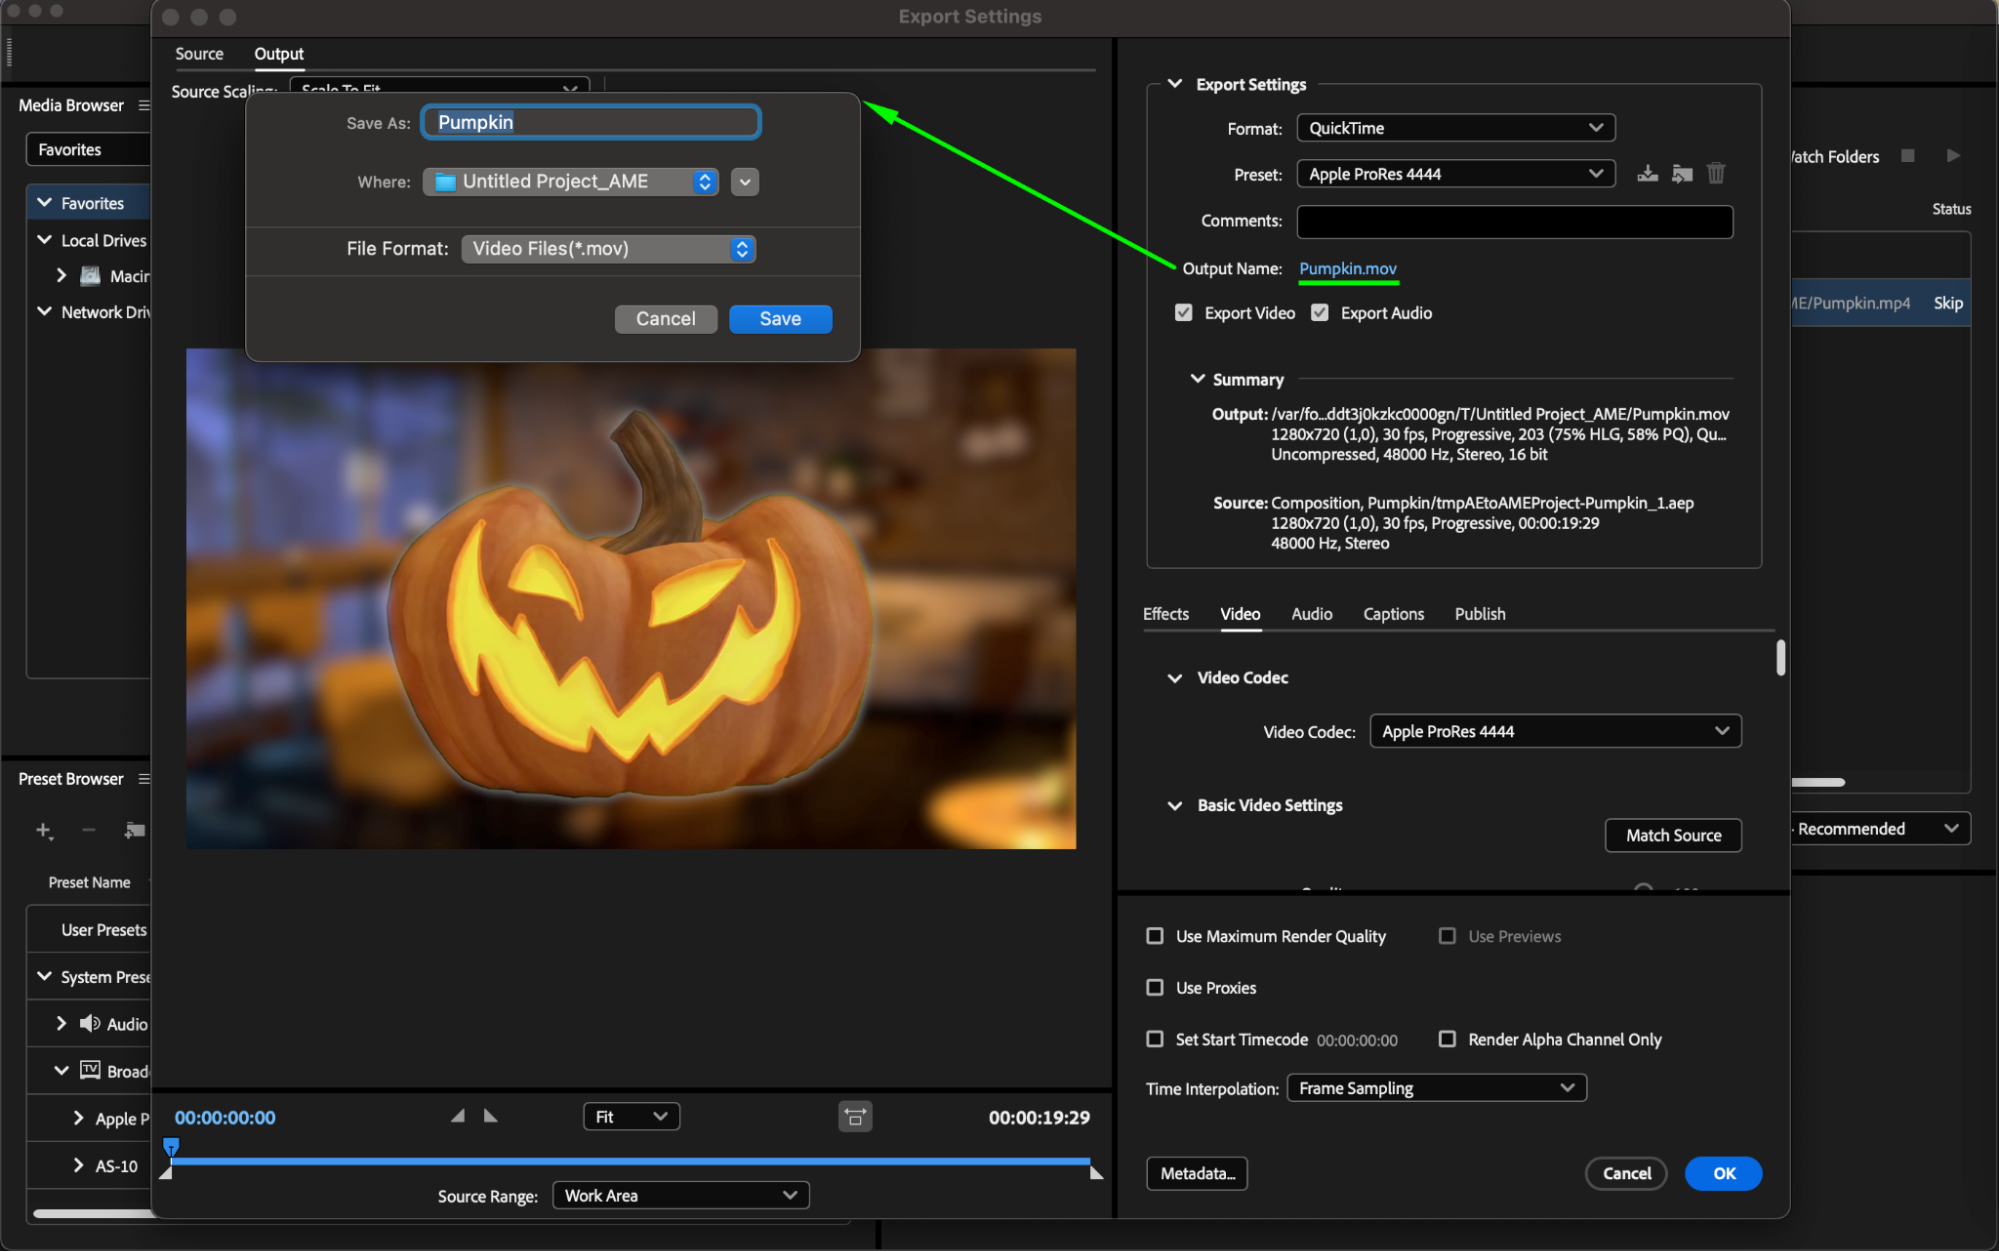
Step 7: Fine-Tune Settings
Utilize additional settings such as video or audio adjustments to enhance your project further.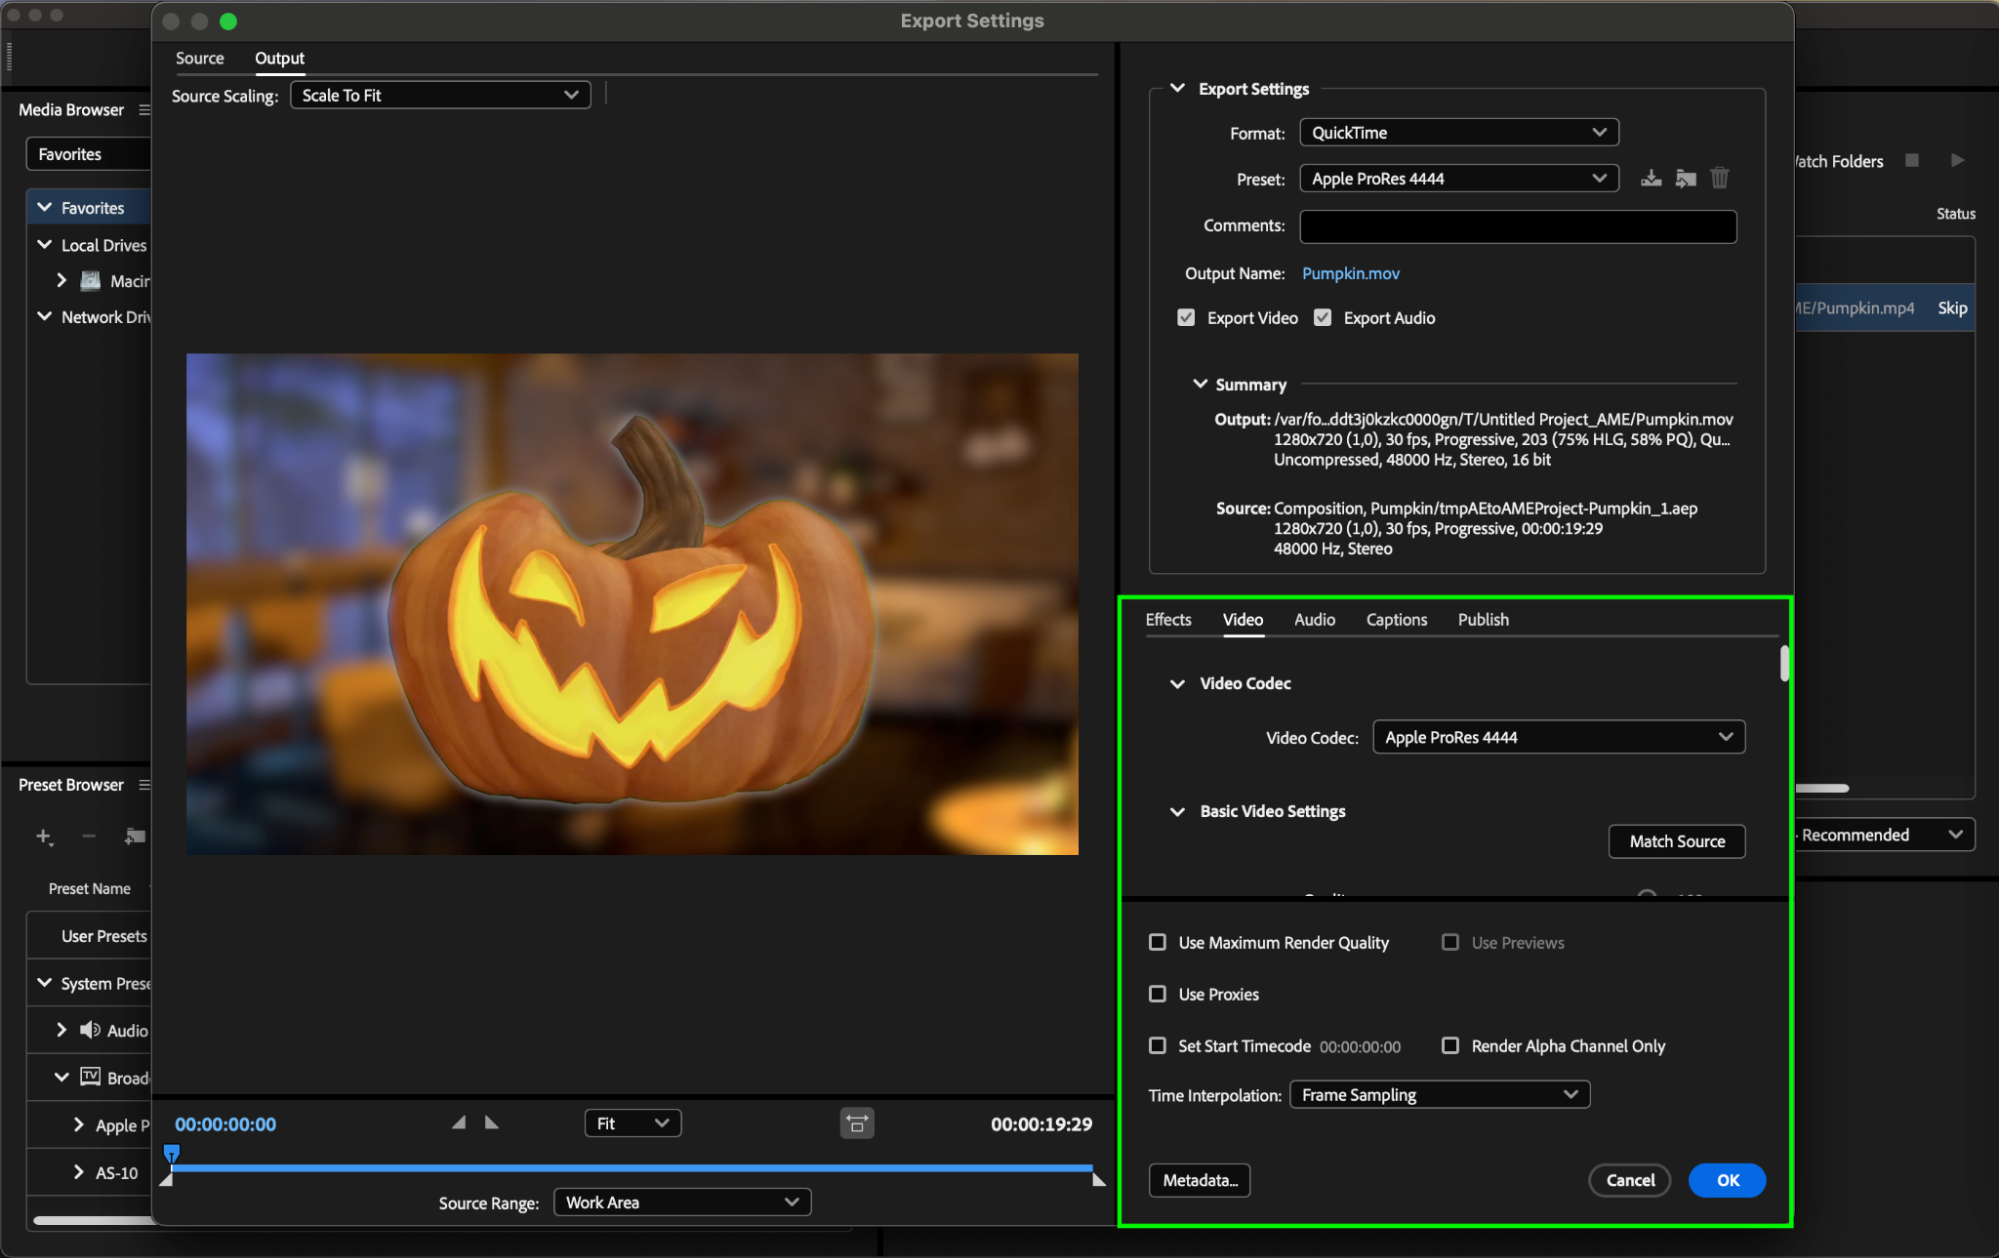
Step 8: Start Rendering
Once you’ve customized the settings, click on the “Start Queue(Play)” button to begin the rendering process.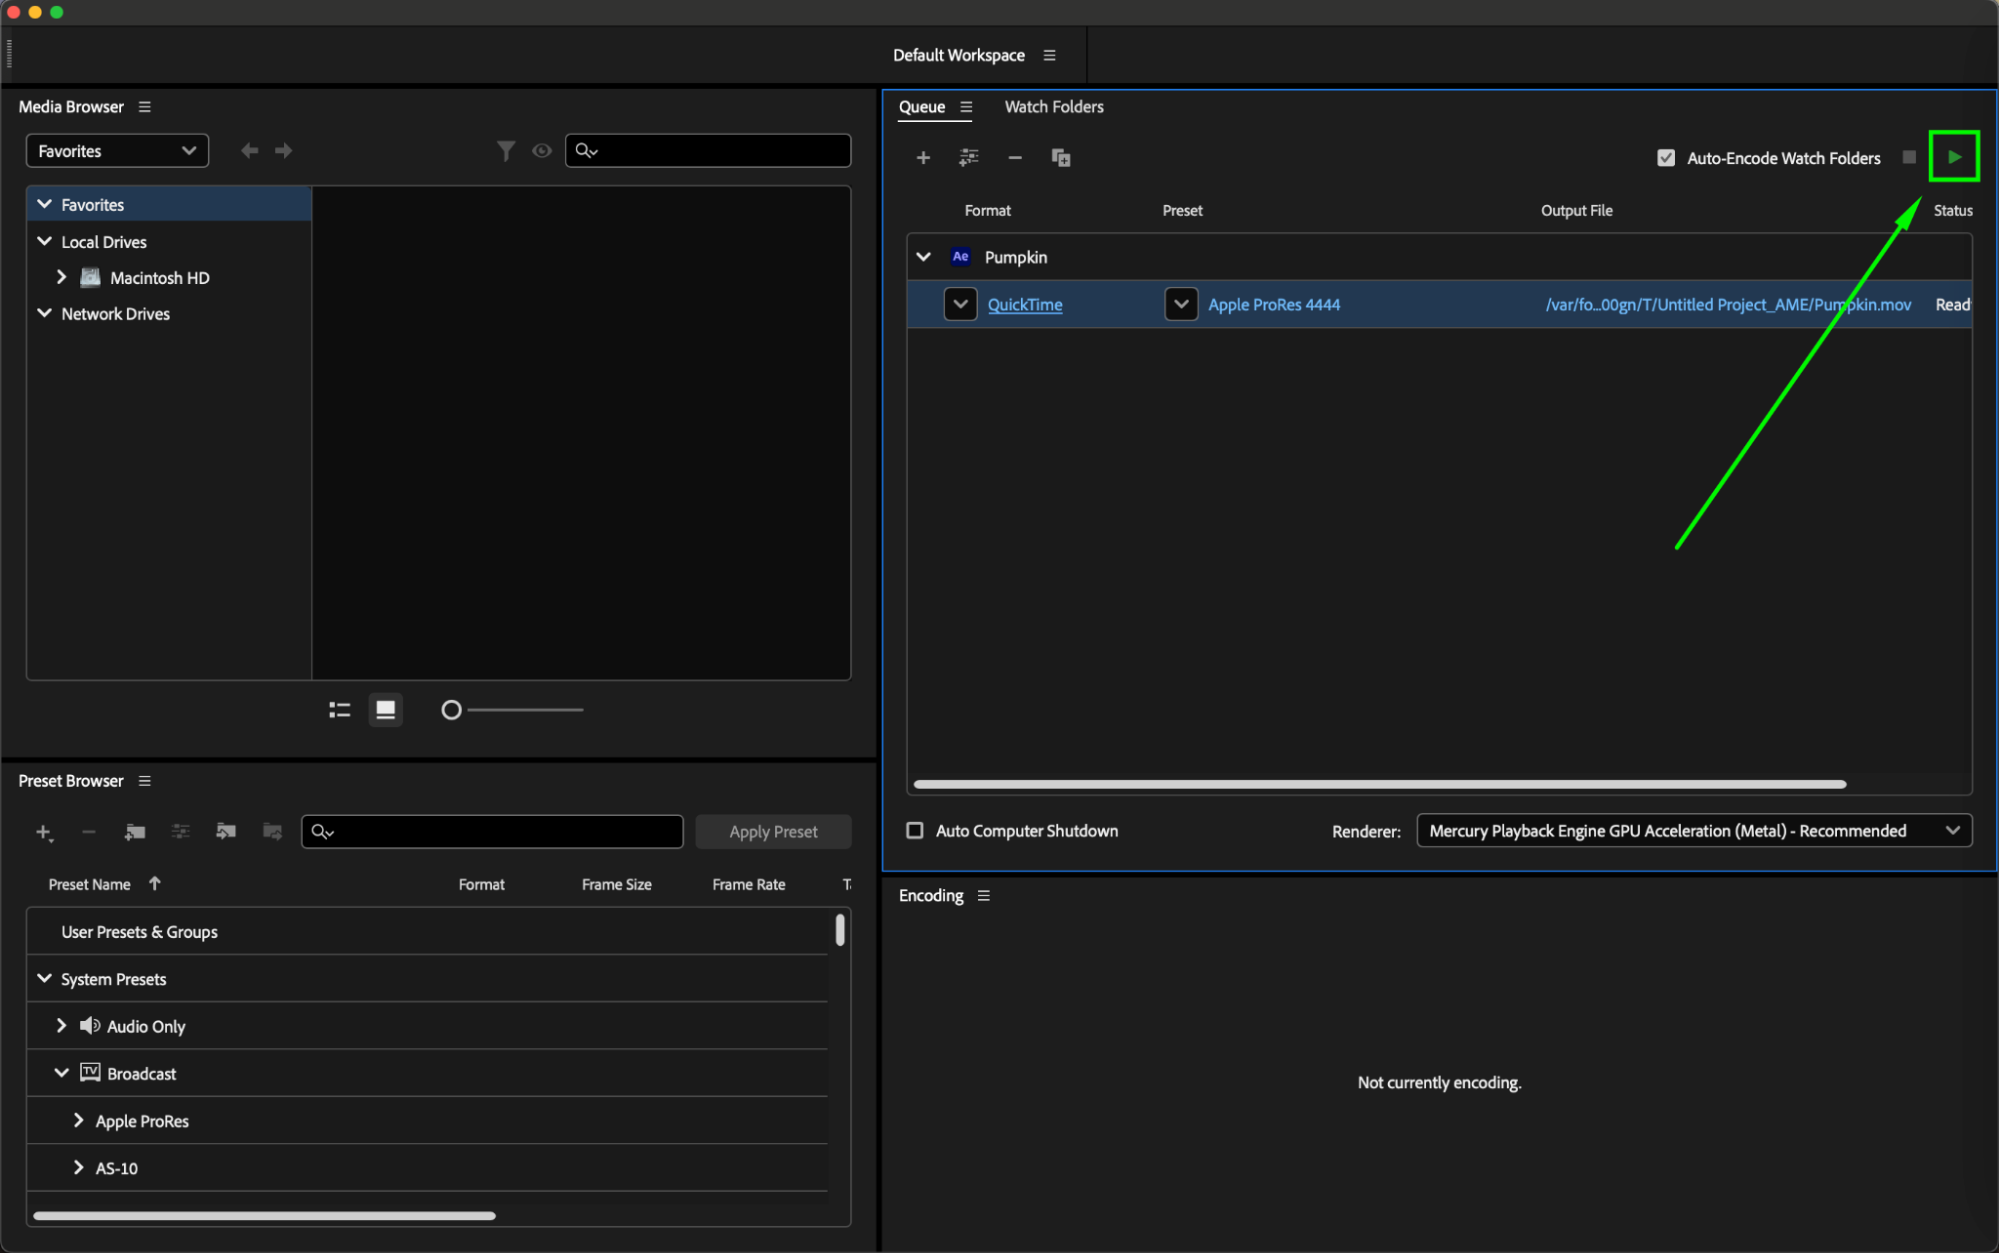
Step 9: Review Output
After rendering is complete, review the output file to ensure it meets your expectations in terms of quality and content.
Conclusion
Rendering After Effects projects with Media Encoder offers a faster and more efficient workflow. Experiment with different settings and presets to find the perfect balance between file size and output quality. Take advantage of customization options to deliver outstanding videos. Happy rendering!

