Mastering After Effects Rendering for YouTube
Crafting High-Quality Videos for YouTube: An Introduction
Are you a content creator striving to craft captivating videos for YouTube? Rendering your projects in After Effects can significantly enhance their quality, ensuring they shine on the platform. Mastering the rendering process is crucial for striking the right balance between quality and efficiency. In this guide, we’ll walk you through the essential steps and best practices to render high-quality videos that stand out on YouTube using Adobe Media Encoder.
Get 10% off when you subscribe to our newsletter

Step 1: Preparing Your Composition
Before diving into rendering settings, ensure your composition is perfectly set up with the desired resolution, frame rate, and duration in After Effects. Then, head to the Composition menu and select “Add to Adobe Media Encoder Queue” to initiate the rendering process.


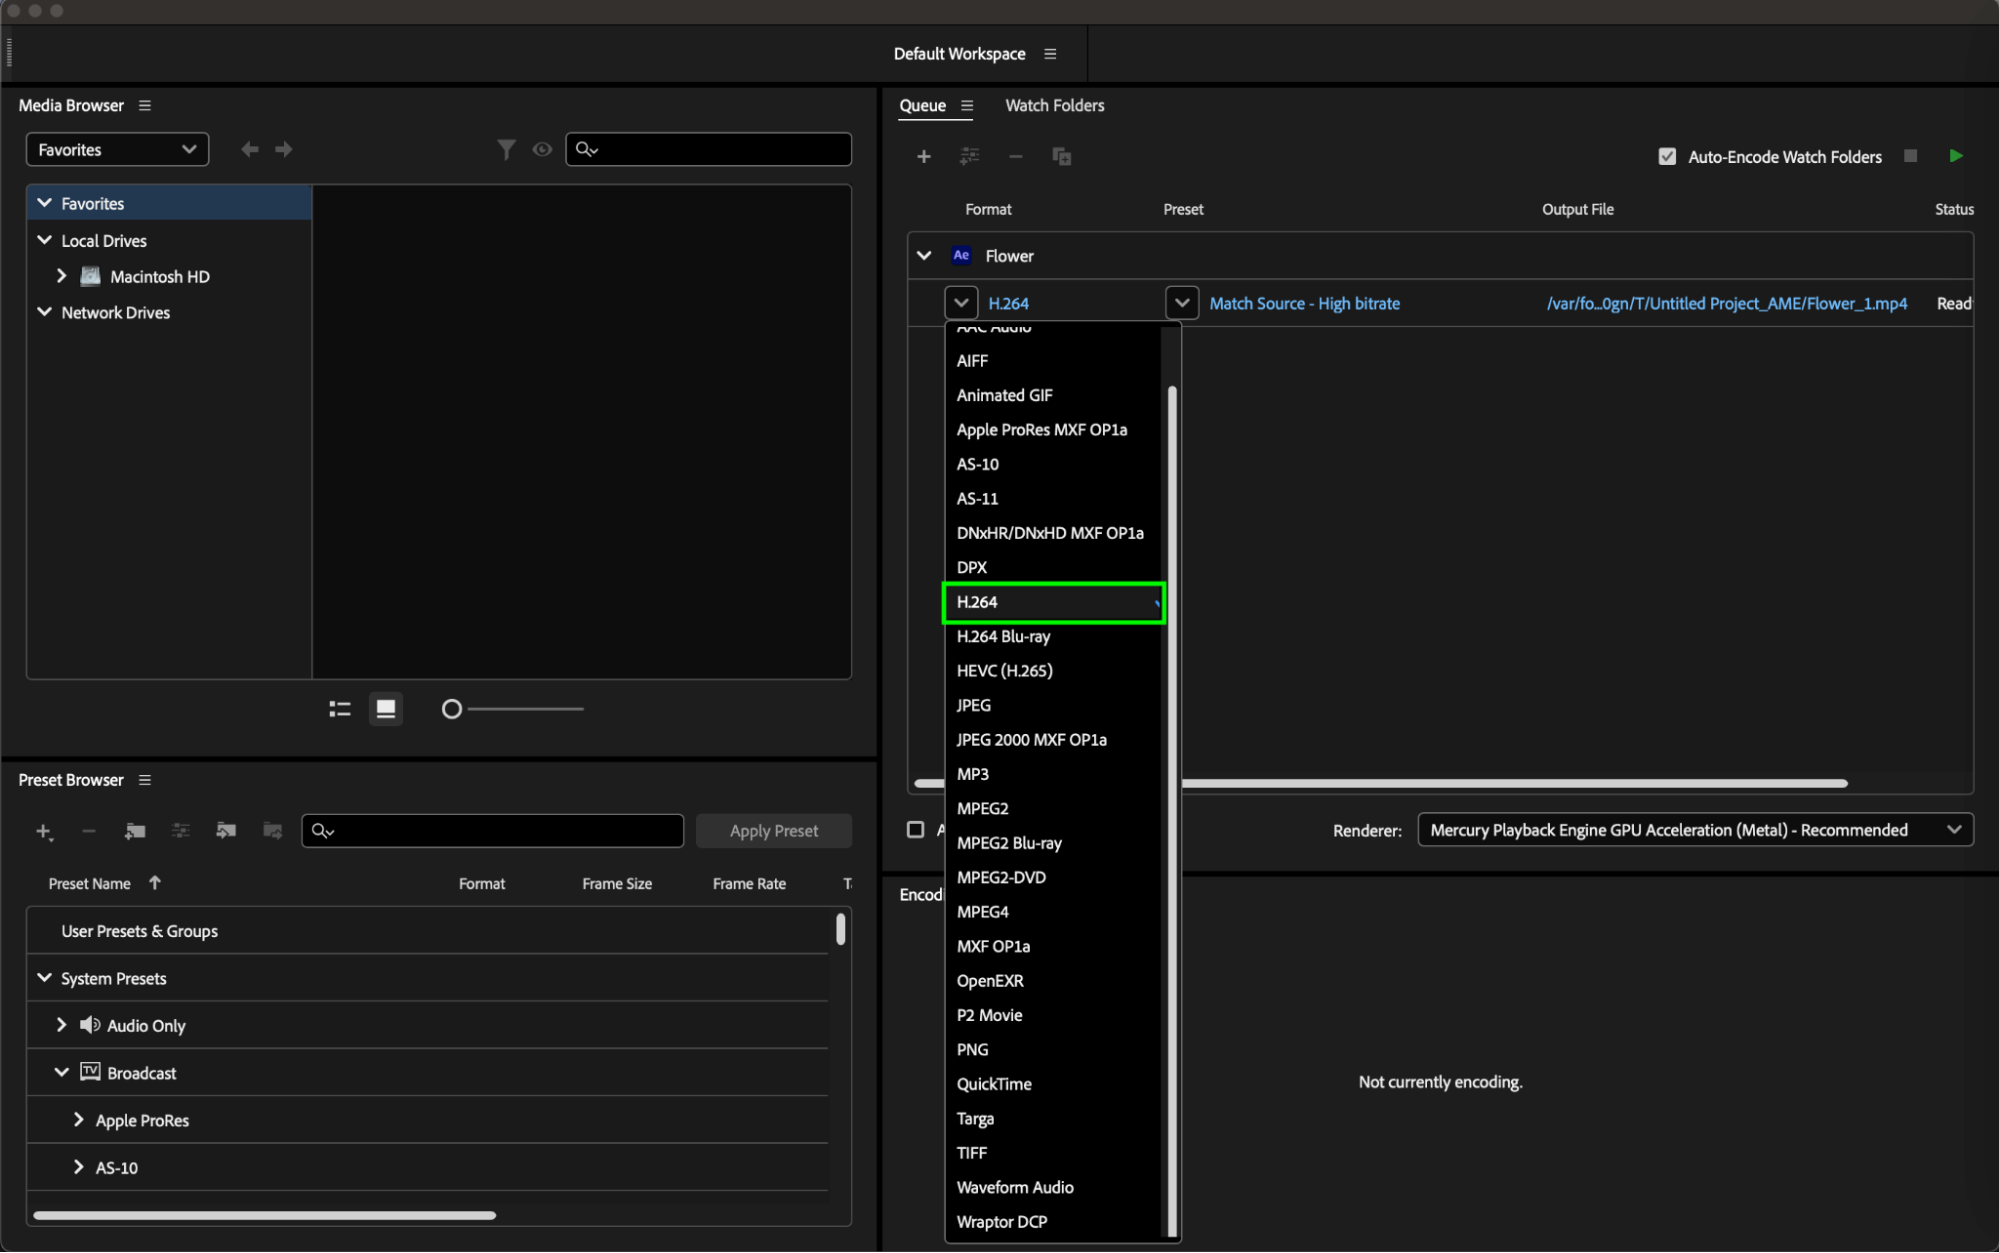
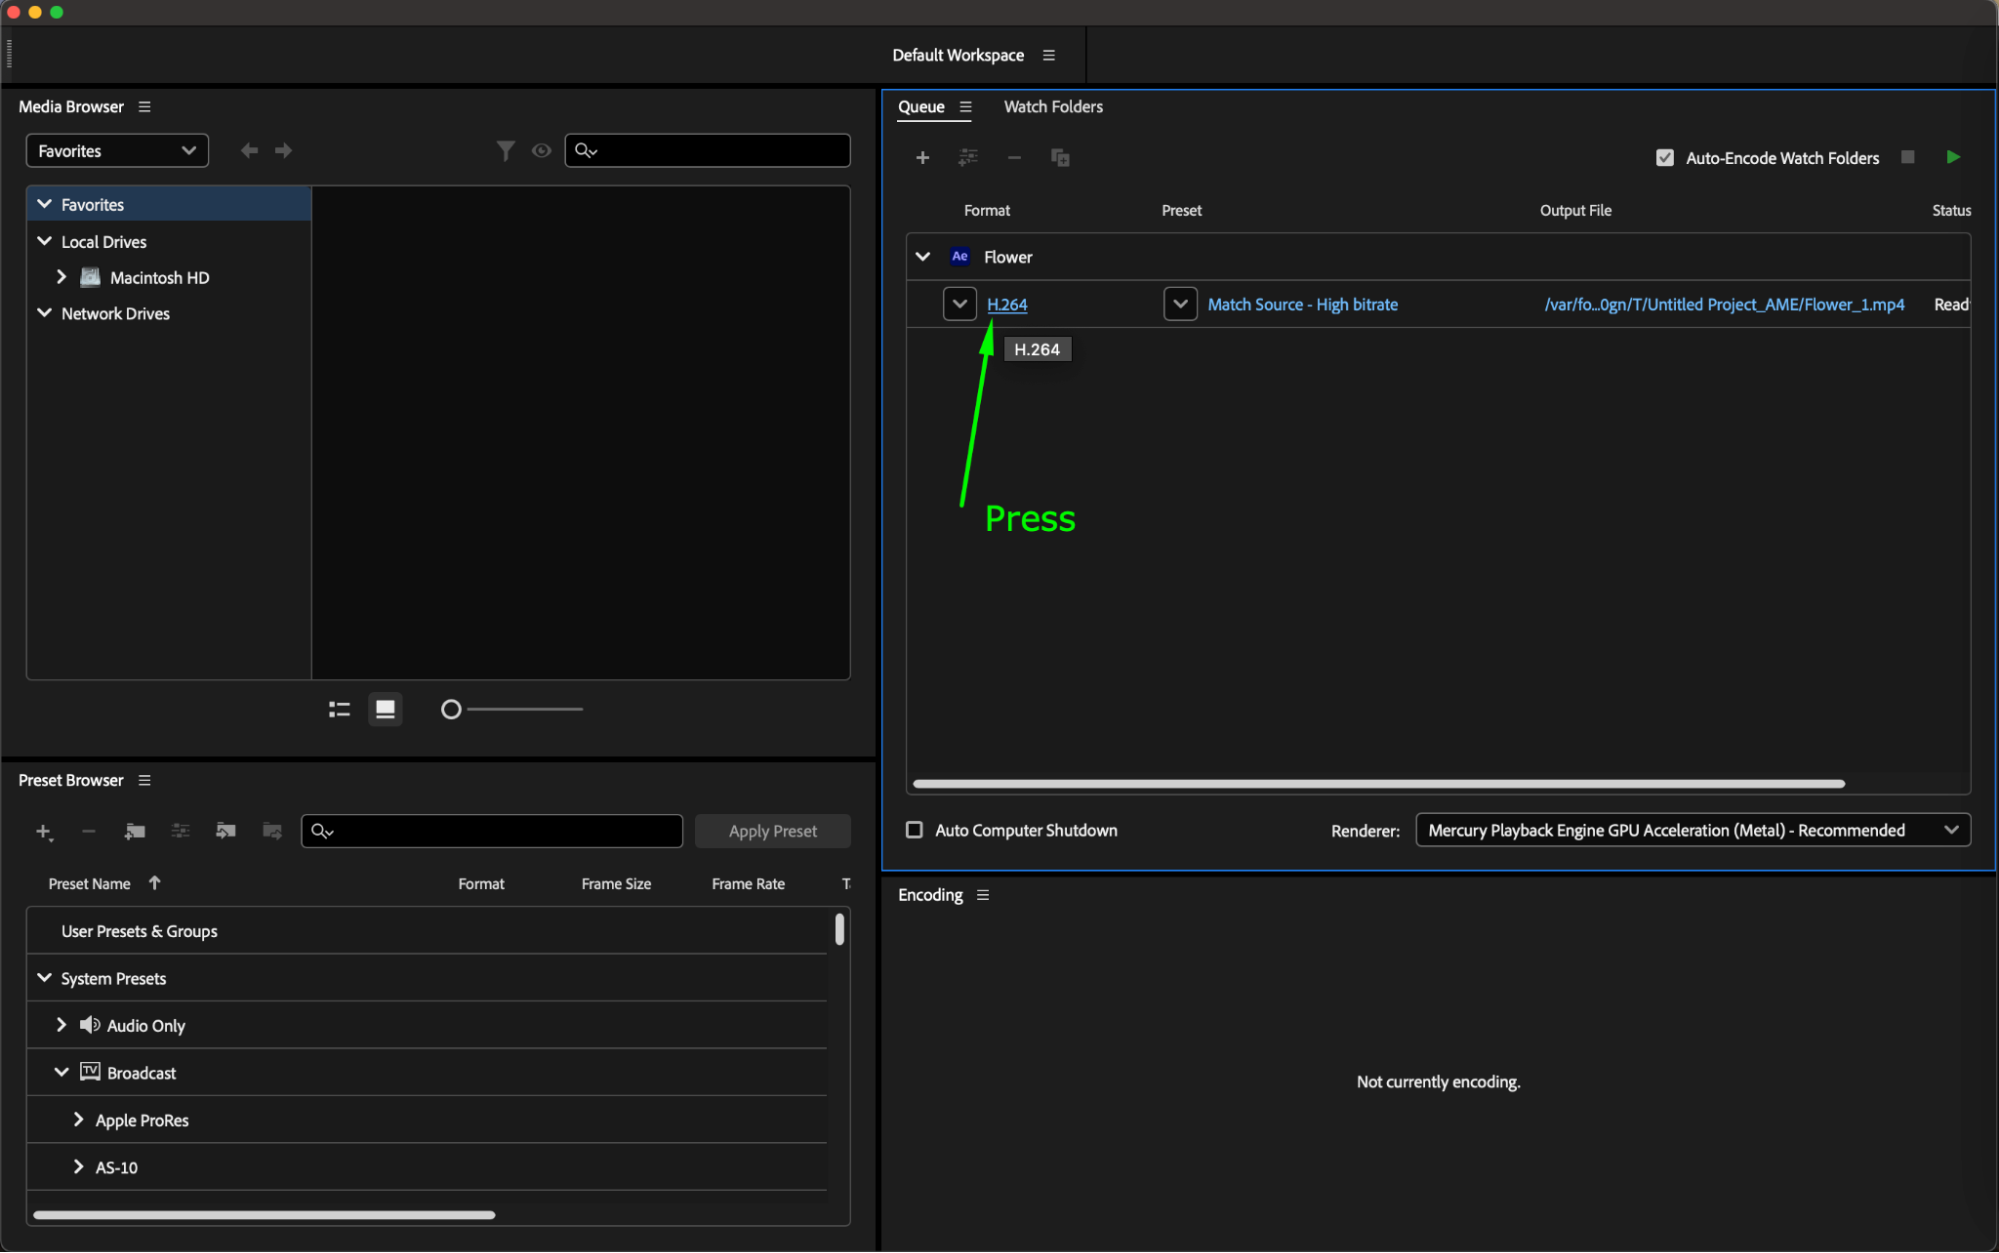
Step 2: Choosing the Right Format and Codec
For optimal results on YouTube, export your videos in H.264 codec with the .mp4 file format. This format is widely supported and offers an excellent balance between quality and file size. Match your composition settings with common resolutions like 1080p or 4K and ensure the frame rate aligns with the original footage to prevent playback issues.
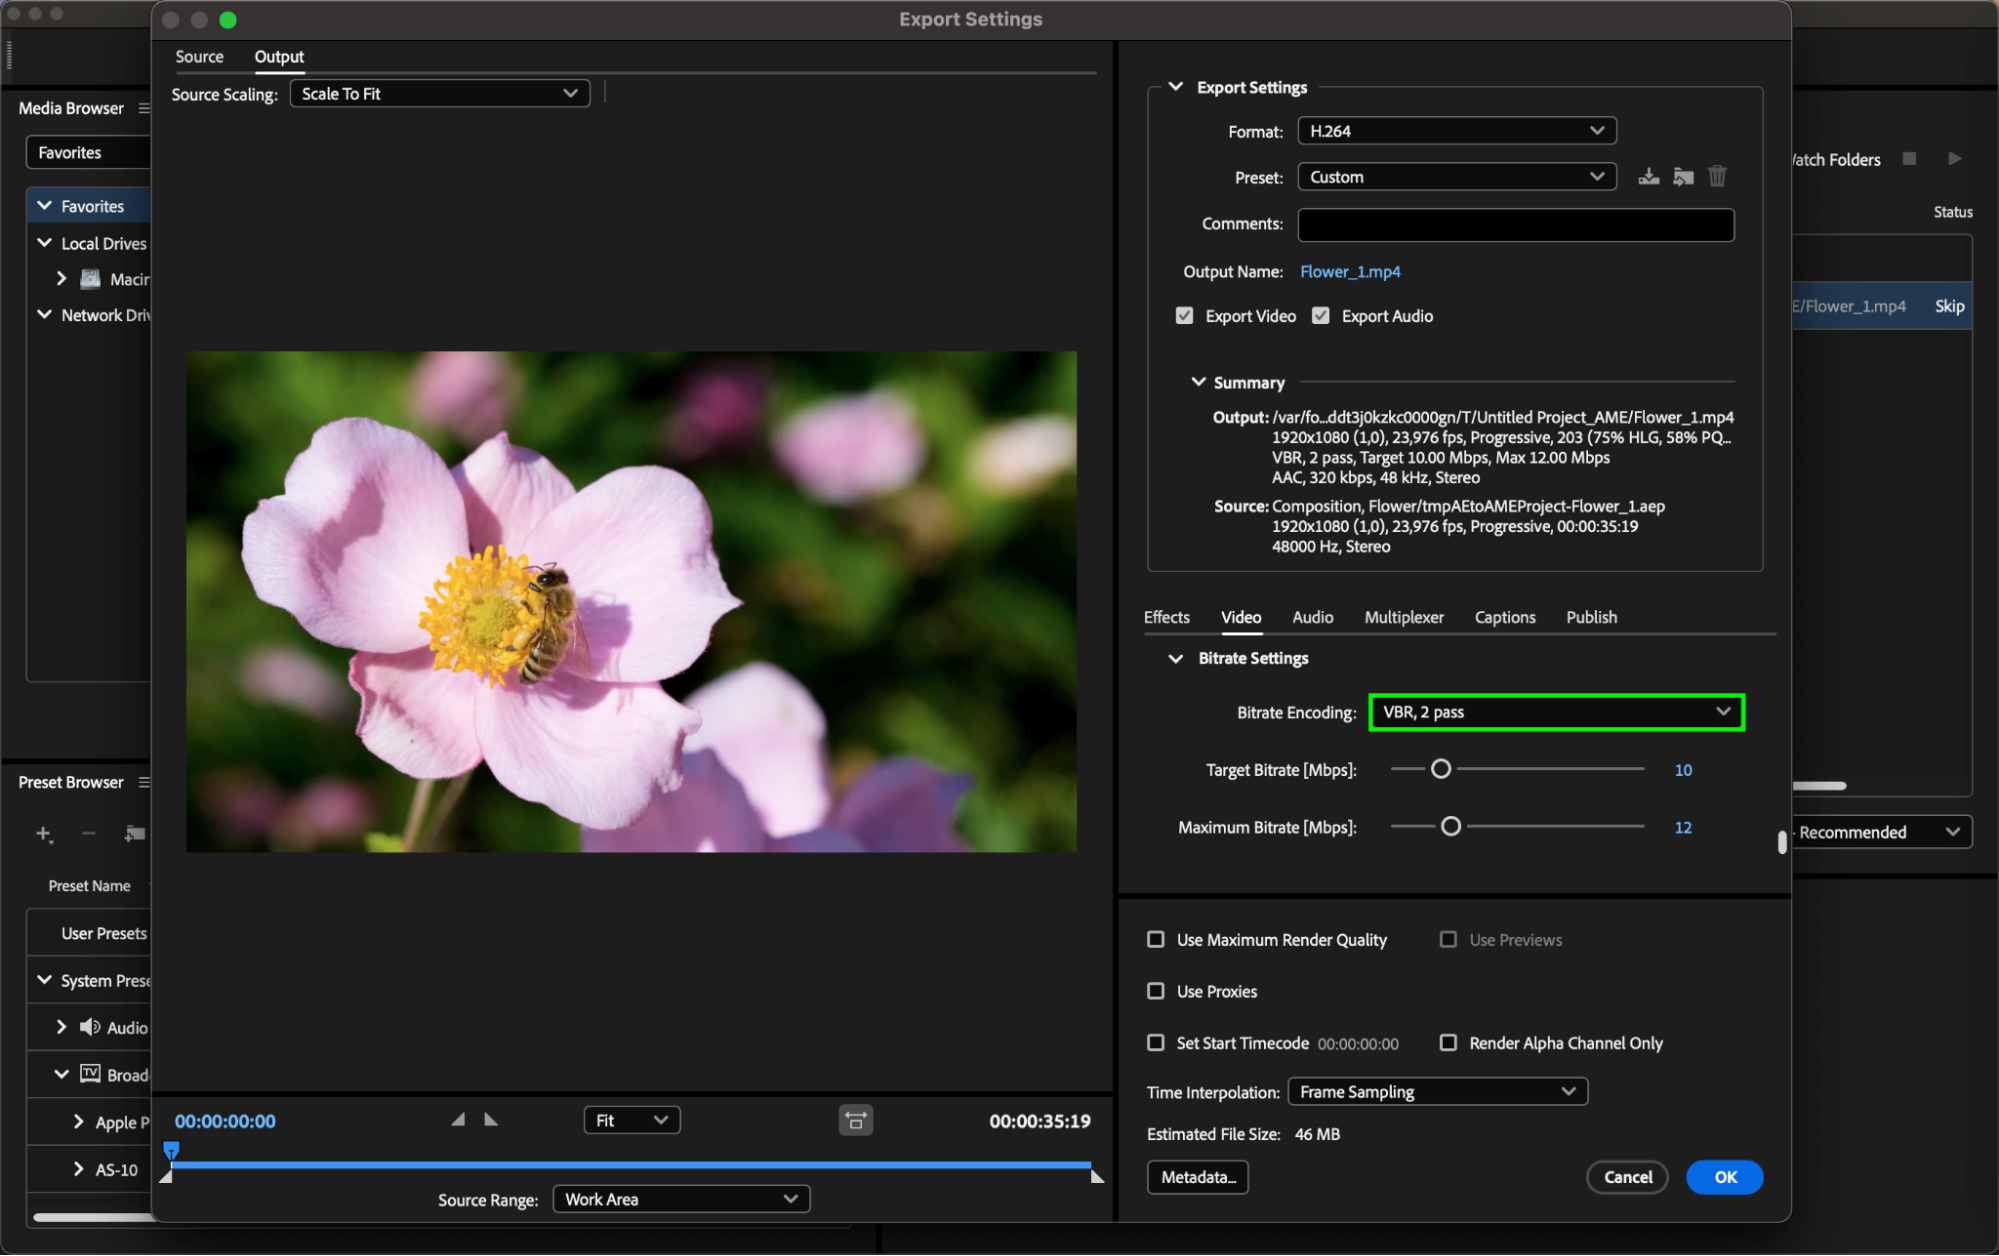
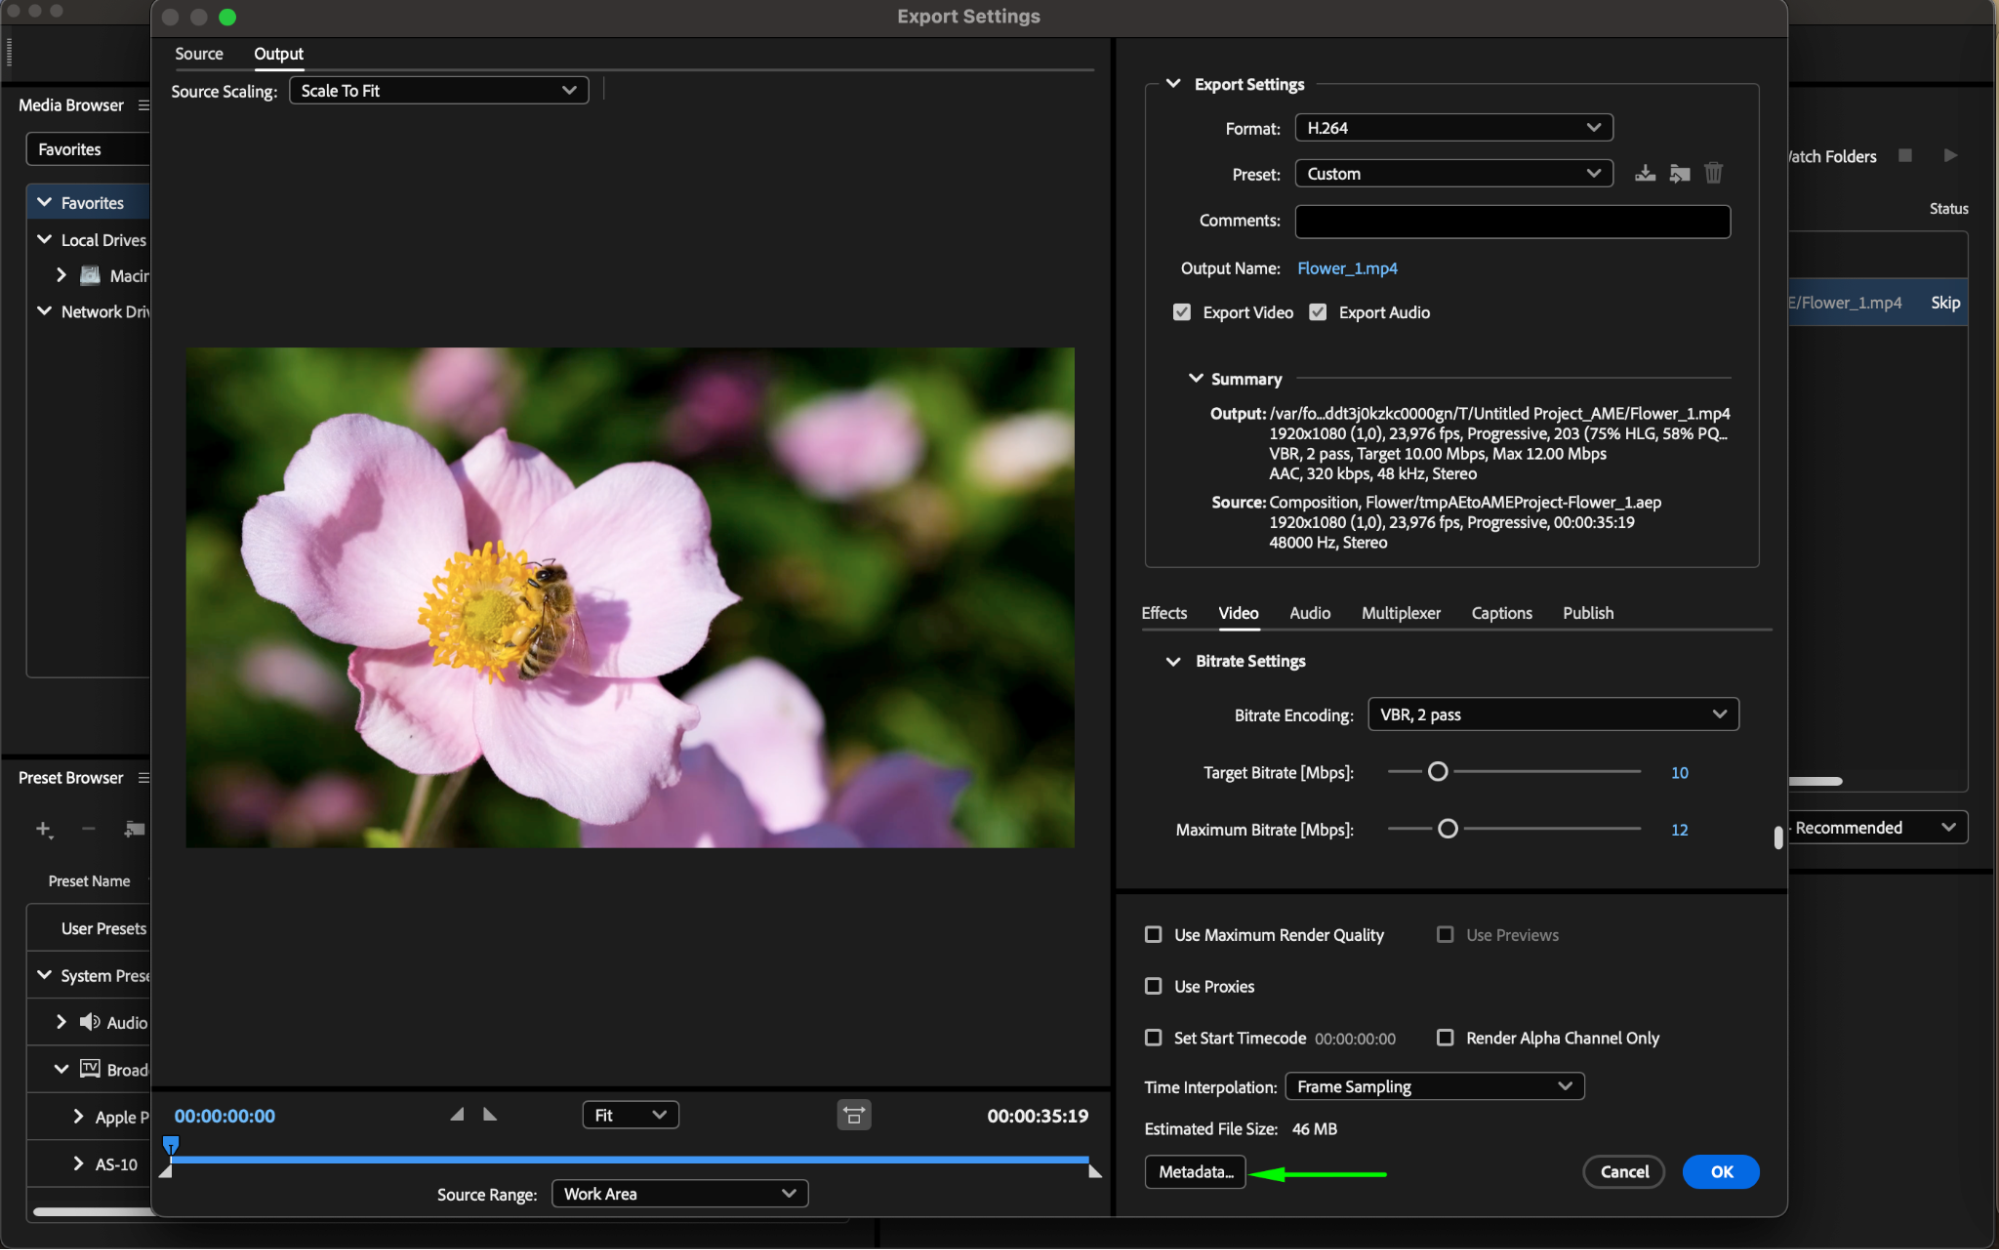
Step 3: Setting Bitrate and Encoding Options
Adjusting the bitrate is crucial as it determines video quality and file size. For YouTube, consider a bitrate of 8 Mbps for 1080p videos and 20 Mbps for 4K videos to maintain quality while managing file size. Additionally, enable VBR 2 pass encoding for smoother gradients and reduced compression artifacts, ensuring optimal visual quality during playback.
Get 10% off when you subscribe to our newsletter
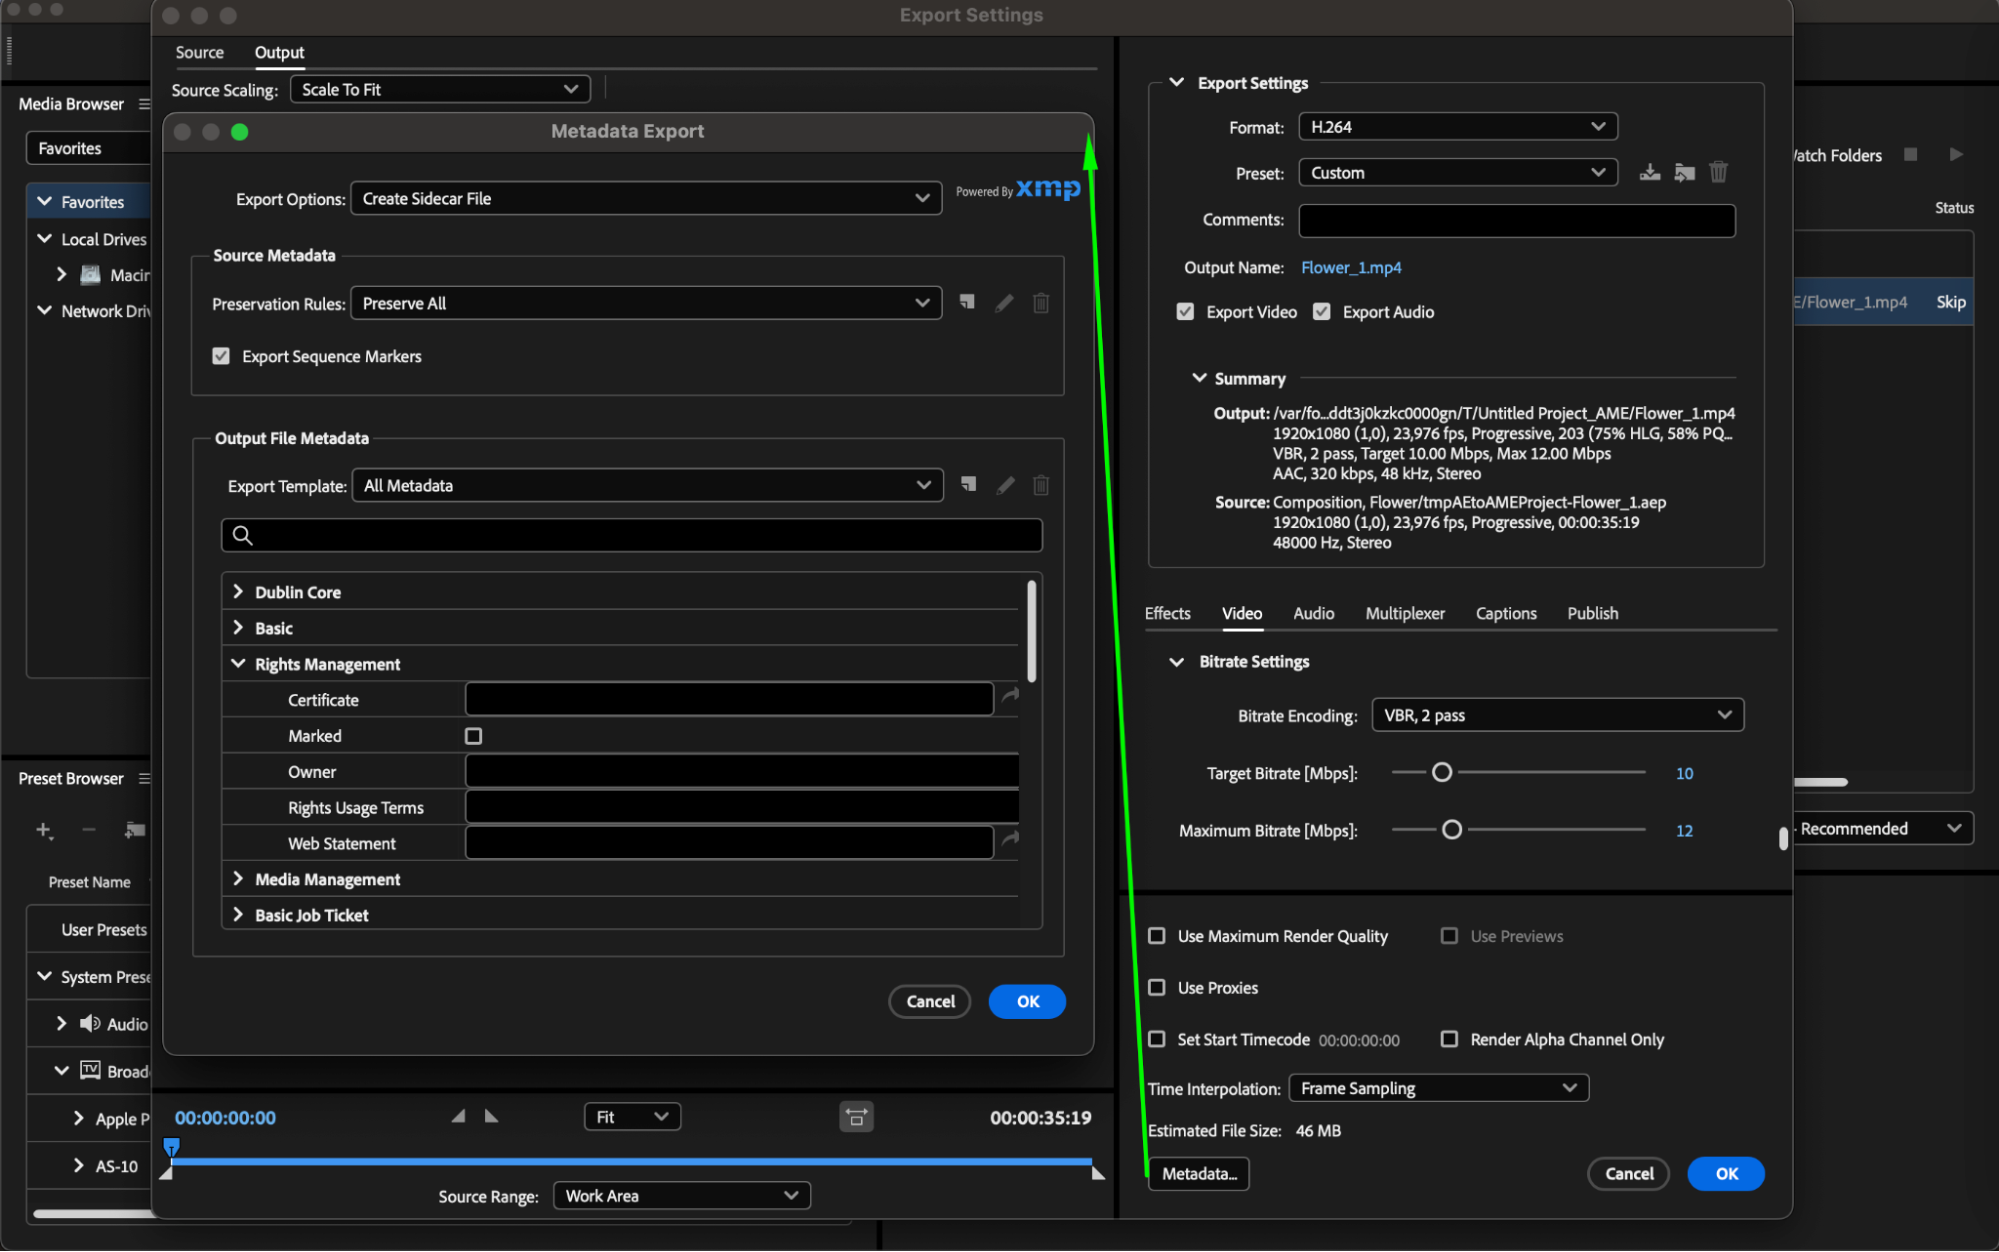
Step 4: Adding Metadata
Before uploading, include metadata such as titles, descriptions, tags, and custom thumbnails to boost visibility on YouTube and attract more viewers.
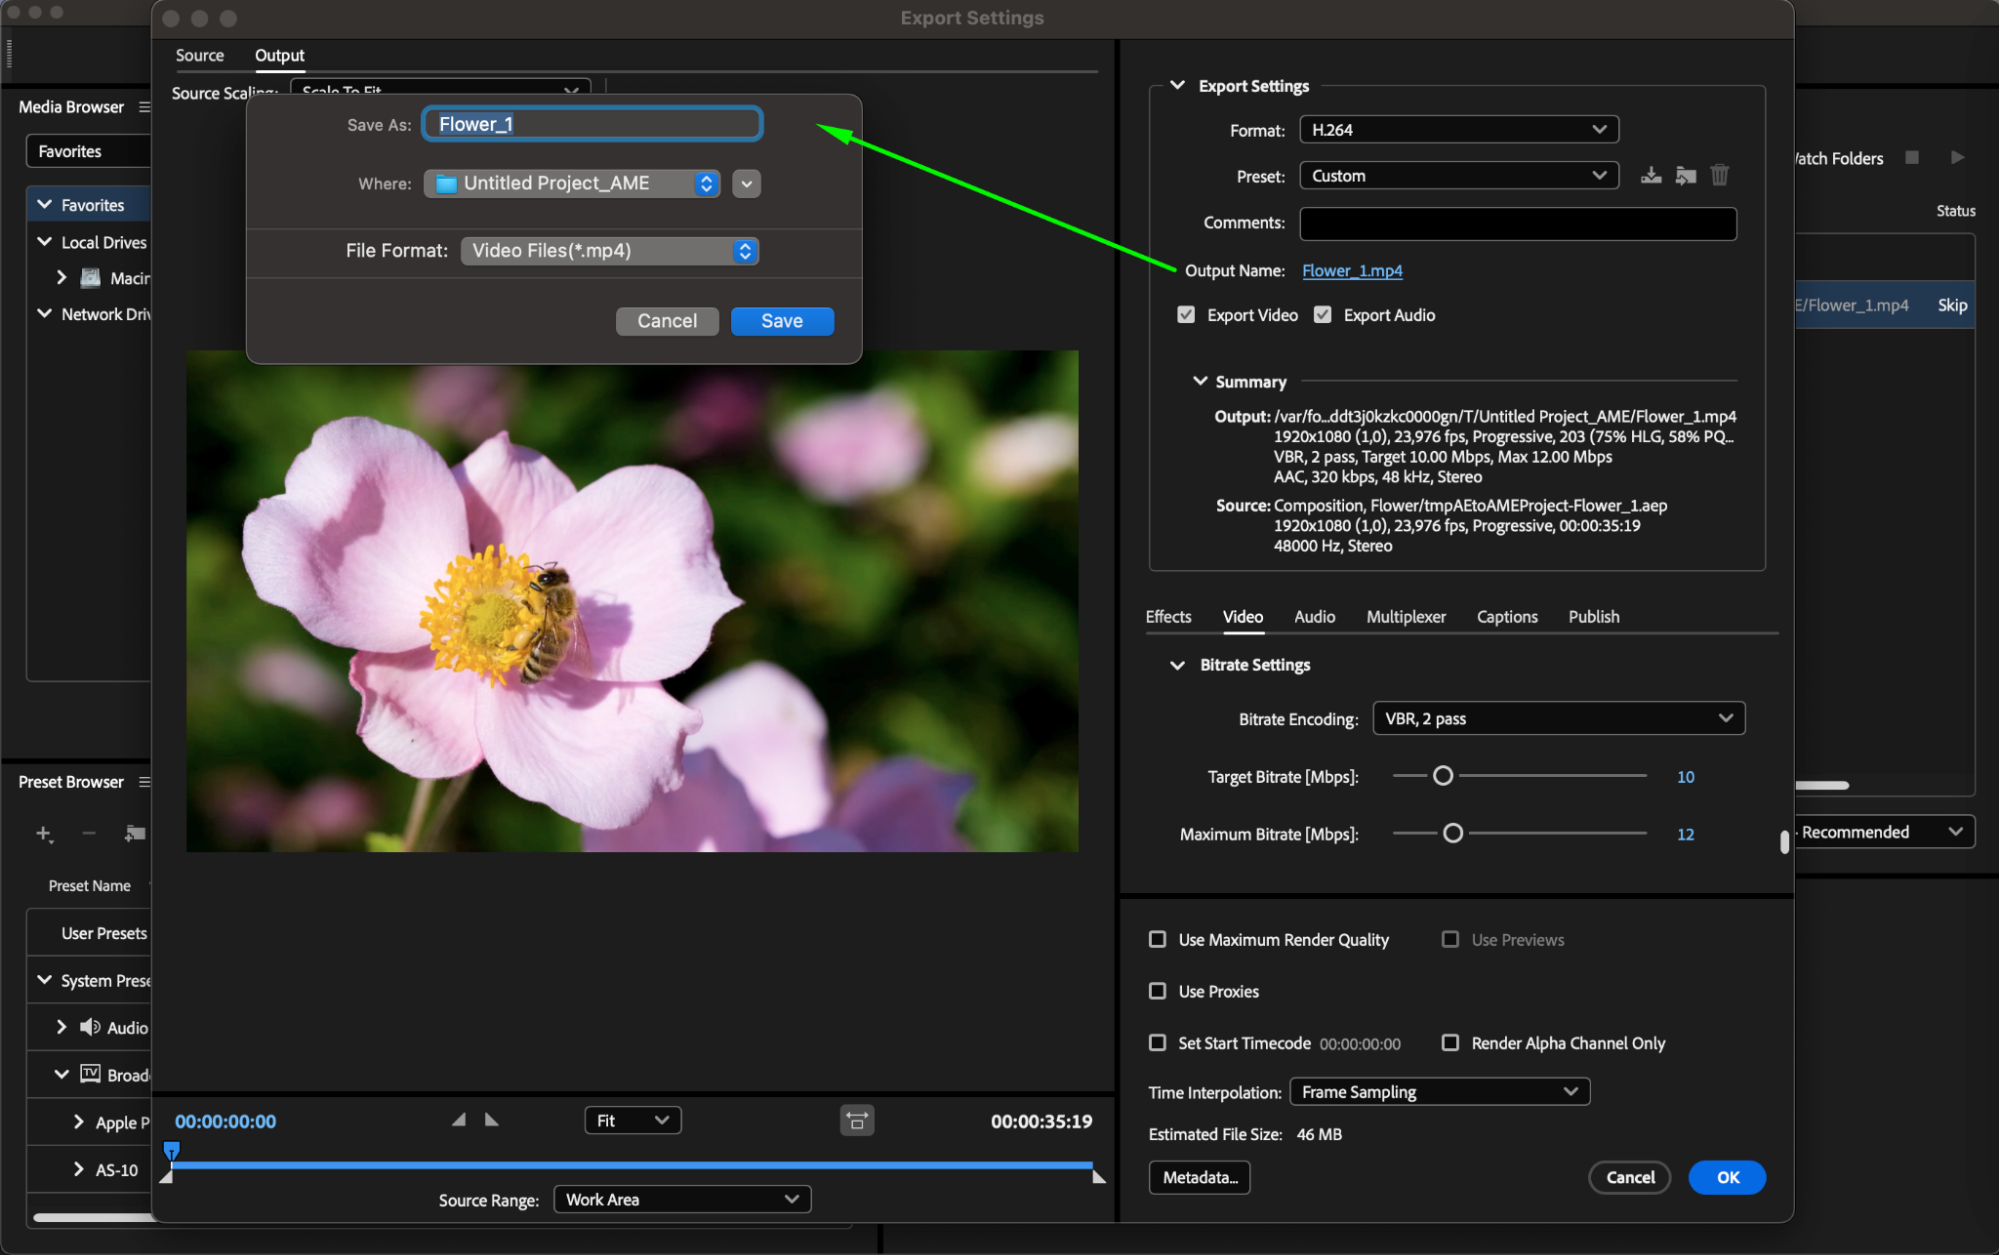
Step 5: Choosing Output Name and Destination
In the “Output Name” section, select a filename and location for saving your file. This step ensures that your rendered video is saved with the desired name and in the specified directory on your computer.
Get 10% off when you subscribe to our newsletter
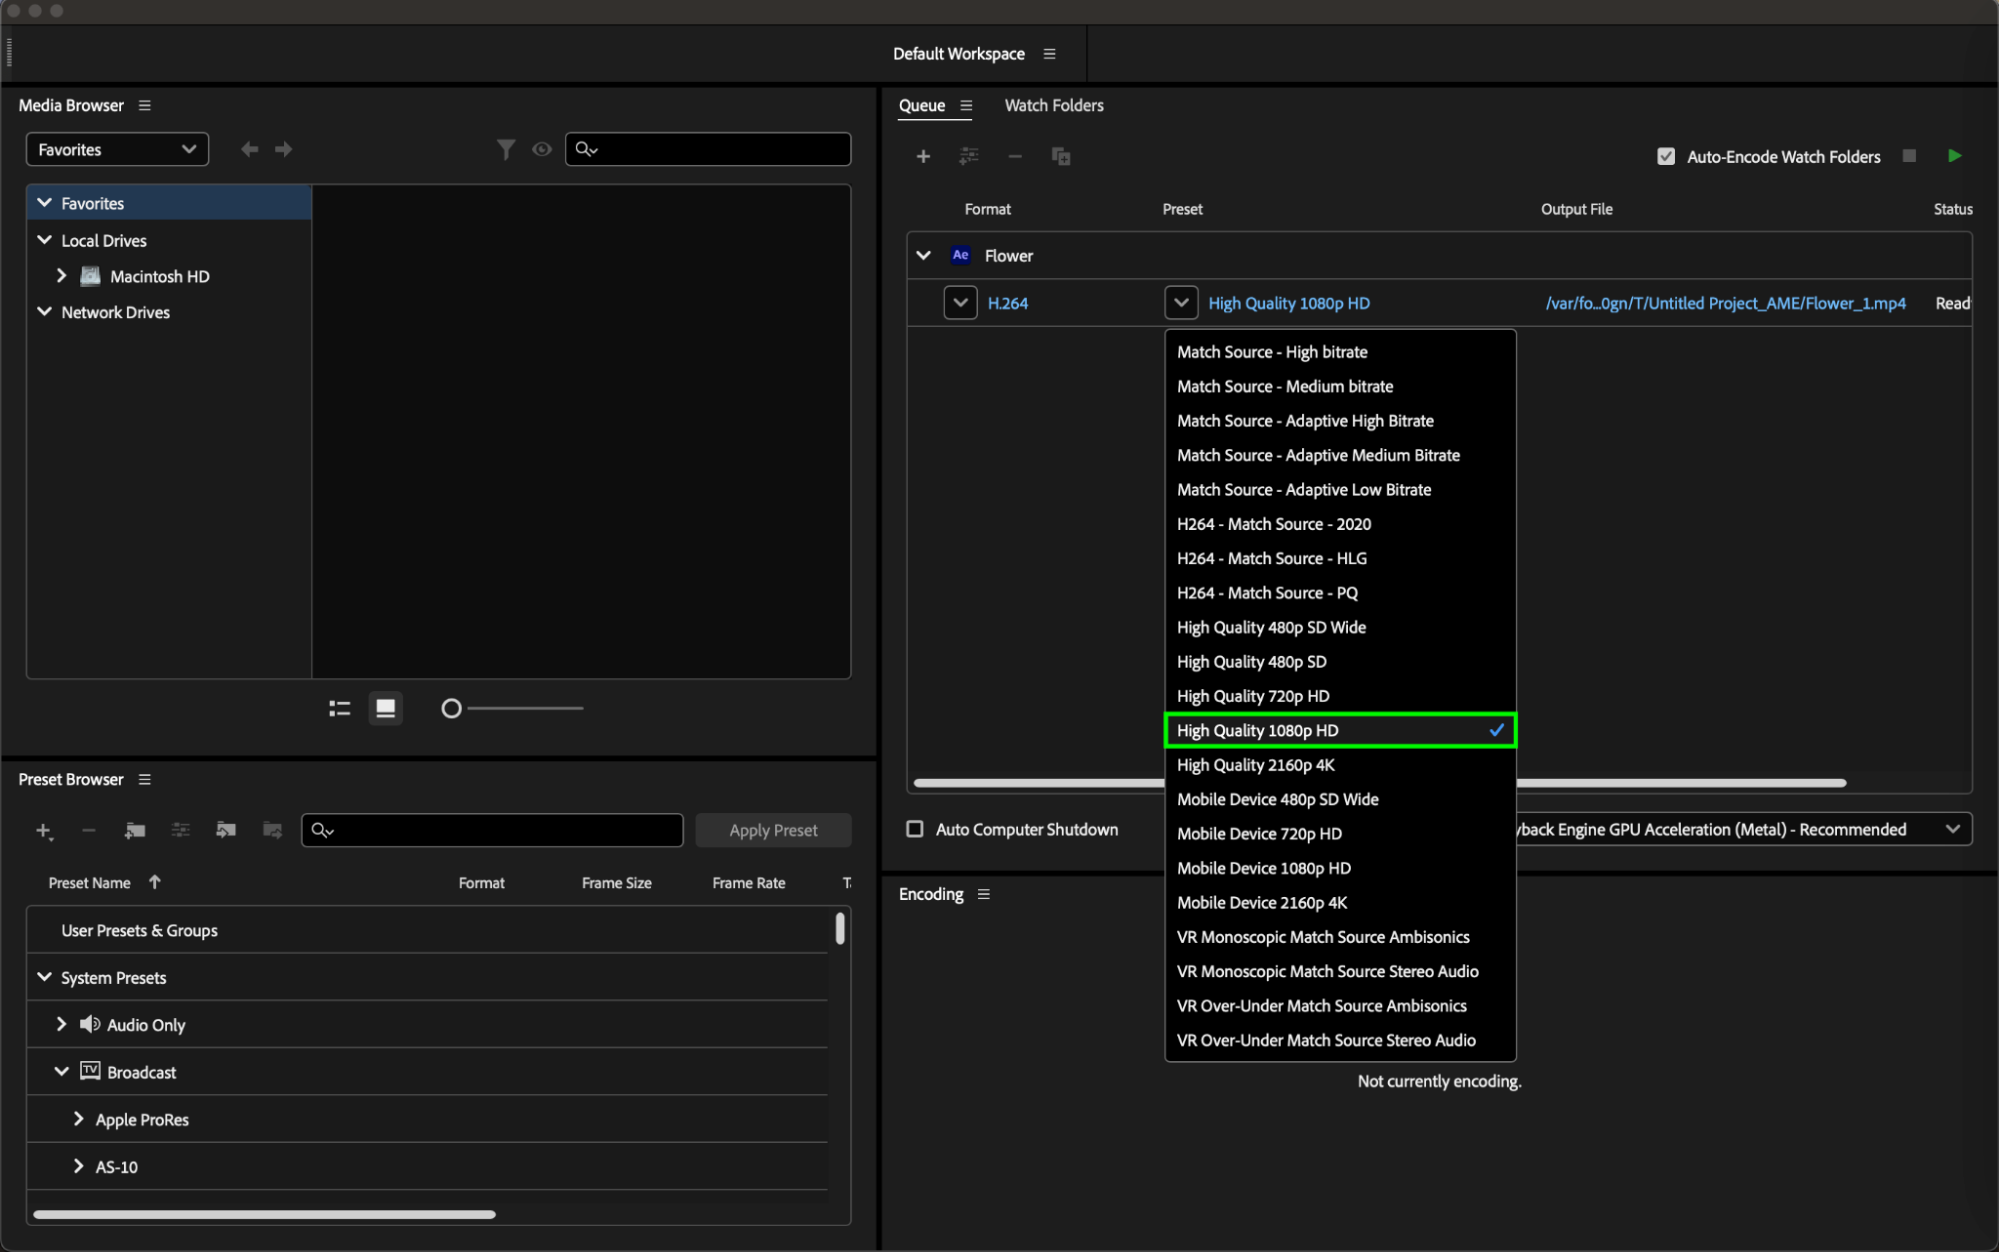
Step 6: Selecting a Suitable Preset for Your Video
Before uploading to YouTube, choose an appropriate preset for your video, such as “High Quality 1080p HD,” for optimal results. This preset is beneficial because it is specifically designed to maintain high quality while ensuring compatibility with YouTube’s standards for 1080p resolution.
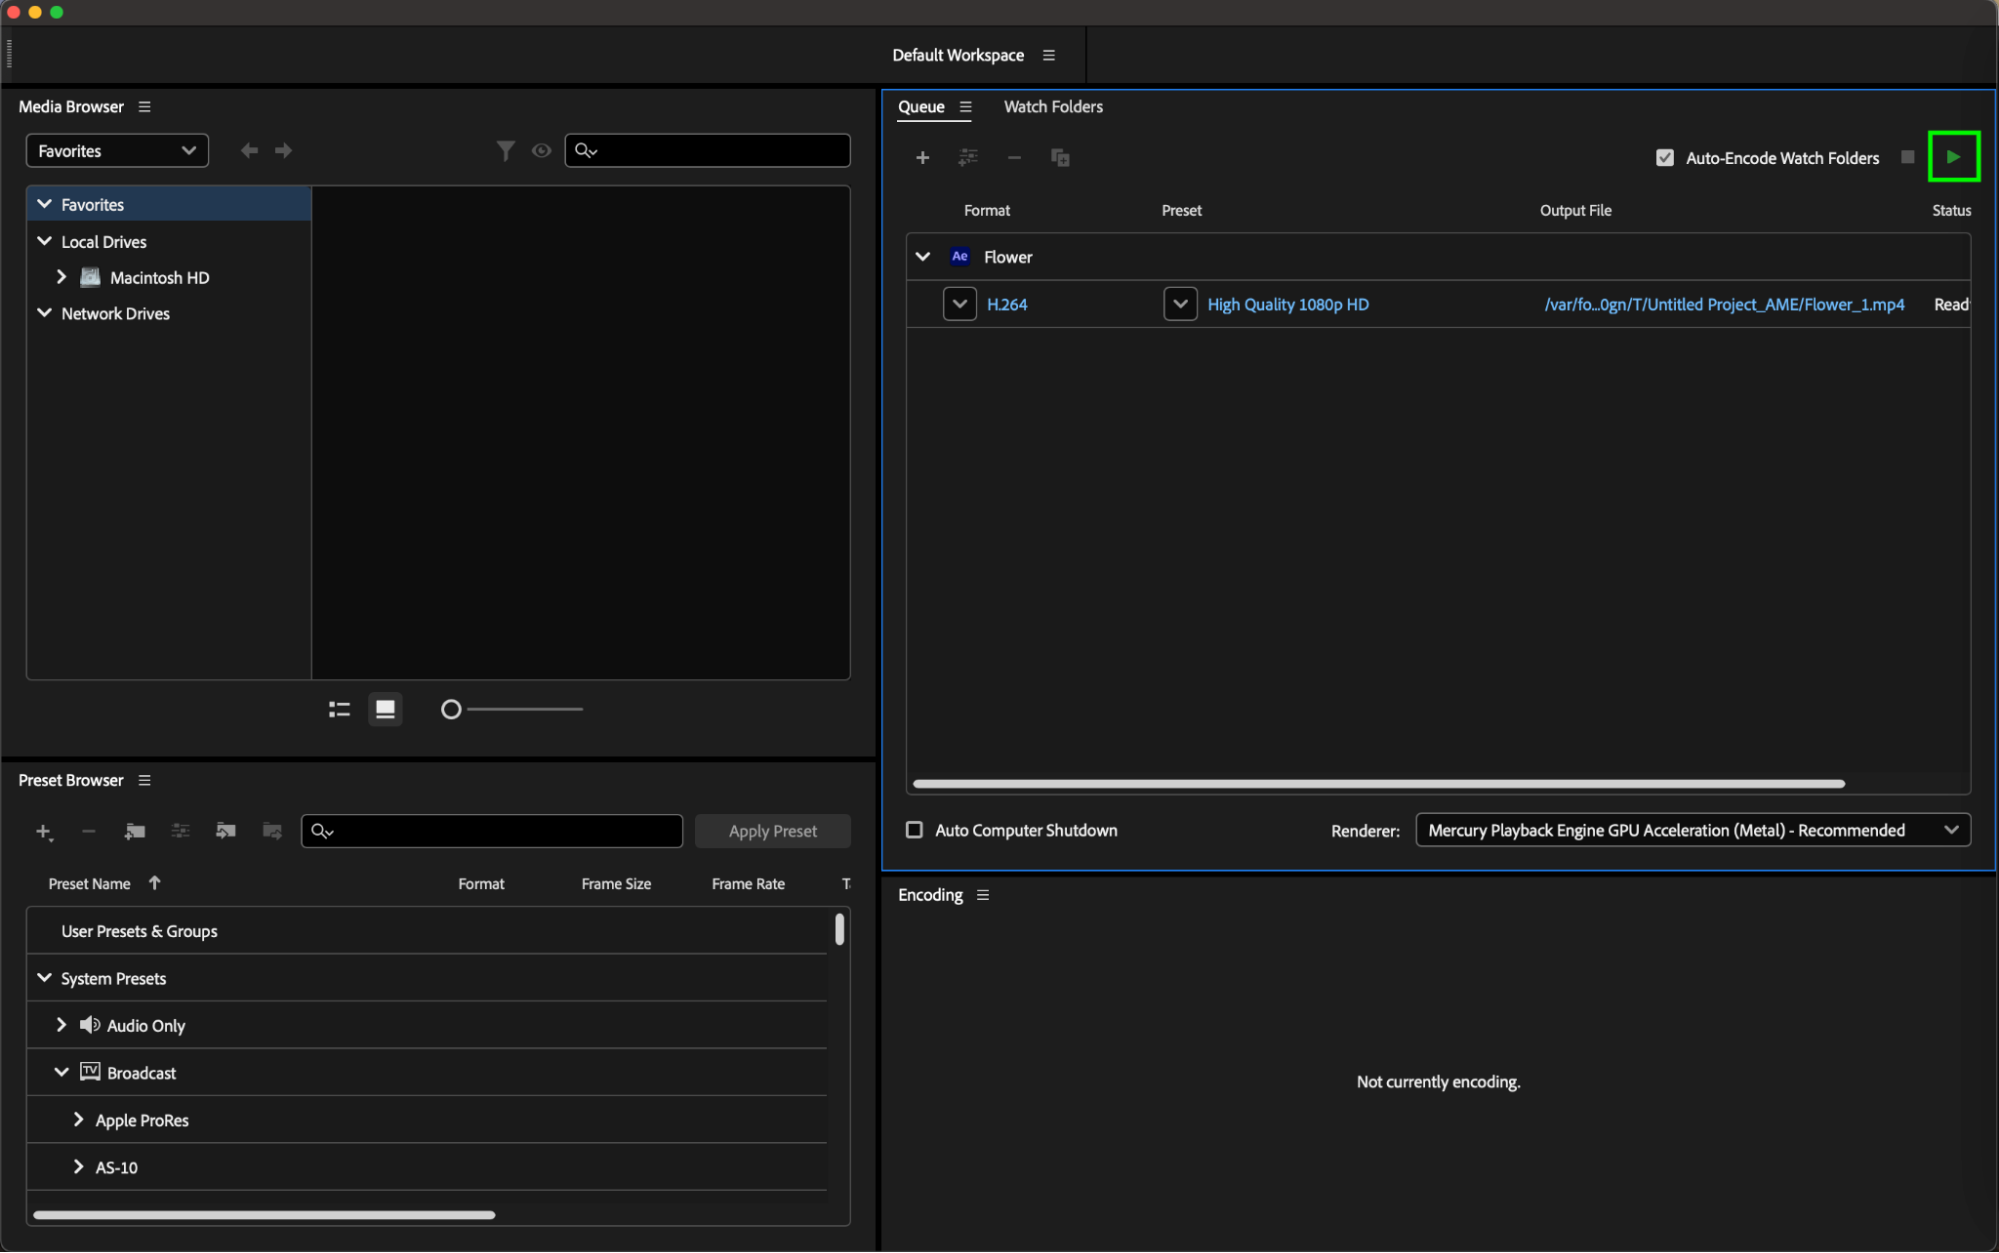
Step 7: Initiating Rendering
Once all settings are adjusted, click on the “Start Queue” button (Return) in the Queue panel to export your video.
Step 8: Uploading to YouTube
After rendering is complete, log into your YouTube account and follow the platform’s upload instructions to share your video with the world.
Conclusion
By following these steps and best practices for rendering in After Effects, you can elevate the quality of your videos and optimize them for a seamless viewing experience on YouTube. Experiment with different settings and techniques to find the perfect balance that suits your content and appeals to your audience. Mastering After Effects rendering will undoubtedly enhance your video production skills and captivate your viewers.
Our Bestsellers


