A Step-by-Step Guide to Rendering in After Effects
Understanding the Rendering Process
Rendering your completed projects in Adobe After Effects is a crucial part of the post-production process. It converts your composition into a final video file that can be shared, uploaded, or distributed across various platforms. However, navigating the rendering settings and options can be challenging, especially if you’re new to the software. This guide will break down the rendering process into simple, actionable steps to help you export your projects efficiently and with the best possible quality.
Get 10% off when you subscribe to our newsletter

Step 1: Prepare Your Composition for Rendering
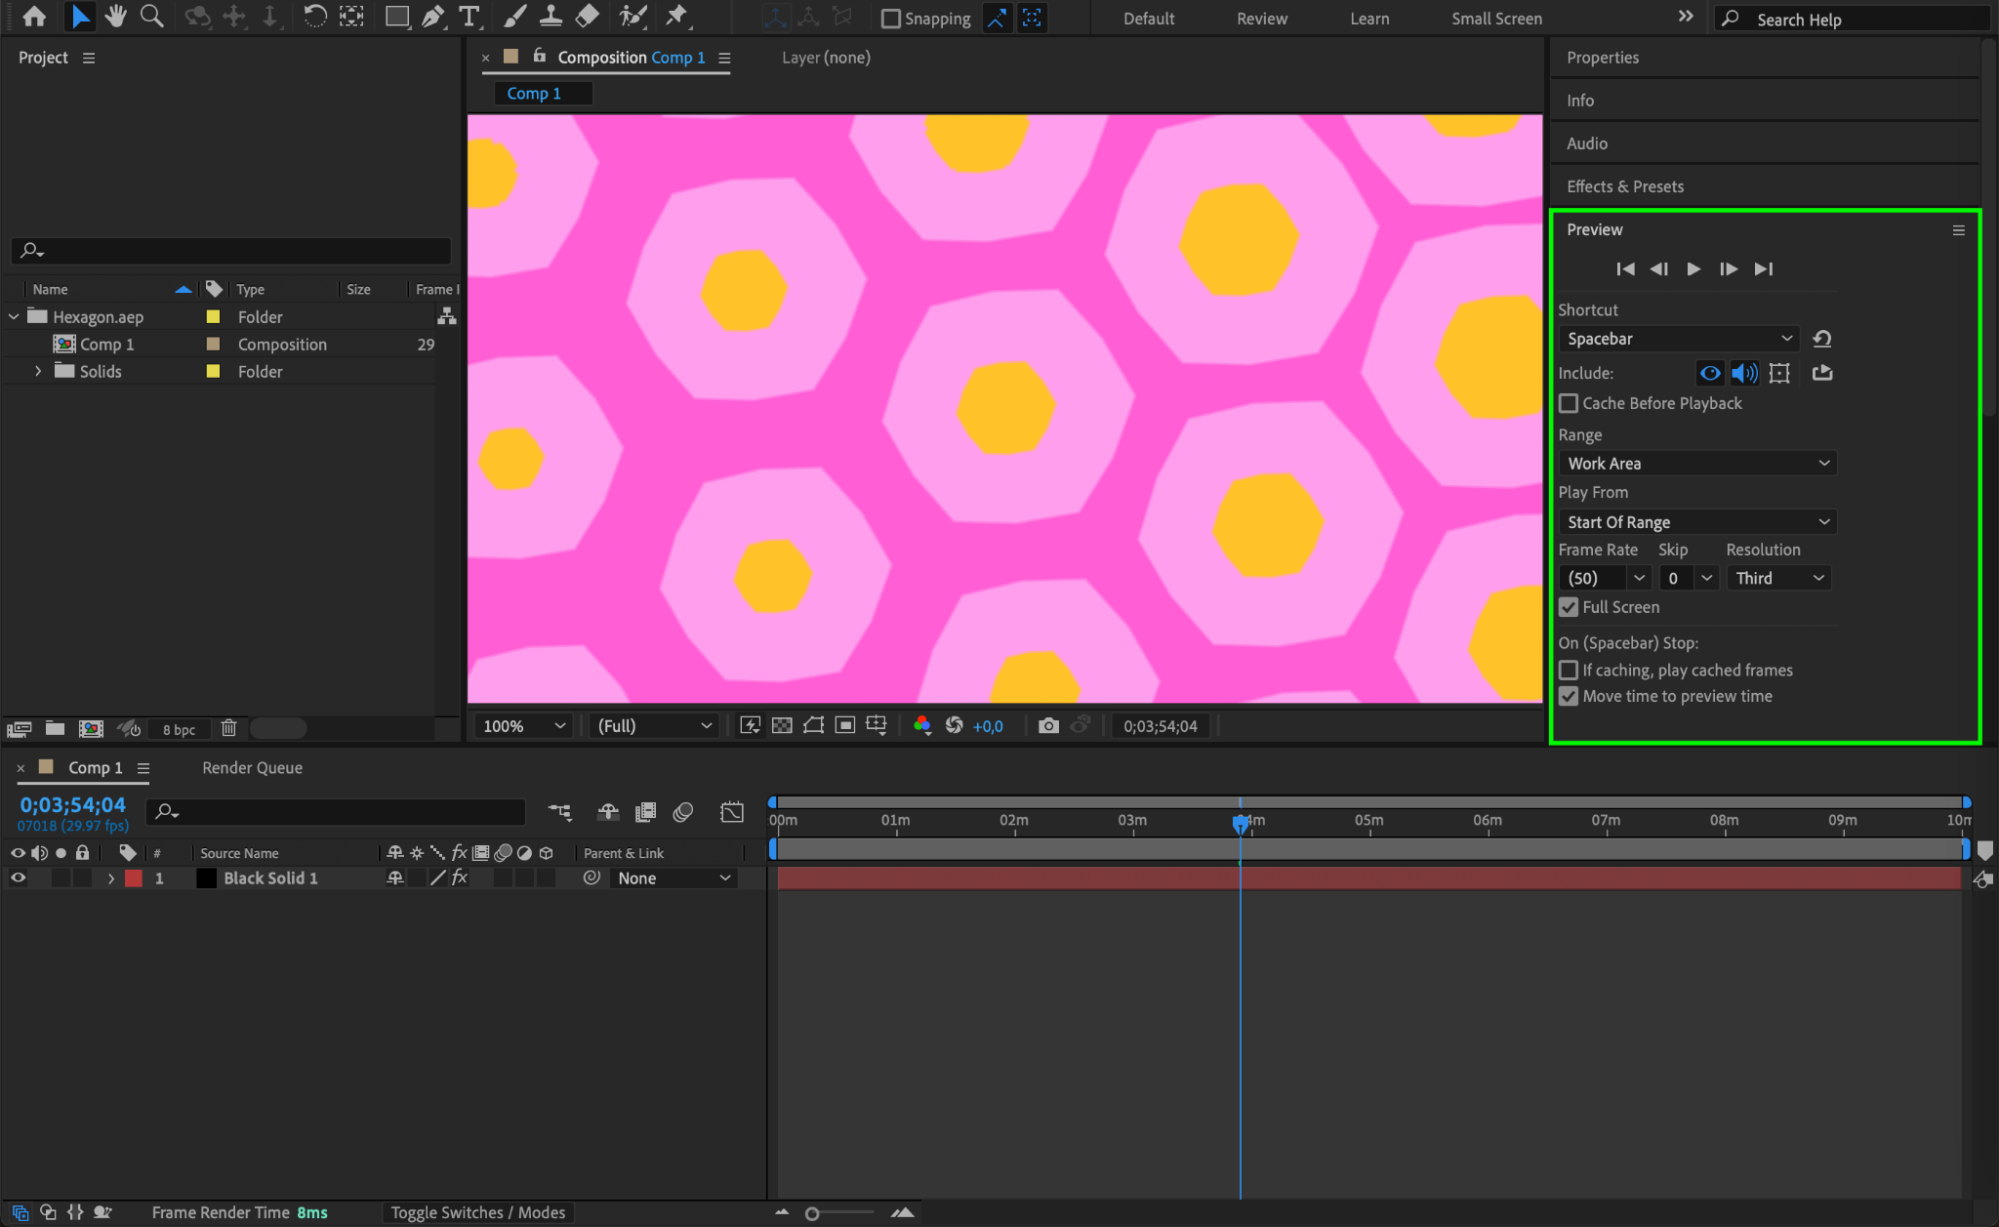
Before you begin rendering, make sure your composition is finalized. This includes checking for any errors, making any last-minute adjustments to effects or animations, and ensuring that all necessary elements are included. You can use the preview function by pressing the spacebar to play back your composition. This step is essential to avoid any mistakes in the final output.
Get 10% off when you subscribe to our newsletter
Step 2: Add Your Composition to the Render Queue
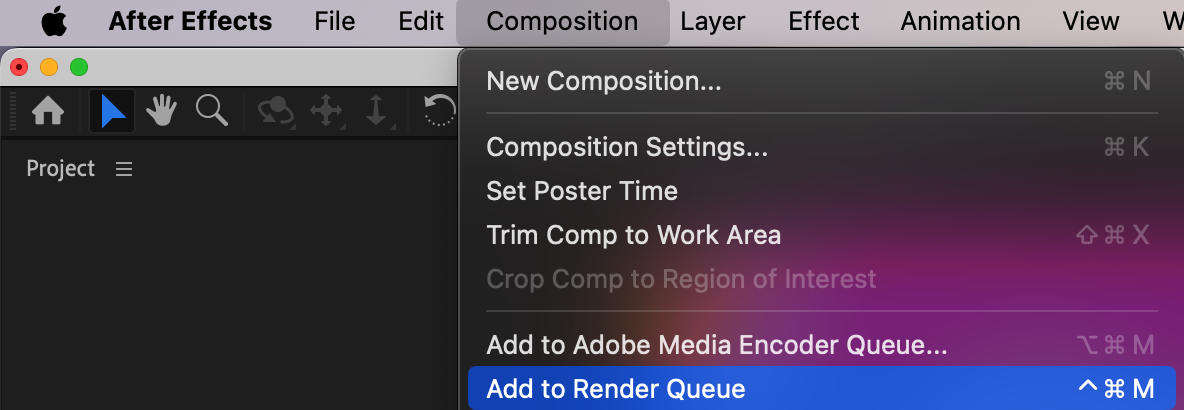
Once your composition is ready, navigate to the “Composition” menu and select “Add to Render Queue.” This will open the Render Queue panel, where you’ll set up the rendering process. The Render Queue is the central hub for exporting your projects, allowing you to control the output settings, format, and more.
Get 10% off when you subscribe to our newsletter
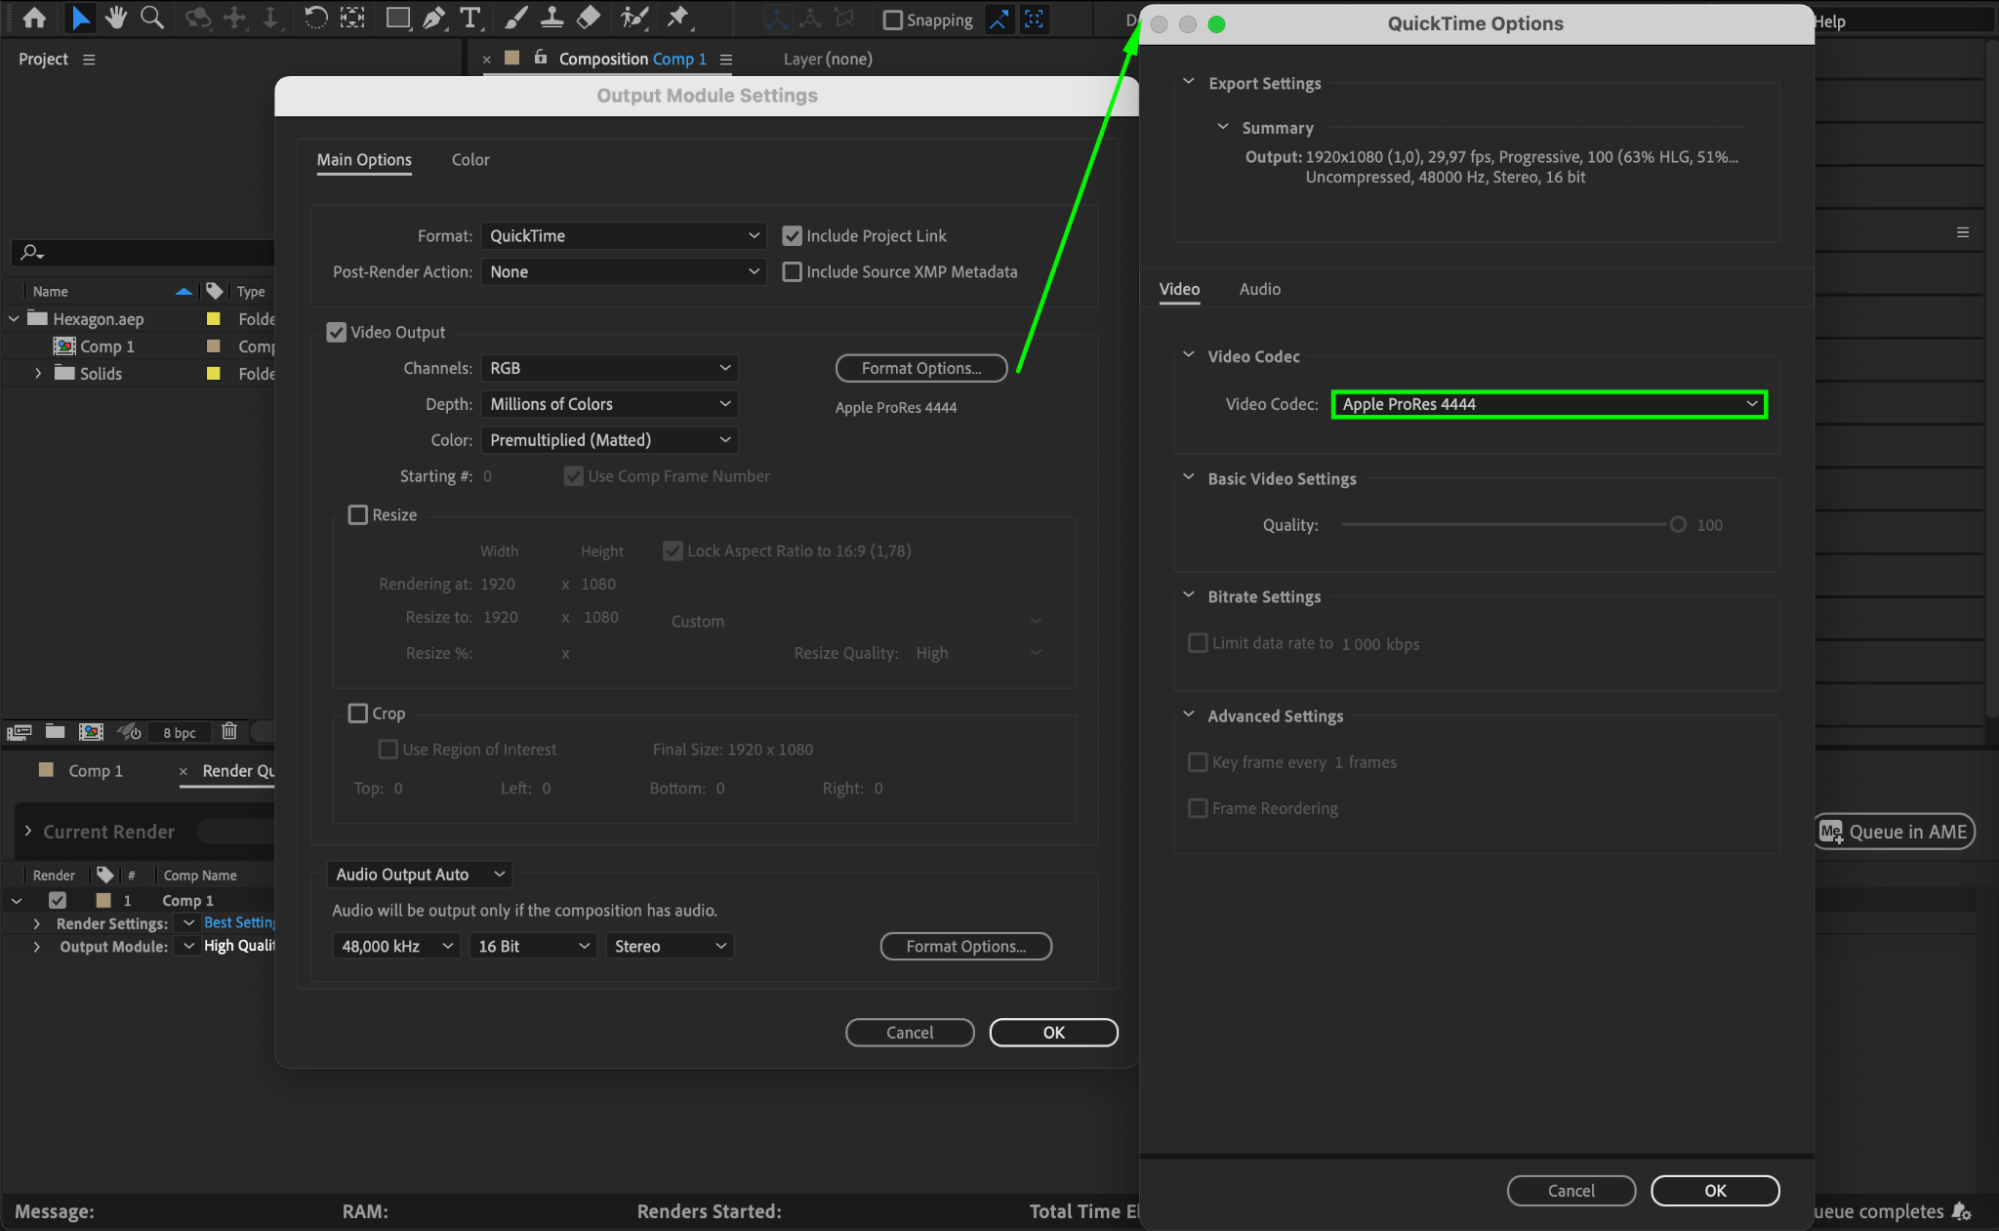
Step 3: Configure the Output Module Settings
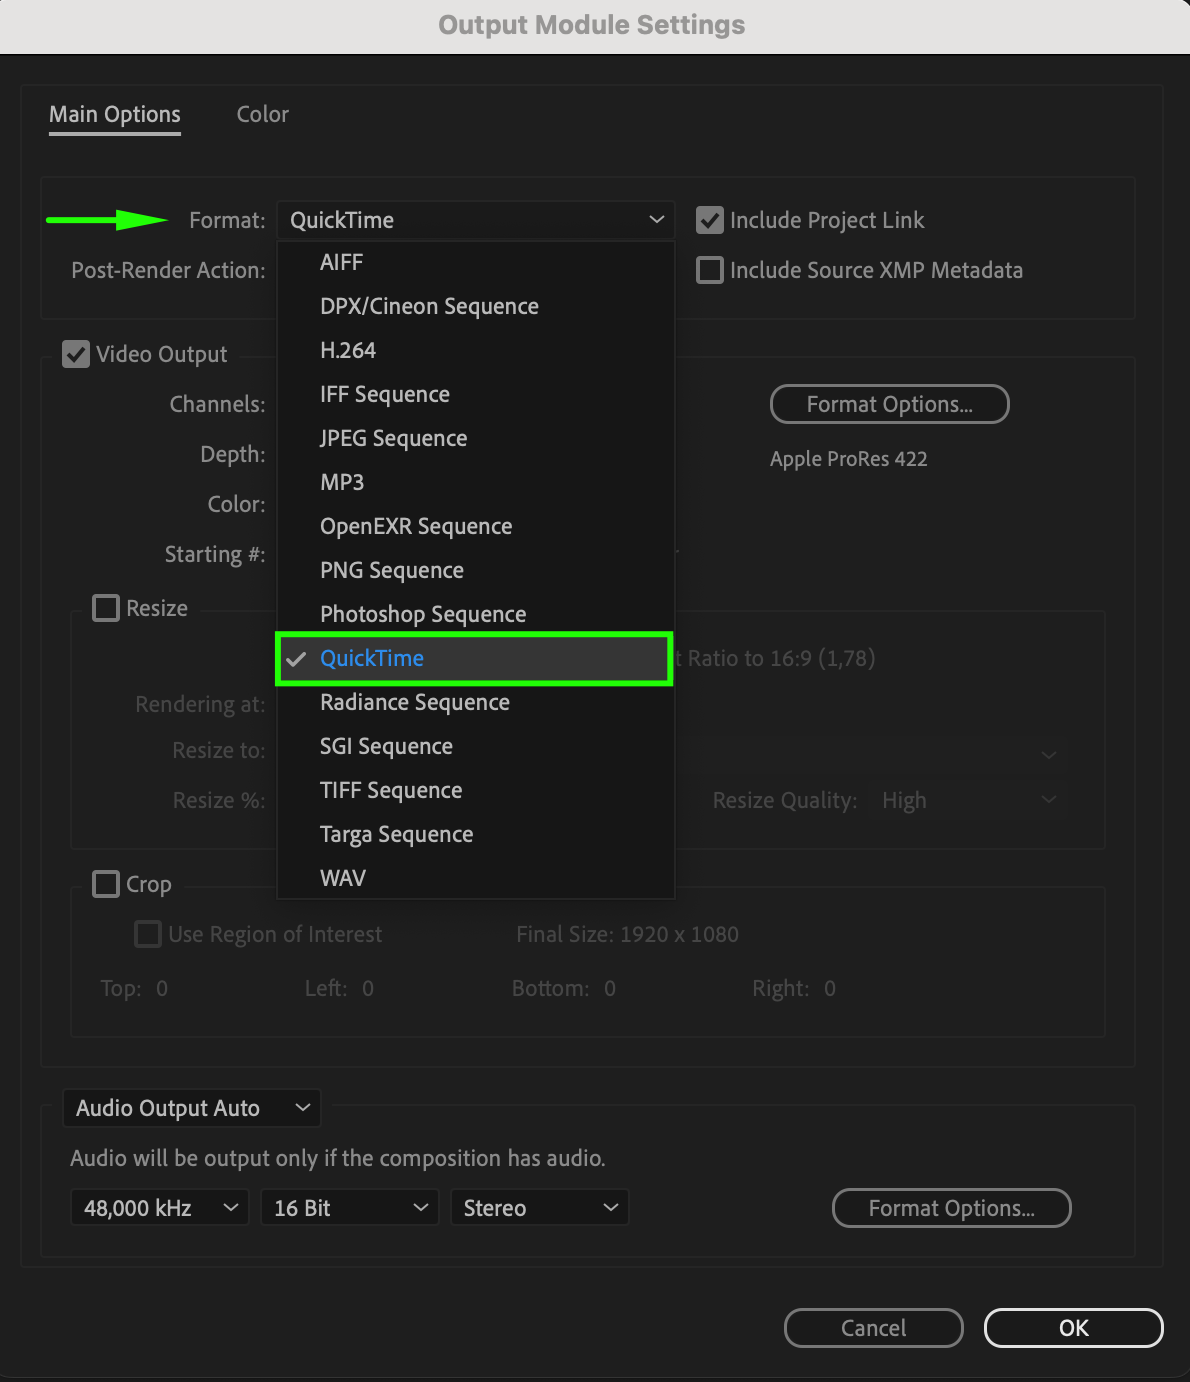
In the Render Queue panel, click on the text next to “Output Module” to open the Output Module Settings dialog box. Here, you can select the format and codec for your rendered file. For instance, choose a format like QuickTime or H.264, depending on your needs. If you require high quality with an alpha channel, consider using a codec like Apple ProRes 4444. This step is crucial for ensuring your final video meets the necessary quality and compatibility standards.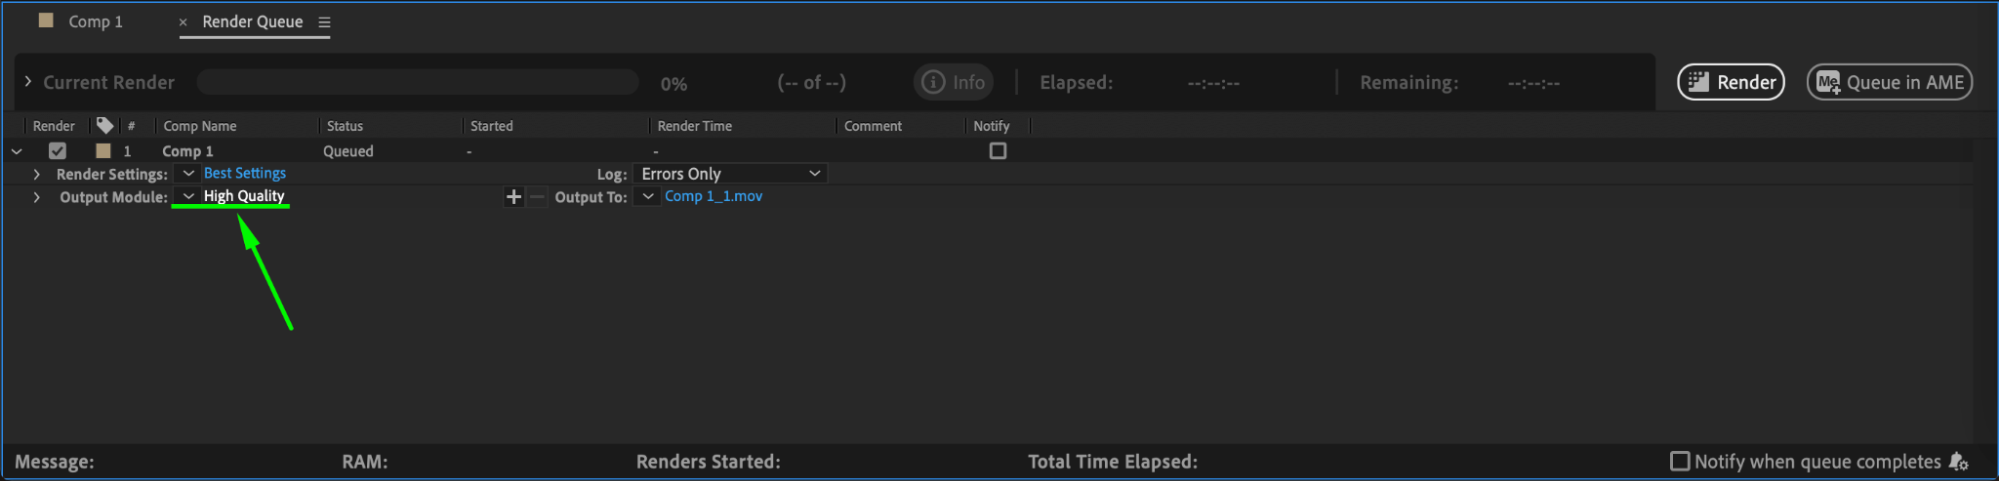
Get 10% off when you subscribe to our newsletter
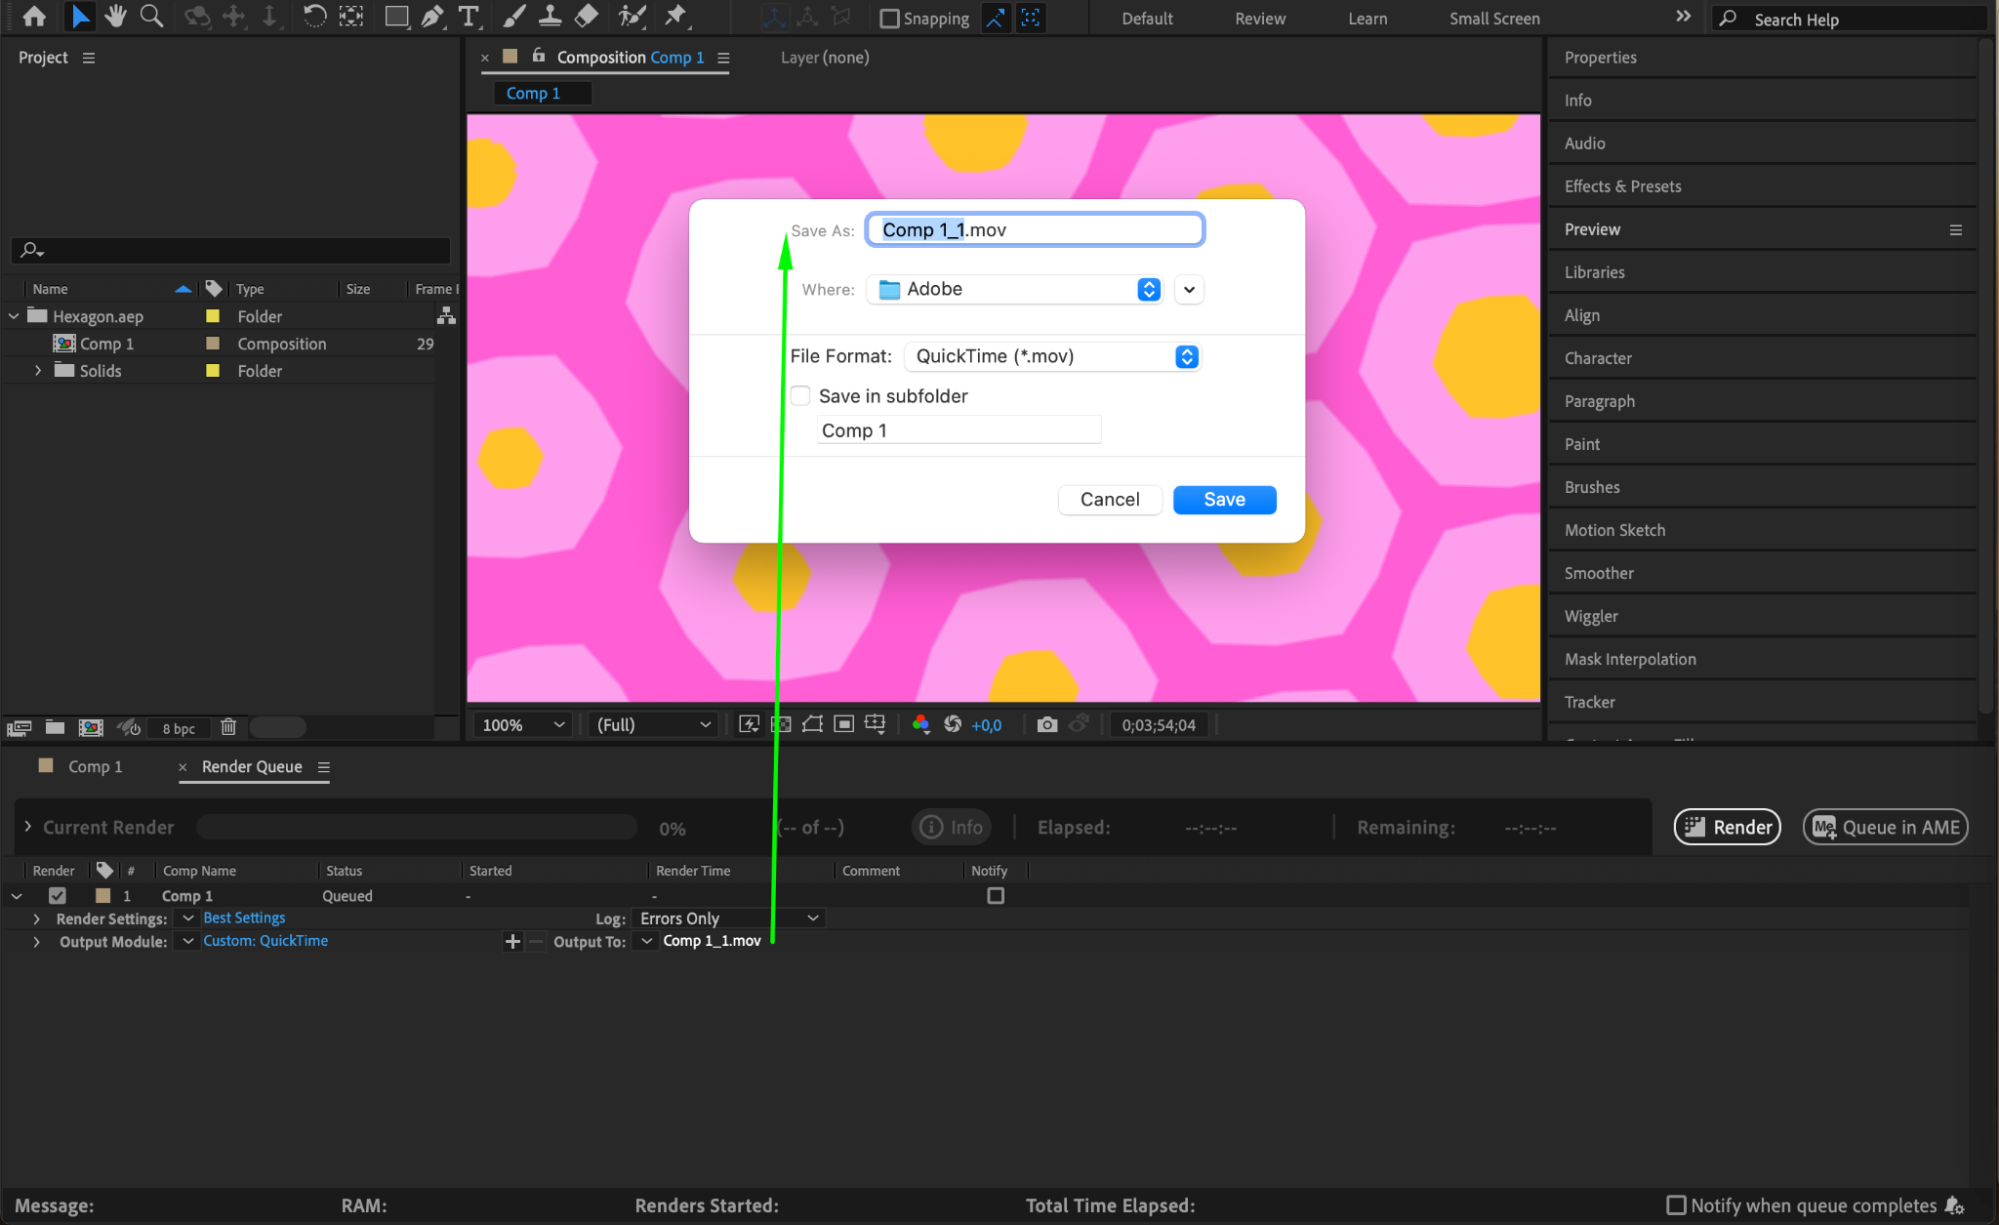
Step 4: Choose Your Output Location
Next, specify where you want to save your rendered file by clicking on the text next to “Output To” in the Render Queue panel. This will allow you to select a location on your computer and name your file. Organizing your files effectively is important to maintain a smooth workflow and easily locate your rendered videos.
Step 5: Start the Rendering Process
After configuring all the settings, click on the “Render” button in the Render Queue panel. After Effects will begin rendering your composition, converting it into a final video file. You can monitor the progress of the render in the Render Queue panel. Be patient, as rendering can take some time, especially for complex compositions or high-resolution videos.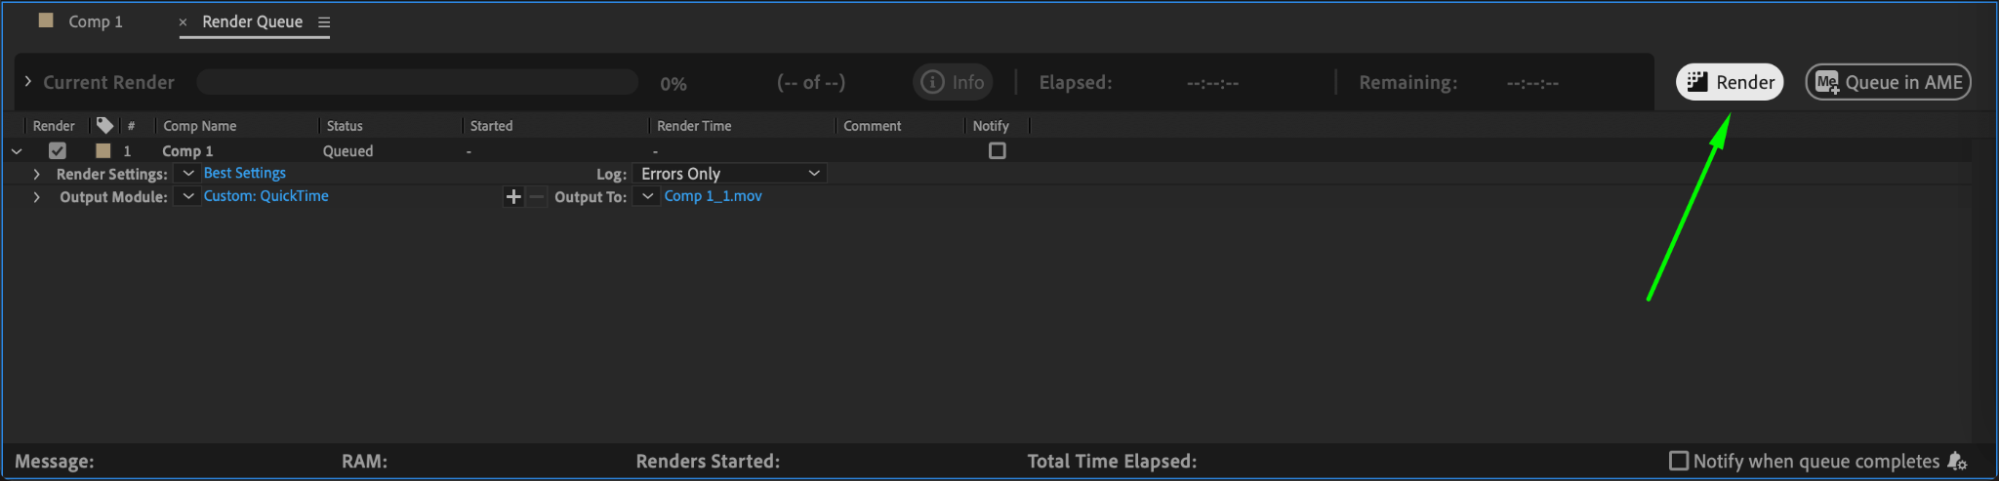 Step 6: Review Your Rendered Video
Once the rendering process is complete, open the rendered file to review it. Ensure that the video meets your expectations in terms of quality, effects, and overall output. If everything looks good, you can then proceed to share it on various platforms, such as YouTube, Vimeo, or social media.
Conclusion
Rendering is a vital step in bringing your After Effects projects to life. While it can be time-consuming, especially for detailed compositions, following these steps will help you navigate the process more efficiently. Remember to experiment with different settings to find the right balance between quality and file size. With practice, you’ll become more comfortable with rendering in After Effects, allowing you to create high-quality videos ready for any platform. Happy rendering!
Our Bestsellers


