Creating and Exporting GIFs from After Effects: A Comprehensive Guide
Unlock the Art of Saving GIFs in After Effects with This Step-by-Step Tutorial
Are you ready to dive into the world of creating mesmerizing GIFs in After Effects? Whether you’re a seasoned animator or just starting out, this step-by-step guide will equip you with the knowledge and techniques needed to save your animated masterpieces as GIFs seamlessly. Let’s explore the nuances of exporting GIFs from After Effects and unleash your creativity to captivate your audience with captivating motion graphics.
If you’ve ever felt daunted by the process of saving GIFs from After Effects, you’re not alone. This guide aims to simplify the steps involved, providing you with a comprehensive overview of the necessary settings to ensure a smooth export. By optimizing your GIF for the best quality and manageable file size, you can strike the perfect balance and make your animations crisp and vibrant.
In the digital landscape, GIFs have become a powerful medium for visual communication. With their ability to convey complex ideas in a concise format, creating GIFs in After Effects allows you to showcase your skills and craft compelling animations that resonate with viewers. This guide will navigate the export process, helping you refine your workflow and create stunning GIFs that captivate and inspire.
Get 10% off when you subscribe to our newsletter

Creativity and experimentation play a significant role in the animation process. GIFs offer a unique platform for showcasing your artistic vision and technical skills, allowing you to push the boundaries of traditional animation. By tapping into the diverse tools of After Effects, you can create GIFs that leave a lasting impression on your audience.
So, are you ready to unleash your creativity and share your vision with the world through captivating GIF animations in After Effects? Join us on this immersive journey where every frame tells a story waiting to be discovered and sparks creativity in others.
Get 10% off when you subscribe to our newsletter
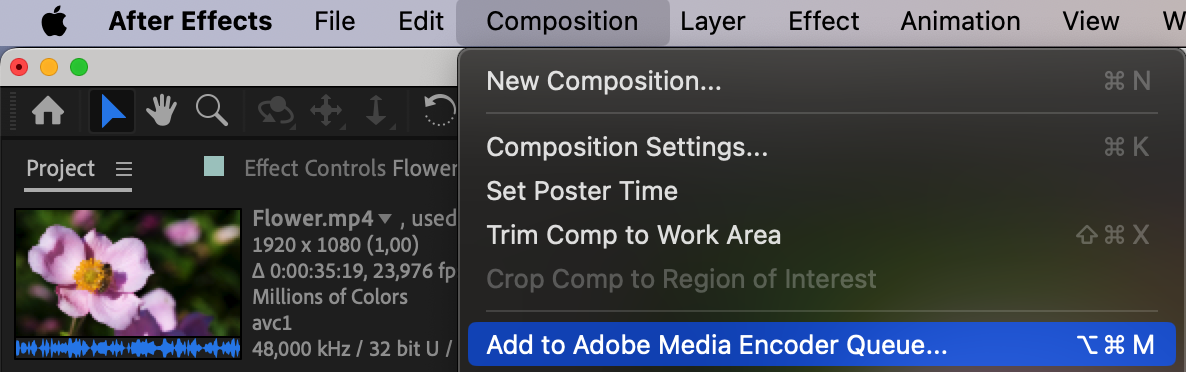
1. Adding to Adobe Media Encoder Queue:
Go to the “Composition” menu > “Add to Adobe Media Encoder Queue” or use the shortcut Ctrl/Cmd + Alt/Option + M.
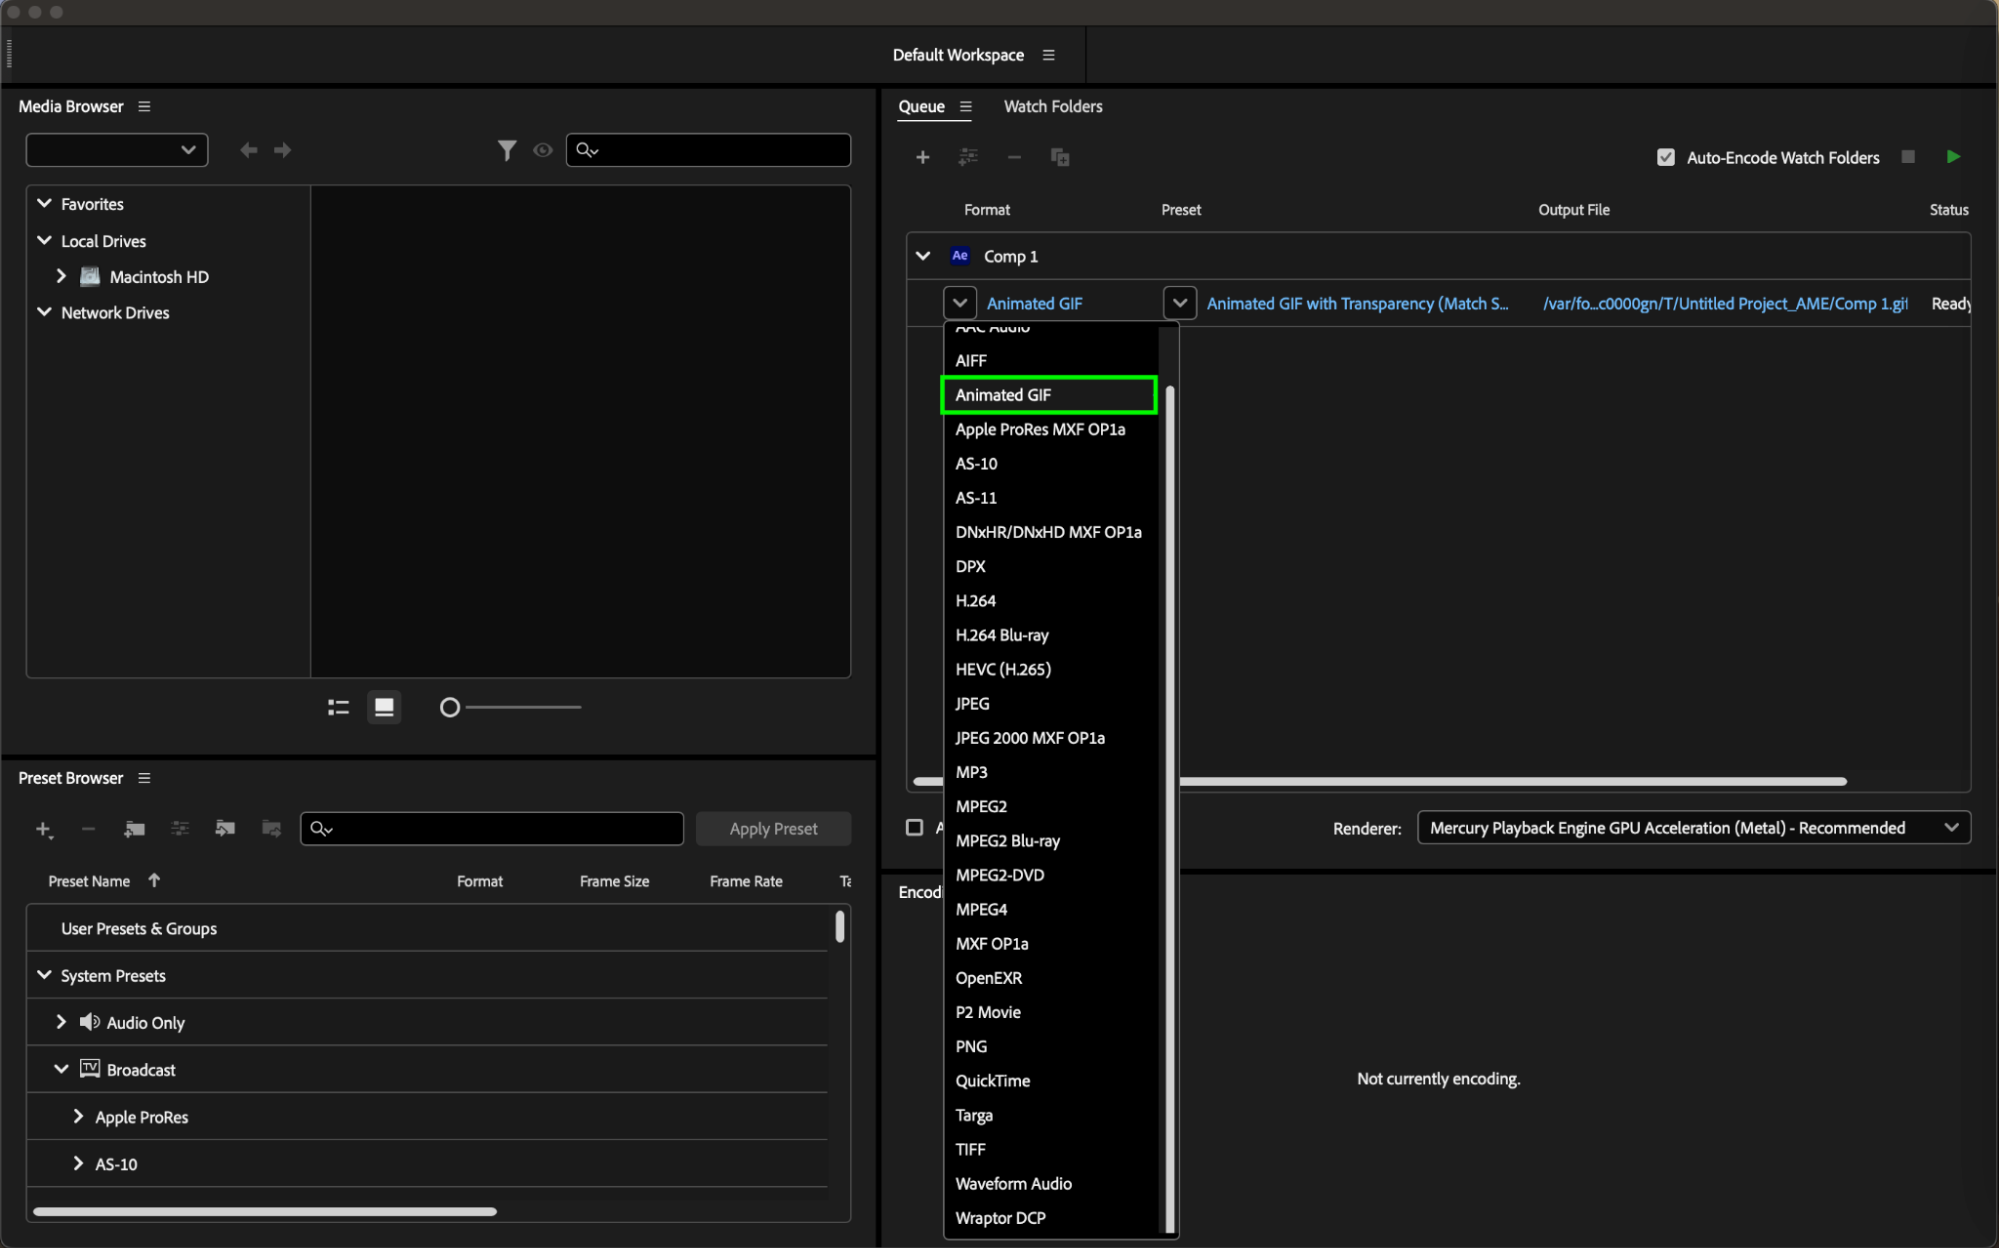
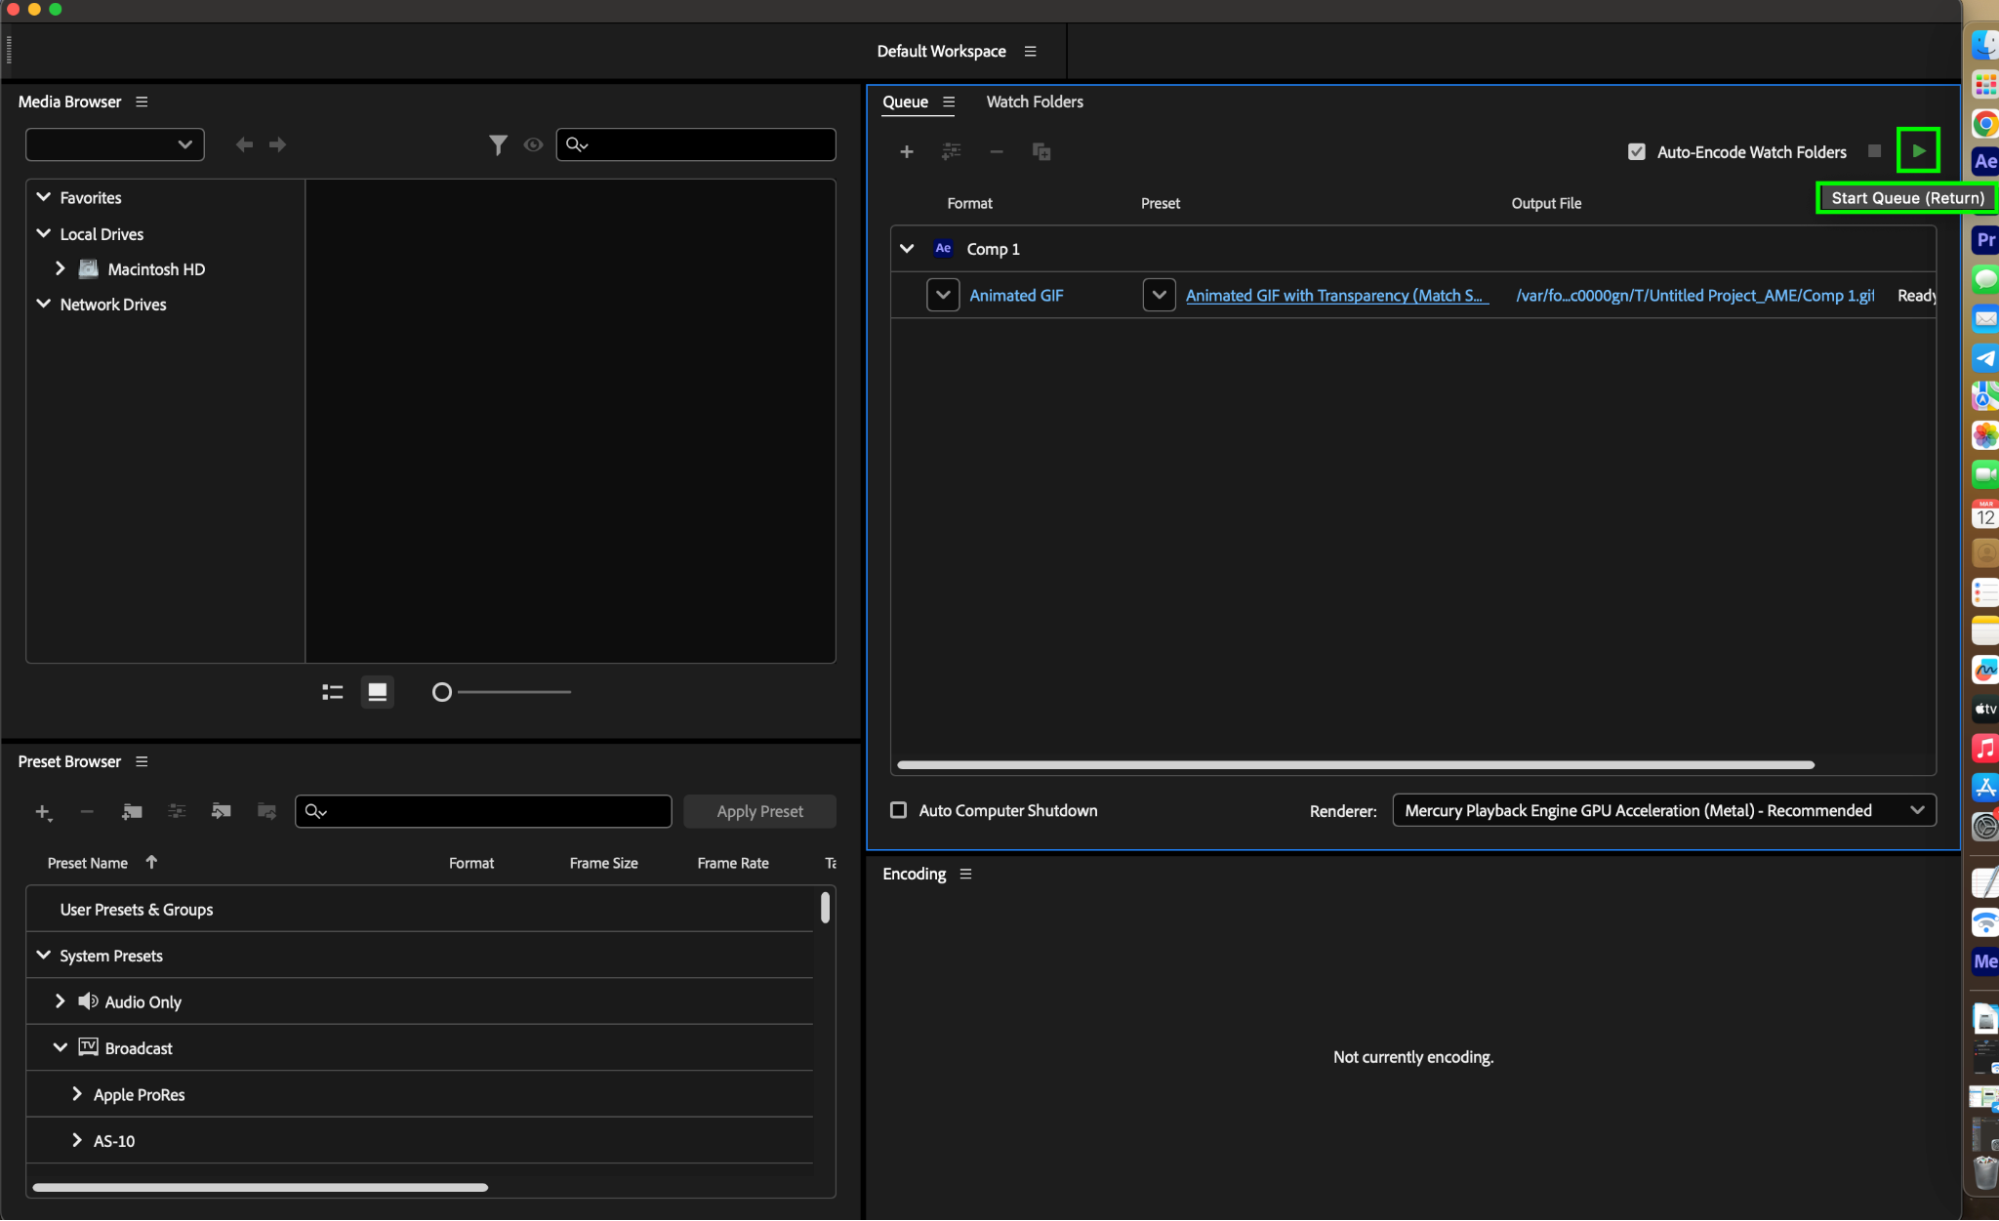
2. Choosing GIF Format in Adobe Media Encoder:
In Adobe Media Encoder, select the “Animated GIF” format.
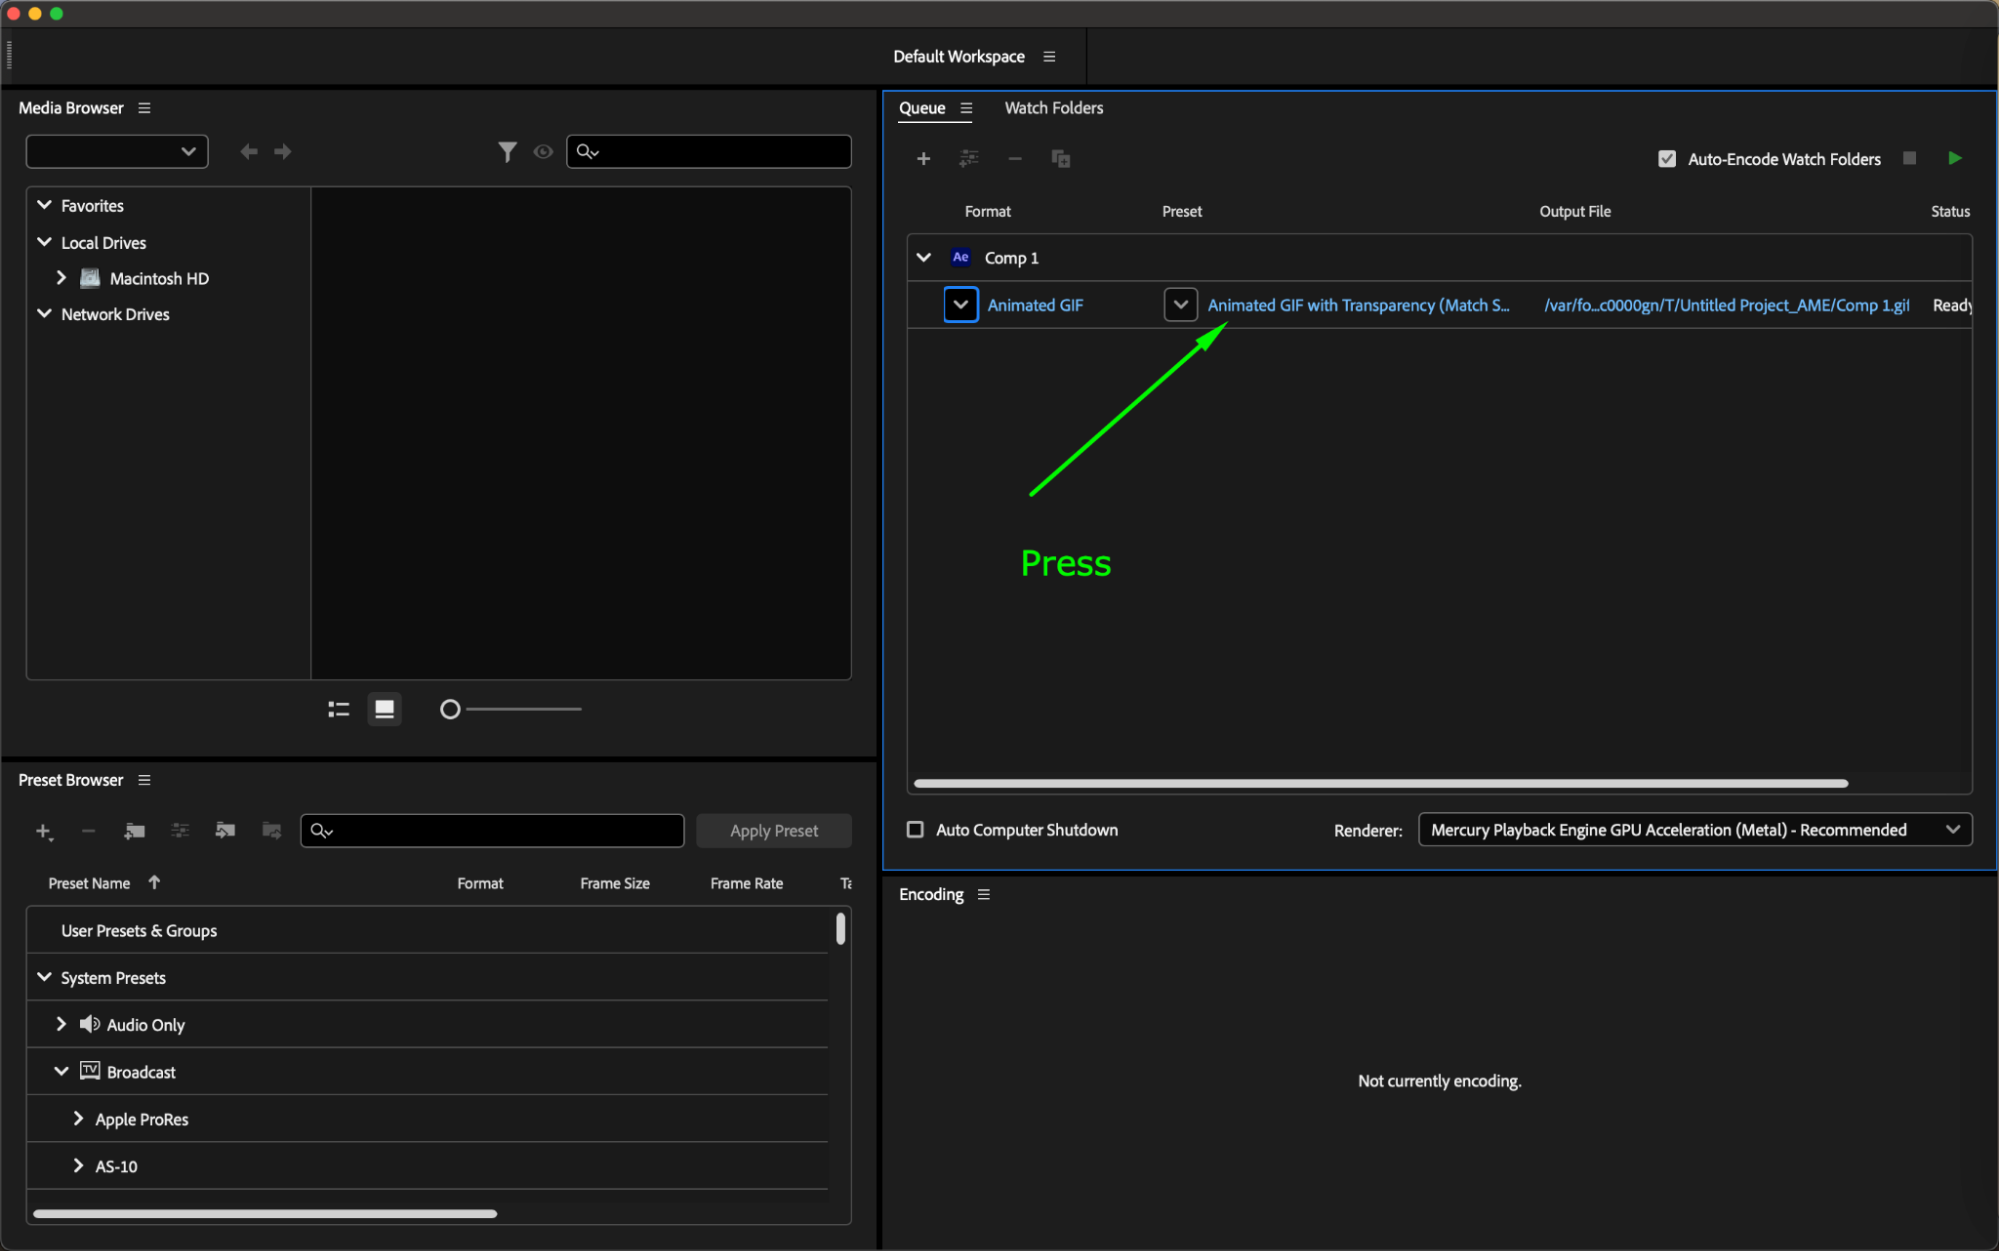
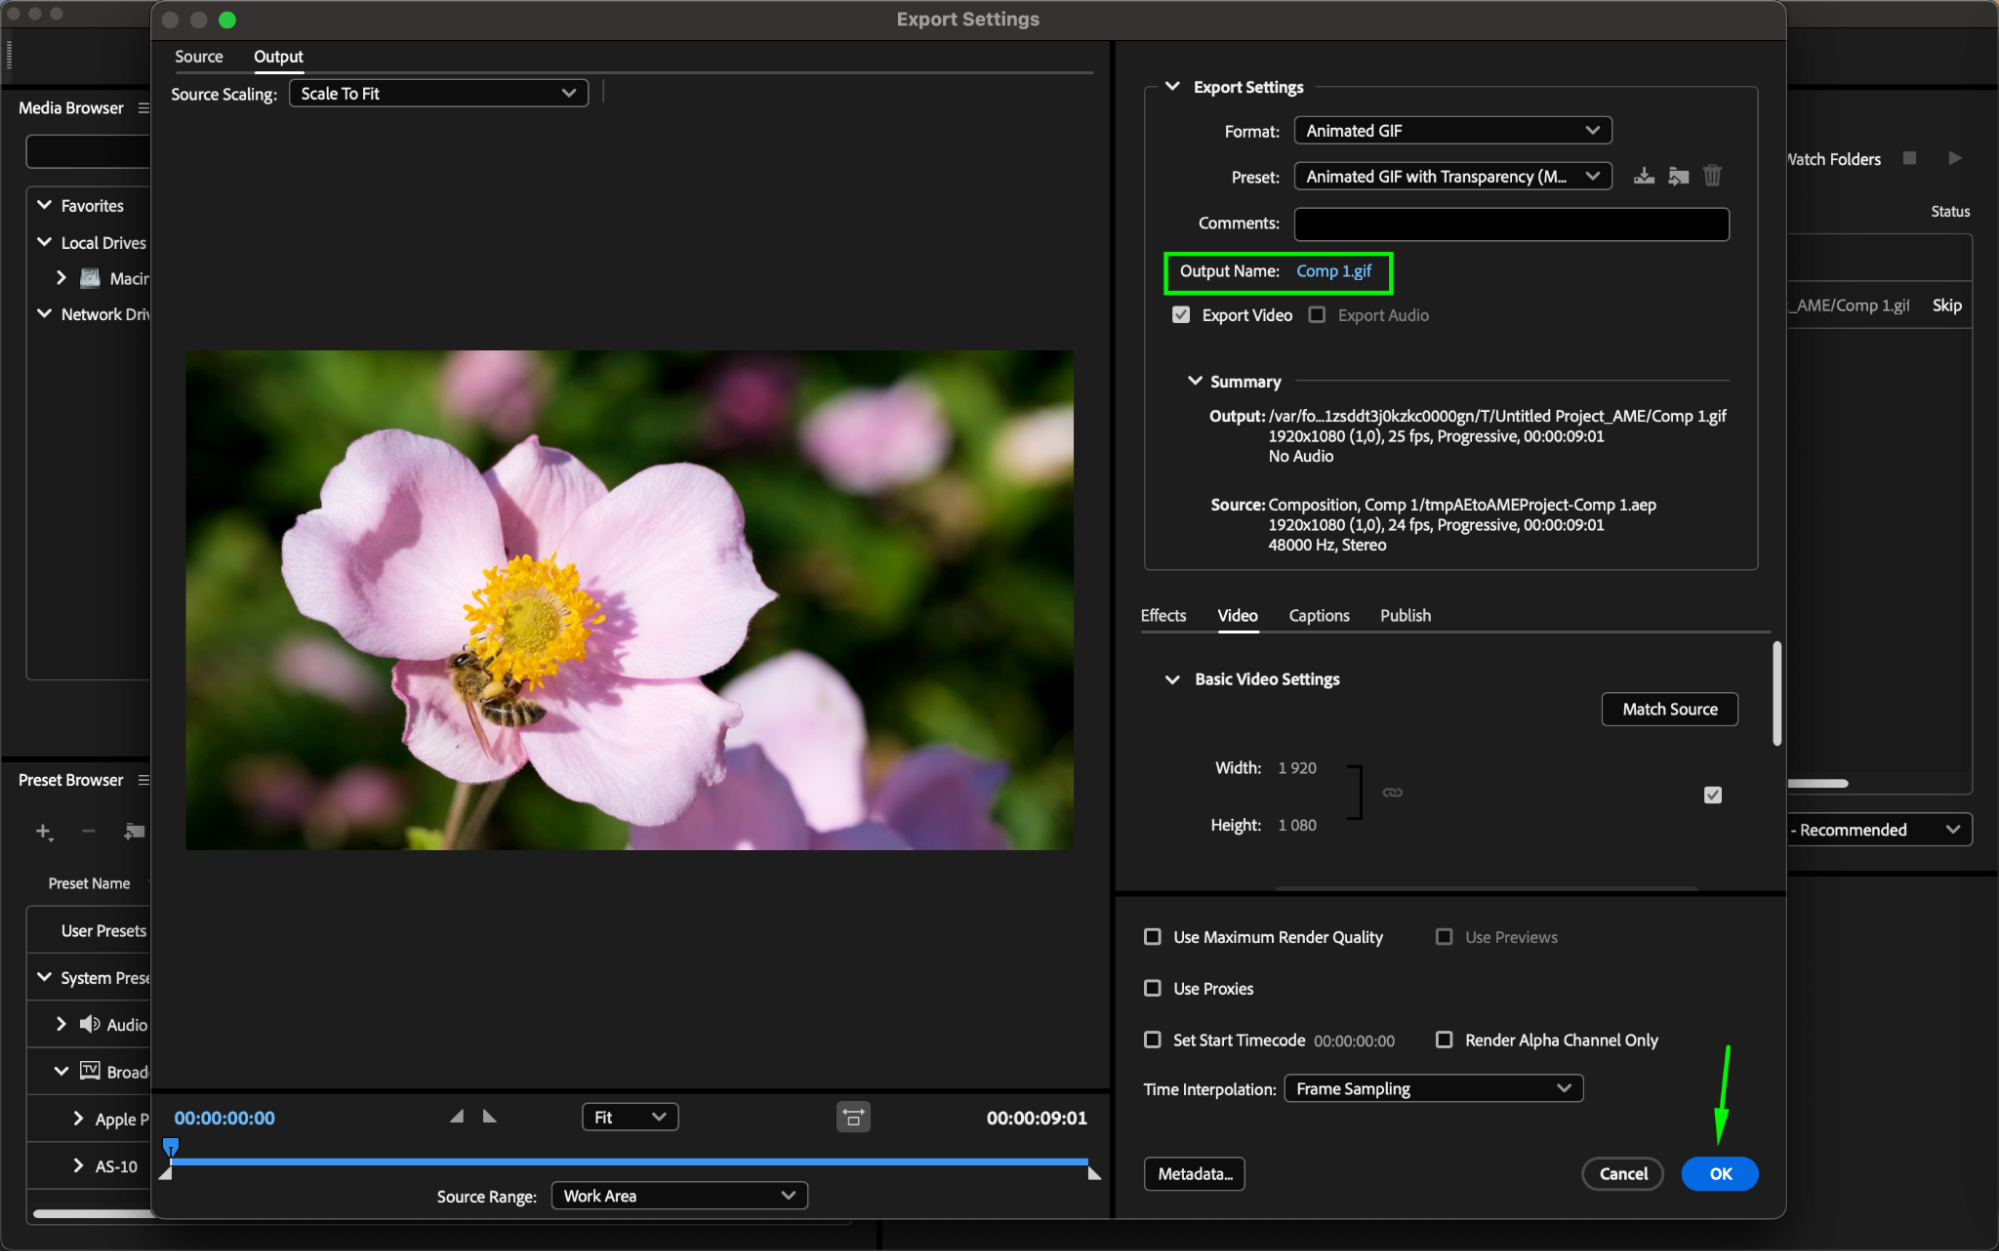
3. Adjusting Settings:
Navigate to the preset parameters and open them. Ensure all settings are correct, including the file name (output name), and click “OK.”
4. Initiating Encoding:
Click the “Start Queue” button or use the “Return” key.
Done! Now you have a saved file in GIF format on your computer.
Get 10% off when you subscribe to our newsletter
Conclusion:
In conclusion, this comprehensive guide empowers you to effortlessly save captivating GIFs from After Effects. Armed with the knowledge gained from this step-by-step tutorial, you can elevate your animation skills and create vibrant, visually stunning motion graphics. Embrace the art of exporting GIFs, and let your creativity shine through every frame. Unlock the potential to captivate and inspire your audience, turning your animated masterpieces into impactful visual stories. Start your journey into the world of GIF creation with After Effects today and watch your creative vision come to life.
Our Bestsellers


