Save Adobe After Effects as MP4: A Simple Step-by-Step Guide
Mastering the Art of Saving Adobe After Effects Projects as MP4
Are you an avid user of Adobe After Effects and want to know how to save your projects in the widely-used MP4 format? Look no further! In this article, we will guide you through the step-by-step process of converting your After Effects creations into MP4 files. Whether you’re a beginner or an experienced user, you’ll find all the necessary information and settings adjustments to ensure smooth playback and compatibility across multiple platforms. Let’s dive in and unlock the secrets of saving After Effects as MP4!
Get 10% off when you subscribe to our newsletter

Essential Tips for You to Successfully Save Adobe After Effects Projects as MP4
When it comes to sharing your Adobe After Effects projects, the MP4 format is a popular choice due to its versatility and compatibility with various devices and platforms. However, exporting your compositions as MP4 files may seem like a daunting task if you’re unfamiliar with the process. But fear not! We have compiled a list of essential tips to help you save your After Effects projects as MP4 files with ease.
Step-by-Step Guide
1. Send Your Project to Adobe Media Encoder
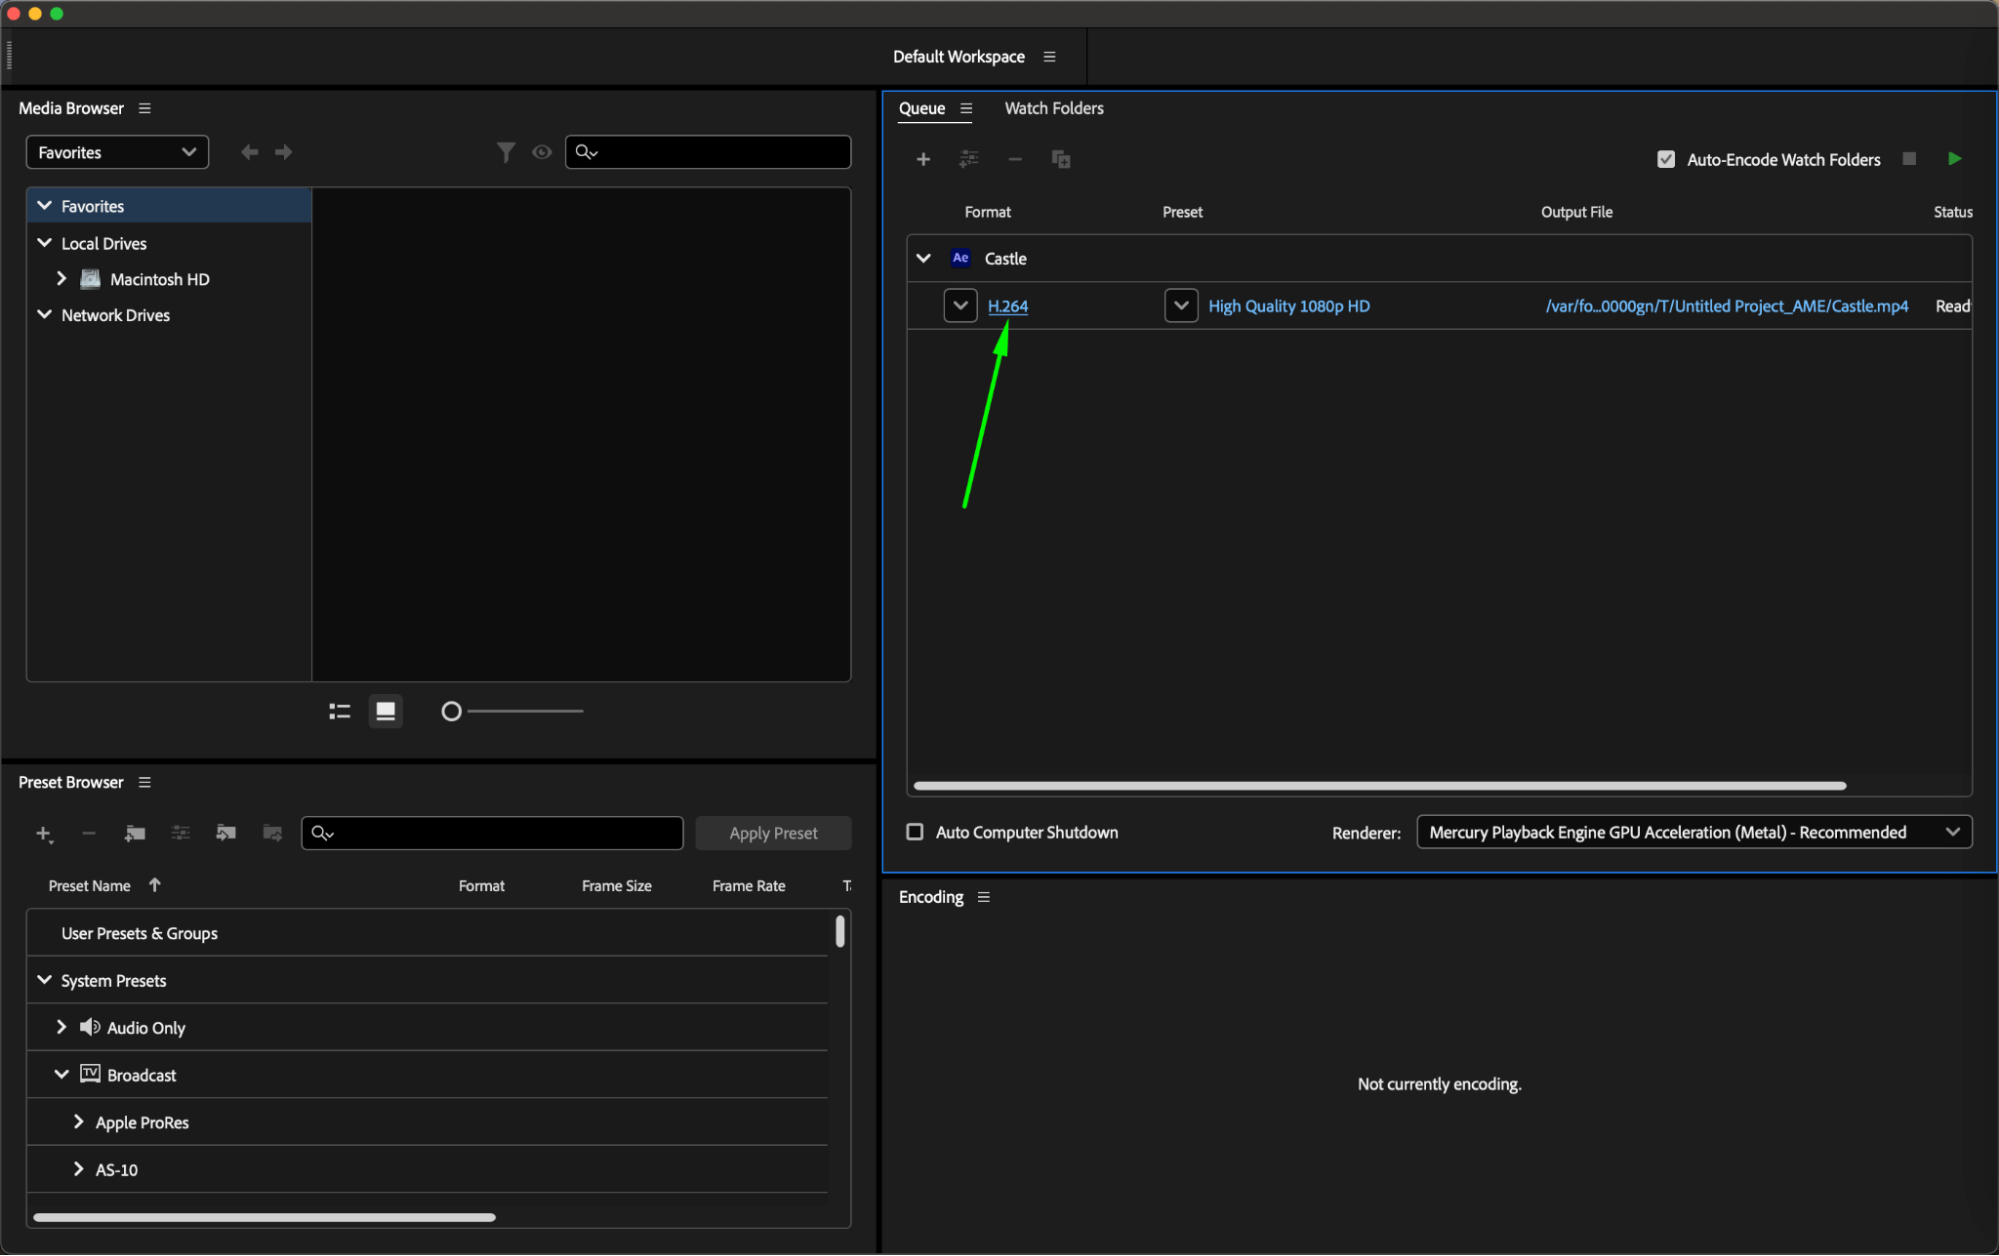
After preparing your composition in Adobe After Effects, you can send it to Adobe Media Encoder for export. Open your composition and ensure that your project is ready for export. Go to the “Composition” menu and select “Add to Adobe Media Encoder Queue”. Adobe Media Encoder will automatically open, and your project will be added to the Queue panel.

2. Set the Format in Adobe Media Encoder
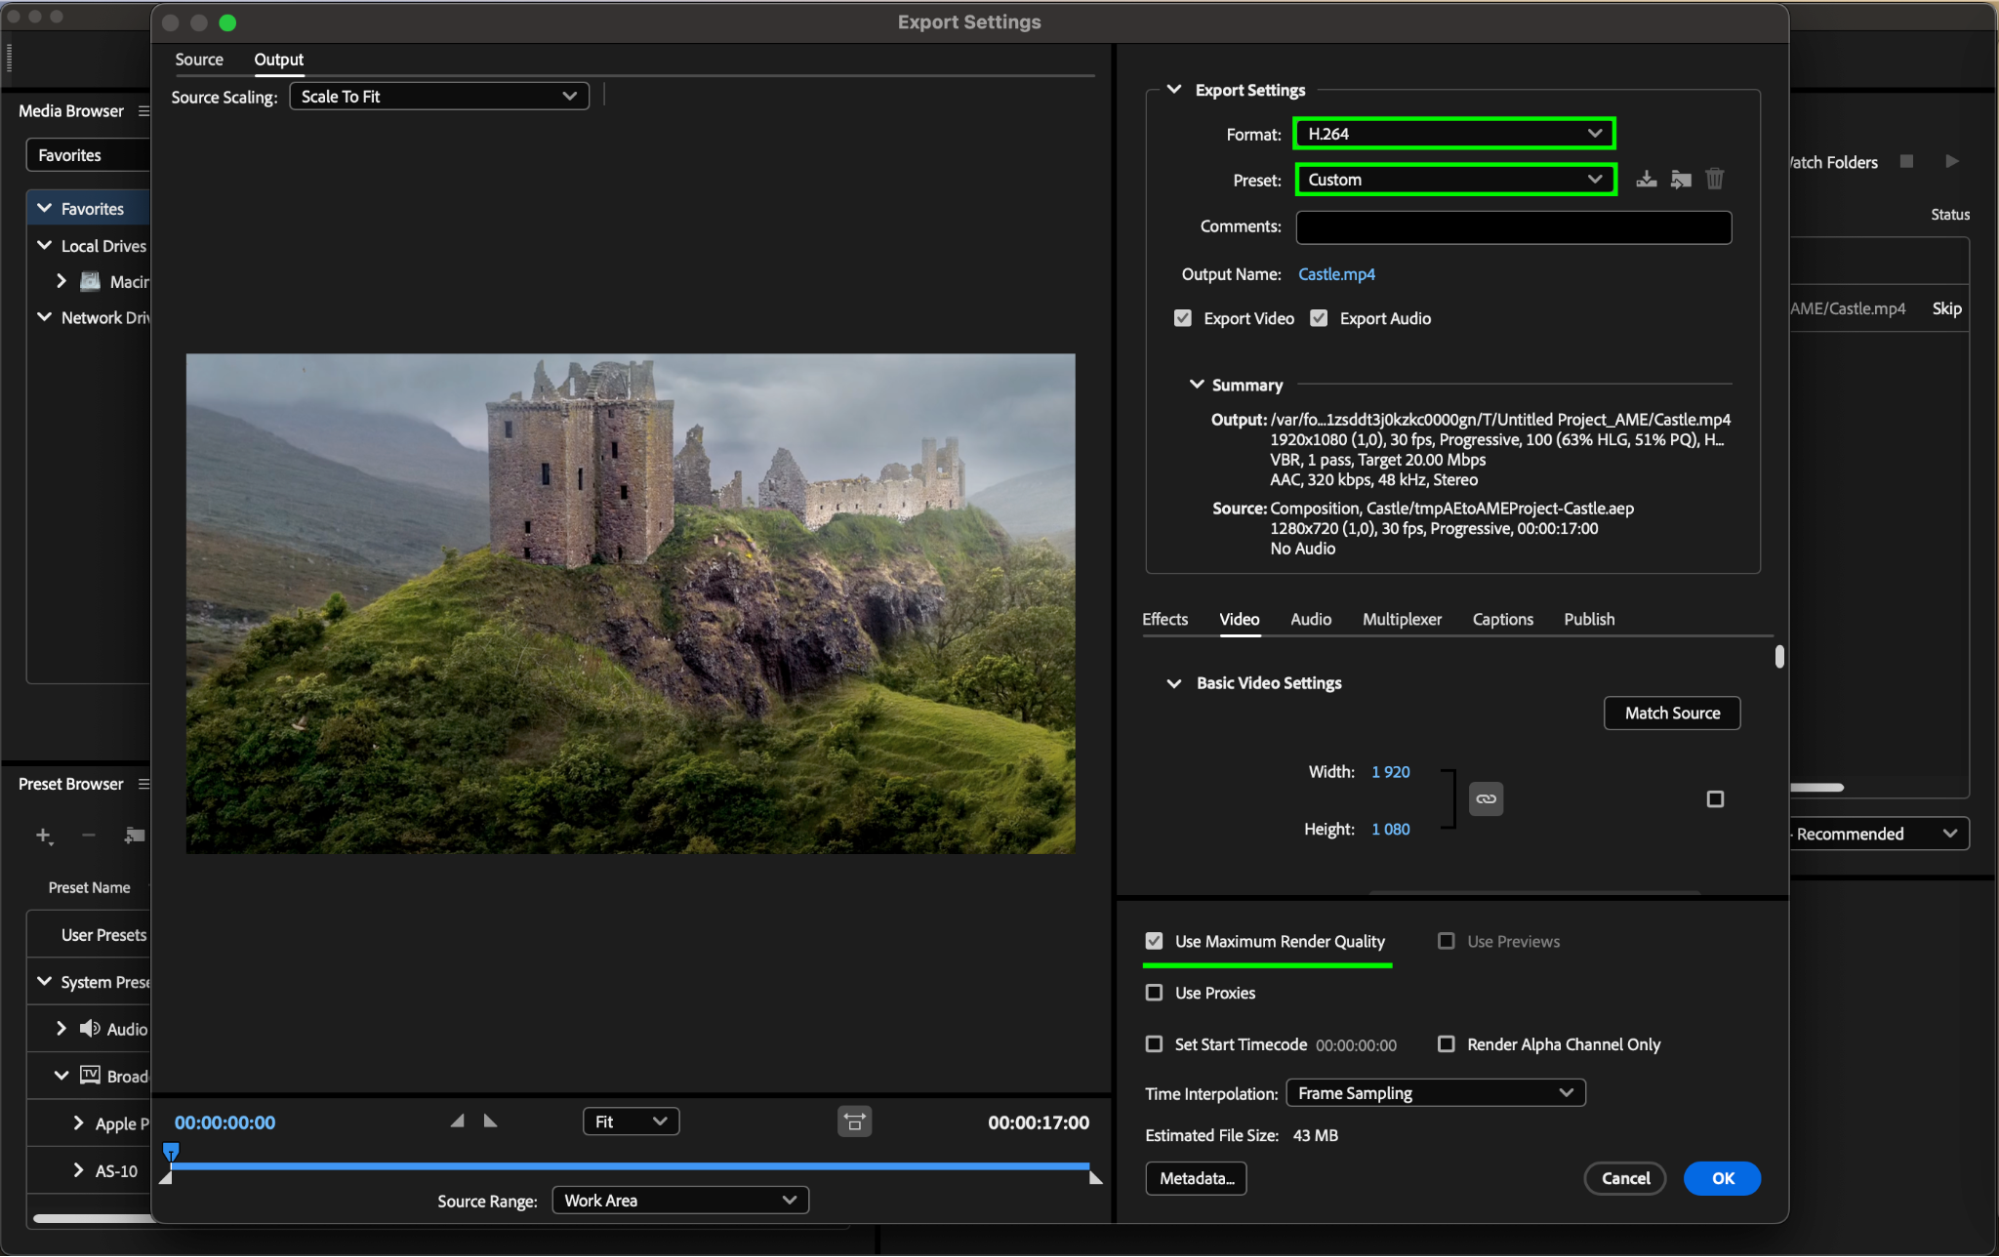
In the Adobe Media Encoder Queue panel, you need to select the appropriate format for your export. Find the Format column, then click on the current format (usually set to the default). In the Export Settings panel that appears, select H.264 from the Format dropdown menu. Also, choose a suitable preset from the Preset dropdown menu to ensure that the export settings match the original composition settings for optimal quality. If needed, you can modify the video and audio settings in the Export Settings panel, such as bitrate, resolution, and frame rate.
3. Specify Output Name and Location
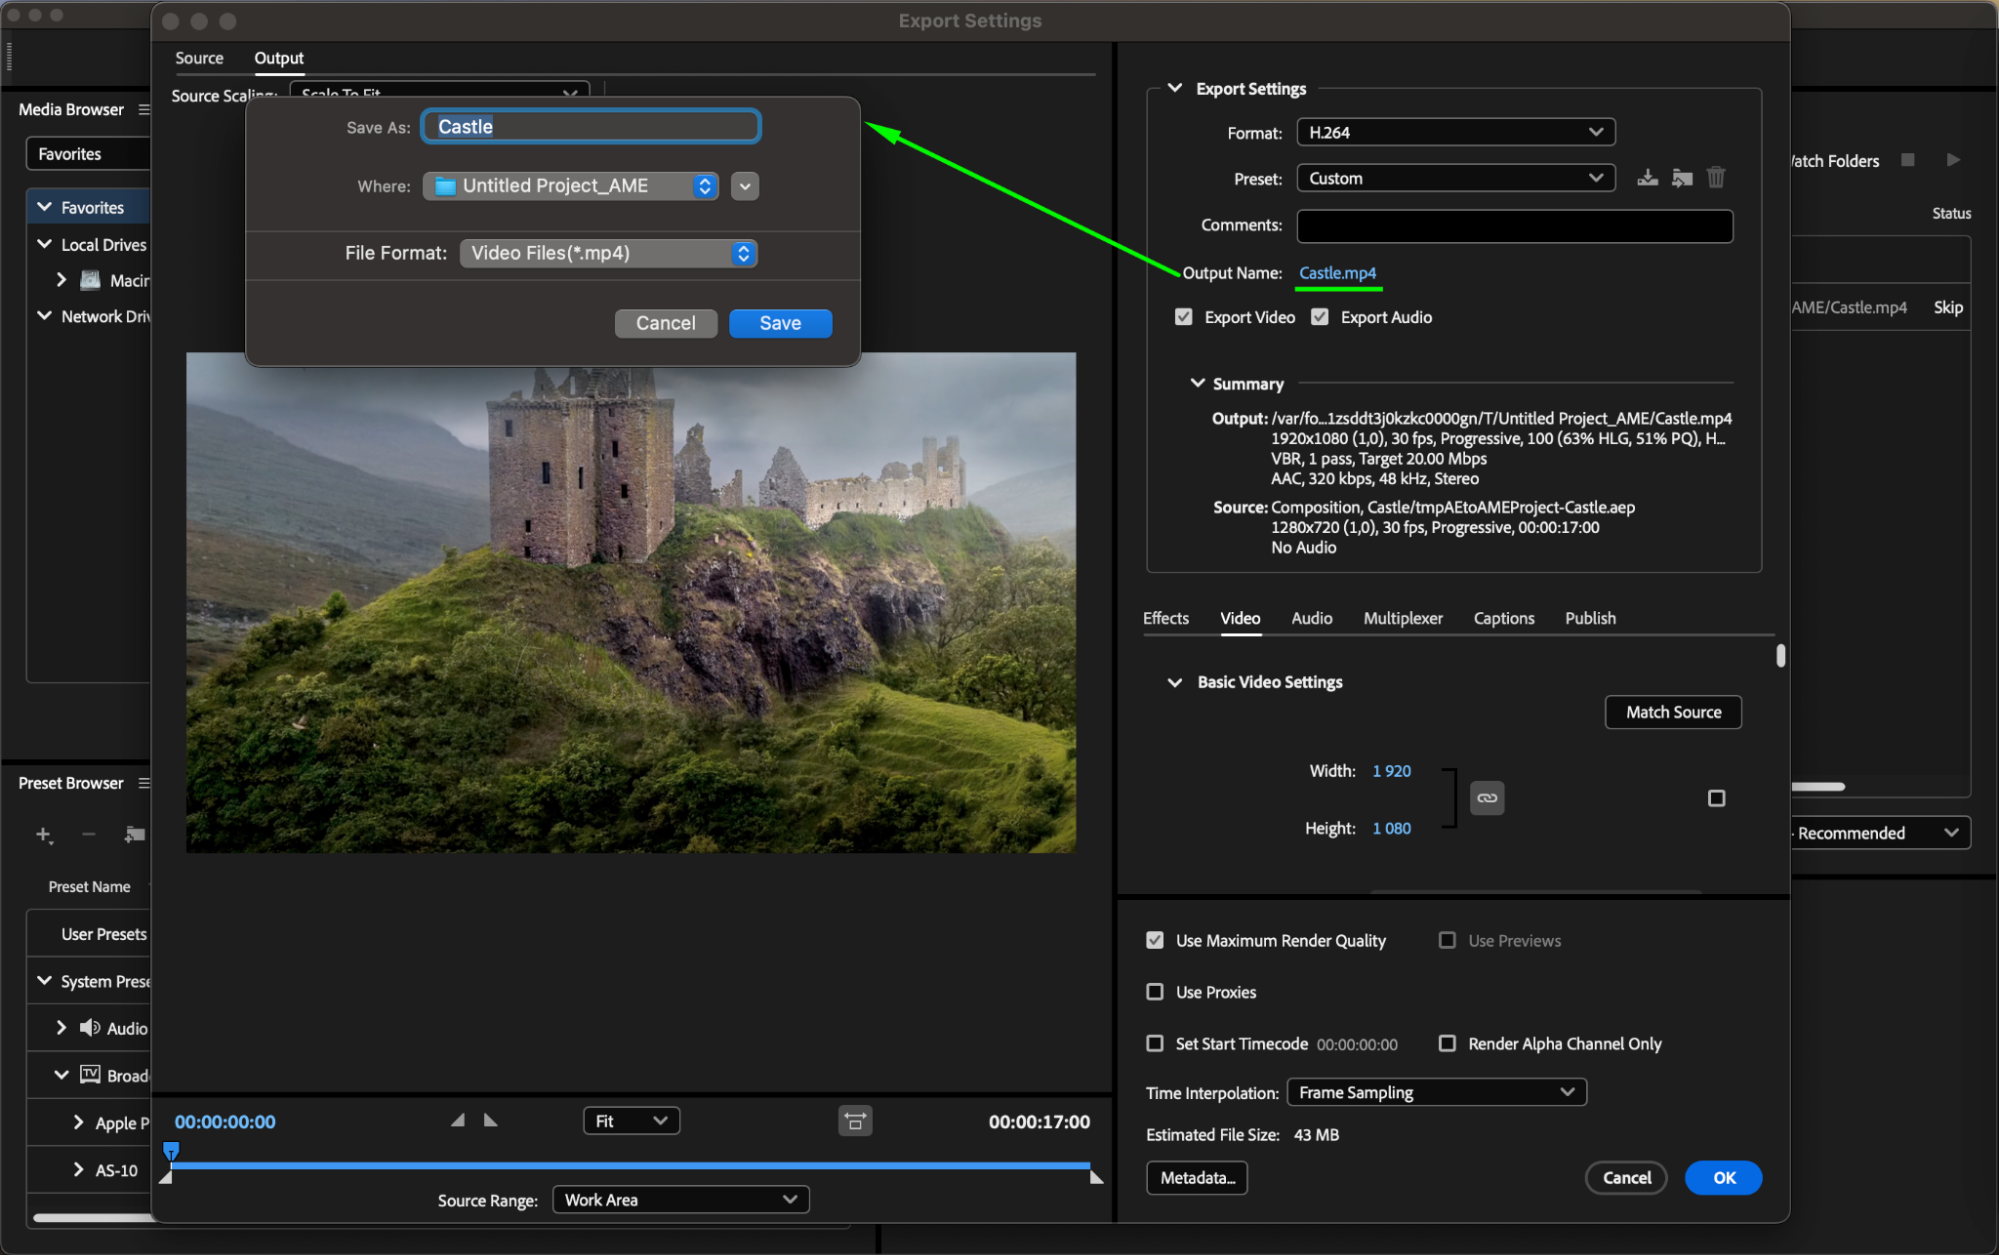
Set the name and location for your output file. Click on the file name in the Output Name section. In the dialog box that appears, select the destination folder and enter a name for your MP4 file. The format will be automatically set to .mp4. Click OK to save your settings and close the Export Settings panel.
4. Start the Encoding Process
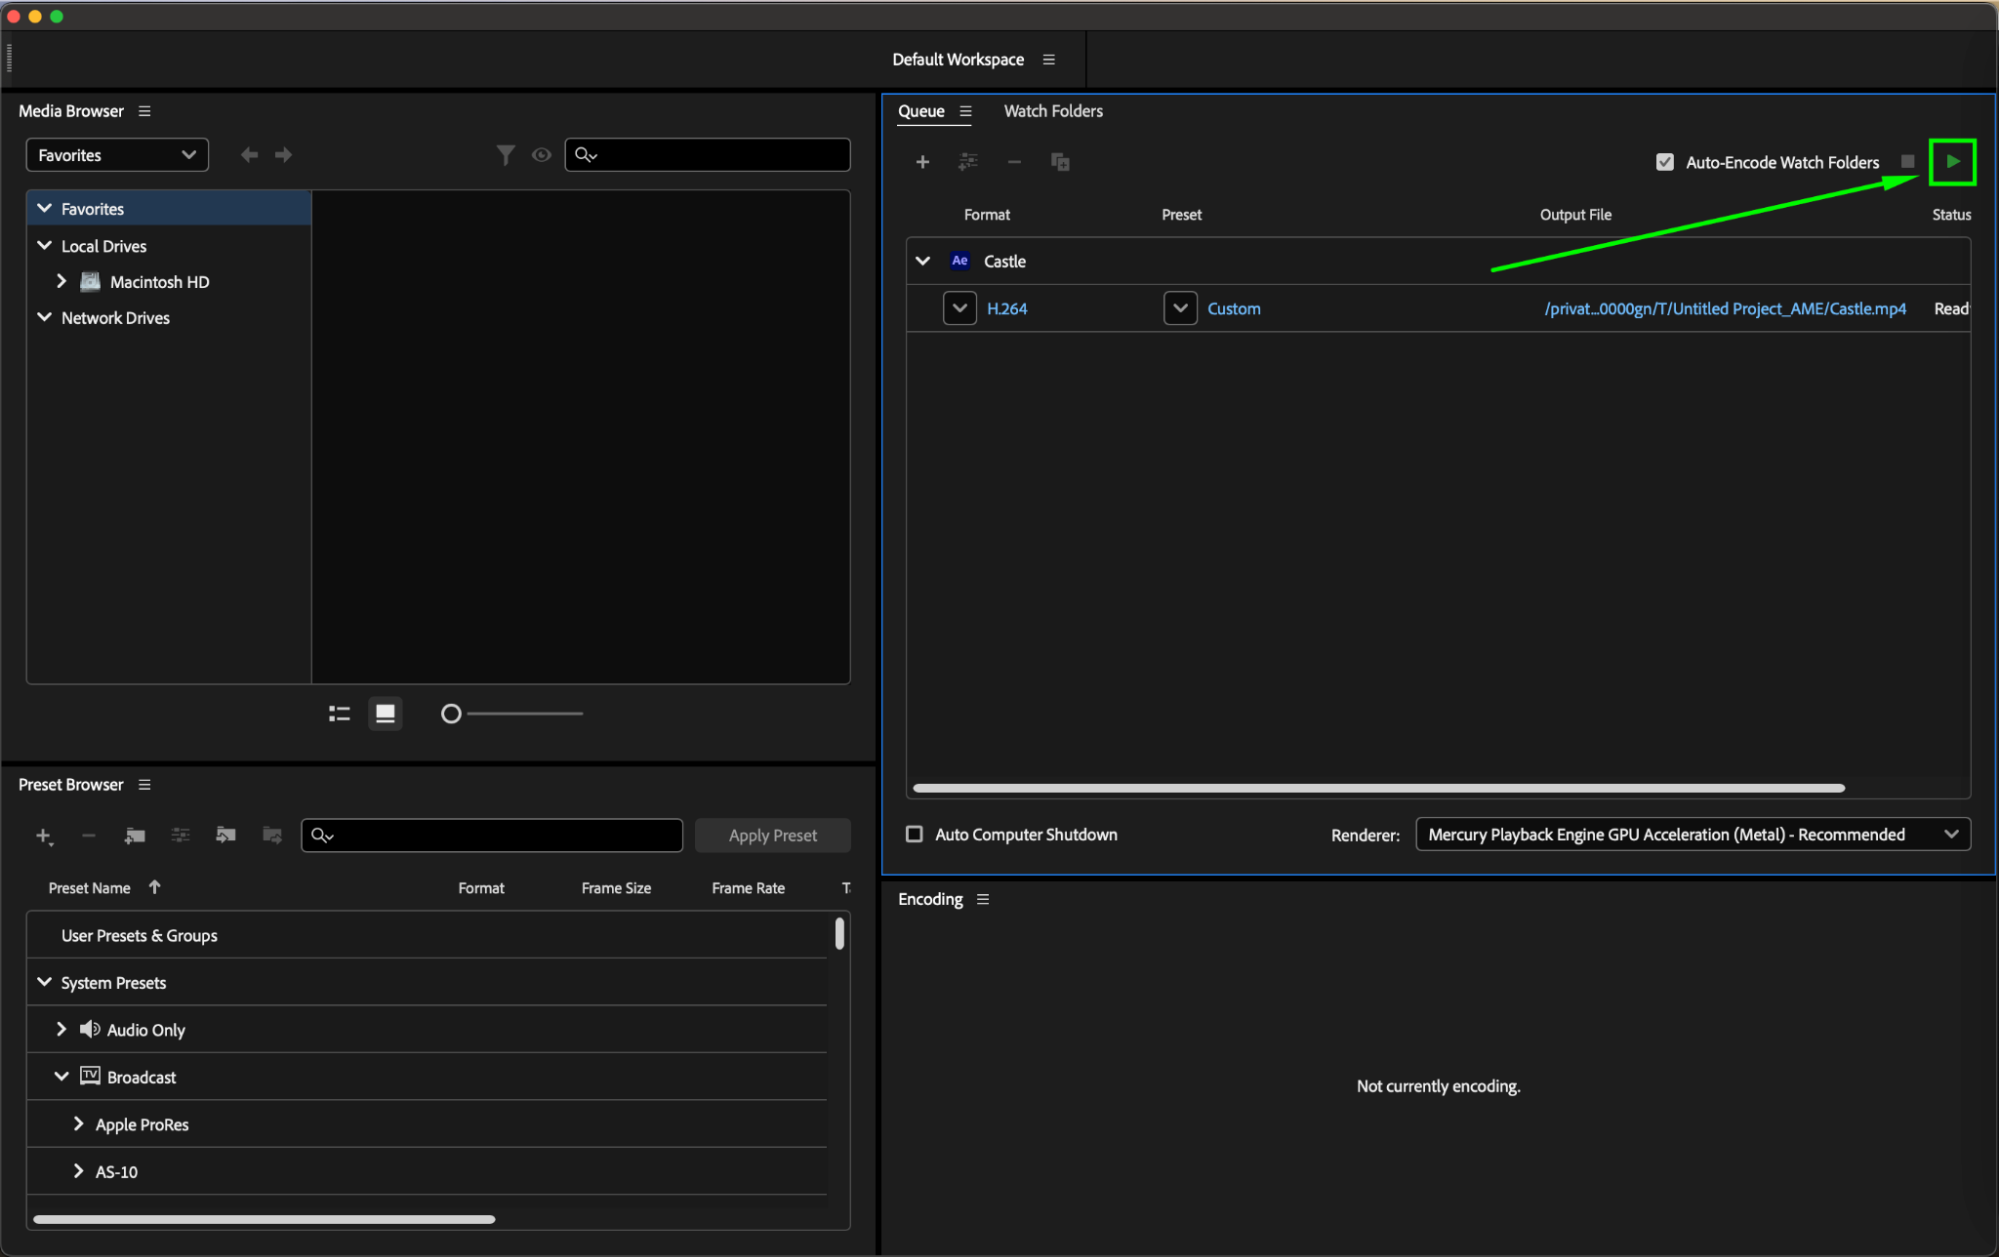
Begin the export process by starting the queue. Find the green Start Queue button in the top right corner of the Queue panel and click on it. The Encoding panel at the bottom will display the progress of your export.
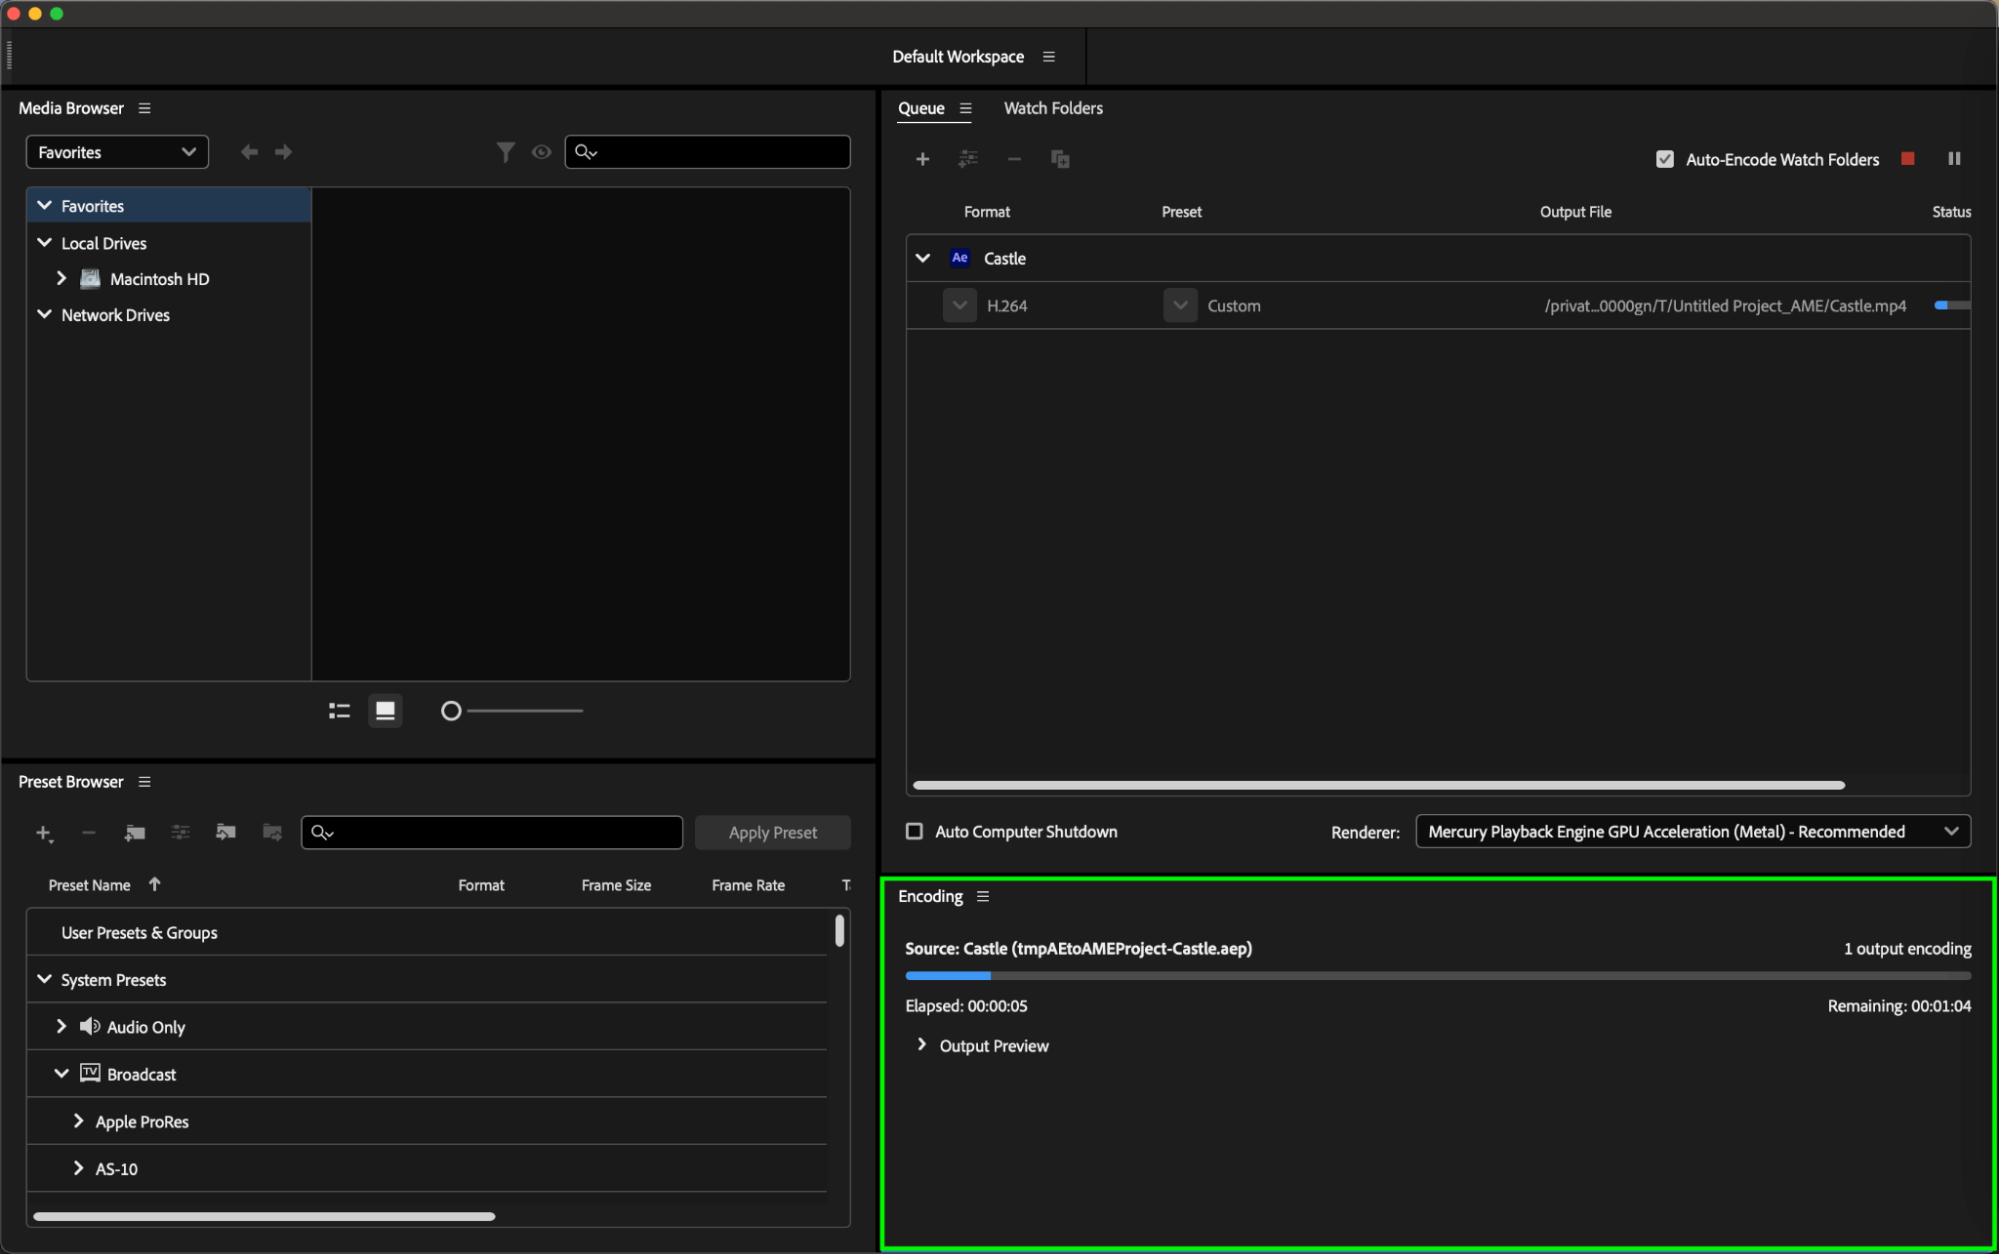
5. Check the Encoding Status
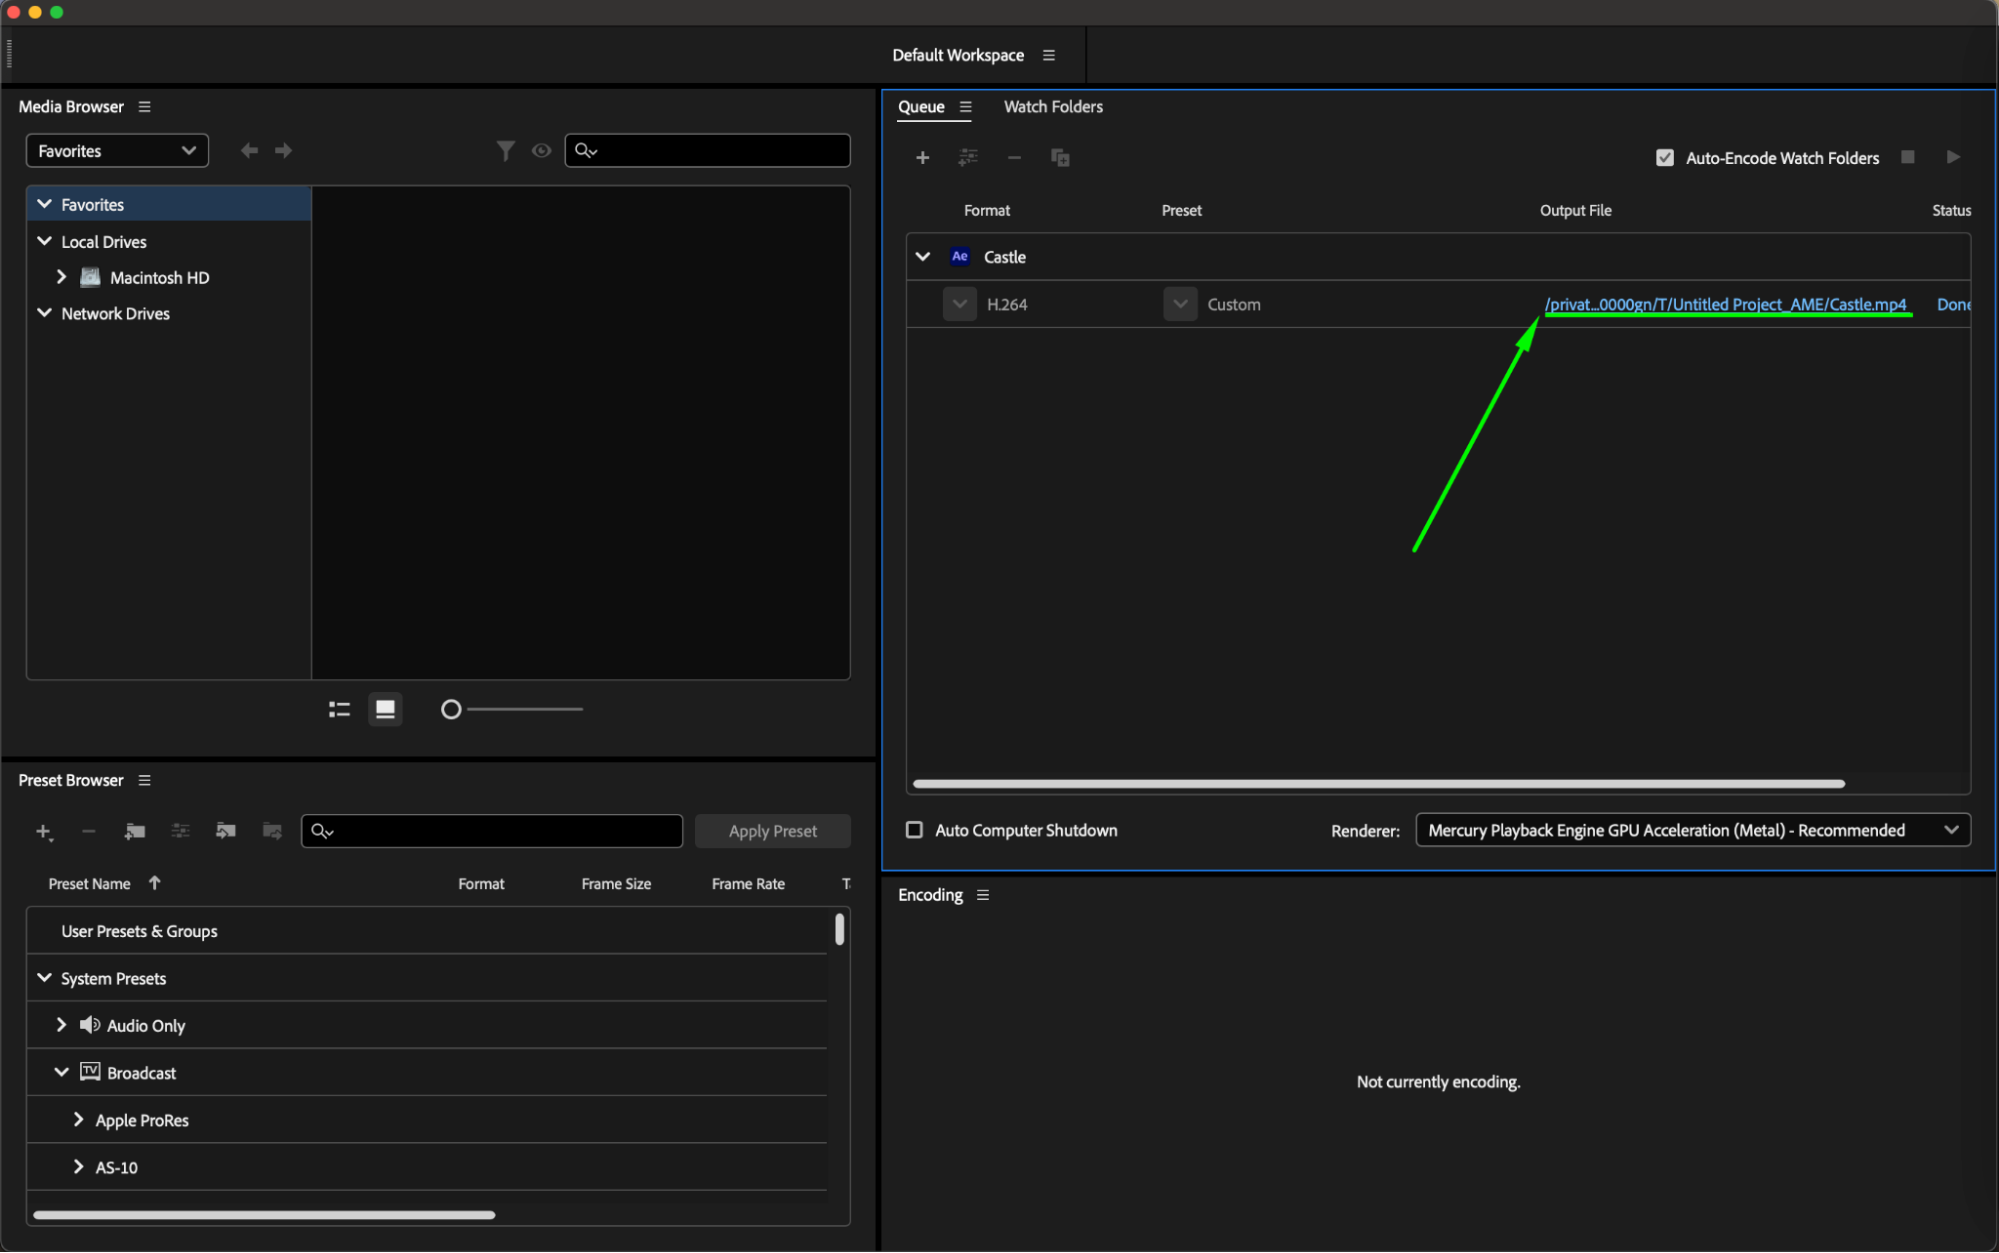
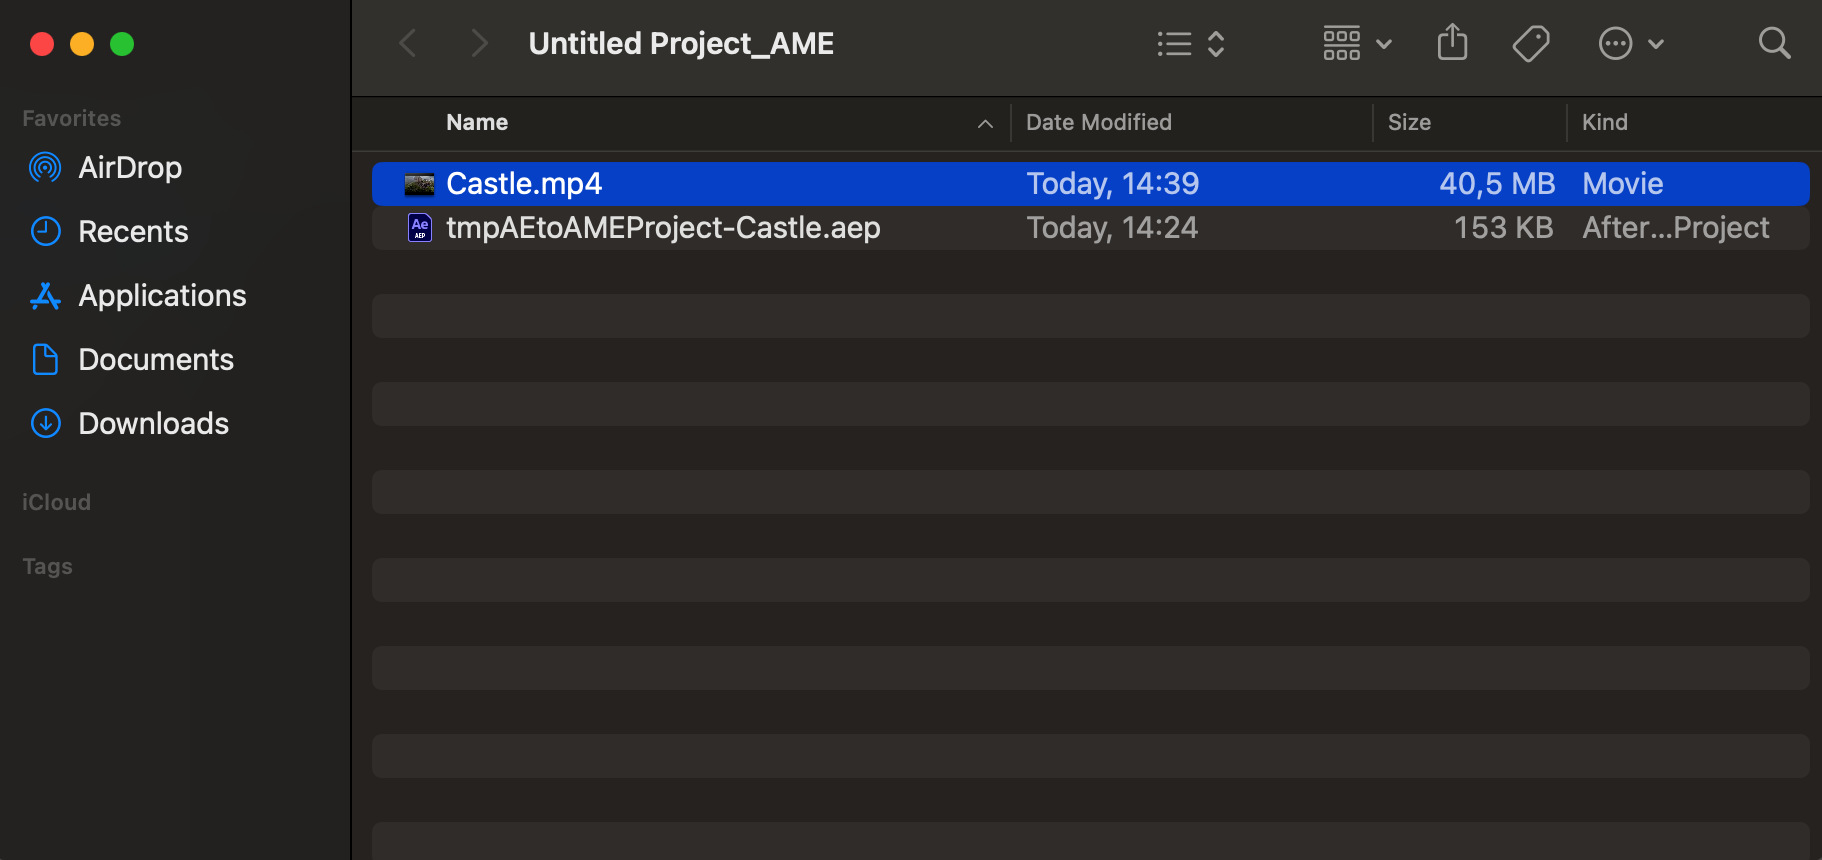
Once the encoding process is complete, the status of your project in the Queue panel will change to Done. To locate your file, click on the file name in the Output File column, which will open the folder where your MP4 file is saved.
Additional Tips
Adobe Media Encoder provides various presets optimized for different purposes, such as web, YouTube, and mobile devices. Select the one that best fits your needs. For advanced users, exploring custom settings can further optimize the output quality and file size. Adobe Media Encoder also allows you to queue multiple projects for export, making it efficient to render several compositions simultaneously.
By following these essential tips, you can confidently save your Adobe After Effects projects as MP4 files and share your creative vision with the world. Say goodbye to compatibility worries and hello to seamless playback across platforms and devices. Start utilizing the power of the MP4 format and make your After Effects creations shine!
Conclusion: Mastering the Art of Saving Adobe After Effects as MP4
Saving your Adobe After Effects projects as MP4 files doesn’t have to be a daunting task. By following the essential tips outlined in this article, you can confidently convert and save your creations in the widely-compatible MP4 format.
Now armed with the knowledge and guidelines presented in this article, you can confidently save your Adobe After Effects projects as MP4 files and share your creative vision with the world. Let the MP4 format be your gateway to reaching a wider audience and showcasing your talent. Put these tips into practice, and you’ll be well on your way to mastering the art of saving Adobe After Effects as MP4. Happy exporting!


