How to save an After Effects project as an MP4 file using Adobe Media Encoder:
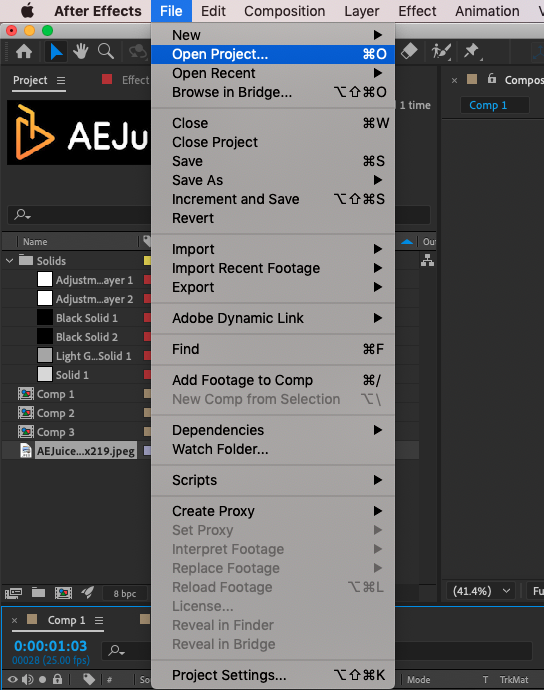
- First, open the After Effects project that you want to export. This can be done by going to File > Open Project…, or by double-clicking the project file on your computer.
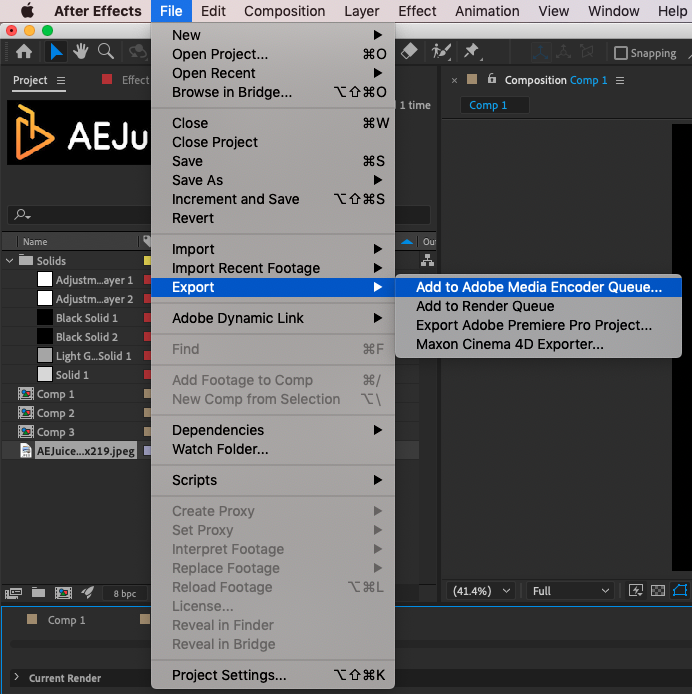
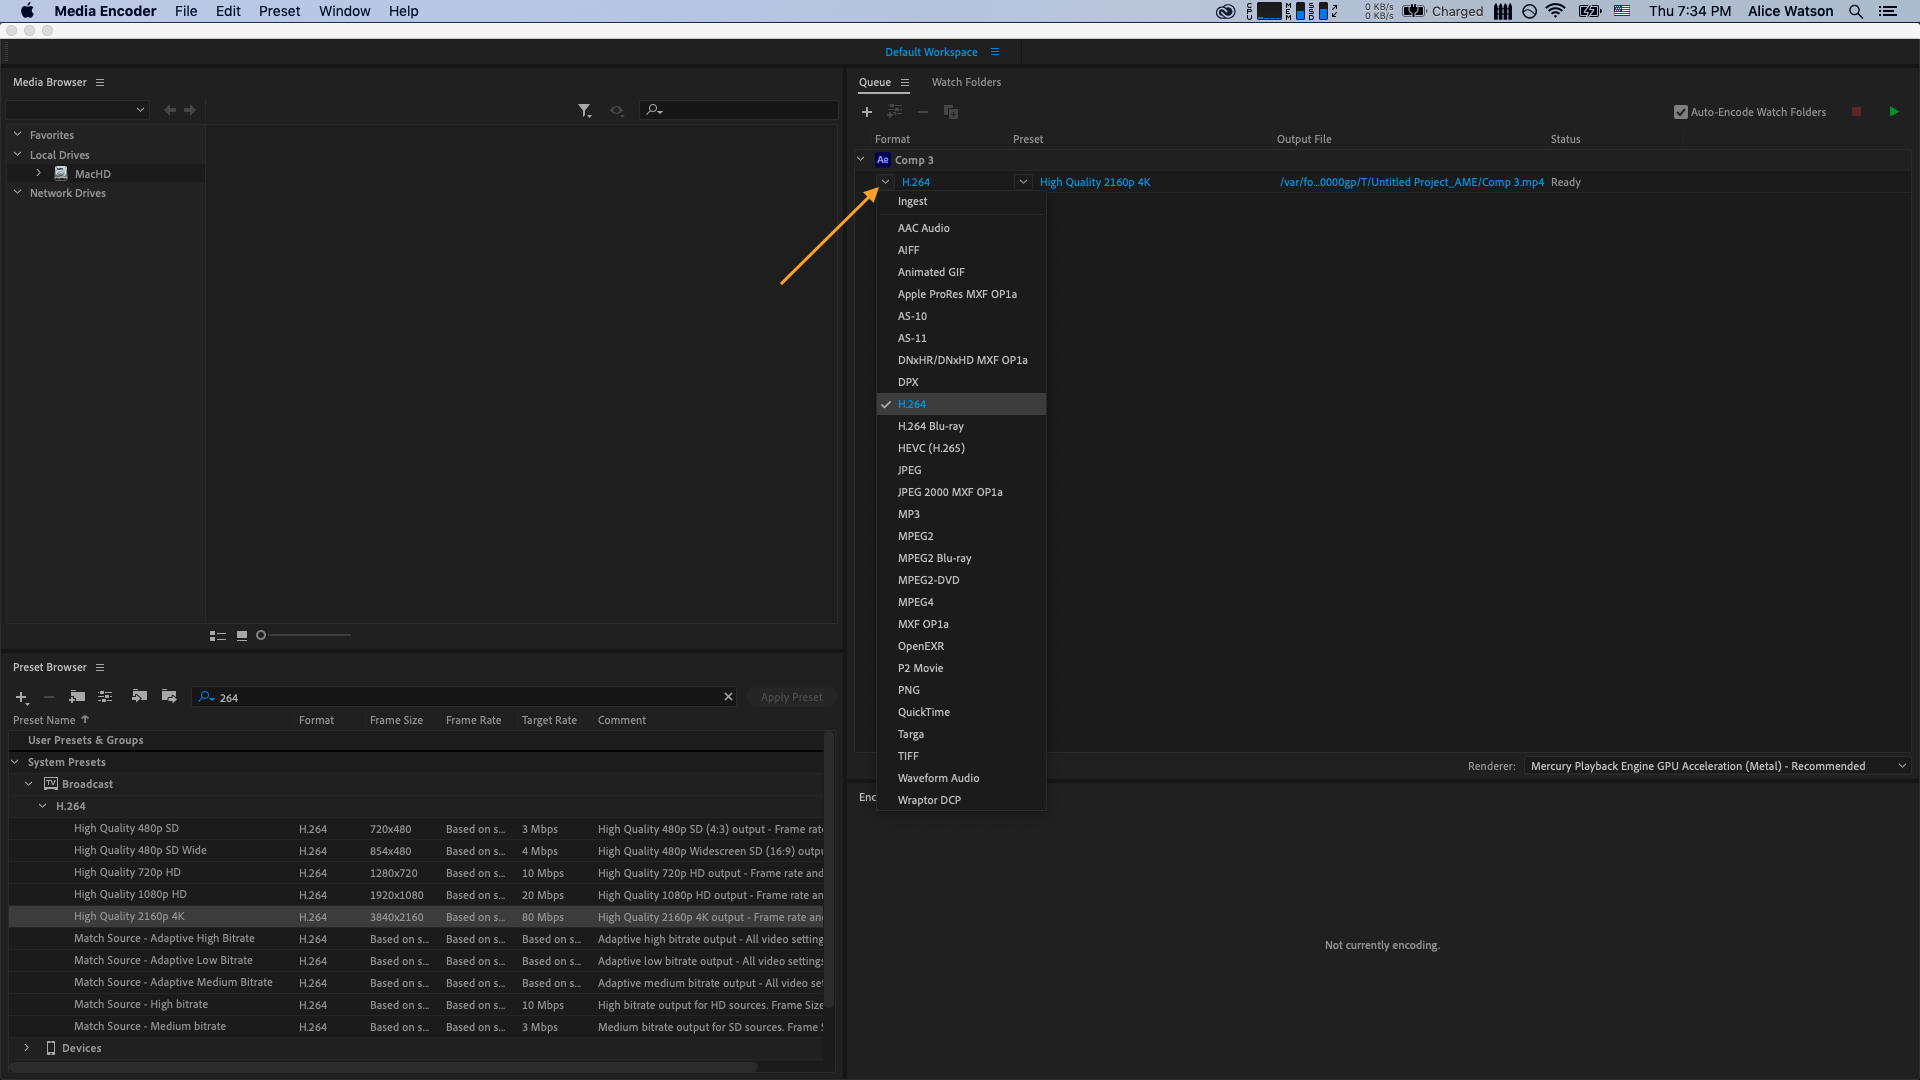
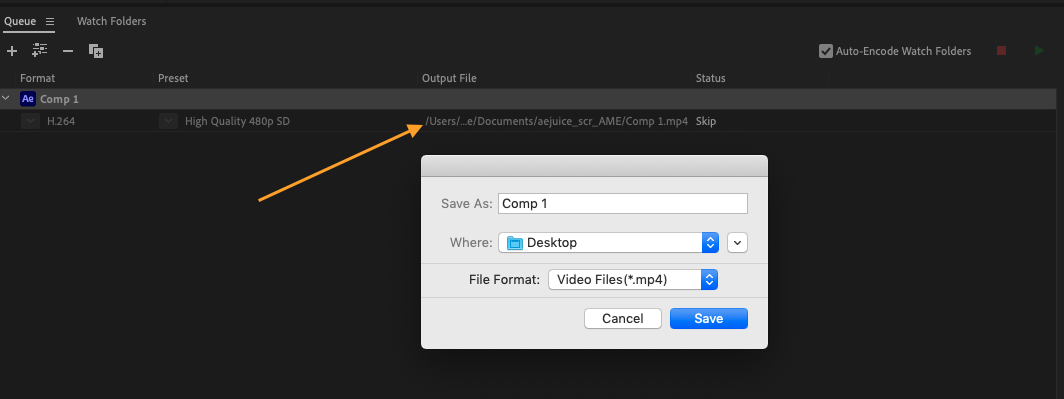
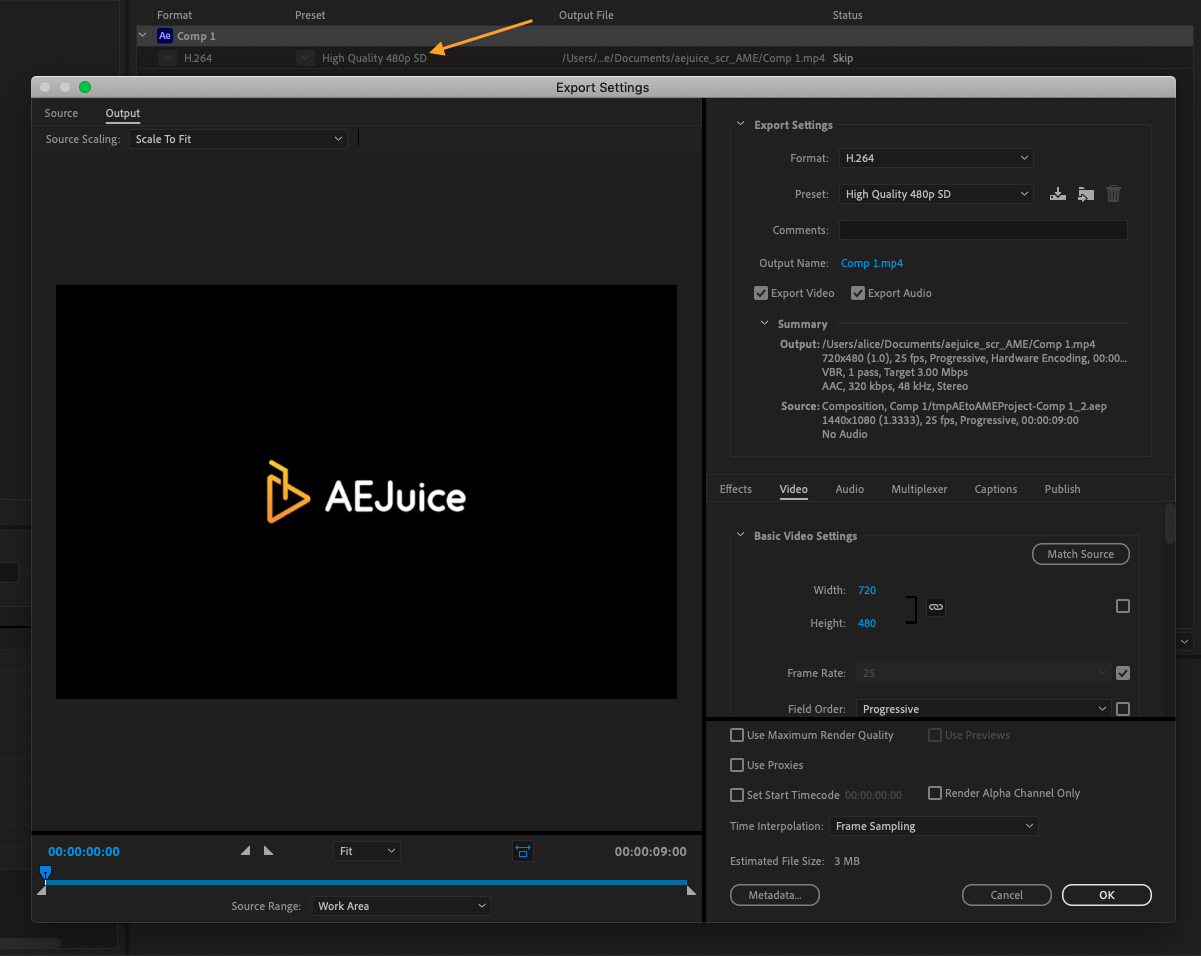
- Next, go to File > Export > Add to Adobe Media Encoder Queue… This will start Media Encoder where you can specify the details for exporting your project.
Get 10% off when you subscribe to our newsletter
By subscribing you agree to your email being stored and used
to receive the emails in accordance to our Privacy Policy


Conclusion
Adobe Media Encoder is very useful when it comes to productivity since you can render the file and continue using After Effects.
Another cool feature is the ability of the Media Encoder to queue and renders multiple exports at once. This can be helpful if you need to save different versions of your project with different settings, or if you want to export multiple projects at the same time.
Overall, saving an After Effects project as an MP4 file is a straightforward process that allows you to share your work with a wider audience. With a little bit of knowledge and practice, you’ll be able to master this important skill and create high-quality videos that showcase your creativity and skills.


