Step-by-Step Guide on Saving a Video File in After Effects
Introduction – Understanding the Importance of Saving Video Files in After Effects
In the world of video editing, Adobe After Effects stands as one of the most widely used software programs. It offers a plethora of tools and effects that allow users to create stunning visuals, motion graphics, and animations. However, once you’ve invested hours of creativity and effort into your project, it is crucial to know how to properly save your video file in After Effects.
Get 10% off when you subscribe to our newsletter

Saving a video file in After Effects not only preserves your hard work, but also ensures that it can be shared, exported, and used on various platforms and mediums. In this article, you will find out how to save your video file in After Effects by choosing the correct file formats for your project.
Whether you’re a seasoned professional or just starting in video editing, mastering the art of saving your video files in After Effects is an essential skill that can greatly benefit your workflow. So, let’s dive in and explore the various techniques to effectively save your projects with complete control and compatibility!
Choosing the Right File Format and Settings for Saving in After Effects
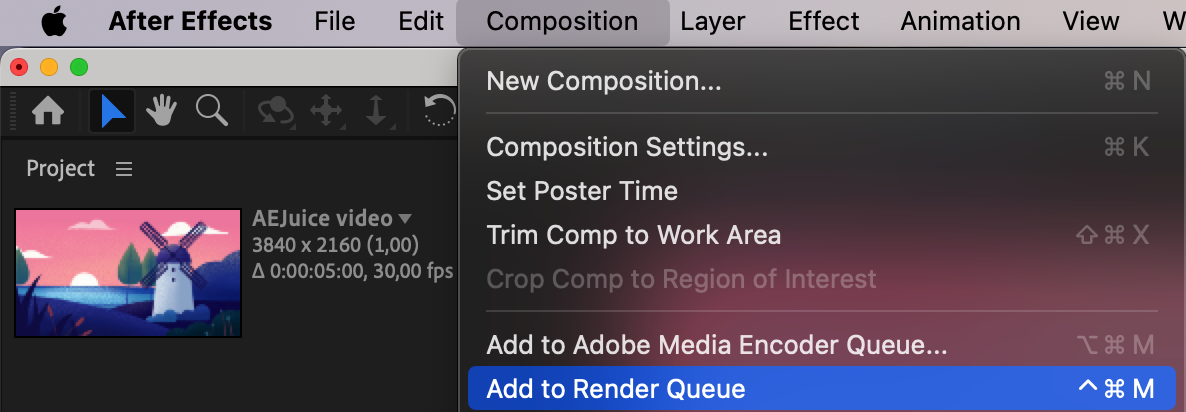
After you’ve completed your masterpiece in After Effects, it’s important to save your video file in a format that matches the purpose of your project. To integrate best practices into your work and make the right choices, make sure to remember these key factors:
1. Export Formats: Depending on your requirements, After Effects offers a range of export formats such as MP4, MOV, AVI, and more. For web and social media sharing, MP4 is frequently used due to its widely supported playback. If you need a lossless compression format, consider using QuickTime’s Animation (Windows) or ProRes codec (Mac).
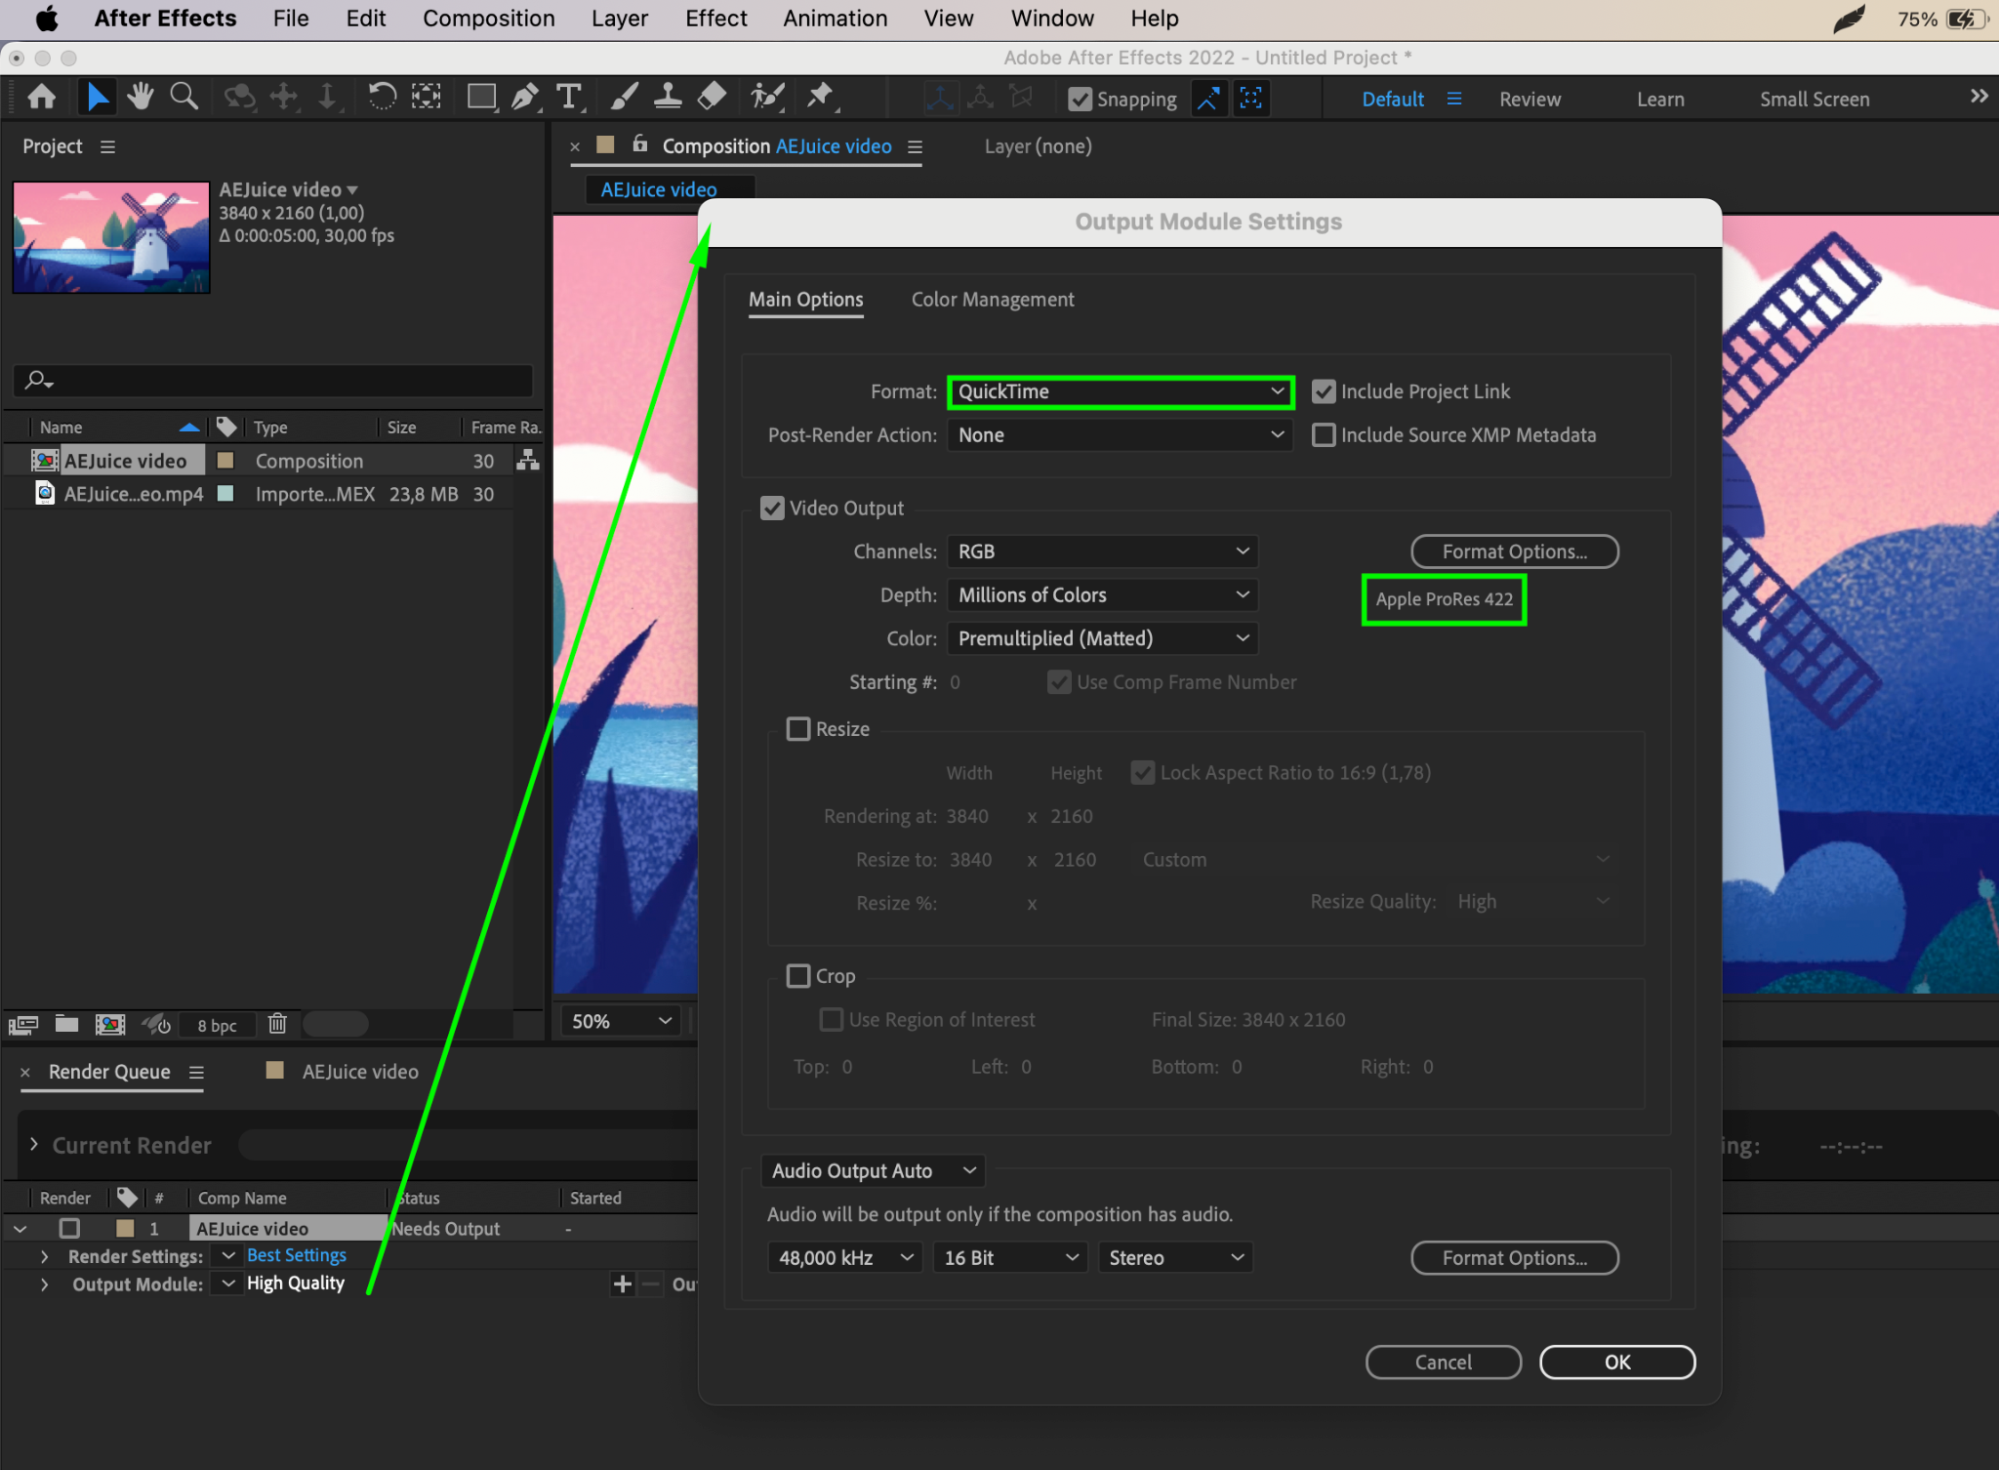
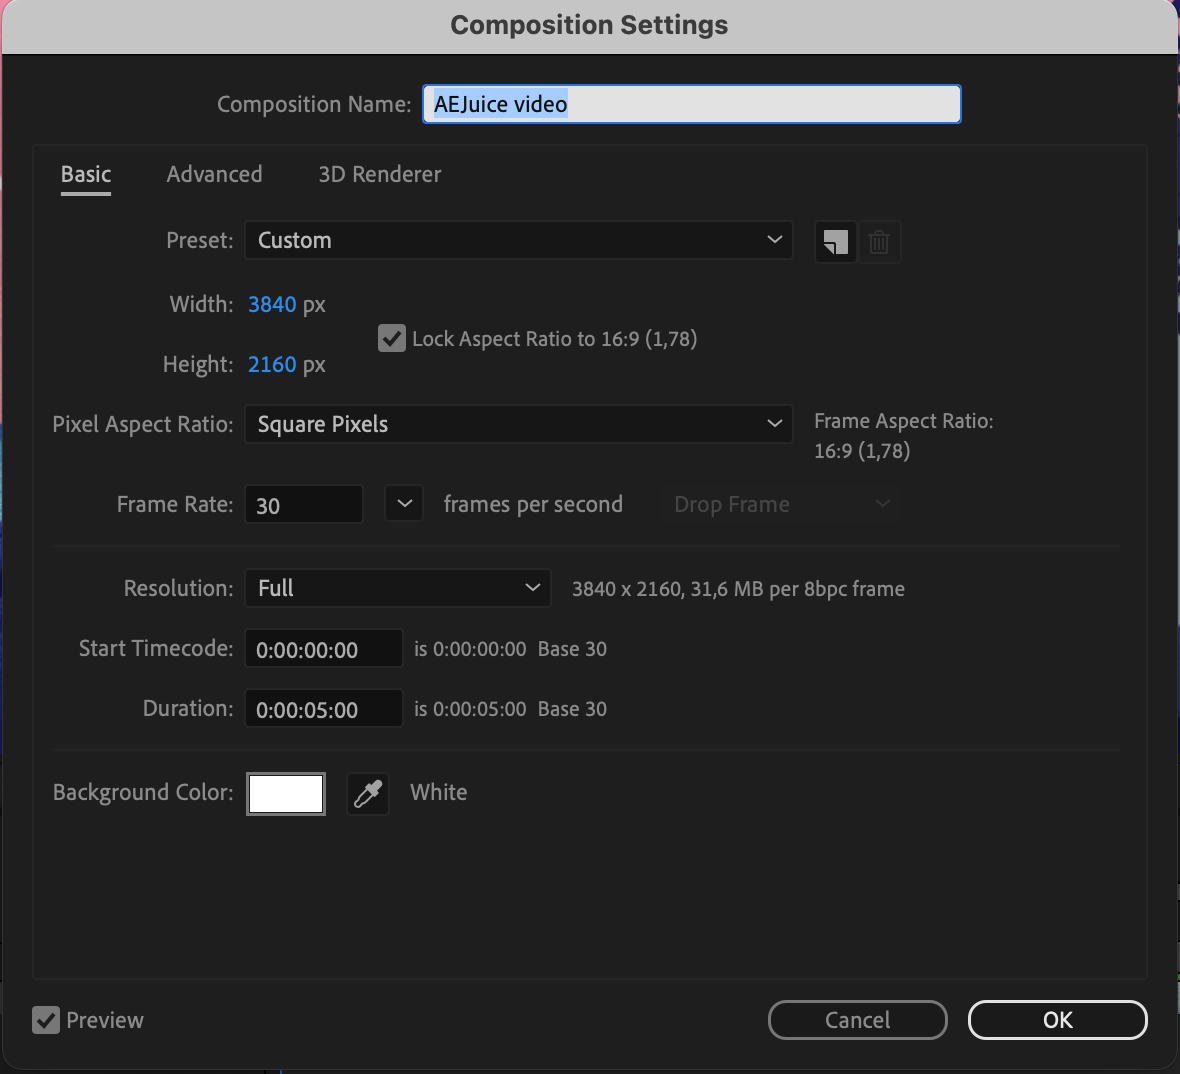
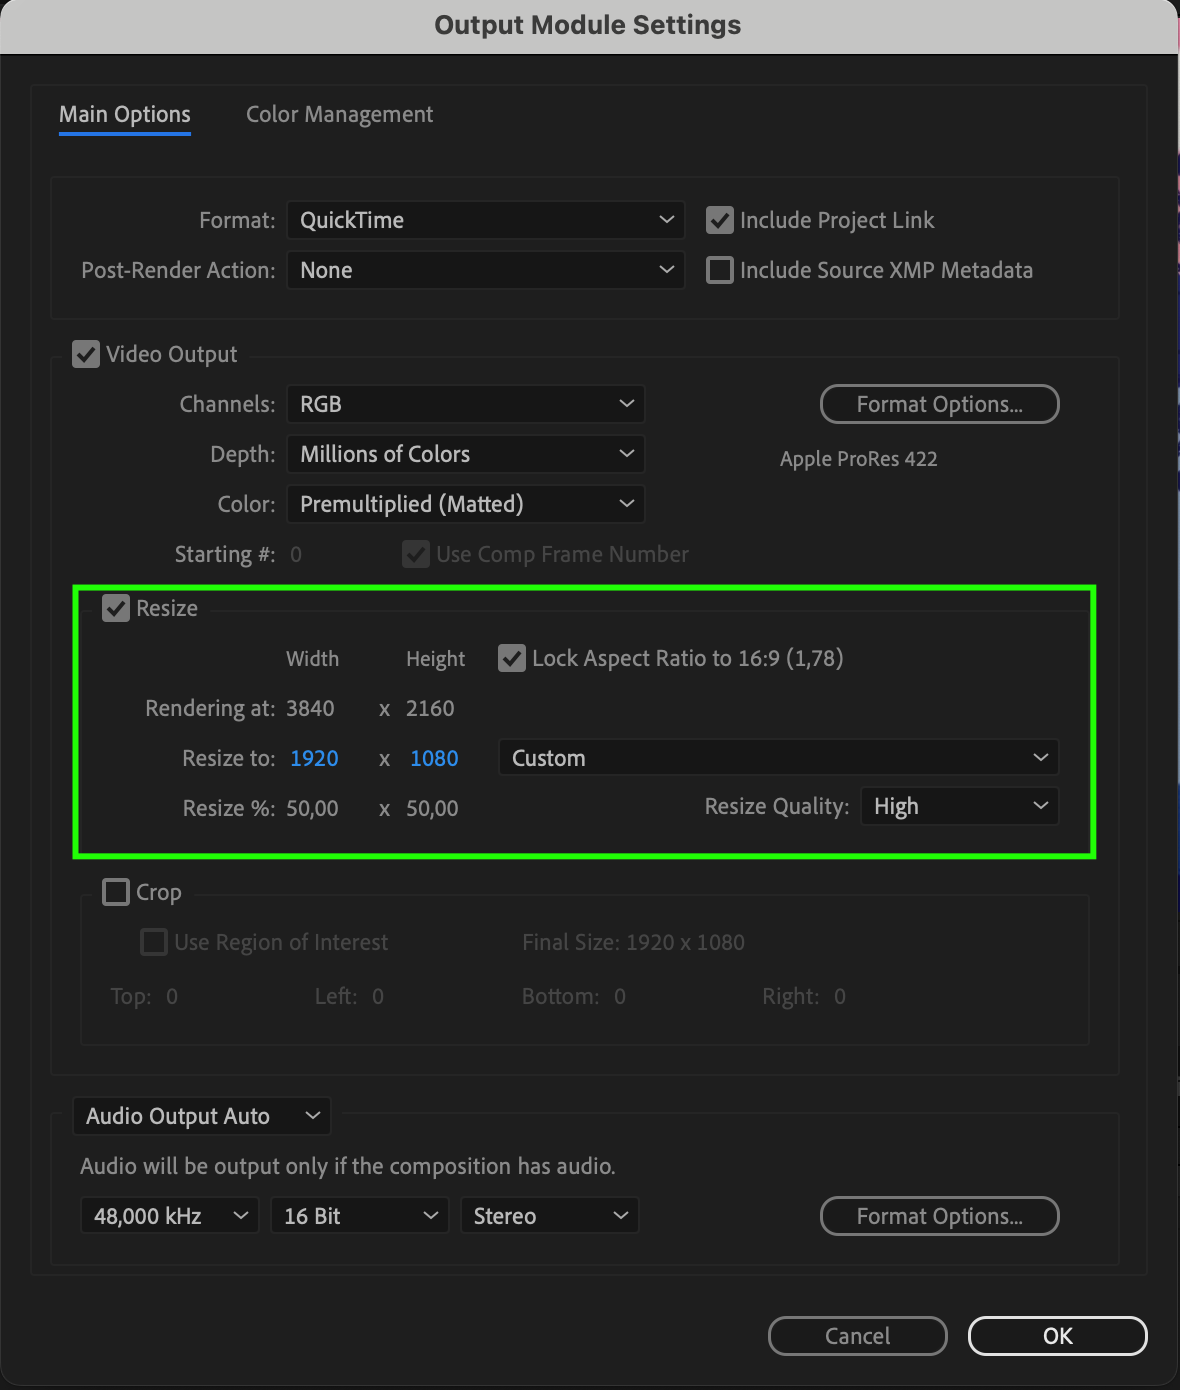
2. Bitrate and Resolution: Choosing the appropriate bitrate and resolution is crucial to maintain video quality. Higher bitrates result in larger file sizes, while lower bitrates may sacrifice visual fidelity. Ensure that you strike the right balance between file size and quality. For resolution, consider the platform on which your video will be viewed. For web and mobile devices, a resolution of 1920×1080 (1080p) is usually sufficient.
Get 10% off when you subscribe to our newsletter

3. Color Space: If your project involves color-critical work, ensure that you choose the appropriate color space and bit depth. For web and standard video delivery, the recommended color space is RGB. For high-end projects, consider using Adobe RGB or ProPhoto RGB to preserve the widest color gamut.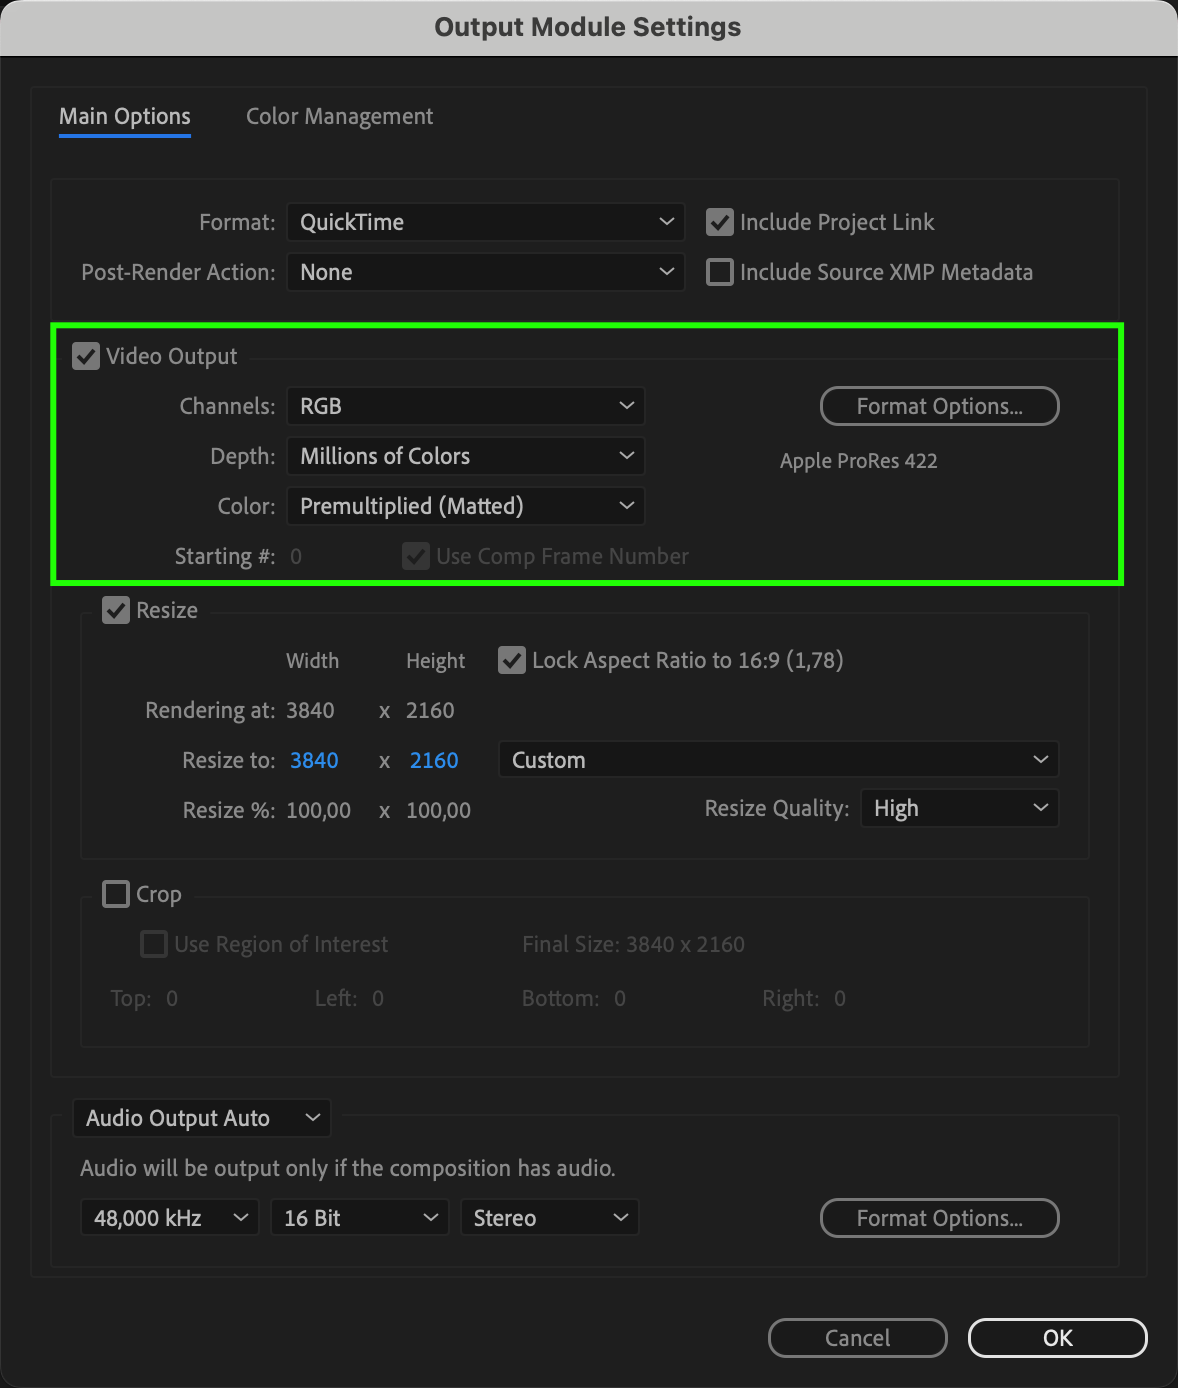
Get 10% off when you subscribe to our newsletter
4. Alpha Channel: If you have transparent elements in your video, make sure to enable the alpha channel option while saving. This allows you to preserve transparency for compositing purposes in other applications.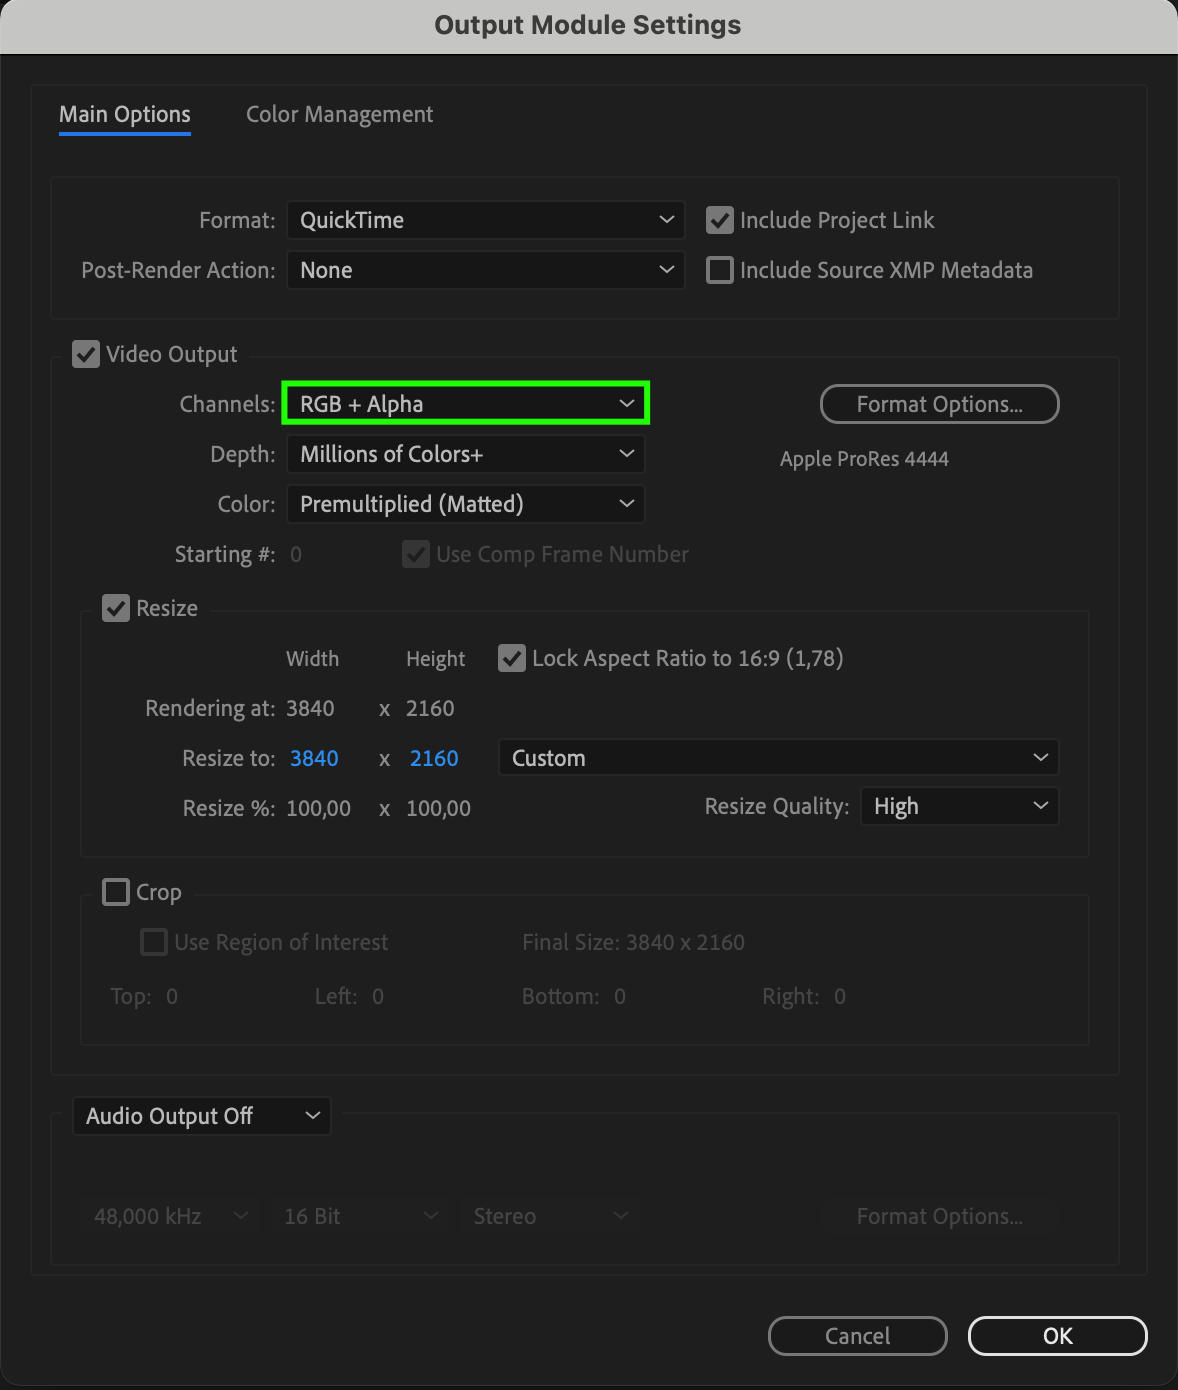
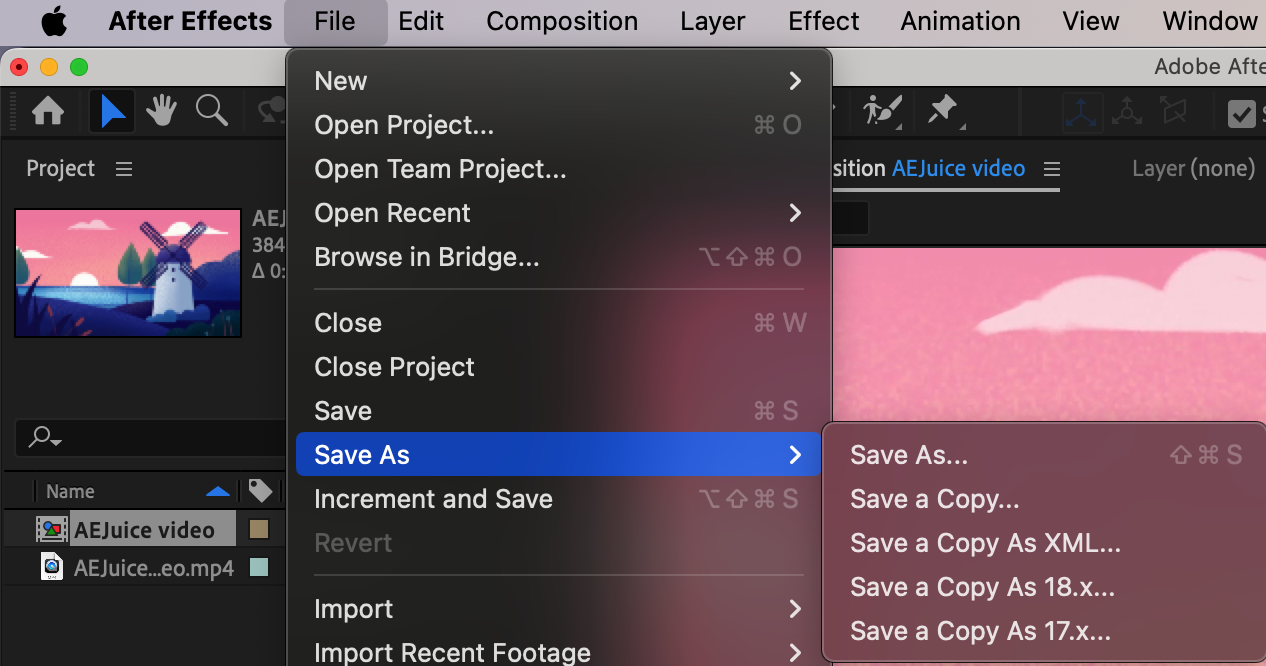
5. Keyboard Shortcuts: Utilizing keyboard shortcuts in After Effects can greatly speed up your workflow. Use hotkeys like Ctrl/Cmd + Shift + S to quickly access the “Save As” dialog box, or Ctrl/Cmd + S to save your project without needing to navigate through menus.

By considering these factors when saving your video files in After Effects, you can ensure optimal quality, compatibility, and flexibility. Additionally, incorporating keyboard shortcuts into your workflow can save you valuable time and effort.
So, remember to pick the right format, adjust the bitrate and resolution, select the appropriate color space, enable the alpha channel if needed, and take advantage of keyboard shortcuts to simplify the saving process. With these tips in mind, you’ll be ready to share your creations with the world in the best possible way!
Conclusion – Mastering the Art of Saving Video Files in After Effects
Saving your video file in After Effects is a critical step to preserve your hard work and ensure its usability across various platforms and mediums. By following the guidelines discussed in this article, you can optimize your saved video files for quality, compatibility, and efficient workflow.
Get 10% off when you subscribe to our newsletter
First, understanding the importance of choosing the right file format and settings is crucial. Consider the intended purpose of your video, whether it’s for web, social media, or high-end projects, and select the appropriate format, resolution, bitrate, color space, and alpha channel options accordingly.
Secondly, don’t forget to take advantage of keyboard shortcuts to save time and streamline your workflow. Utilize hotkeys such as Ctrl/Cmd + Shift + S or Ctrl/Cmd + S to quickly access the save dialog box or save your project without navigating through multiple menus.
Get 10% off when you subscribe to our newsletter
Remember, each project may have unique requirements, so it’s essential to experiment and adapt the settings and formats to best suit your specific needs.
By mastering the art of saving video files in After Effects, you can ensure the preservation of your creative endeavors, maintain the highest quality output, and effortlessly share your work with the world.
So, go ahead and utilize these strategies, enjoy the creative process in After Effects, and confidently save your video files knowing that you have made the most of this powerful software!
Get 10% off when you subscribe to our newsletter
Our Bestsellers

