Keyframes determine the starting and ending points of an animation, as well as any intermediate points in between. They allow you to animate properties such as position, scale, rotation, opacity, and more. Placing a keyframe is the fundamental process of After Effects. Instances that all designers and editors need to learn and apply it.
Here’s a step-by-step guide on how to set a keyframe in after effects:
Step 1: Open your composition
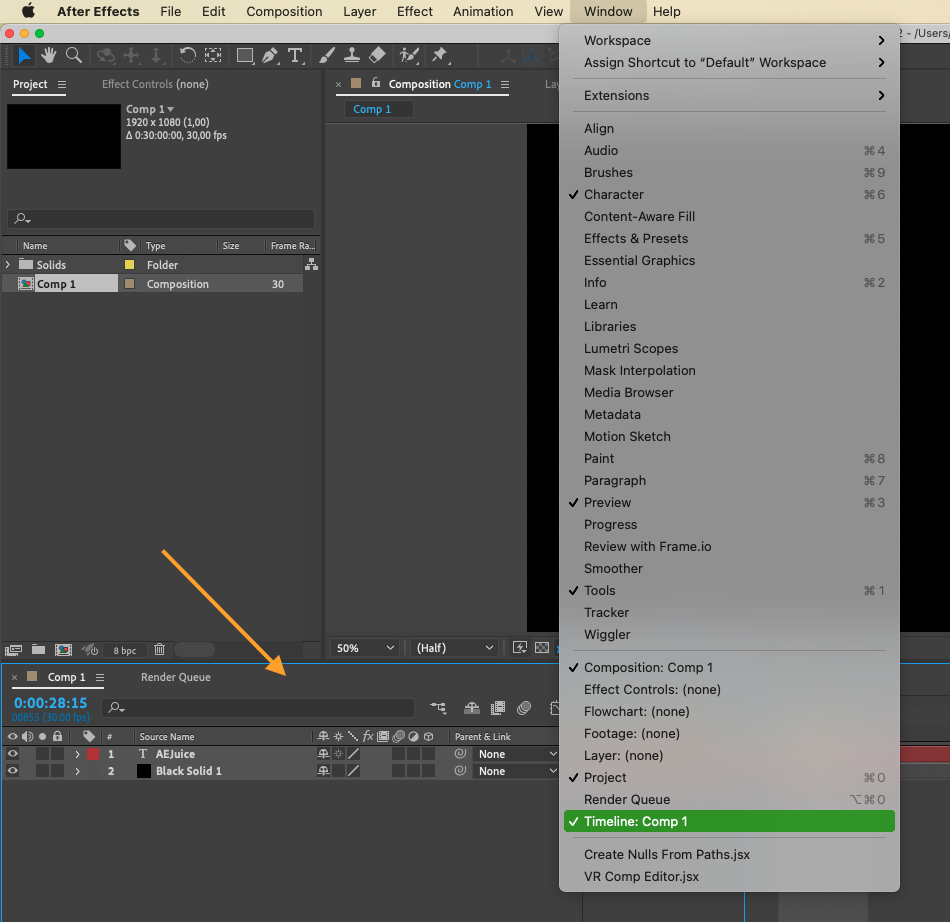
Open After Effects and create a new composition or open an existing one. Ensure that the timeline panel is visible, as it is where you will be setting your keyframes.
Step 2: Select your layer
In the timeline panel, locate the layer that you want to apply the keyframes to. Click on the layer to select it.
Step 3: Choose a property to animate
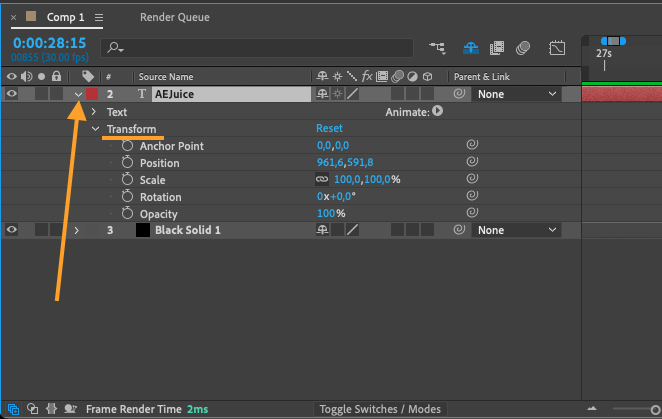
With the layer selected, click on the arrow to the left of the layer name to reveal the properties. Expand the property you wish to animate, such as position or opacity.
Step 4: Set the initial value
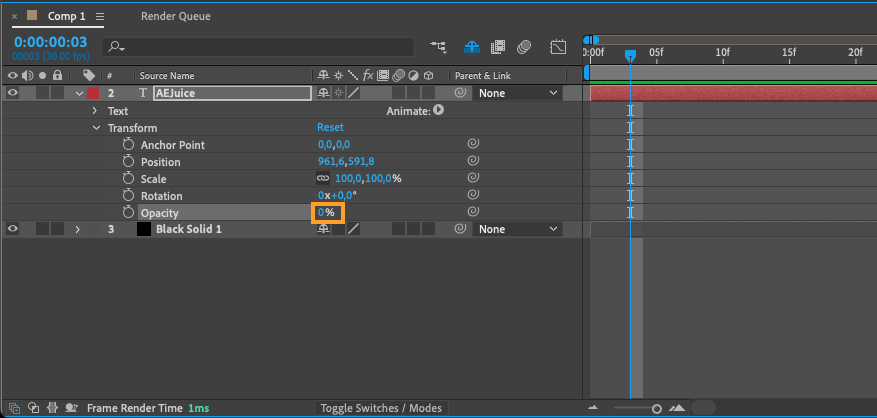
Move the current-time indicator (CTI) to the desired starting point of your animation by dragging the time scrubber or entering a specific timecode. Adjust the property value by dragging the slider or entering a numerical value in the property panel. This value will be the starting point of your animation.
Step 5: Set the keyframe
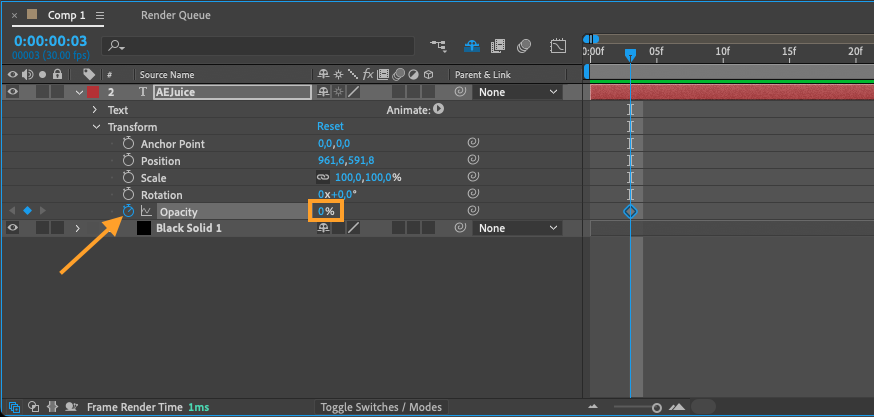
To set a keyframe, click on the stopwatch icon next to the property name. This will create a keyframe at the current position of the CTI, with the initial value you set in Step 4.
Step 6: Adjust the property value over time
Move the CTI to a different frame in the timeline where you want to change the property value. Modify the value of the property to a new desired setting. After Effects will automatically create a new keyframe at this position.
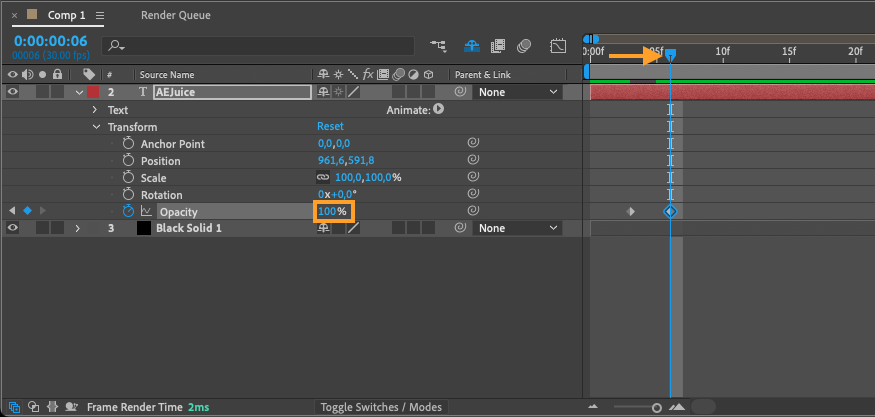
Step 7: Refine your animation
Repeat Step 6 to set additional keyframes at various points in time. By adjusting the values of these keyframes, you can create smooth and dynamic animations.
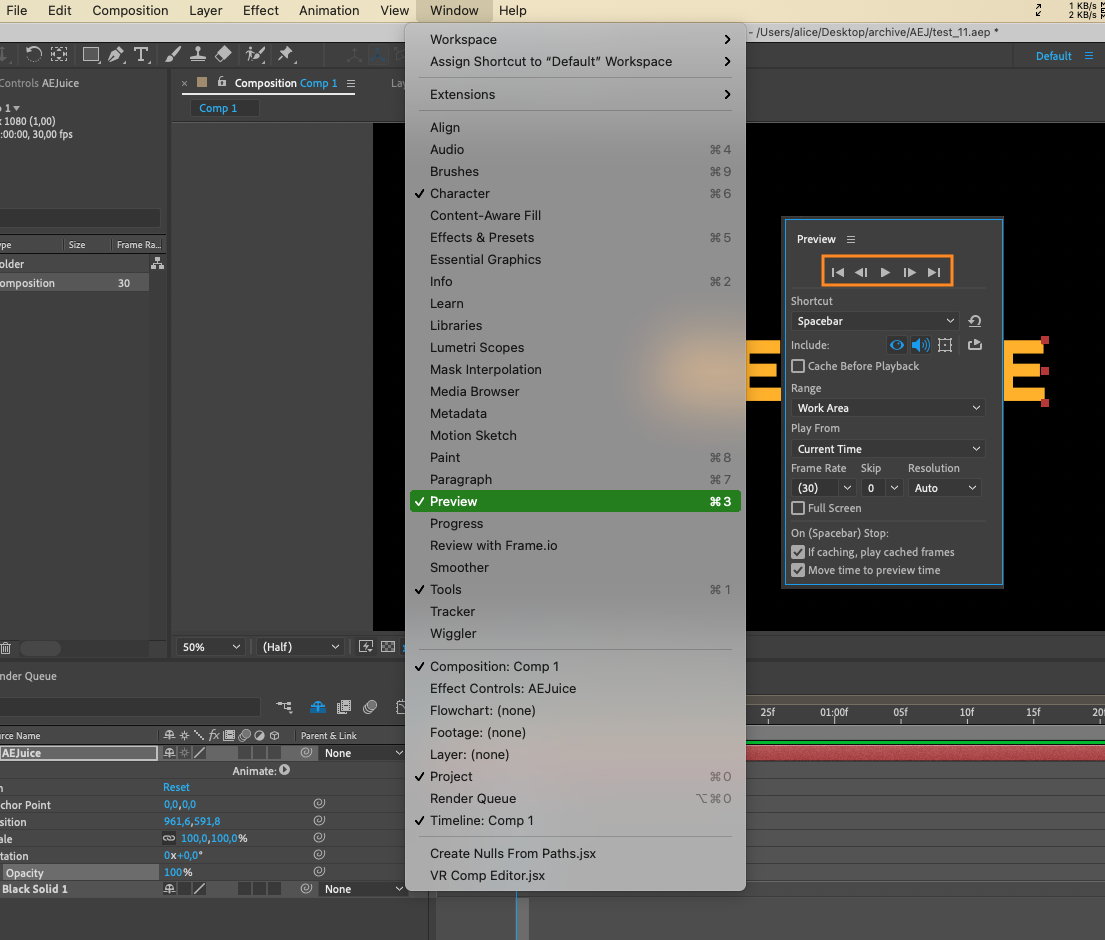
Step 8: Preview your animation
To preview your animation, press the spacebar or use the RAM Preview function (shortcut: “0” on the numeric keypad). This will play back your composition, showing the animation created by the keyframes you set.
Setting keyframes is such a fundamental skill. It allows you to create exceptional animations and bring your designs to life. By manipulating properties over time, you can achieve intricate motion and video enhancements. With practice, you’ll become experienced with the art of setting keyframes to take your animations to the next level.
Now that you have the basic knowledge of how to set a keyframe in After Effects, it’s time to unleash your creativity and explore the limitless possibilities that this powerful video editor offers. Happy Animating!

