Setting Up Output Module in After Effects
Mastering Output Module Settings in After Effects
When you work on projects in After Effects, you put a lot of effort into creating visually appealing and impactful content, right? But all that hard work would be in vain if you don’t export your project correctly. That’s where the output module comes into play—it’s like the finishing touch that ensures your project shines when you share it with the world.
So, let’s dive into the world of setting up the output module in After Effects. Have you ever wondered how to export your project in just the right format and quality? You’re in the right place! In this article, we’ll guide you through the process, step by step, so that you can export your projects effectively and impress your audience.
Understanding the output module is key to getting the best results. It’s like having a magic wand that lets you customize your final export just the way you want. From choosing the right format and codec to adjusting the resolution, frame rate, and audio settings, the output module has got you covered. By tweaking these settings, you can ensure that your exported video looks amazing and sounds great—no more fuzzy visuals or crackling audio!
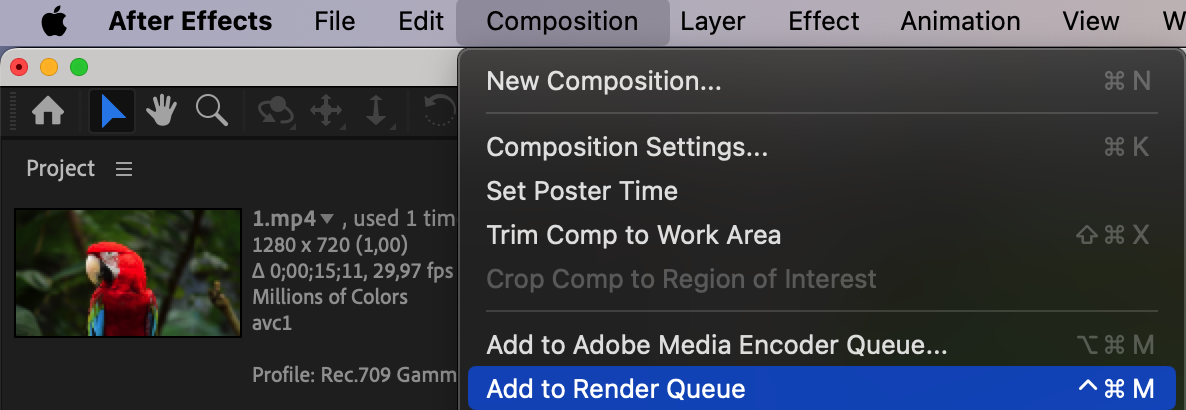
Step 1: Adding the composition to the render queue
Navigate to the Composition menu and select “Add to Render Queue”. This will open the Render Queue panel with your chosen composition.
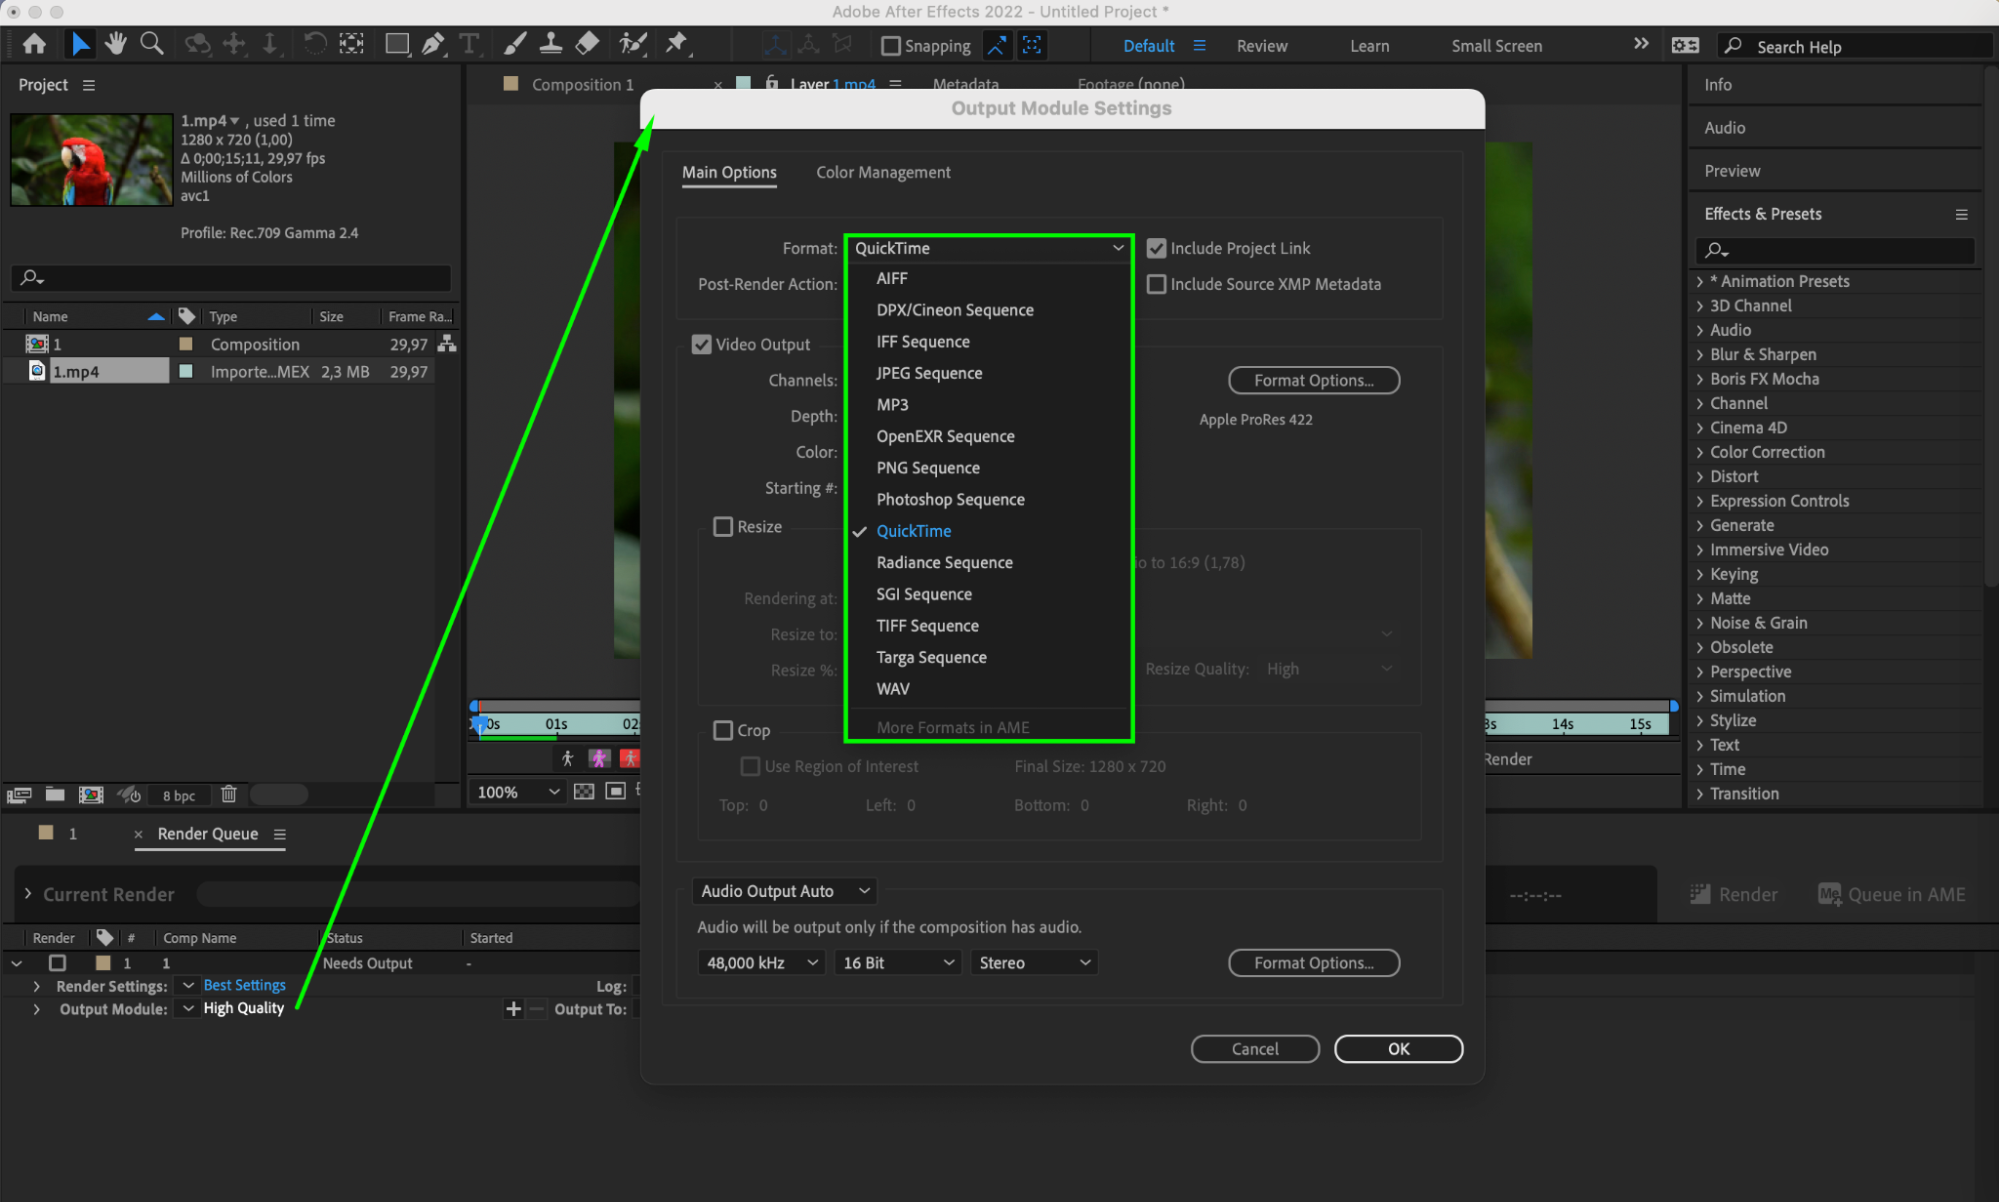
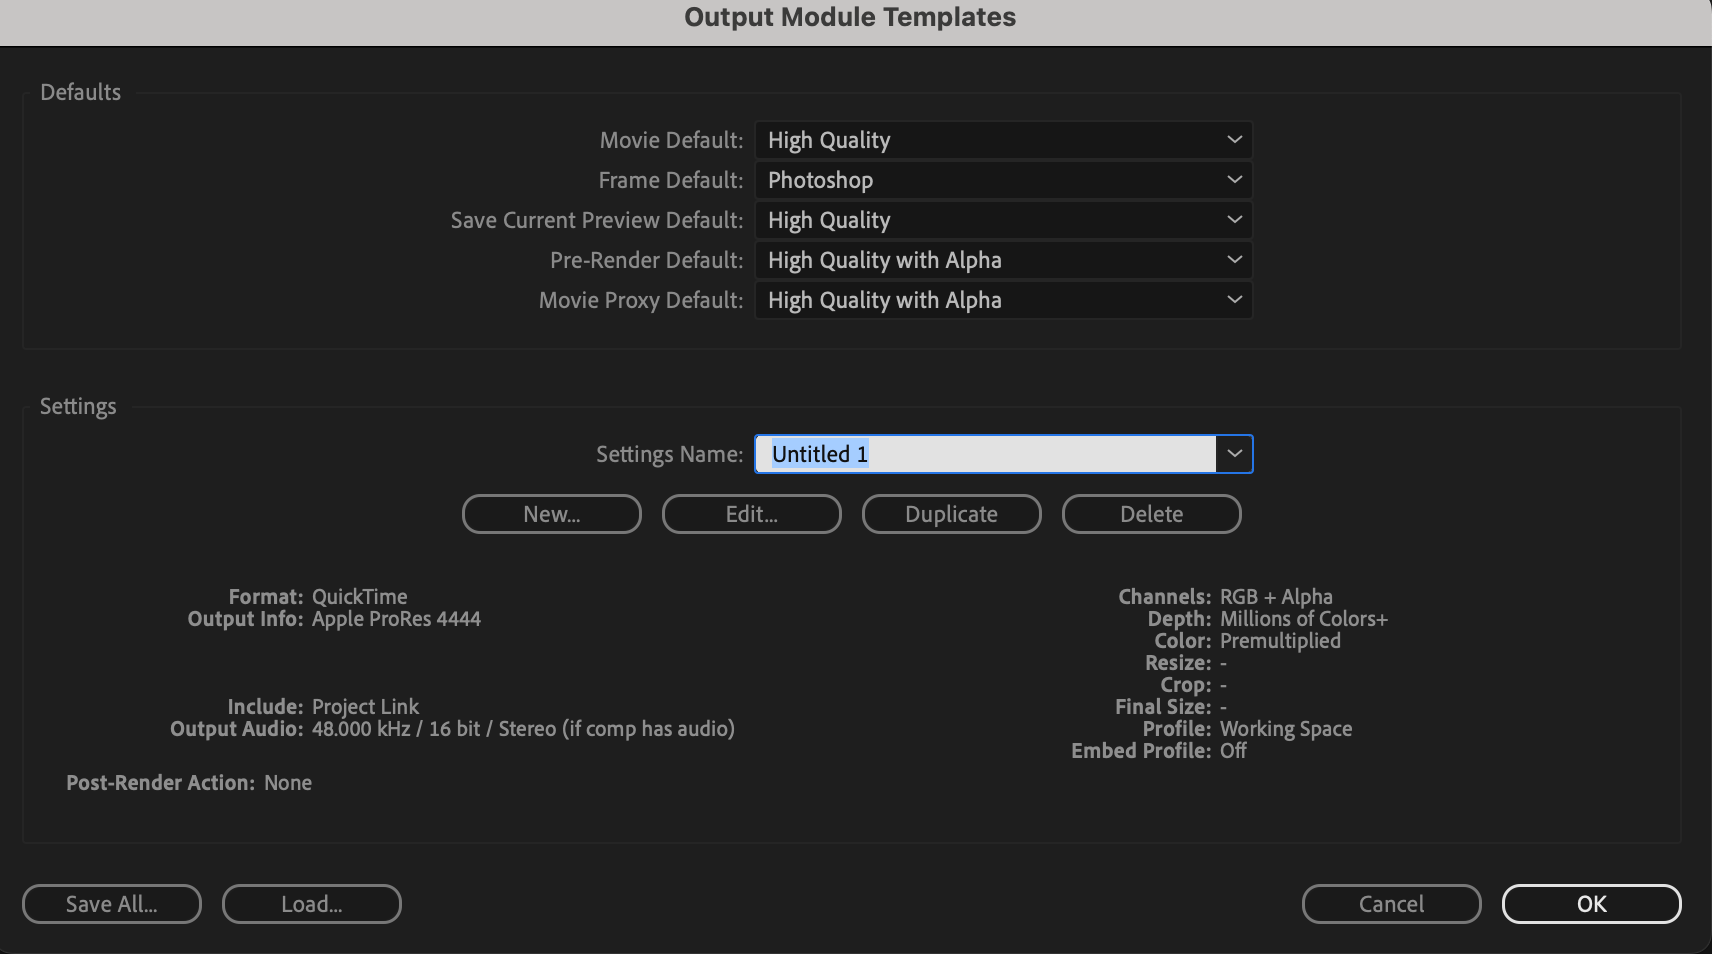
Step 2: Choosing the file format
Select your desired file format, such as QuickTime. Its advantages include high-quality video and audio support, as well as broad compatibility with various programs and devices. You can also choose the popular format H.264.
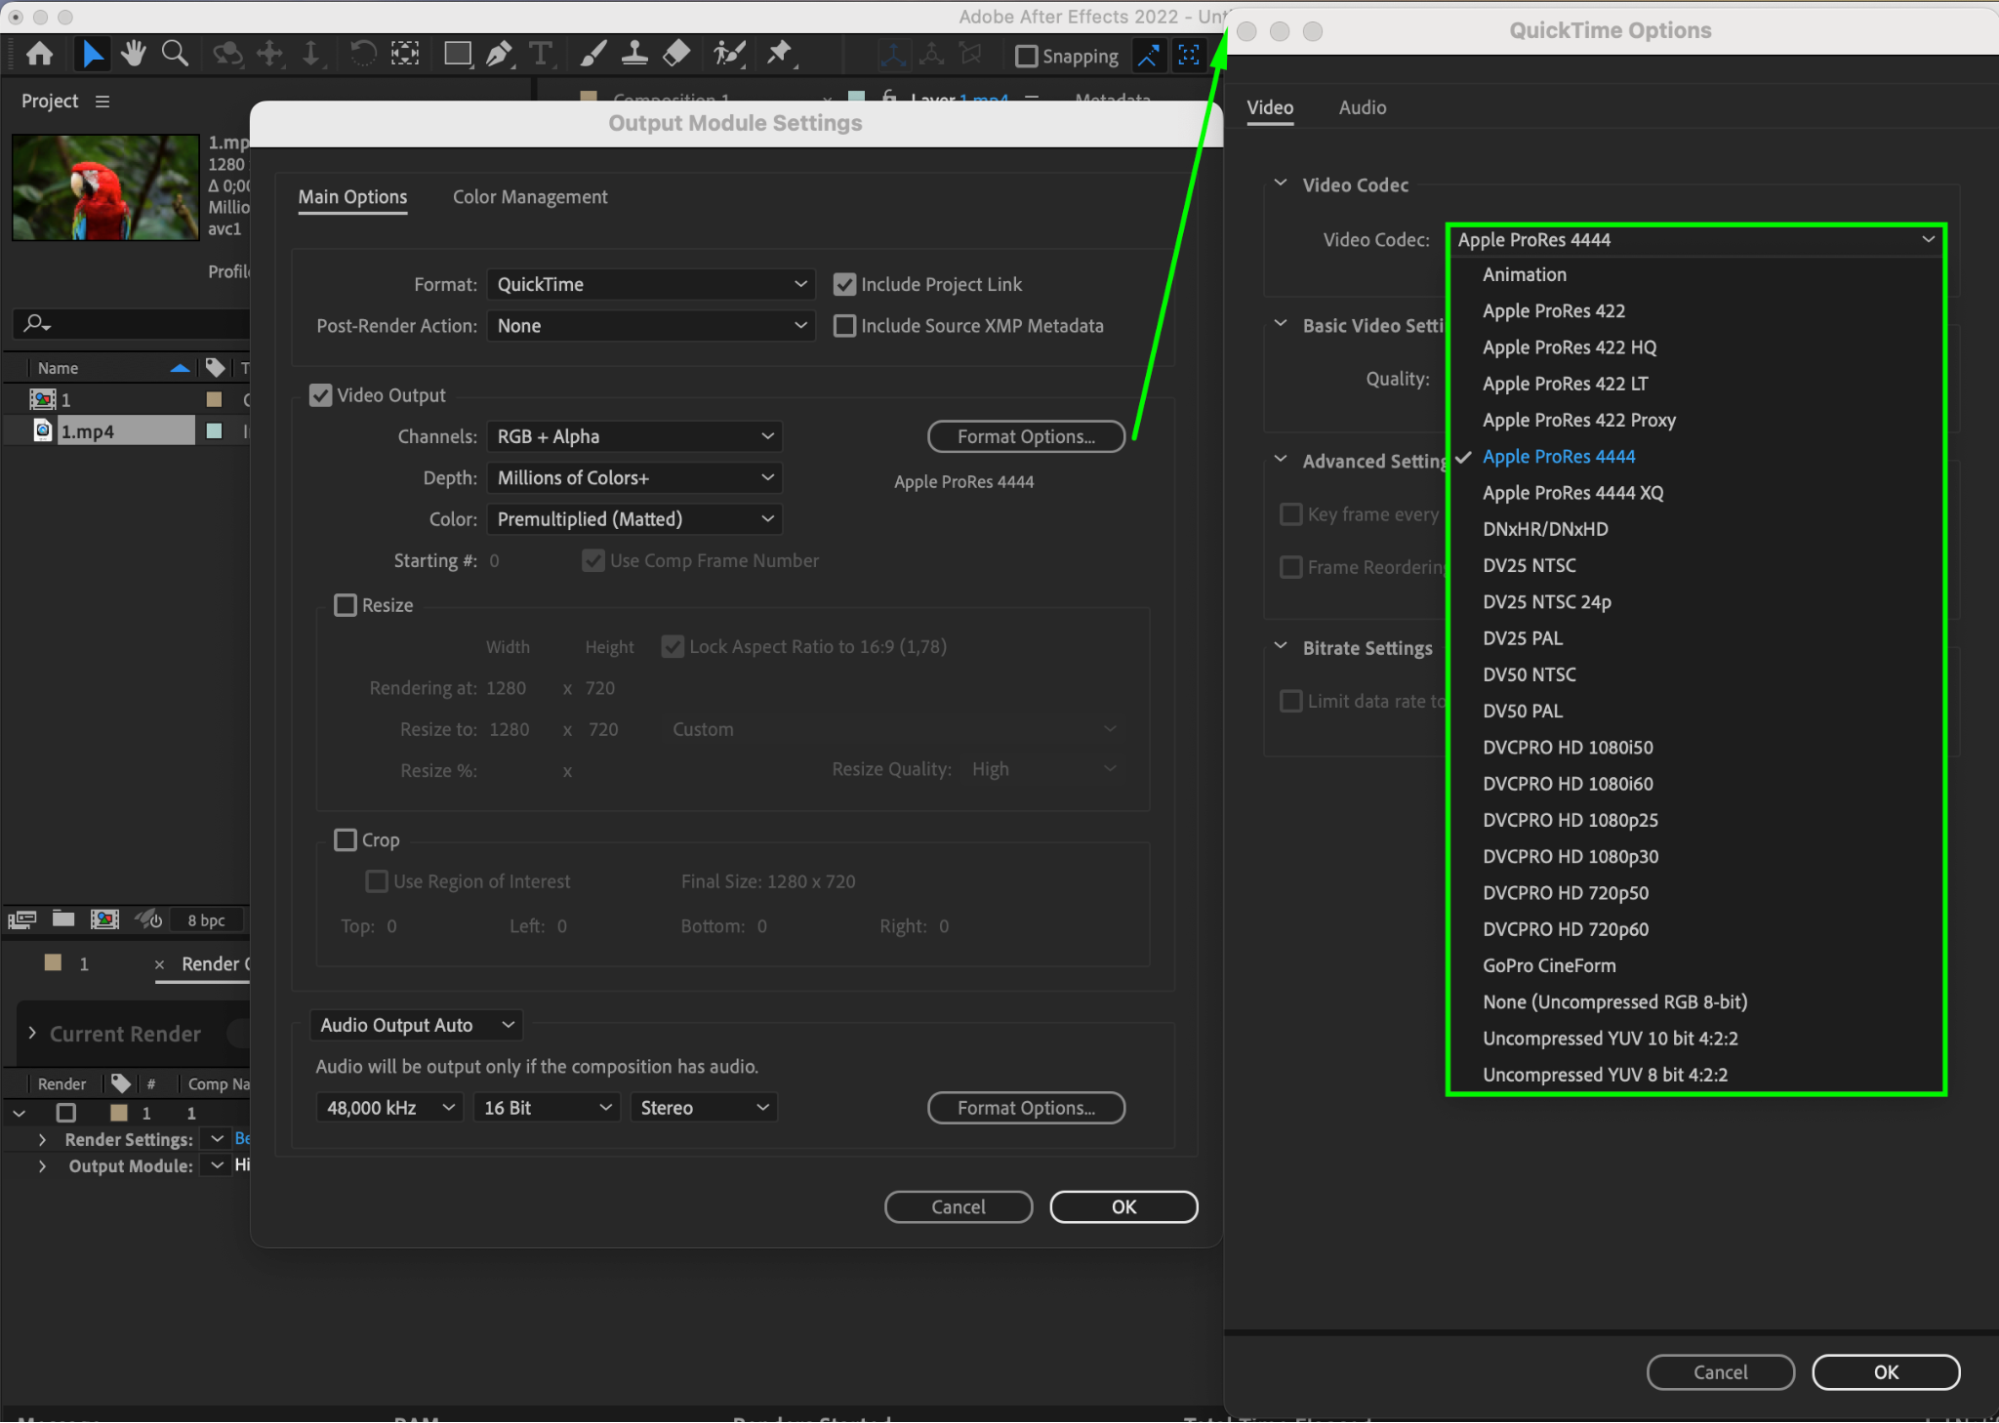
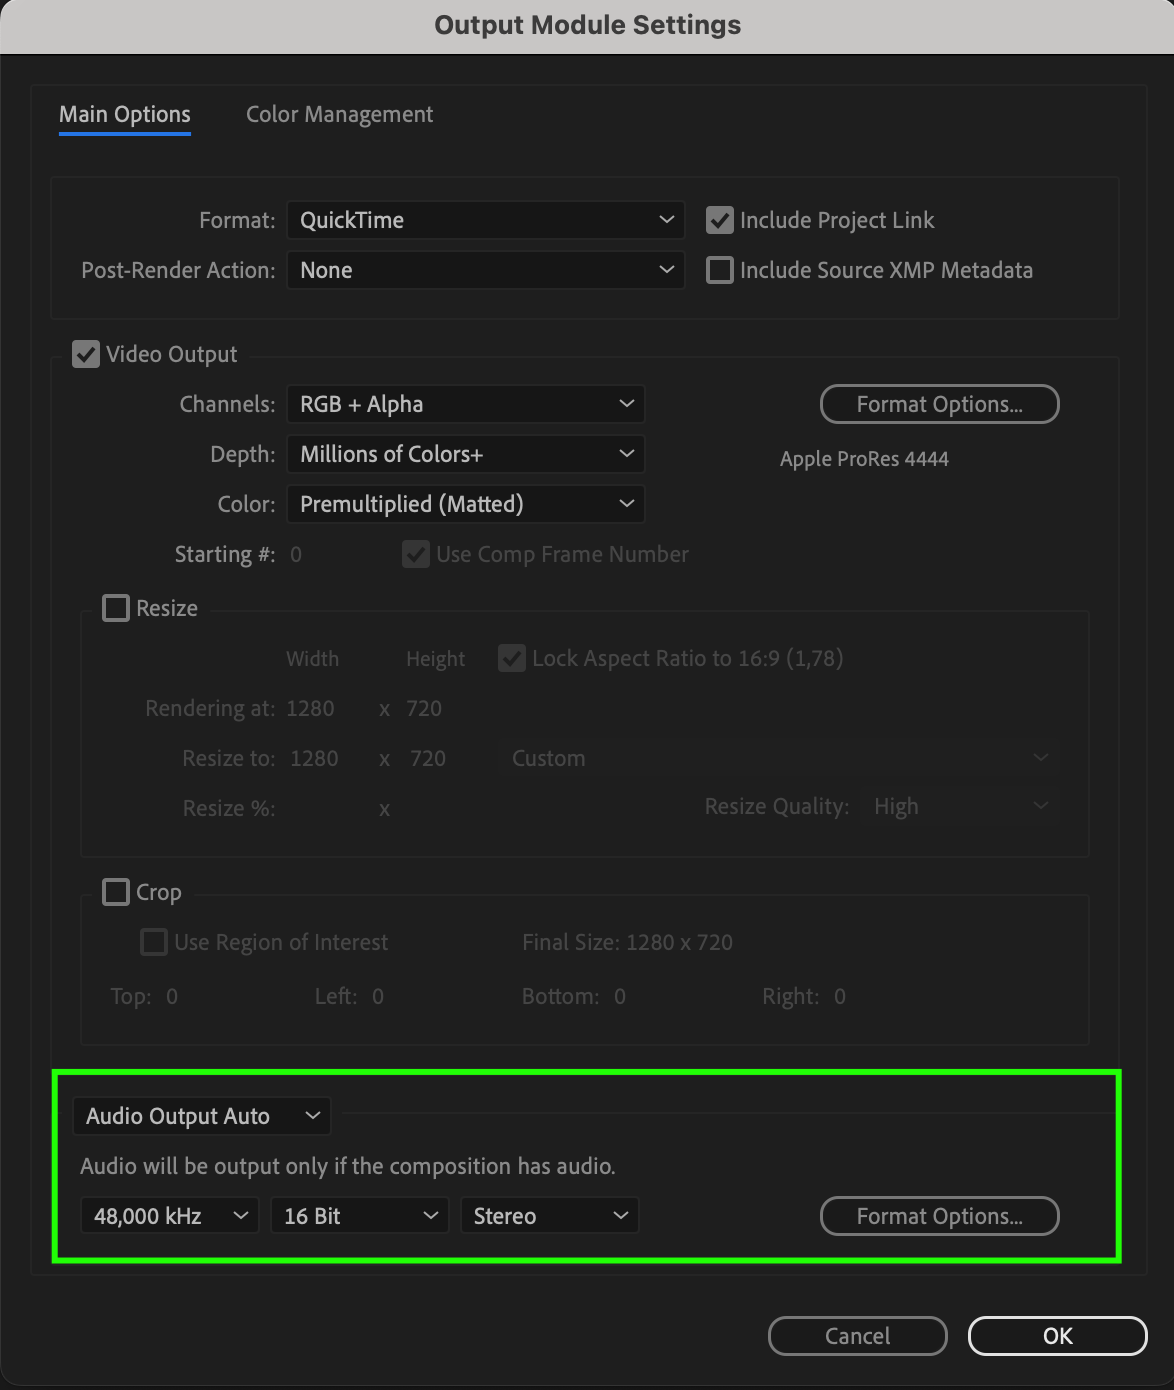
Step 3: Configuring the video codec
Click on “Format Options” and choose a video codec, such as Apple ProRes 4444. Its advantages include high-quality image and support for alpha channel for transparency.
Get 10% off when you subscribe to our newsletter

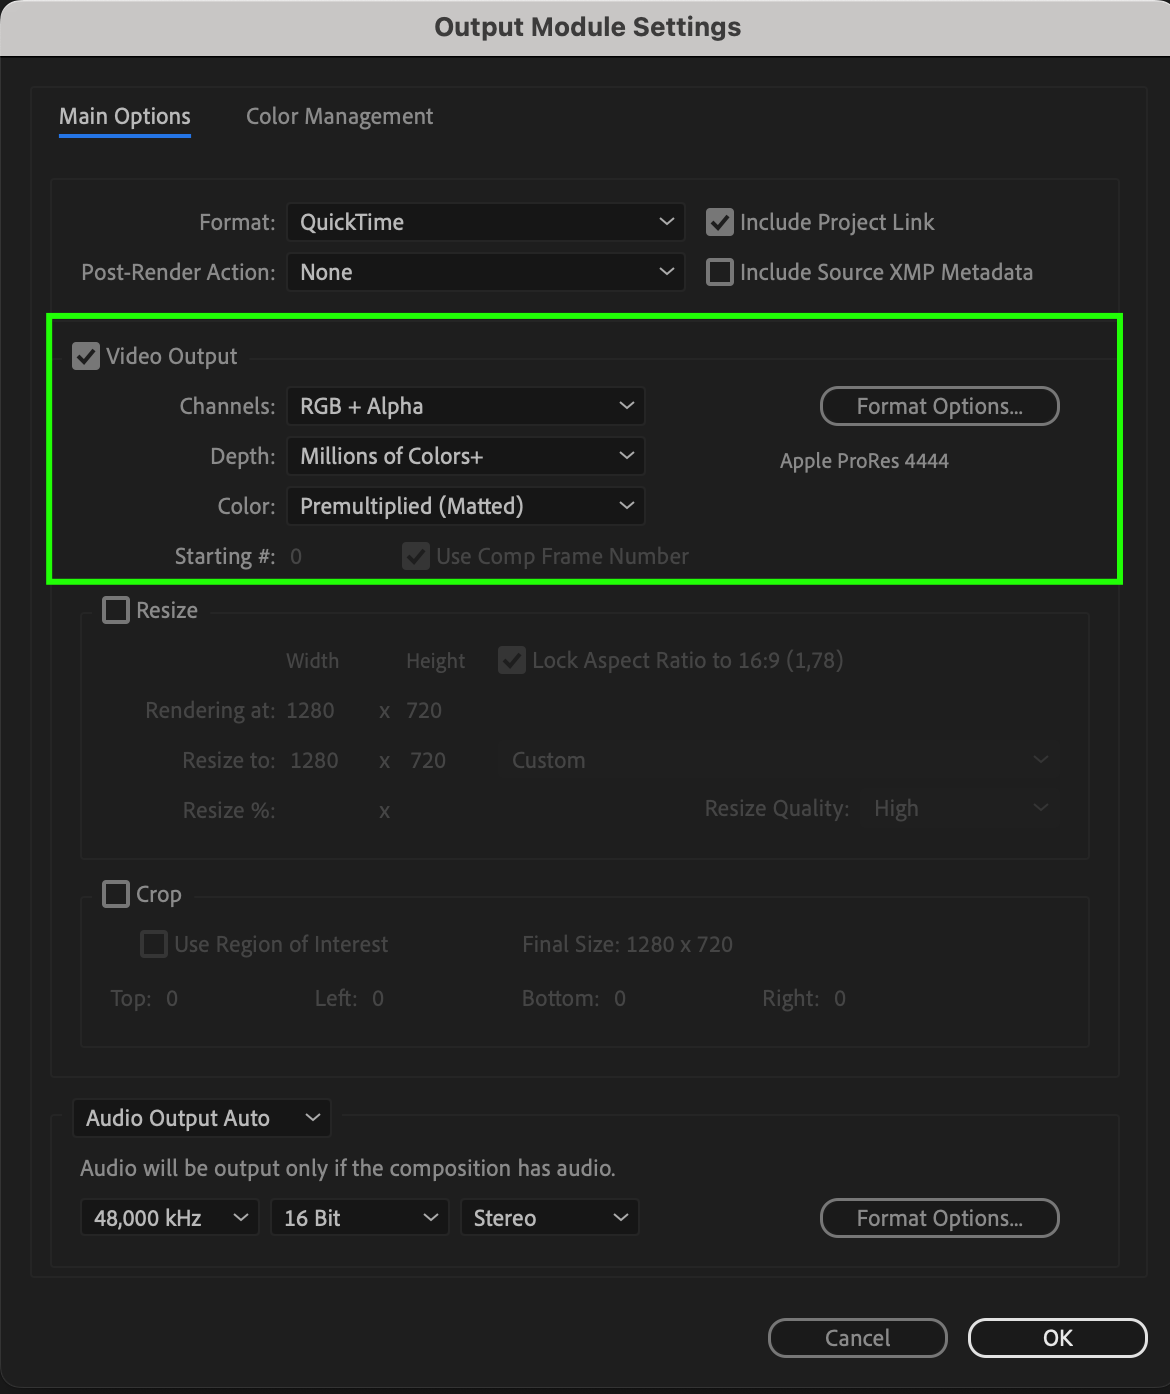
Step 4: Setting up video output
In the Video Output section, choose the desired color depth, such as “millions of colors+” for a rich color palette. If your project has a transparent background, select “RGB+Alpha” to preserve the alpha channel.
Step 5: Configuring audio (if necessary)
Get 10% off when you subscribe to our newsletter
If your project contains audio, specify the parameters for the best sound quality. It’s recommended to choose high quality settings like 48 kHz and 16-bit.
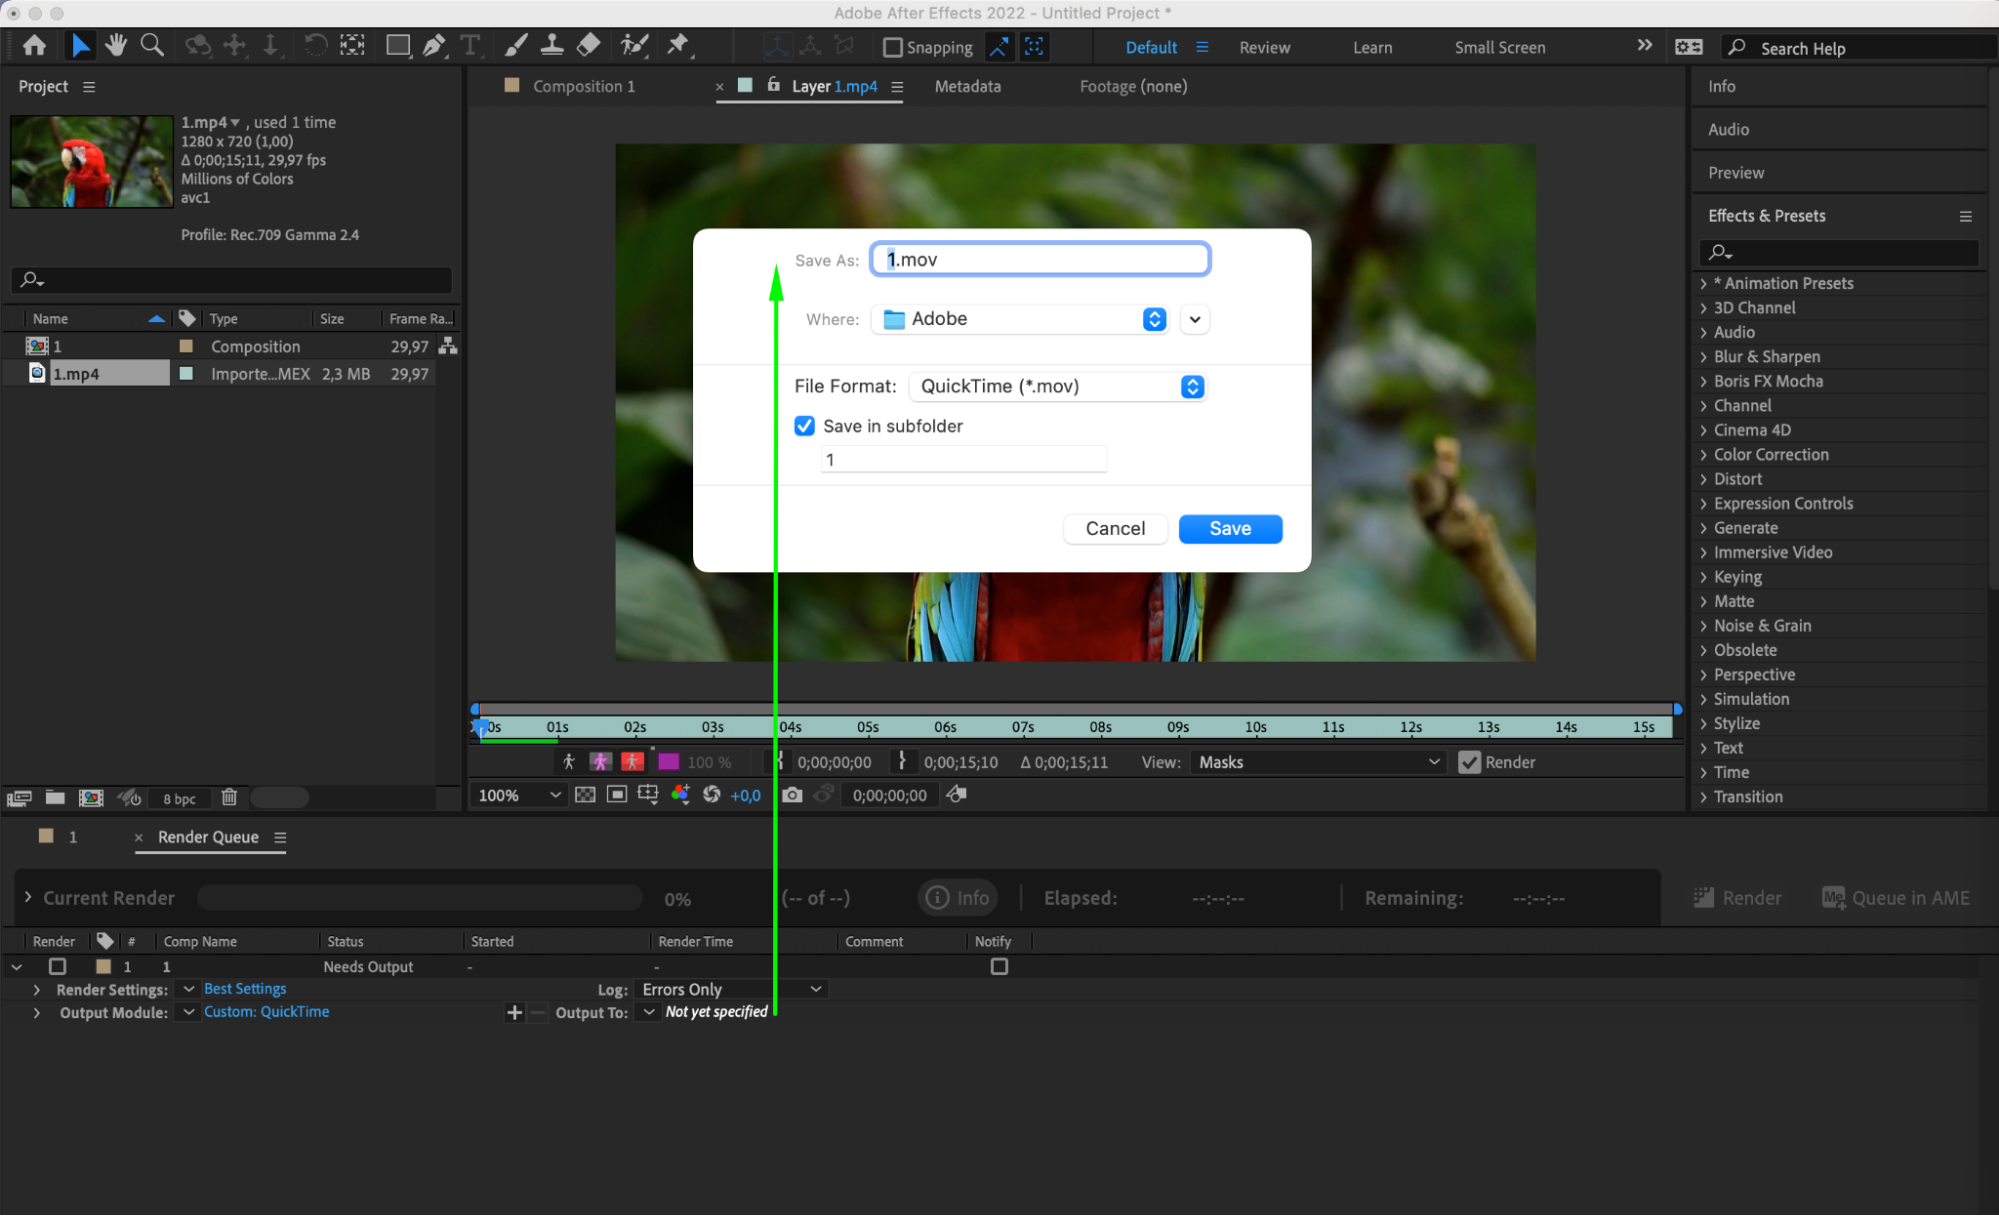
Step 6: Specifying the saving location
In the Output To panel, select the file name and saving location. Also, double-check the file format your project will be saved in.
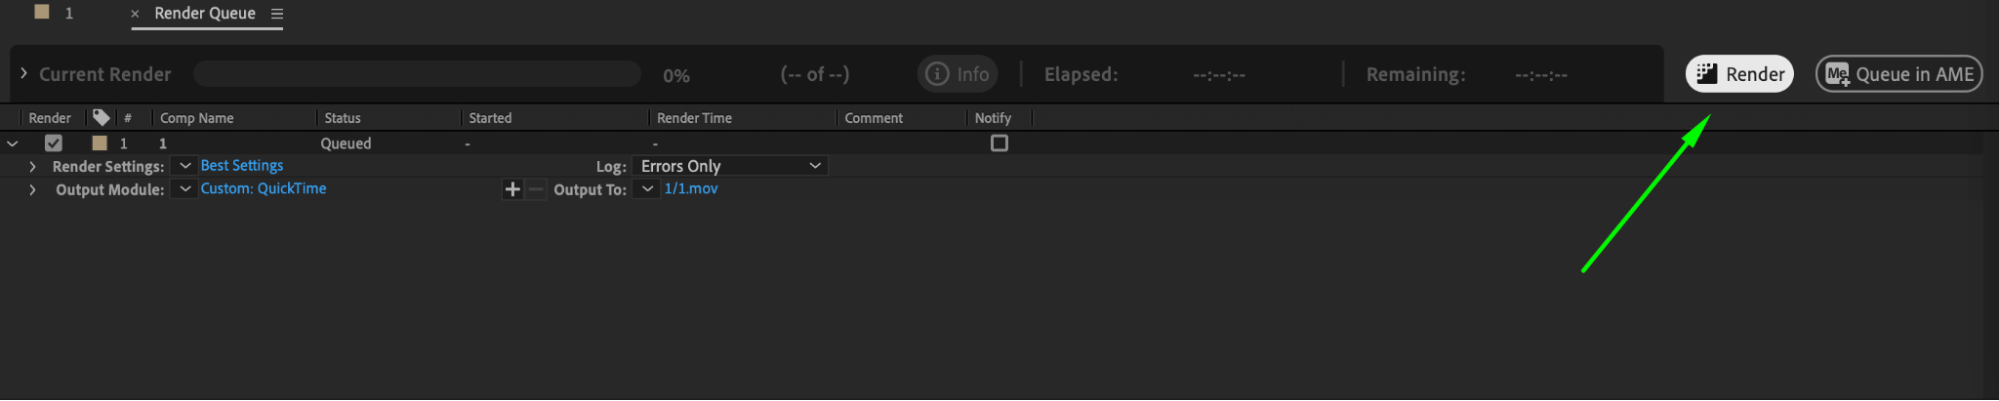
Step 7: Initiating the rendering process
Click on the Render button to start the rendering process. After Effects will process your composition with the selected settings and save the result to the specified location.
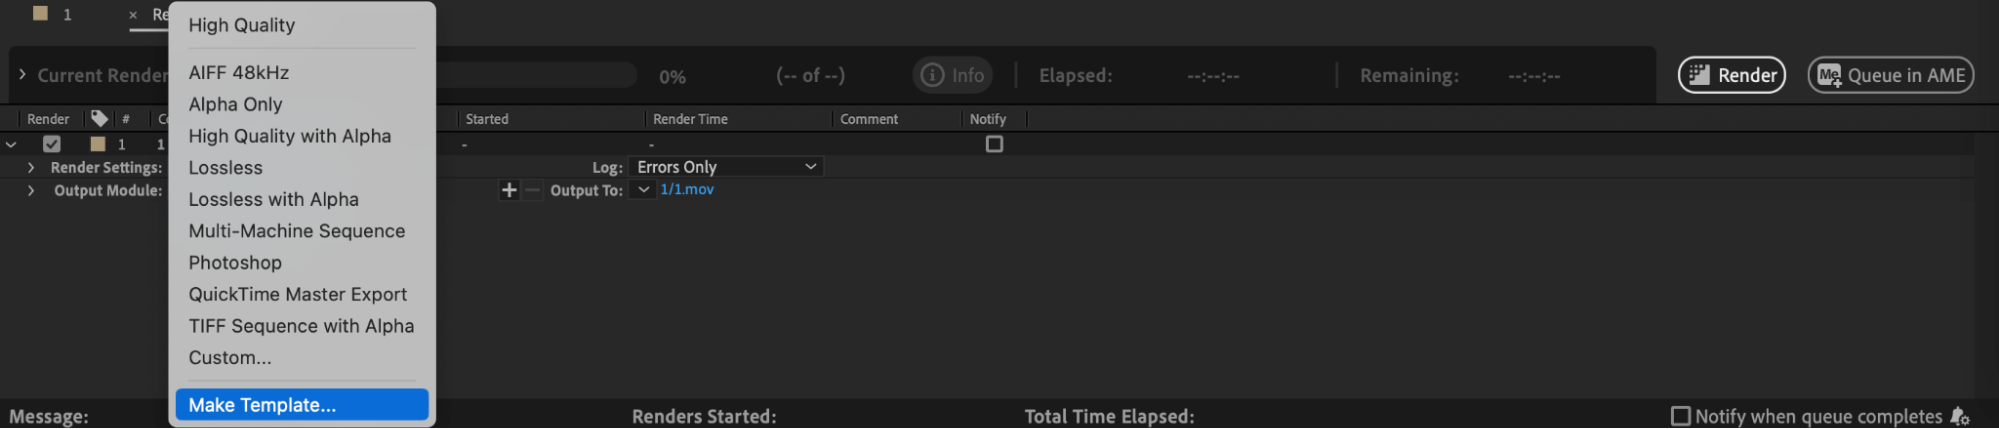
Step 8: Creating templates
To streamline future work, you can create templates with your export settings, saving them for later use.

Conclusion
By following these strategies and incorporating them into your workflow, you’ll become a pro at setting up the output module in After Effects. So, go ahead, export your projects with confidence, and showcase your creative talent to the world—it’s your time to shine!
Our Bestsellers


