A Step-by-Step Guide to Skewing Video in After Effects with 3D Layers
Introduction – Using 3D Layers to Skew and Animate Video
Skewing video in After Effects using 3D layers opens up creative possibilities for dynamic transformations and animations. This method lets you manipulate a video’s rotation, scale, and position in three-dimensional space for a more immersive and unique visual effect. Here’s how to do it.
Get 10% off when you subscribe to our newsletter

Step 1: Import Your Video
Start by importing your video file into After Effects. Go to File > Import > File, select your video, and drag it to the timeline. This will create a new layer in your composition.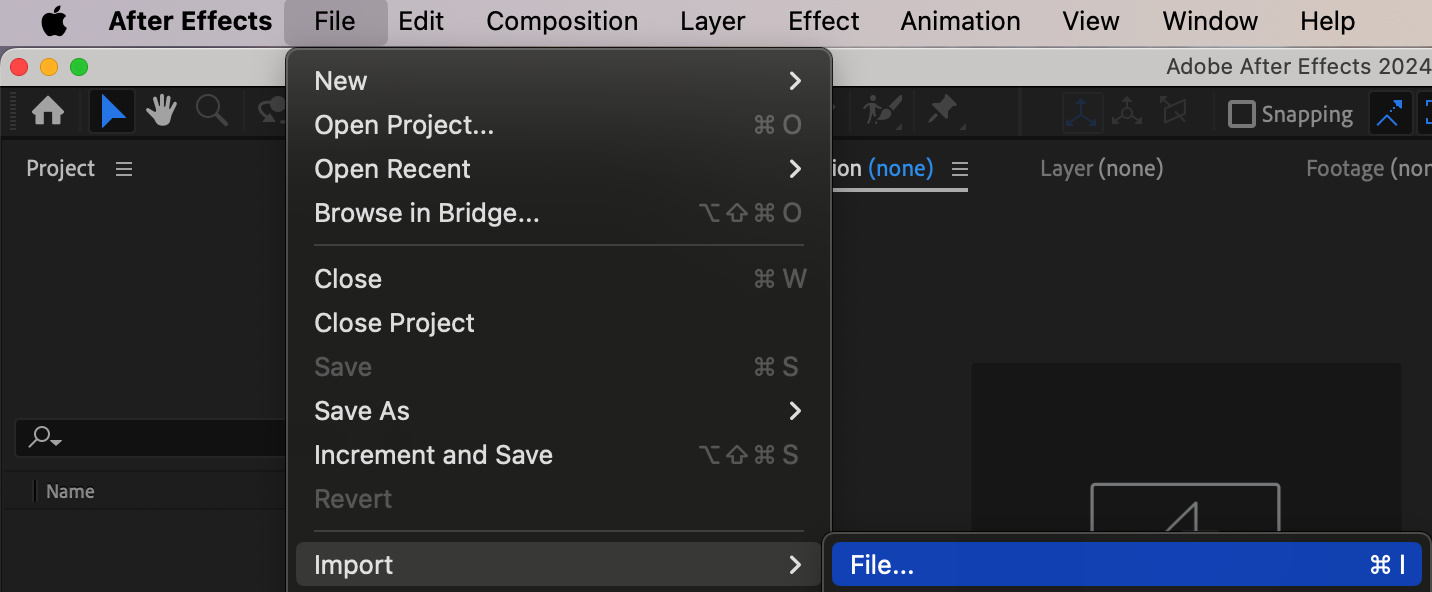
 Step 2: Make the Layer 3D
In the timeline panel, locate your video layer and enable the 3D Layer option. This is represented by a cube icon. Enabling this feature allows you to manipulate the video in 3D space, unlocking the ability to adjust its X, Y, and Z axes.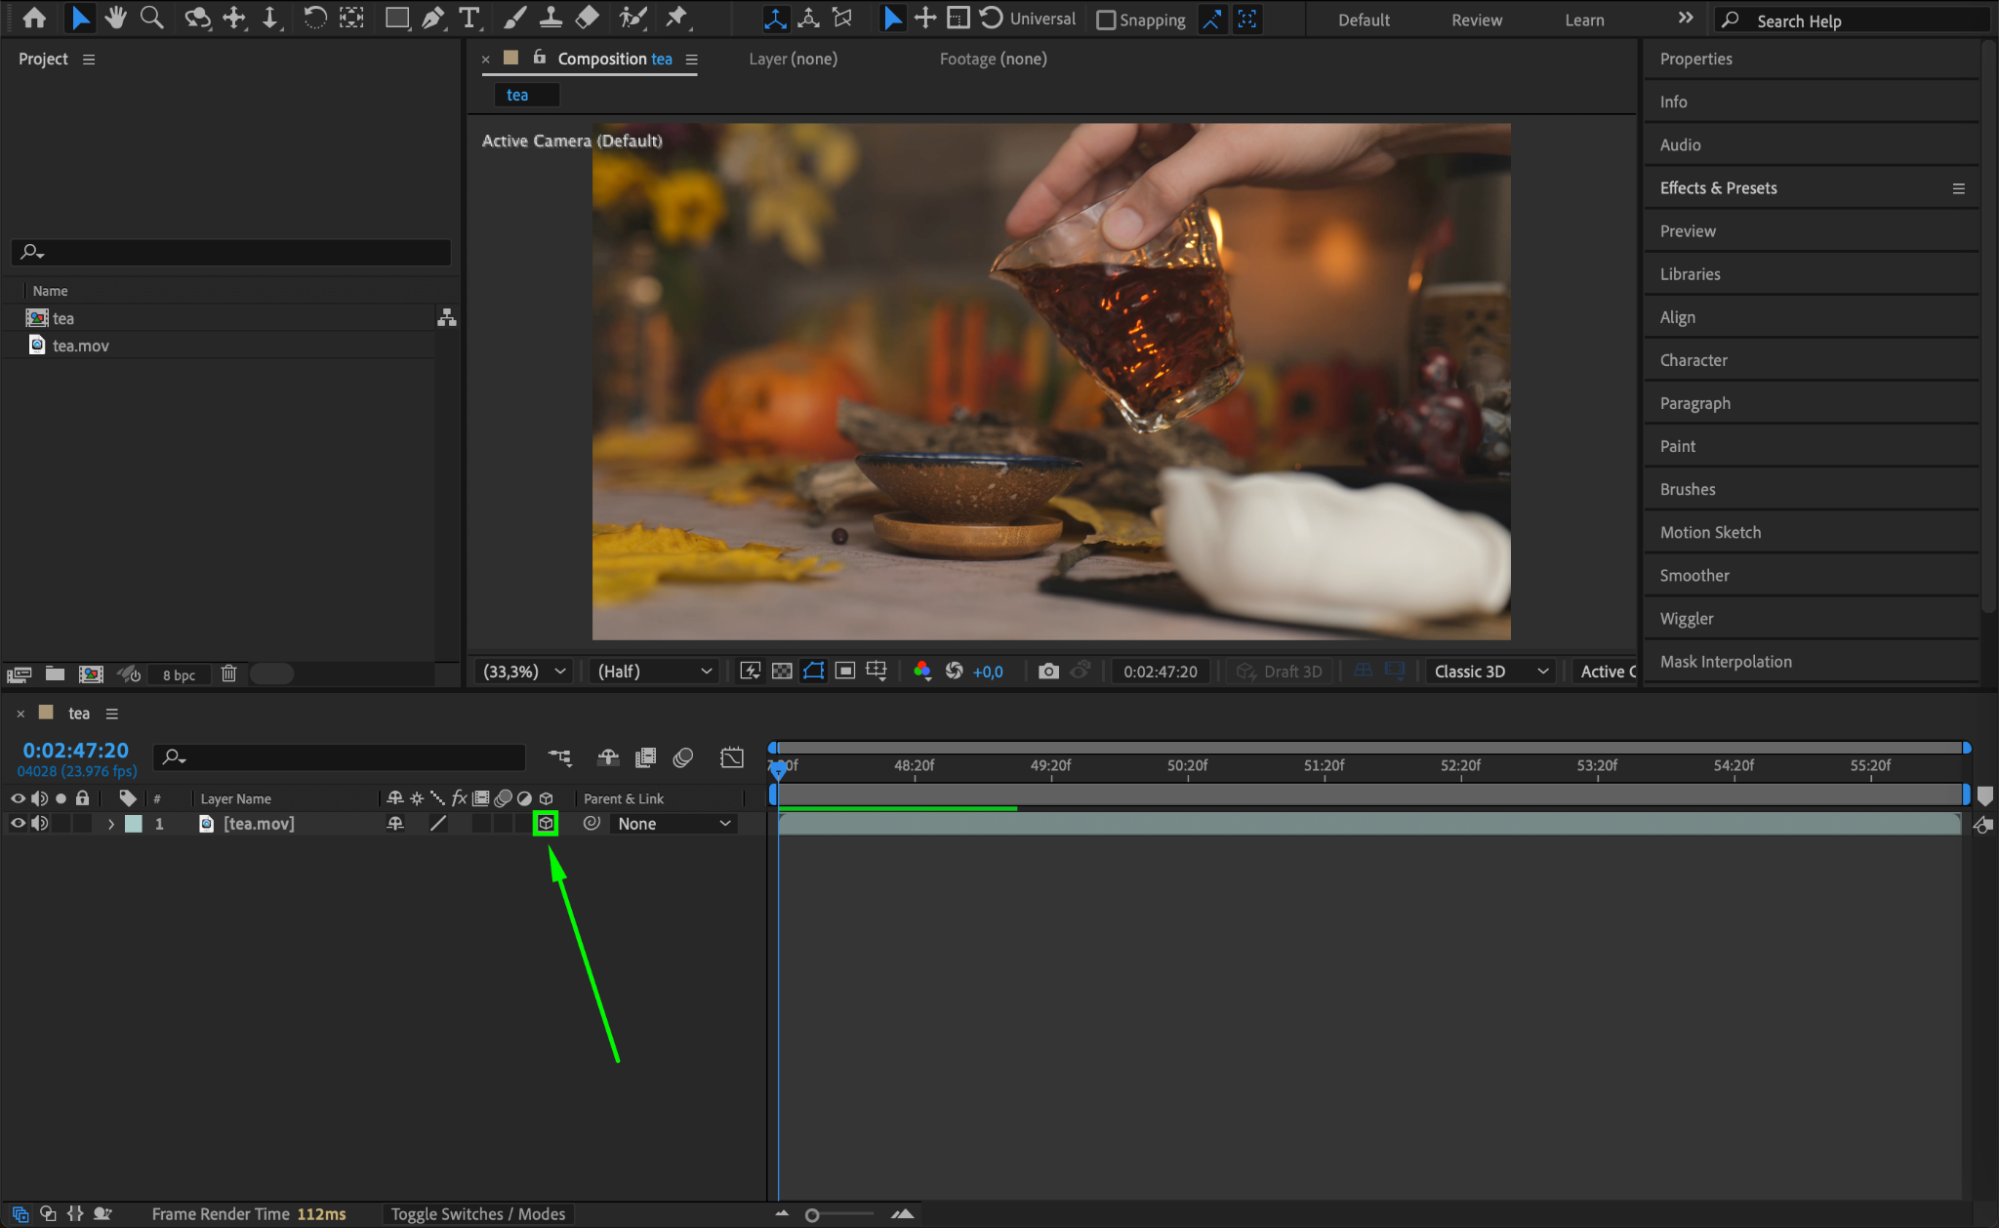 Step 3: Adjust Rotation and Scale
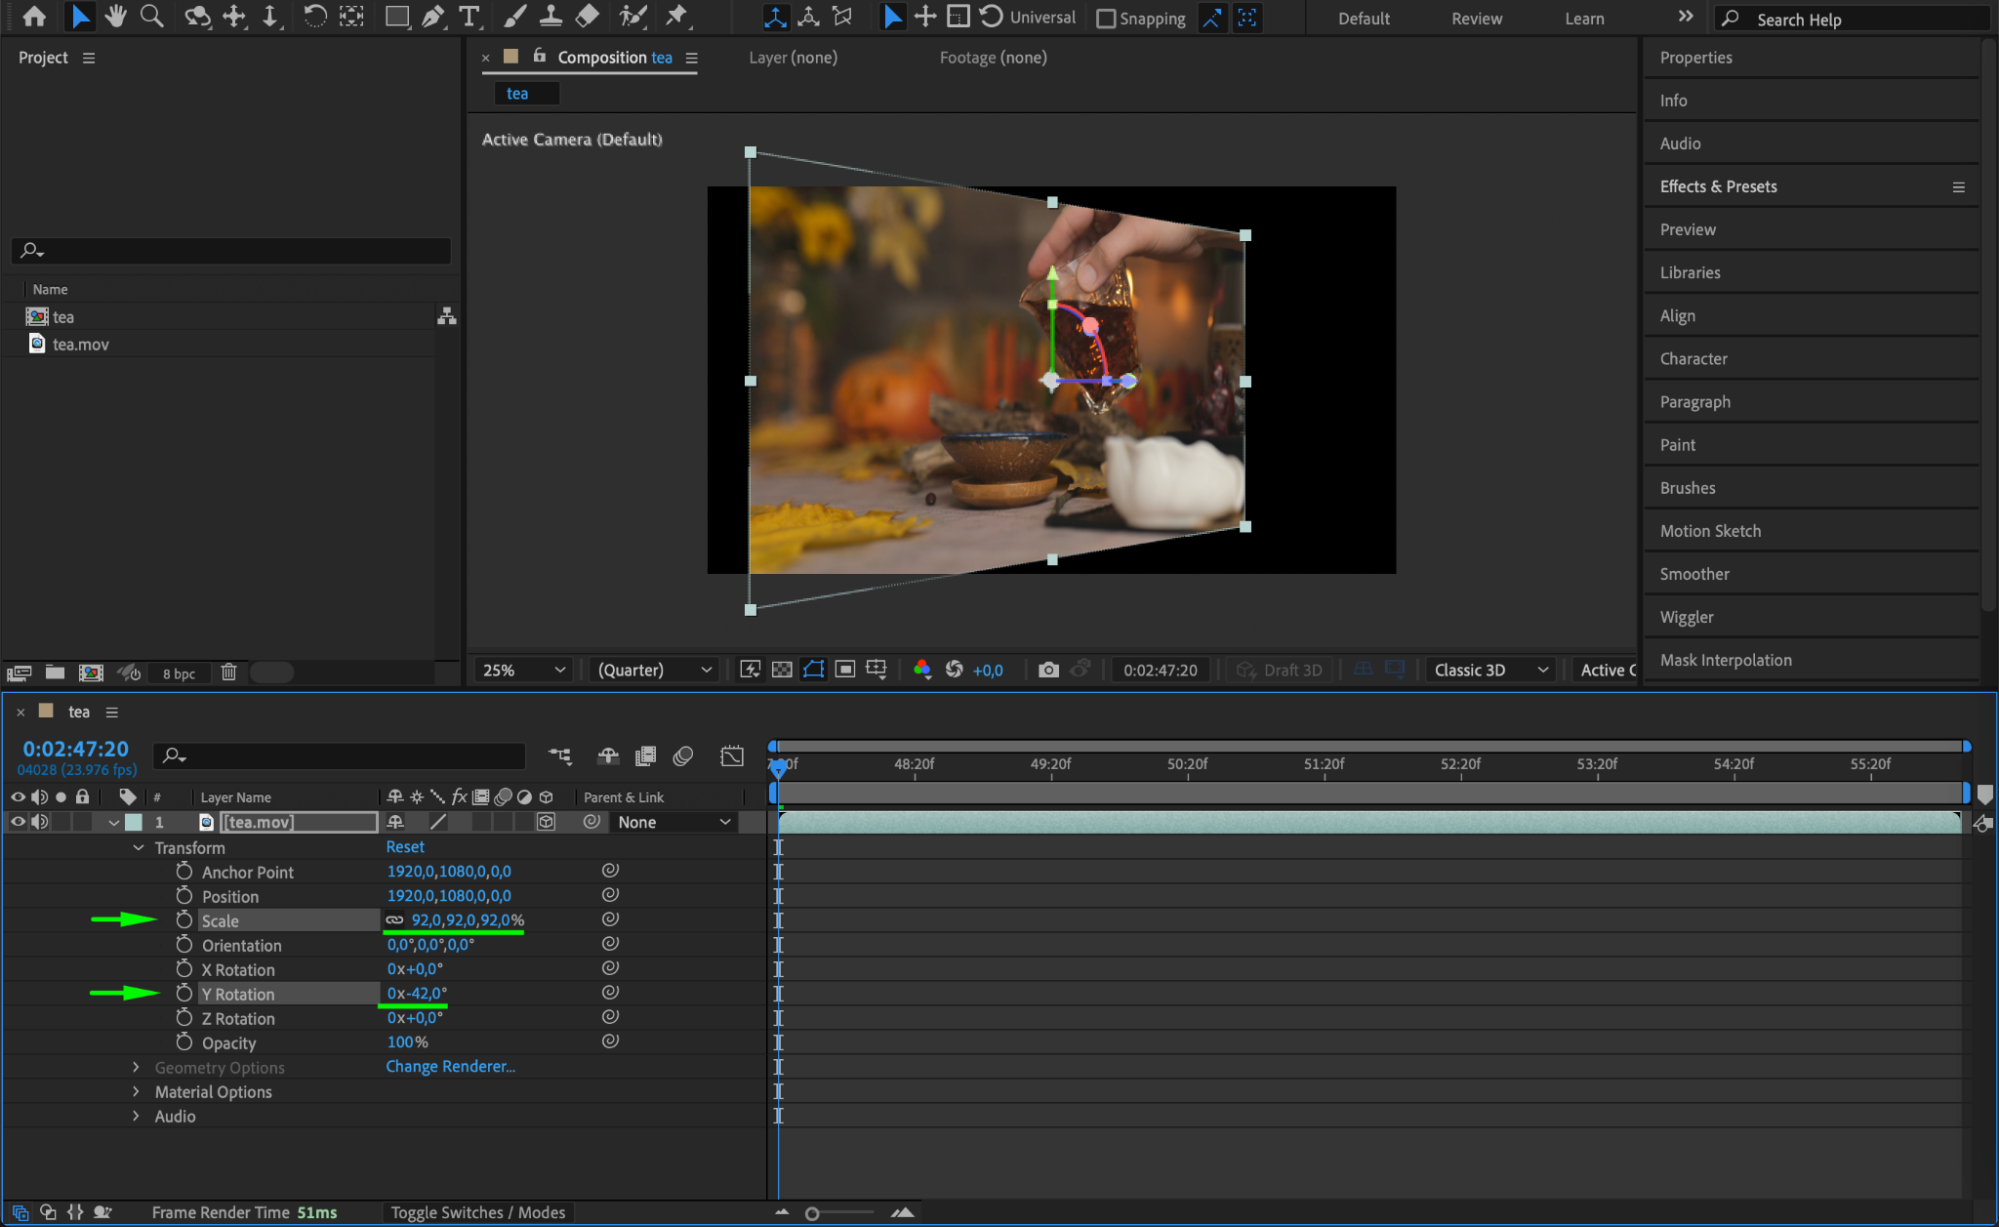
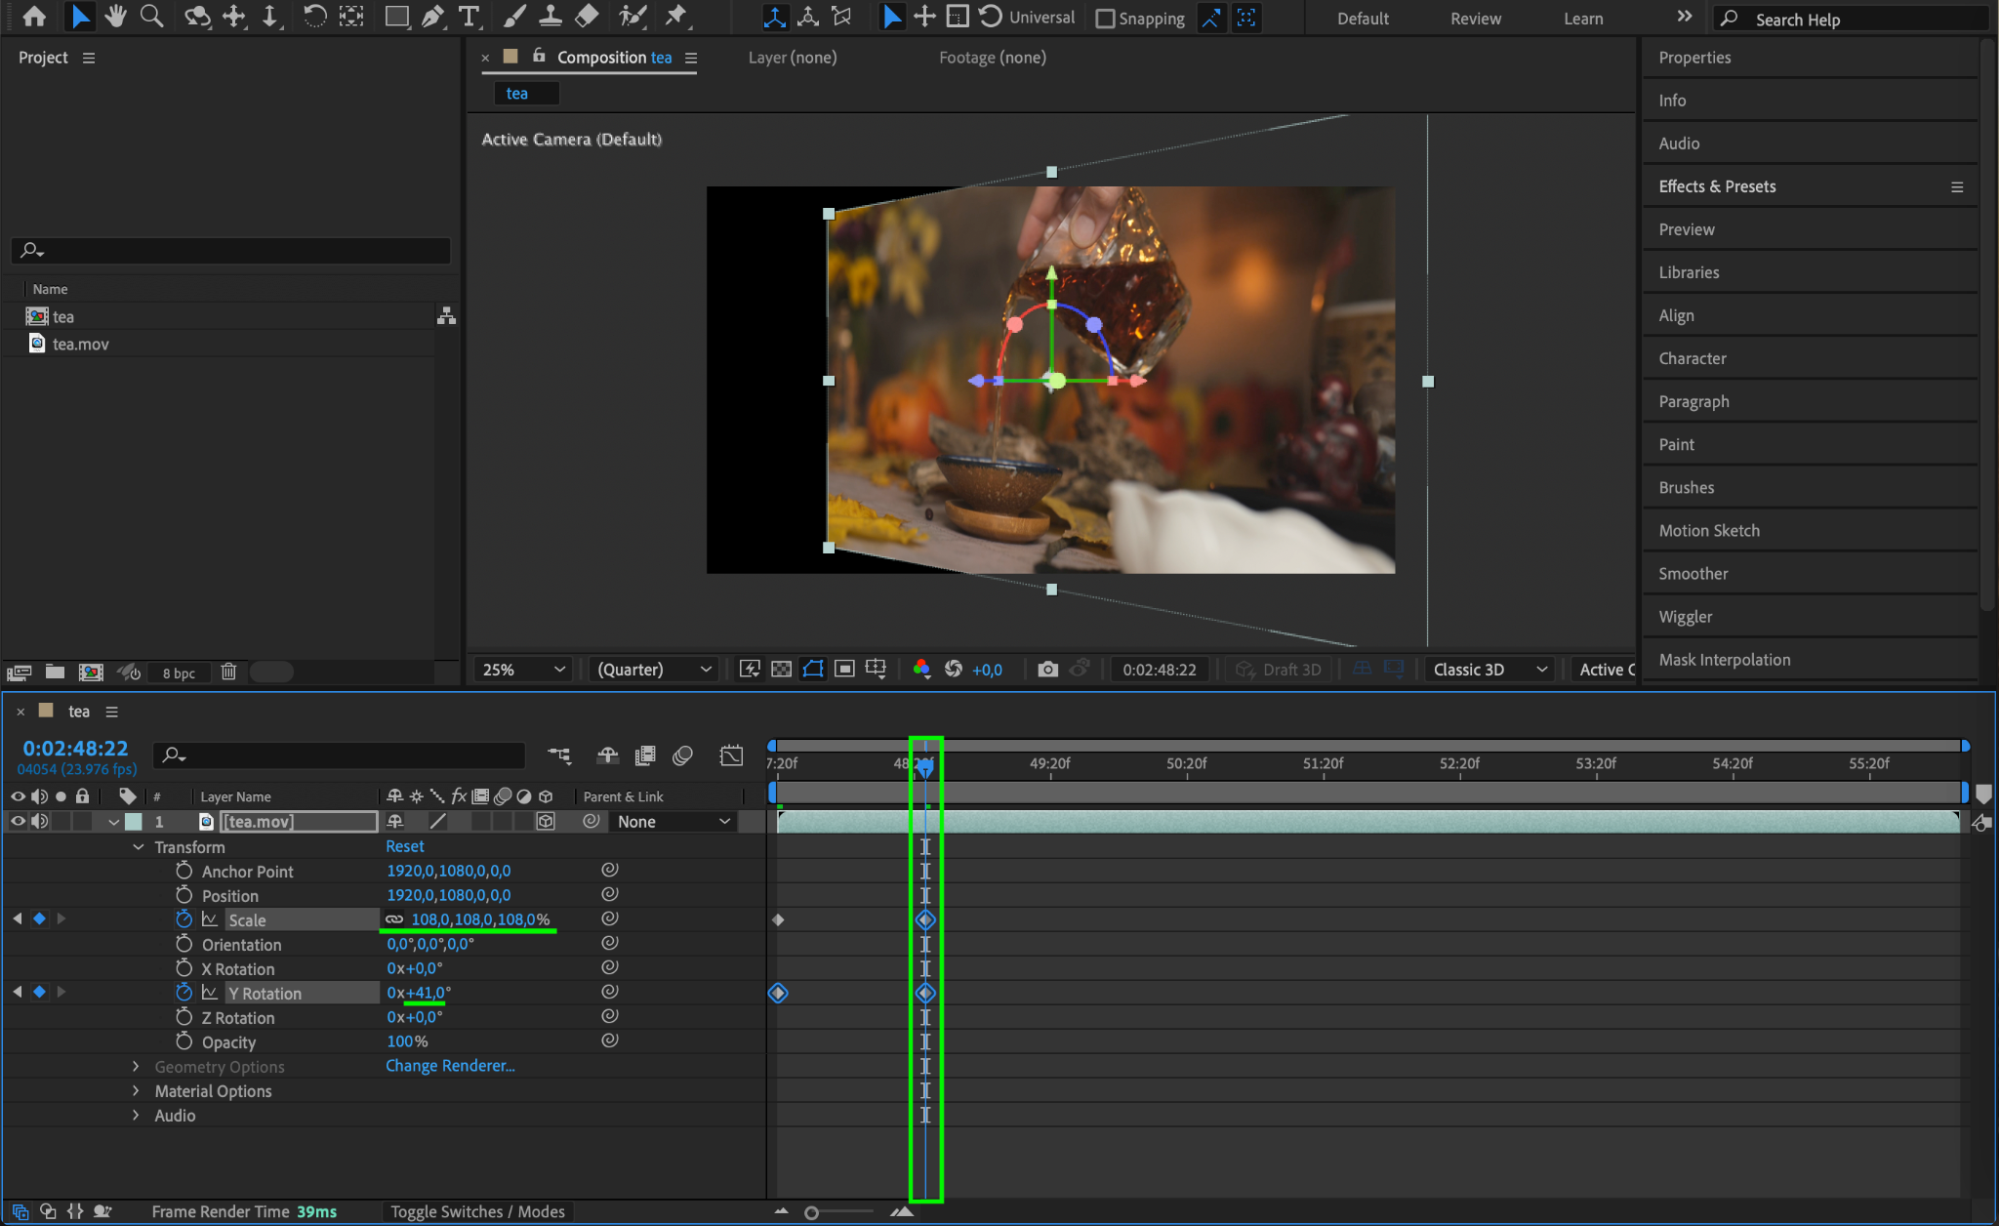
With the layer now a 3D object, open the transformation properties by pressing “R” to reveal rotation controls. Adjust the X Rotation, Y Rotation, and Z Rotation values to skew the video along the desired axis. You can also press “S” to adjust the scale, creating a perspective effect.
 Step 4: Animate the Video Properties
To add dynamic motion, animate the rotation, scale, or position properties. Click the stopwatch icon next to the property you want to animate to set a keyframe. Move the Current Time Indicator (CTI) along the timeline and adjust the values to create an animated skew effect.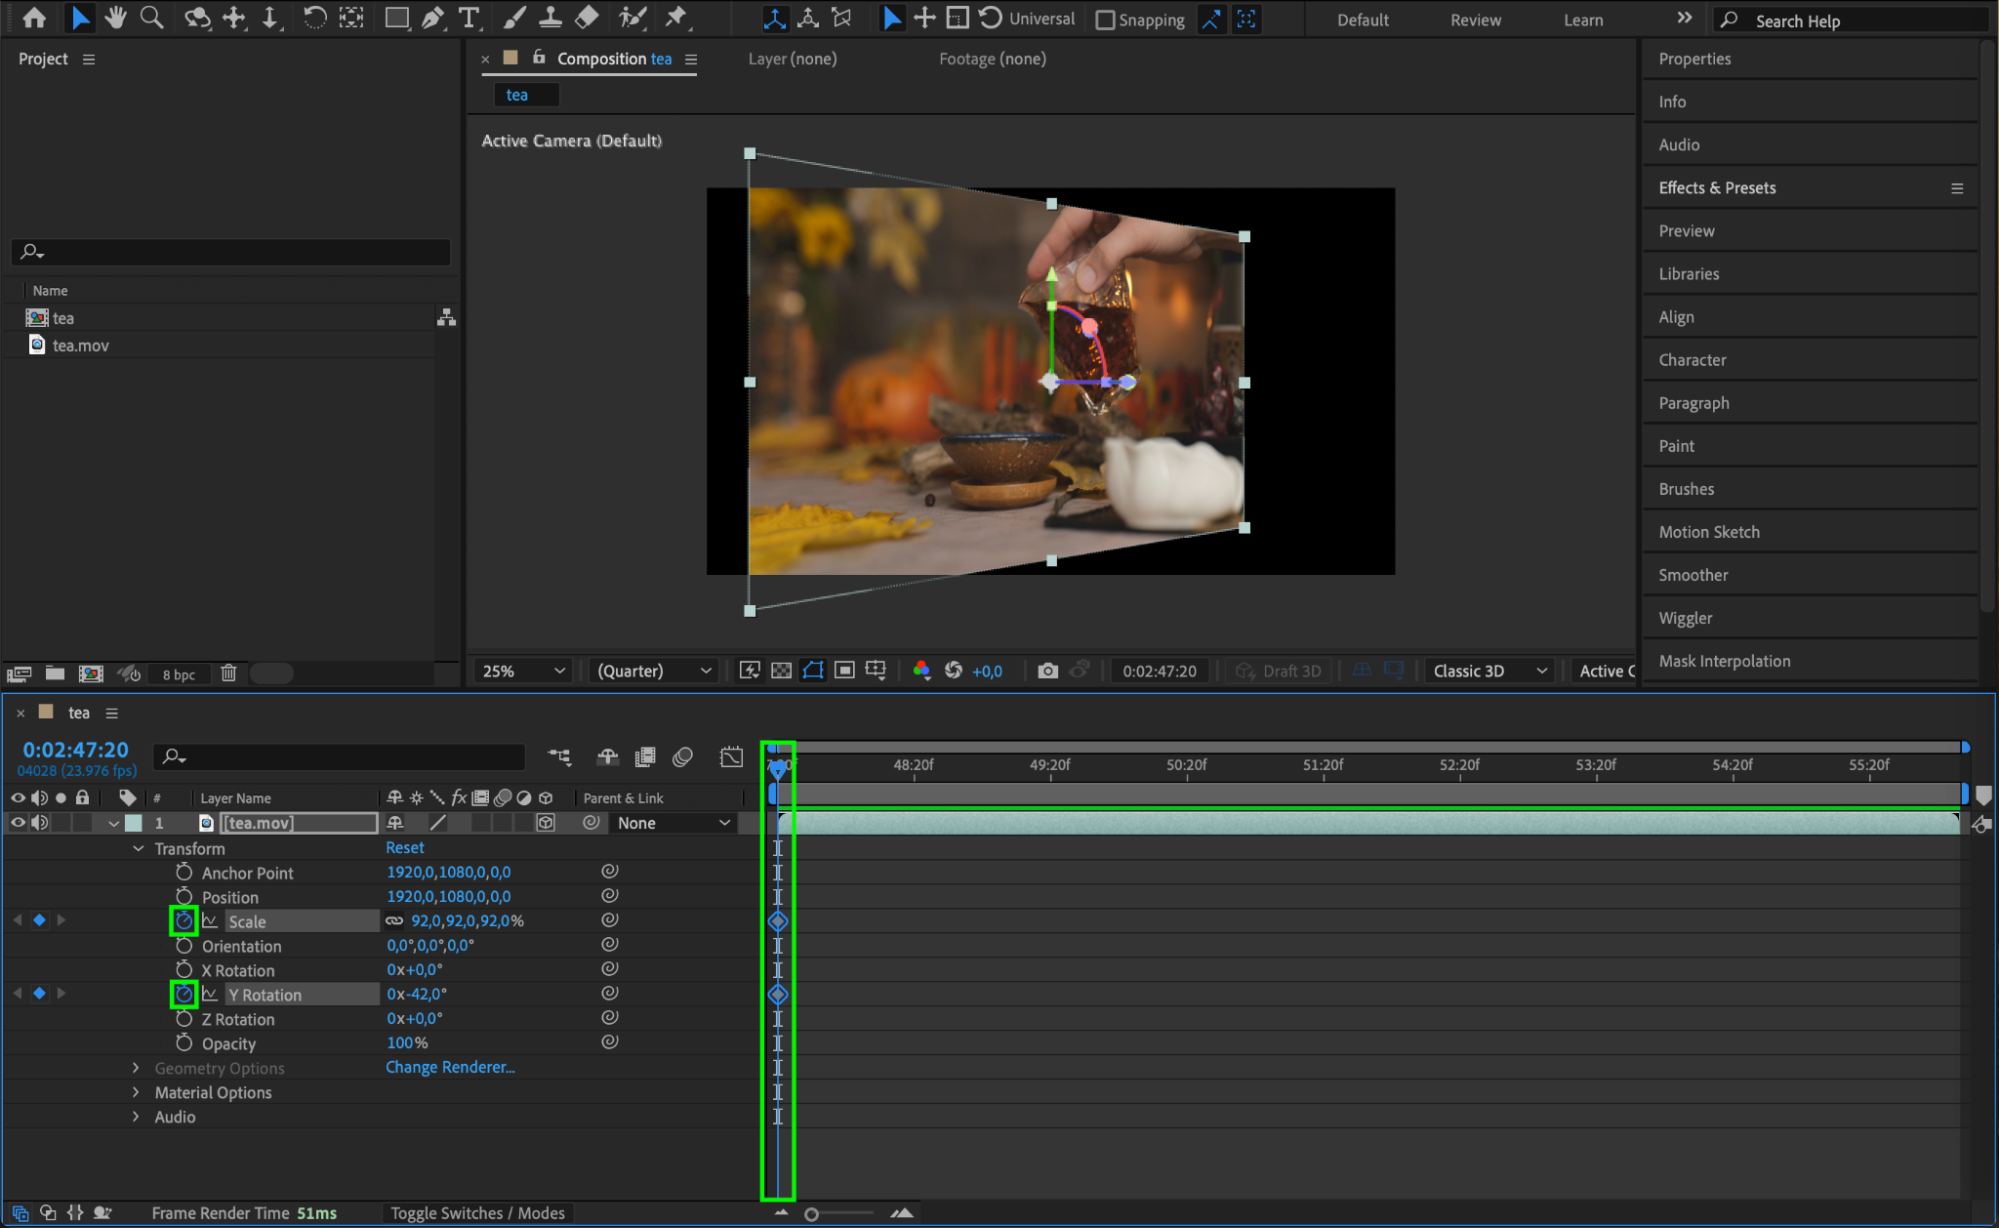
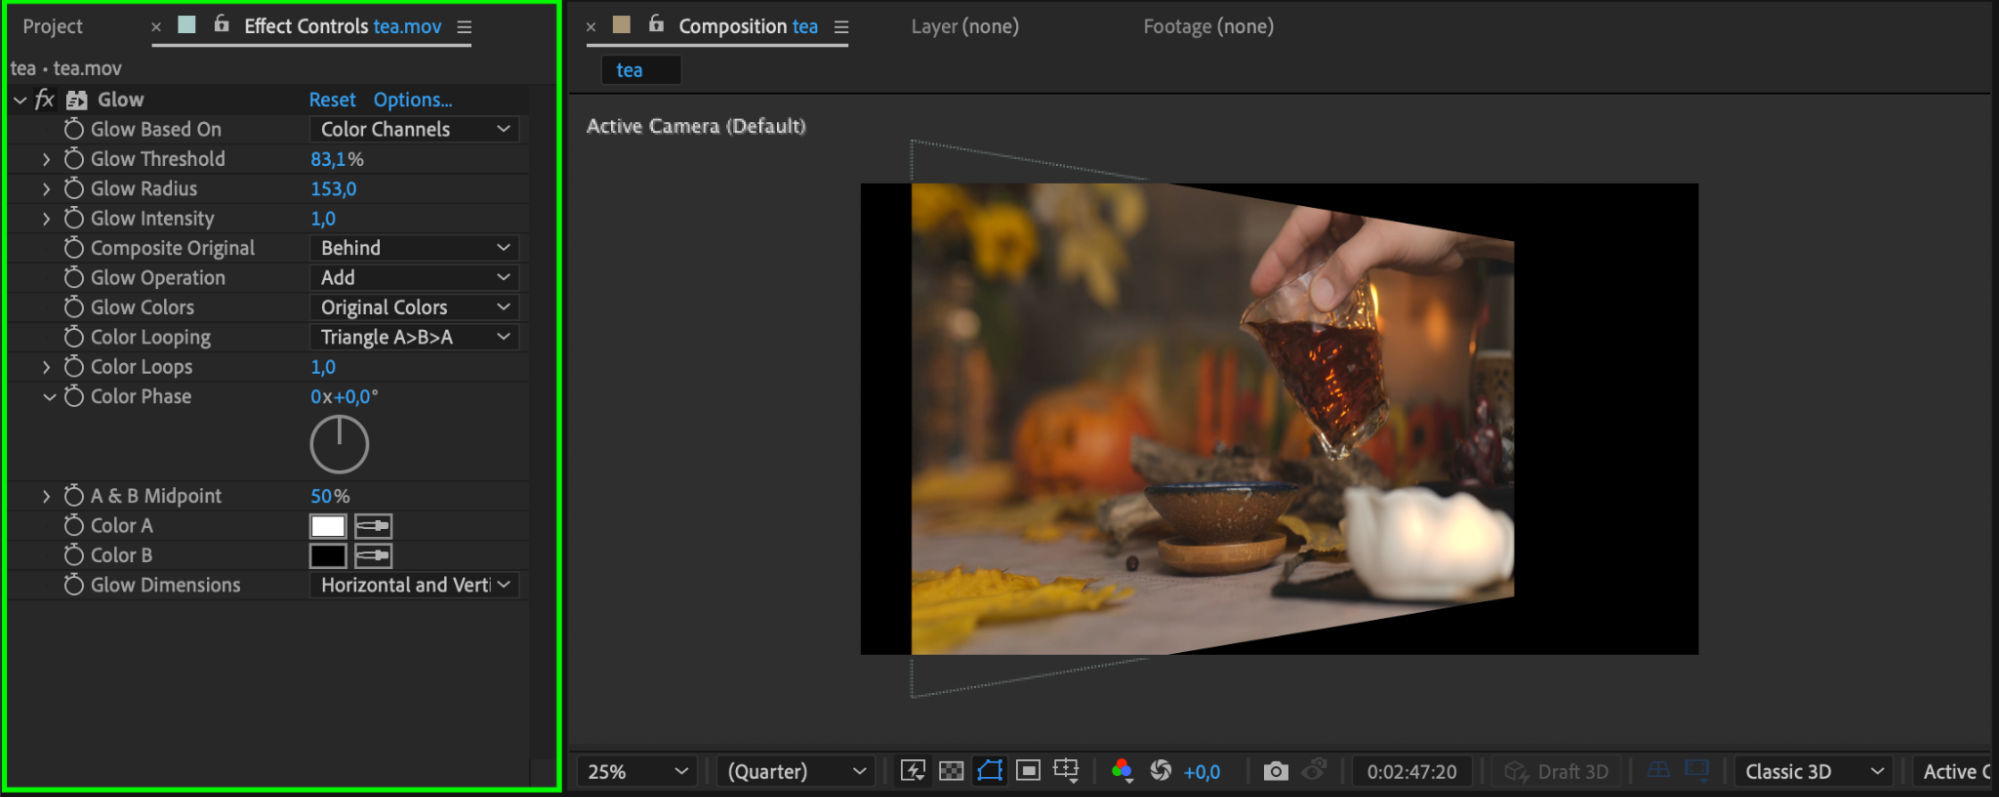
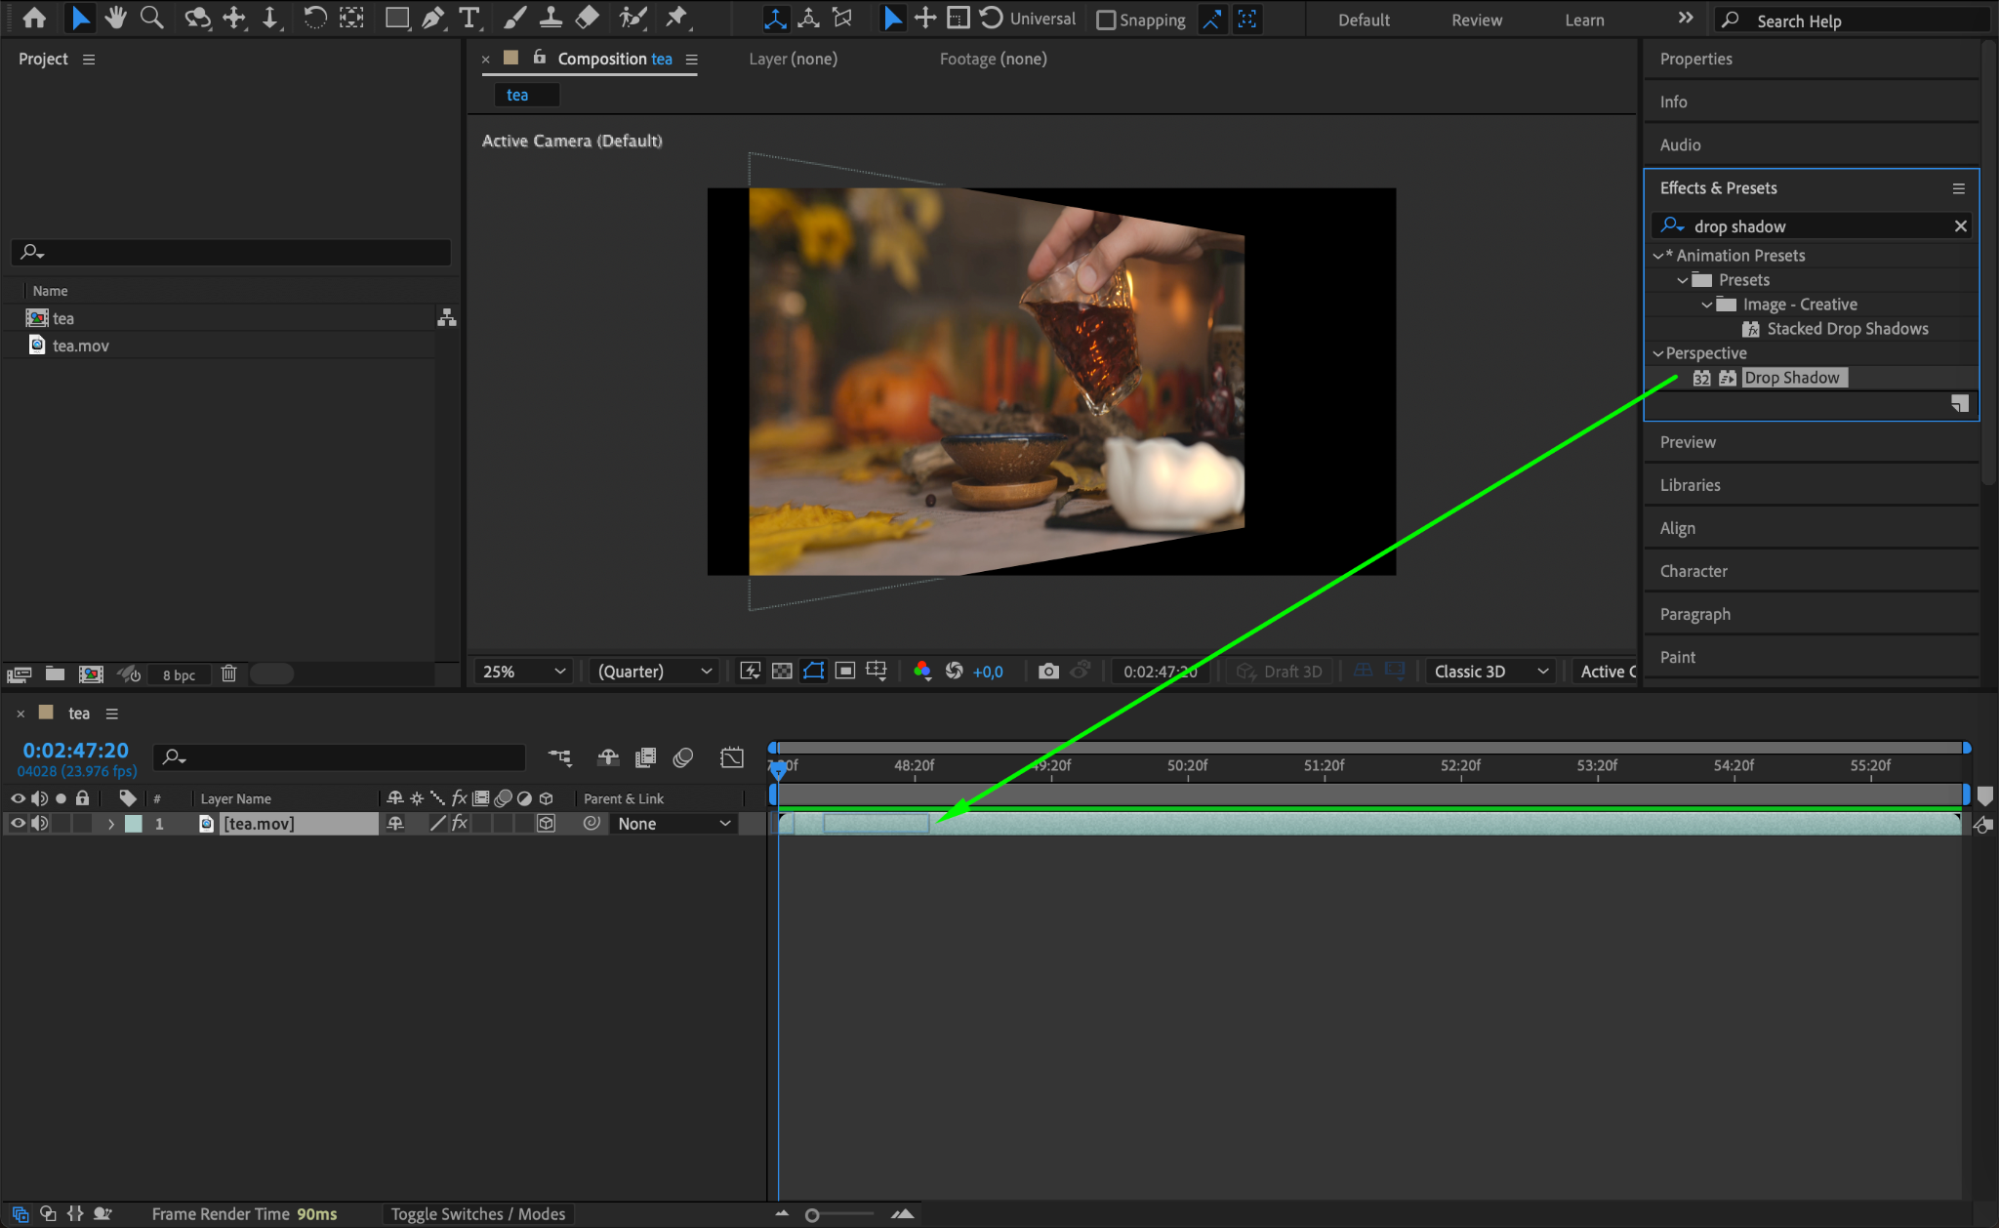
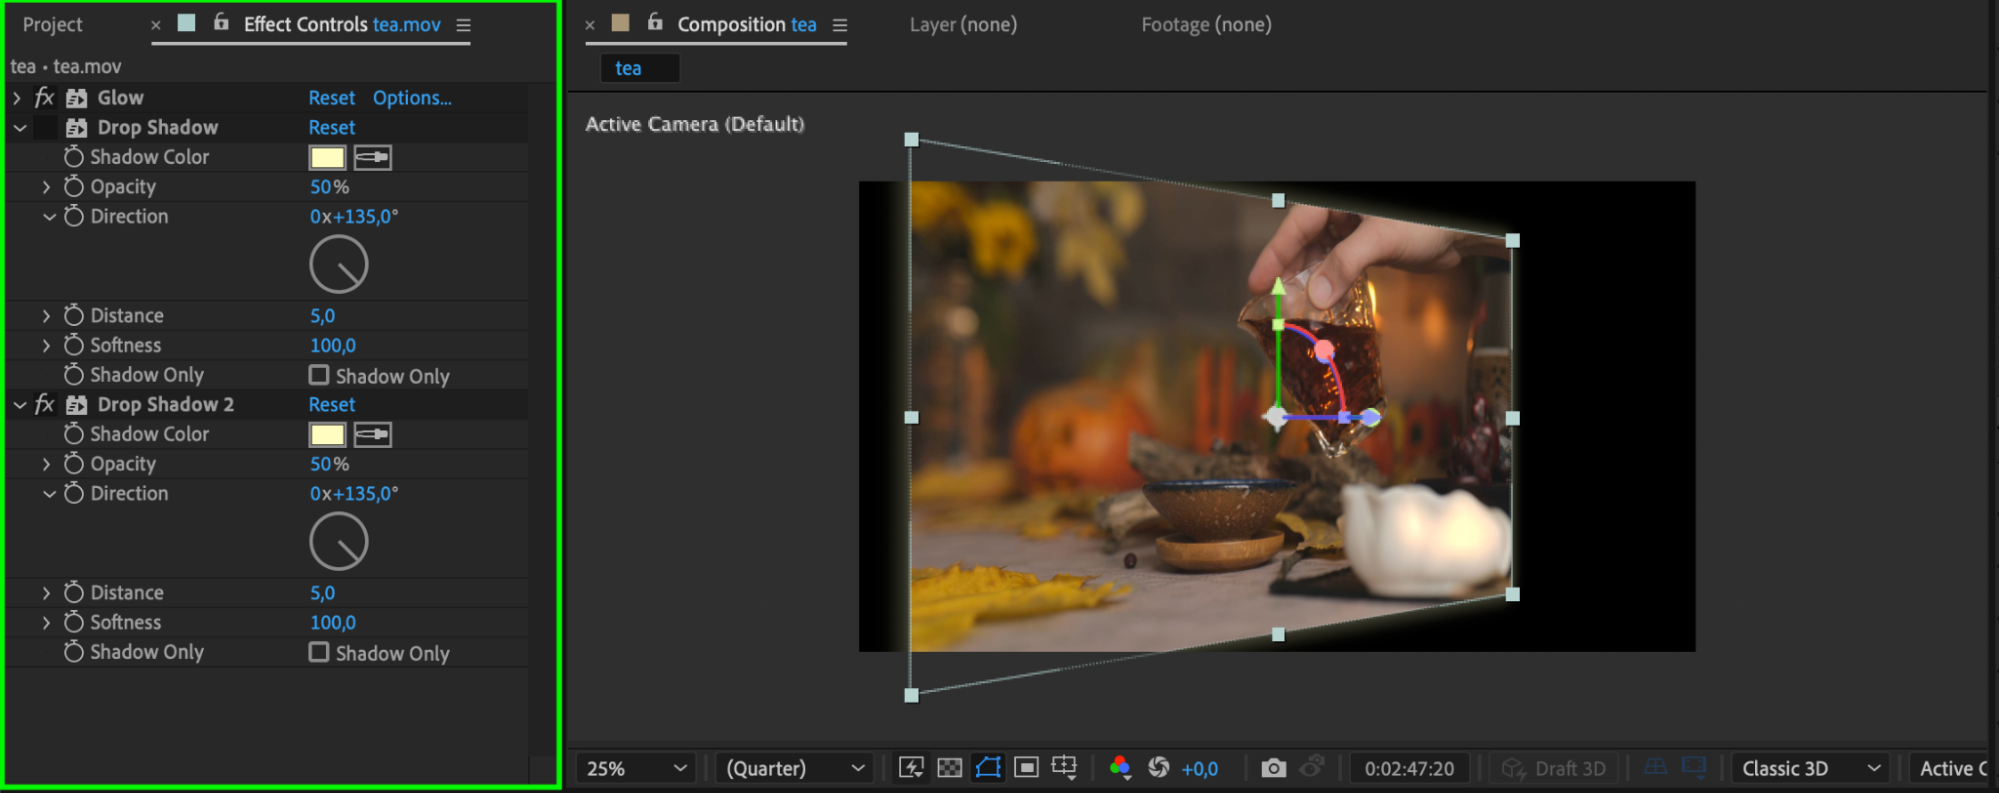
 Step 5: Add Visual Enhancements
Enhance the visual impact of your skewed video by applying effects. Go to the Effects & Presets panel and choose effects like Drop Shadow, Glow, or others to complement your skew. Drag and drop the effects onto your layer and adjust the parameters in the Effect Controls panel.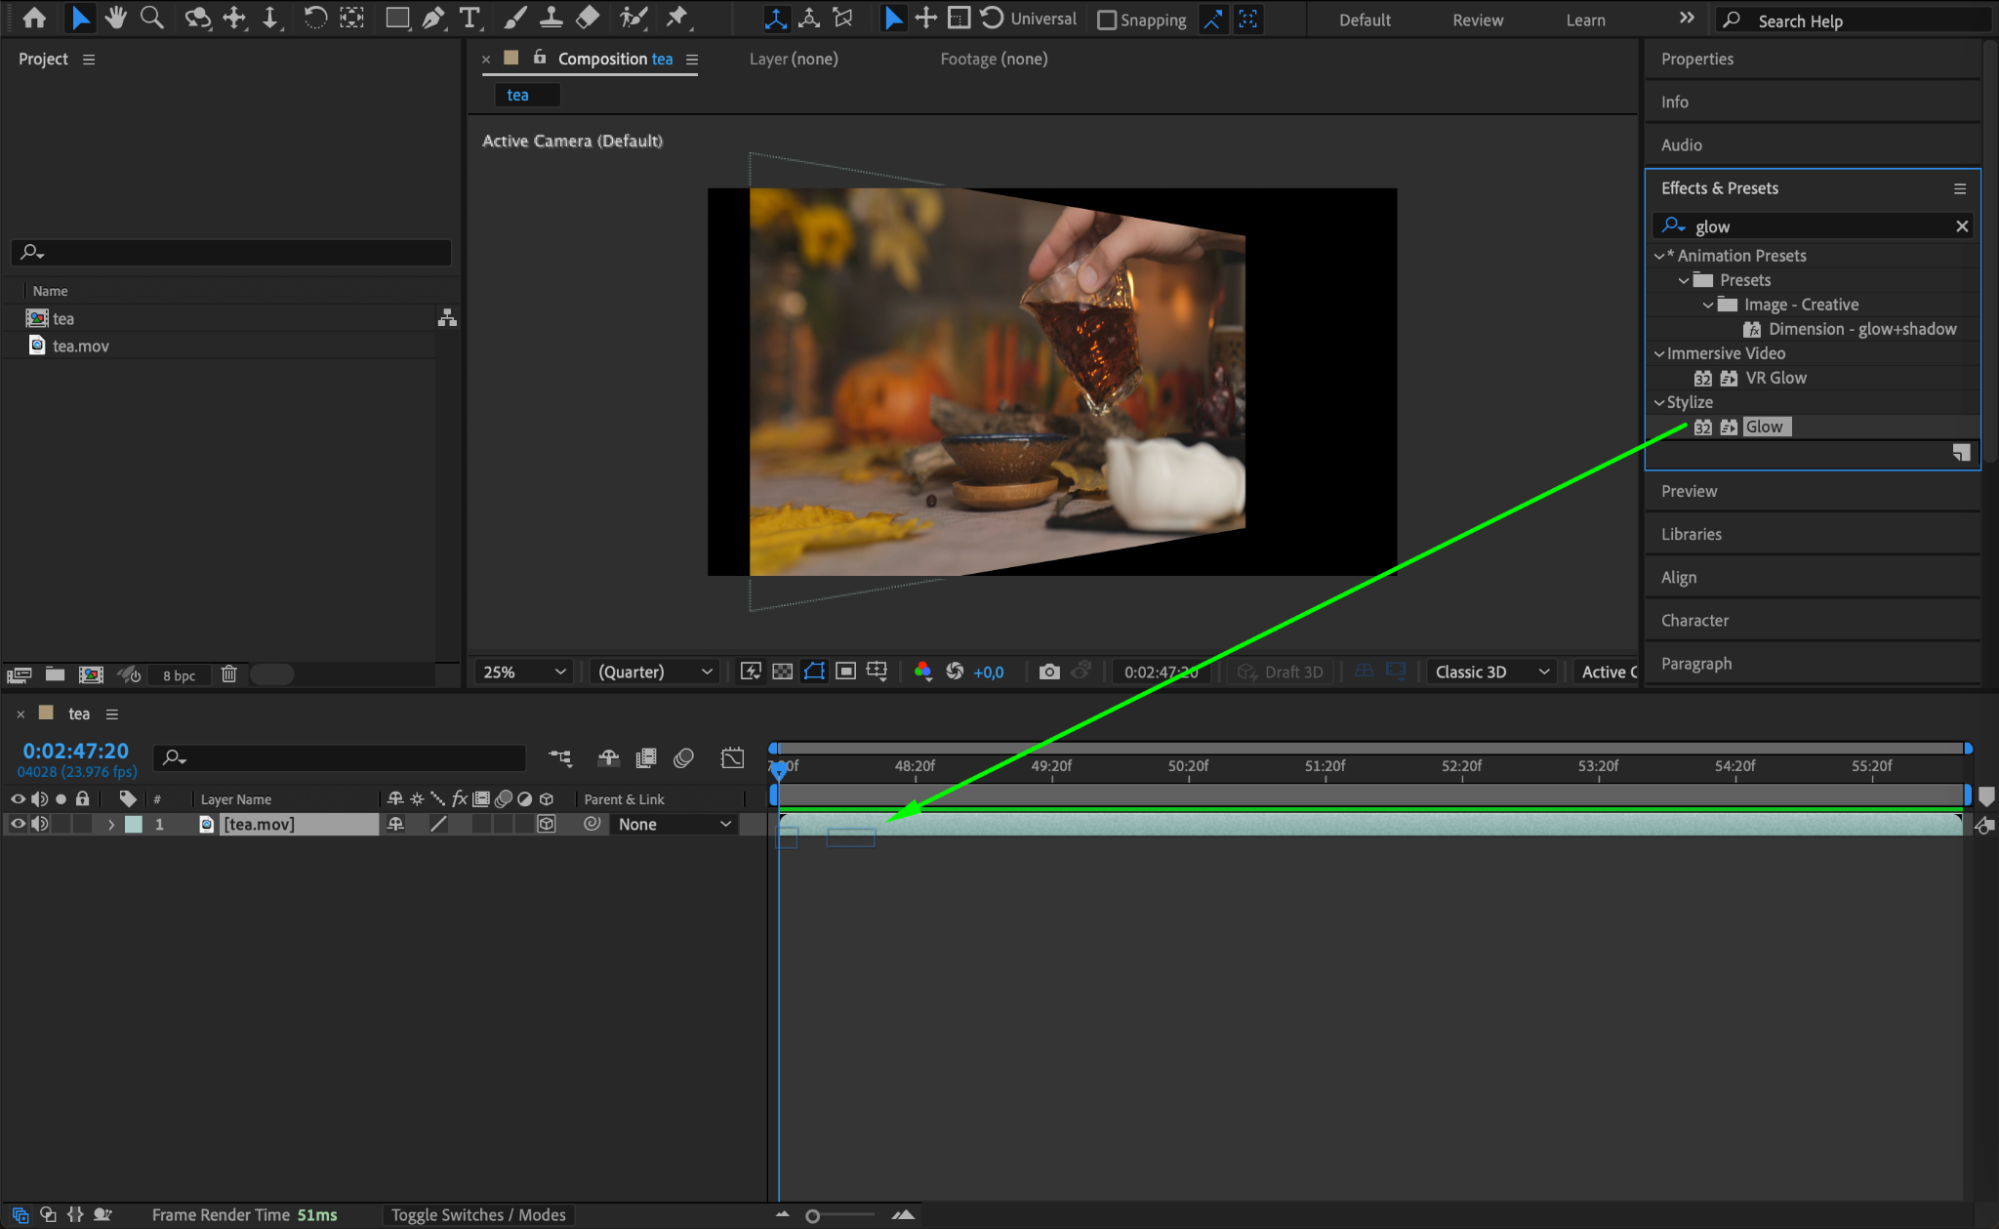
 Step 6: Preview Your Work
Press the Spacebar to preview your animation. Observe how the skew, animations, and effects interact. Make any necessary adjustments to ensure a smooth and visually appealing result.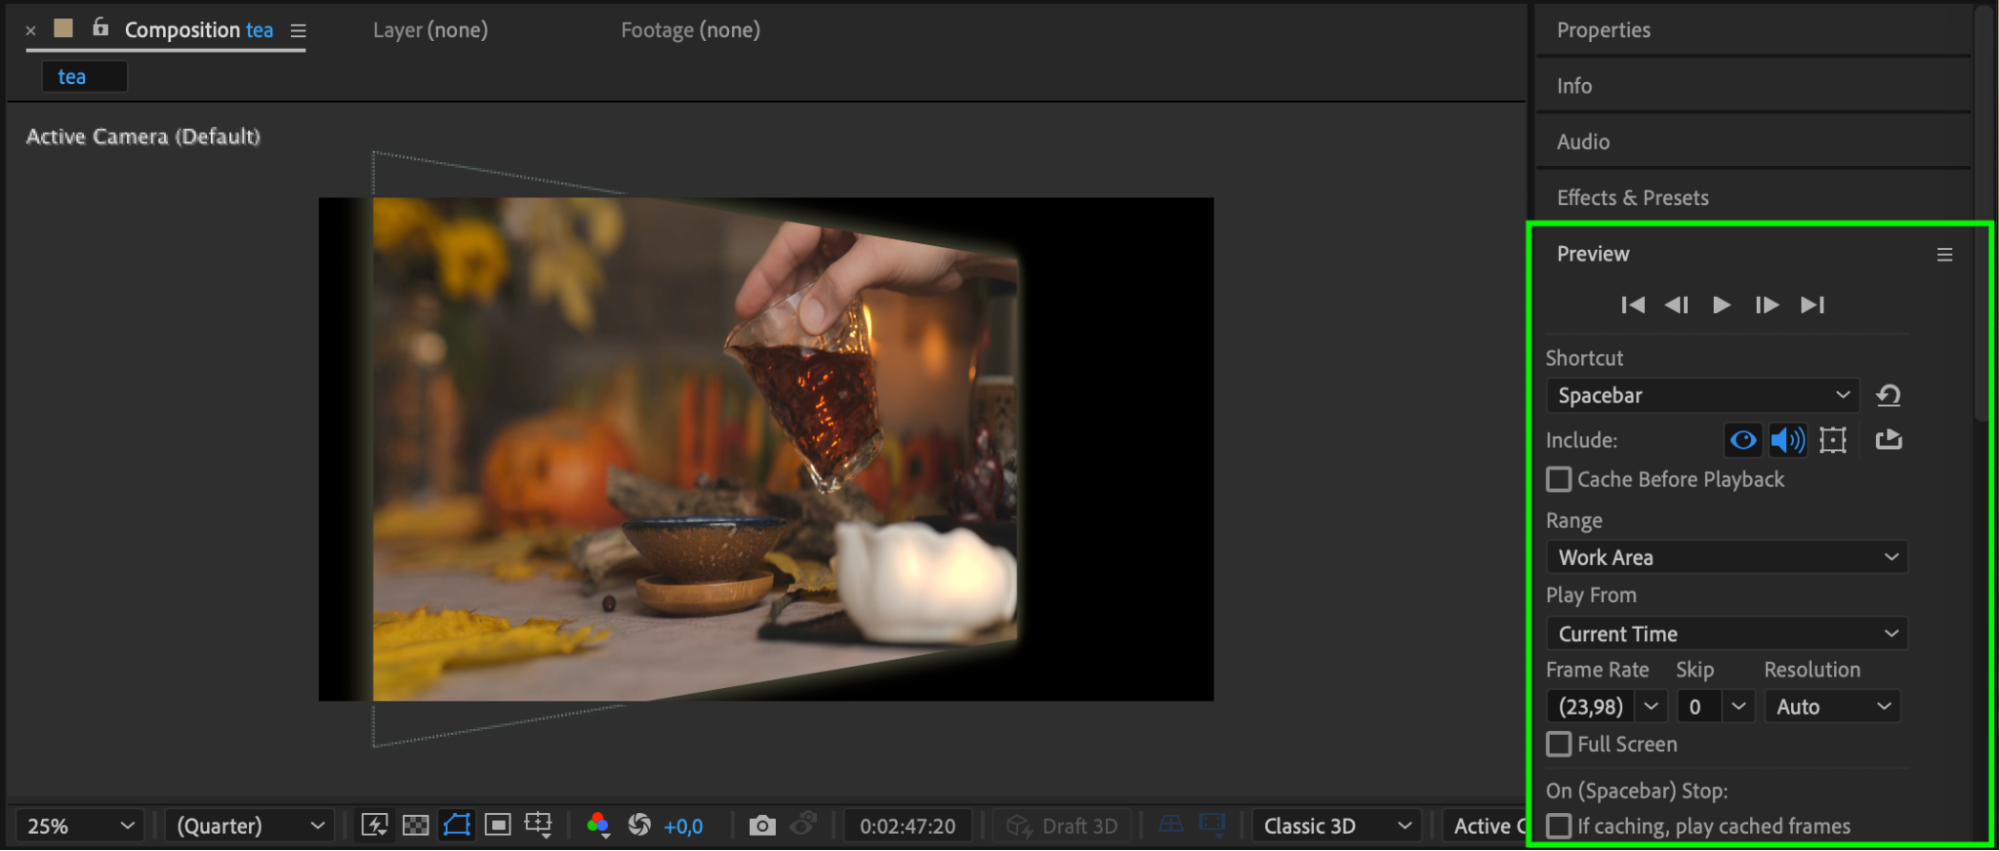 Step 7: Render Your Composition
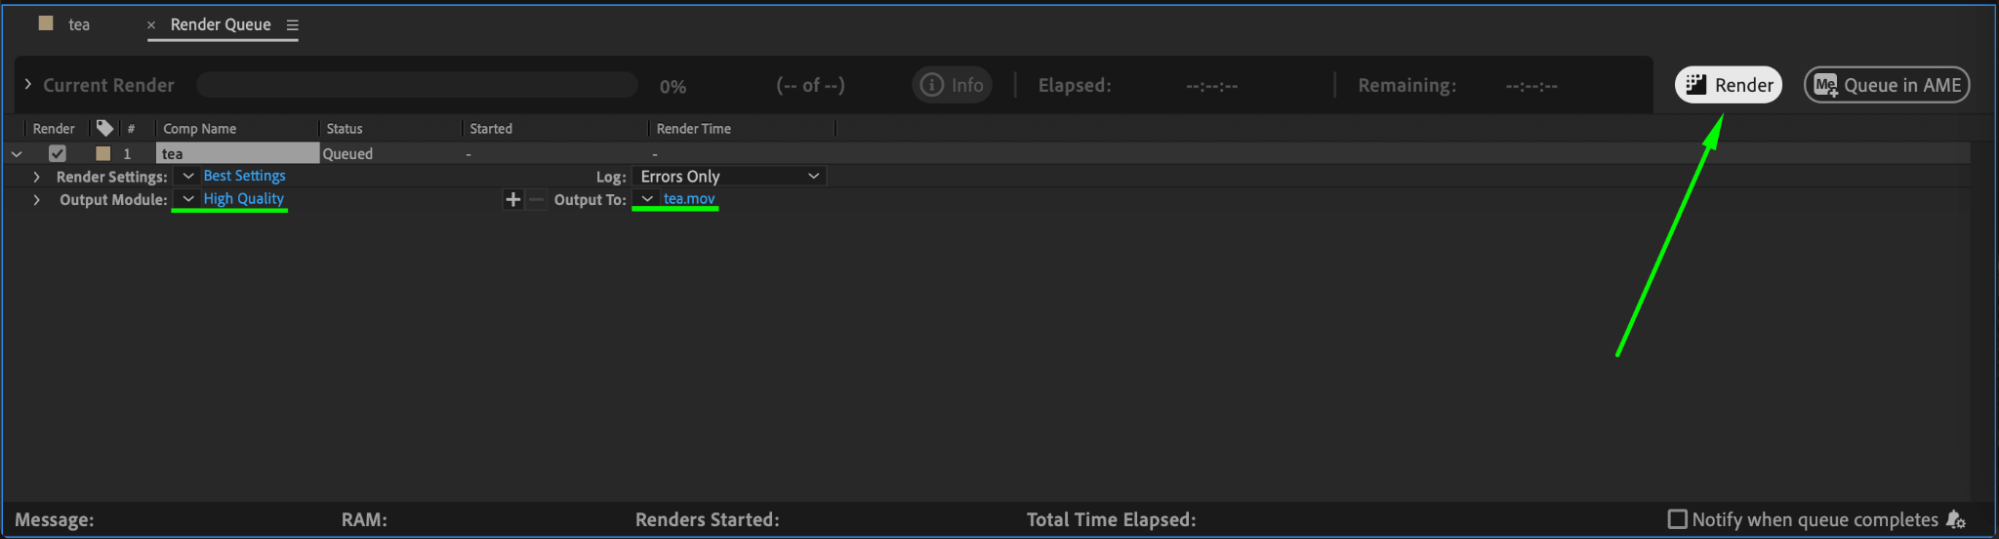
Once you’re satisfied with the result, render the composition. Go to Composition > Add to Render Queue, configure your output settings, and click Render to export your project.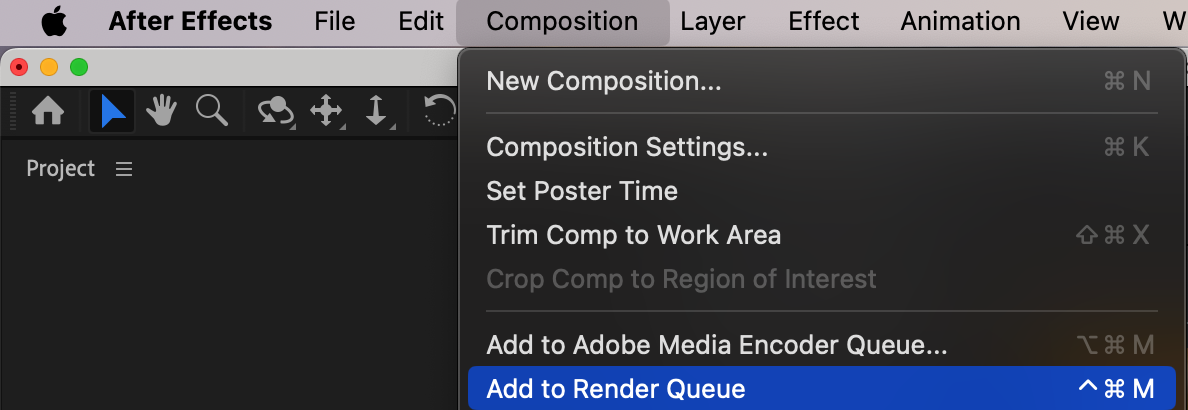
 Conclusion
Skewing video using 3D layers in After Effects is a creative way to introduce dynamic motion and perspective to your compositions. By animating rotation and scale and enhancing with effects, you can transform simple videos into captivating visuals. Experiment with different settings and effects to craft truly unique projects!
Our Bestsellers


