How to Make Your Animations Smoother in After Effects
Introdution
If you want to create captivating animations in After Effects, mastering keyframes is essential. Keyframes allow you to define the starting and ending points of an animation, but sometimes the transitions between these points can look choppy or abrupt. This is where smoothing keyframes comes in.
Get 10% off when you subscribe to our newsletter

In this article, I will guide you through various techniques to create smoother animations by manipulating keyframe interpolation in After Effects. By understanding how to use easing and other interpolation options, you can enhance your animations and give them a polished and professional look.
Whether you’re a beginner just getting started with animation or an experienced motion designer looking to improve your skills, read on to discover the secrets of smoothing keyframes in After Effects.
How to Smooth Keyframes in After Effects
Are you tired of your animations looking jerky or rigid? Do you want to give your motion graphics a polished and professional look? The solution lies in mastering keyframe interpolation techniques in After Effects.
Keyframe interpolation determines how a property transitions from one keyframe to another. By manipulating the spatial and temporal interpolation options, you can create seamless animations with smooth movements.
Get 10% off when you subscribe to our newsletter

Here are some essential tips and techniques to help you smooth keyframes in After Effects:
1. Understand Easing: Easing gradually accelerates or decelerates an animation, creating a more natural movement. After Effects offers easing options like ease in, ease out, which control the animation’s speed at the beginning or end.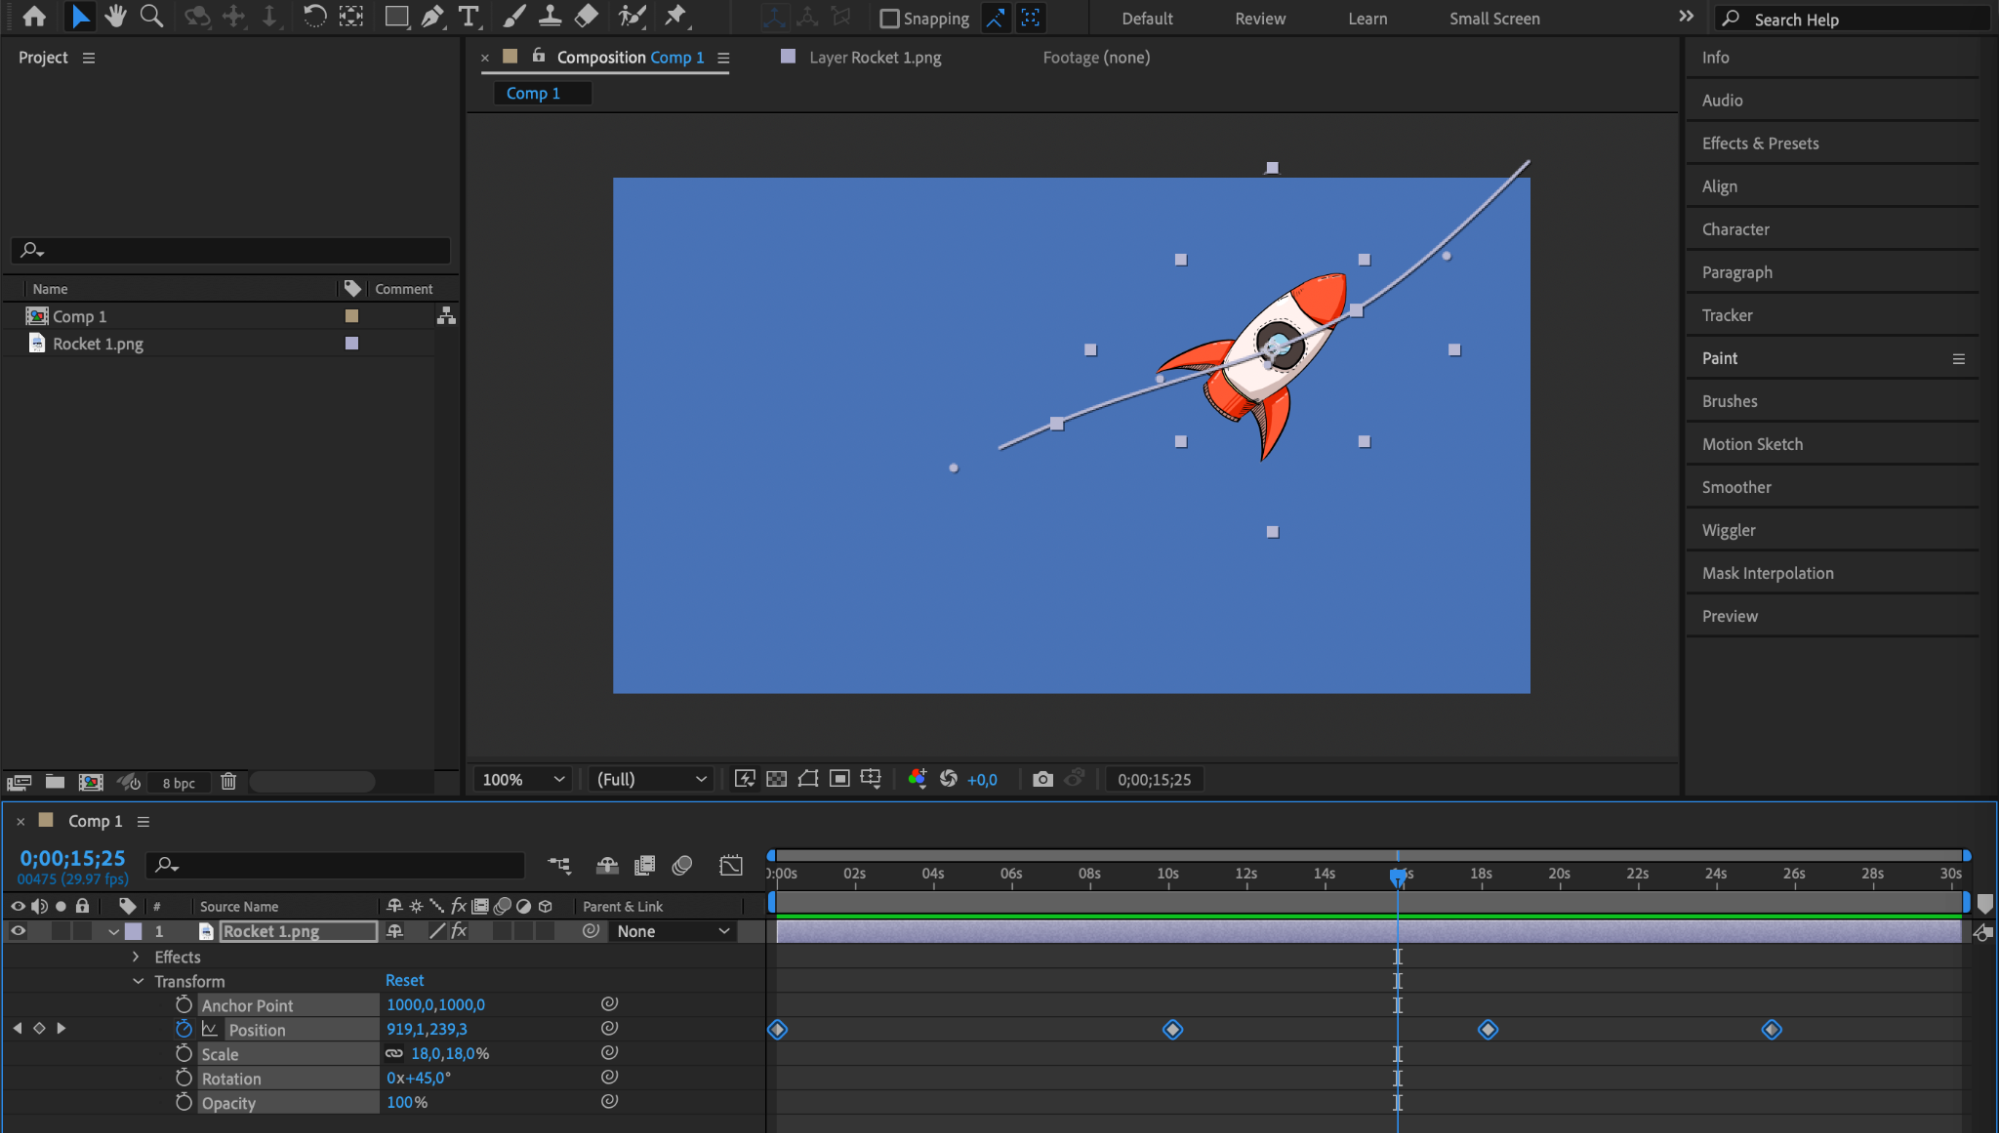


 2. Use the Graph Editor: The Graph Editor in After Effects is a powerful tool that lets you visualize and manipulate keyframe interpolation. By adjusting the velocity and speed of the animation, you can create smoother curves and more fluid animations.

3. Experiment with Interpolation Methods: After Effects provides different interpolation methods, including linear, bezier, and hold. Linear interpolation creates a straight path between keyframes, while bezier interpolation allows for curved and smooth movements. Hold interpolation freezes a property’s value until the next keyframe, creating a static effect.
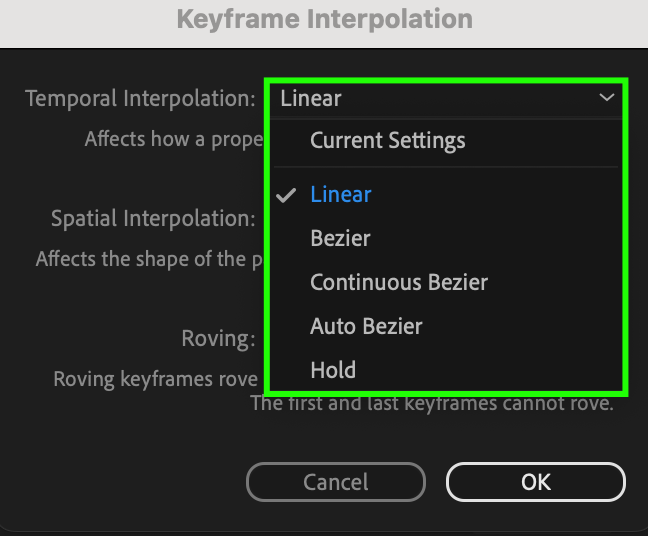
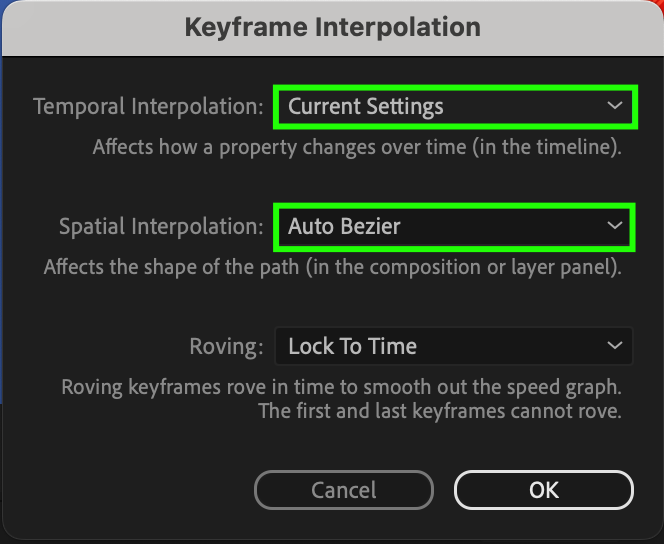
4. Utilize the Easy Ease Function: The Easy Ease function in After Effects is a convenient shortcut that automatically applies easing to selected keyframes. It adds a natural deceleration or acceleration to the animation, smoothing out the transitions. To use it, right-click on the keyframes and choose “Easy Ease” or use the keyboard shortcut F9. 5. Adjust Spatial and Temporal Interpolation: After Effects allows you to control spatial and temporal interpolation individually. Spatial interpolation determines the animation’s path between keyframes, while temporal interpolation affects the timing. By manipulating both types of interpolation, you can fine-tune the motion and create smoother transitions.
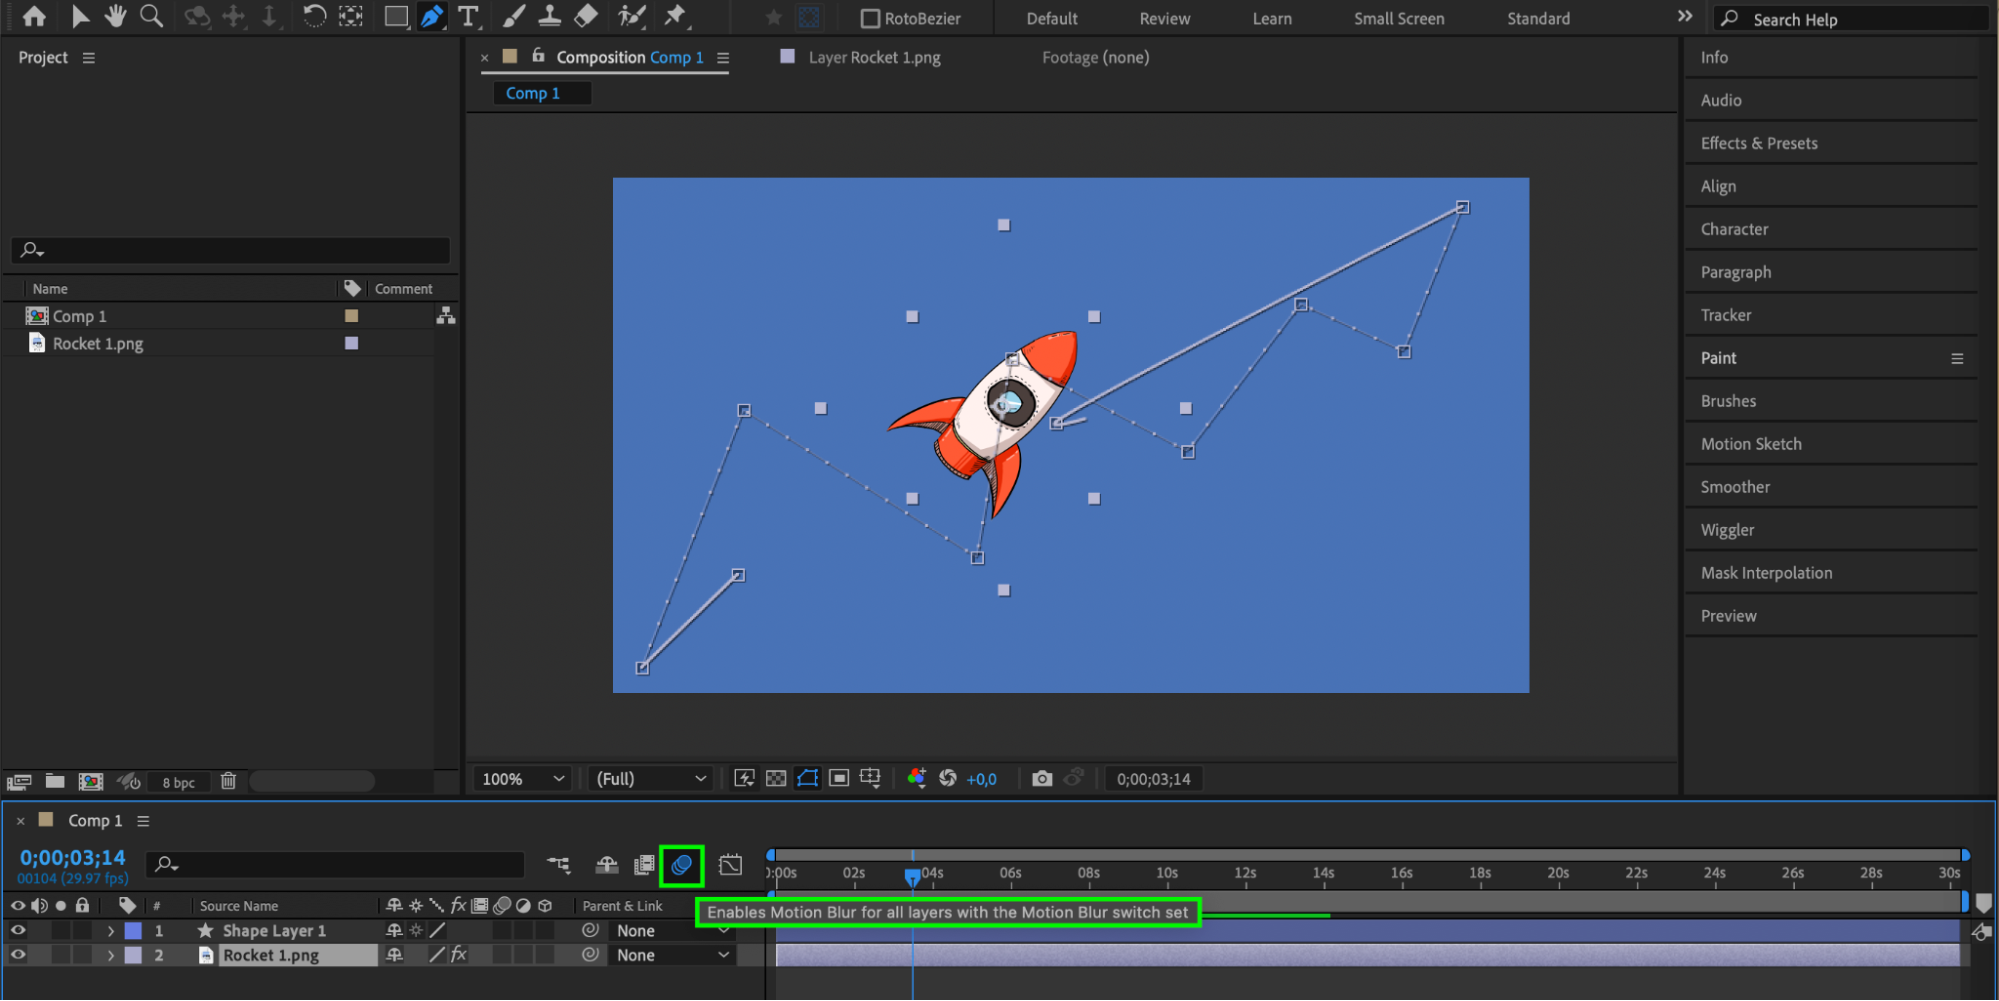
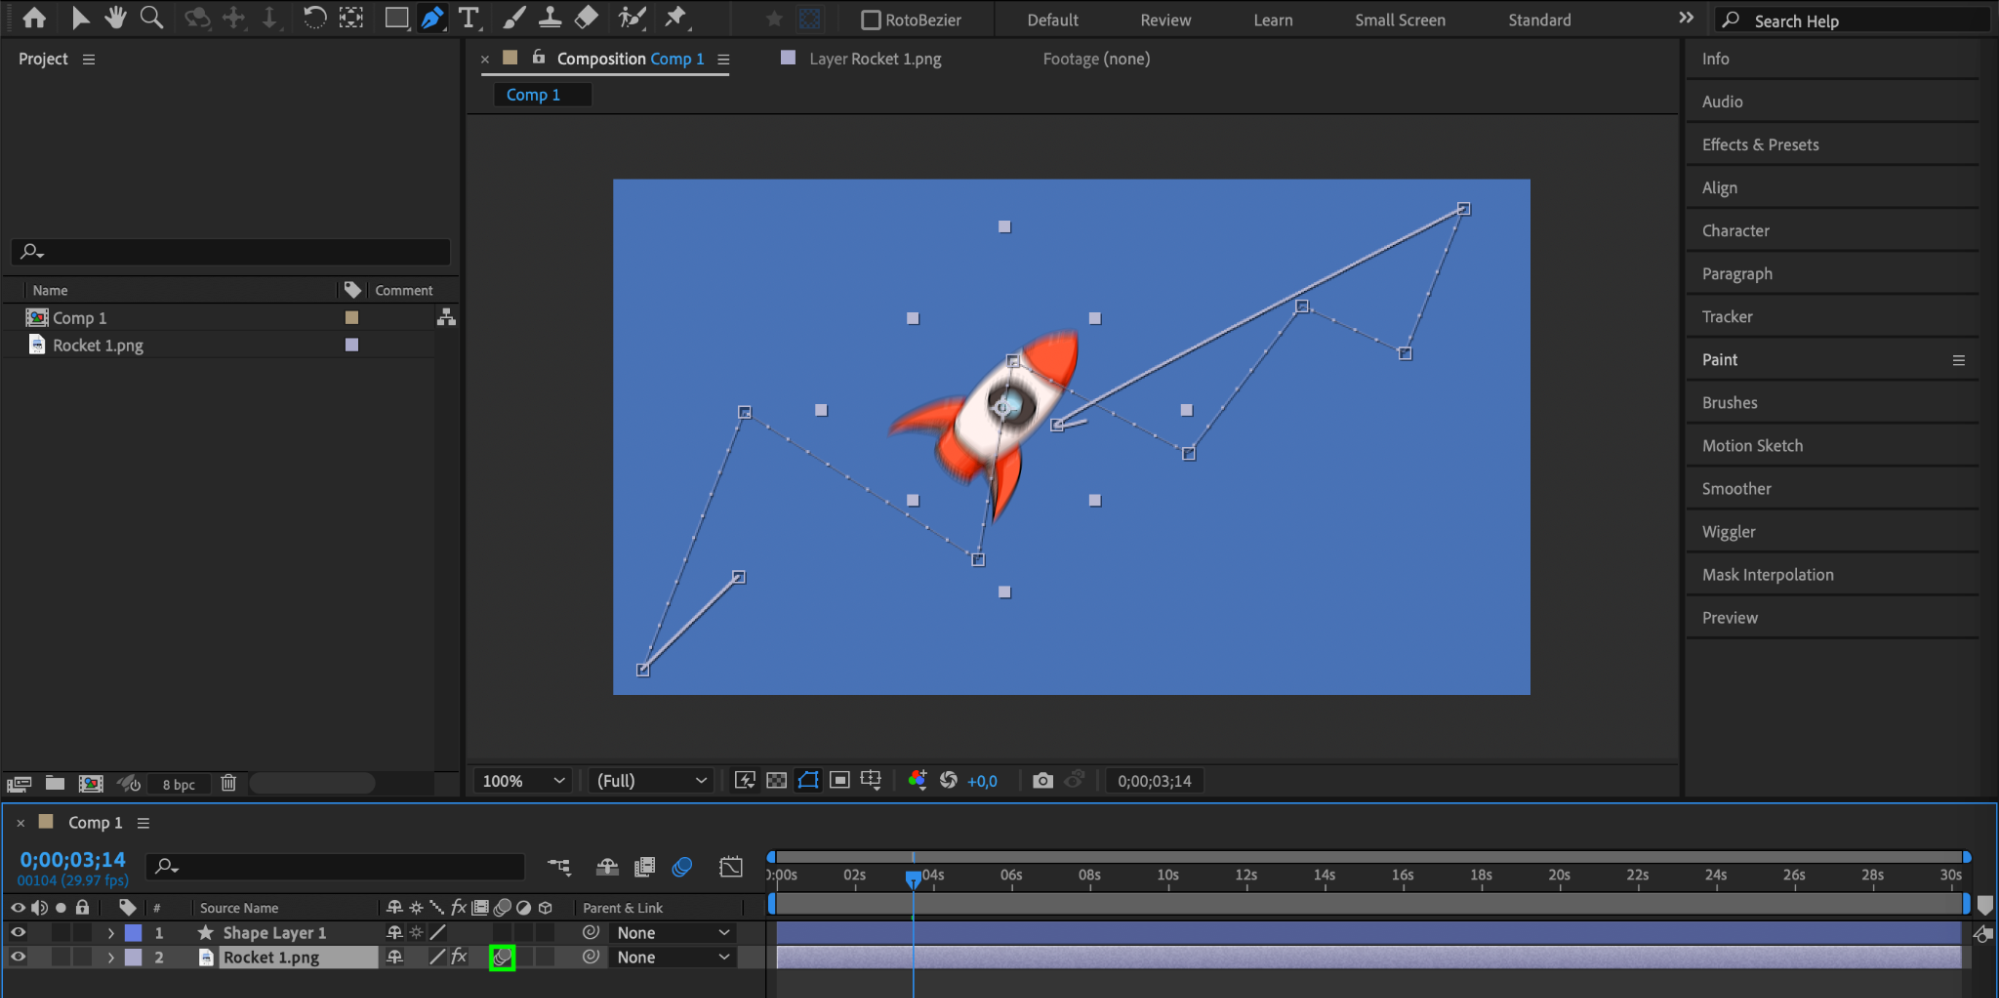
 6. Consider Motion Blur: Adding motion blur to your animations enhances the perception of smoothness. Motion blur mimics the blurring effect seen in real-world moving objects, making your animation appear more realistic. Enable motion blur in After Effects by clicking on the Motion Blur icon in the Timeline panel.
 Conclusion
By implementing these techniques and paying attention to the details of keyframe interpolation, you can create visually pleasing and seamless animations. Smoother animations give a more professional and engaging feel to your designs.
Take your motion graphics to the next level by mastering the art of smoothing keyframes in After Effects. With practice and experimentation, you’ll be able to create stunning, polished animations that captivate viewers and bring your designs to life.

