Mastering Smooth Slow Motion in After Effects
Introduction – “Elevating Your Videos: A Comprehensive Guide to Smooth Slow Motion in After Effects
Welcome to the ultimate guide on achieving silky-smooth slow motion in Adobe After Effects. Dive into the intricacies of time-stretching mastery and frame blending finesse as we unravel the secrets behind captivating and polished video content. Elevate your video editing skills with our comprehensive steps and unleash your creative potential for stunning, cinematic results.
Steps to Time Stretch Video in Adobe After Effects:
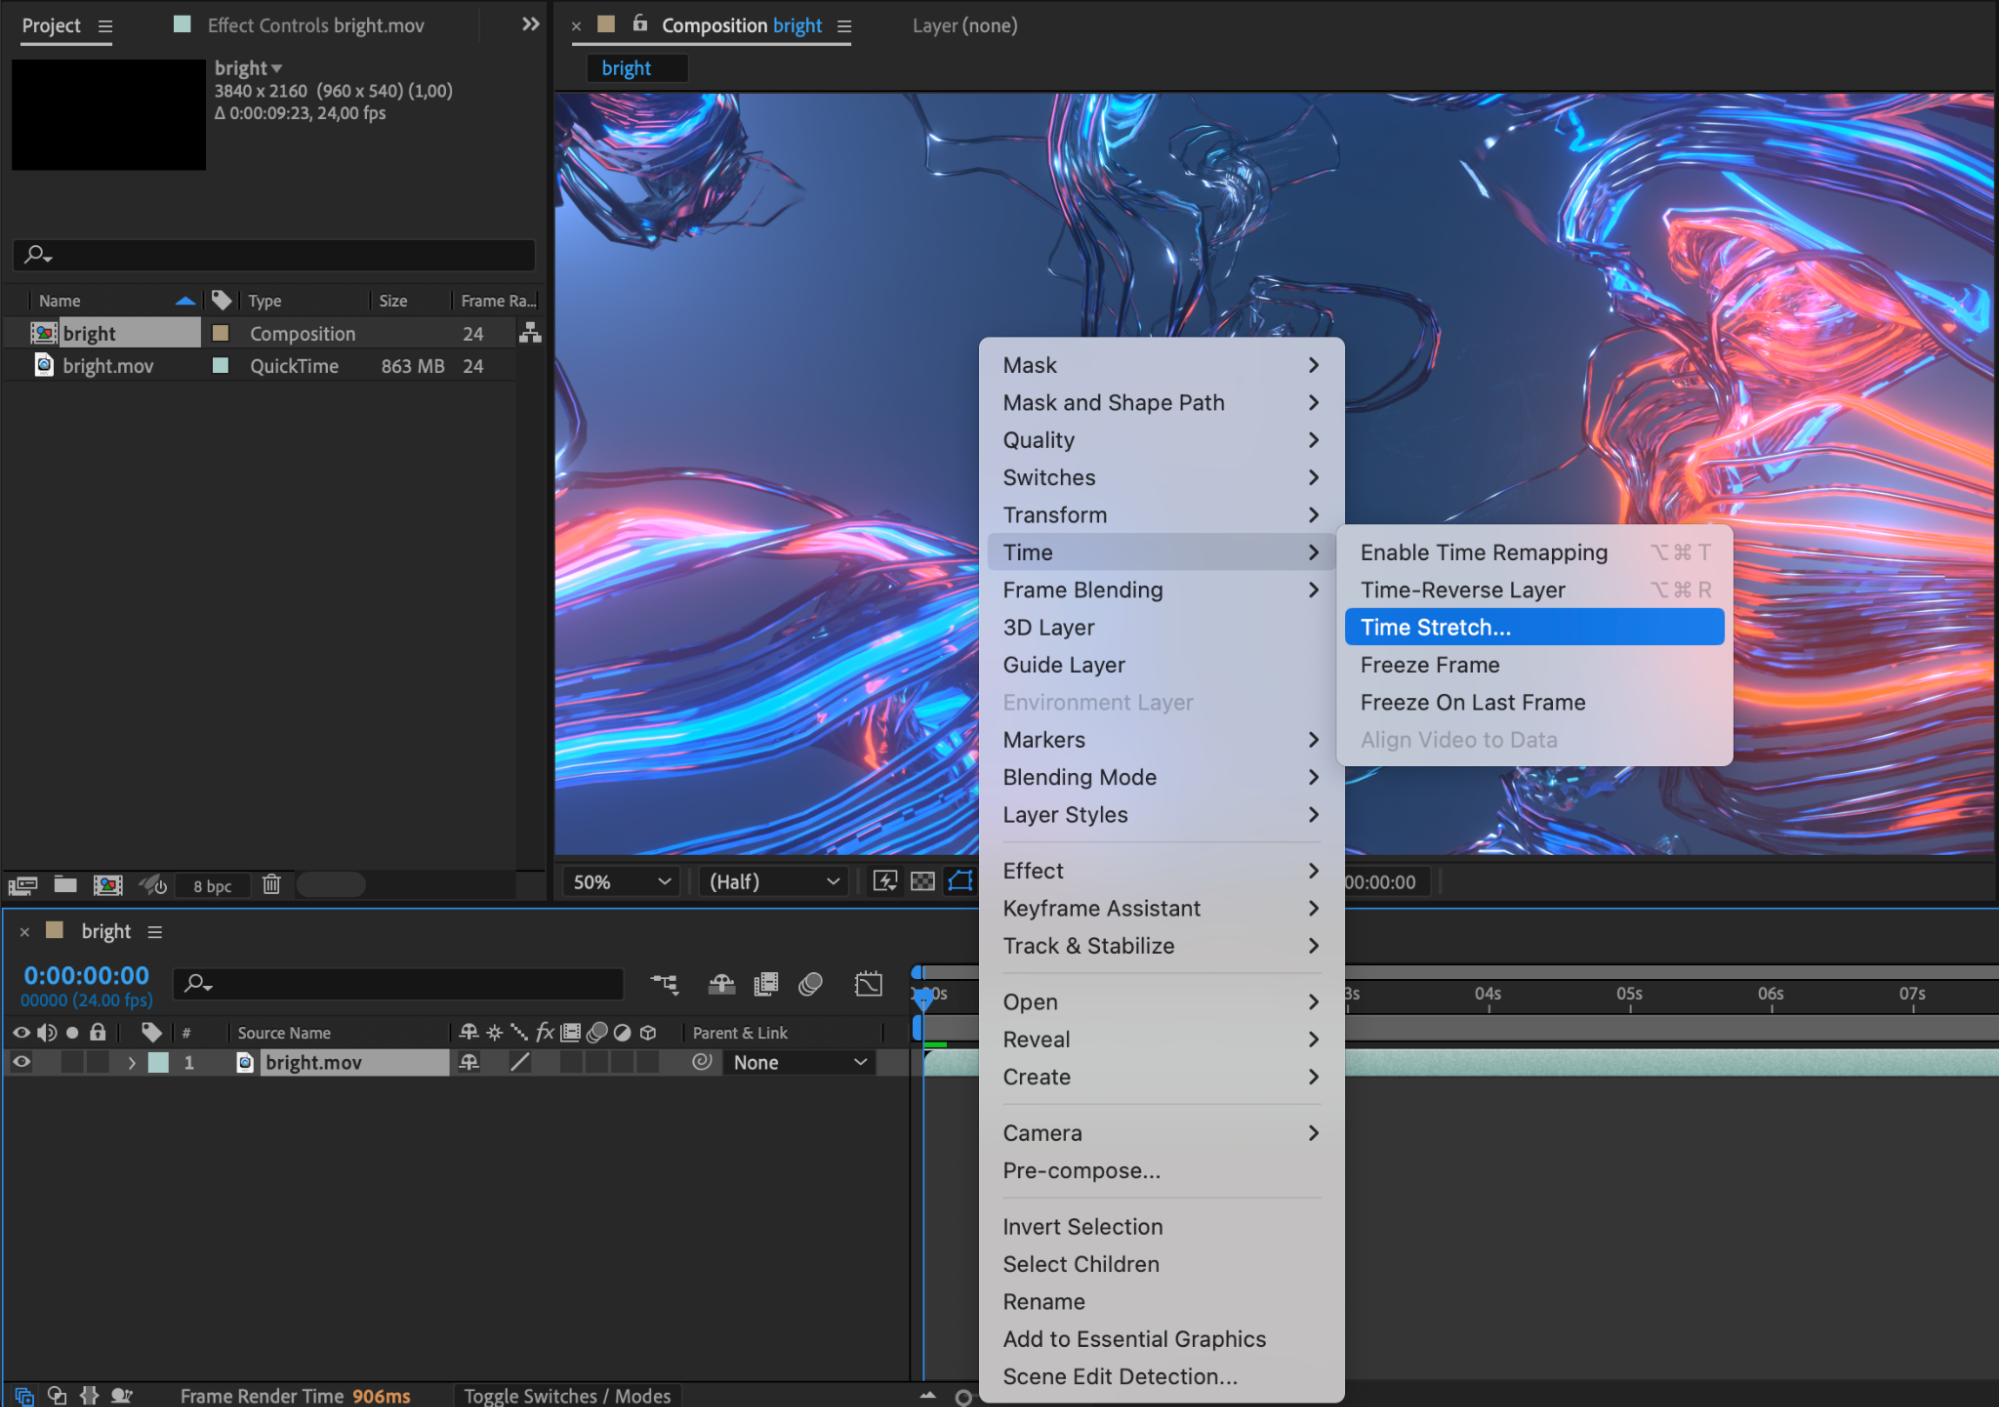
1. Right-Click on the Video:
Locate the video clip in your composition.
Right-click on the video layer.
2. Choose Time > Time Stretch:
In the context menu, hover over “Time.”
Select “Time Stretch” from the submenu.

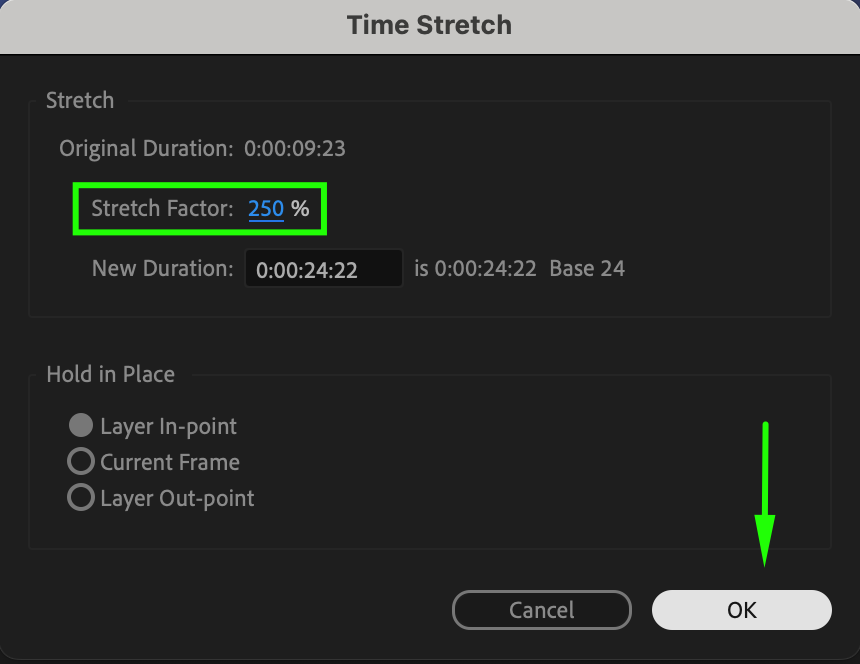
3. Set Stretch Factor to 250:
In the Time Stretch dialog that appears, find the “Stretch Factor” field.
Set the stretch factor to 250.

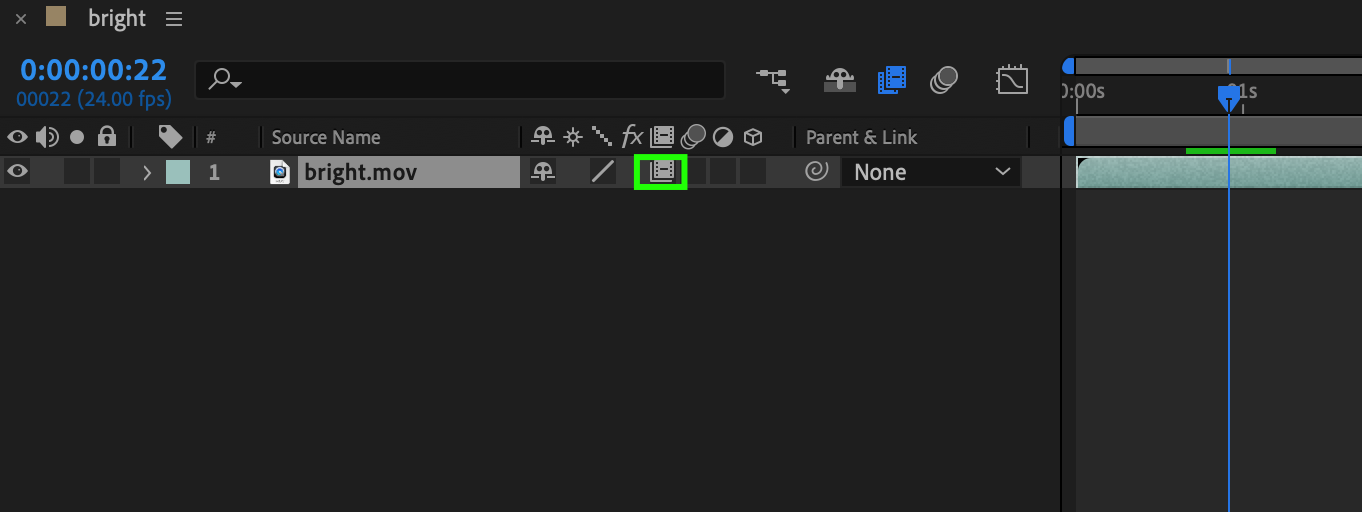
4. Enable Frame Blending:
Check the box next to “Frame Blending” to enable this feature.

5. Choose Frame Blending Options:
Within the Frame Blending options, select:
“1 – Standard Frame Blending” for the first option.
“2 – Pixel Motion Frame Blending” for the second option.


These steps will effectively time-stretch your video with the specified settings in Adobe After Effects.
Conclusion: Unleashing Creative Potential
In conclusion, mastering the art of time-stretching in Adobe After Effects empowers creators to manipulate the temporal aspects of their videos with precision. The straightforward steps, from right-clicking to selecting time stretch and adjusting the stretch factor, provide a user-friendly process. Enabling frame blending, with the choice between standard and pixel motion options, adds finesse to the temporal transformation. By following these steps, users can unlock a realm of creative possibilities, allowing for nuanced control over the speed and duration of their video content in Adobe After Effects.

