Step-by-Step Guide to Speeding Up Part of a Video in After Effects
Introduction – Accelerate Sections of Your Video Seamlessly
Speeding up parts of a video in After Effects allows you to highlight key moments or add a dramatic effect to your project. With just a few adjustments, you can seamlessly create dynamic speed transitions that enhance the storytelling. This guide walks you through the process step by step.
Get 10% off when you subscribe to our newsletter

Step 1: Import Your Video
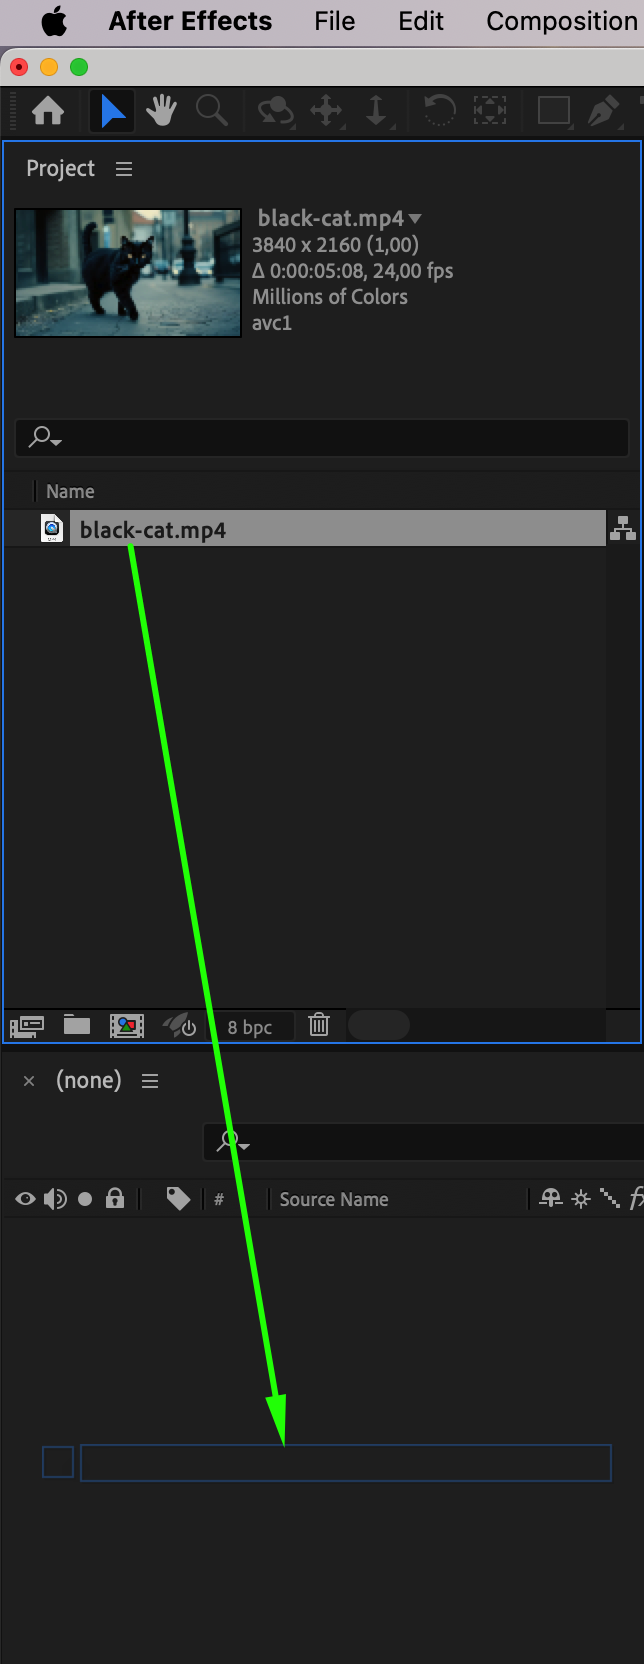
Start by importing your video file. Go to File > Import > File, select your video, and drag it to the timeline. Make sure the video is placed at the correct position in your composition. This will serve as the base for your editing.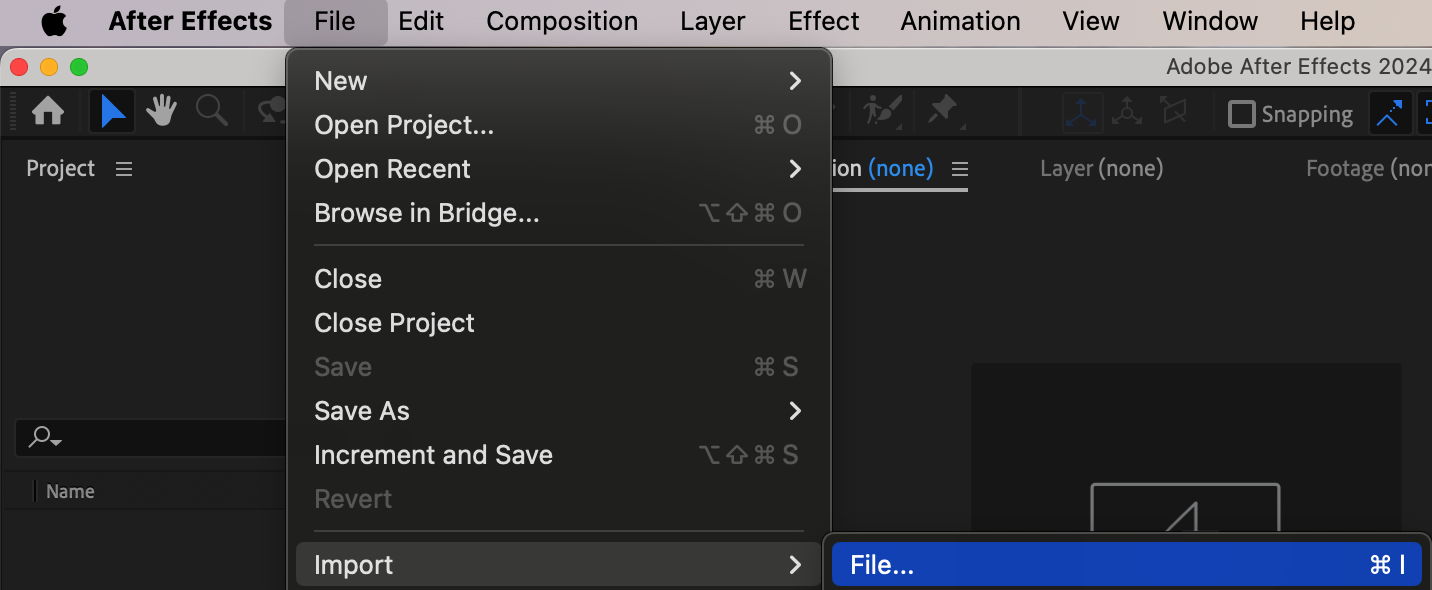
 Step 2: Split the Video Layer
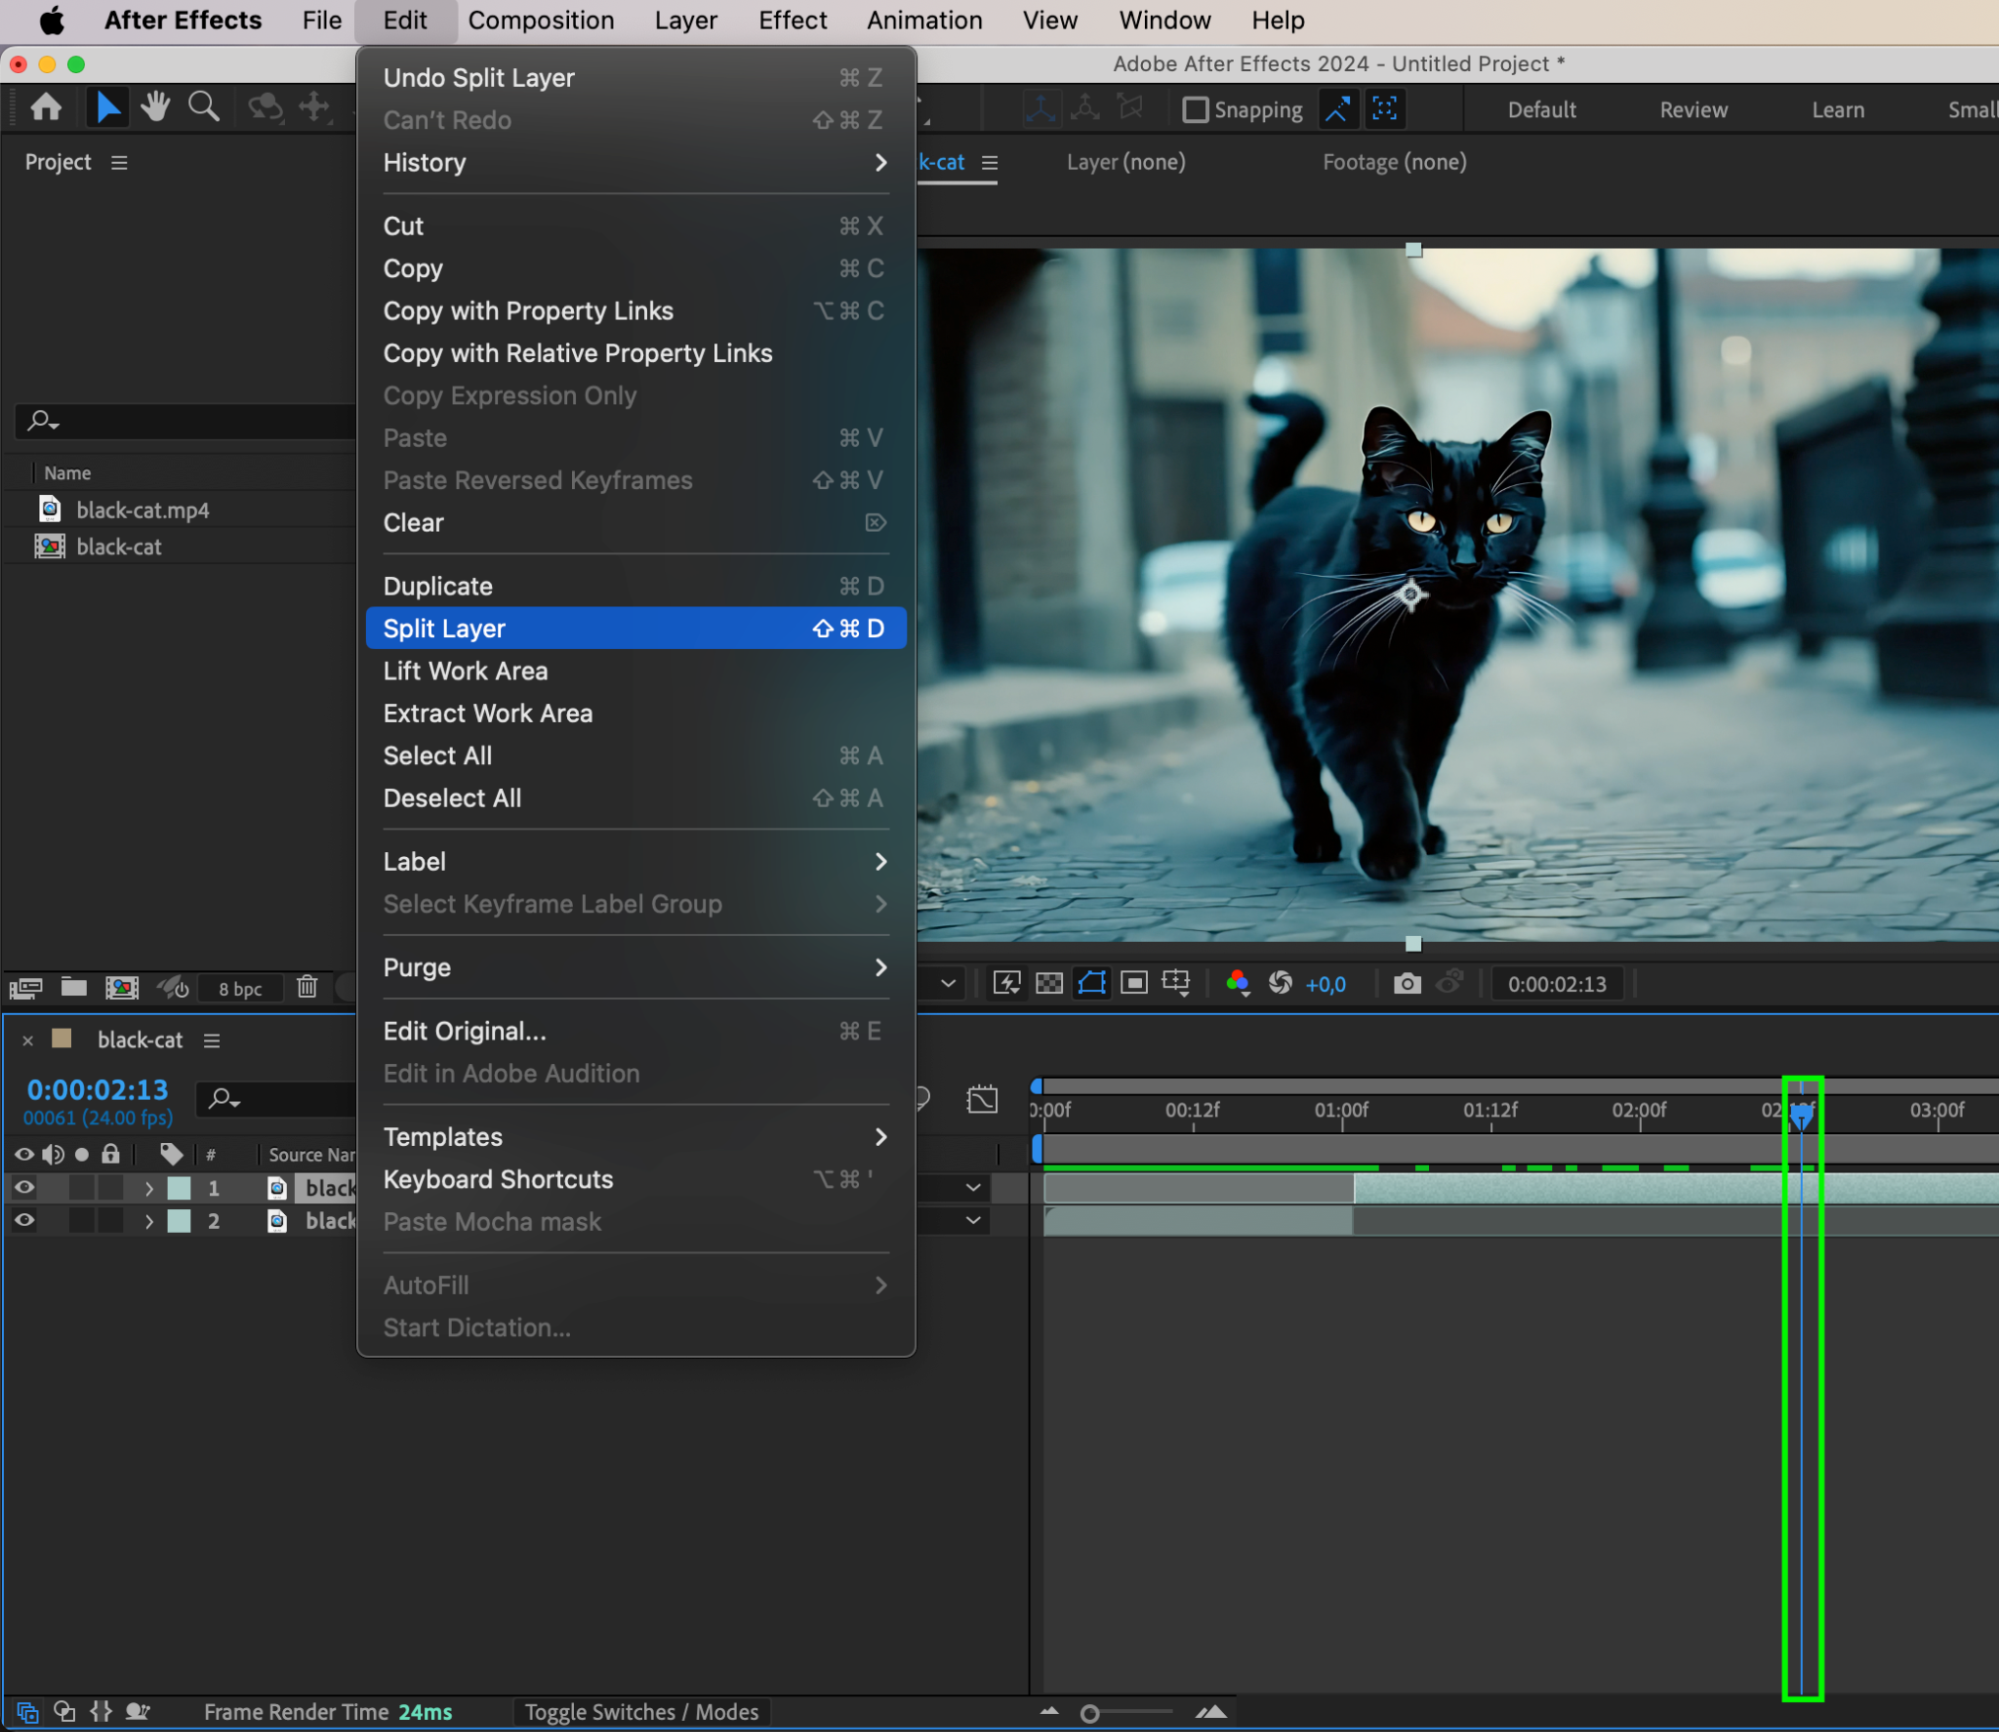
Position the Current Time Indicator (CTI) at the point where you want the speed-up effect to begin. Go to Edit > Split Layer to divide the layer. Move the CTI to the point where the effect should end and split the layer again. You now have three separate layers: the normal-speed section before the effect, the speed-up section, and the normal-speed section after the effect.

 Step 3: Apply Time Stretch to the Split Layer
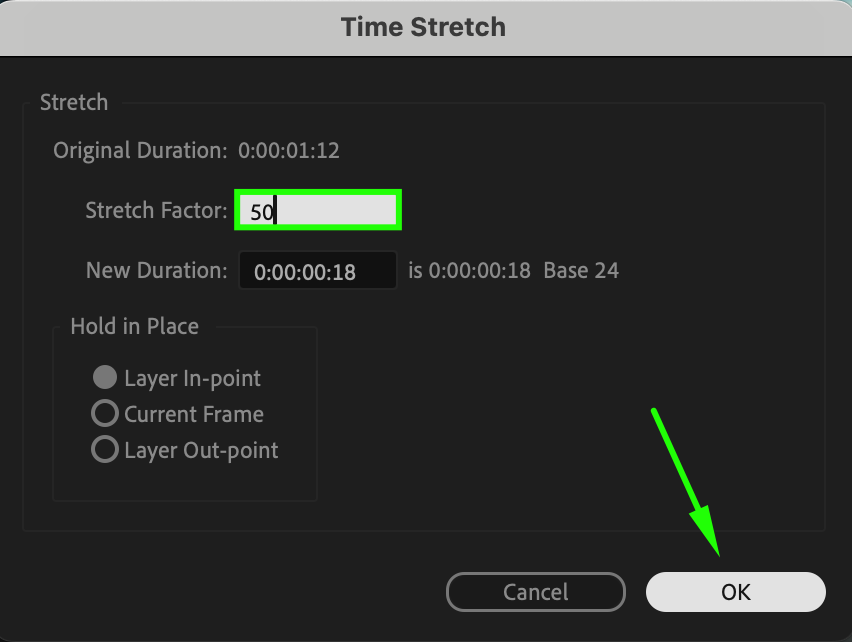
Right-click on the middle (split) layer that represents the section to be sped up. Choose Time > Time Stretch from the context menu. In the dialog box, reduce the Stretch Factor to a lower value (e.g., 50) to speed up the video. A lower stretch factor means the layer’s duration will shrink, making the video play faster.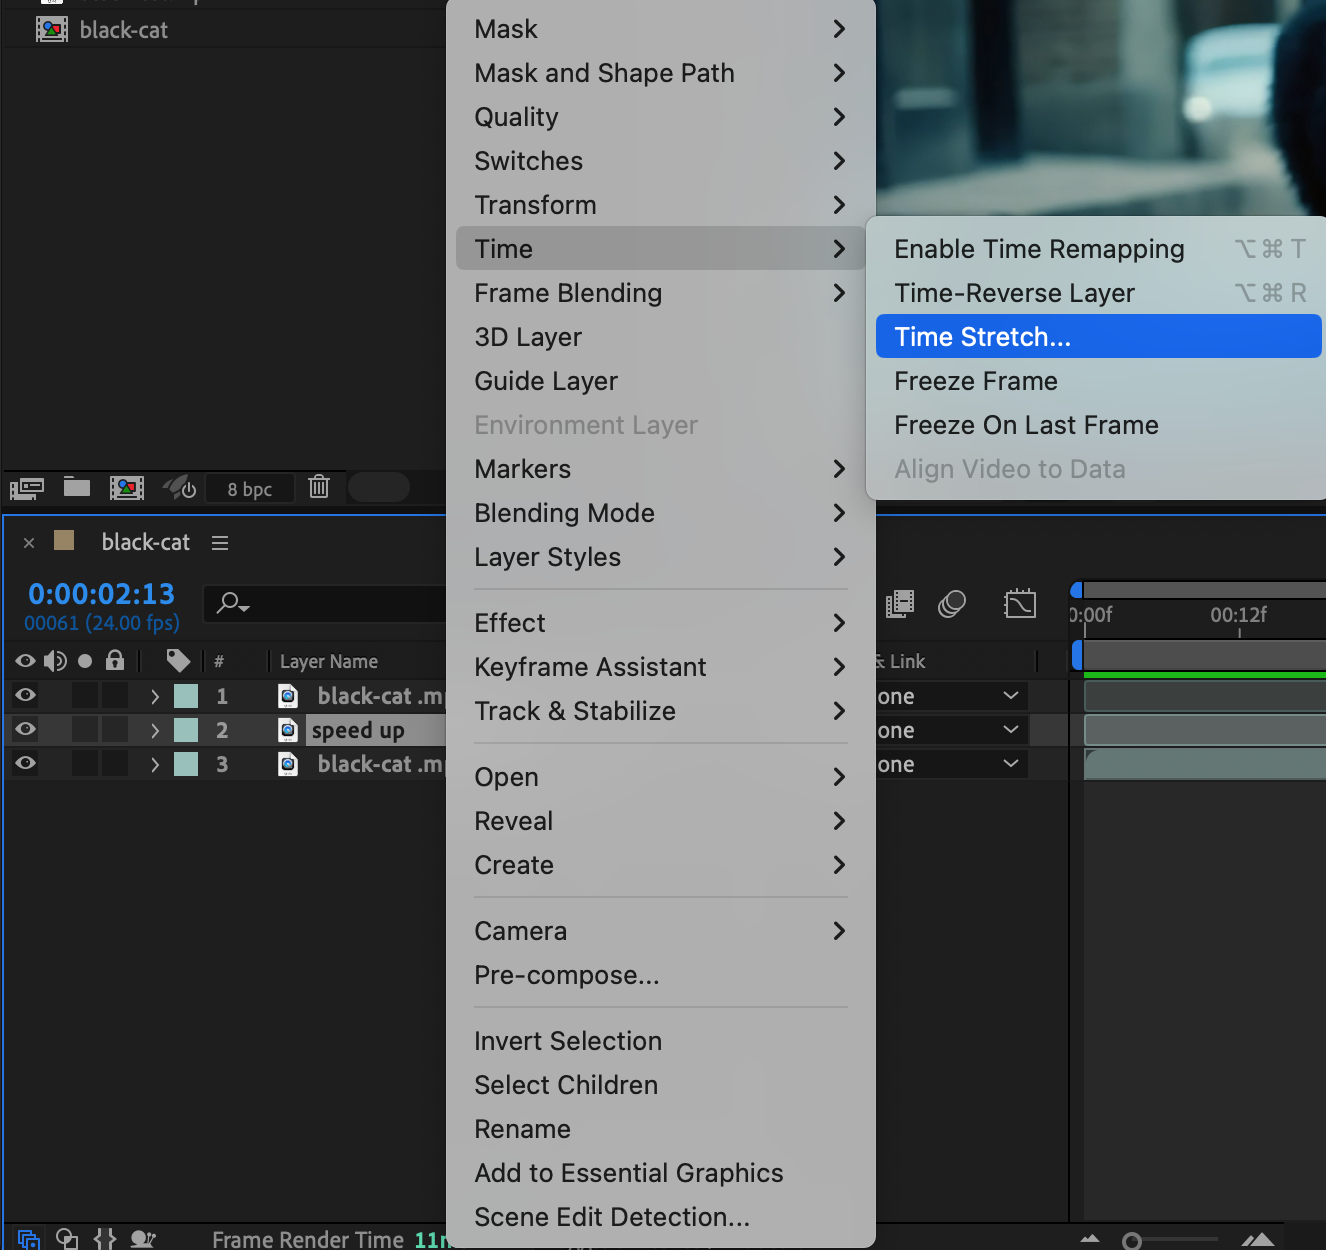
 Step 4: Arrange the Layers
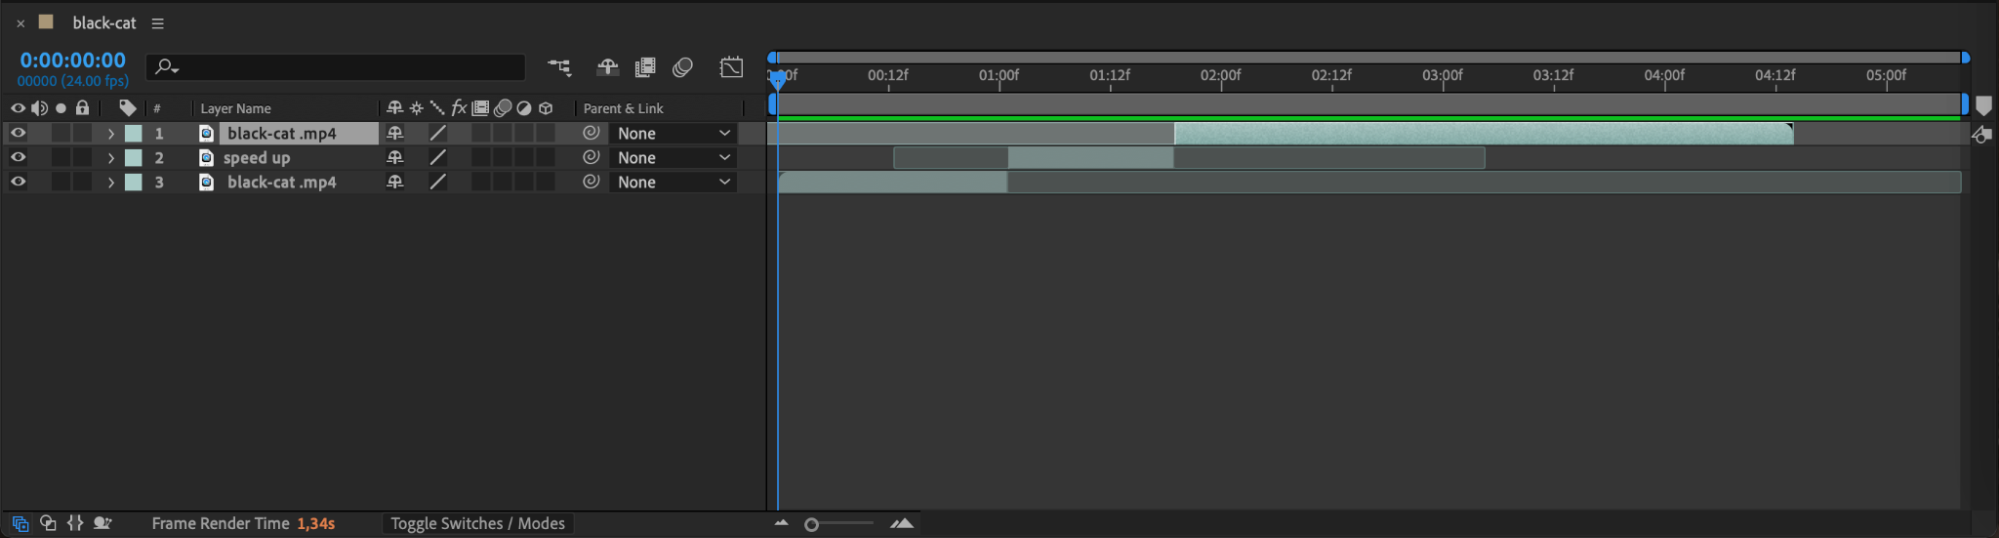
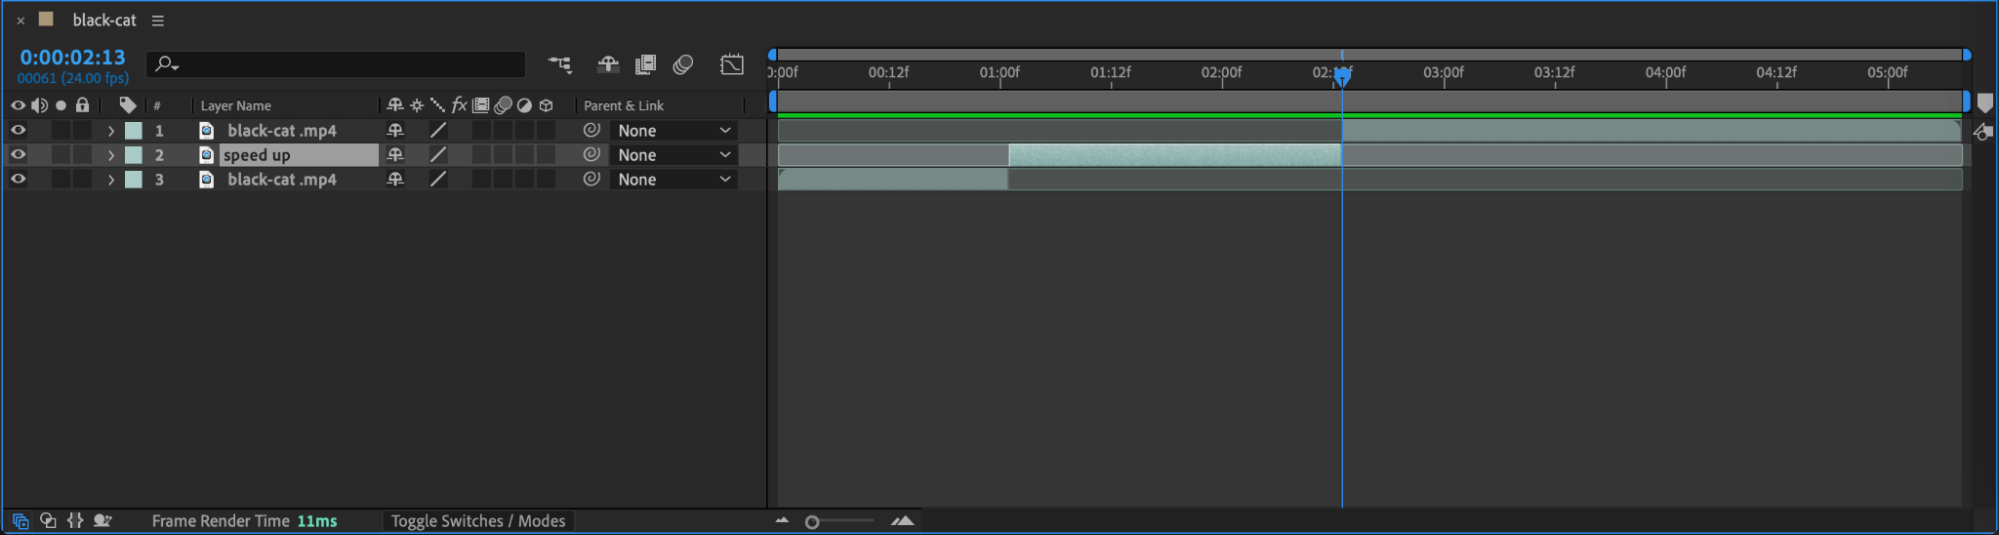
Ensure the layers are properly aligned on the timeline. Drag the split layers so they follow one another seamlessly. This ensures there are no gaps between sections, creating a smooth transition from normal speed to the sped-up section and back.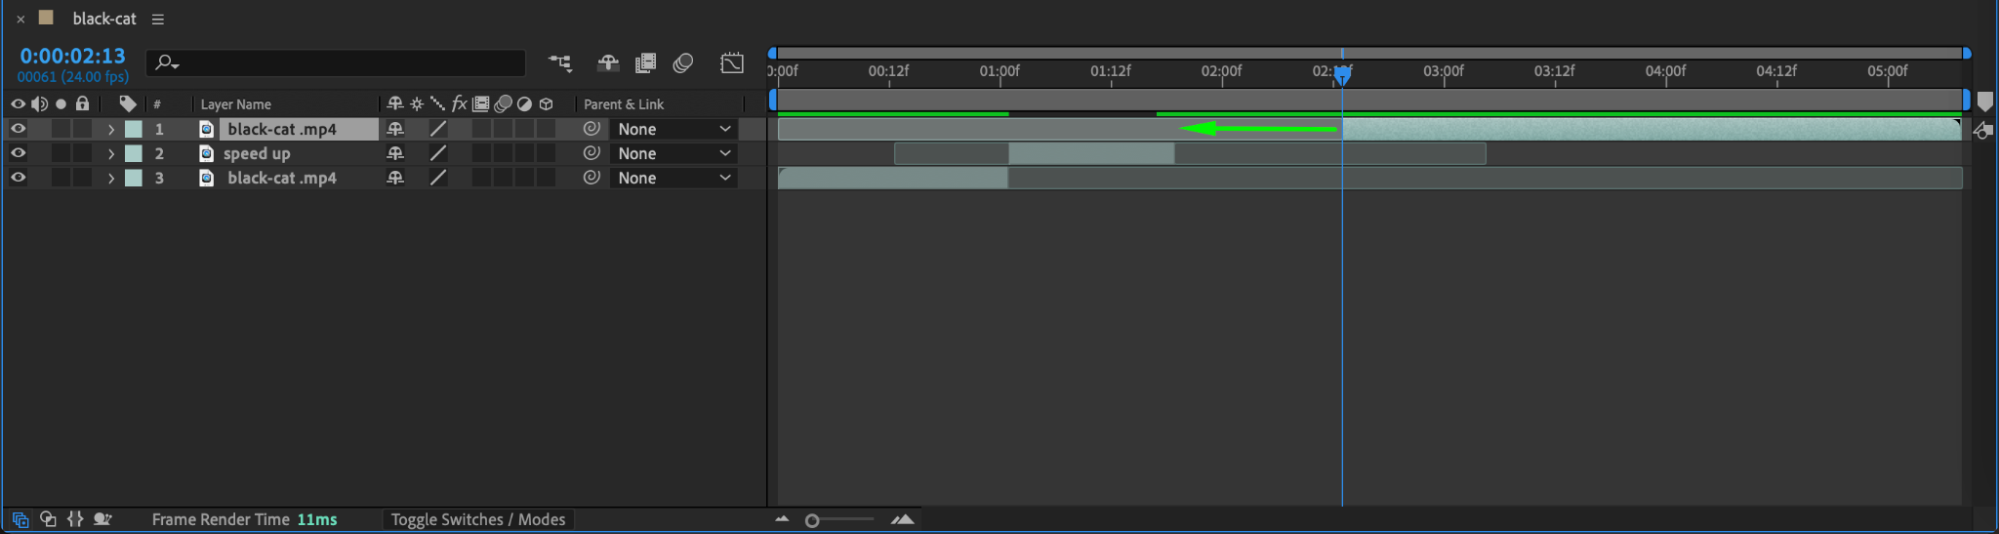
 Step 5: Preview the Result
Press the Spacebar to preview the composition. Check that the speed-up effect transitions smoothly and matches your desired timing. Adjust the stretch factor or split points if needed. Step 6: Render the Final Composition
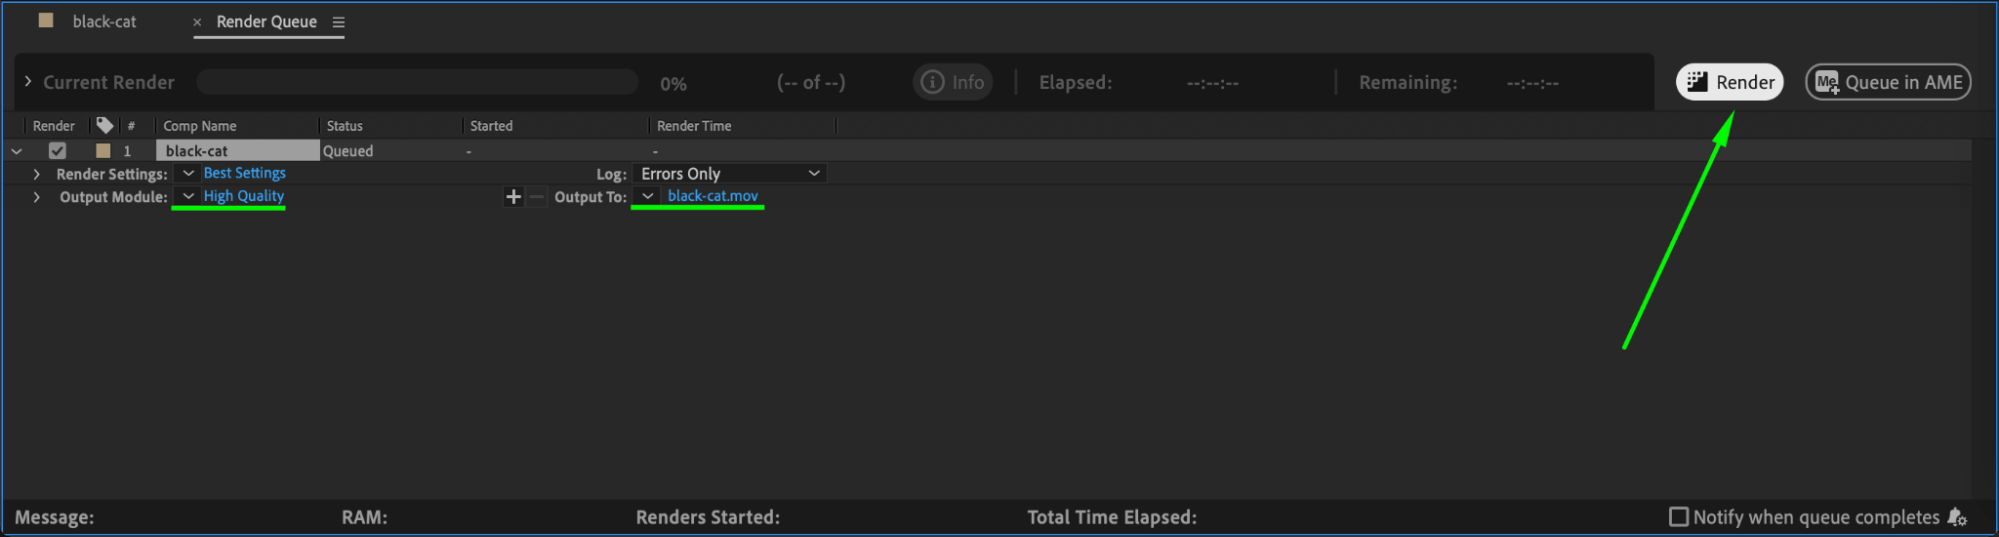
Once you are satisfied with the effect, render the composition. Go to Composition > Add to Render Queue, configure your output settings, and click Render to export your video.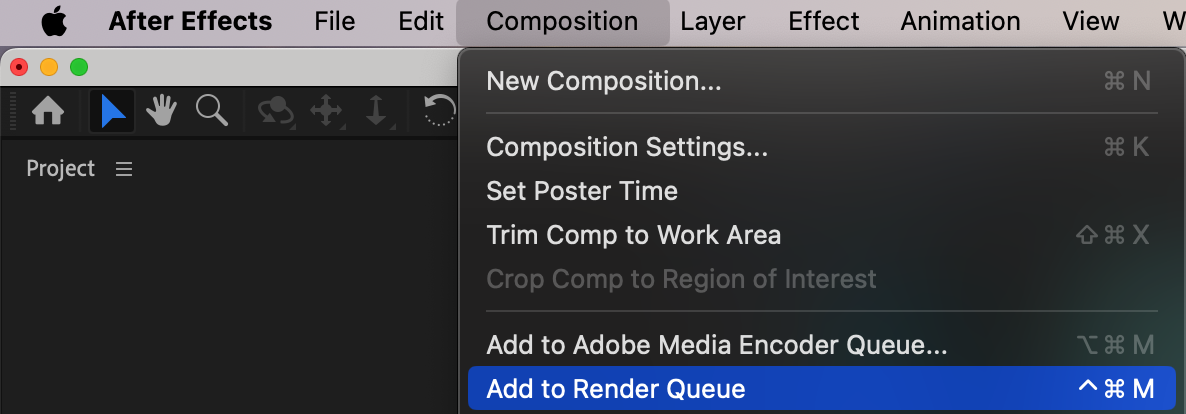
 Conclusion
Speeding up parts of a video in After Effects is a simple yet effective way to add variety and focus to your content. By splitting layers, adjusting the time stretch, and ensuring smooth transitions, you can create dynamic and professional-looking results. Experiment with different stretch factors to find the perfect speed for your project!


