A Complete Guide to Staggering Layers in After Effects
Introduction – Create Dynamic Animations with Layer Staggering
Staggering layers in After Effects is a powerful technique to create smooth, flowing animations where each layer’s action begins sequentially. This approach can be used for text, shapes, or any other elements to add rhythm and visual interest to your project. In this guide, we’ll show you how to stagger layers manually and with automated tools.
Get 10% off when you subscribe to our newsletter

Step 1: Create or Import Your Layers
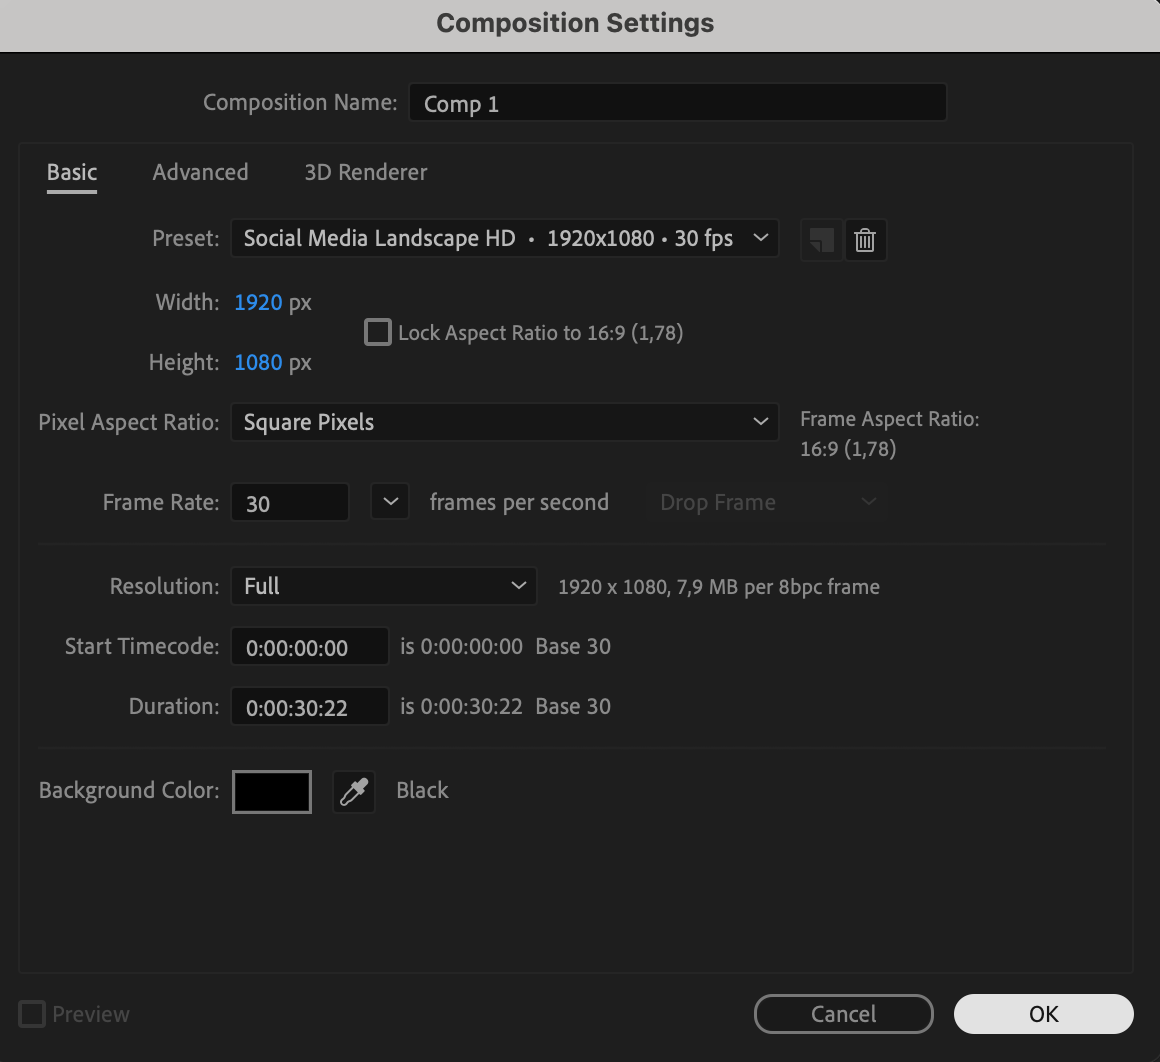
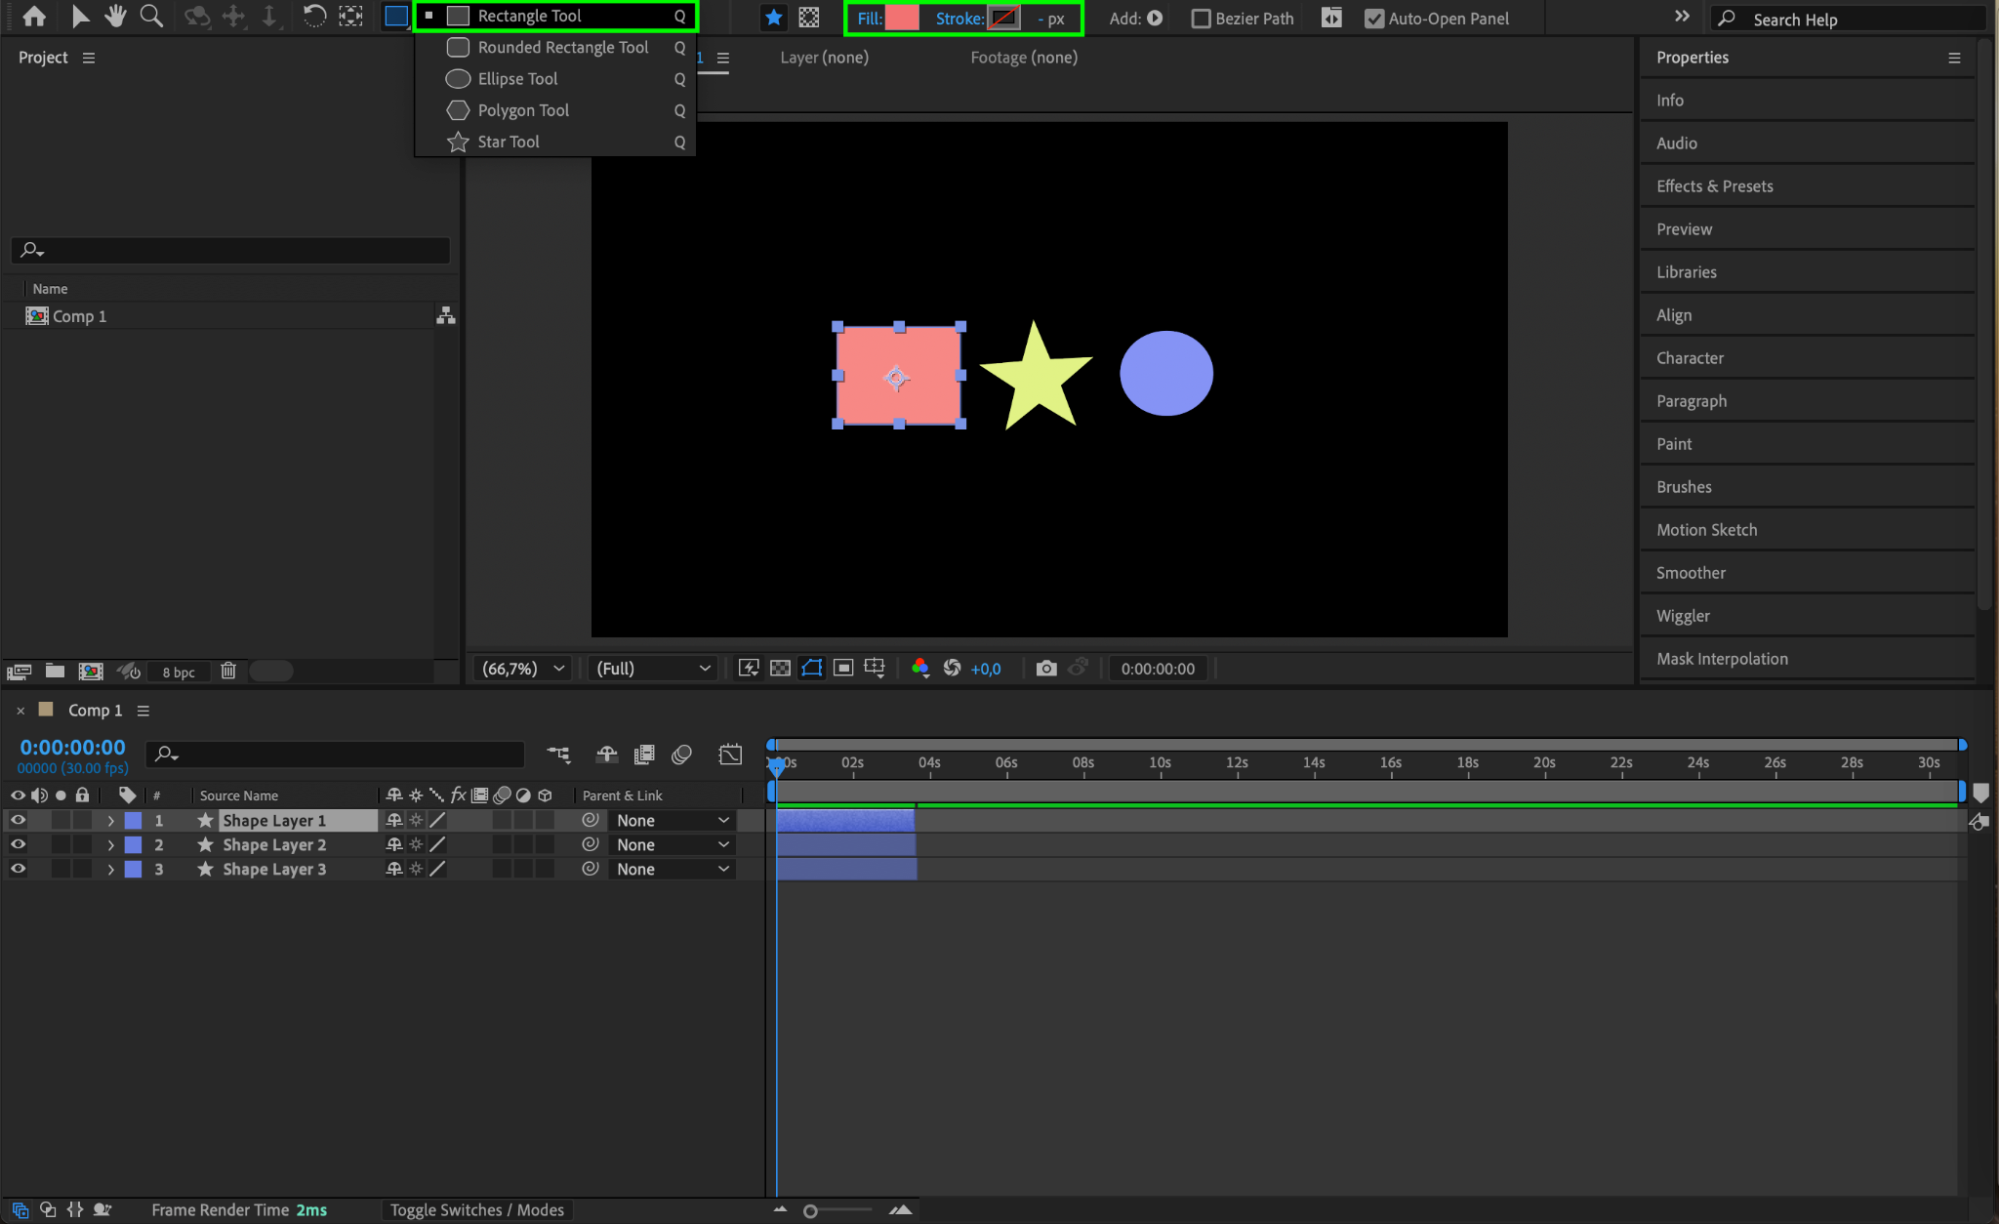
Start by creating a new composition. Go to Composition > New Composition and set the desired resolution, frame rate, and duration. Then, create or import the layers you want to animate, such as text or shape layers. Arrange them on the timeline in the order they should appear.
 Step 2: Animate the First Layer
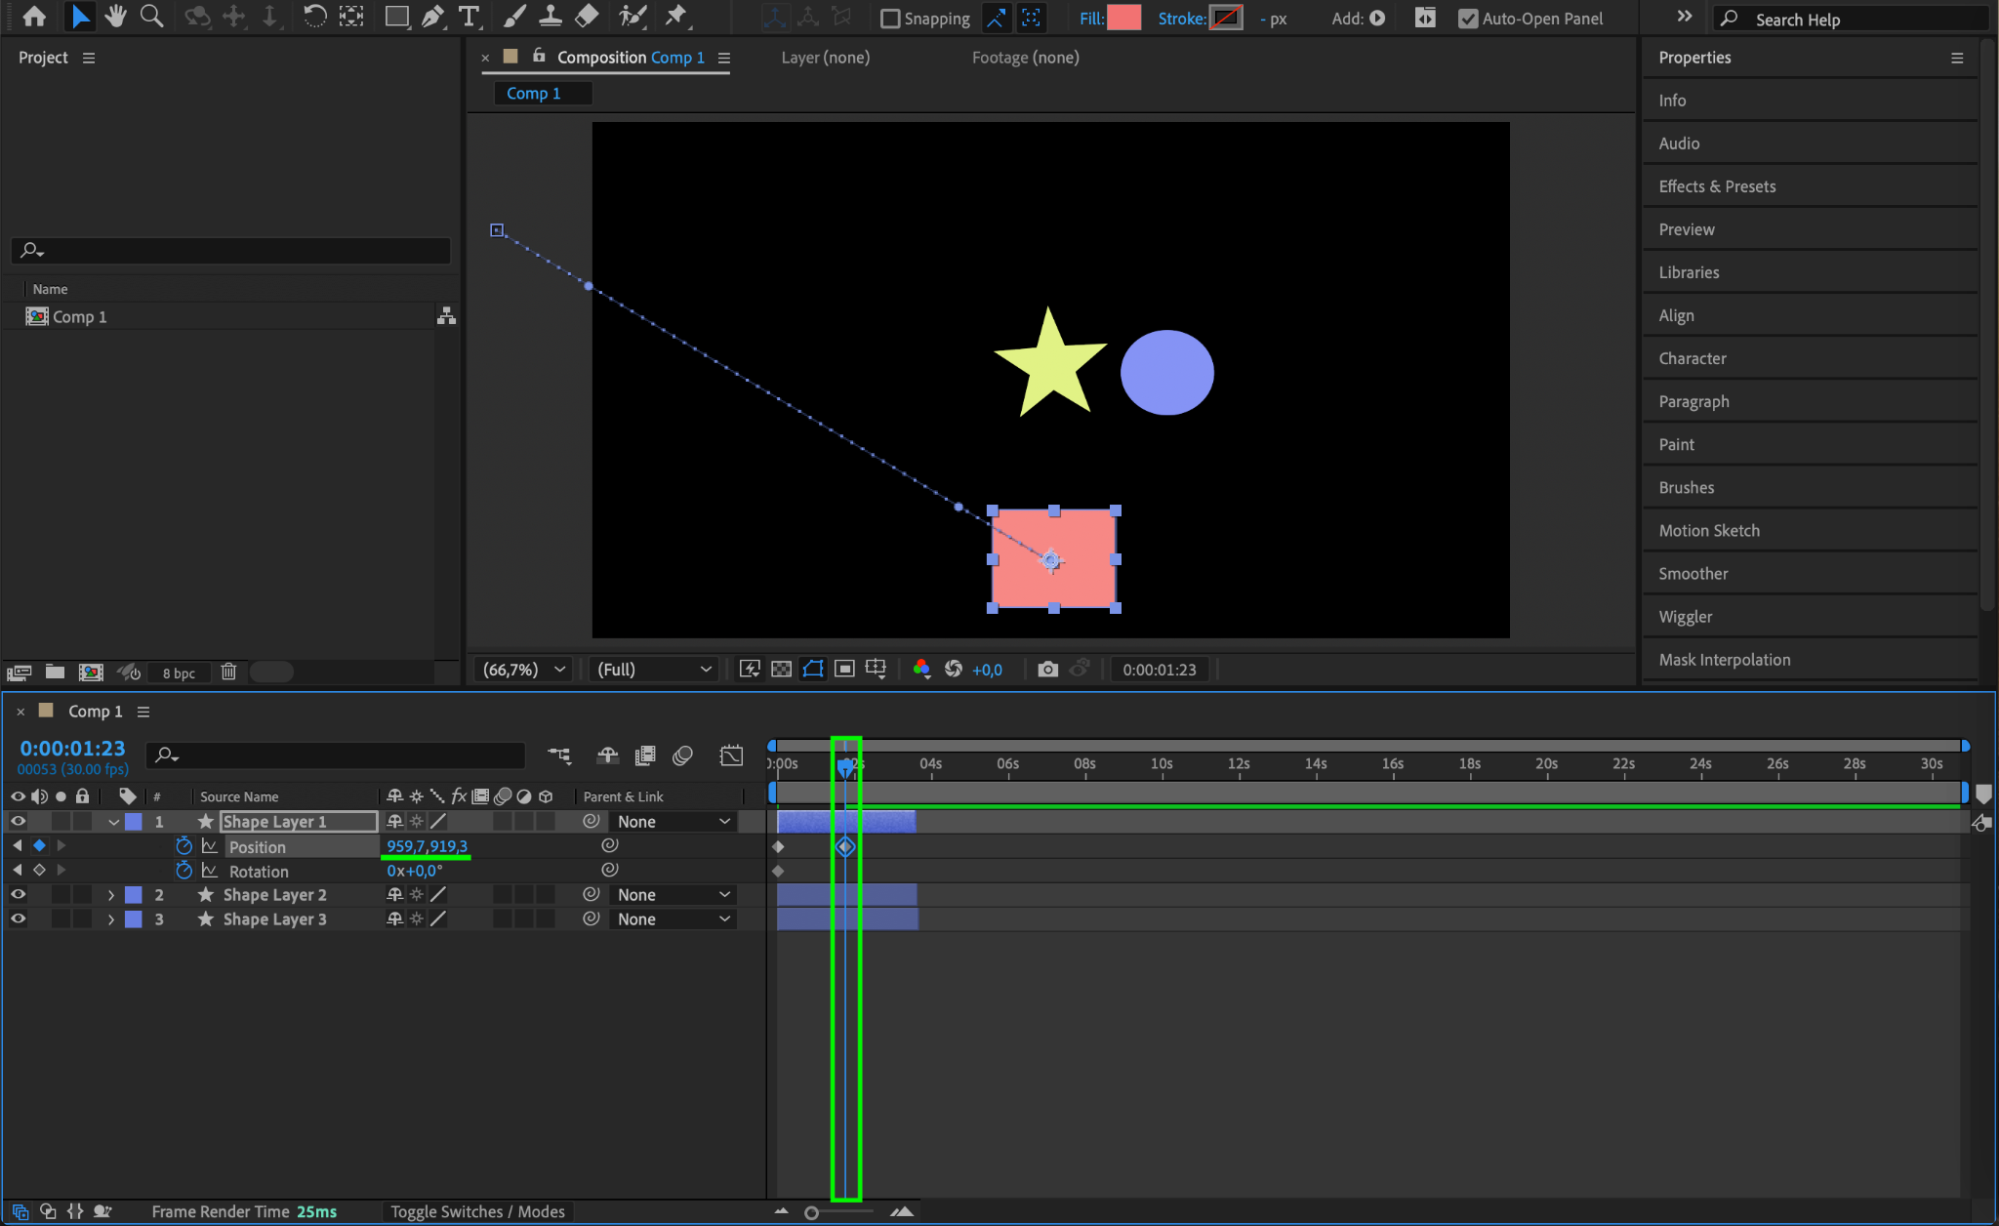
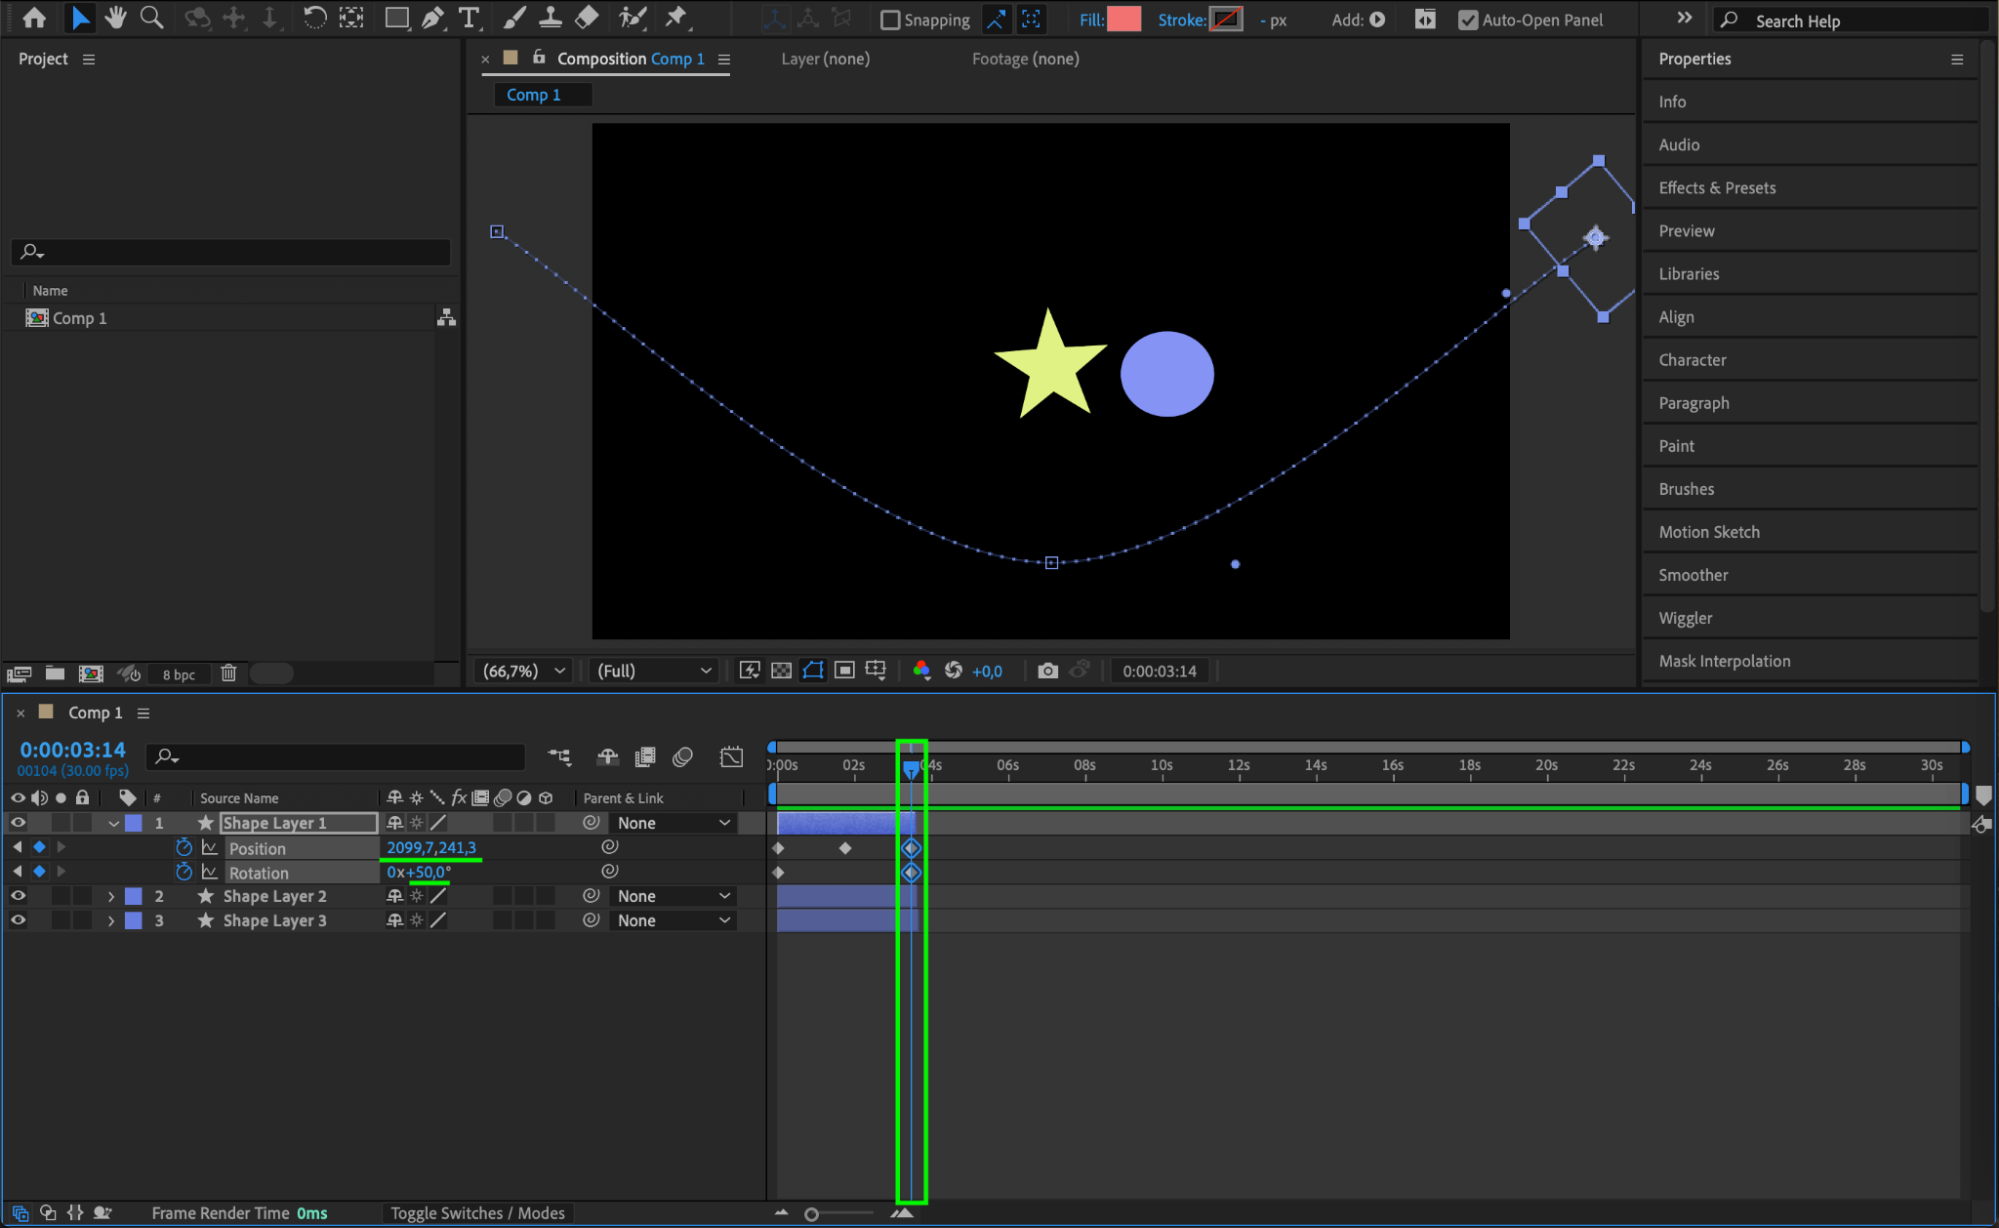
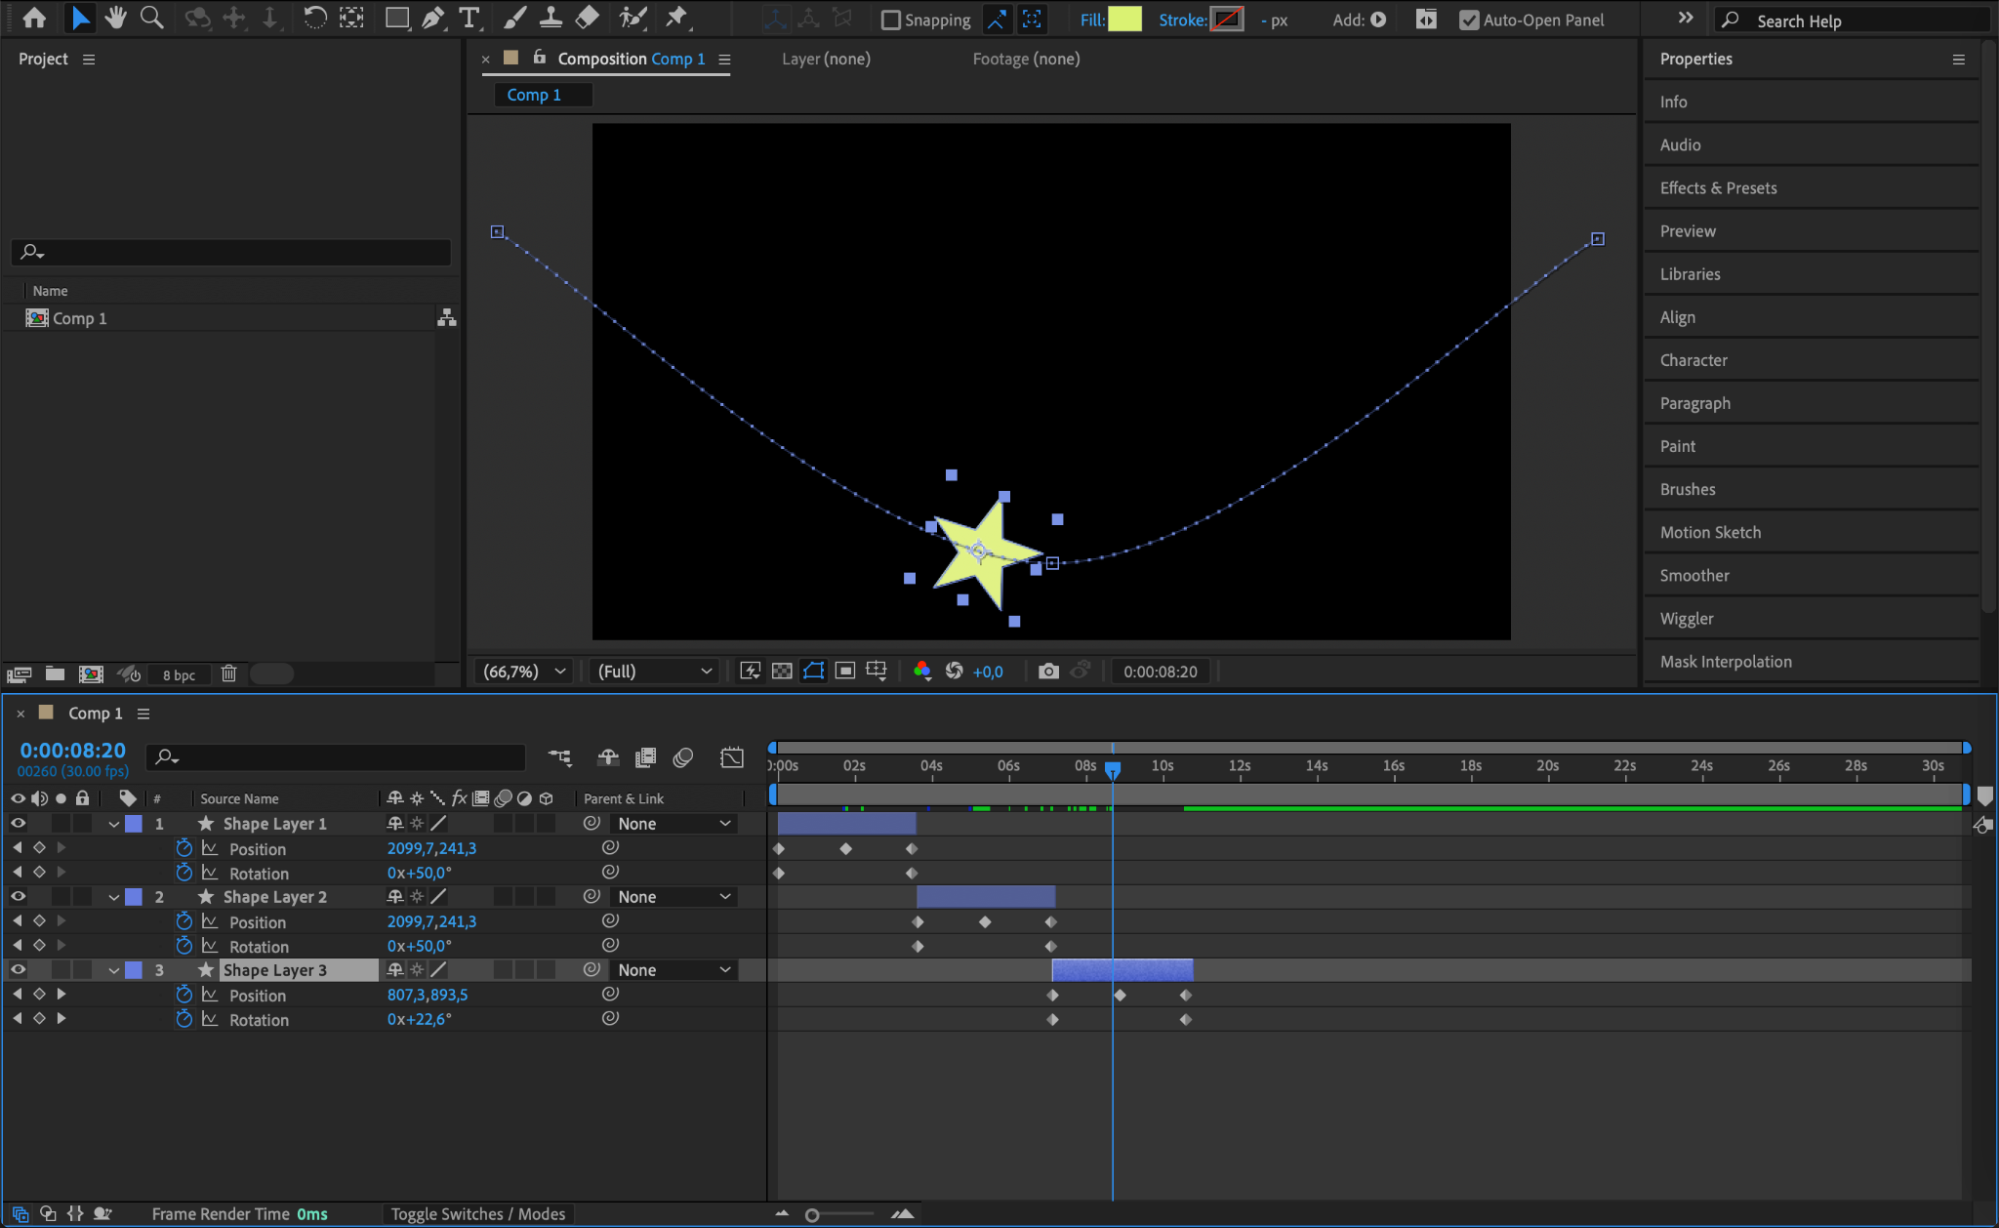
Select the first layer and add keyframes to animate its position, opacity, scale, or other properties. Press P (position), R (rotation), or S (scale) to reveal these properties. Click the stopwatch icon next to the property to add keyframes, then adjust the values at different points in the timeline to create the desired animation.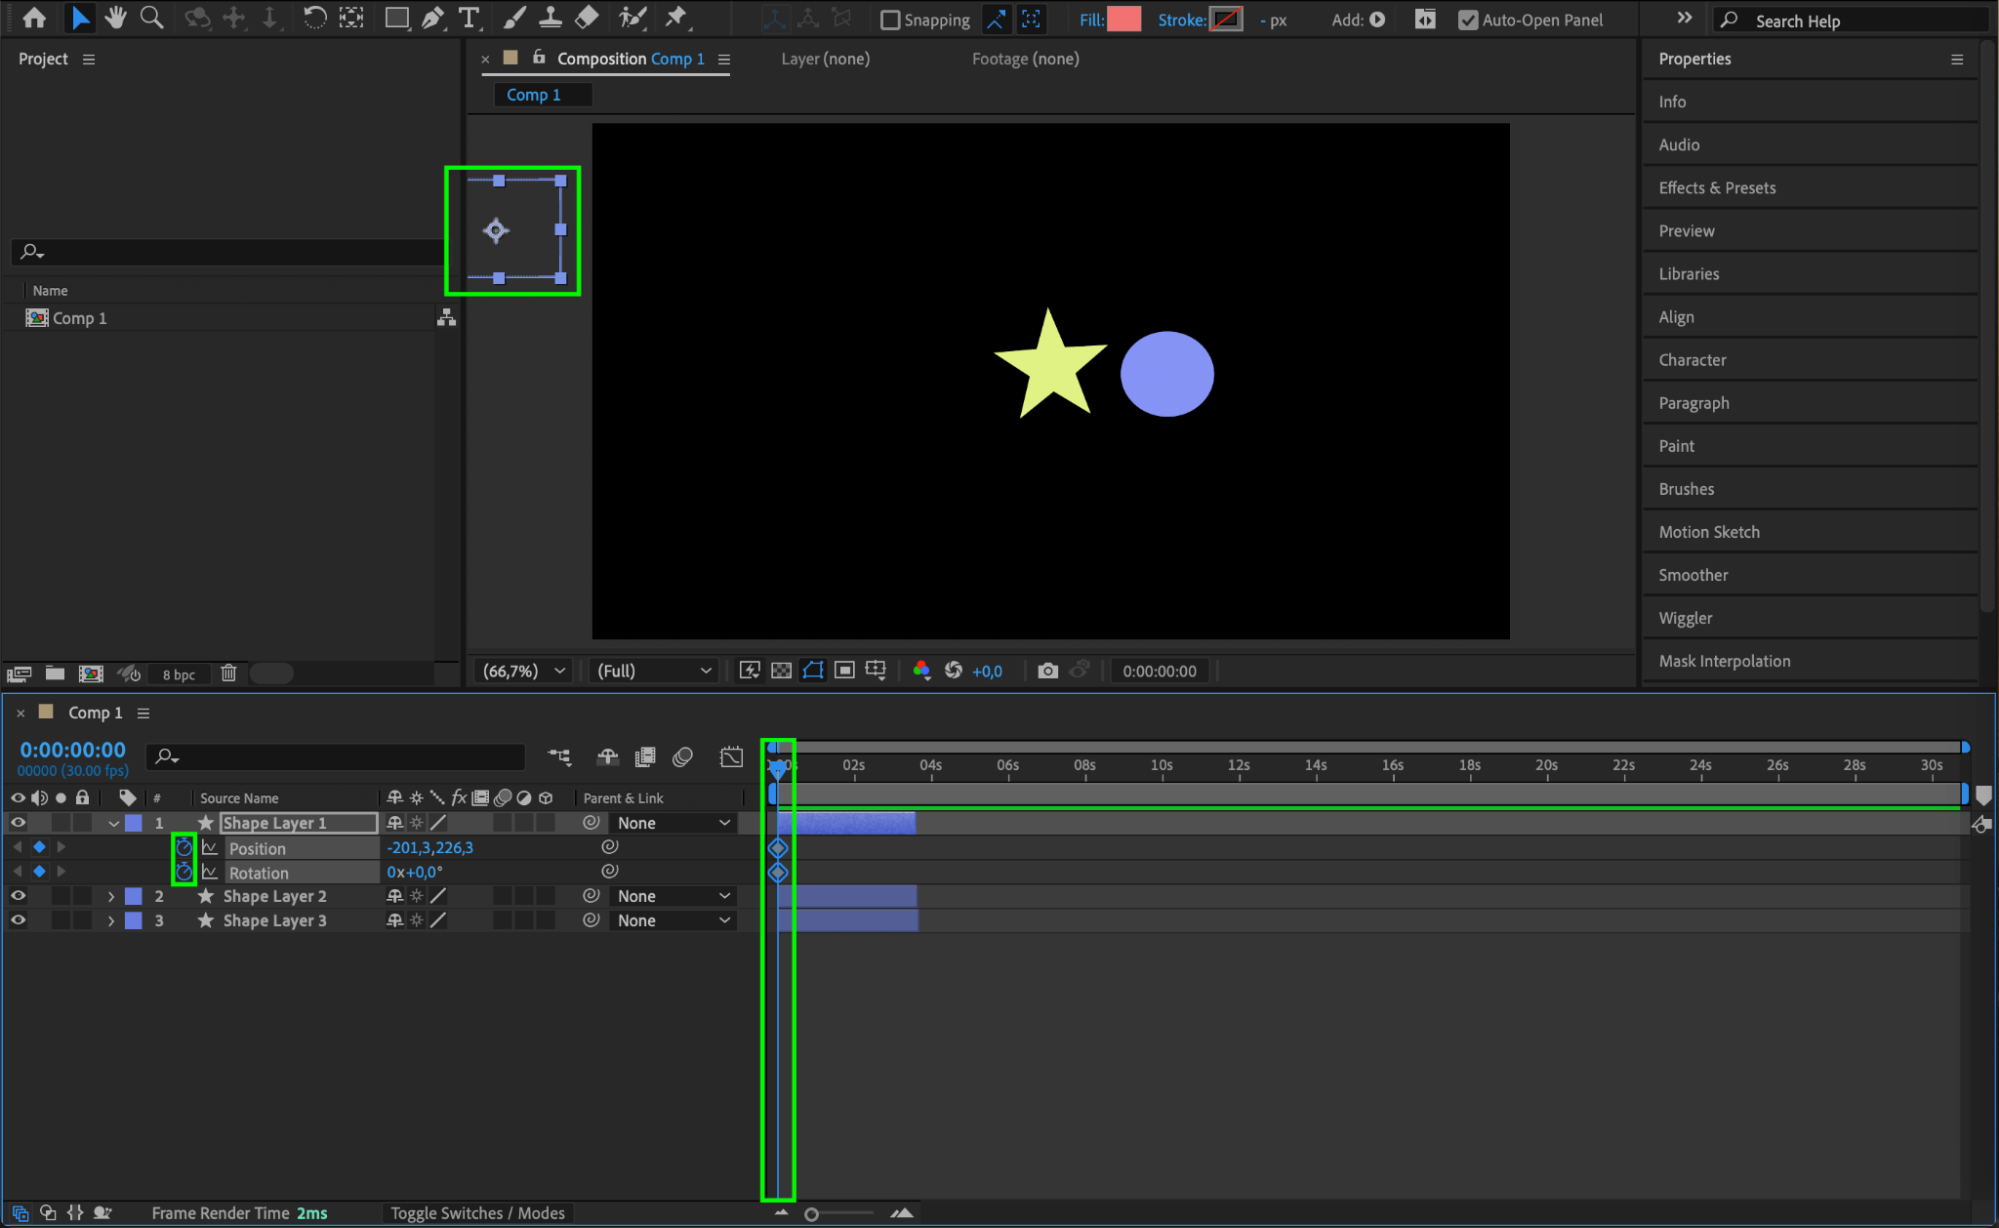
 Step 3: Duplicate or Prepare Other Layers
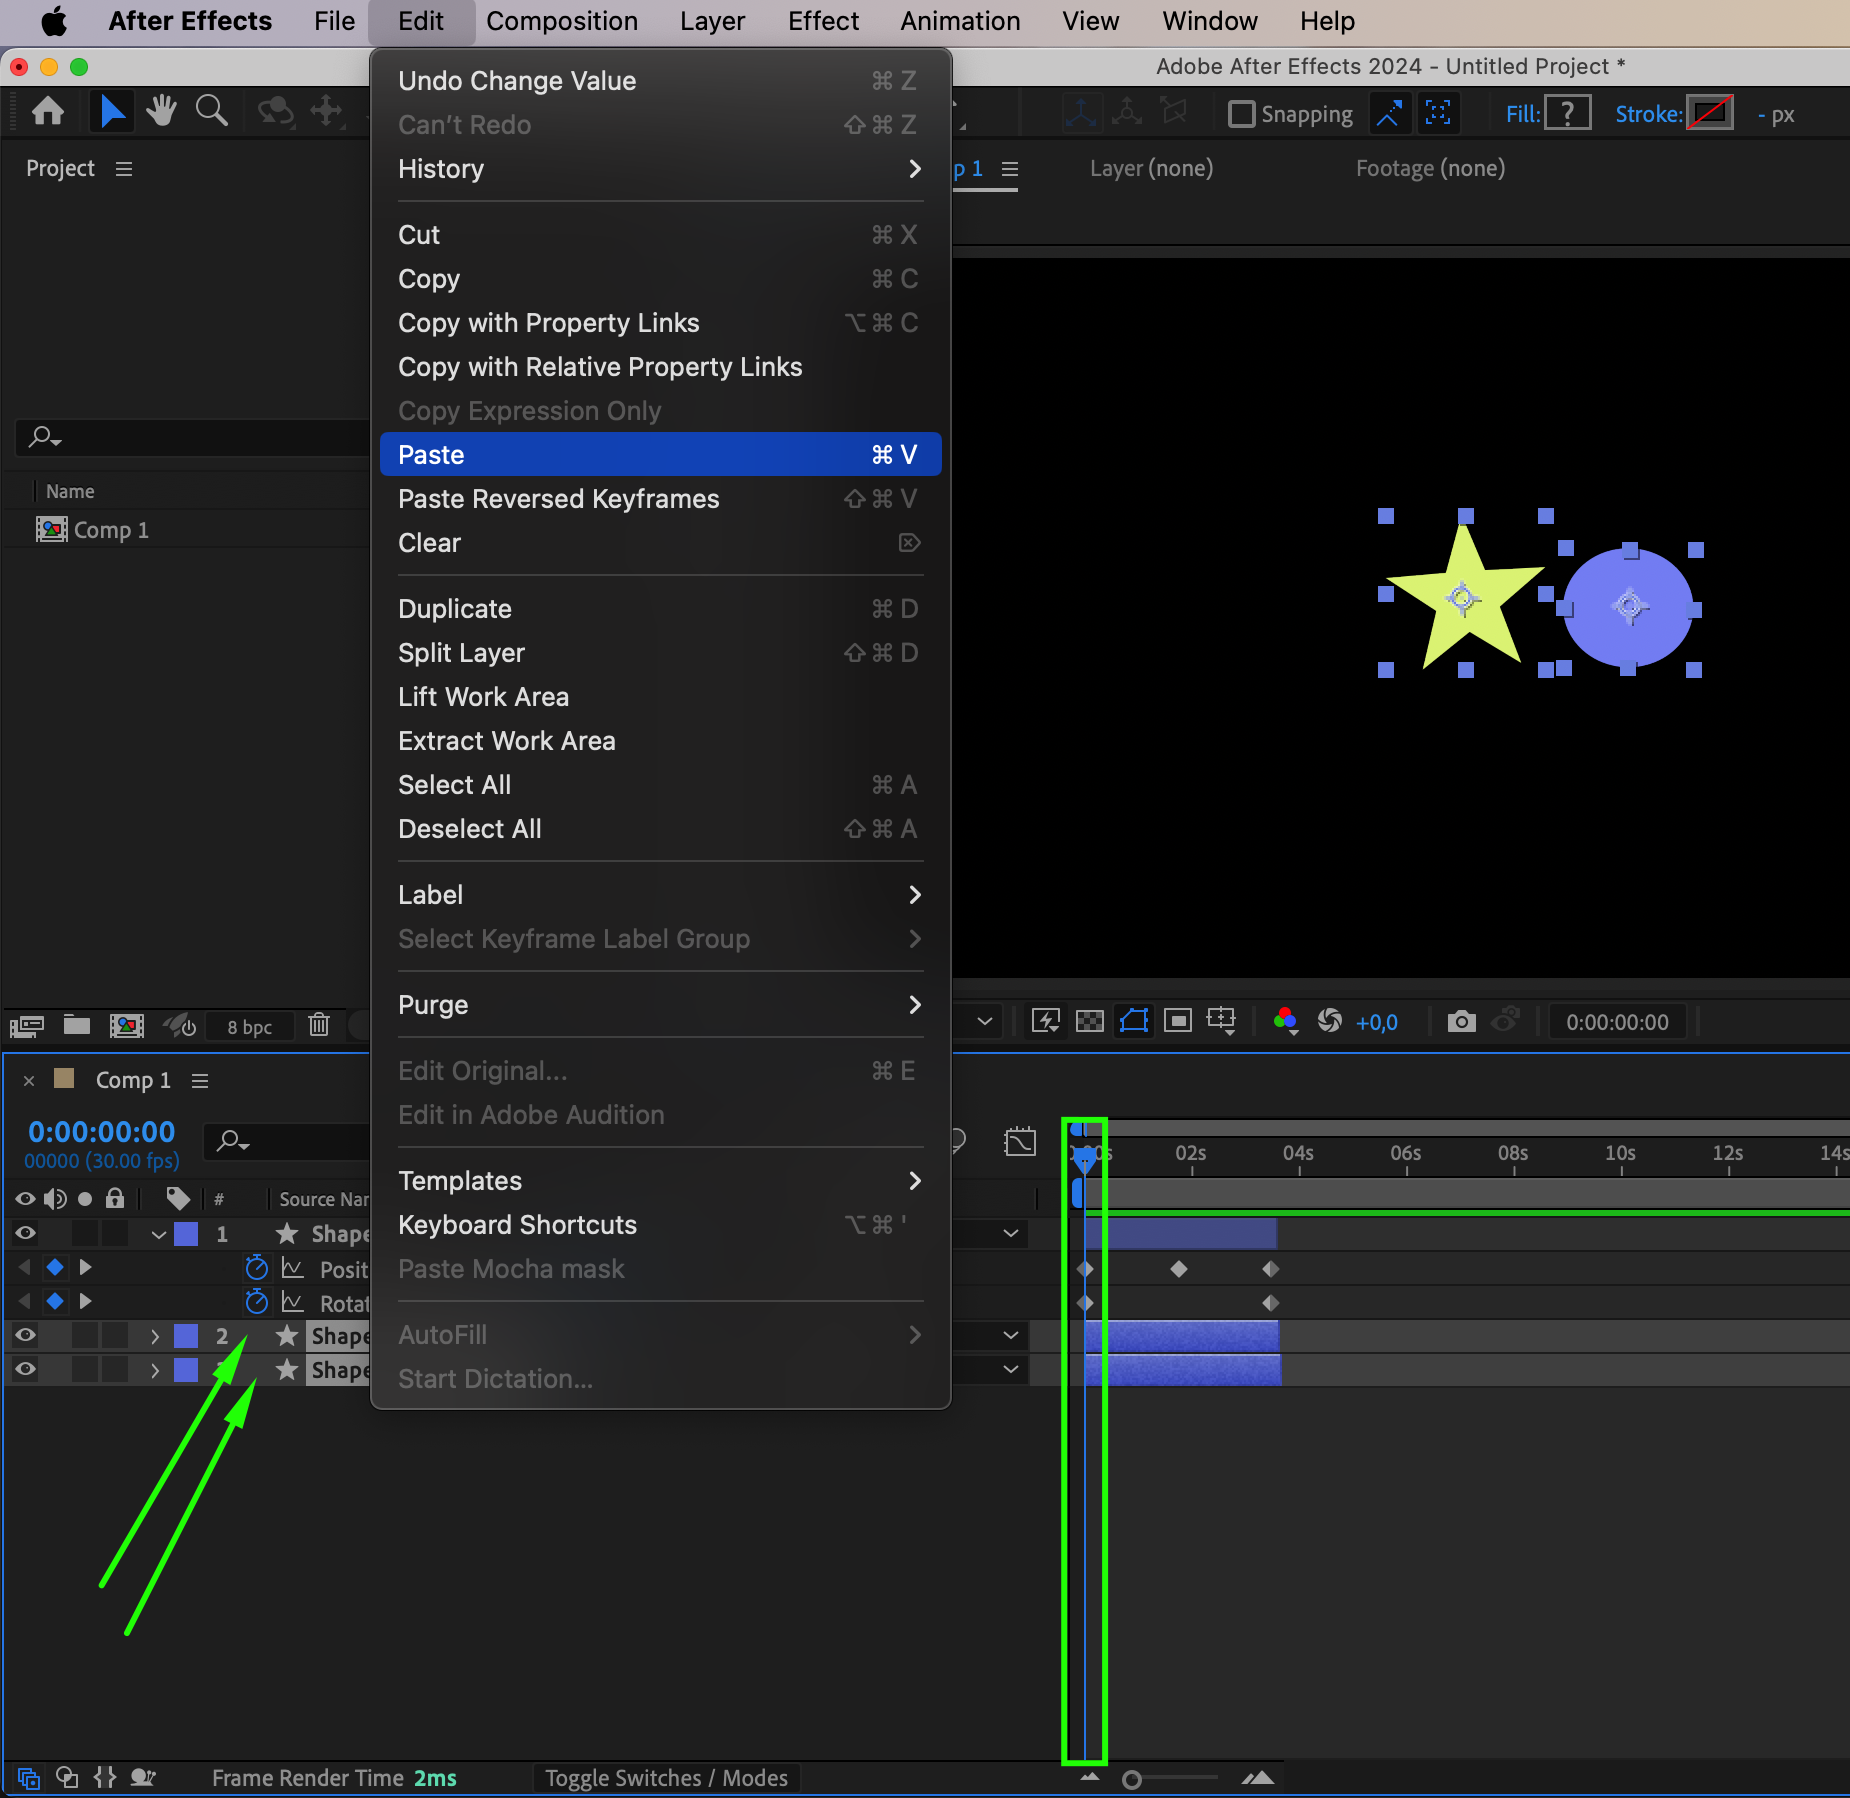
If your layers require similar animations, you can duplicate the first layer along with its keyframes. Select the layer, press “Ctrl/Cmd + D” to create a copy, and position the CTI (Current Time Indicator) at the beginning of the composition. Paste the keyframes for each selected layer to maintain synchronization. Alternatively, create unique animations for each layer to add variety and make your project more visually engaging.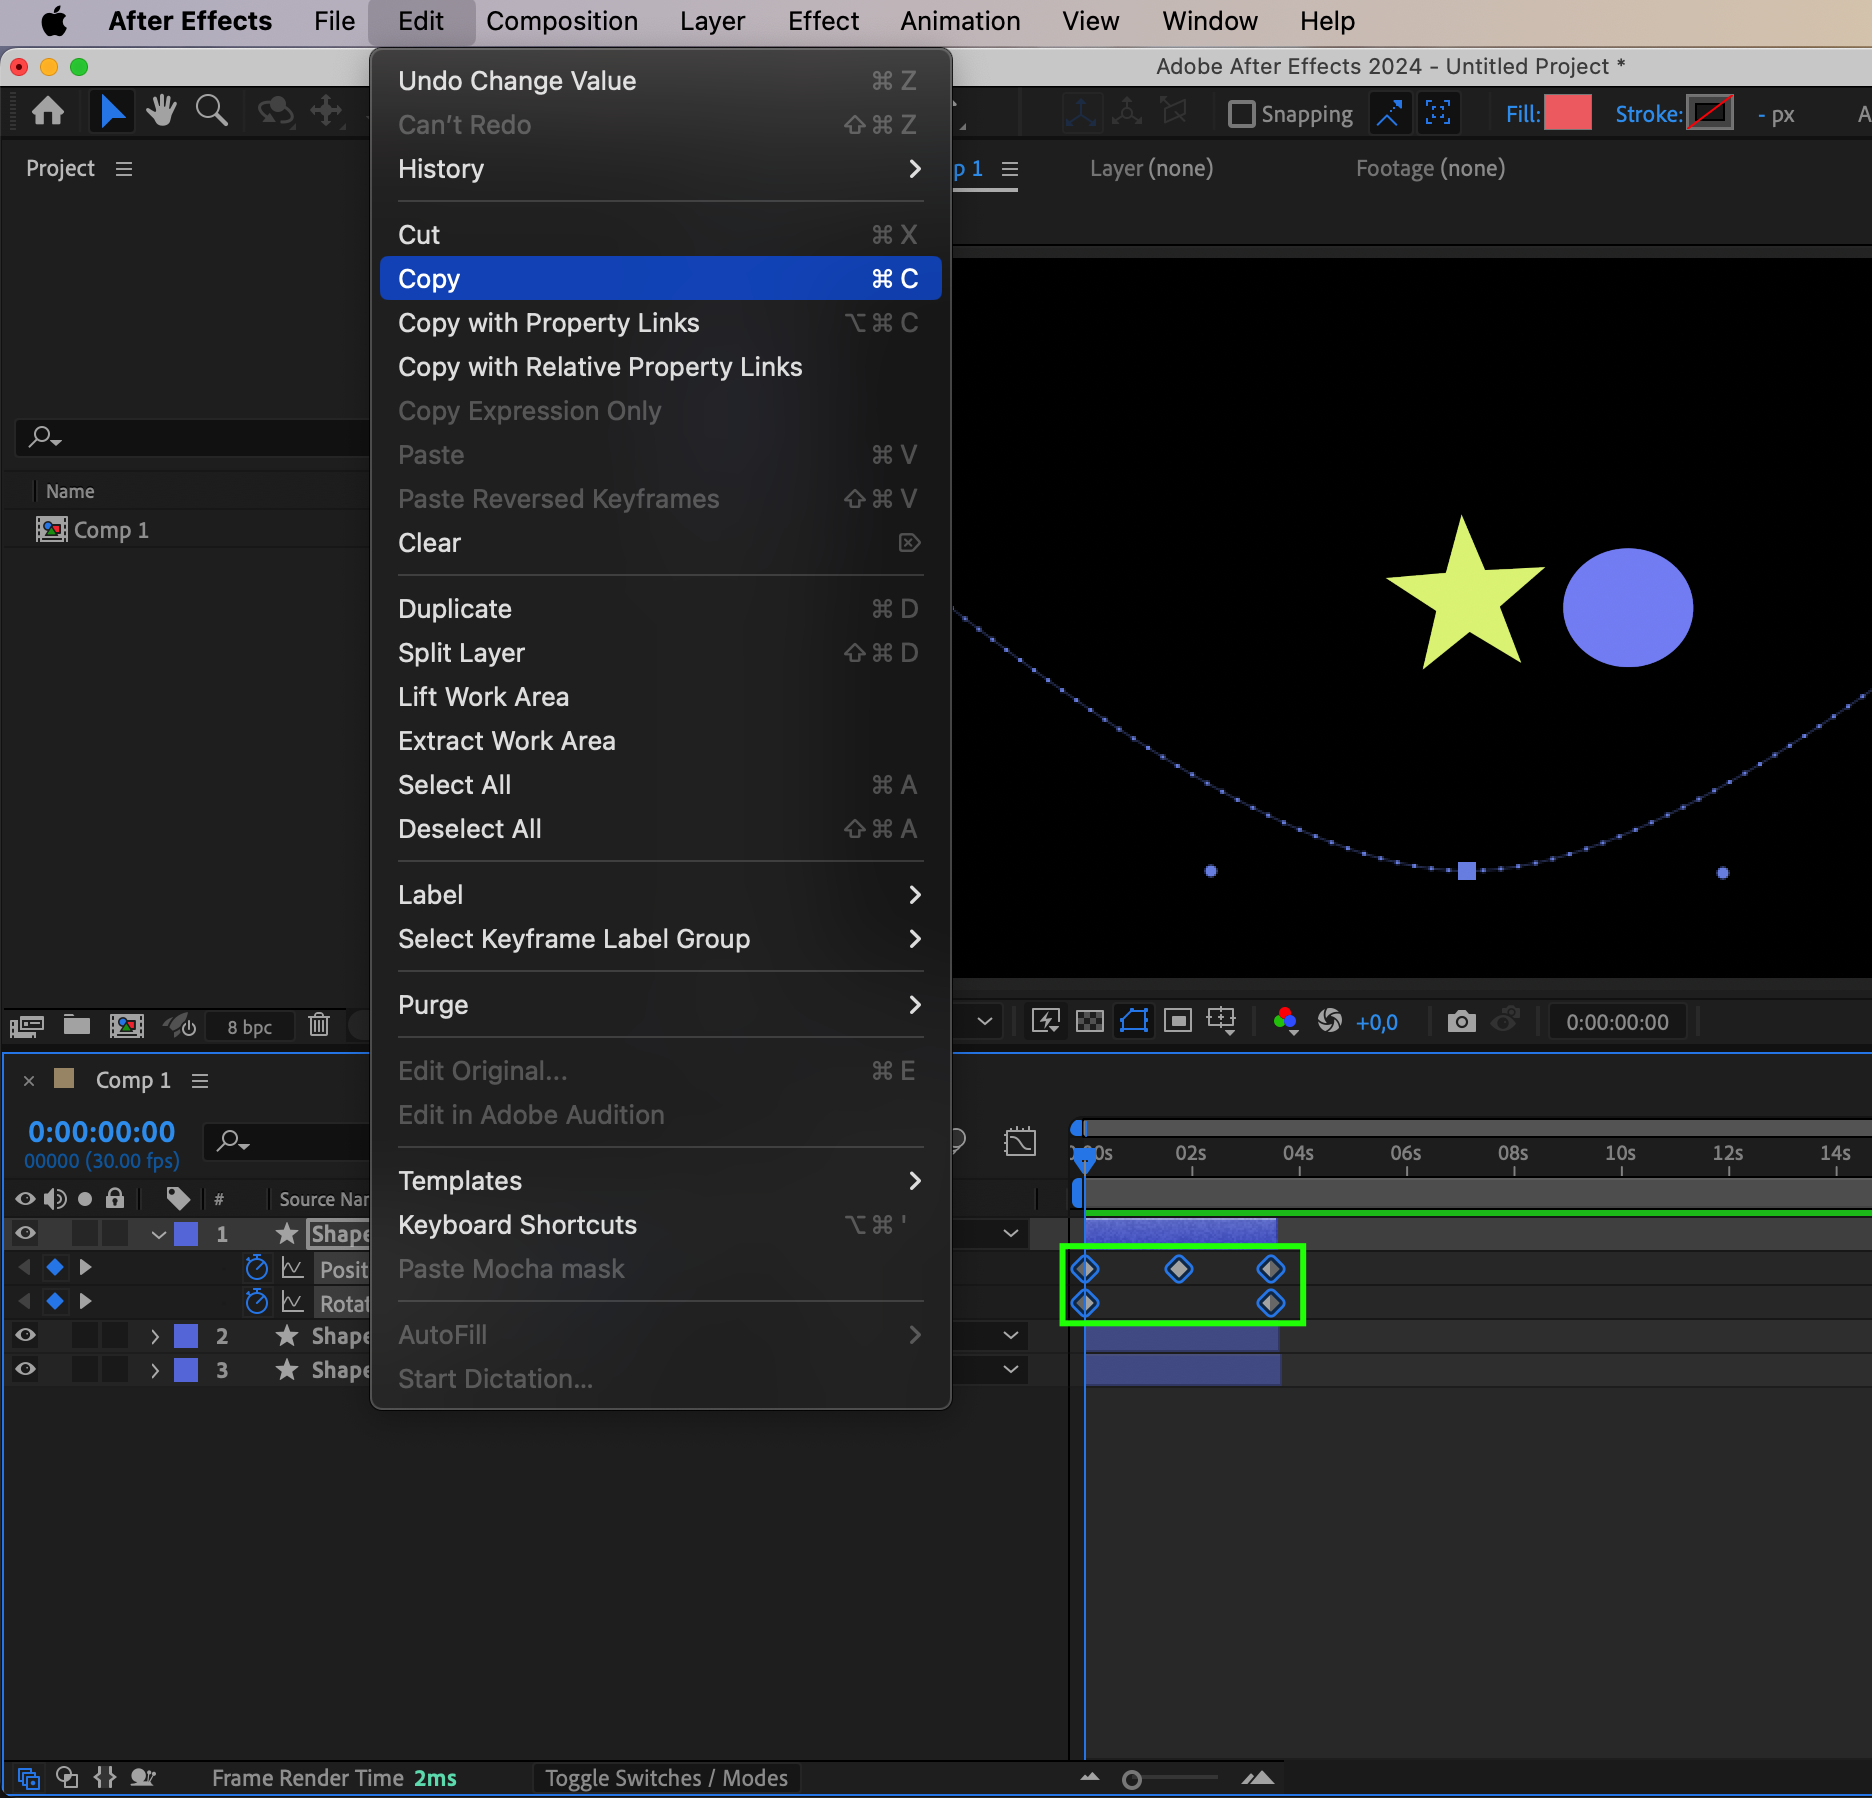
 Step 4: Offset the Layers Manually
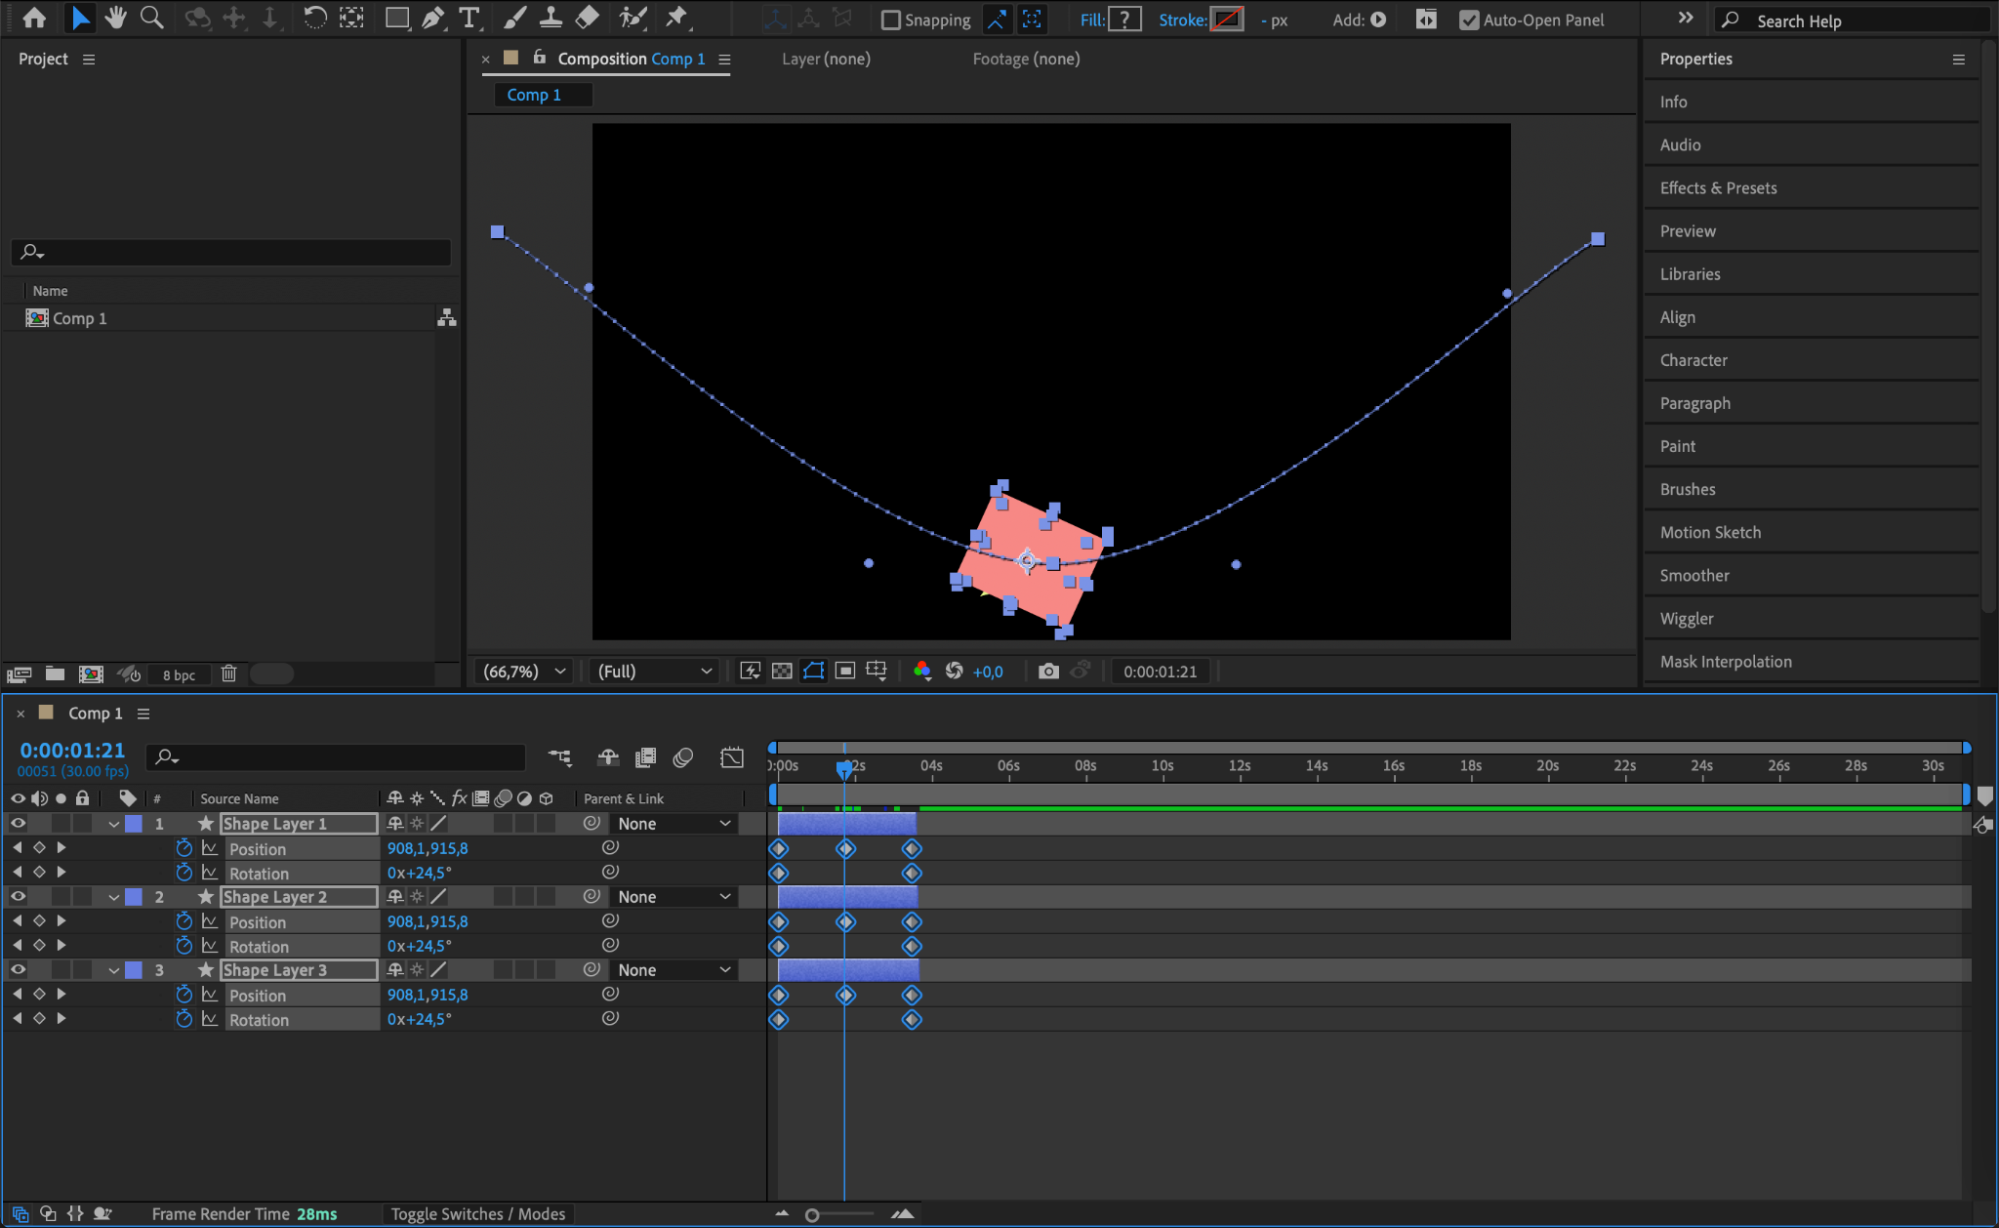
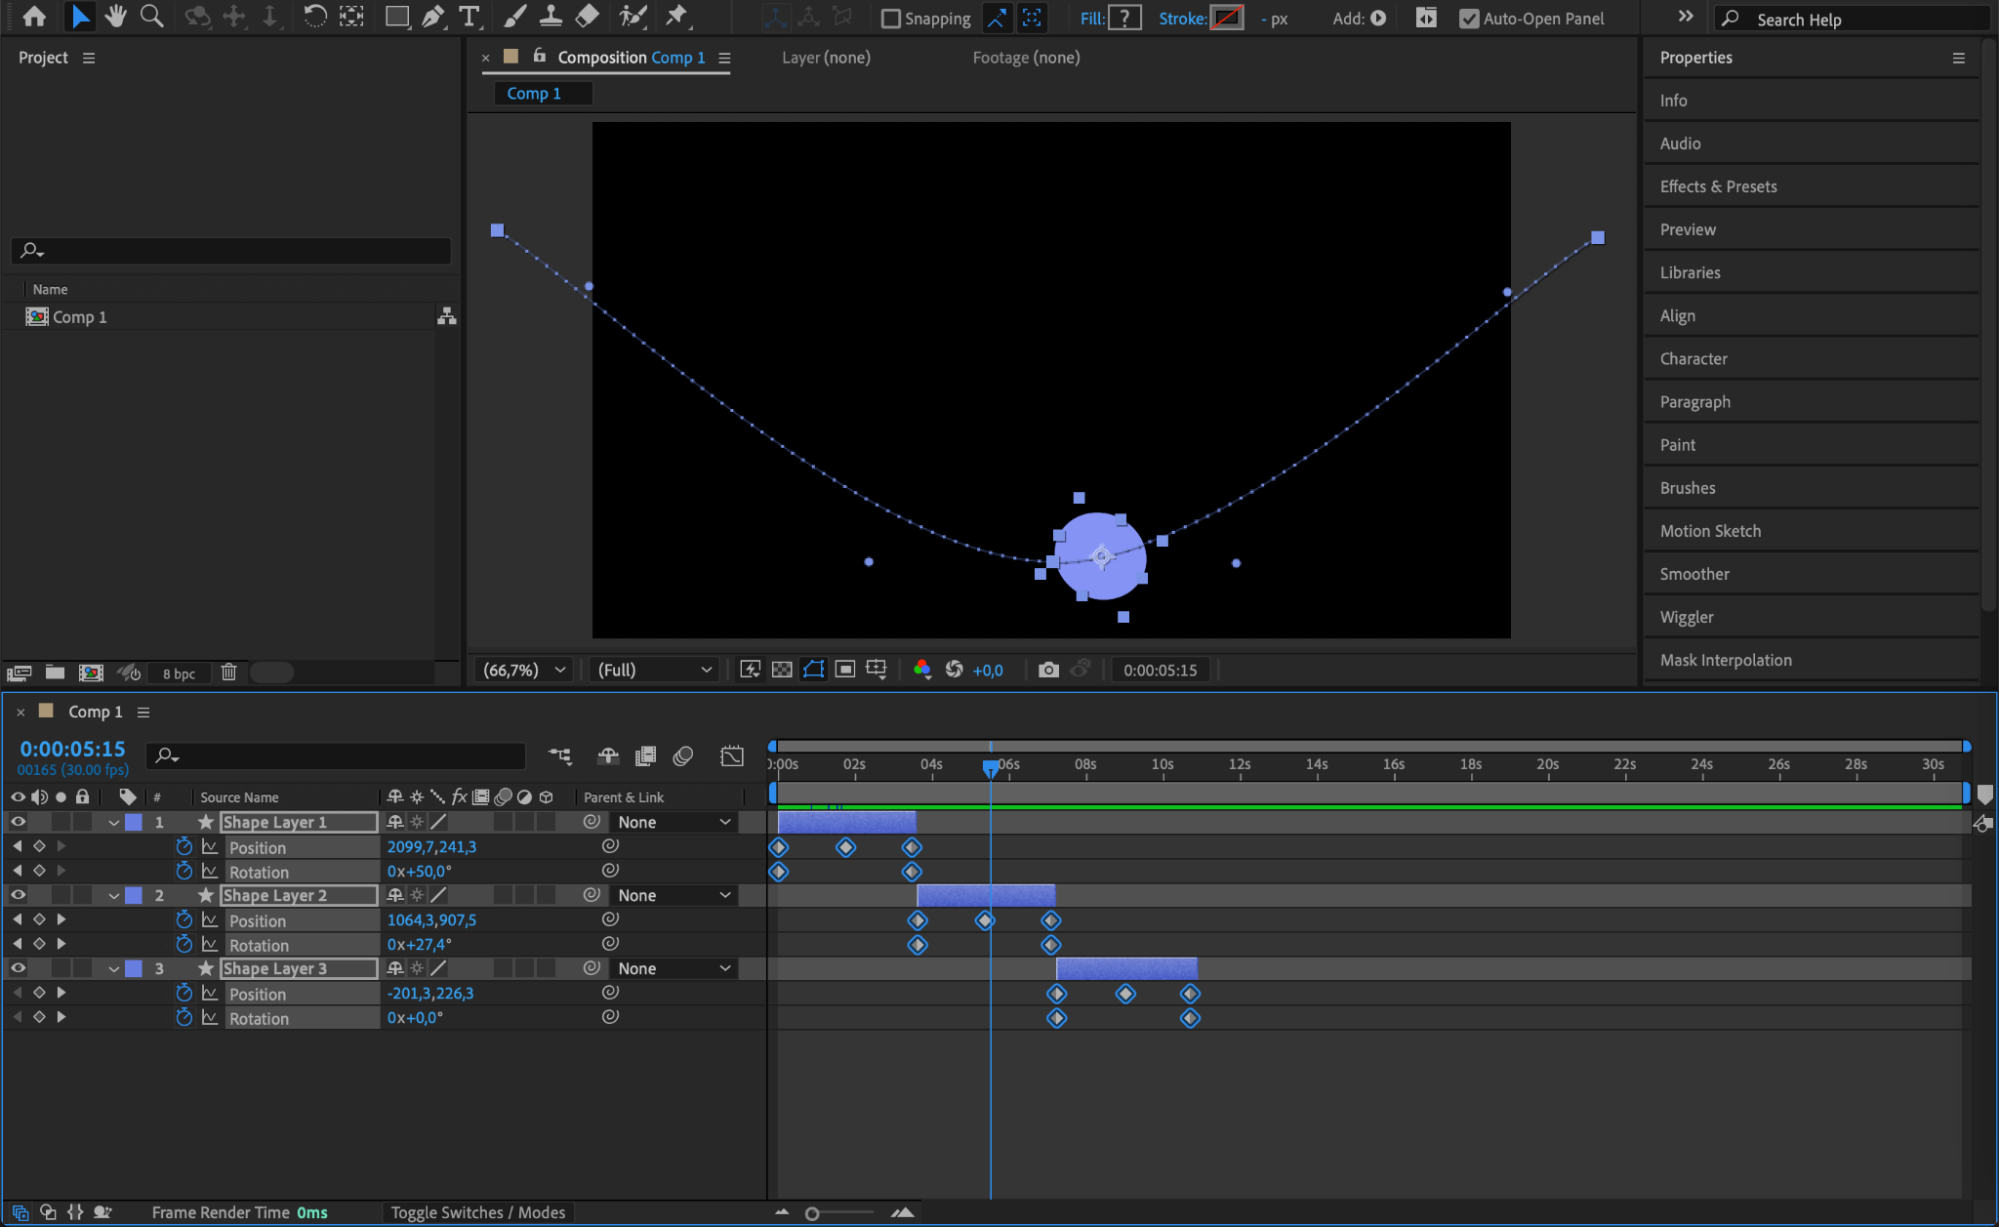
To stagger the layers, drag each layer in the timeline slightly forward. Select a layer and move it to the right on the timeline so that its animation begins after the previous layer. Repeat this process for all layers, creating a sequential flow.
 Step 5: Use the Sequence Layers Option
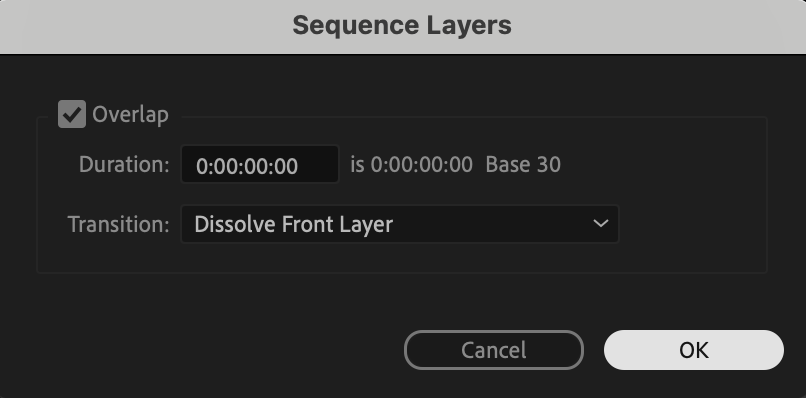
For faster results, select all the layers you want to stagger. Right-click and choose Keyframe Assistant > Sequence Layers. In the dialog box that appears, uncheck Overlap if you want each layer to start after the previous one ends, or check it to allow overlapping animations. Click OK to apply the staggered effect automatically.
 Step 6: Add Easing to Keyframes
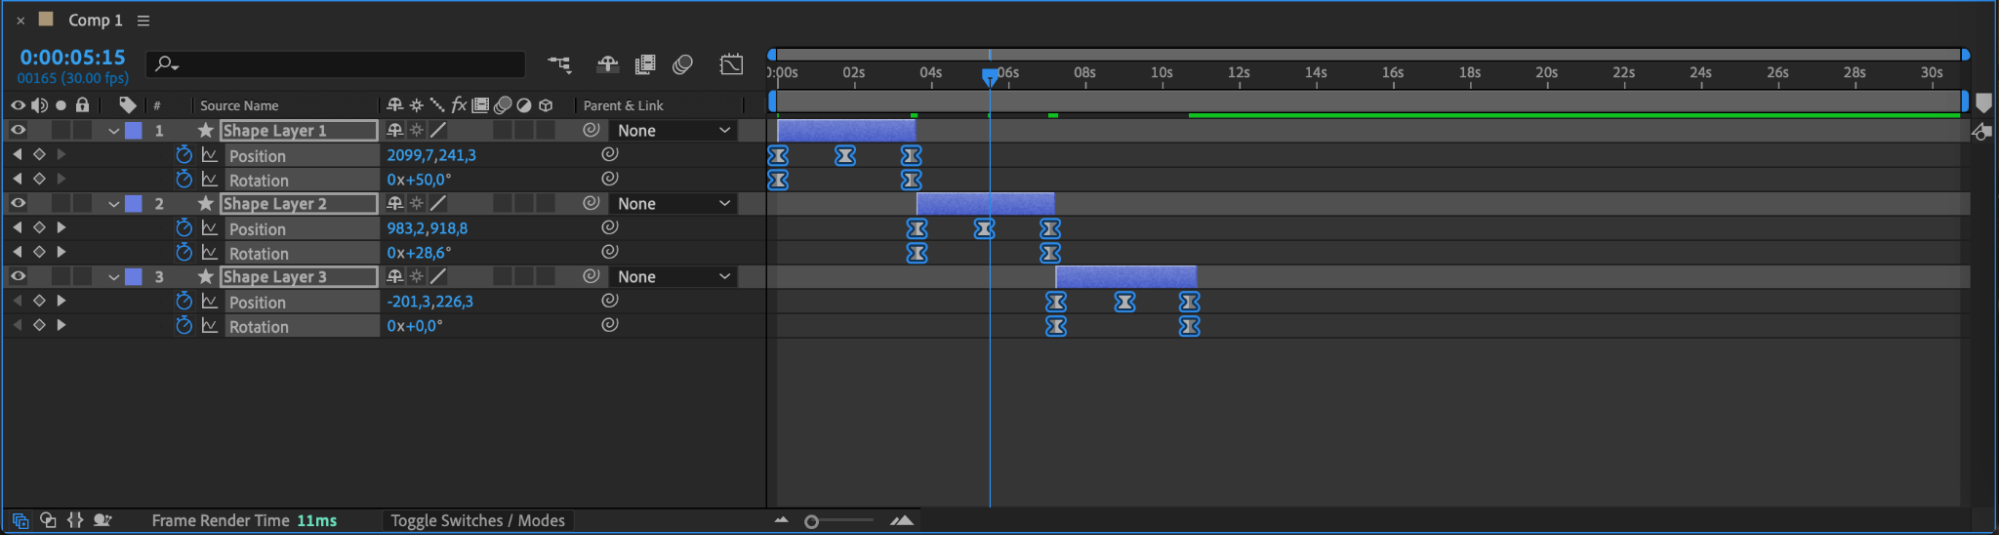
Select all keyframes, then right-click and choose Keyframe Assistant > Easy Ease. This smoothens the motion for a more polished and professional look. You can further refine the easing using the Graph Editor to customize acceleration and deceleration curves.
 Step 7: Preview and Adjust Timing
Press the Spacebar to preview your animation. Adjust the timing of individual layers by dragging them further apart or closer together in the timeline. This lets you fine-tune the flow of the staggered animation.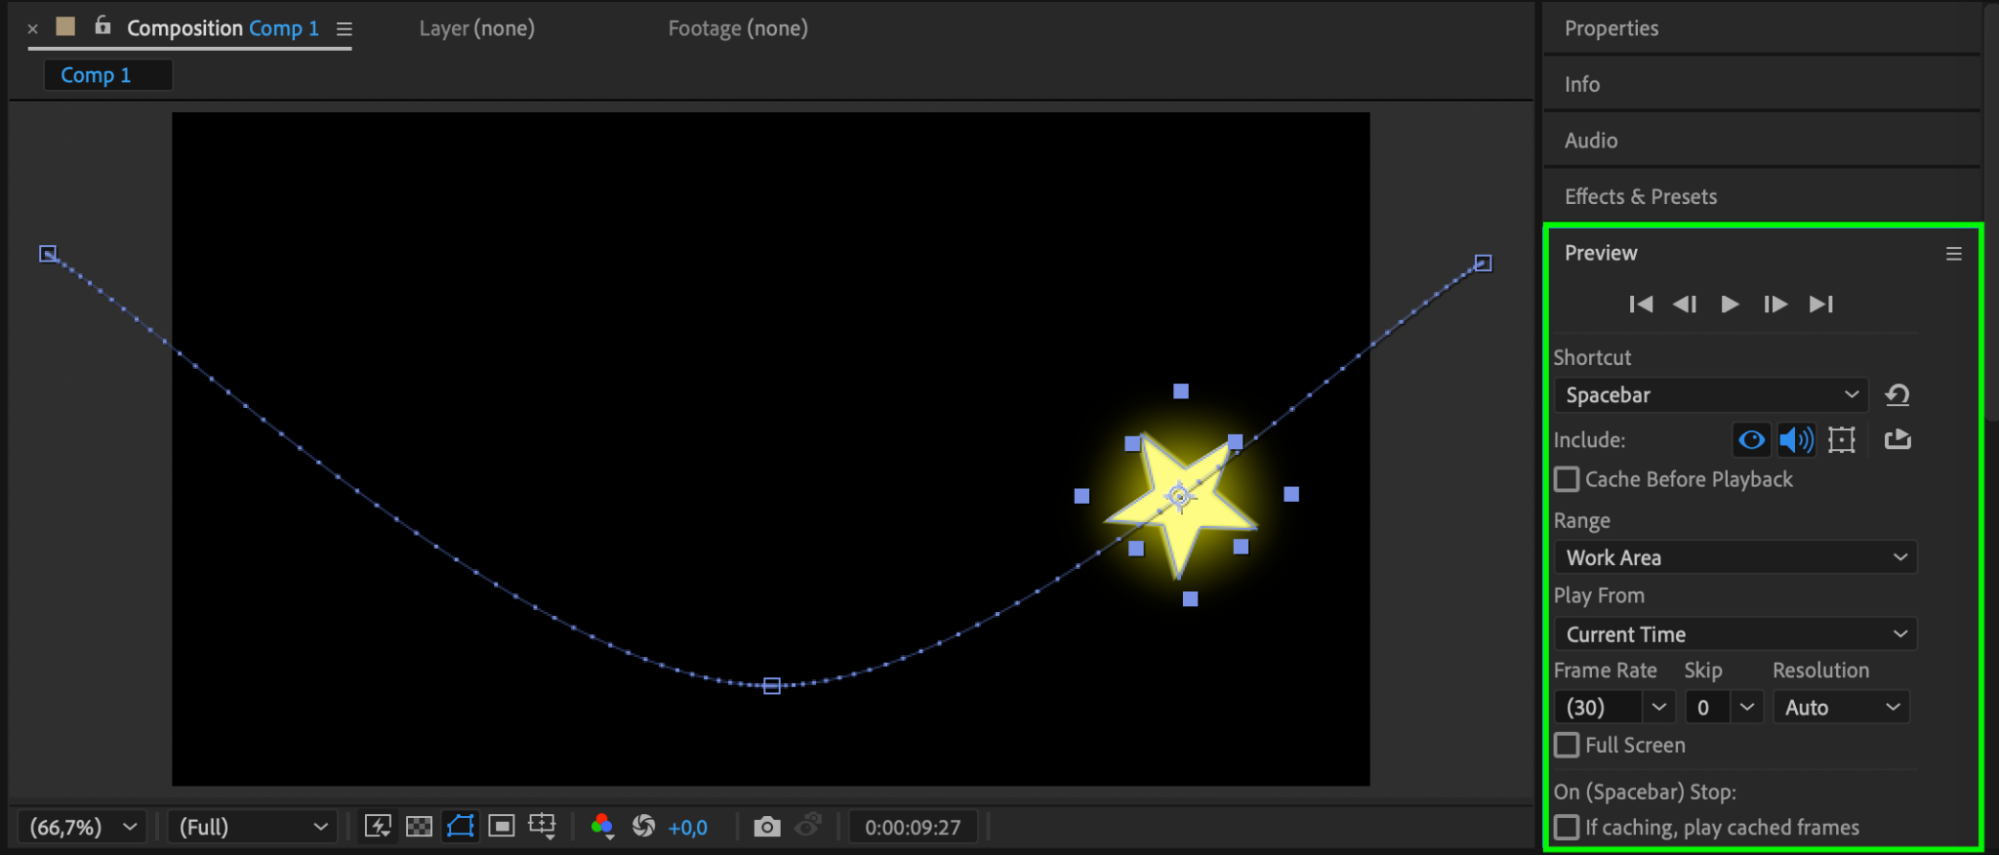 Step 8: Render the Staggered Animation
Once satisfied with your animation, render it by going to Composition > Add to Render Queue. Adjust the output settings, choose a file location, and click Render to export your staggered animation.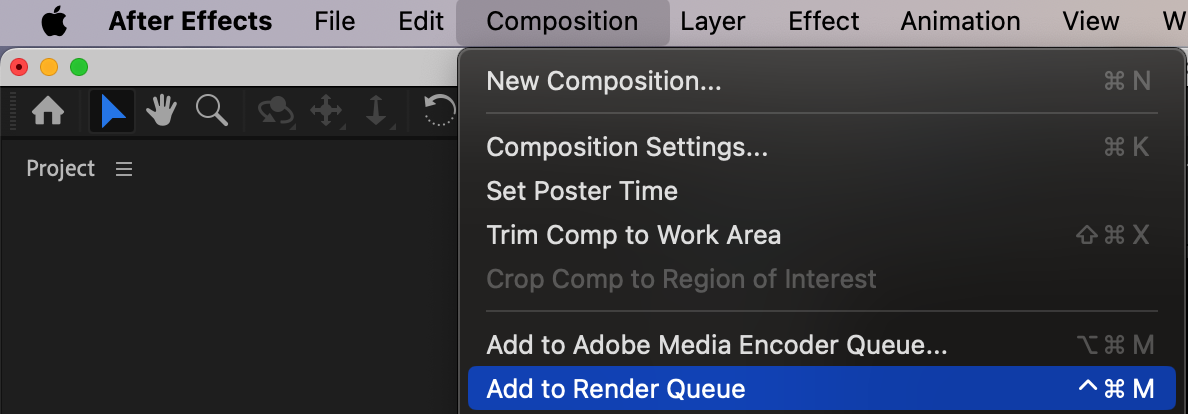
 Conclusion
Staggering layers in After Effects is an essential skill for creating dynamic and engaging animations. Whether you’re animating text, shapes, or complex compositions, this technique adds depth and rhythm to your projects. Experiment with layer timing, easing, and overlap to craft unique animations that captivate your audience!
Our Bestsellers
Introduction – Create Dynamic Animations with Layer Staggering
Staggering layers in After Effects is a powerful technique to create smooth, flowing animations where each layer’s action begins sequentially. This approach can be used for text, shapes, or any other elements to add rhythm and visual interest to your project. In this guide, we’ll show you how to stagger layers manually and with automated tools.
Step 1: Create or Import Your Layers
Get 10% off when you subscribe to our newsletter
Our Bestsellers


