How to Time Remap in After Effects: A Comprehensive Guide
Introduction – “Understanding Time Remap in After Effects”
Are you eager to add a touch of cinematic flair to your videos? Look no further than the incredible world of time remapping in After Effects. This powerful feature allows you to manipulate time in your footage, opening up a world of creative possibilities. Whether you want to create stunning slow-motion effects, speed up a sequence, or even freeze a moment in time, time remapping in After Effects is the key to achieving your desired visual impact.
Get 10% off when you subscribe to our newsletter

In this comprehensive guide, we will take you through the step-by-step process of time remapping in After Effects. By the end, you’ll have the skills and knowledge to effortlessly control the pace and timing of your videos, breathing life into your projects with dynamic and captivating visual effects.
So, grab your popcorn and get ready to dive into the mesmerizing world of time remapping in After Effects. Let’s unlock the full potential of your footage and bring your creative vision to life!
Get 10% off when you subscribe to our newsletter
Understanding Time Remap in After Effects
Before we dive into the process of time remapping in After Effects, it’s important to have a solid understanding of what time remap is and how it works.
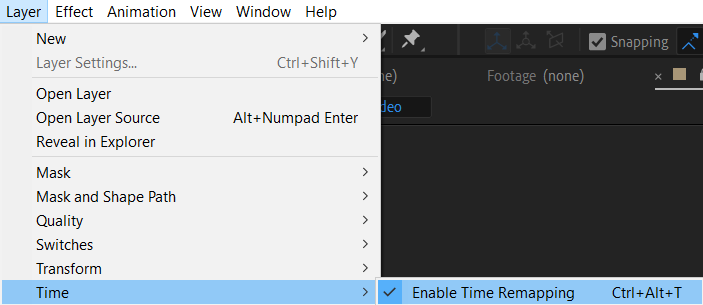
Time-remapping in Adobe After Effects is a technique for altering the speed and timing of a video. With it, you can create effects such as slow-motion, accelerated playback, and even reverse playback. To use Time-remapping, select your composition and press “Ctrl/Cmd” + “Alt/Option” + “T” to open the Time-Remapping panel. This panel allows you to set keyframes, adjusting the speed at different parts of the video. By utilizing this feature, you can generate dynamic effects and precisely fine-tune the tempo of your video content.
Get 10% off when you subscribe to our newsletter
 Now that we know what time remapping is, let’s explore some valuable tips and advice when it comes to effectively using this feature in After Effects.
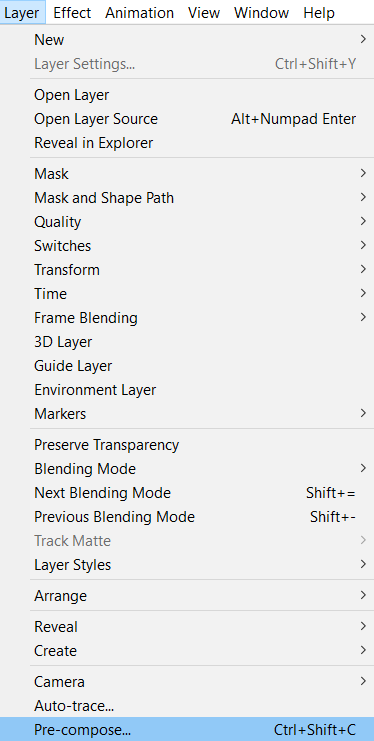
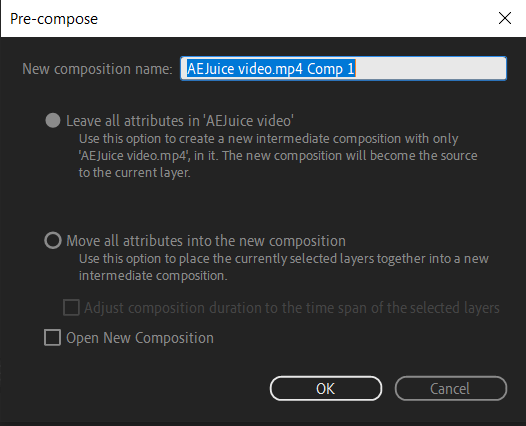
1. Pre-compose your footage: Before applying the time remap effect, it’s a good idea to pre-compose your footage. This keeps your timeline clean and organized, making it easier to manage and apply keyframes.
 2. Set work area: Set your work area to the desired duration of the time remap effect. This helps you keep track of the specific sections you want to manipulate and ensures you don’t accidentally affect other areas of your footage.
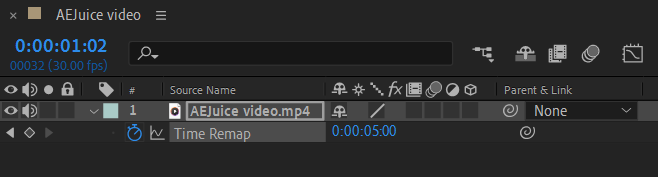
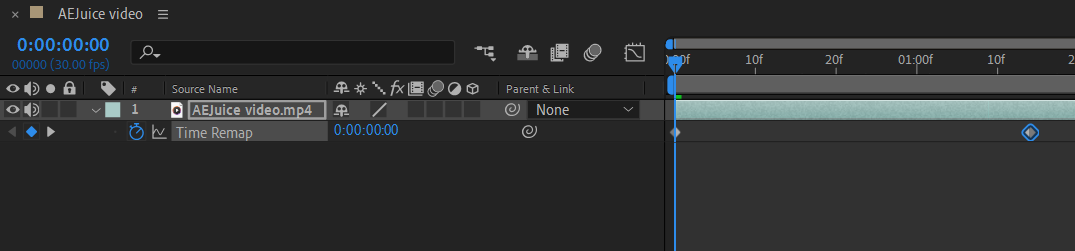 3. Using keyframes: Keyframes are essential in creating smooth and seamless time remapping effects. To set a keyframe, navigate to the time remap property, click on the stopwatch icon, move to the desired point in time, and adjust the value accordingly. Repeat the process for each keyframe you want to set.
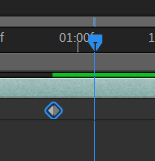
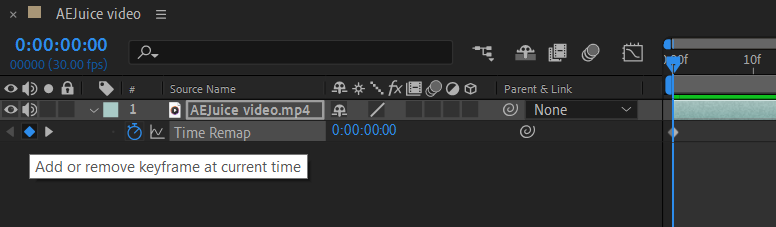 4. Adjusting keyframes: To fine-tune the timing of your time remapping effect, you can adjust the position of keyframes on the timeline. This allows you to achieve precise control over the speed and rhythm of your footage. To adjust the position of keyframes on the timeline in Adobe After Effects, click on the keyframe and drag it along the timeline. To delete a keyframe, select it and press “Delete” on the keyboard.
 5. Using hotkeys: You can use the handy hotkeys in After Effects to speed up your time remapping workflow. For example, use the “J” key to move to the previous keyframe, the “K” key to move to the next keyframe. I know you are in a hurry!
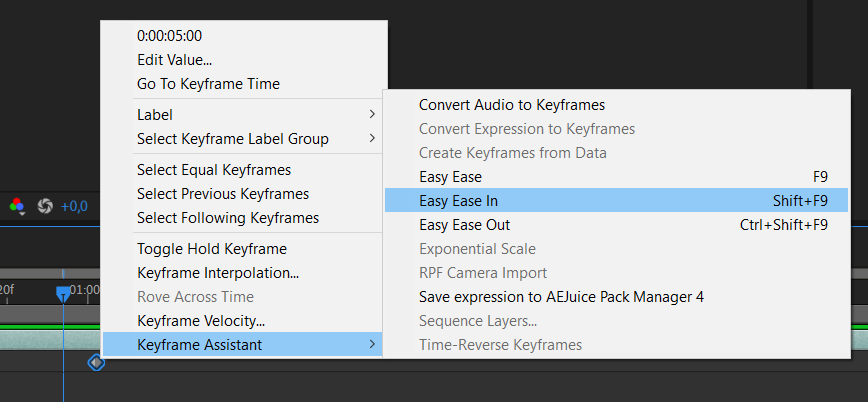
 6. Keyframe Assistant: Keyframe Assistant in Adobe After Effects provides a set of tools for precise control of keyframes in animation. This toolkit includes features such as “Easy Ease” for creating smooth transitions, “Time-Reverse Keyframes” for changing the animation direction, “Exponential Scale” for additional control over scale changes, and other options that streamline the animation process. By using Keyframe Assistant, you can elevate the quality of your animations, making them more dynamic and professional.
 7. Experiment and have fun: Time remapping is a creative process that invites experimentation. Don’t be afraid to try different techniques, play around with speed variations, and explore the endless possibilities. The more you experiment, the more you’ll discover unique effects that can elevate your videos to the next level.
By following these tips and advice, you’ll be well-equipped to leverage the power of time remapping in After Effects. It’s time to unleash your creativity and transform your footage into captivating visual experiences!
Get 10% off when you subscribe to our newsletter
Conclusion
Congratulations! You have now mastered the art of time remapping in After Effects. By following this comprehensive guide, you have learned how to manipulate the timing of your footage, creating stunning visual effects and adding a cinematic touch to your videos.
Throughout this journey, we explored the key concepts of time remapping, such as setting keyframes, adjusting timing, and utilizing hotkeys to streamline your workflow. We also delved into the importance of pre-composing your footage and setting work areas.
Get 10% off when you subscribe to our newsletter
Remember, the key to mastering time remapping is practice and experimentation. Don’t be afraid to push the boundaries and try new techniques. Explore different speed variations, reverse footage, or create dramatic slow-motion effects to truly bring your vision to life.
Now armed with the knowledge and skills of time remapping in After Effects, you can transform your videos and captivate your audience. So, go forth and let your creativity soar!
Get 10% off when you subscribe to our newsletter
We hope this guide has been valuable to you on your journey to becoming a skilled time remapping artist in After Effects. Keep practicing, keep innovating, and unlock the full potential of your videos with this powerful tool.
Happy time remapping!
Our Bestsellers


