How to Use Tracking Matte in After Effects: A Step-by-Step Guide
Introduction to Tracking Matte in After Effects
Are you a video editor or motion graphics artist looking to enhance the visuals of your projects?
If so, you’ve come to the right place.
In this article, we’ll be exploring the powerful technique of tracking matte in After Effects to create stunning visual effects and seamless compositions.
Tracking matte is a method used to seamlessly integrate assets or elements into your footage. It allows you to apply visual effects, graphics, or animations to specific areas or objects within a video, making them appear as if they naturally belong in the scene. Whether you want to blur a face, replace a sign, or create realistic composites, tracking matte is an essential tool in your creative arsenal.
Understanding how to track matte in After Effects can significantly elevate the visual quality and production value of your videos. With its multitude of tracking options and powerful masking capabilities, After Effects provides you with all the necessary tools to achieve professional results.
In this comprehensive guide, we will take you through the step-by-step process of using tracking matte in After Effects. We will cover everything from the basics to advanced techniques, ensuring you have the knowledge and skills to create seamless compositions and impressive visual effects.
So, if you’re ready to take your video editing and motion graphics skills to the next level, grab your mouse, open After Effects, and let’s dive into the world of tracking matte!
Get 10% off when you subscribe to our newsletter

How to Track Matte in After Effects: A Step-by-Step Guide
Tracking matte is a powerful tool that can elevate your video projects to new heights. With After Effects, you have a plethora of options and techniques at your disposal to create seamless composites and stunning visual effects. In this step-by-step guide, we will walk you through the process of using tracking matte in After Effects, from the basics to advanced techniques. So let’s get started!
1. Preparing Your Project
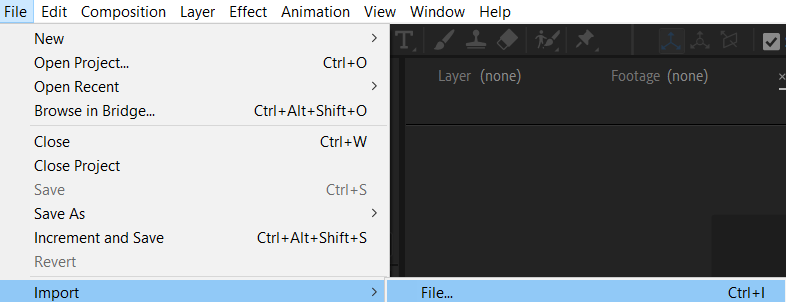
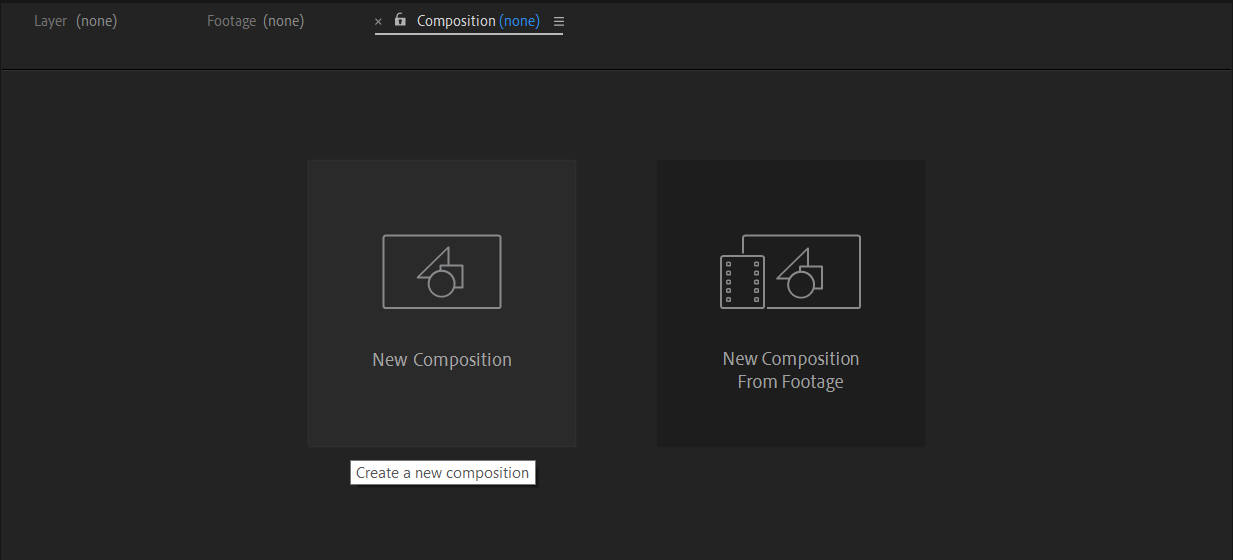
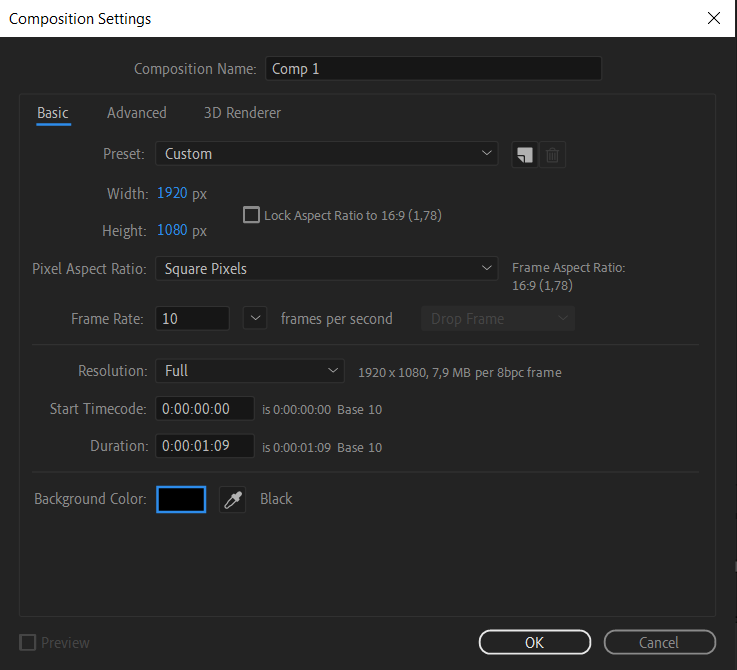
Before diving into tracking matte, it’s essential to have your project set up properly. Import your footage into After Effects and create a new composition that matches your desired output settings. Make sure the footage and any elements you plan to add are properly aligned and positioned.
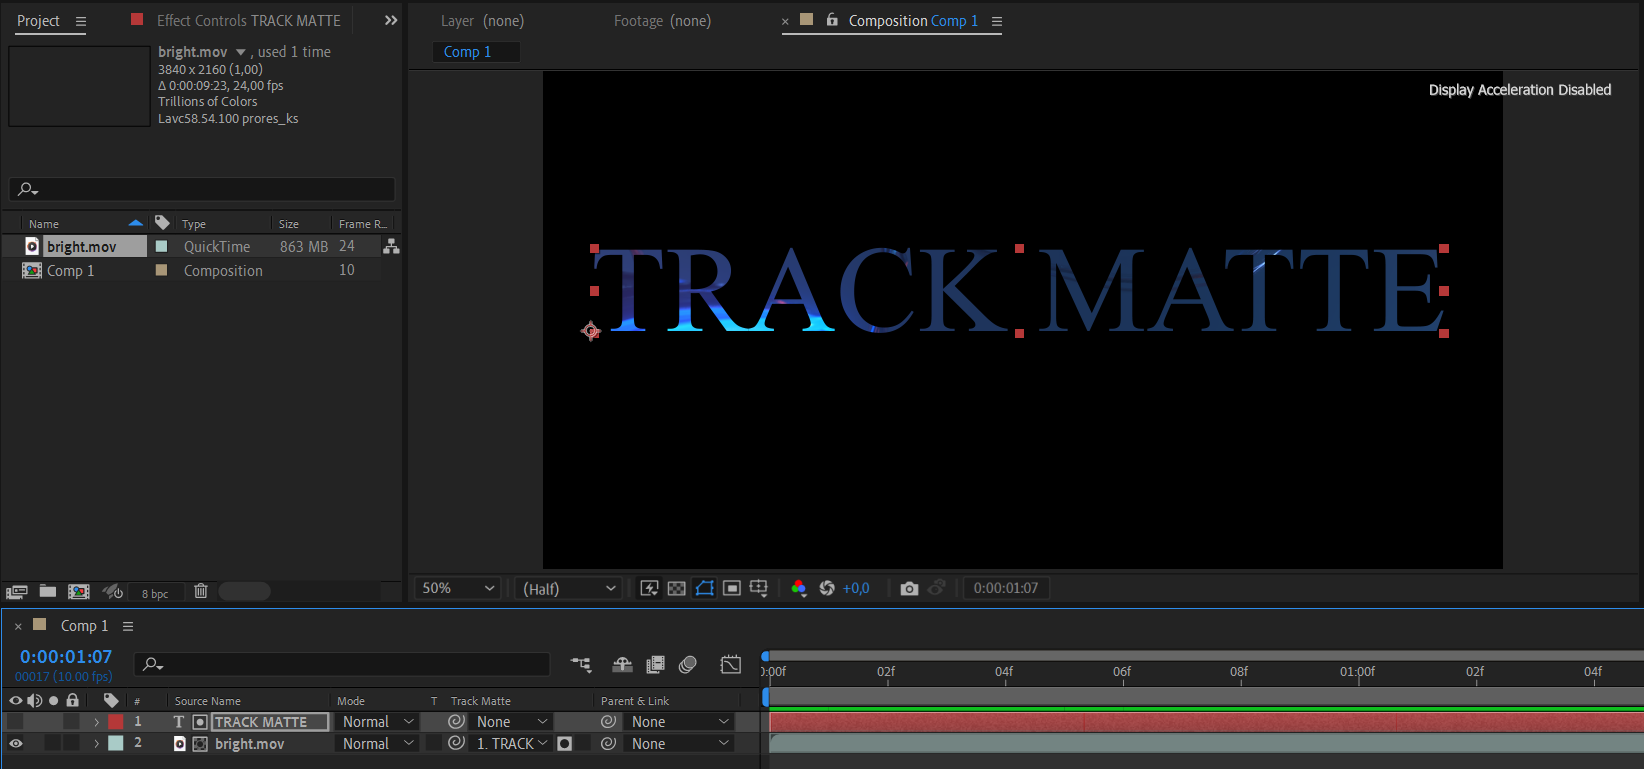
2. Creating the Track Matte Layer
The next step is to create text using the Horizontal Type Tool (Ctrl/Cmd + T) or a shape using the Pen Tool (G). You can also use other masking tools like the Rectangle or Ellipse tool. A new layer will be automatically created on the Timeline panel.

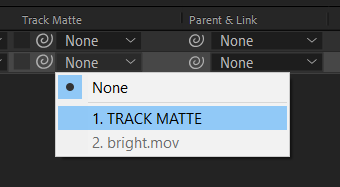
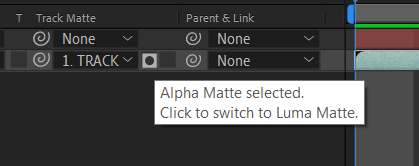
3. Applying the Track Matte
Select the layer you want to apply the effect or composite to and click on the TrkMat dropdown in the Timeline panel. Choose the desired option, such as Alpha Matte or Luma Matte, depending on the characteristics of your track matte layer. This will make the layer use the luminance or transparency of the track matte layer to create the effect.
![]()
4. Advanced Techniques
Once you’ve mastered the basics, explore advanced techniques to take your tracking matte skills to the next level. Experiment with different blending modes, apply effects or adjustments to the track matte layer or use multiple track matte layers for complex composites. Don’t be afraid to get creative and think outside the box!
Remember to save your project regularly and experiment with different settings and techniques to achieve the desired effect. Play around with opacity, feathering, and other properties to refine your track matte further. So, practice, experiment, and let your imagination run wild as you create stunning visuals that captivate your audience.
Conclusion
Congratulations! You’ve now learned the ins and outs of tracking matte in After Effects. By mastering this technique, you have the power to seamlessly integrate elements into your videos and create professional-looking visual effects.
Throughout this guide, we covered the basics, including how to create a track matte layer, apply it to your footage, and refine it for optimal results. We also explored advanced techniques, such as experimenting with blending modes, applying effects to the track matte layer, and using multiple track mattes.
Remember, practice makes perfect. The more you experiment with tracking matte in After Effects, the more comfortable and proficient you’ll become. Don’t hesitate to push your creative boundaries and explore different ways to utilize this technique.
By implementing tracking matte effectively, you can enhance your video projects and bring your ideas to life. Whether you want to replace text, blur faces, or create realistic composites, tracking matte allows you to seamlessly blend elements into your footage, creating polished and visually captivating results.
So, go ahead and unleash your creativity using the power of tracking matte in After Effects. Transform your videos into visually stunning masterpieces that will impress your audience and set apart your work from the rest.
Thank you for joining us on this journey to mastering tracking matte in After Effects. Happy compositing!
Our Bestsellers


