Mastering the Graph Editor in After Effects for Smoother Animations
Introduction
The Graph Editor in After Effects is a powerful tool that allows you to fine-tune animations by adjusting keyframe interpolation. Instead of linear or default easing, you can control how motion speeds up or slows down over time. Understanding the Graph Editor will help you create more natural and dynamic animations. This guide will walk you through the basics of using it effectively.
Step 1: Open the Graph Editor
First, create an animation by adding keyframes to a layer’s position, scale, rotation, or any other animatable property. Once you have at least two keyframes, select the property in the Timeline panel and click the Graph Editor button (located in the Timeline). This will switch the display from the standard timeline view to the Graph Editor.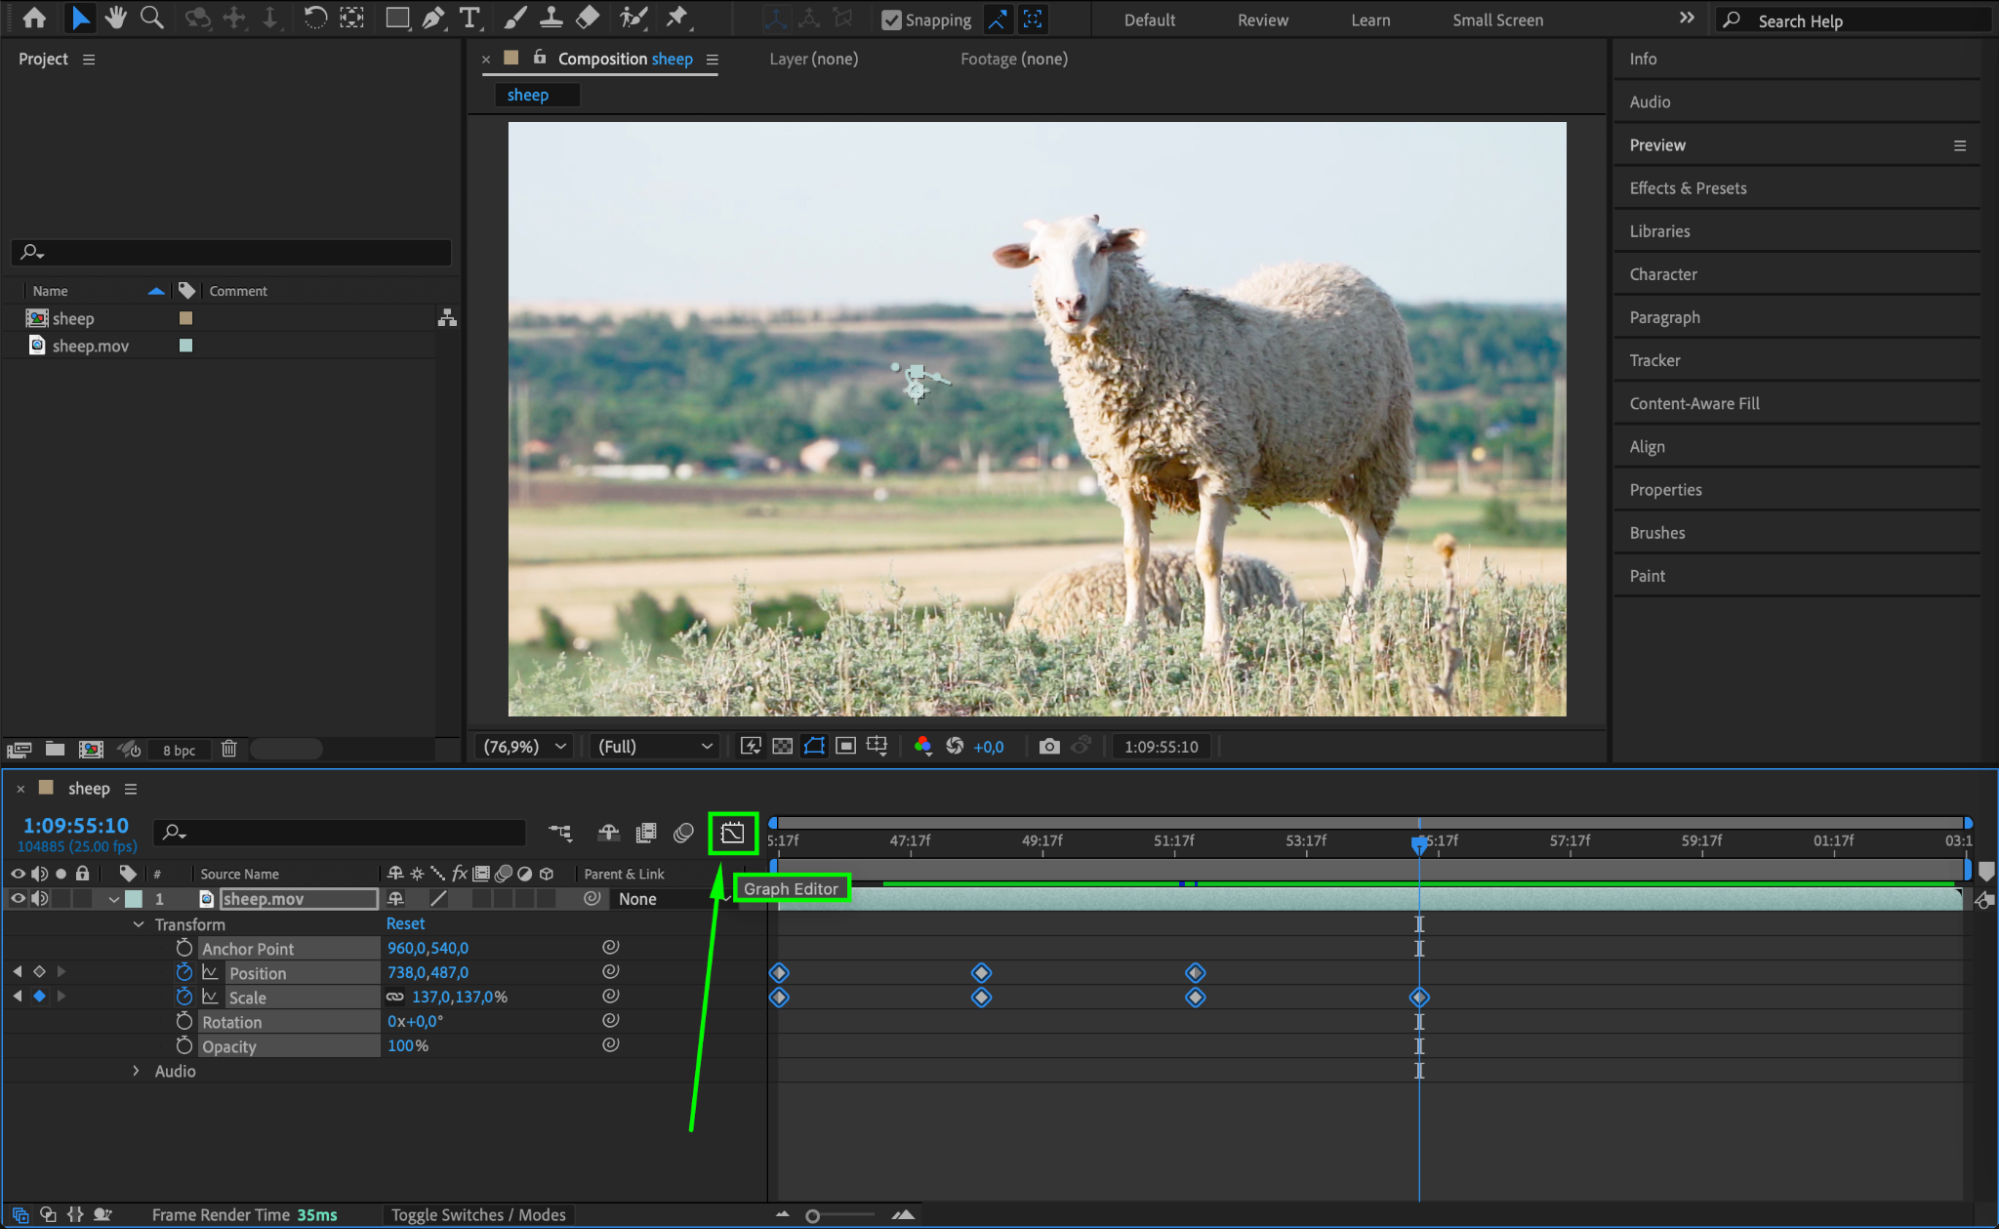 Step 2: Understand the Two Graph Modes
Get 10% off when you subscribe to our newsletter

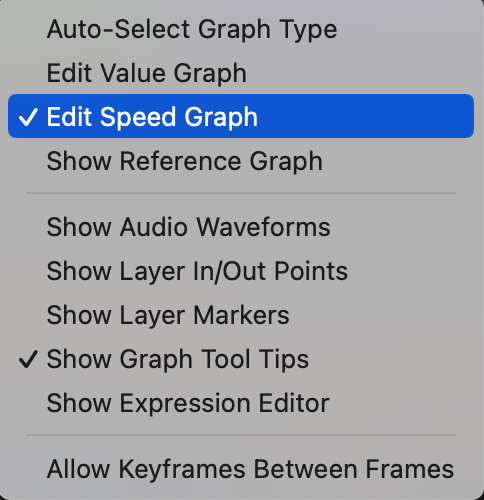
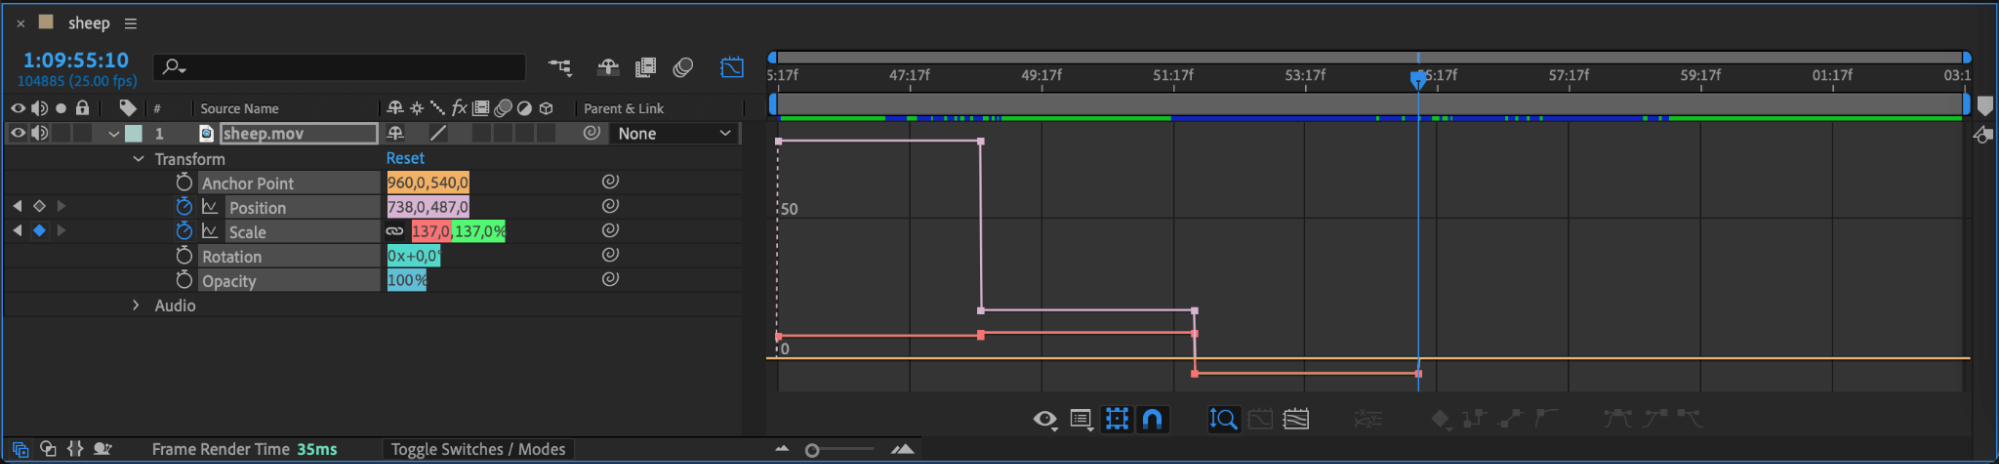
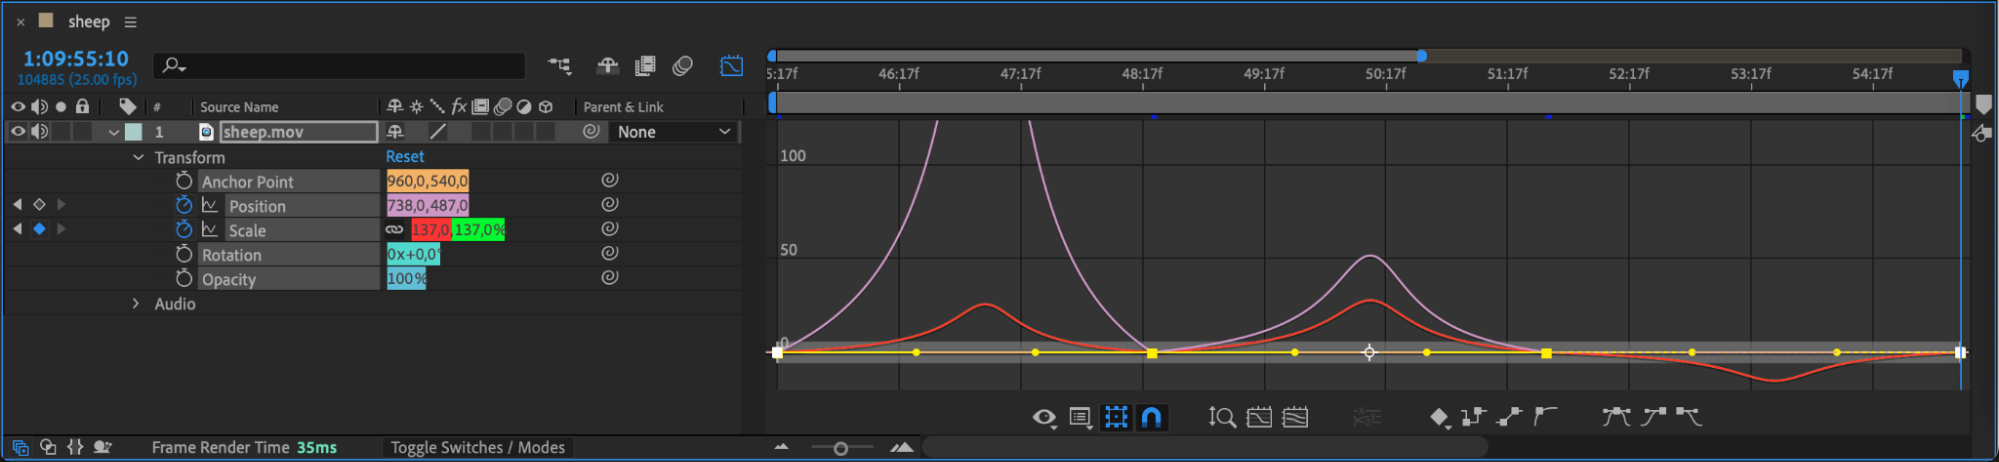
The Graph Editor has two modes:
Value Graph – Controls how the property value changes over time (e.g., scale percentage or position coordinates).
Speed Graph – Shows how fast the animation occurs at different points.
If your graph doesn’t look right, click the Choose Graph Type and Options button at the bottom of the Graph Editor and switch between Value and Speed Graph modes to find the best fit for your adjustments.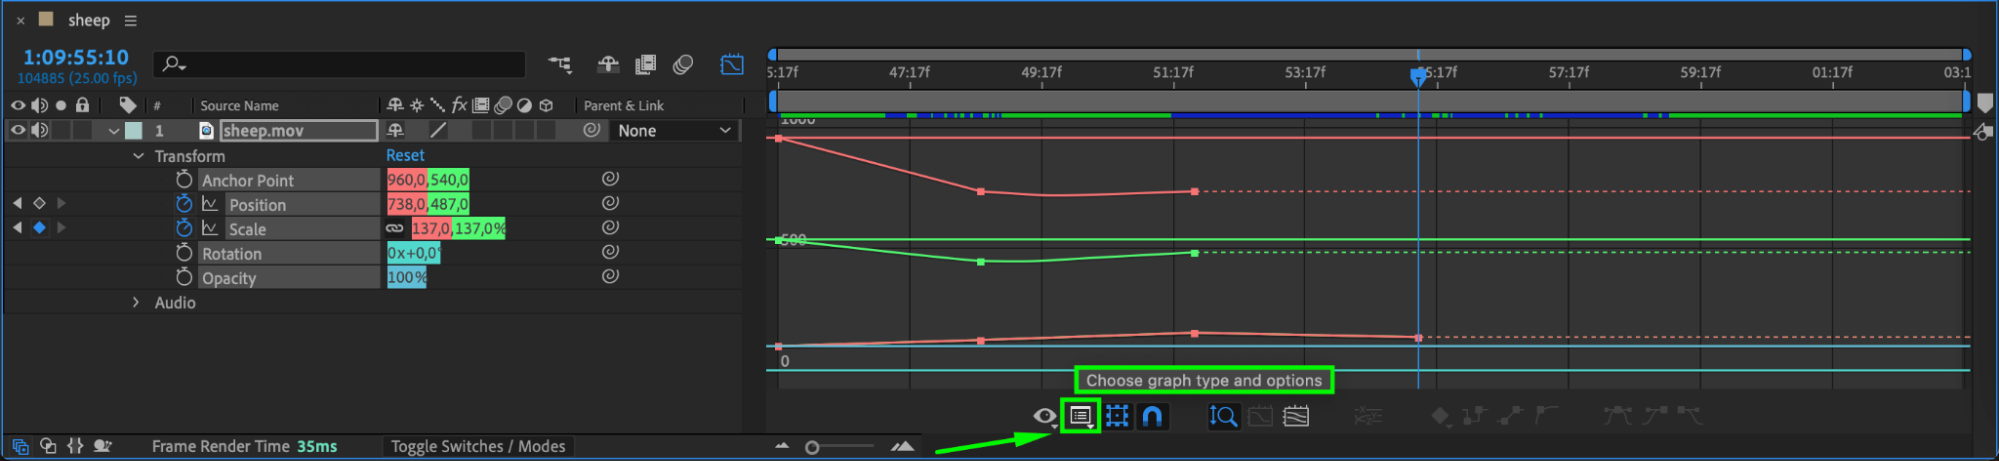
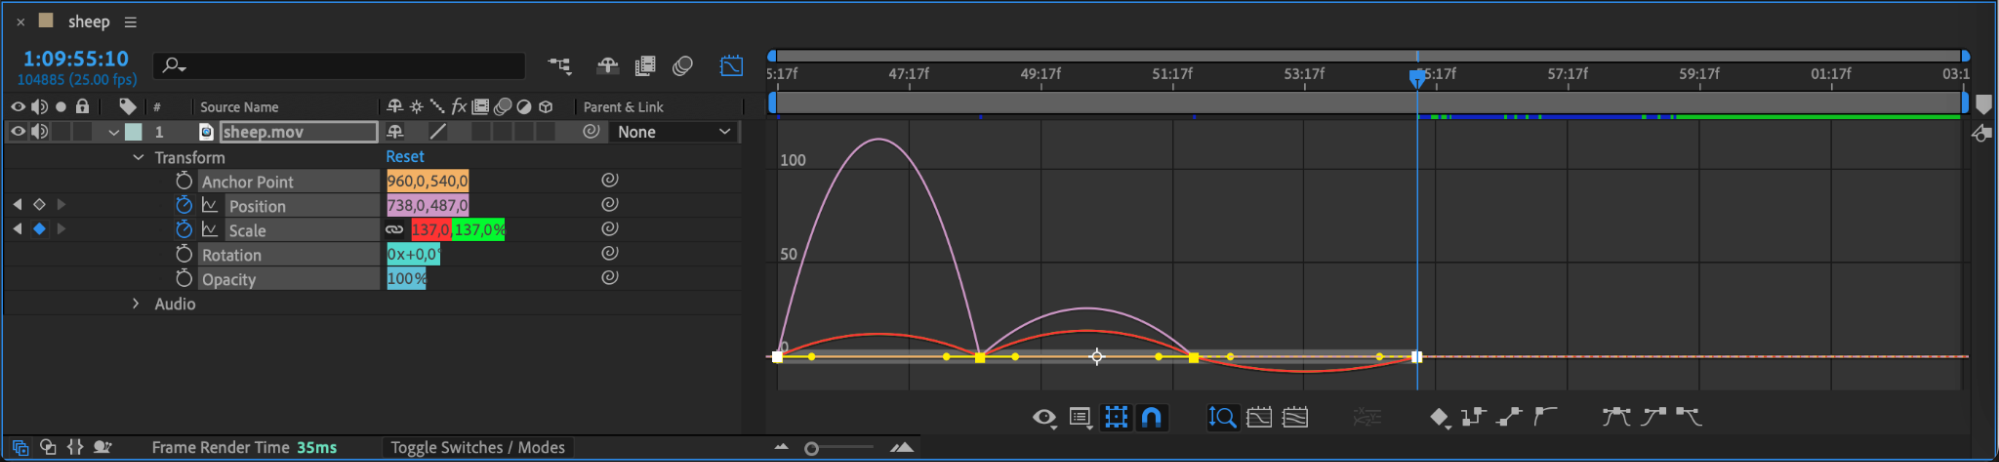
 Step 3: Apply Easy Ease for Smoother Motion
By default, keyframes may be linear, meaning the motion is constant without any acceleration or deceleration. To make movement more natural:
Select a keyframe in the Graph Editor.
Press F9 or right-click and choose Keyframe Assistant > Easy Ease.
For finer control, use Easy Ease In (gradual start) or Easy Ease Out (gradual stop) from the Keyframe Assistant menu.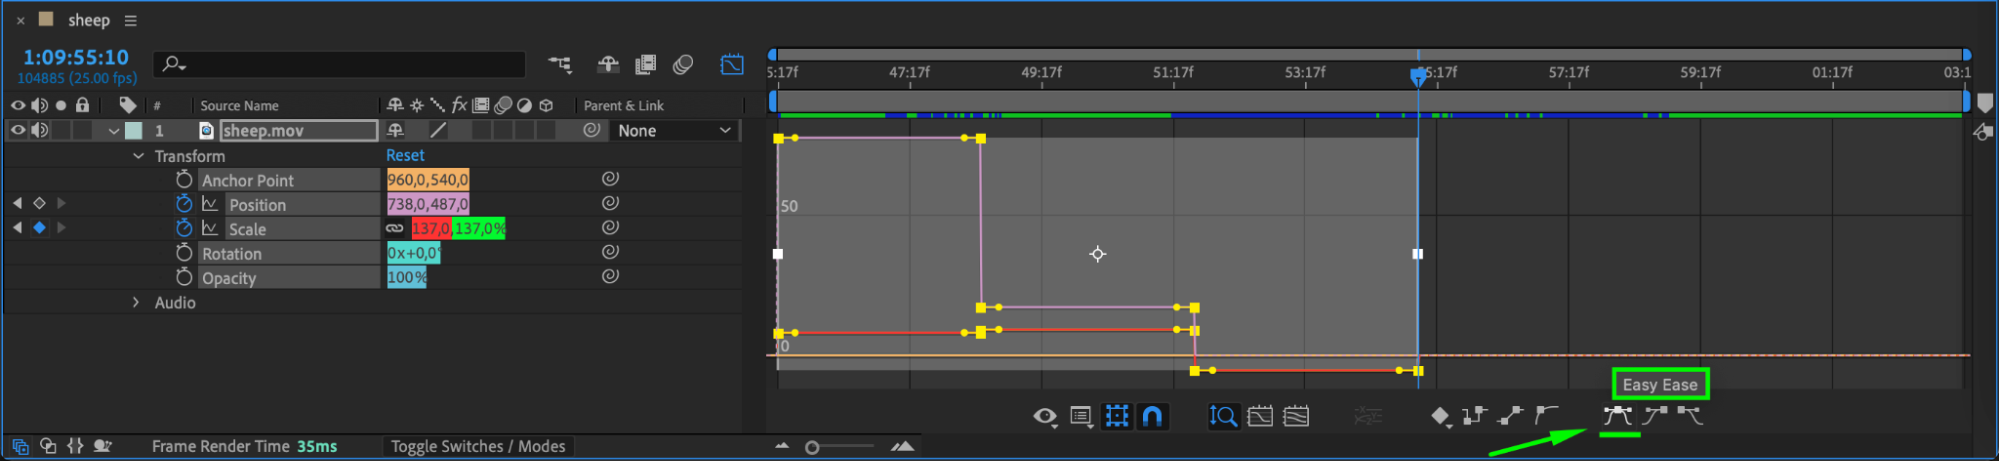
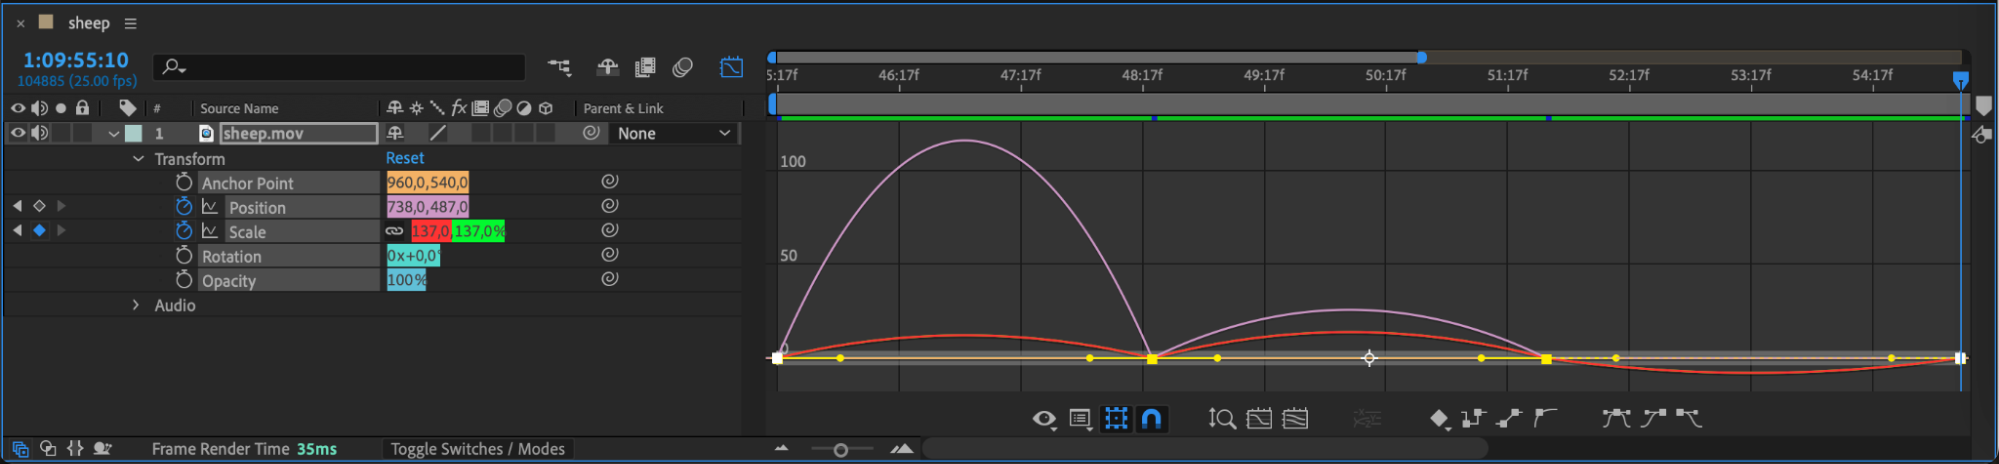
 Step 4: Adjust the Graph View for Precision
To get a better view of your curves:
Click Fit All Graphs to View to zoom out and see the entire motion curve.
Use the Zoom tool or manually adjust the graph area to fine-tune specific sections of the animation.
Having a clear view of the graph helps in making precise adjustments to motion curves.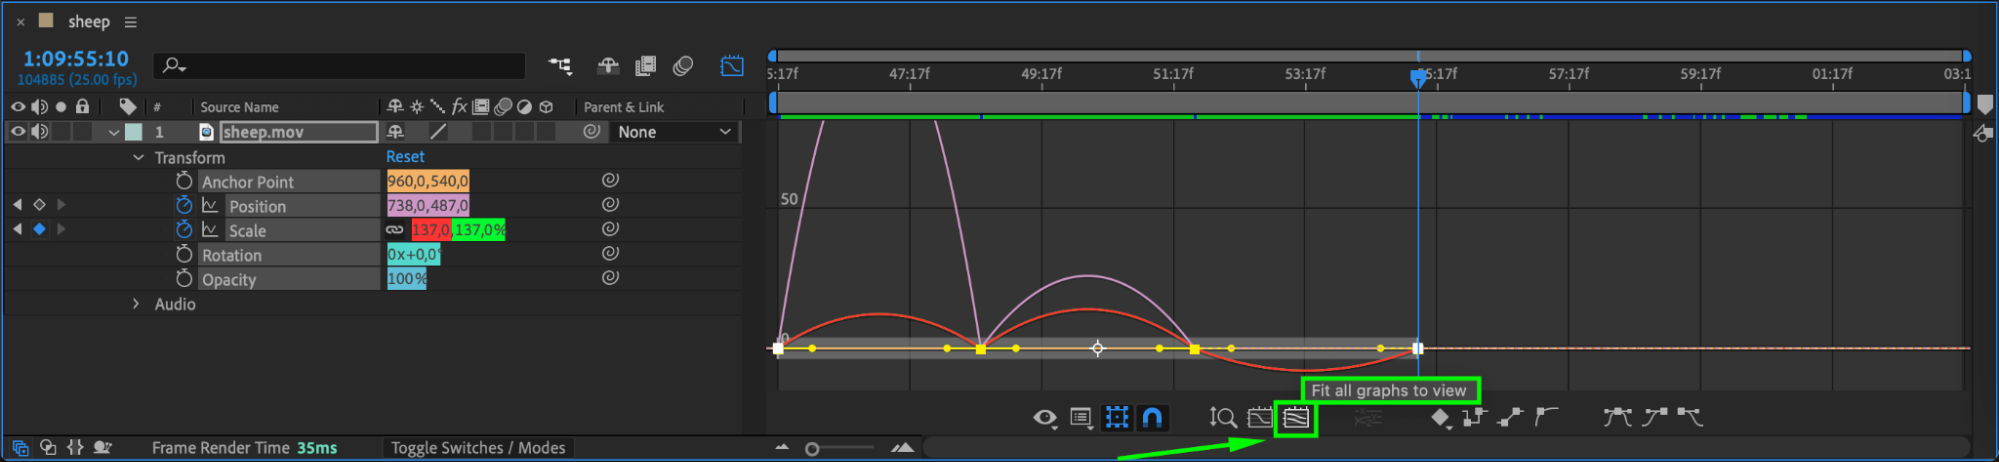
 Step 5: Modify Motion Curves with Handles
Keyframes in the Graph Editor have Bezier handles (small yellow arrows). You can:
Extend the handles to smooth out motion changes.
Shorten them for sharper movements.
Drag them up or down to modify acceleration and deceleration.
This allows you to shape the motion curve exactly as needed, making the animation feel more organic.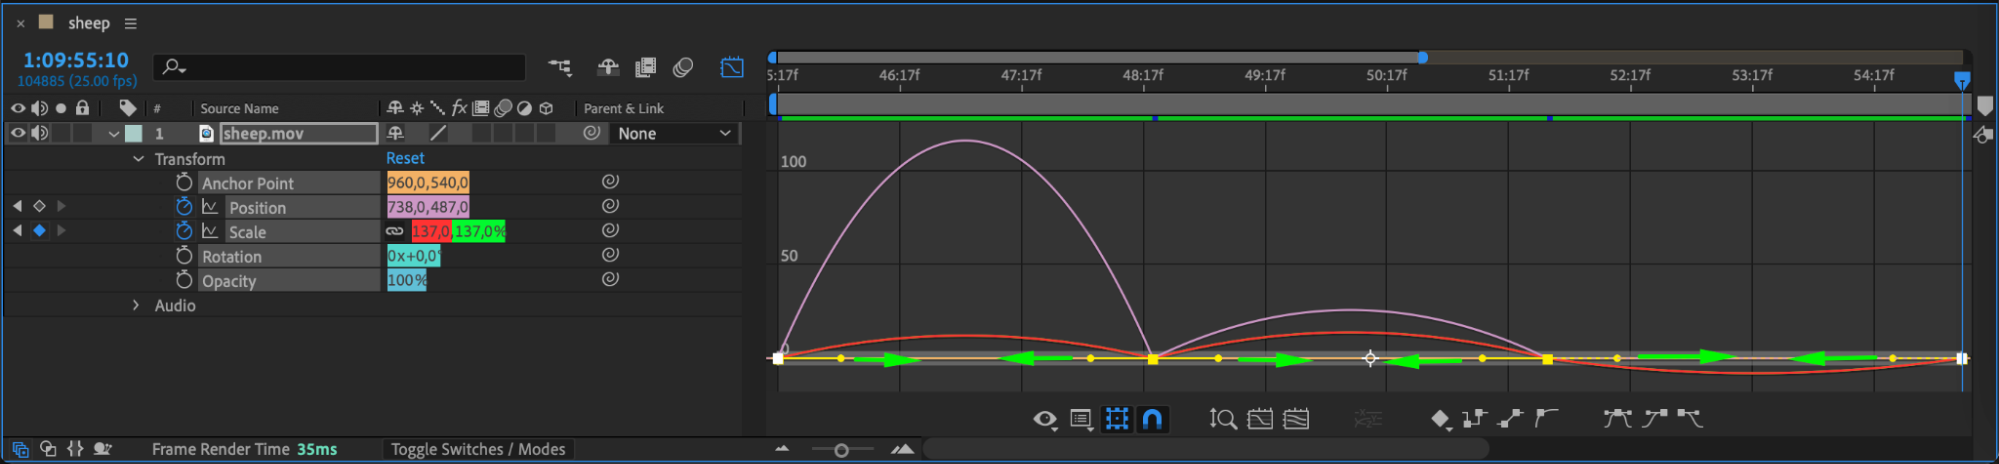
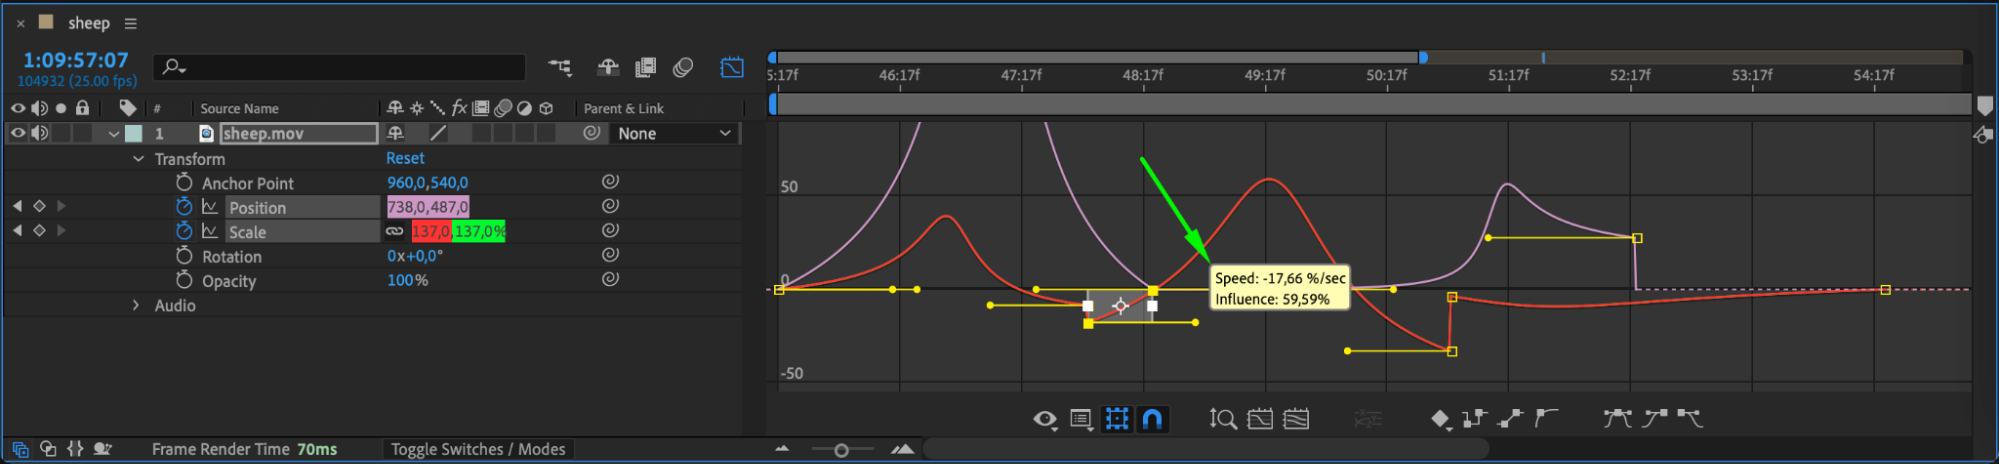
 Step 6: Manually Adjust Keyframes for Custom Motion
You can drag keyframes manually within the Graph Editor to create unique movement patterns. Each keyframe’s speed and influence values can be adjusted for fine-tuned control over animation flow. Experiment with different placements to achieve a dynamic look.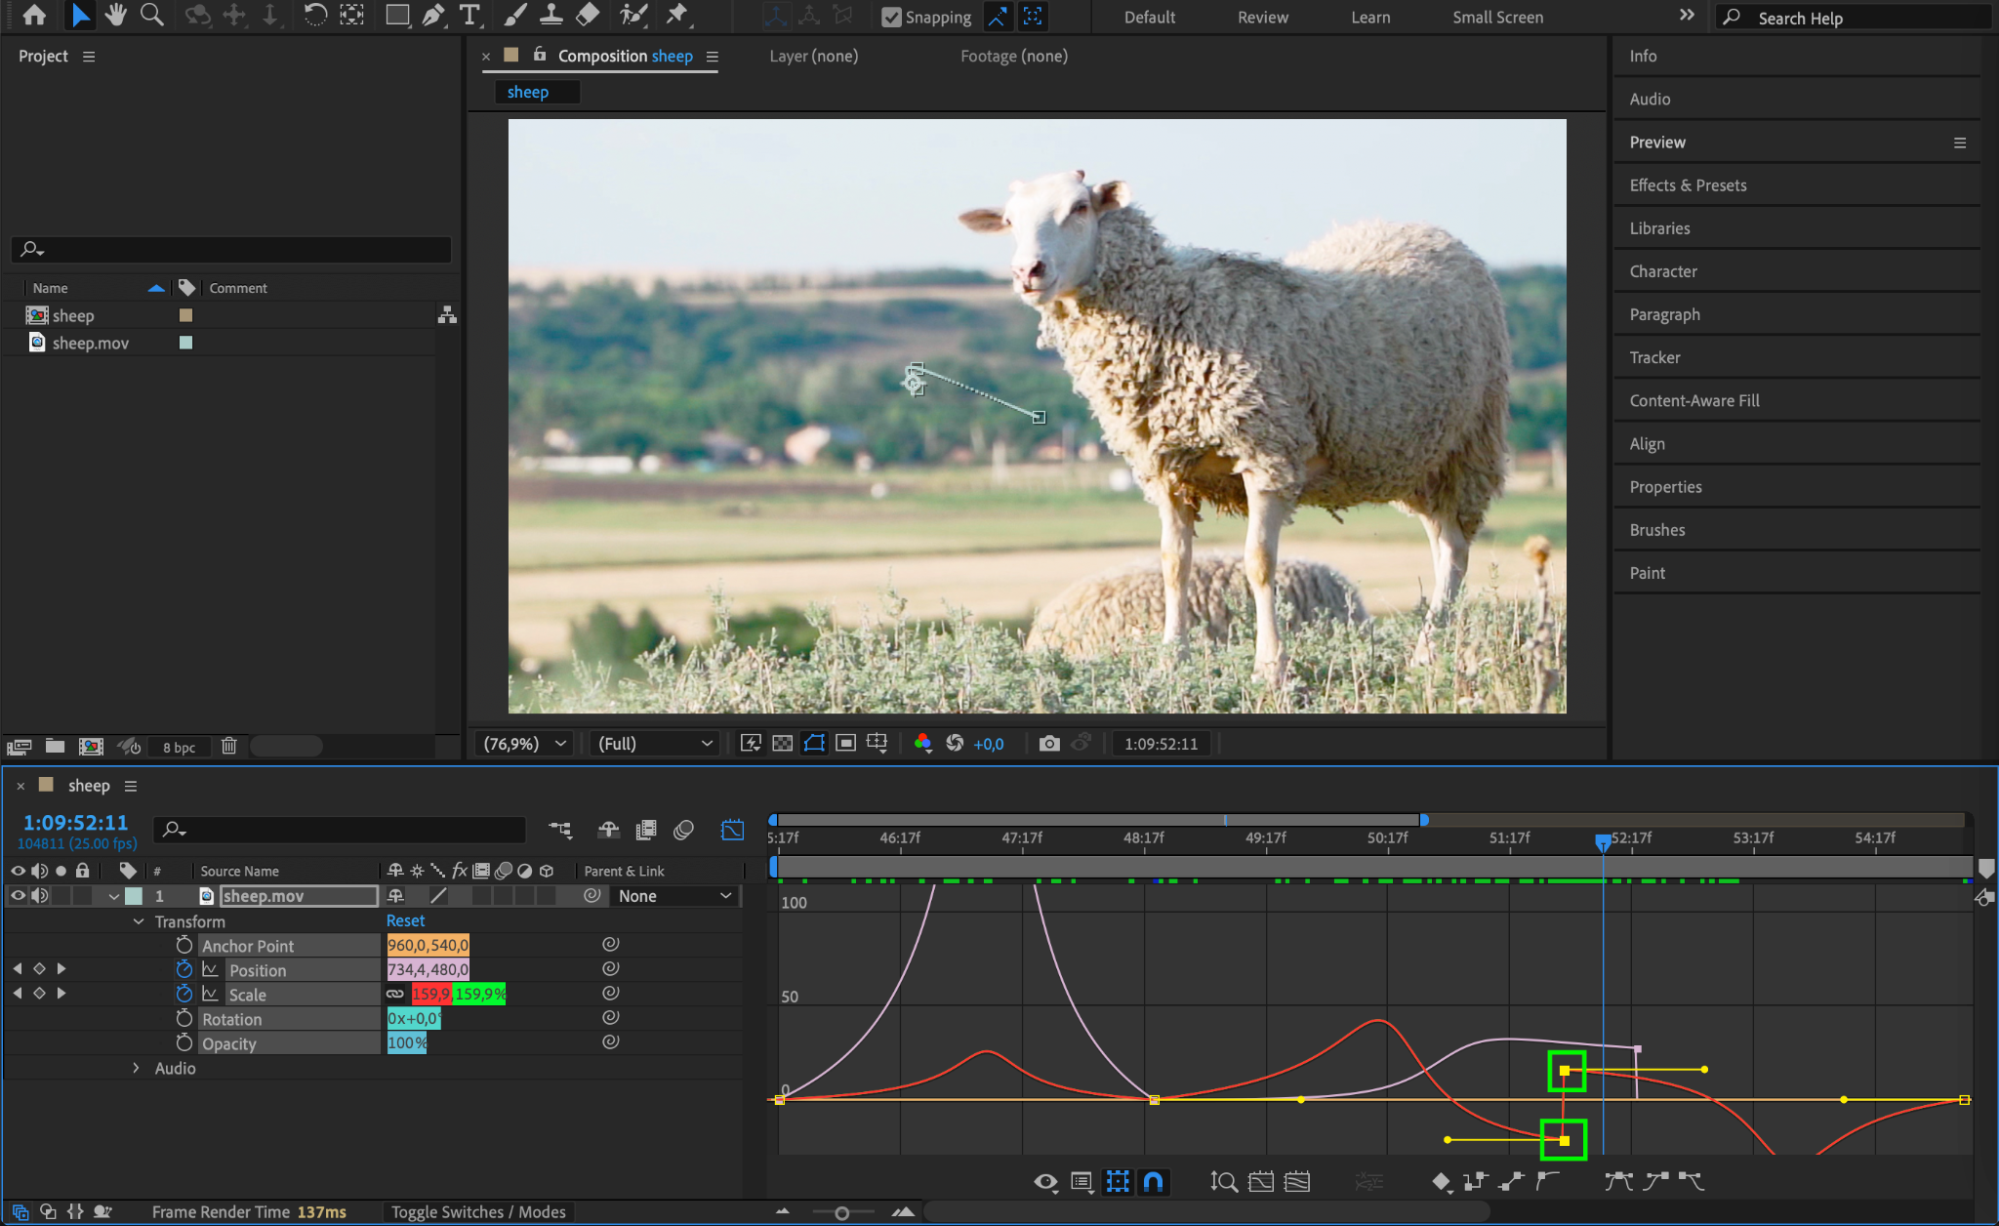
 Step 7: Preview and Refine Your Animation
Press Spacebar to preview the animation in real time. If the motion feels too fast, slow, or abrupt, return to the Graph Editor and tweak the easing curves. Small refinements can make a huge difference in achieving professional-quality animation.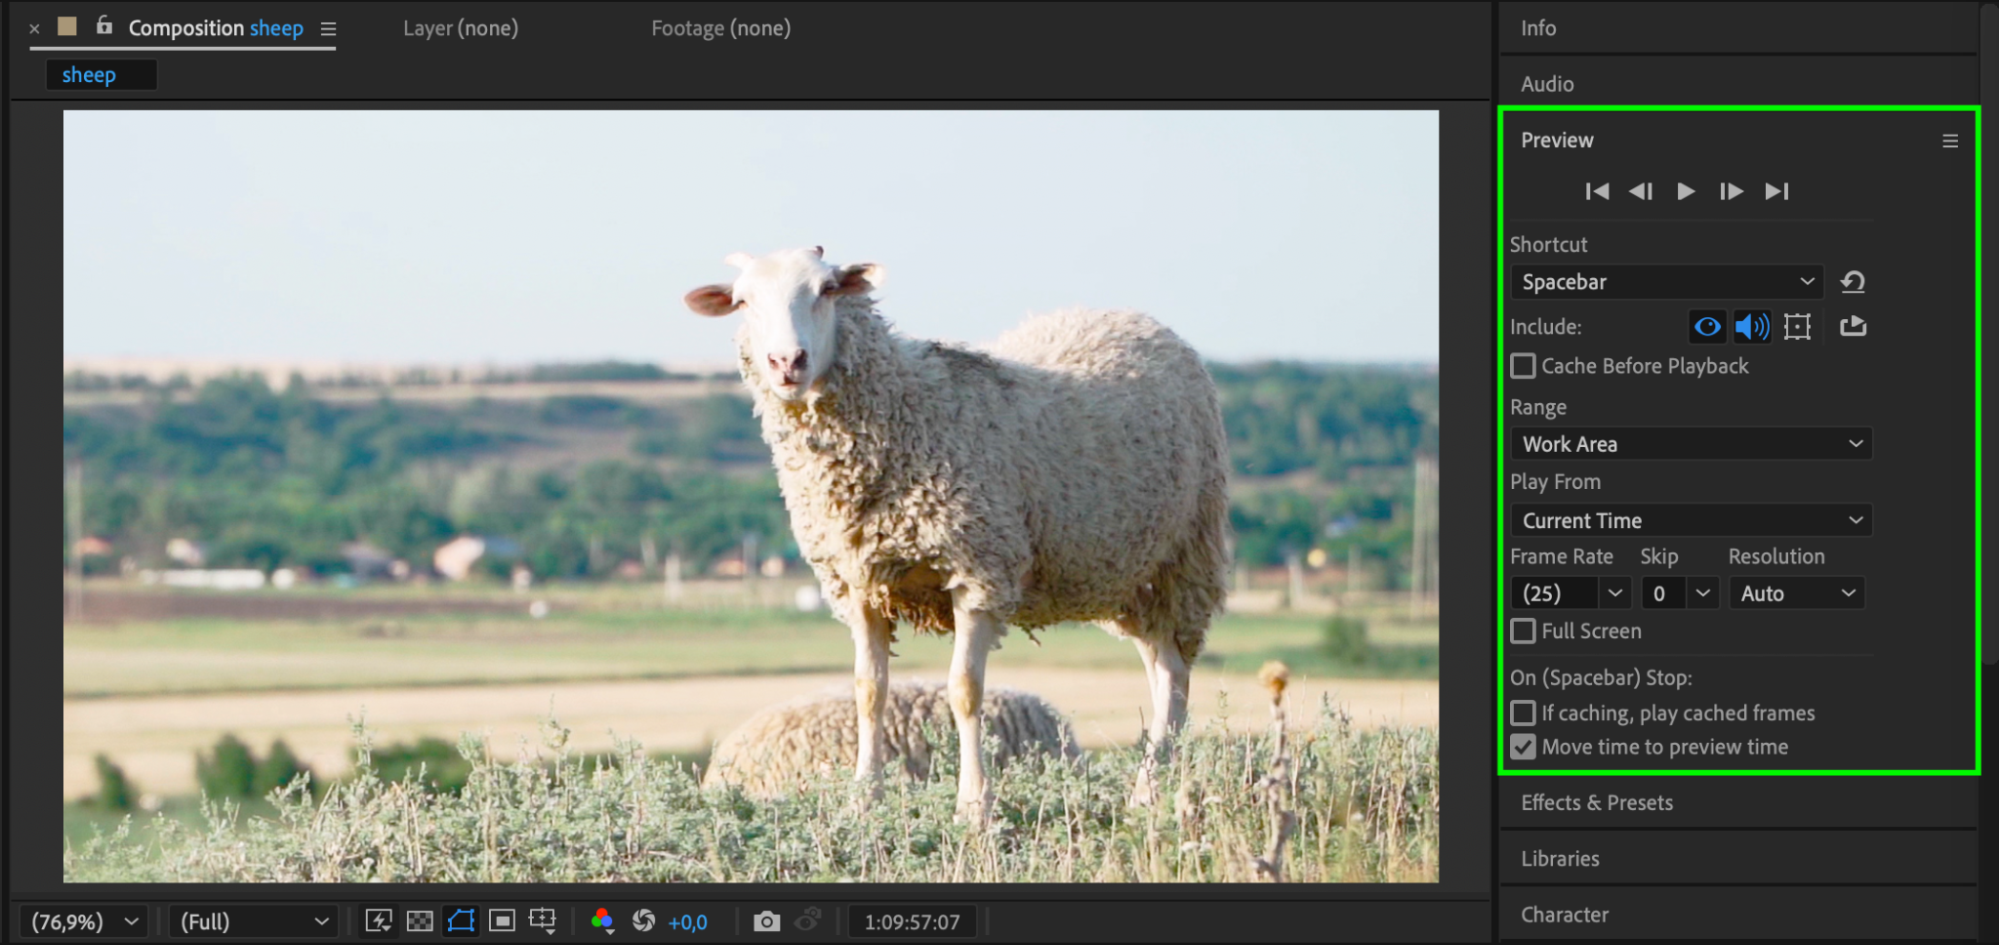 Step 8: Save and Render Your Animation
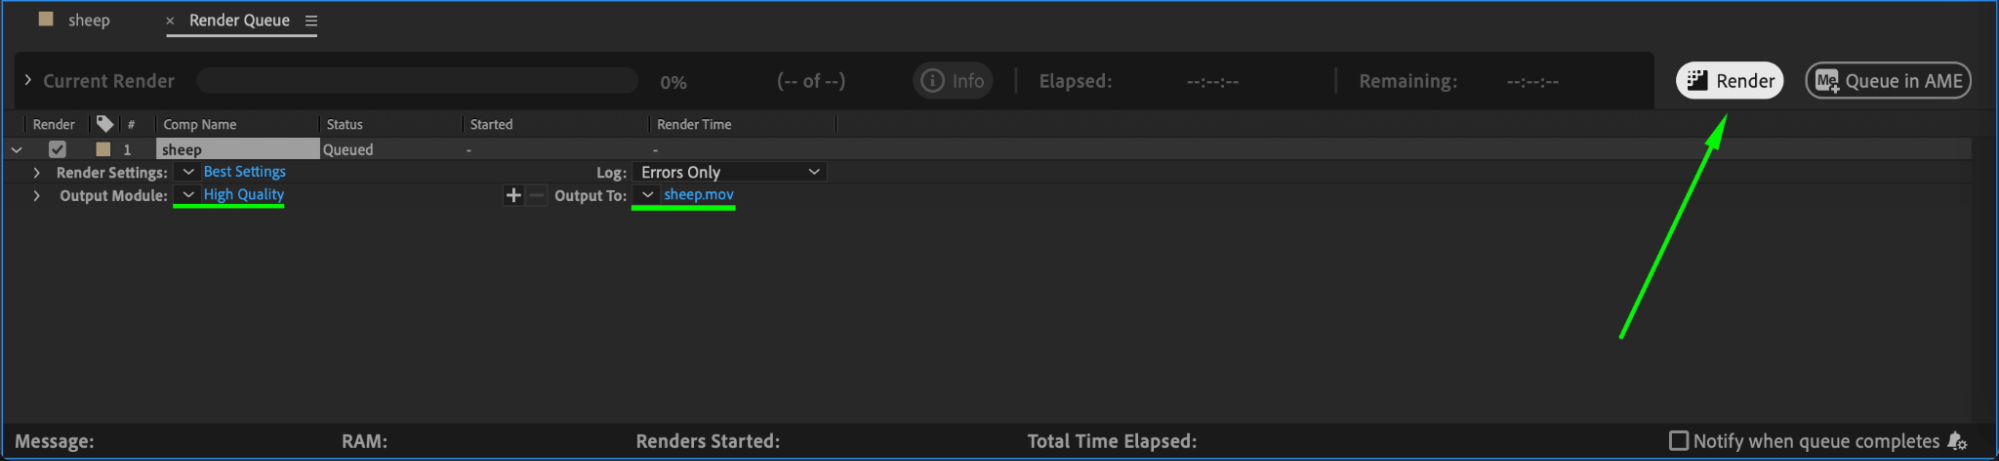
Once satisfied with the animation, go to Composition > Add to Render Queue, choose your preferred output settings, and render your project.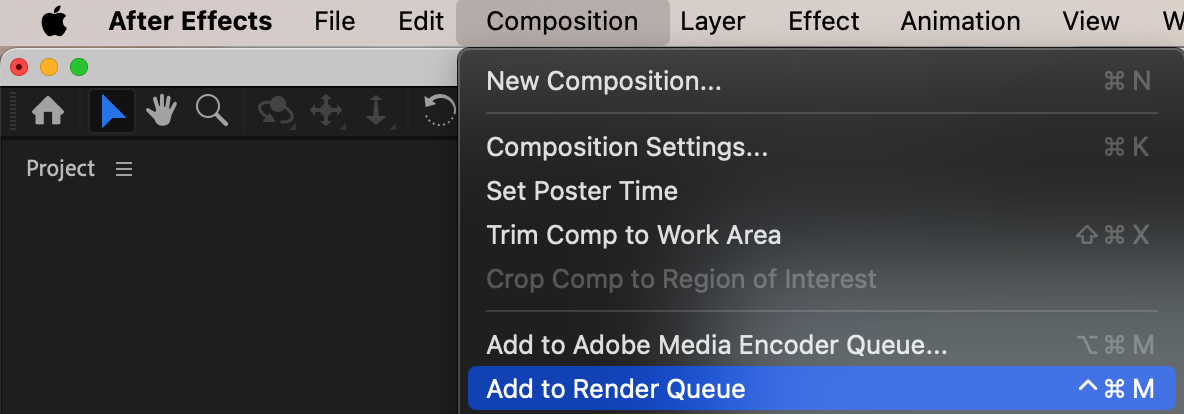
 Conclusion
The Graph Editor is an essential tool for refining motion in After Effects. By mastering its features, you can create smooth, realistic animations that elevate your work. Experiment with different easing curves, keyframe placements, and motion speeds to achieve the best results. Happy animating!
Our Bestsellers


