Mastering the Motion Tile Effect in After Effects
Introduction to the Motion Tile Effect in After Effects
The Motion Tile effect in Adobe After Effects is a versatile tool that can extend, mirror, and tile your footage, making it ideal for creating looping backgrounds, dynamic transitions, or filling gaps in your composition. This guide covers how to apply and customize the Motion Tile effect, with step-by-step instructions and tips for achieving the best results.
Get 10% off when you subscribe to our newsletter

Step 1: Import Your Footage
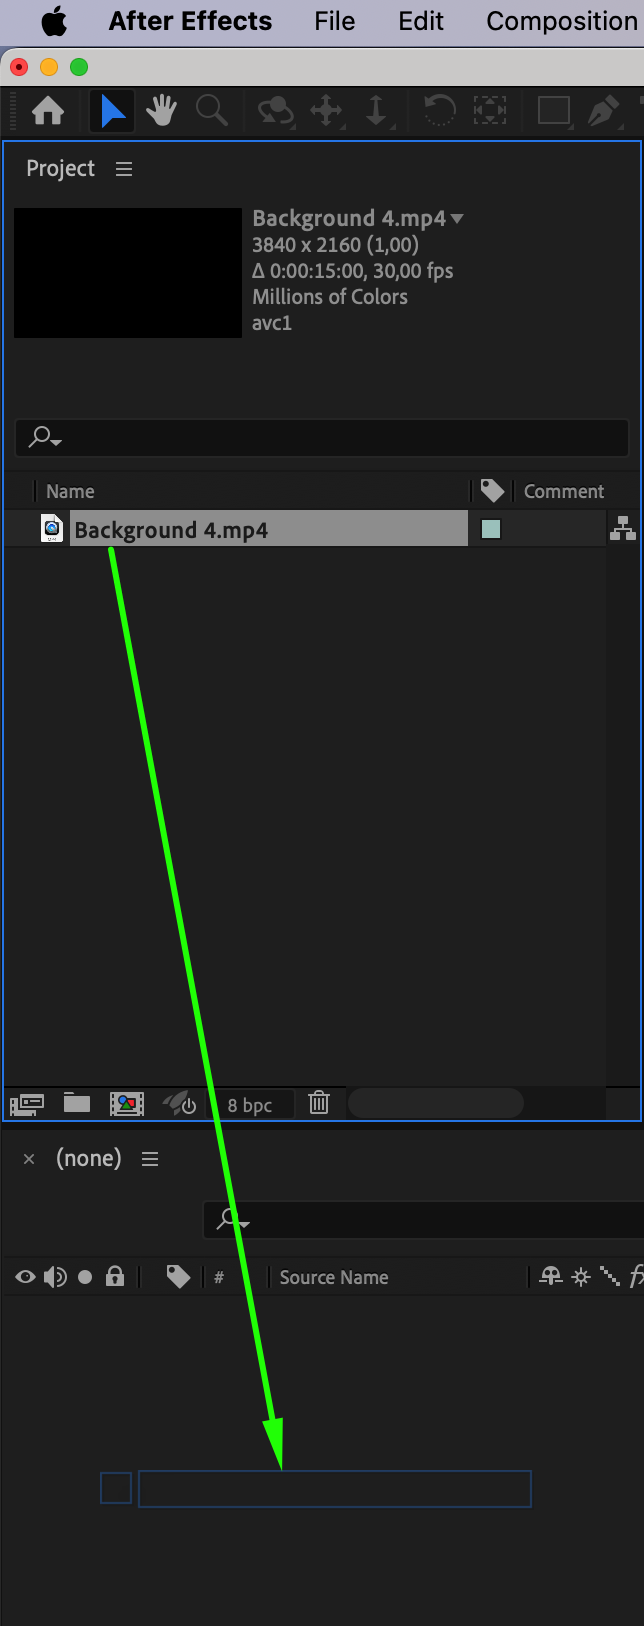
To begin, import the footage or image you want to use with the Motion Tile effect. Go to File > Import > File and select your media, then drag it into the timeline to create a new composition. Having your footage set up in a composition will let you see the real-time impact of the Motion Tile effect as you make adjustments.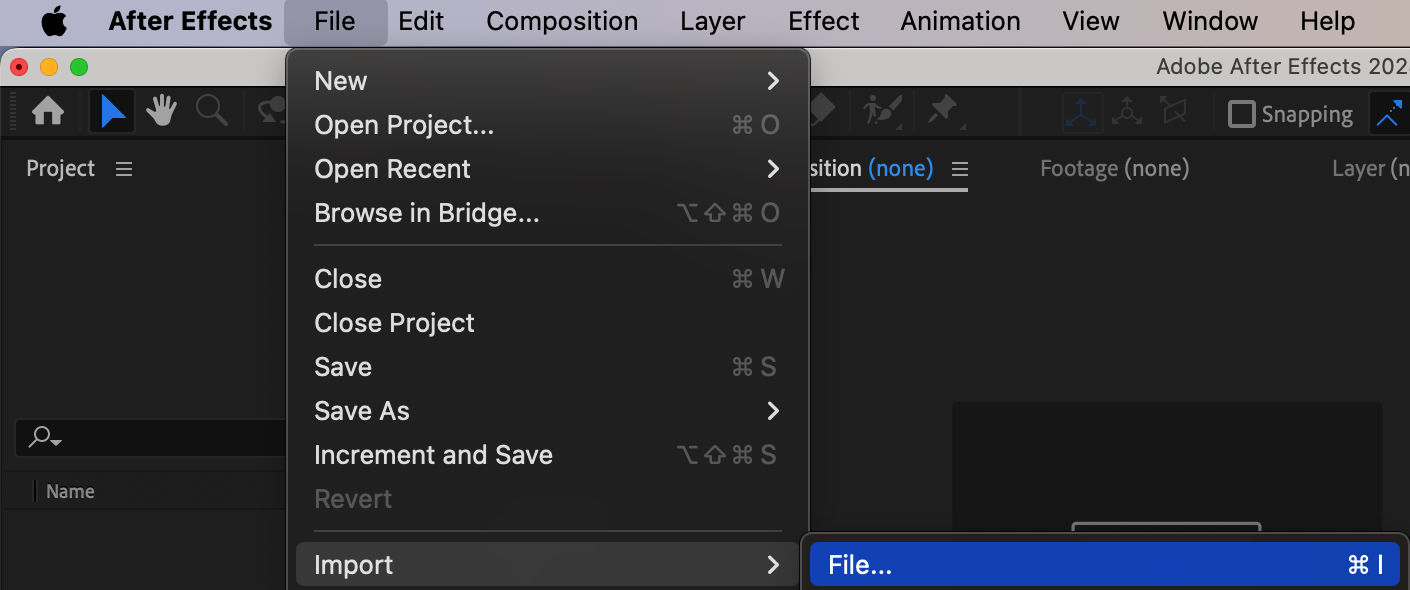
 Step 2: Apply the Motion Tile Effect
Get 10% off when you subscribe to our newsletter

With the layer selected in the timeline, go to the Effects & Presets panel and search for Motion Tile. Drag and drop the effect onto your selected layer. The Motion Tile options will appear in the Effect Controls panel, where you can customize settings to tile and mirror your footage. This opens up a wide array of creative options to manipulate your footage’s appearance and flow.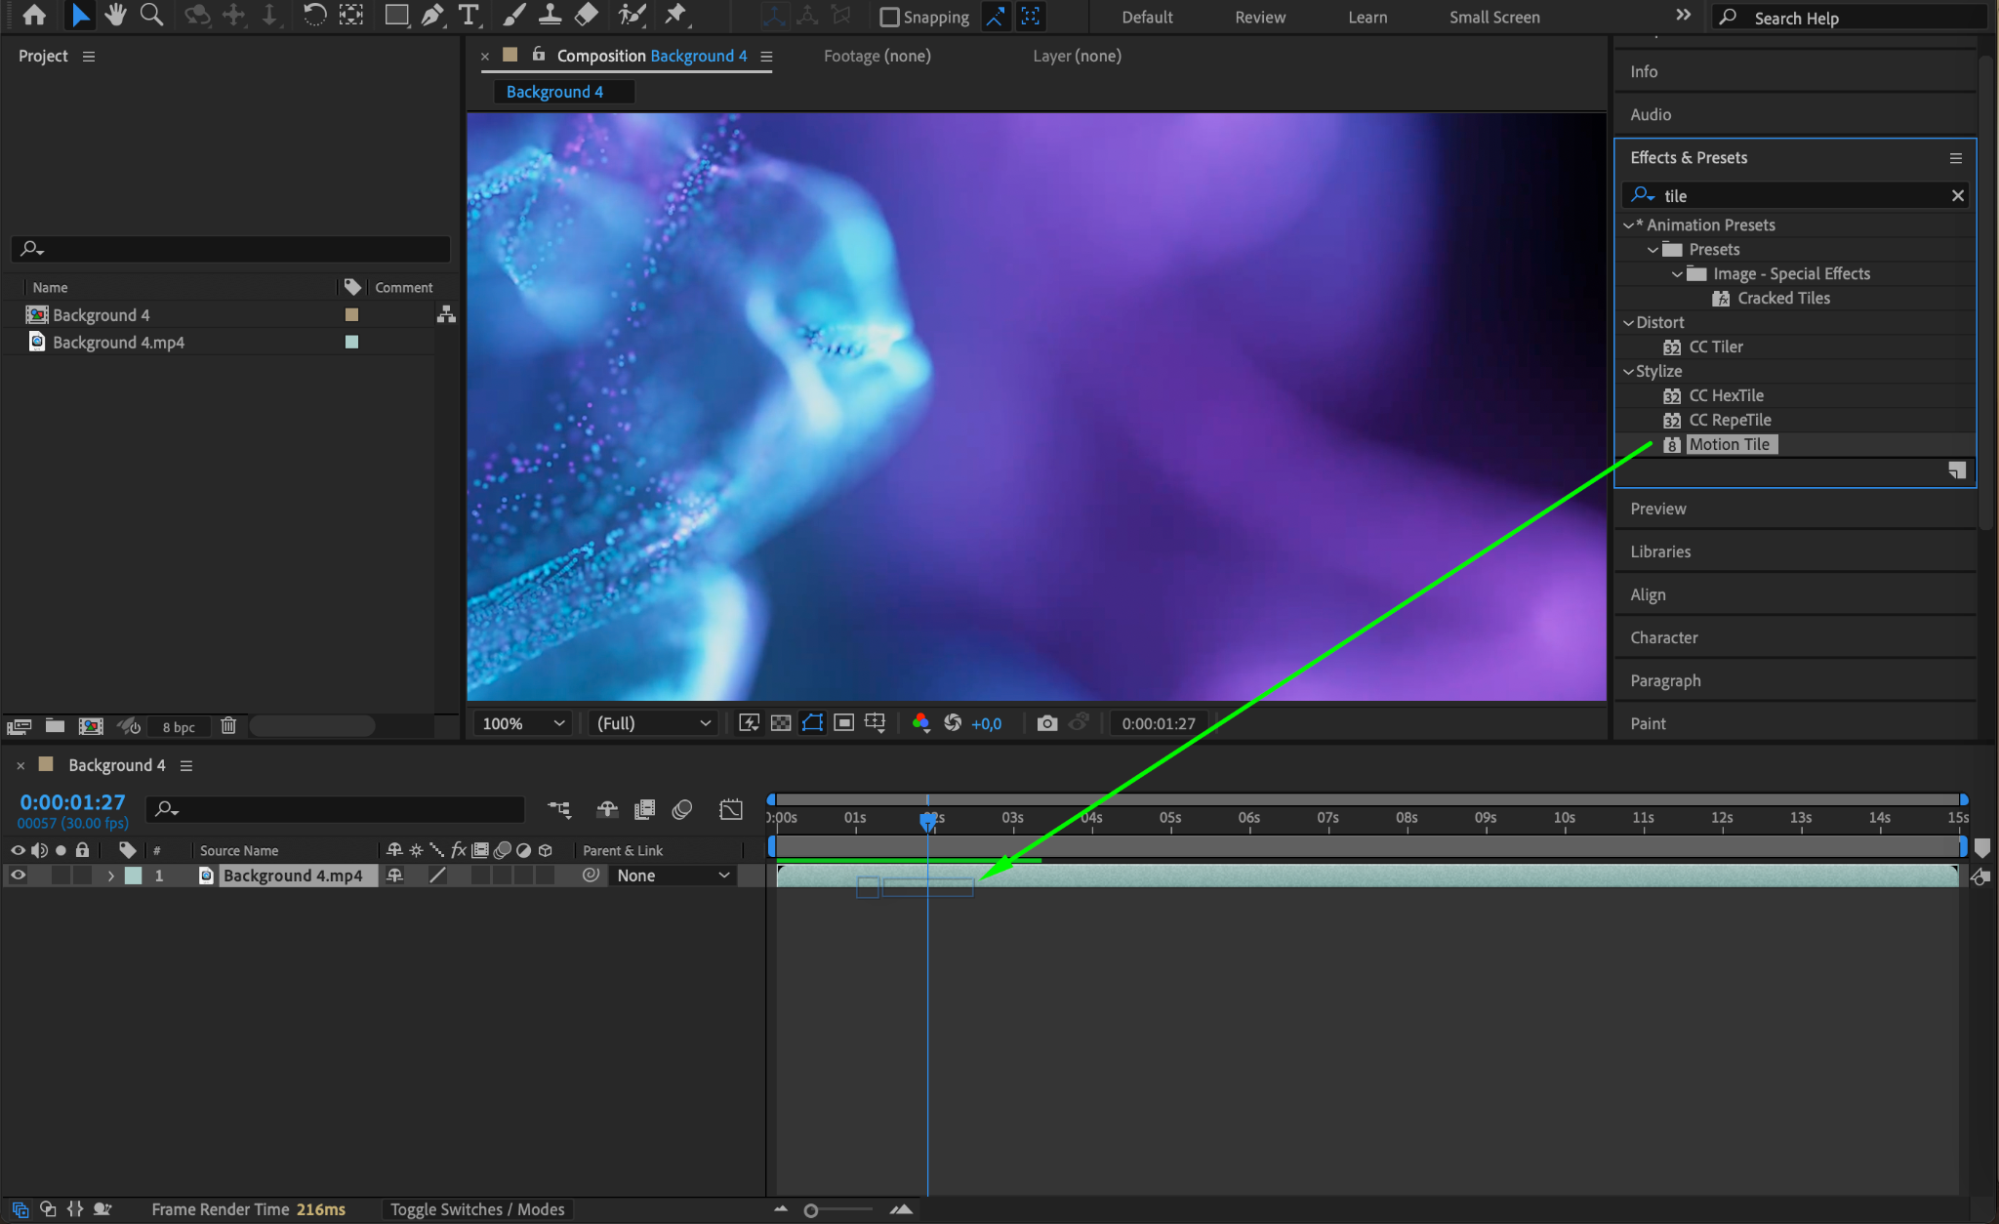 Step 3: Adjust the Output Width and Height
In the Effect Controls panel, locate the Output Width and Output Height settings. Increasing these values will expand your footage horizontally and vertically, allowing the image to repeat across the screen. This is especially useful for extending backgrounds seamlessly or creating patterned effects. Experiment with these values until the footage fills the desired area of your composition.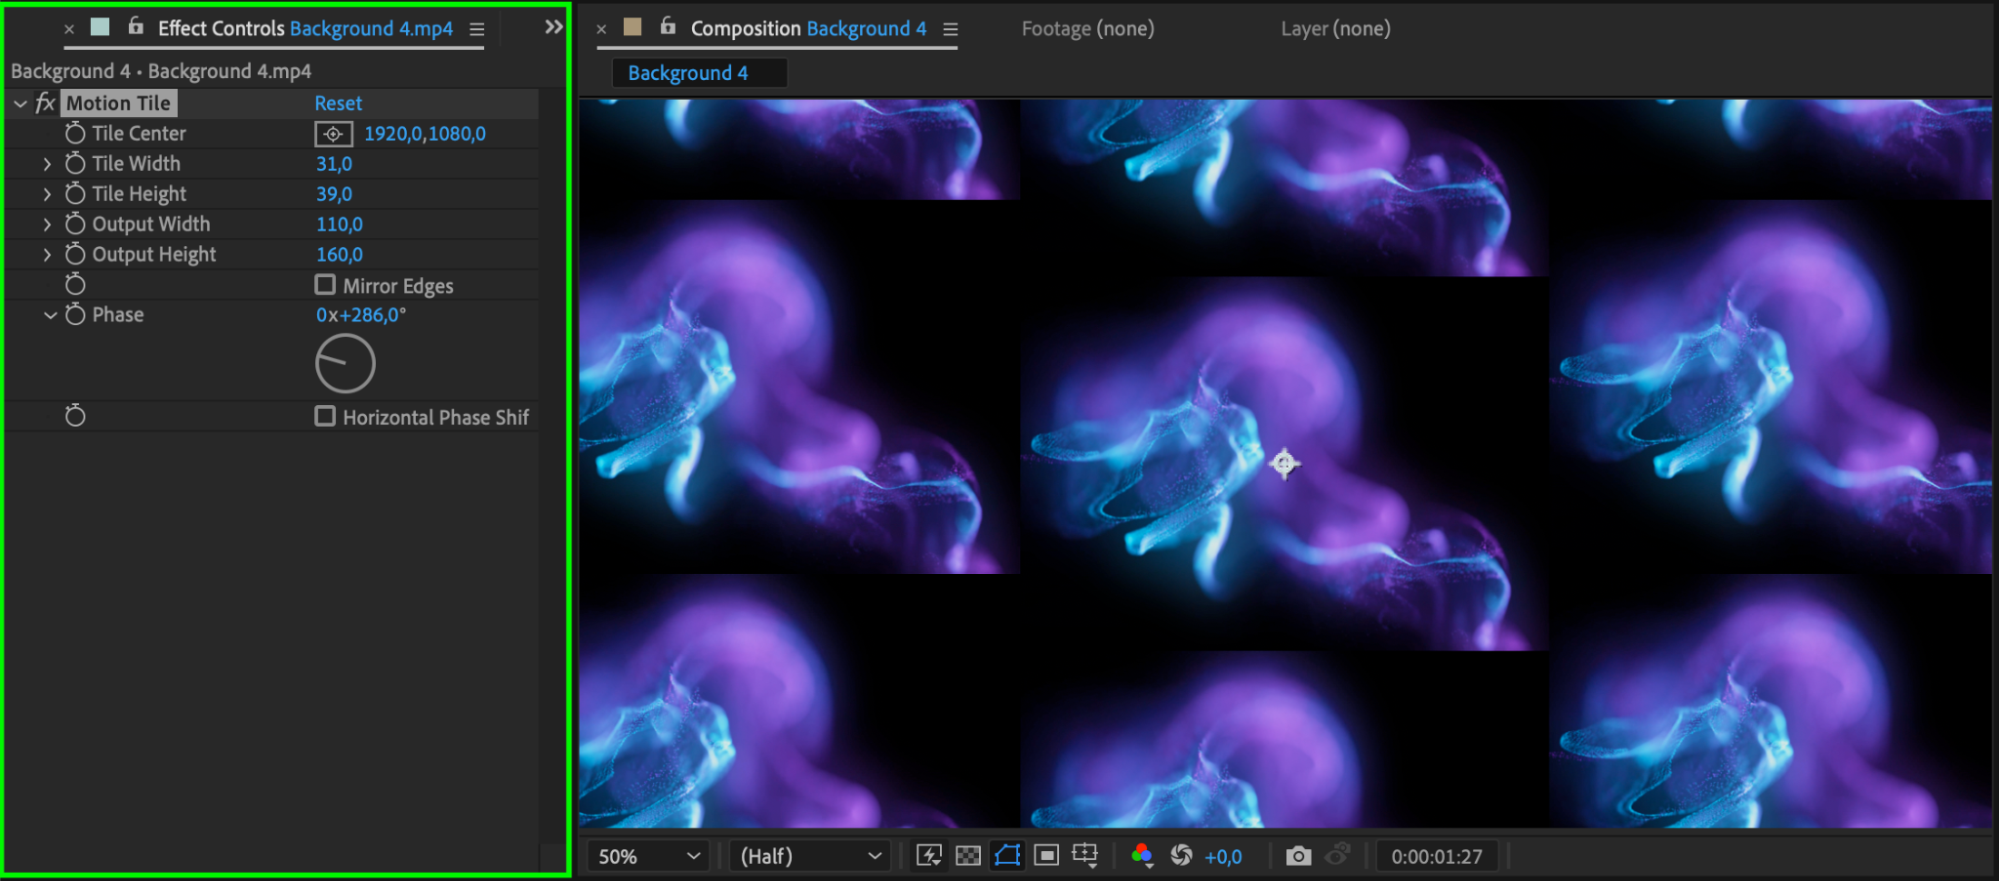 Step 4: Enable Mirror Edges for Seamless Tiling
Get 10% off when you subscribe to our newsletter

To create a smooth, continuous pattern without visible edges, enable the Mirror Edges option in the Effect Controls panel. This feature mirrors the footage along the borders, ensuring the tiled image flows seamlessly. Mirror Edges is especially useful for creating infinite looping effects or filling backgrounds without harsh breaks between tiles.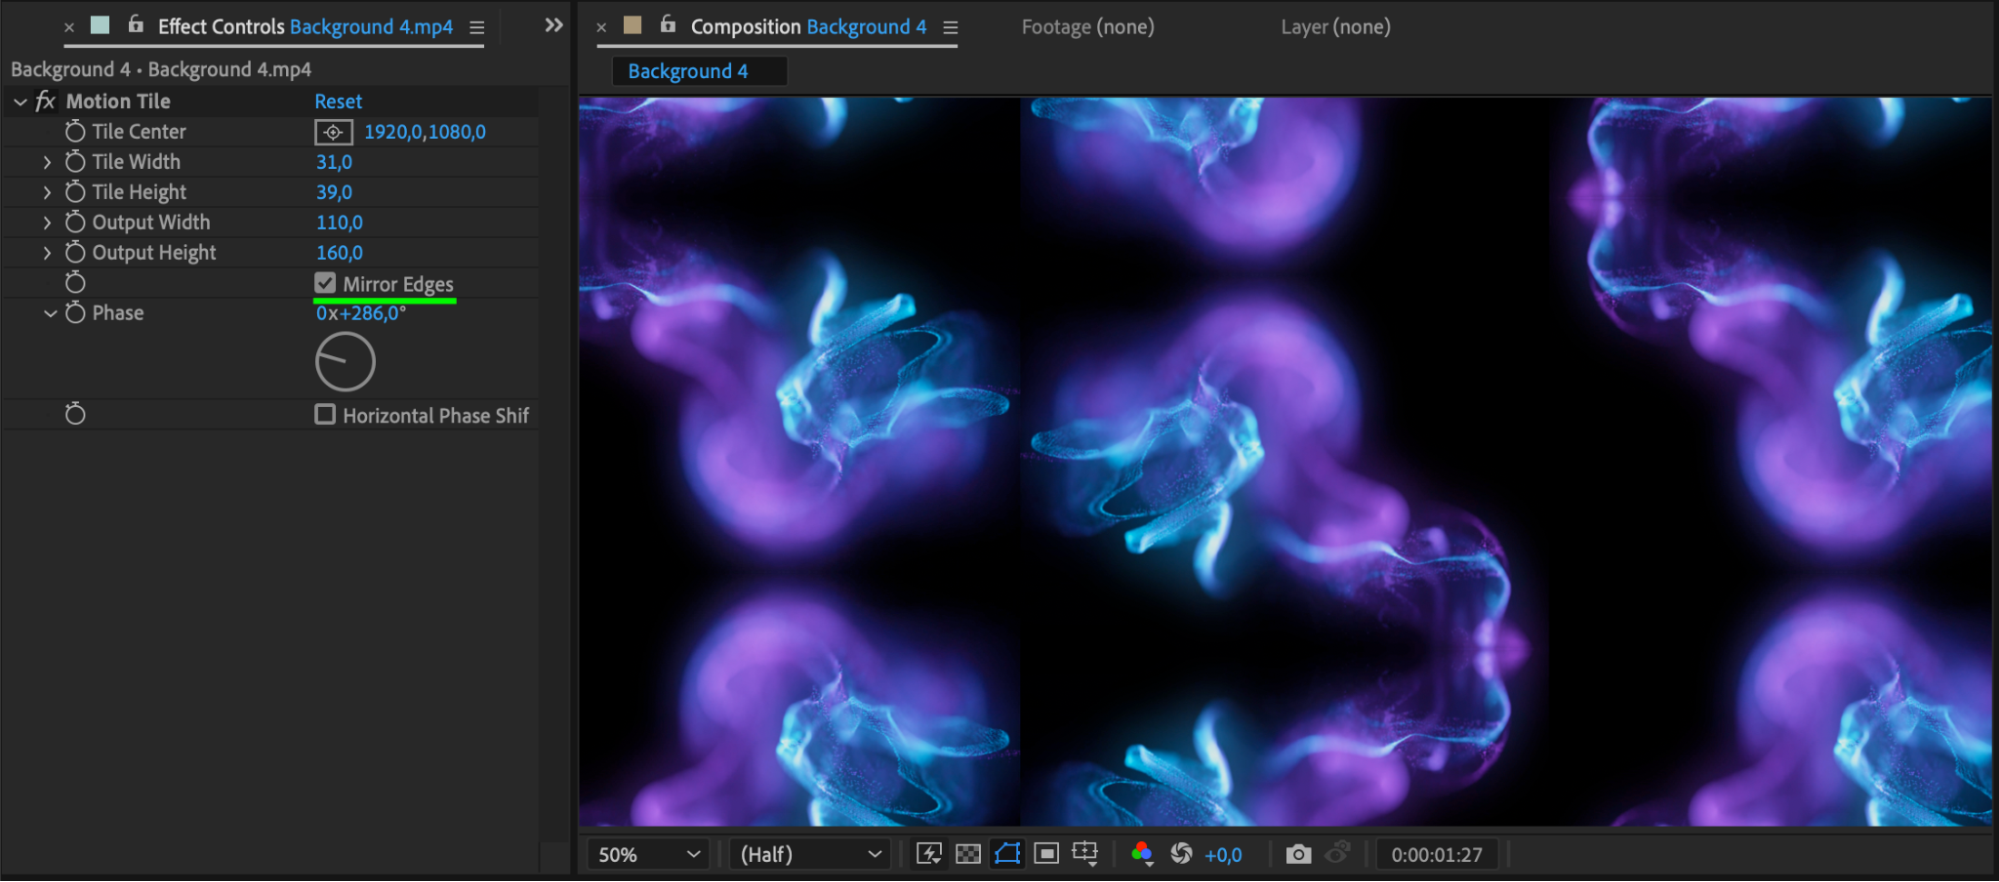 Step 5: Animate the Tile Center for Dynamic Effects
Get 10% off when you subscribe to our newsletter

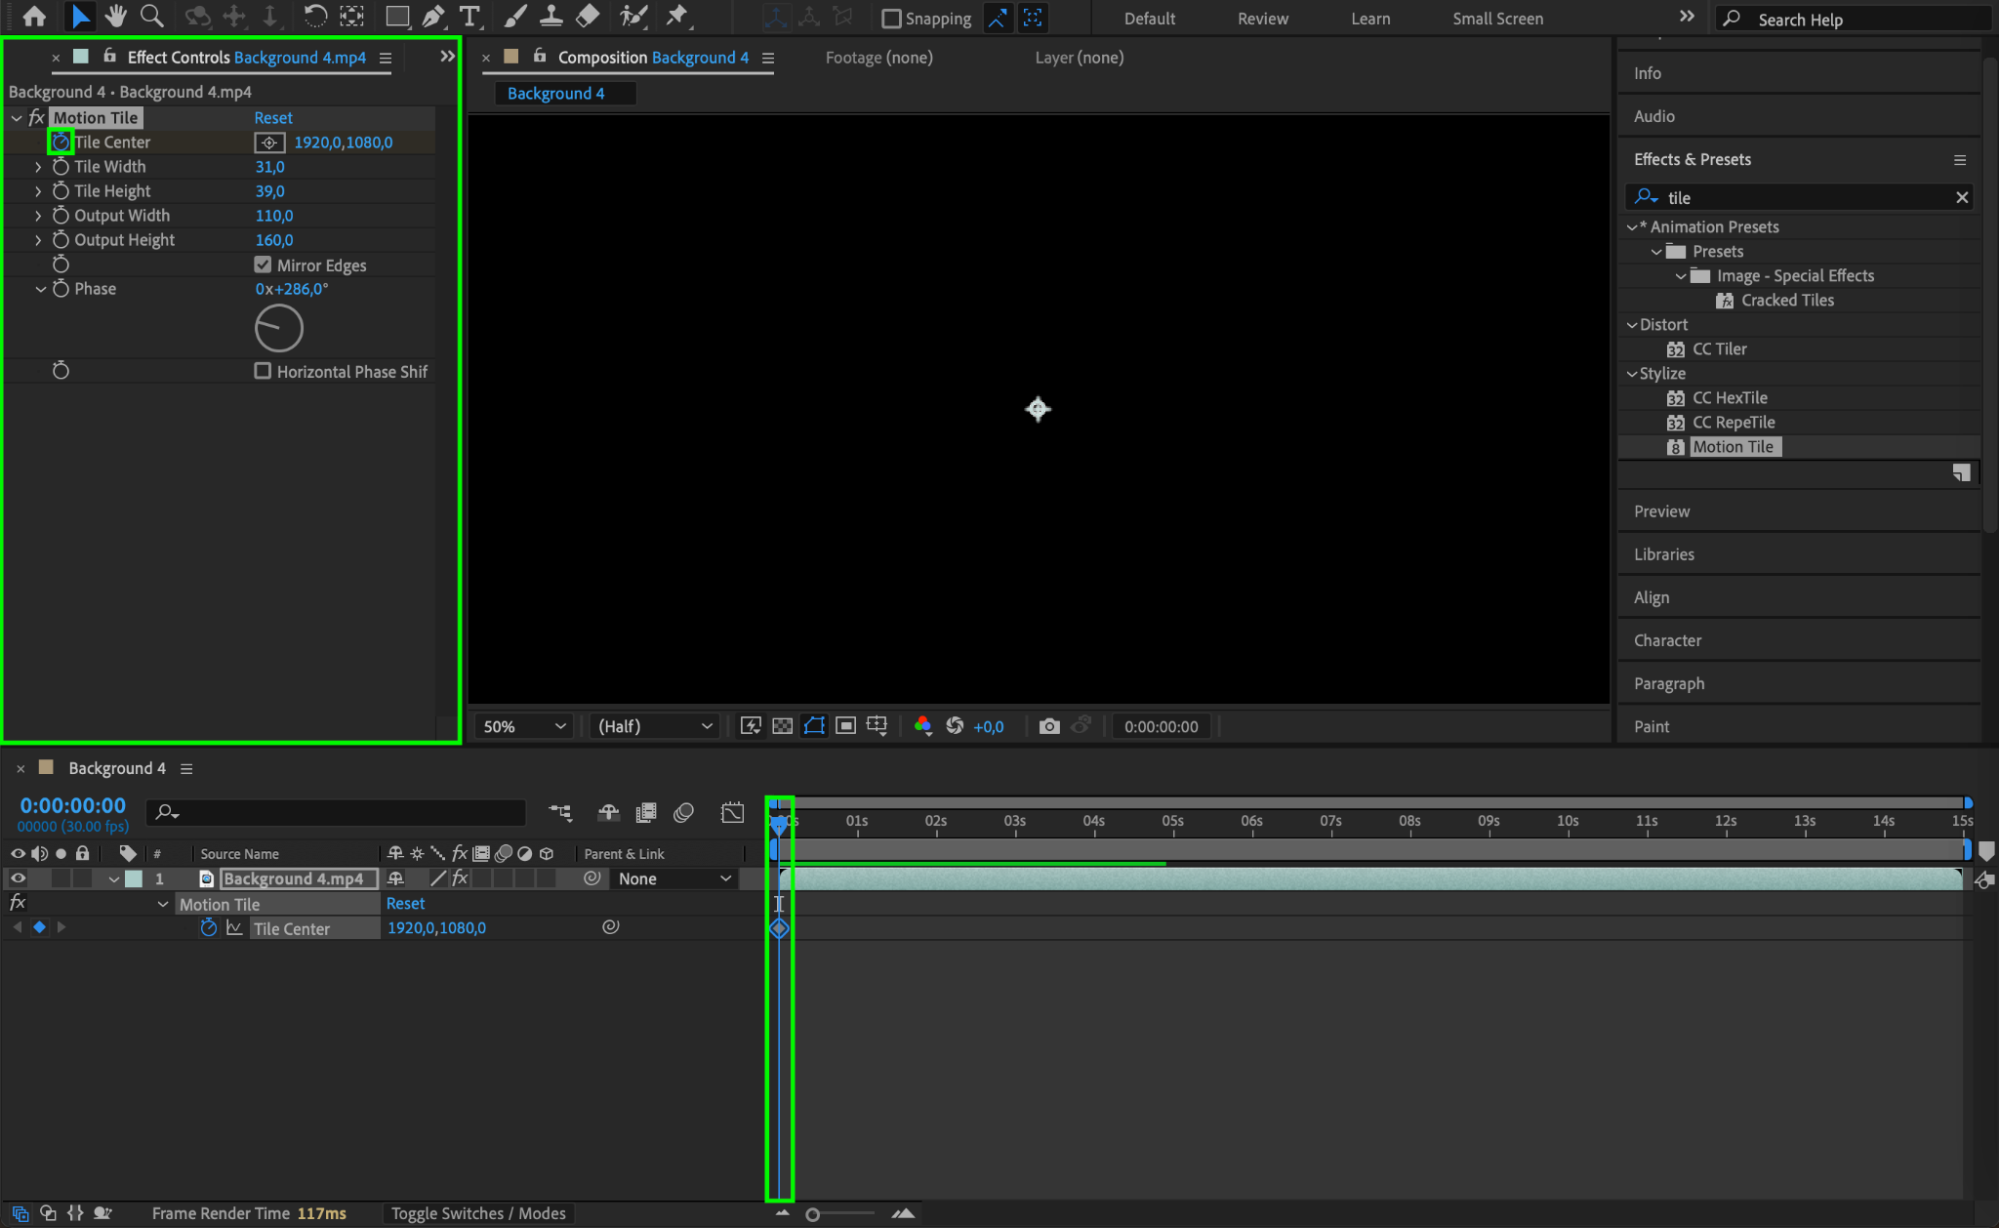
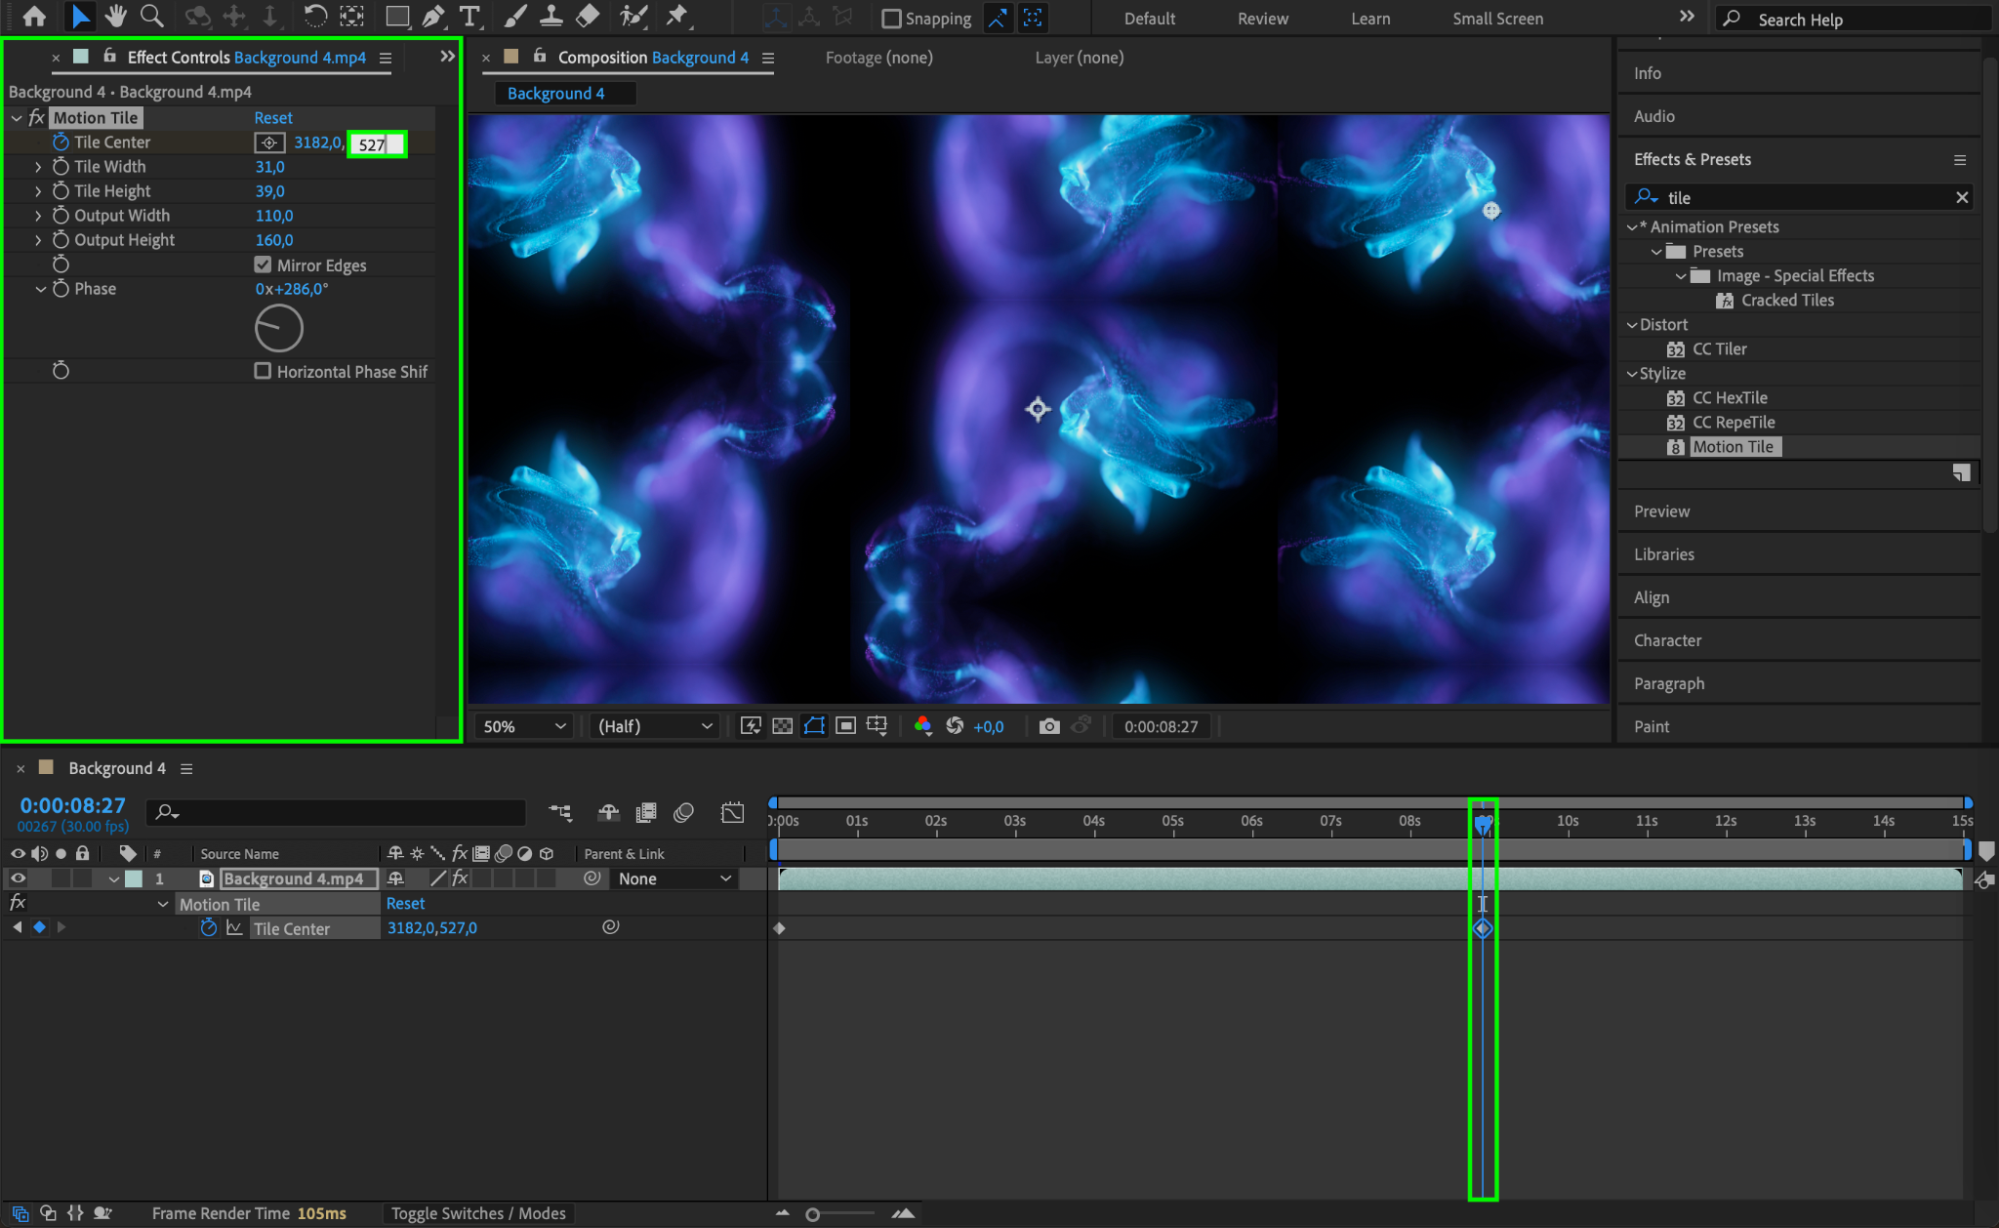
For a more engaging effect, you can animate the Tile Center to create movement within your pattern. Toggle the stopwatch next to Tile Center in the Effect Controls to set a keyframe at the beginning of the timeline. Move to another point in the timeline and adjust the Tile Center position, creating an animation that will make your footage scroll or shift. This technique adds motion to backgrounds or elements, giving your project a dynamic touch.
 Step 6: Preview and Fine-Tune the Effect
After setting up the Motion Tile effect, preview your work by pressing Spacebar to play back the timeline. Review the tiled and mirrored areas, making any final adjustments to Output Width, Height, and Tile Center animations to ensure a cohesive look. Fine-tuning these parameters helps create a polished result that aligns well with your project’s visual style.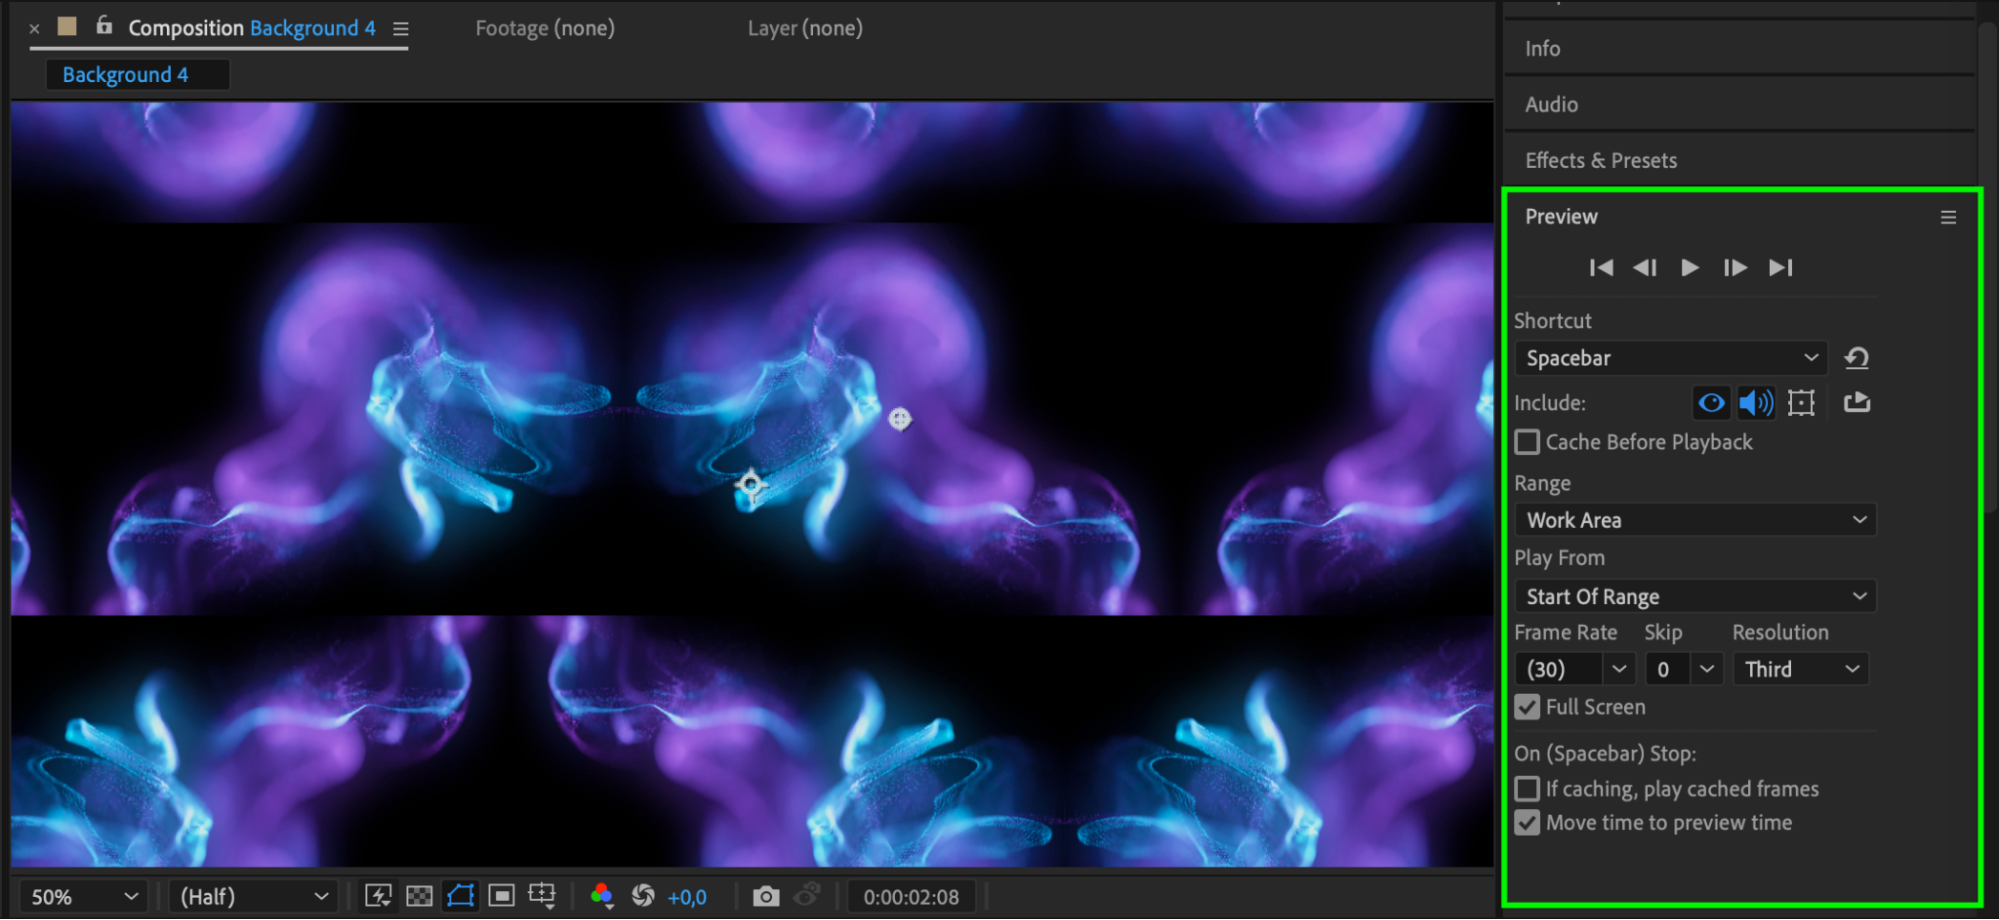 Step 7: Save Your Project
Get 10% off when you subscribe to our newsletter

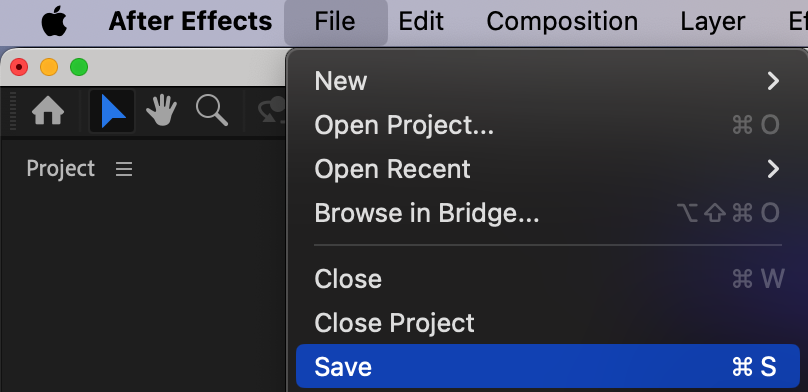
When you’re satisfied with the effect, save your project by going to File > Save or using the shortcut “Ctrl/Cmd + S”. Regularly saving your work preserves your progress and ensures your Motion Tile customizations are safe.
Conclusion
The Motion Tile effect in After Effects is a powerful tool for extending and enhancing your footage with seamless tiling and mirroring. By following these steps, you can master the Motion Tile effect, applying it to backgrounds, transitions, and other elements to achieve dynamic, visually compelling compositions.


