Exploring the Roto Brush Tool in After Effects
Introduction: Unleashing the Power of the Roto Brush in After Effects
Let’s talk about the Roto Brush tool in After Effects. If you’re a video designer, you know the importance of creating precise masks. Whether it’s isolating subjects, removing unwanted elements, or adding visual effects, accurate masking is key to achieving professional-looking results. And that’s where the Roto Brush comes in.
The Roto Brush is a game-changer. It simplifies the process of creating precise masks by automatically detecting edges in your video clips. With this tool, video editors and motion graphics artists can effortlessly separate foreground subjects from backgrounds with unmatched precision and speed. It’s a must-have in your toolkit.
In this guide, we’ll cover everything you need to know about using the Roto Brush effectively in After Effects. We’ll start with the basics and work our way up to advanced techniques. So, whether you’re a beginner or a pro looking to level up your masking skills, get ready to unlock the full potential of the Roto Brush in After Effects. Let’s get started!
Understanding the Roto Brush Workflow in After Effects
The Roto Brush tool in After Effects offers an efficient way to create and refine masks for your video footage. It saves you time and effort with its automatic edge detection and user-friendly interface. Here’s a breakdown of how to use the Roto Brush effectively:
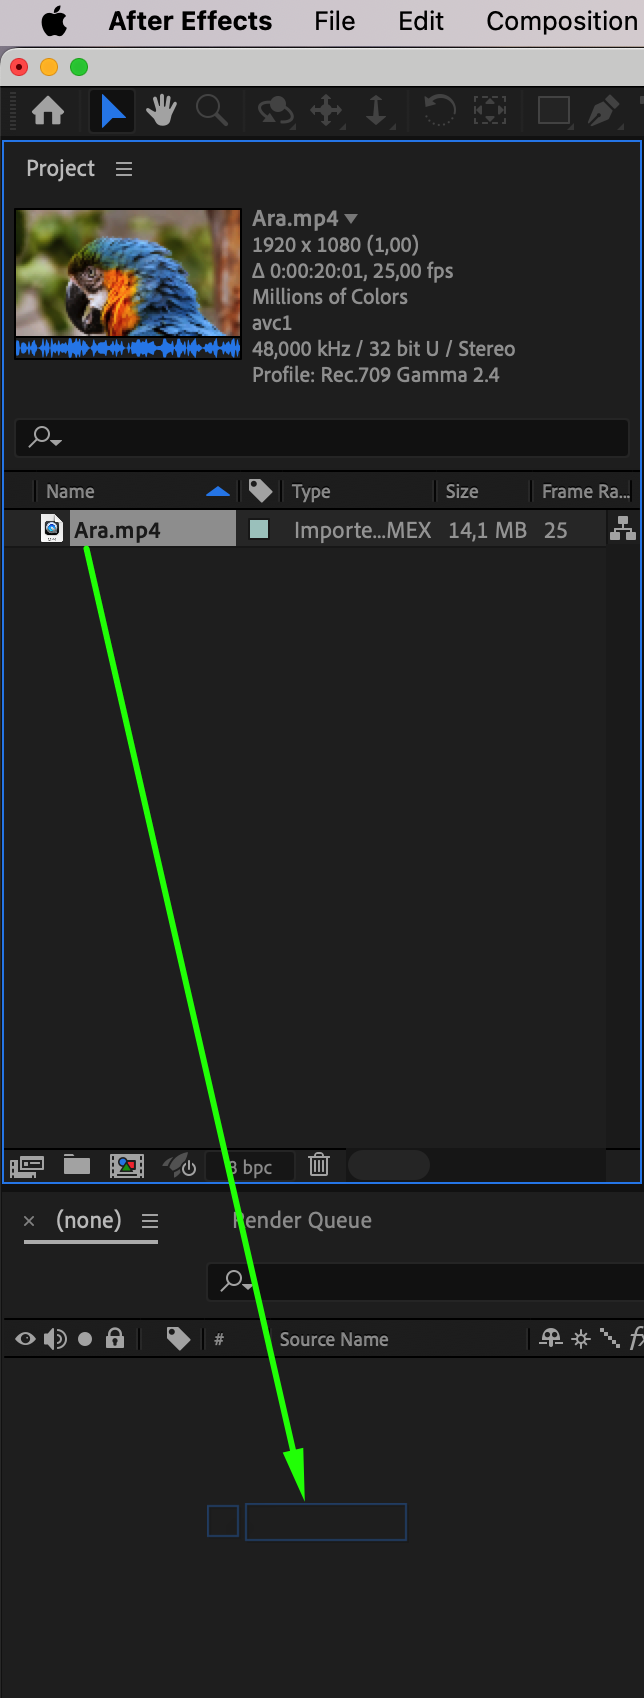
1. Import and Prepare Your Footage:
Before you do anything else, import your footage into After Effects and drag the file onto the timeline panel. Make sure it’s clean and high-quality, with a clear subject and distinct background for better results.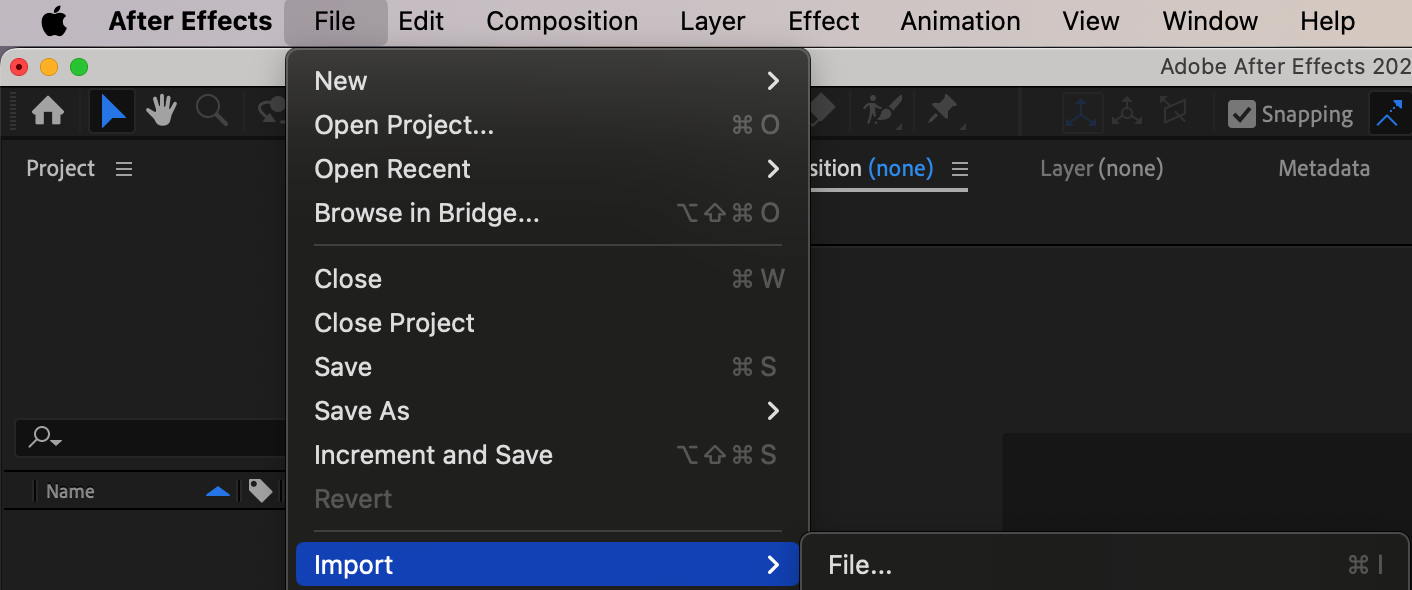
 2. Activate the Roto Brush Tool:
Get 10% off when you subscribe to our newsletter

Select the layer to which you want to apply the Roto Brush and navigate to the toolbar. Locate the Roto Brush tool or use the shortcut “Alt/Option + W”. 3. Define the Foreground and Background:
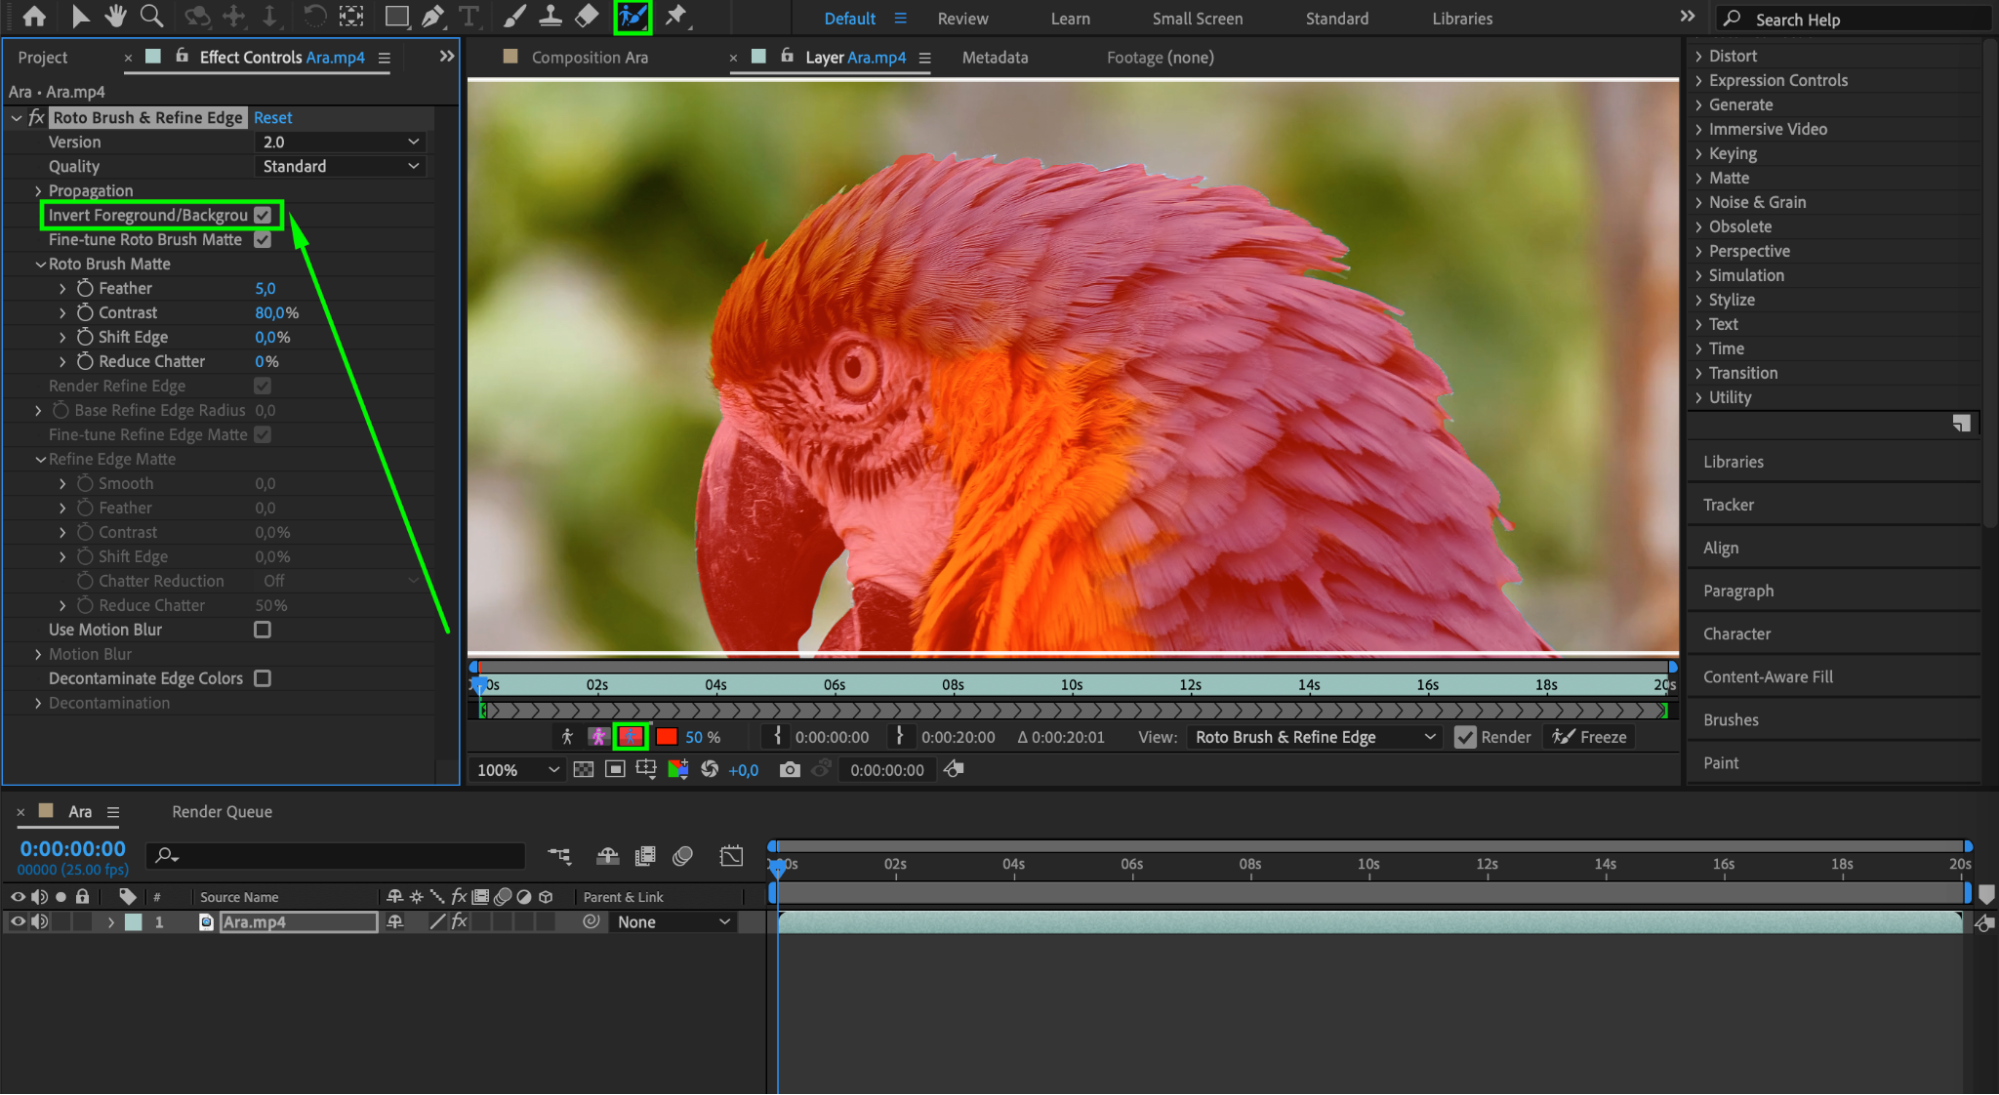
Click on the layer in the composition panel and, while holding down the left mouse button, select the object in the foreground. To precisely adjust the selection edges, use the Alt/Option key with the left mouse button to deselect areas. If you need to select the background instead, simply click the “Invert Foreground/Background” button in the Effect Controls panel to switch the selected areas.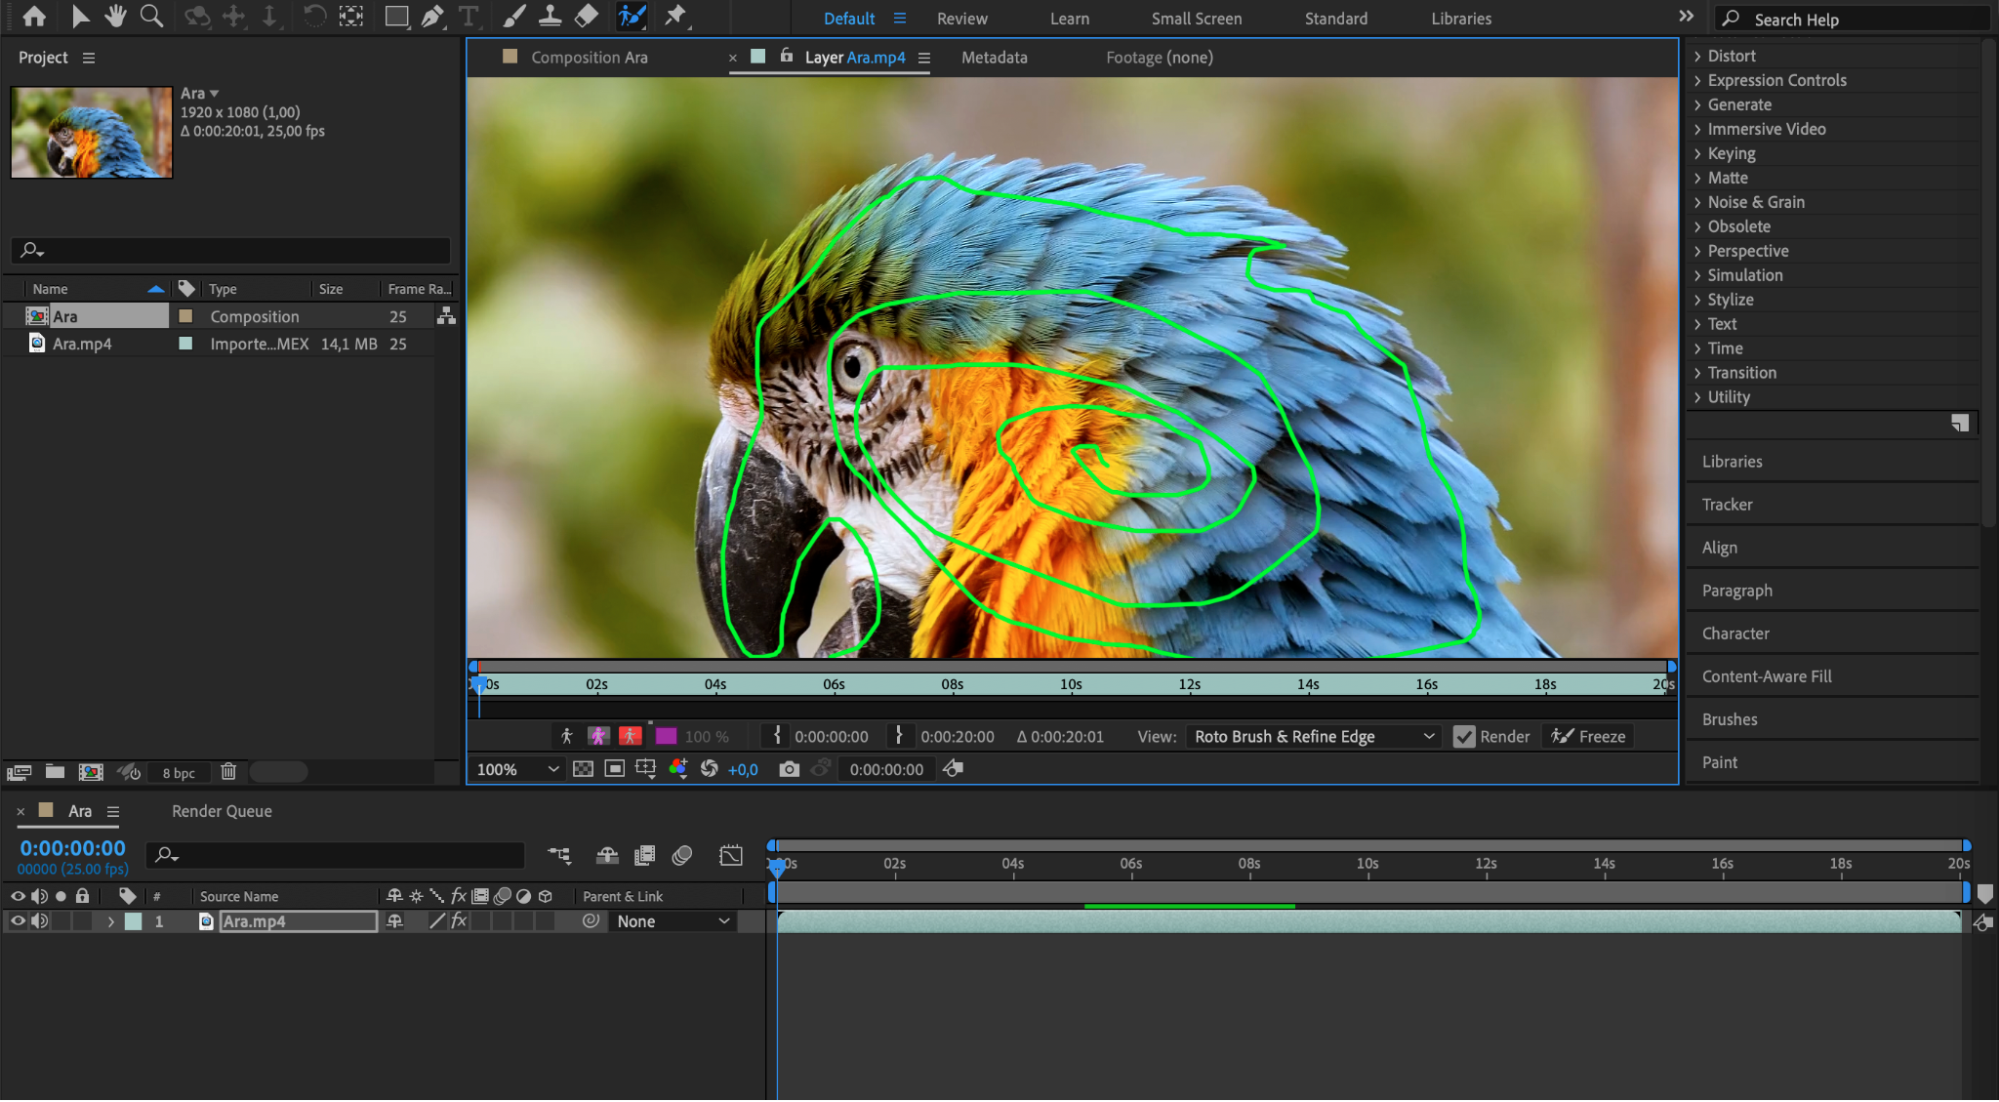
 4. Refine the Roto Brush Edges:
Get 10% off when you subscribe to our newsletter
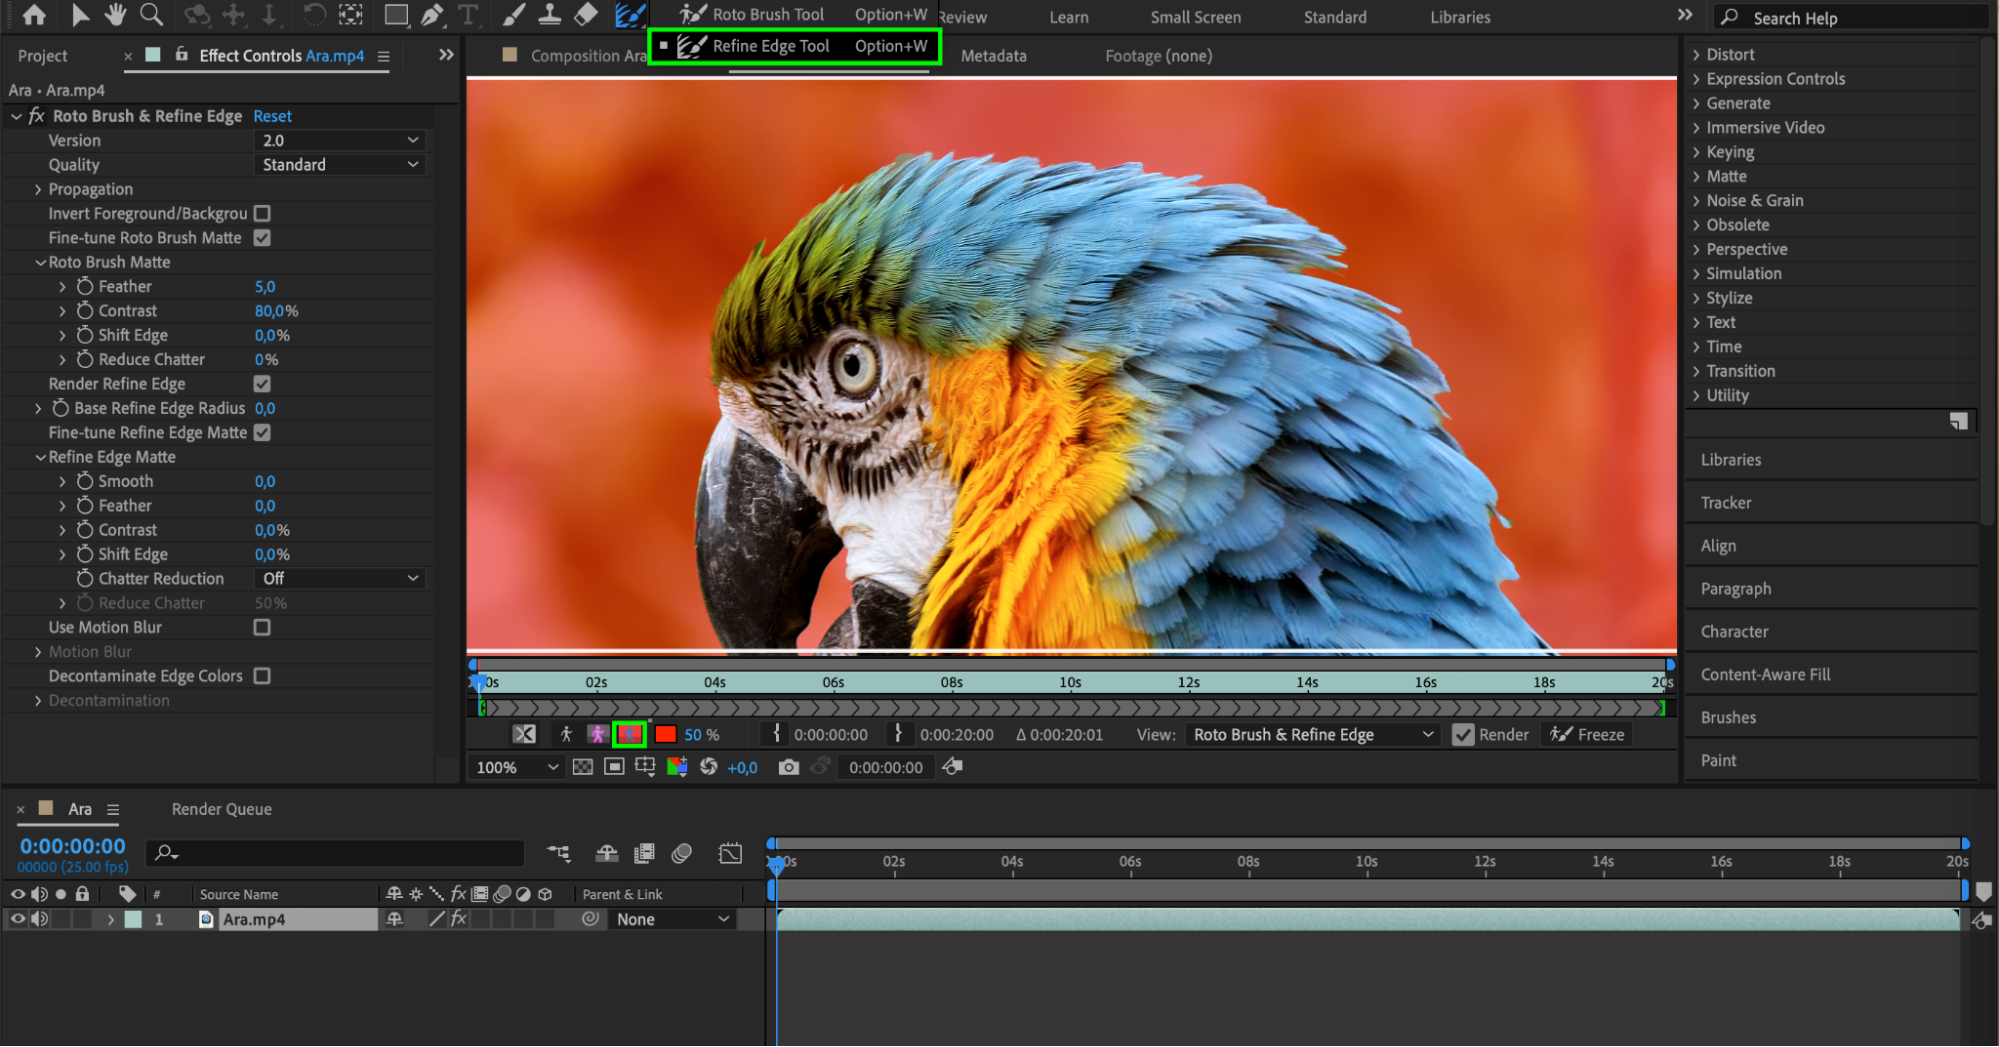
The initial Roto Brush selection may not be perfect, especially when dealing with intricate details like hair. To refine the mask, use the Refine Edge tool (Press “Alt/Option + W”) to paint over problematic areas. Pay attention to the edges and ensure they accurately follow the subject’s contours.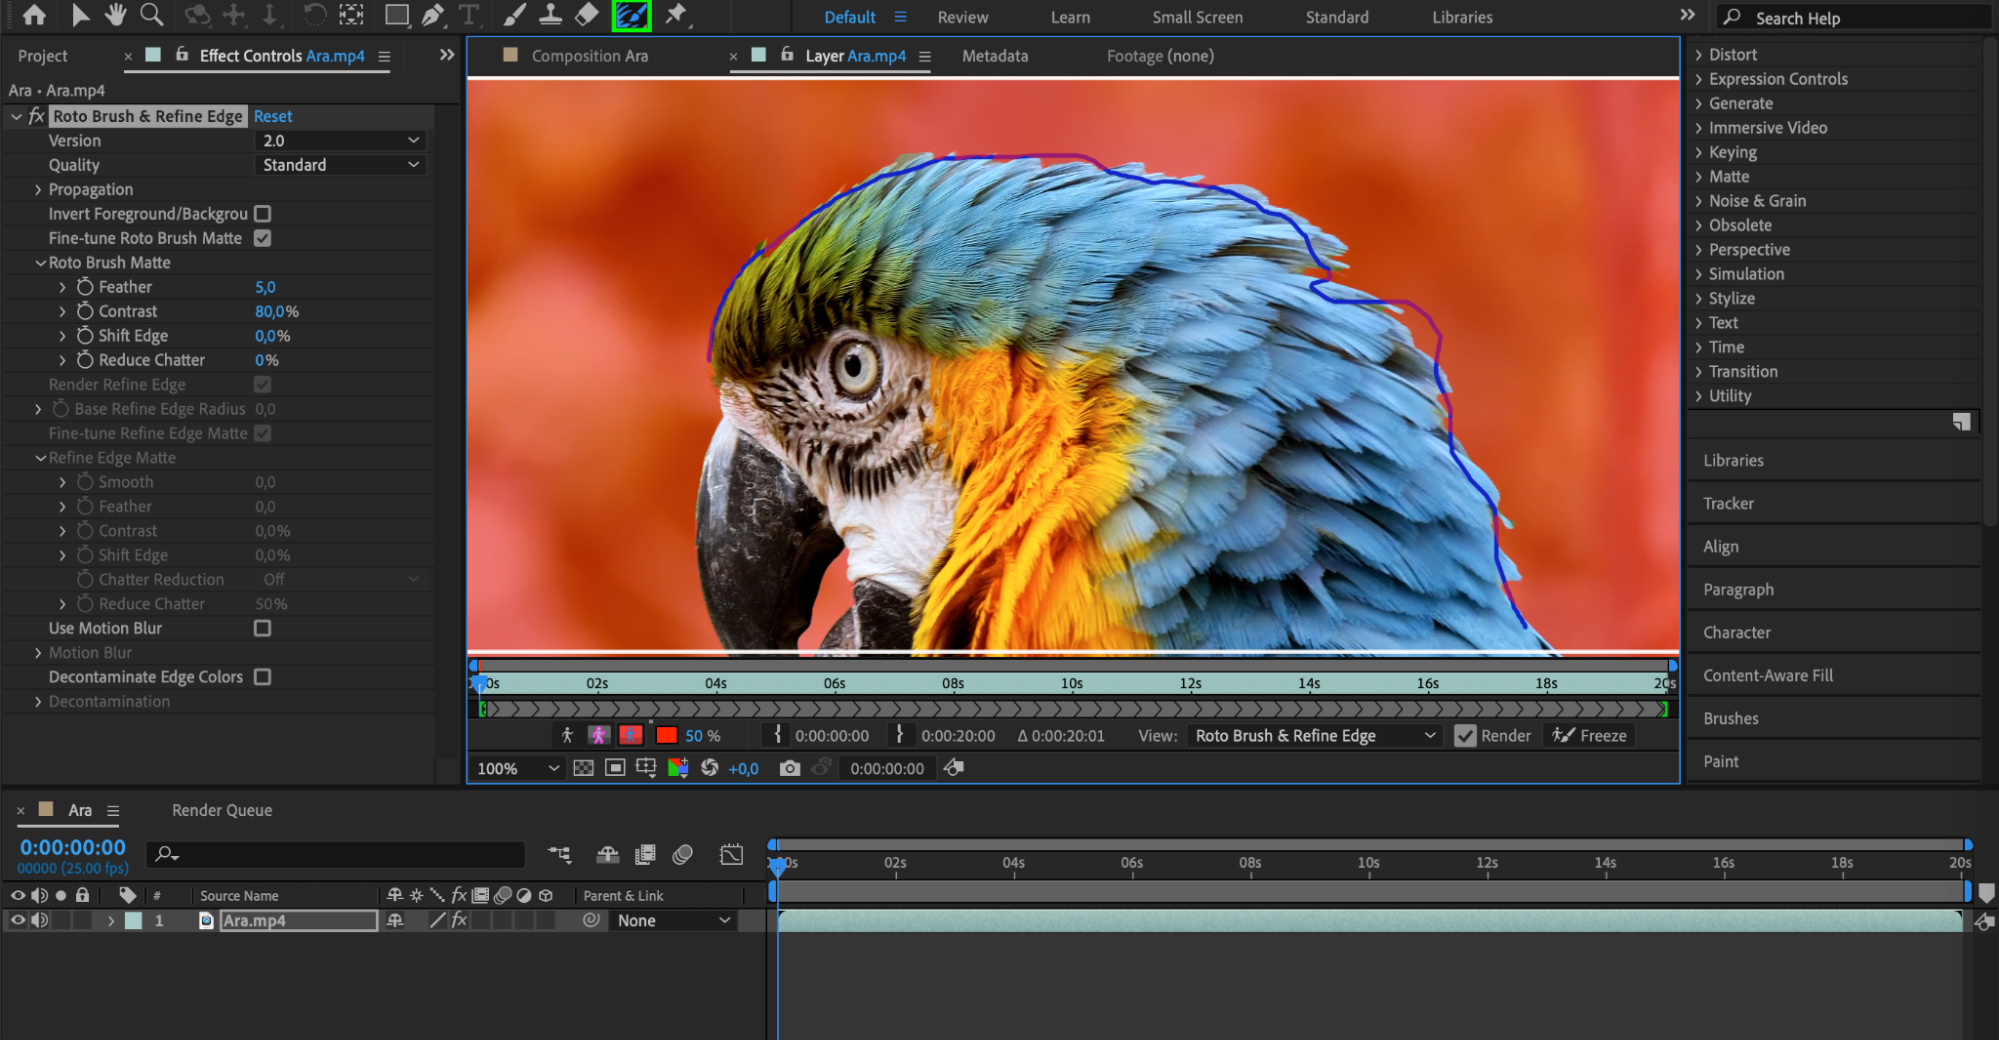
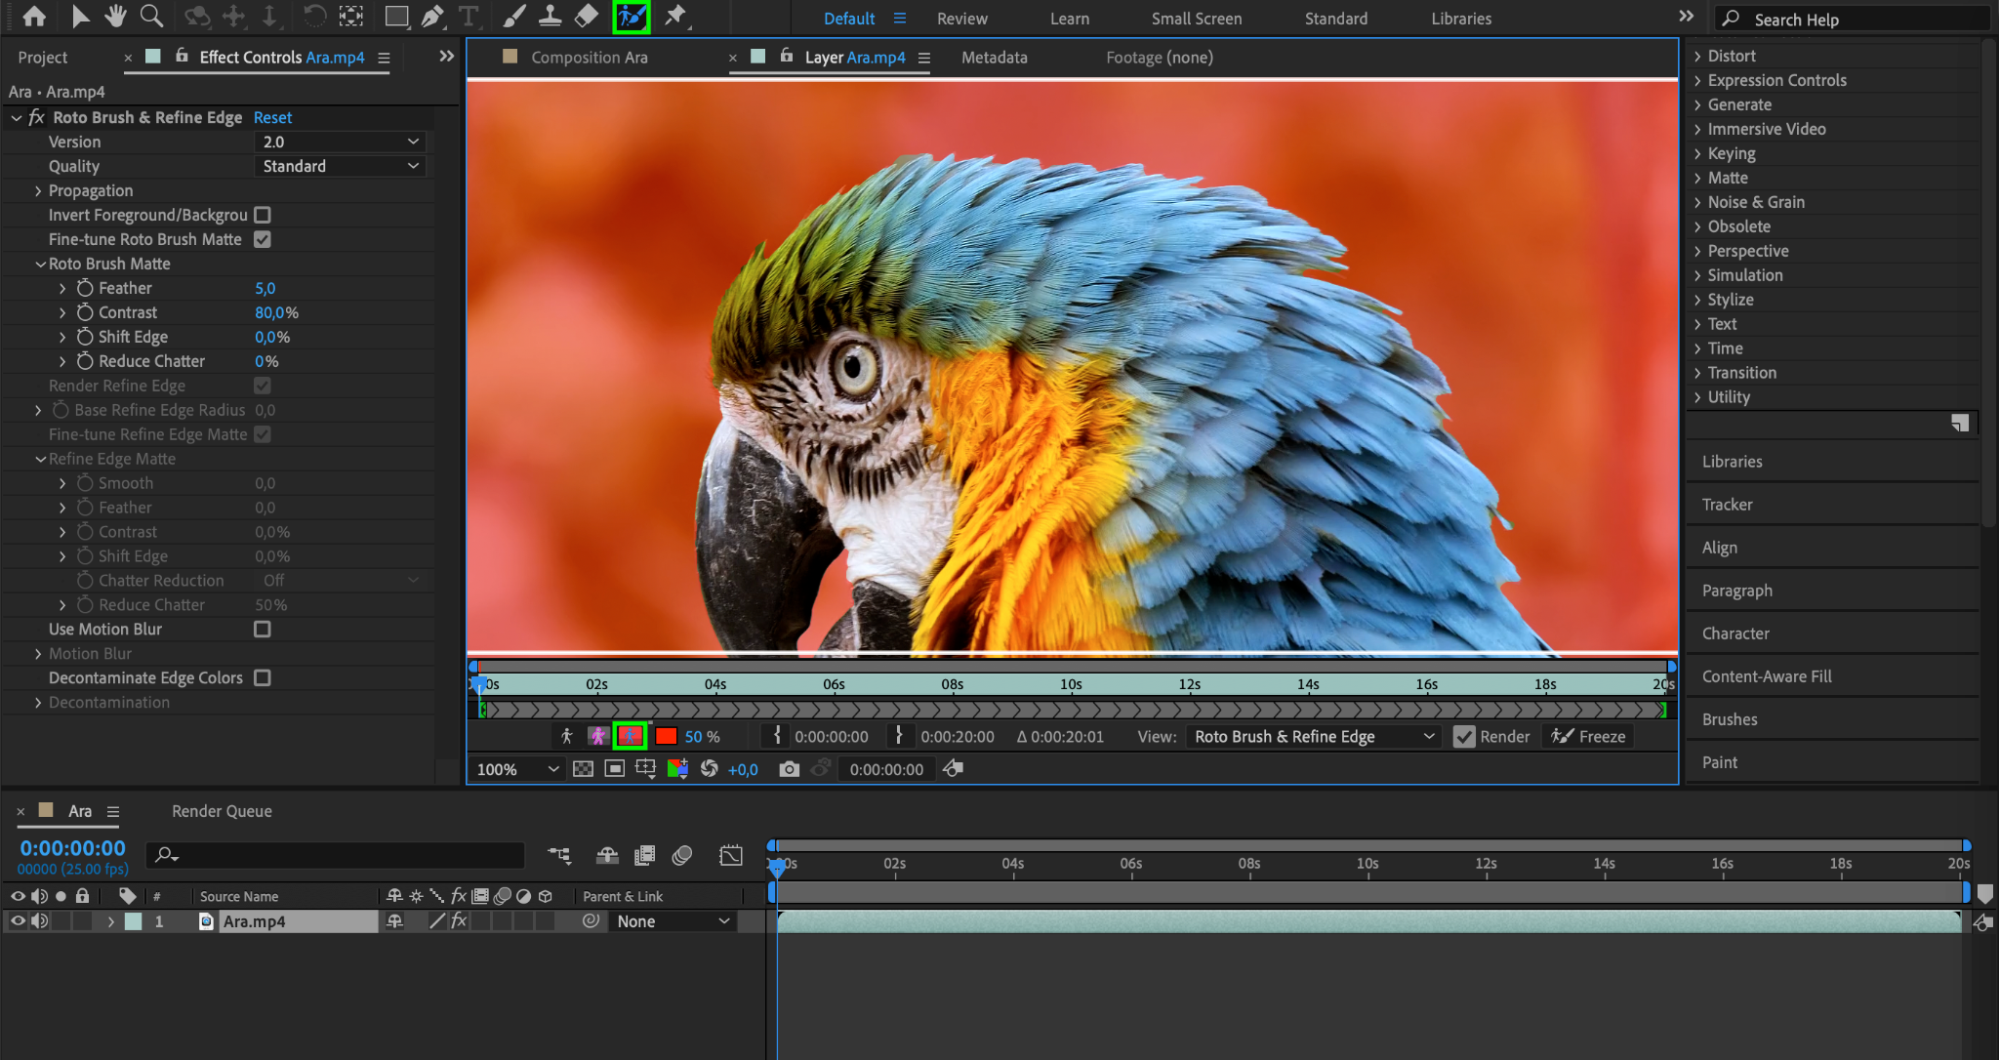
 5. Fine-Tune the Mask:
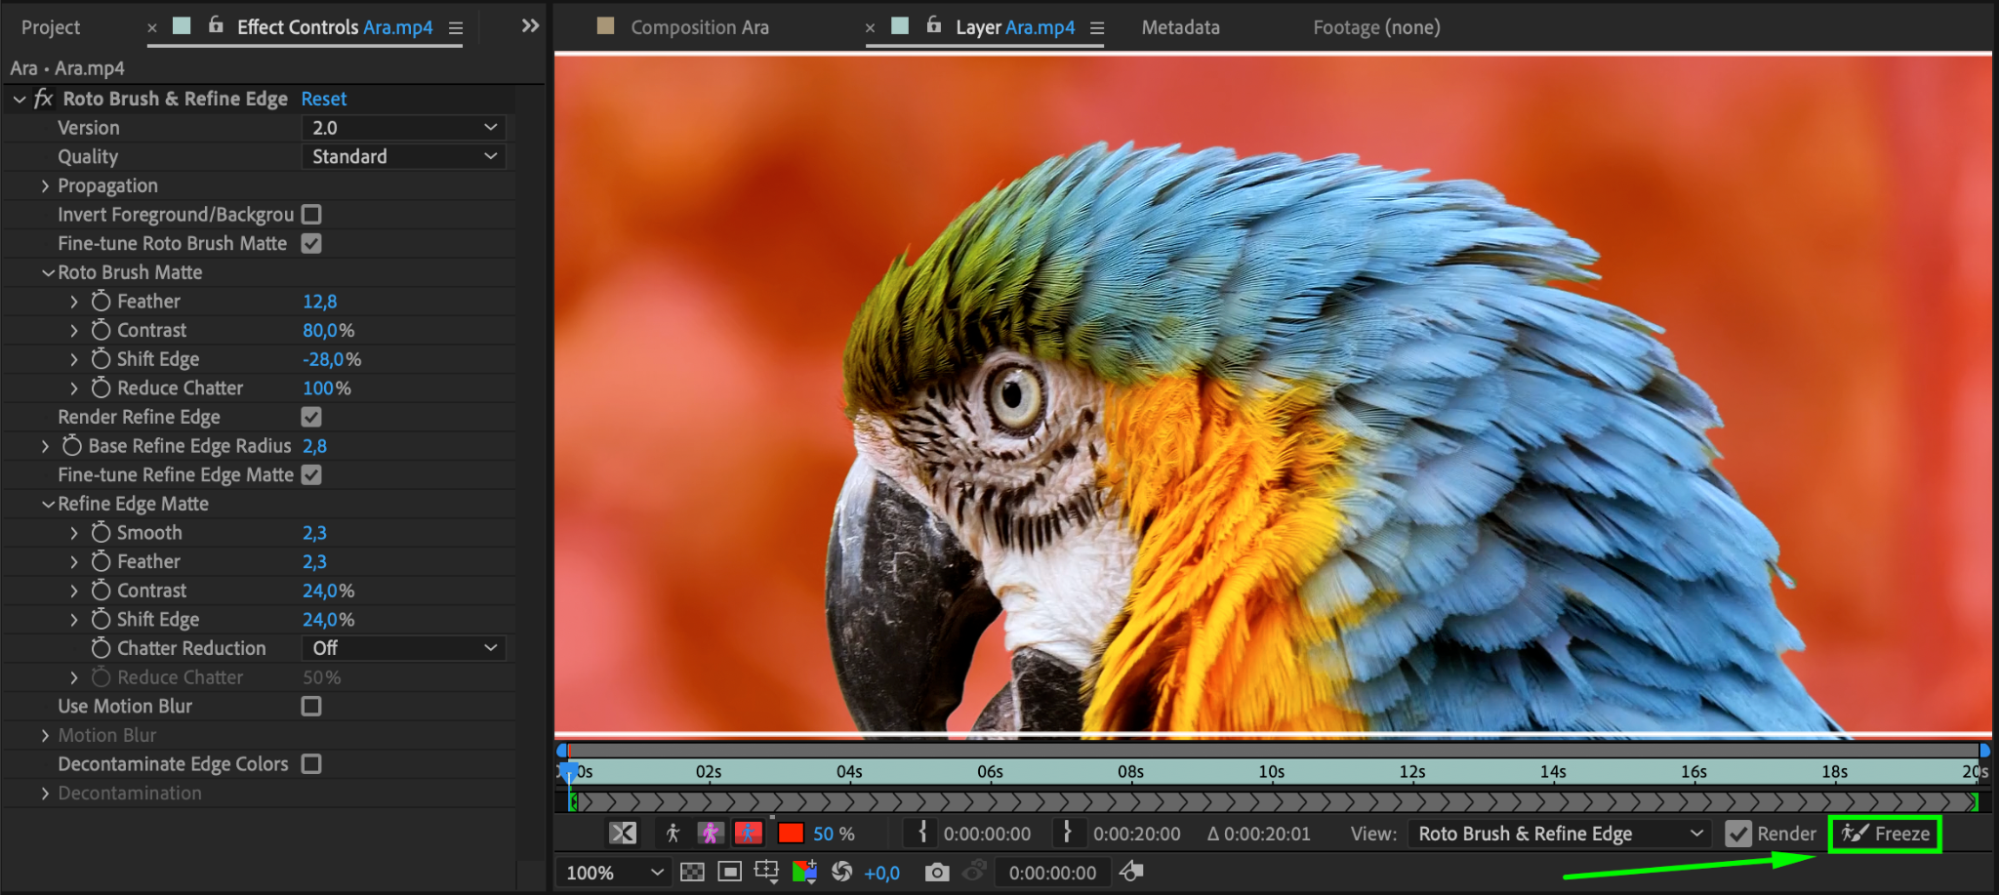
Once you’ve refined the initial Roto Brush selection, you can further enhance the mask using the Effect Controls panel. Utilize parameters such as feather, contrast, shift edge, and reduce chatter to achieve the desired mask appearance. After refining the mask edges, click on the “Freeze” button to lock in the mask and prevent further adjustments.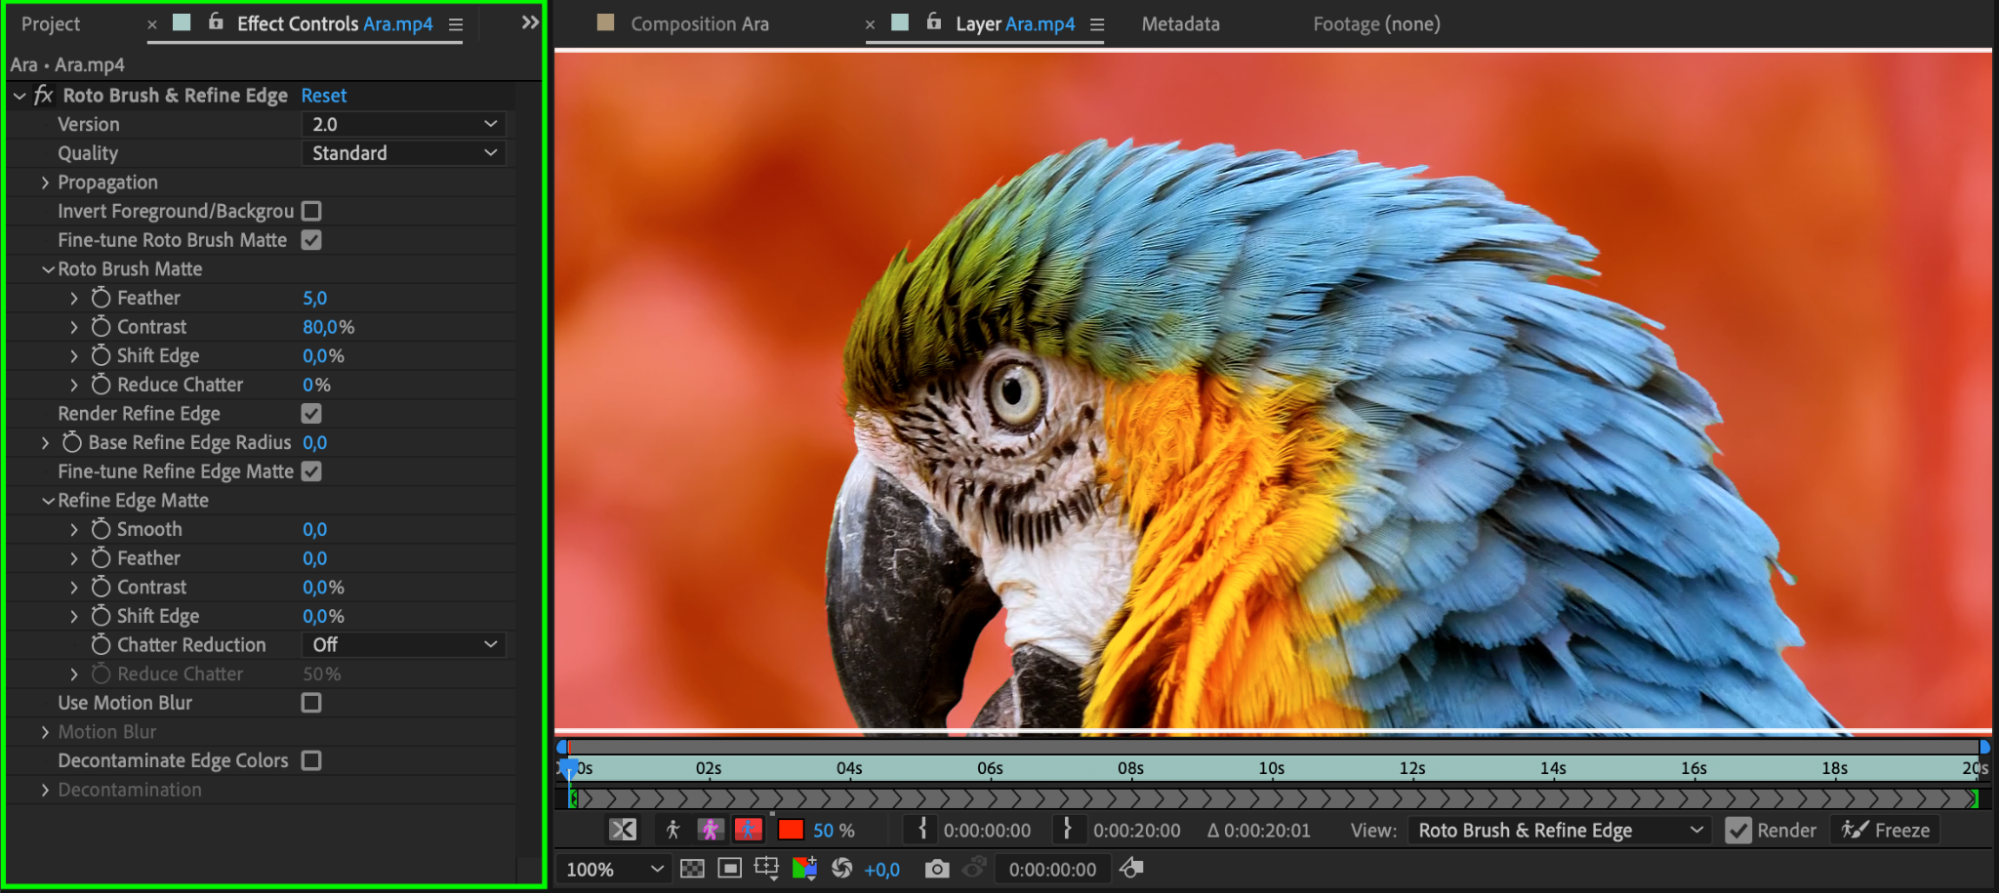
 6. Preview and Render:
Get 10% off when you subscribe to our newsletter
Press the Spacebar to preview your composite in the Composition panel. If you’re satisfied with the result, render your composition to permanently apply the Roto Brush changes.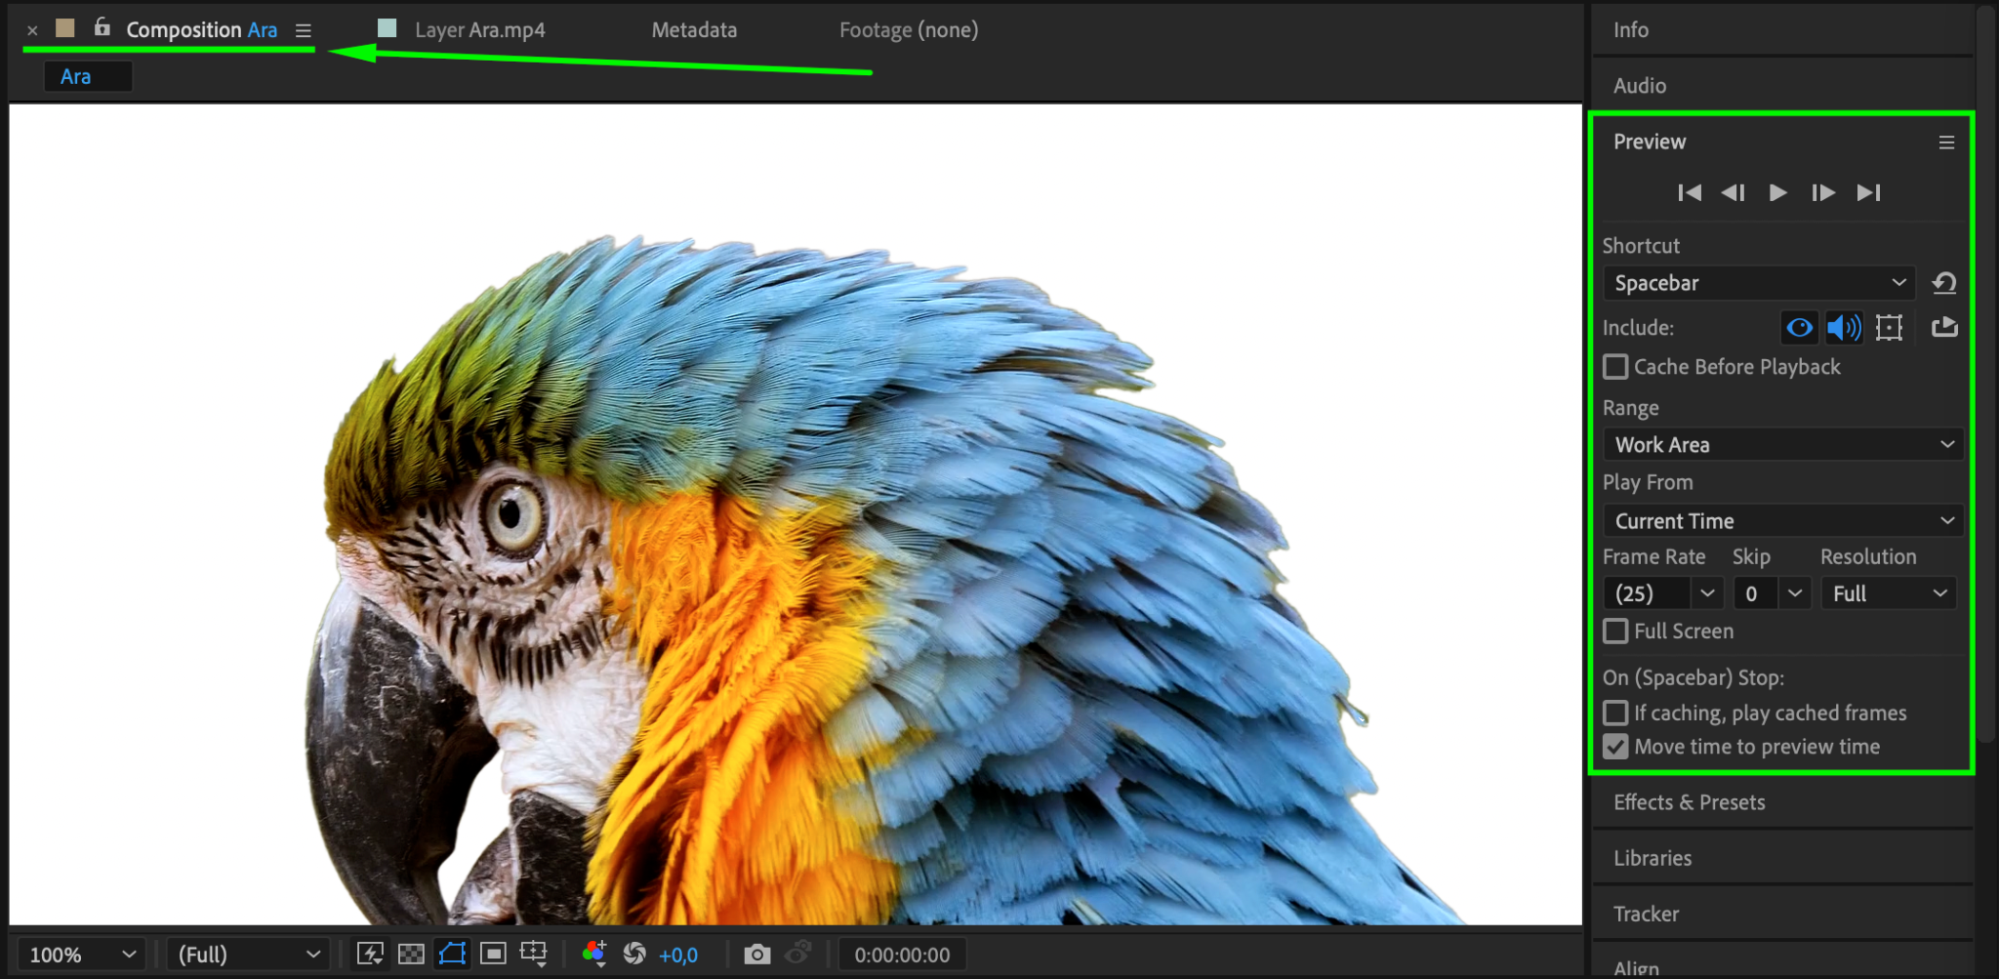 Conclusion
That’s it! By following this practical workflow, you can effectively use the Roto Brush tool in After Effects to create precise masks for your video projects. Don’t be afraid to experiment and practice with different settings. Soon enough, you’ll master the art of separating foreground subjects from complex backgrounds. Happy masking!
Our Bestsellers


