How to Use the Camera Tracker Tool in After Effects
Introduction to Camera Tracking in After Effects
The Camera Tracker in After Effects is a powerful tool that allows you to integrate virtual elements into your footage by tracking the camera movement. This feature helps you achieve realistic motion tracking effects, enhancing the quality and realism of your visuals. Whether you’re adding 3D objects, text, or other effects, mastering the Camera Tracker can significantly elevate your video and animation projects. This guide will walk you through the process of using the Camera Tracker, from importing footage to rendering the final product.
Step 1: Import Your Footage
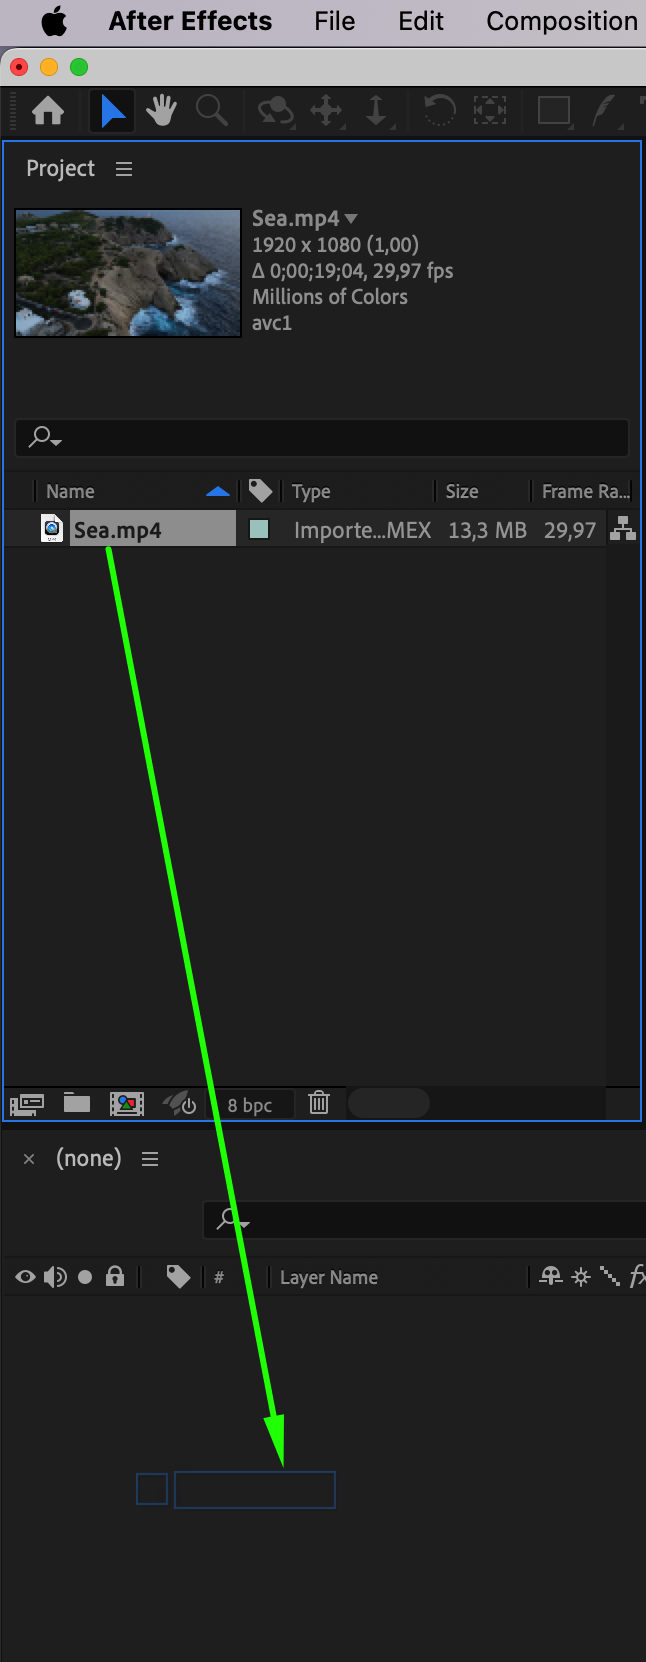
Start by importing your video file into After Effects. Go to File > Import > File and select your video file. Once the file is imported, drag it from the Project panel onto the Timeline. This is the footage you will be tracking and integrating with virtual elements.
 Step 2: Open the Tracker Panel
Get 10% off when you subscribe to our newsletter

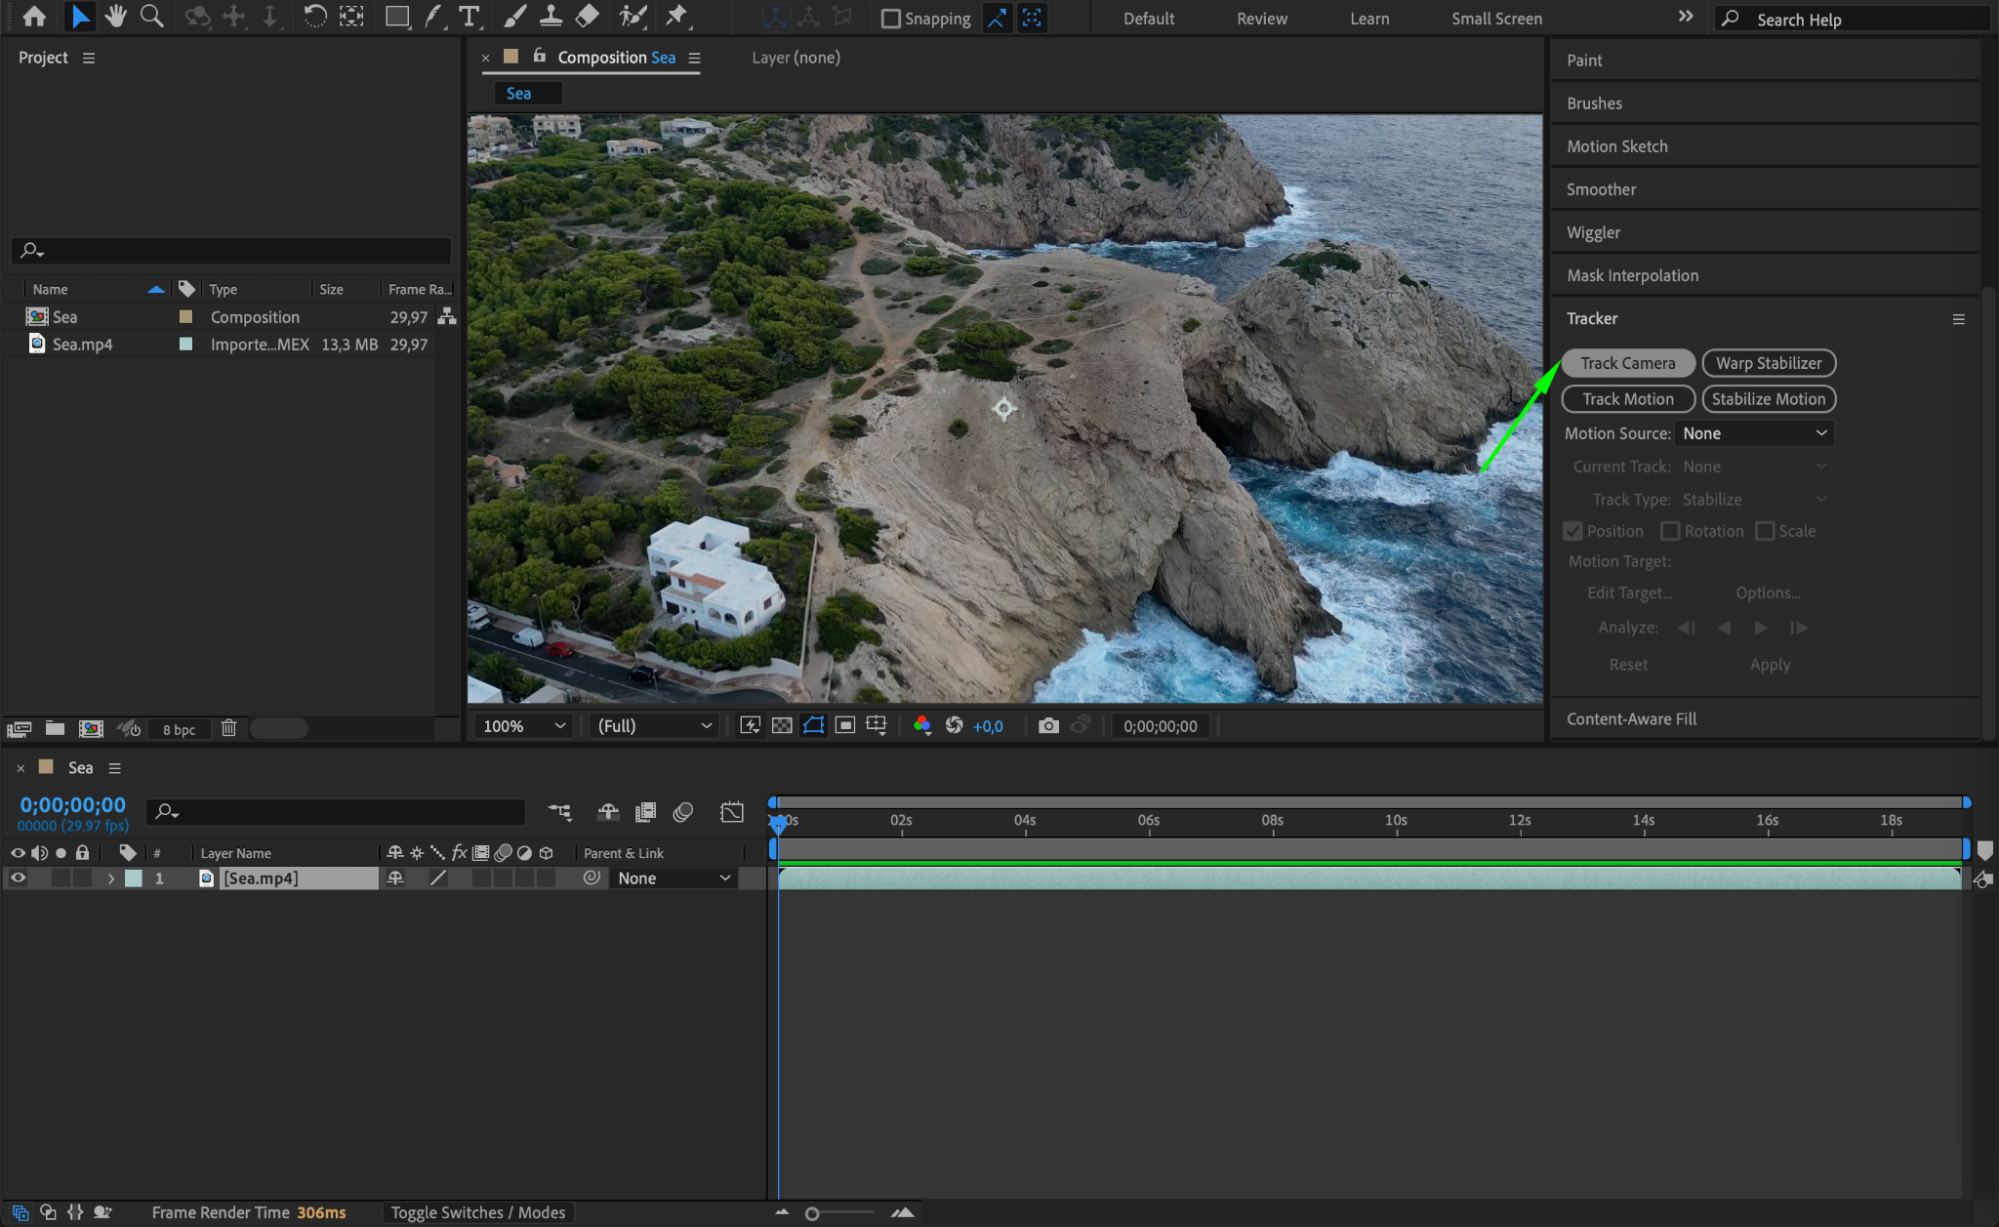
To access the Camera Tracker tool, go to Window > Tracker. This will open the Tracker panel where you can find the Camera Tracker option. Click on Track Camera to start the tracking process. This step is crucial for analyzing the movement of the camera in your footage.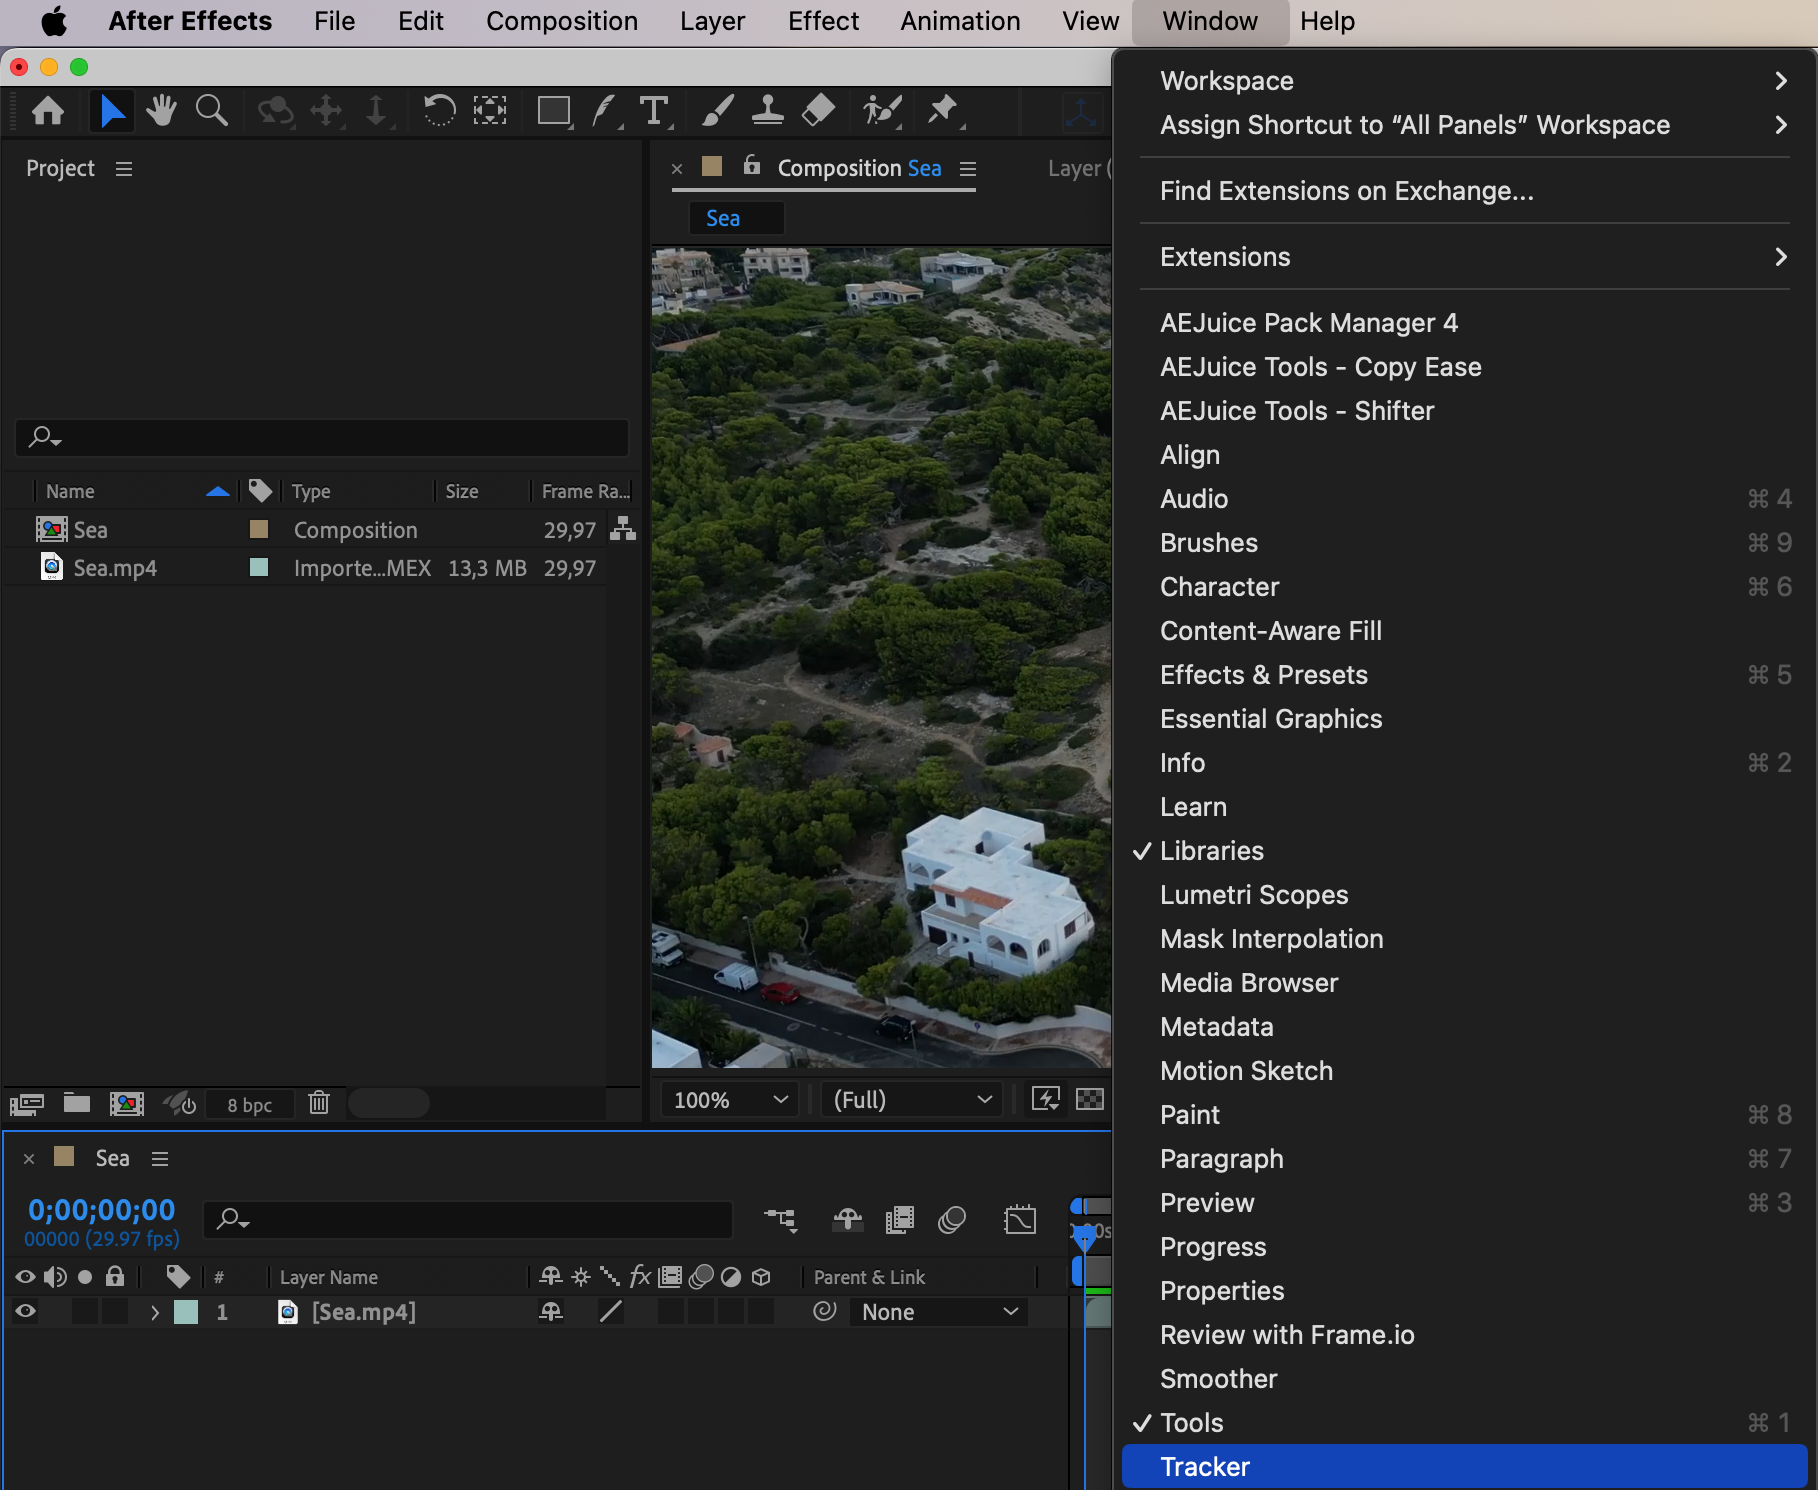
 Step 3: Track the Camera
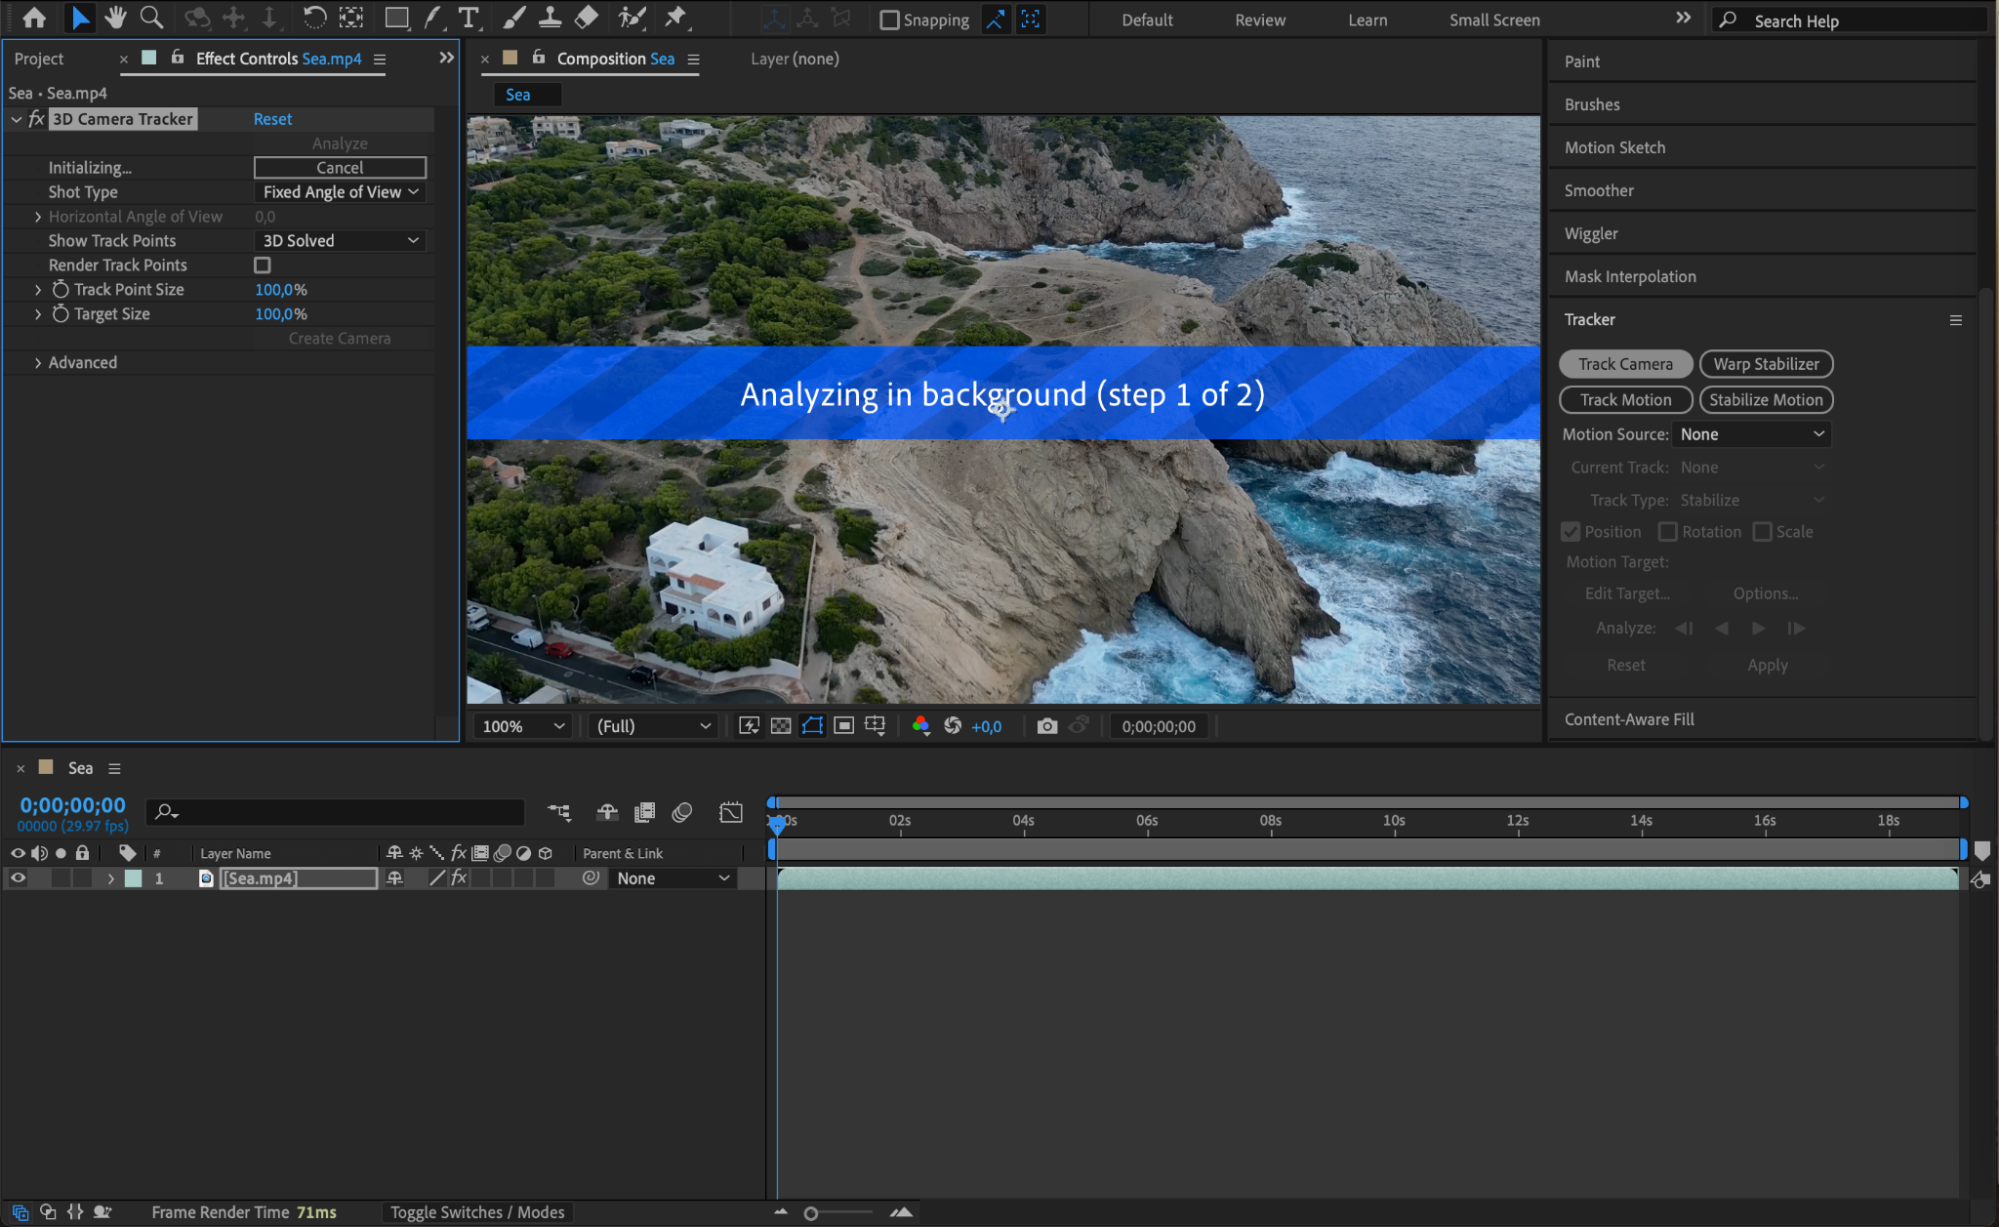
After selecting Track Camera, After Effects will analyze your footage to detect the camera movement. This process might take some time depending on the complexity and length of your video. Once tracking is complete, you will see tracking points.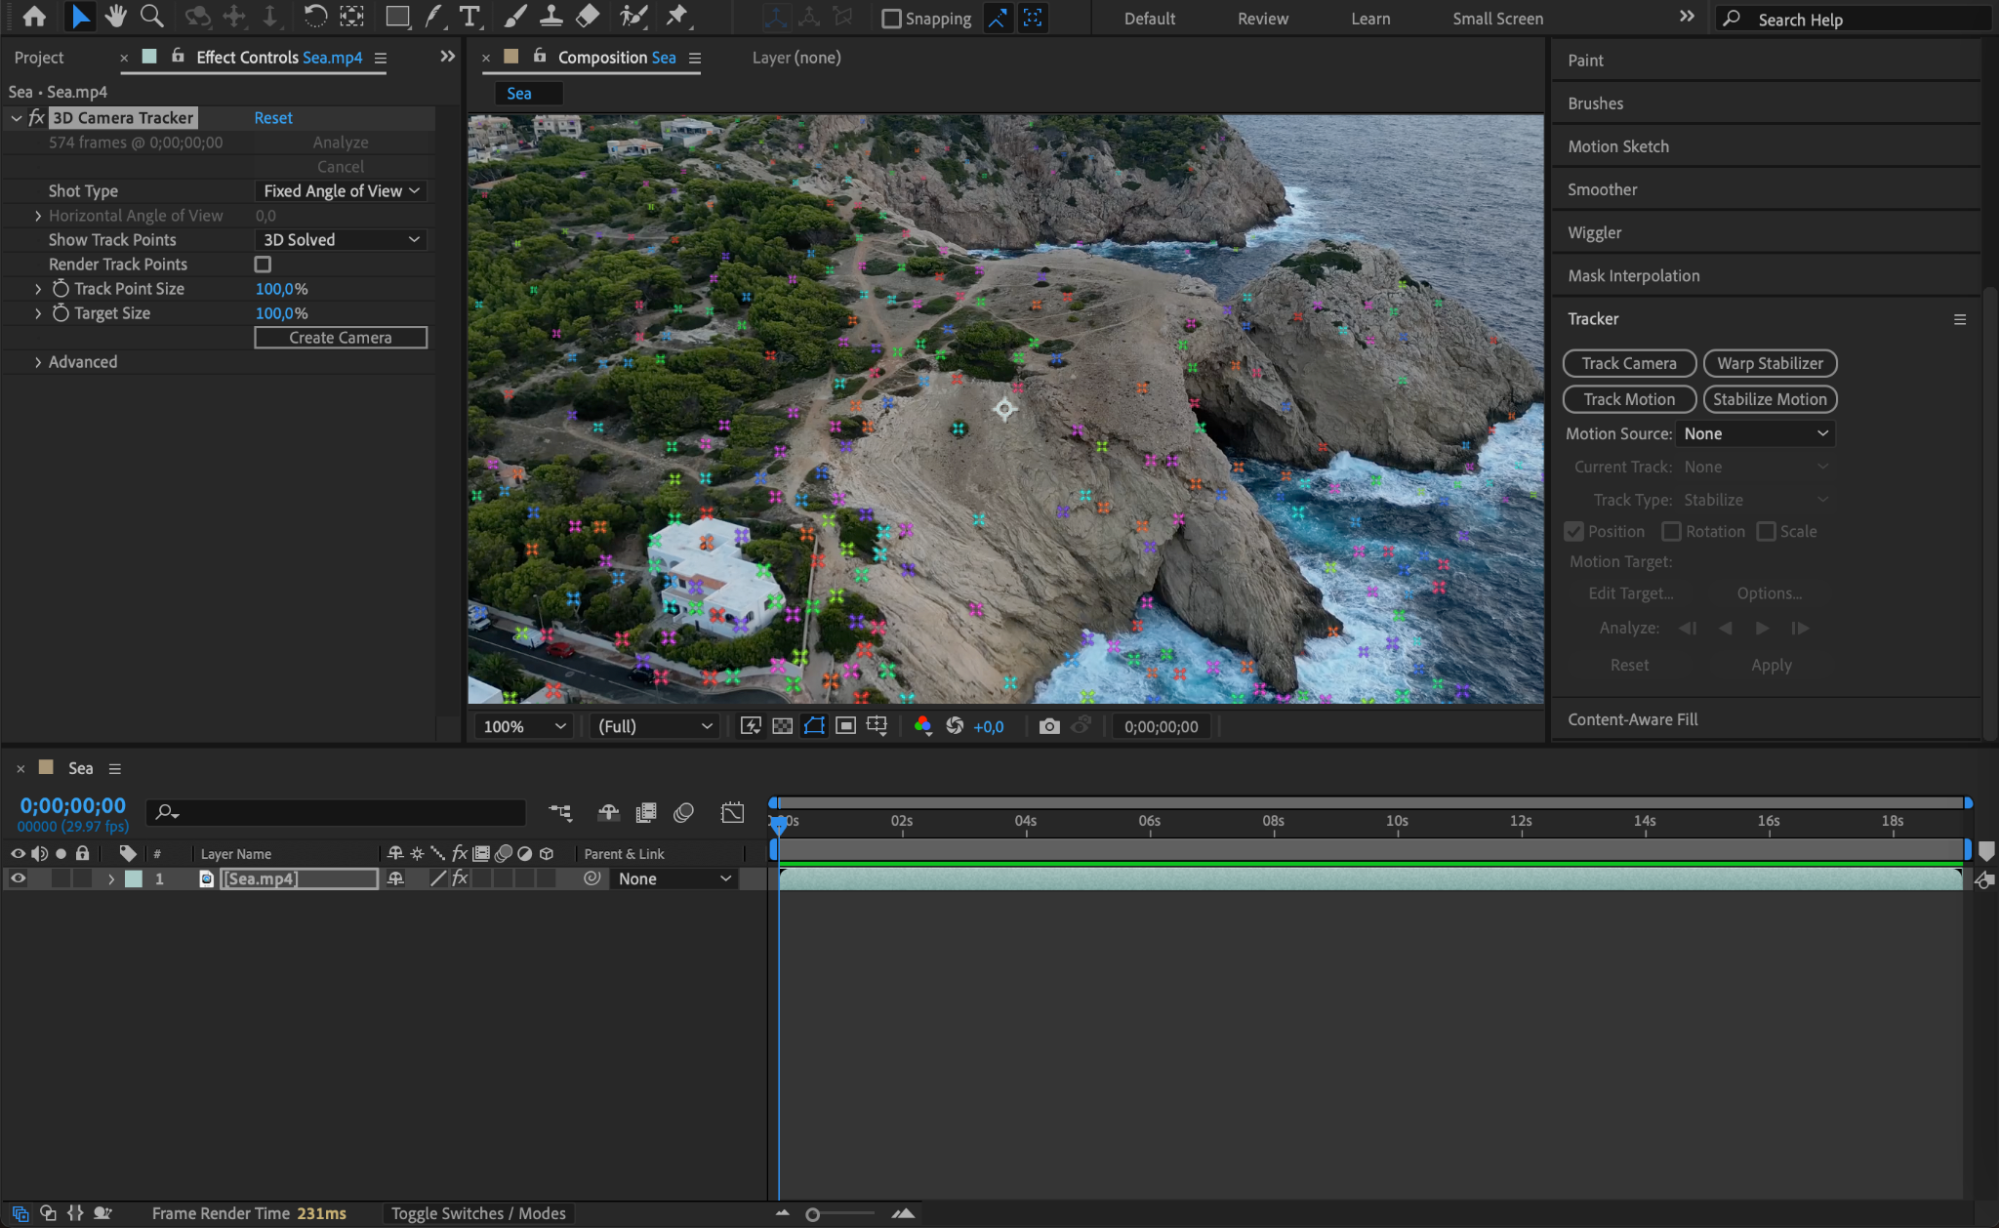 Step 4: Select and Create Elements
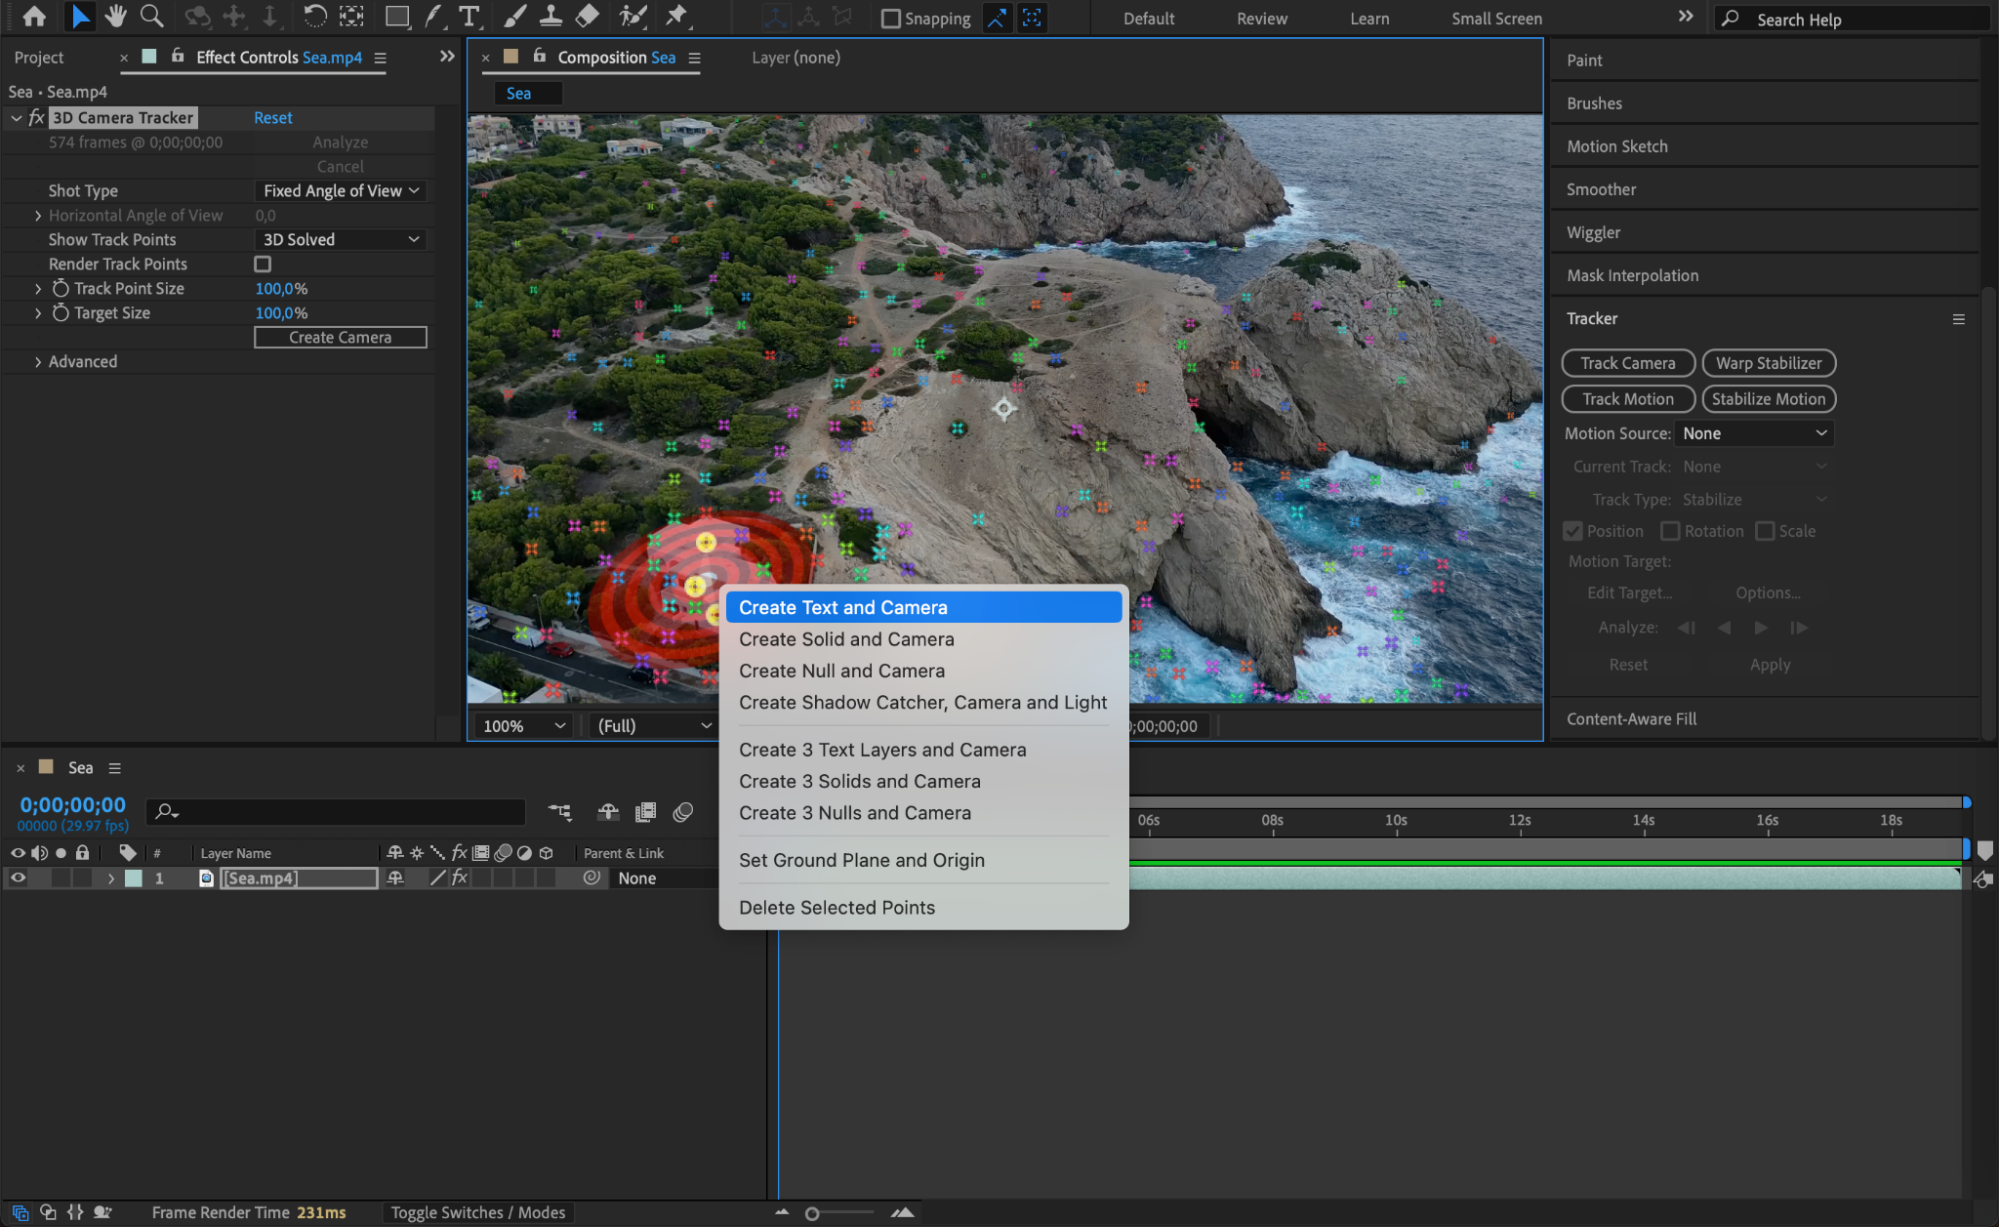
Once the tracking is finished, select the area where you want to add a virtual element. Click and drag to draw a shape around the area you want to use. Right-click within the selected area and choose from the submenu options such as Create Text and Camera. This action creates a new text layer and a camera layer that match the perspective and movement of your tracked footage.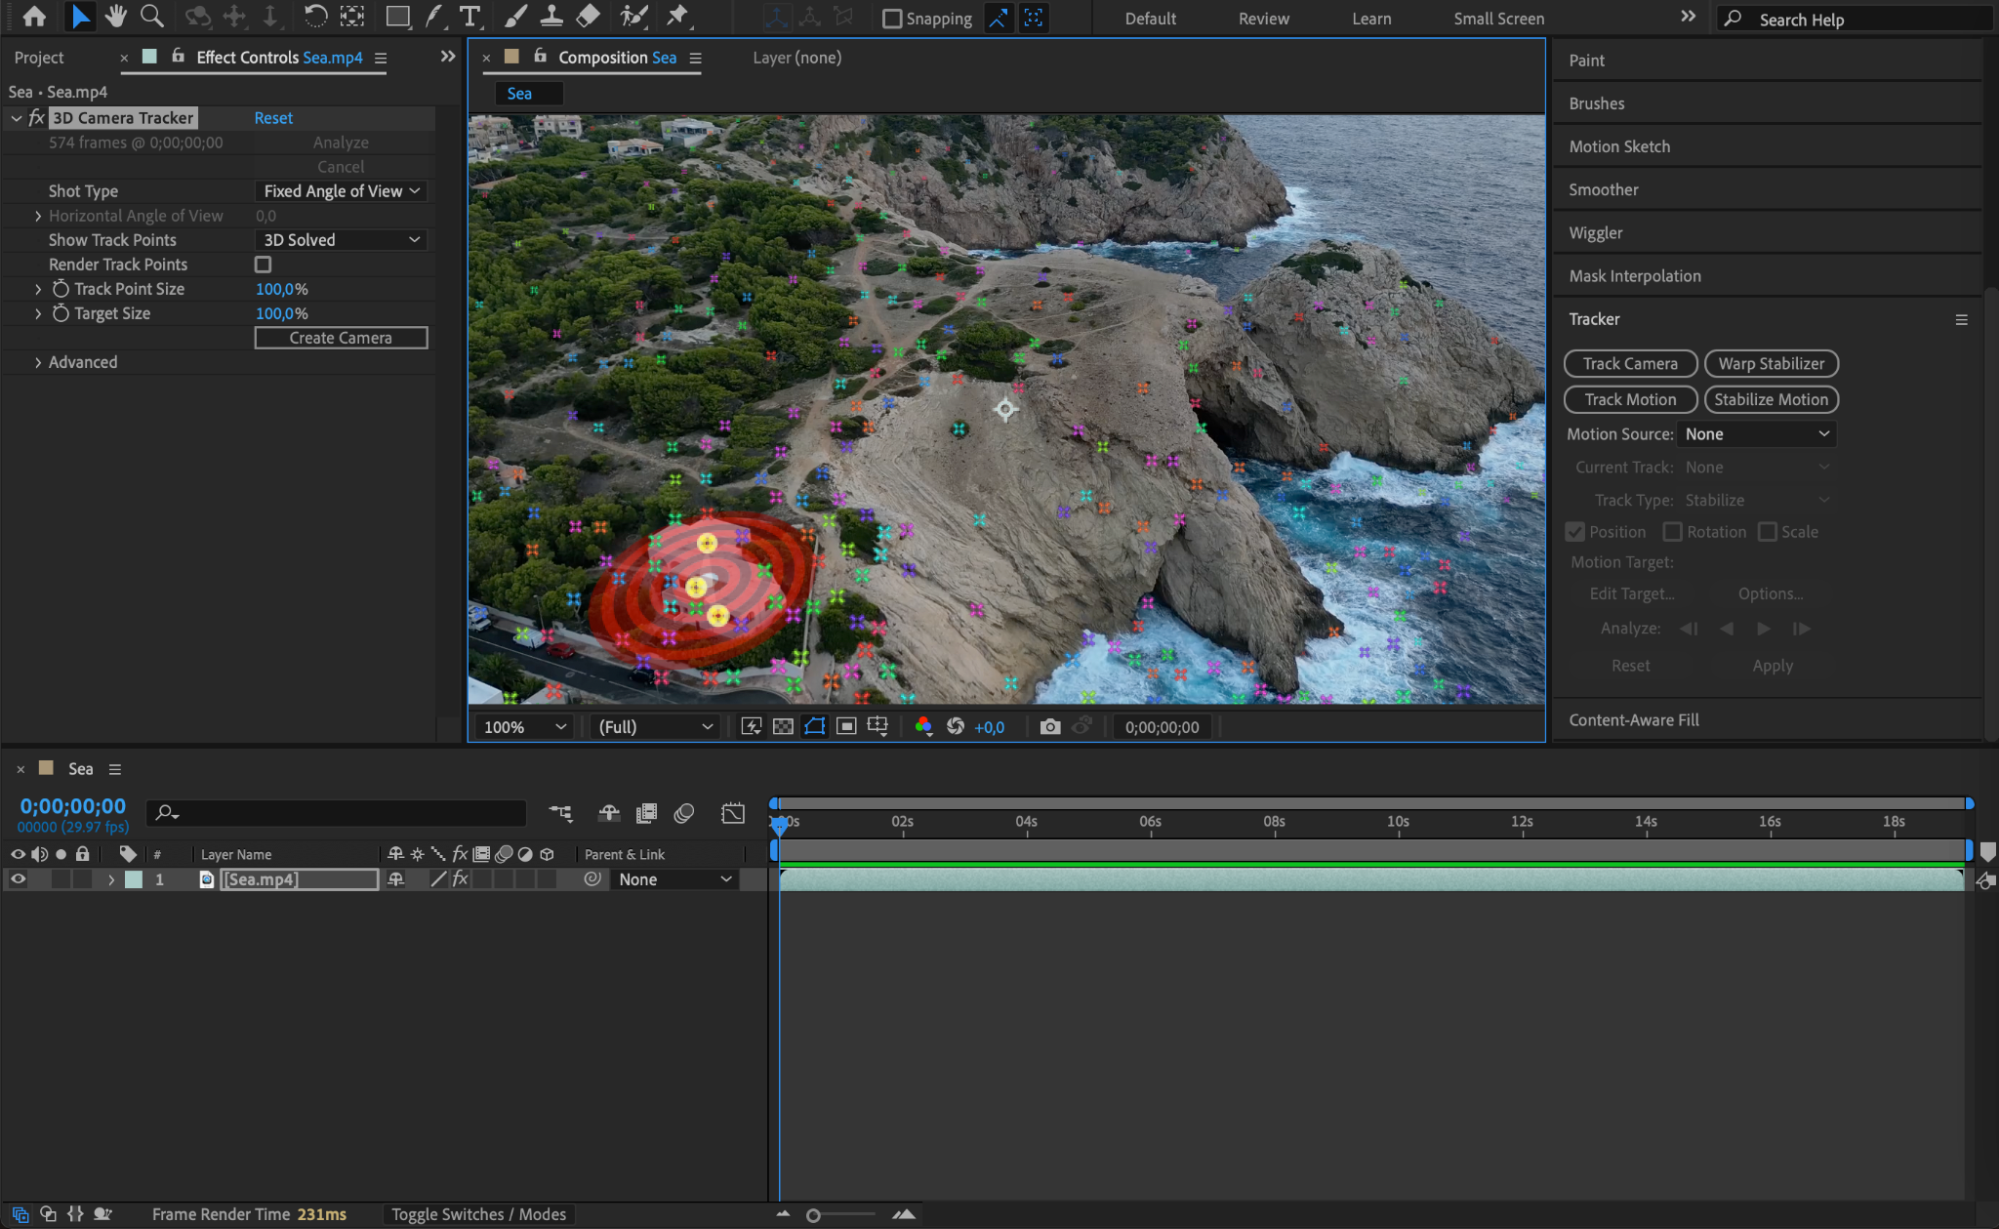
Step 5: Customize Your Text
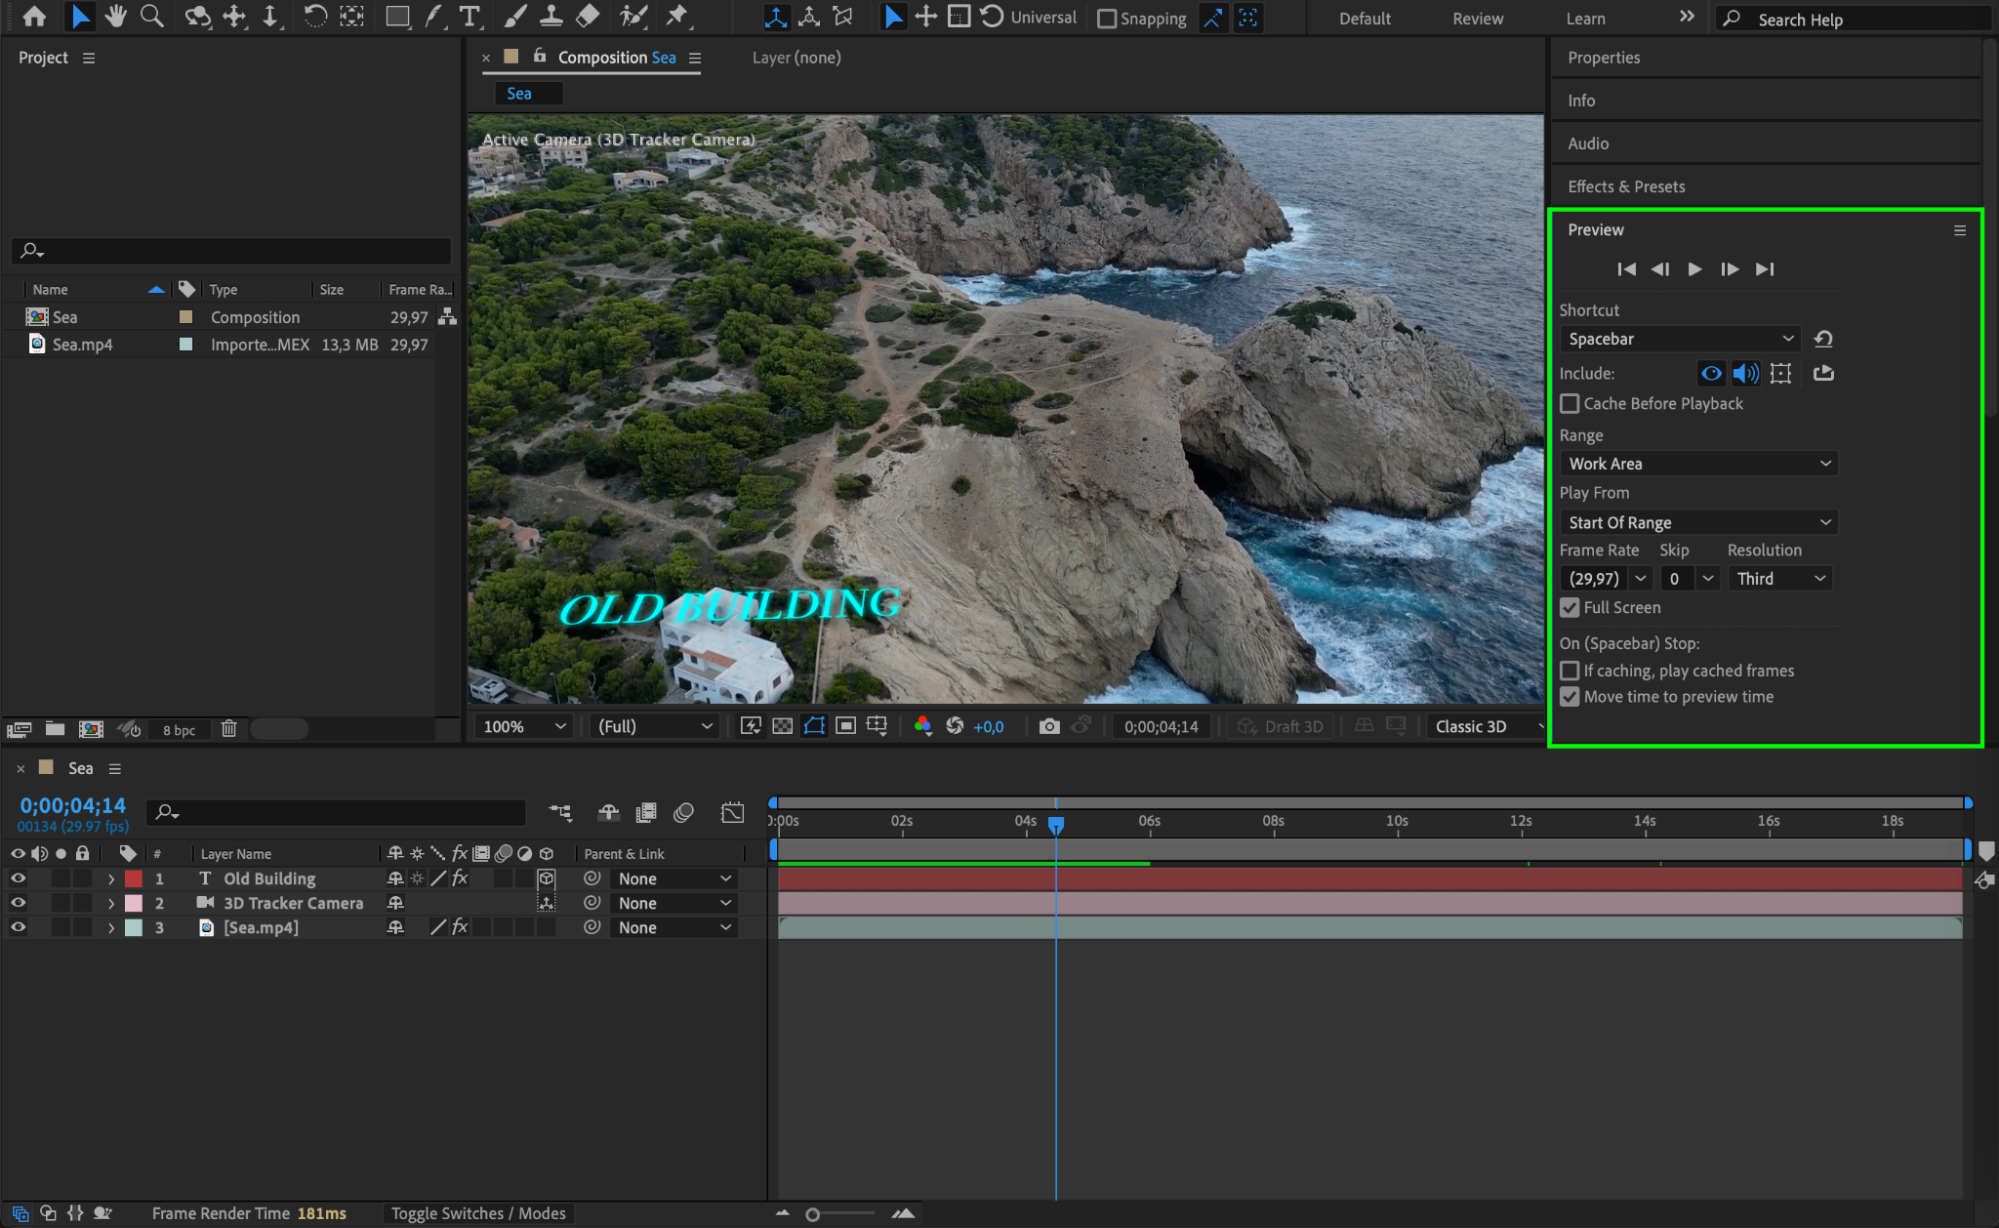
In the Timeline panel, you will now see a new text layer and a camera layer. Double-click on the text layer to edit its content and appearance. You can change the text, font, size, and color as needed. Utilize the Effects & Presets panel to add additional effects or enhance the visual style of your text.
 Step 6: Preview Your Work
To review how the text integrates with your footage, use the Preview panel to play back your composition. Observe how the text moves and interacts with the camera movement. Make any necessary adjustments to ensure that the text appears seamlessly integrated and maintains a realistic appearance throughout the animation.
 Step 7: Render and Export
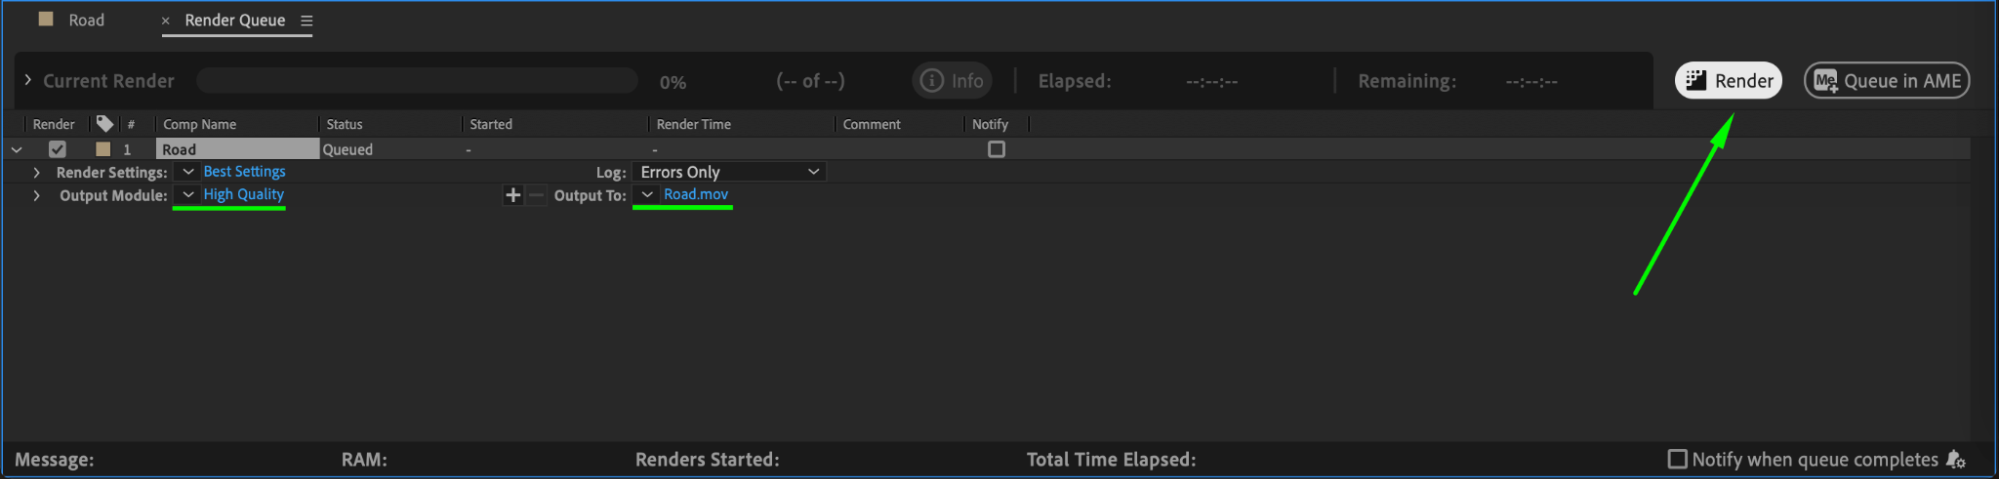
Once you are satisfied with how everything looks, proceed to render and export your composition. Go to Composition > Add to Render Queue, then adjust the render settings as needed. Click Render to process your project. Ensure that the final output meets your quality standards and project requirements before finalizing.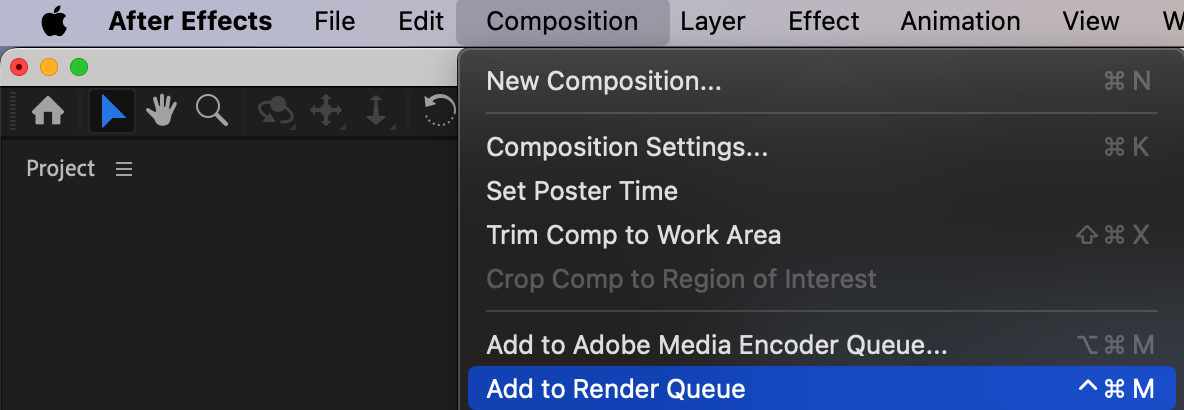
 Conclusion
Mastering the Camera Tracker tool in After Effects opens up a world of creative possibilities for integrating virtual elements into your footage. By experimenting with different tracking techniques and settings, you can achieve impressive results for various types of projects. Whether you’re working on a high-profile video production or a personal animation, the Camera Tracker can significantly enhance your workflow and visual outcomes. Dive into the tool, explore its features, and elevate your video projects to new heights. Happy tracking!
Our Bestsellers


