Introduction
Adding depth to a circle can make simple shapes feel three-dimensional and visually appealing. In this tutorial, you’ll learn how to use layer styles, adjustment layers, and effects to create a circle with realistic shading and glow.
Step 1: Create a New Composition
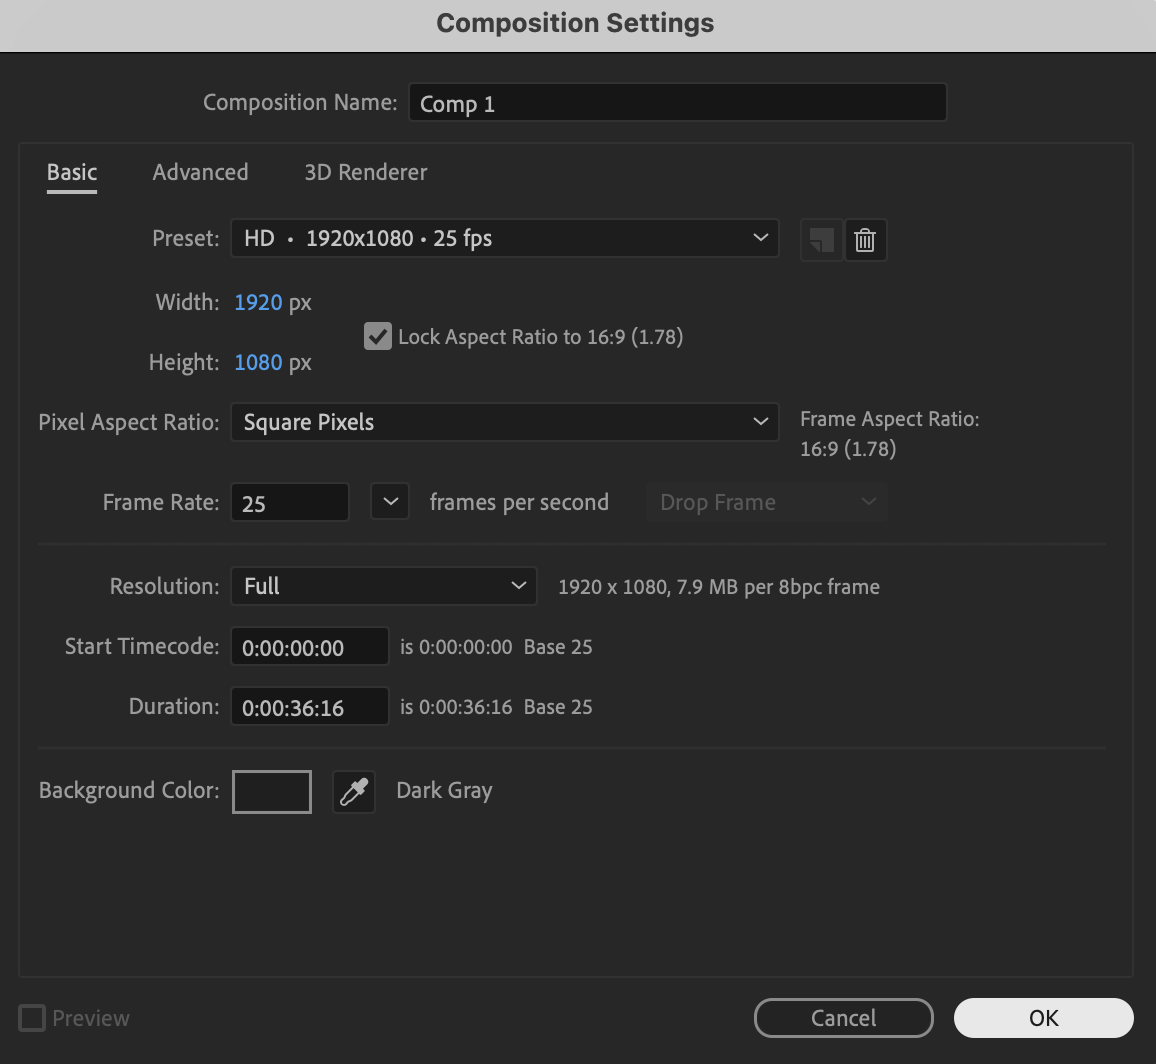
Create a new composition with your desired resolution and frame rate.
 Step 2: Draw a Circle
Select the Ellipse Tool (Q). Hold Ctrl / Cmd + Shift while drawing to create a perfect circle.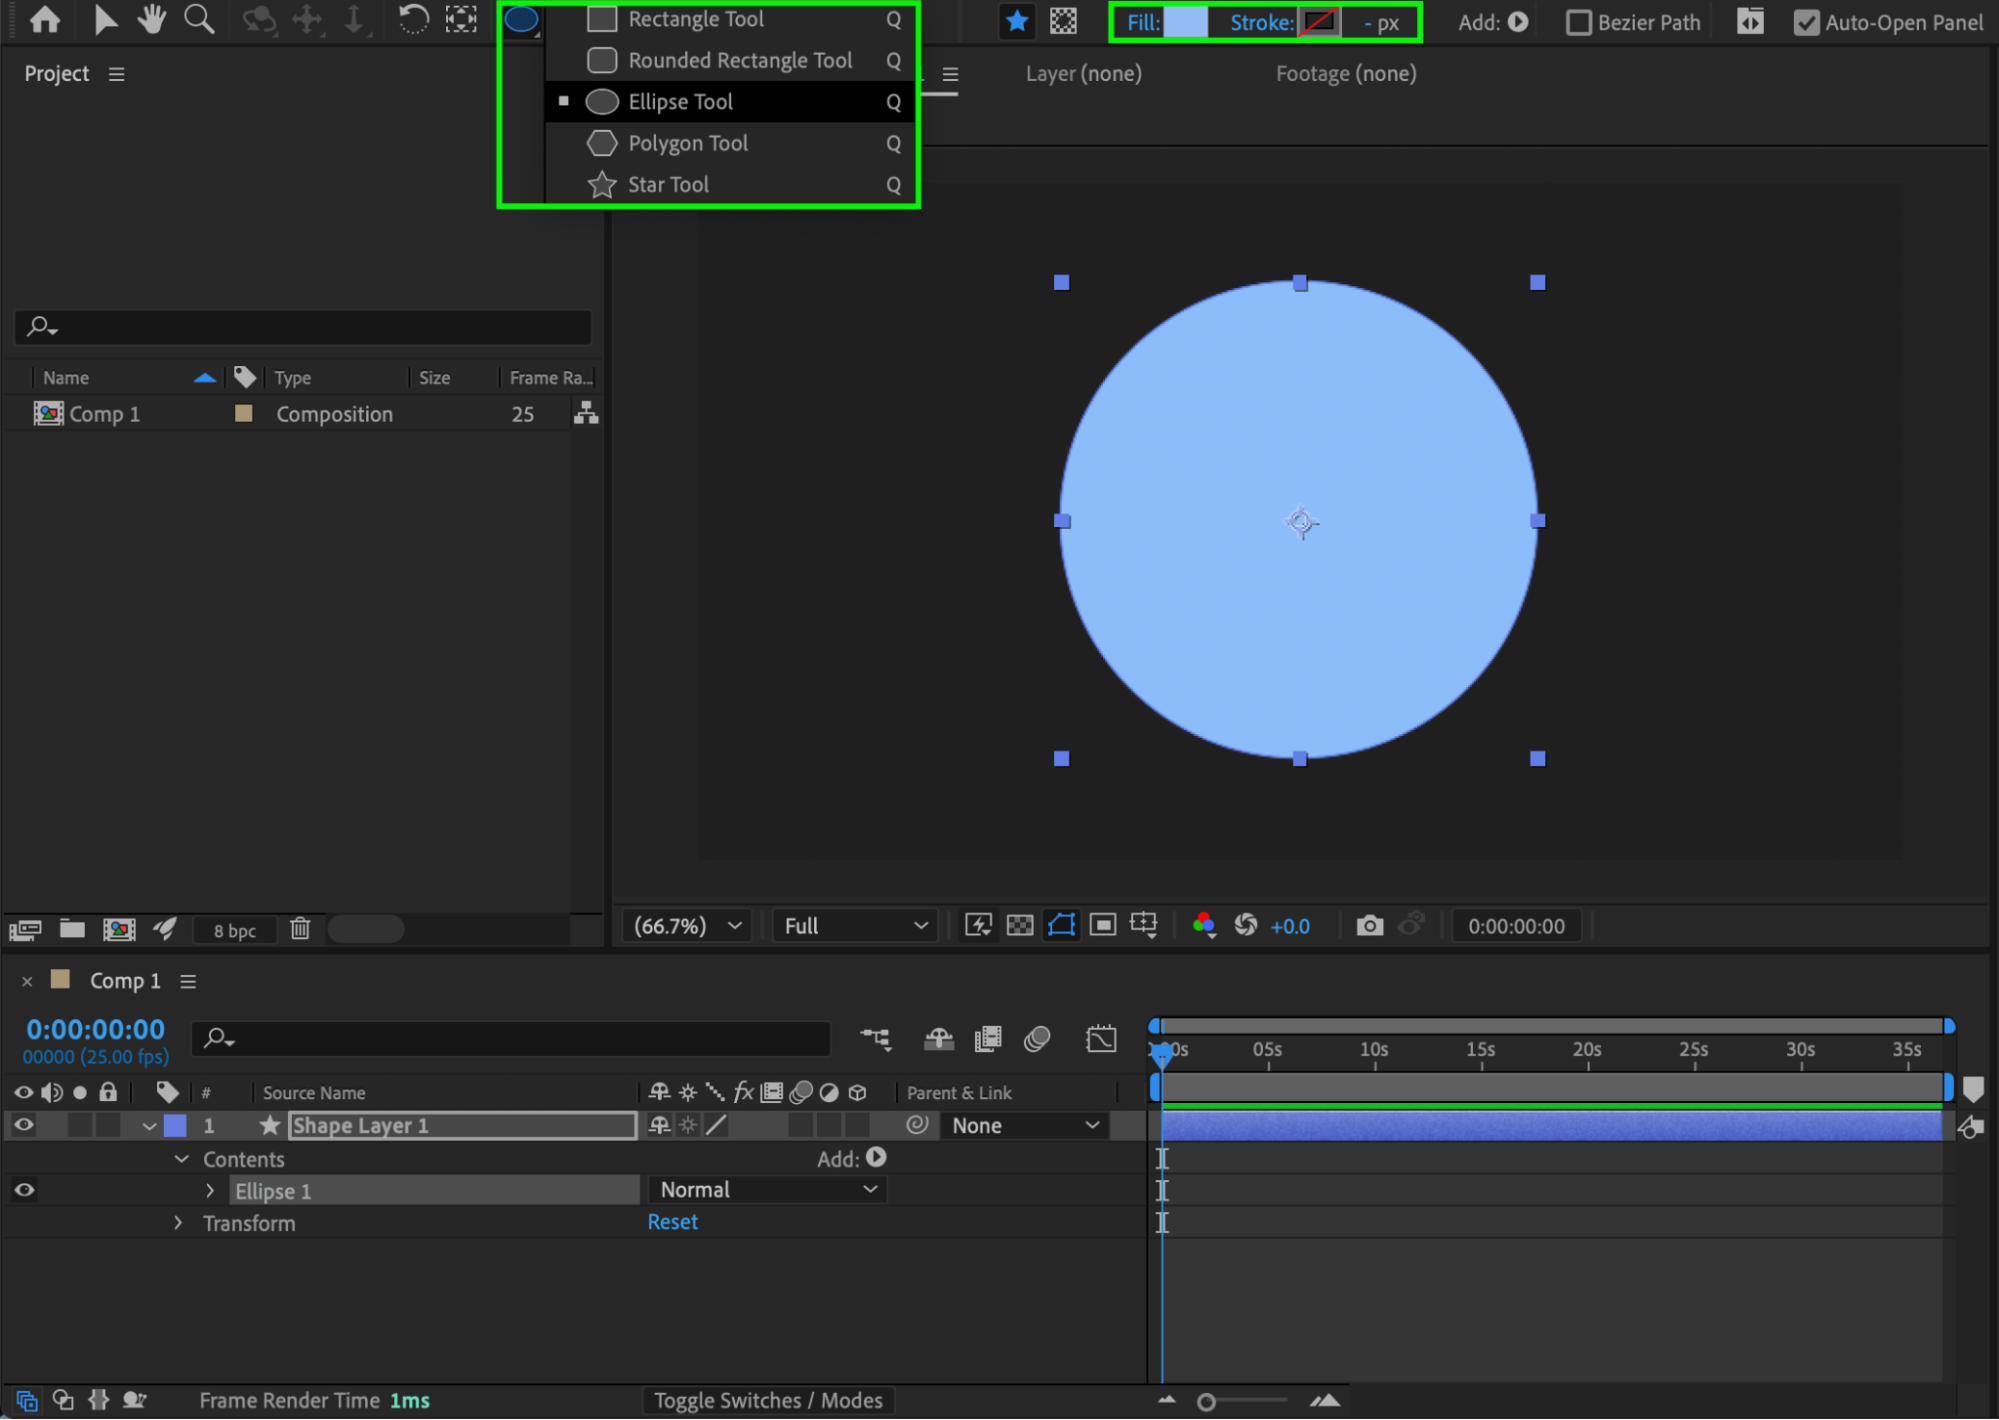
Step 3: Apply Gradient Overlay
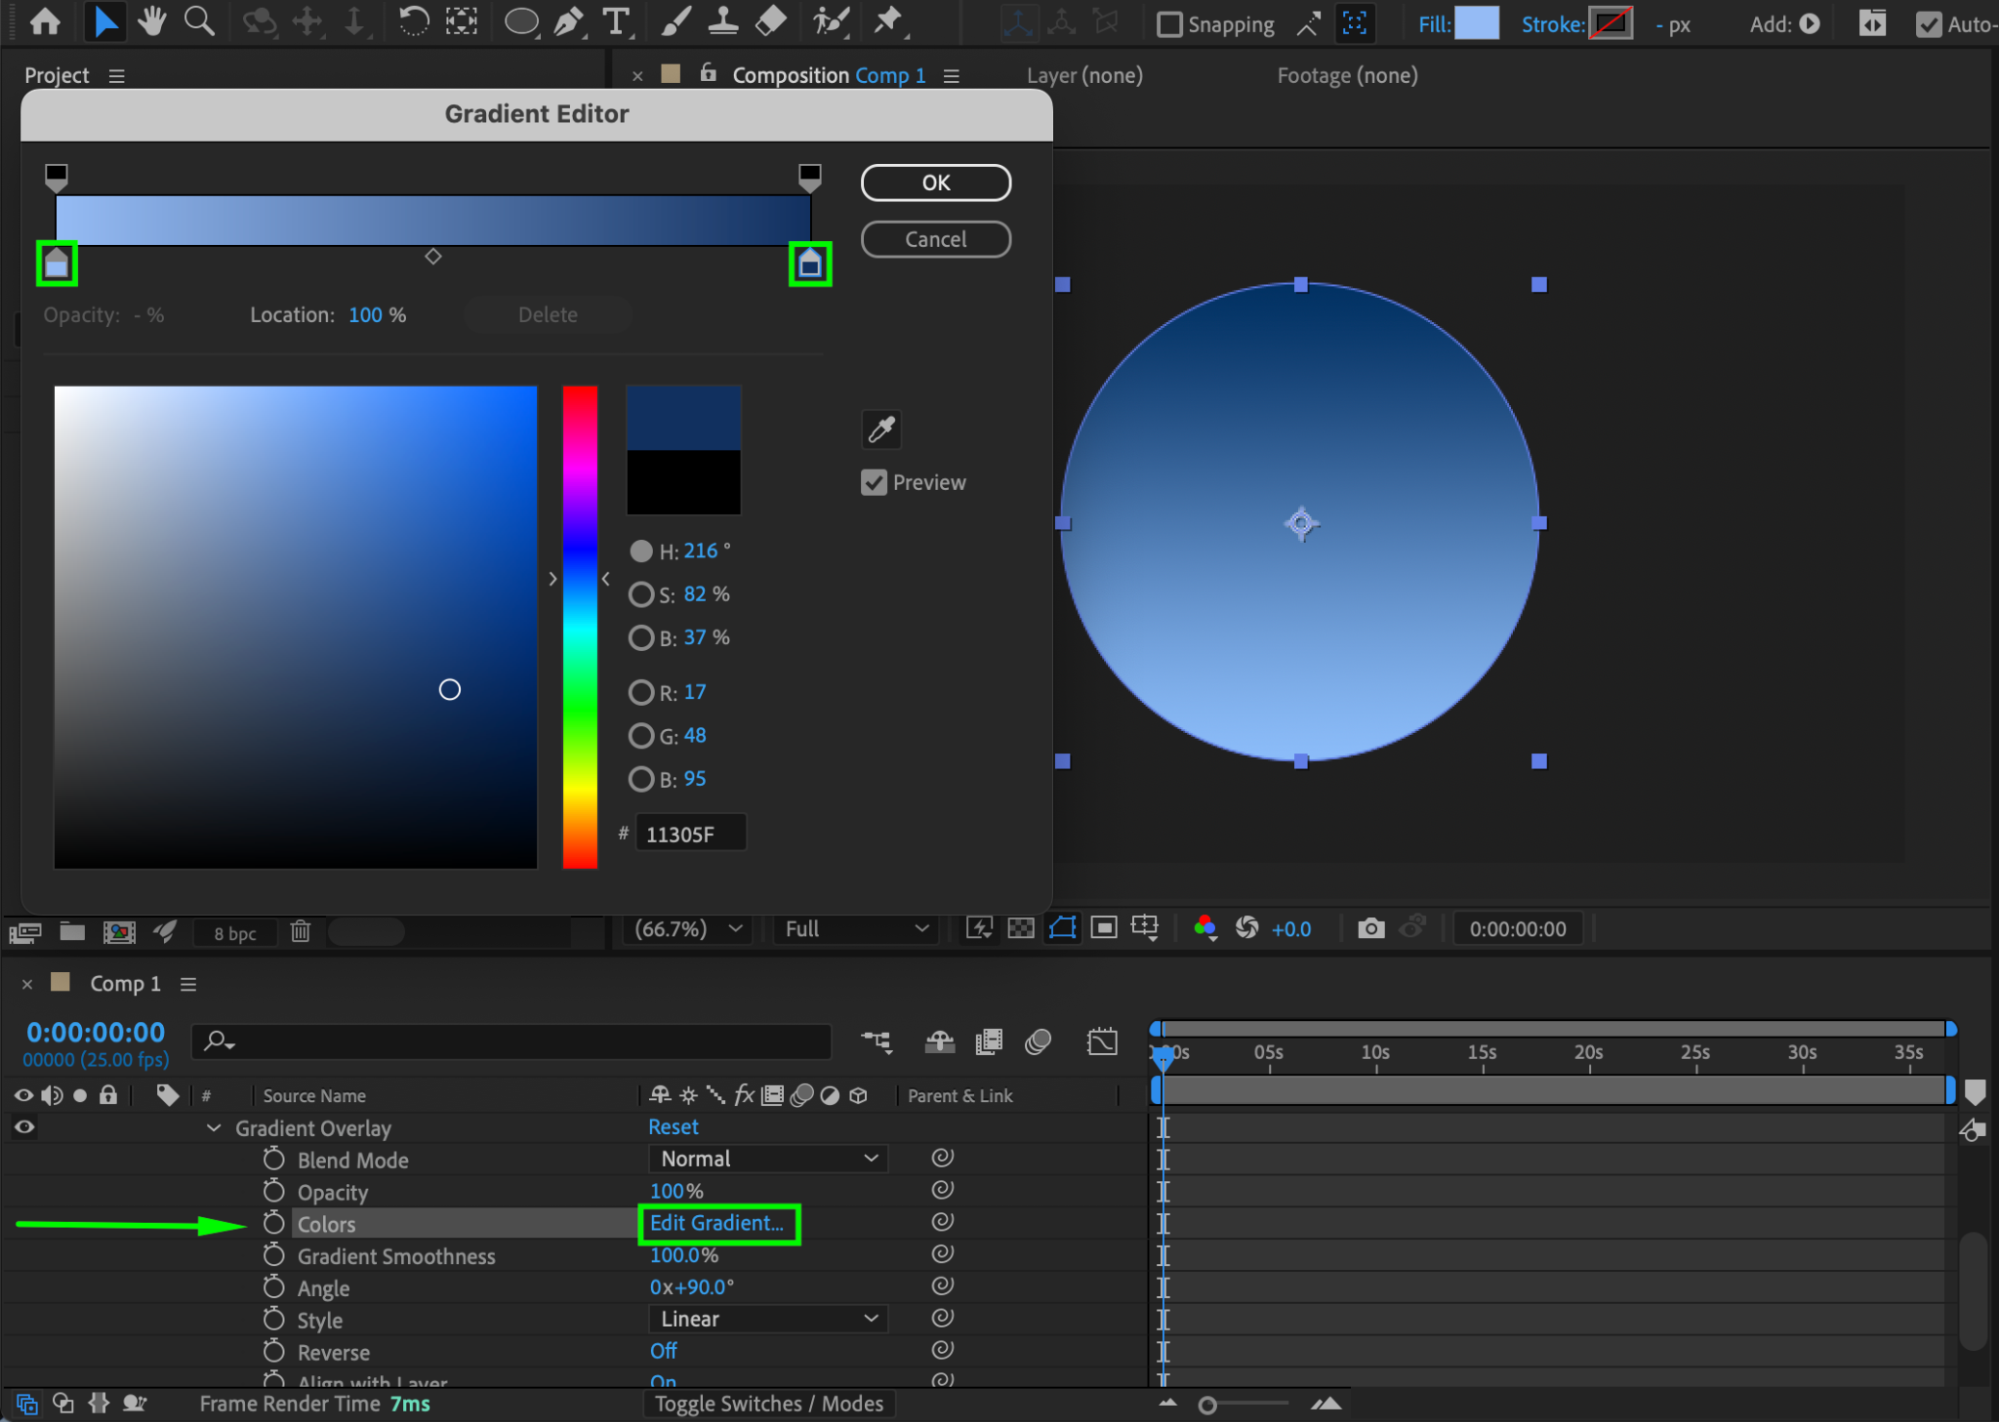
Right-click the circle layer → Layer Styles → Gradient Overlay. Expand the layer properties, and next to Colors, click Edit Gradient… Choose your gradient colors (for example, light blue to dark blue) to give the circle volume.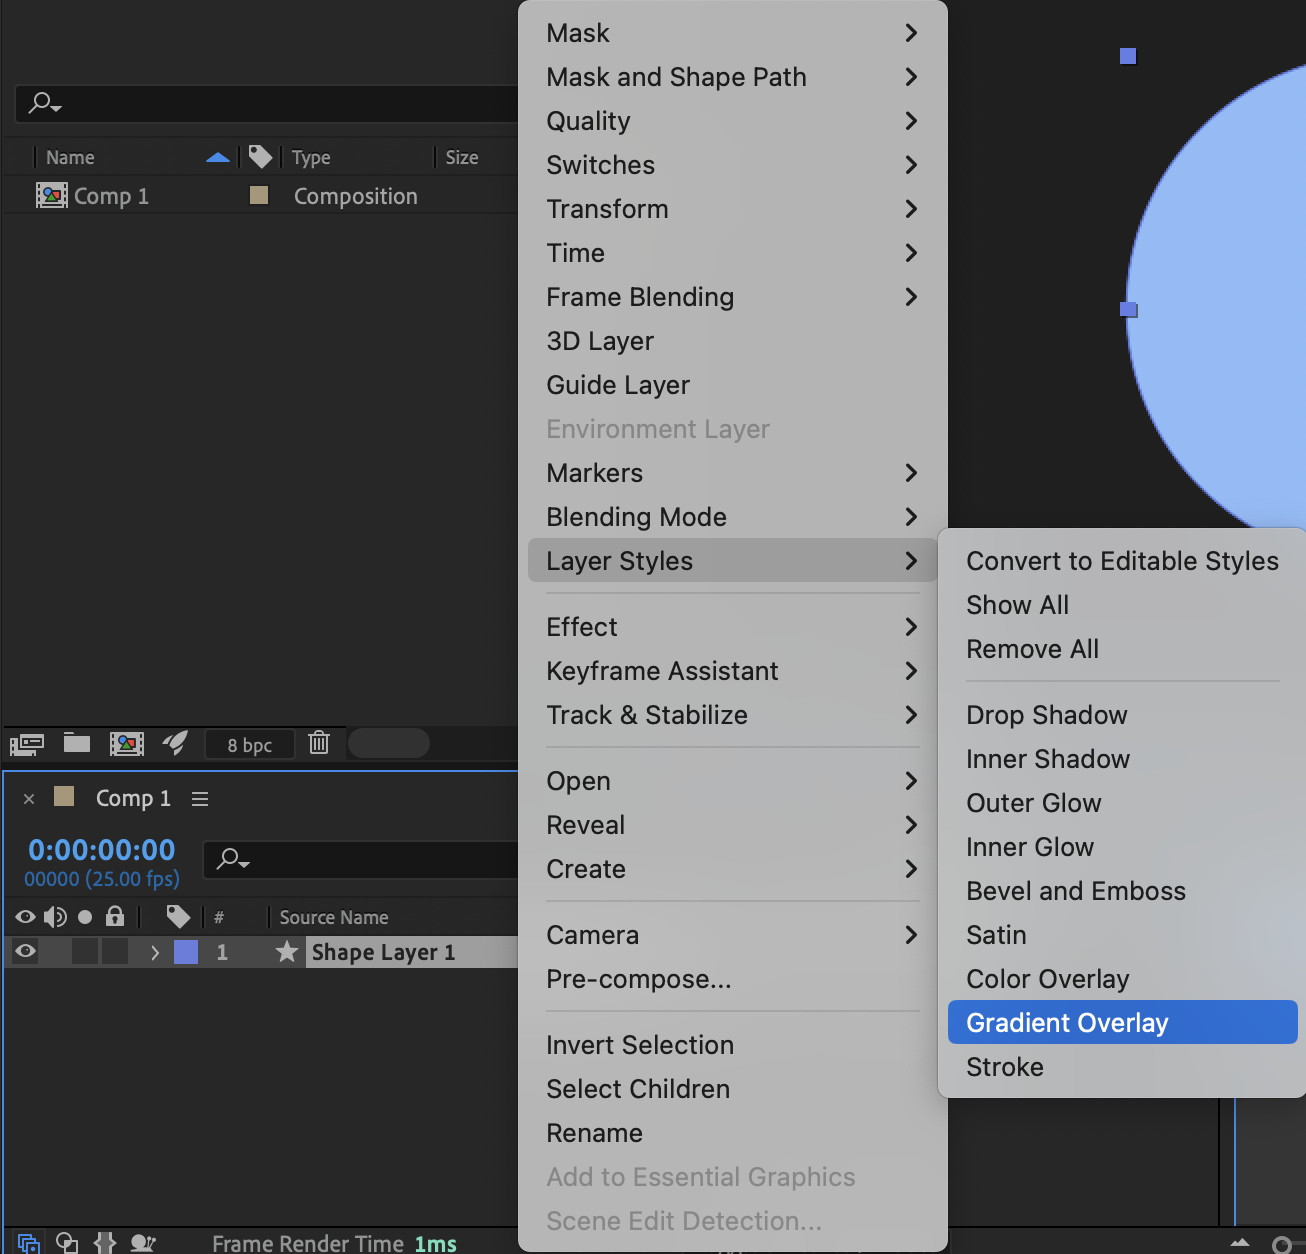
ニュースレター登録で10%オフ

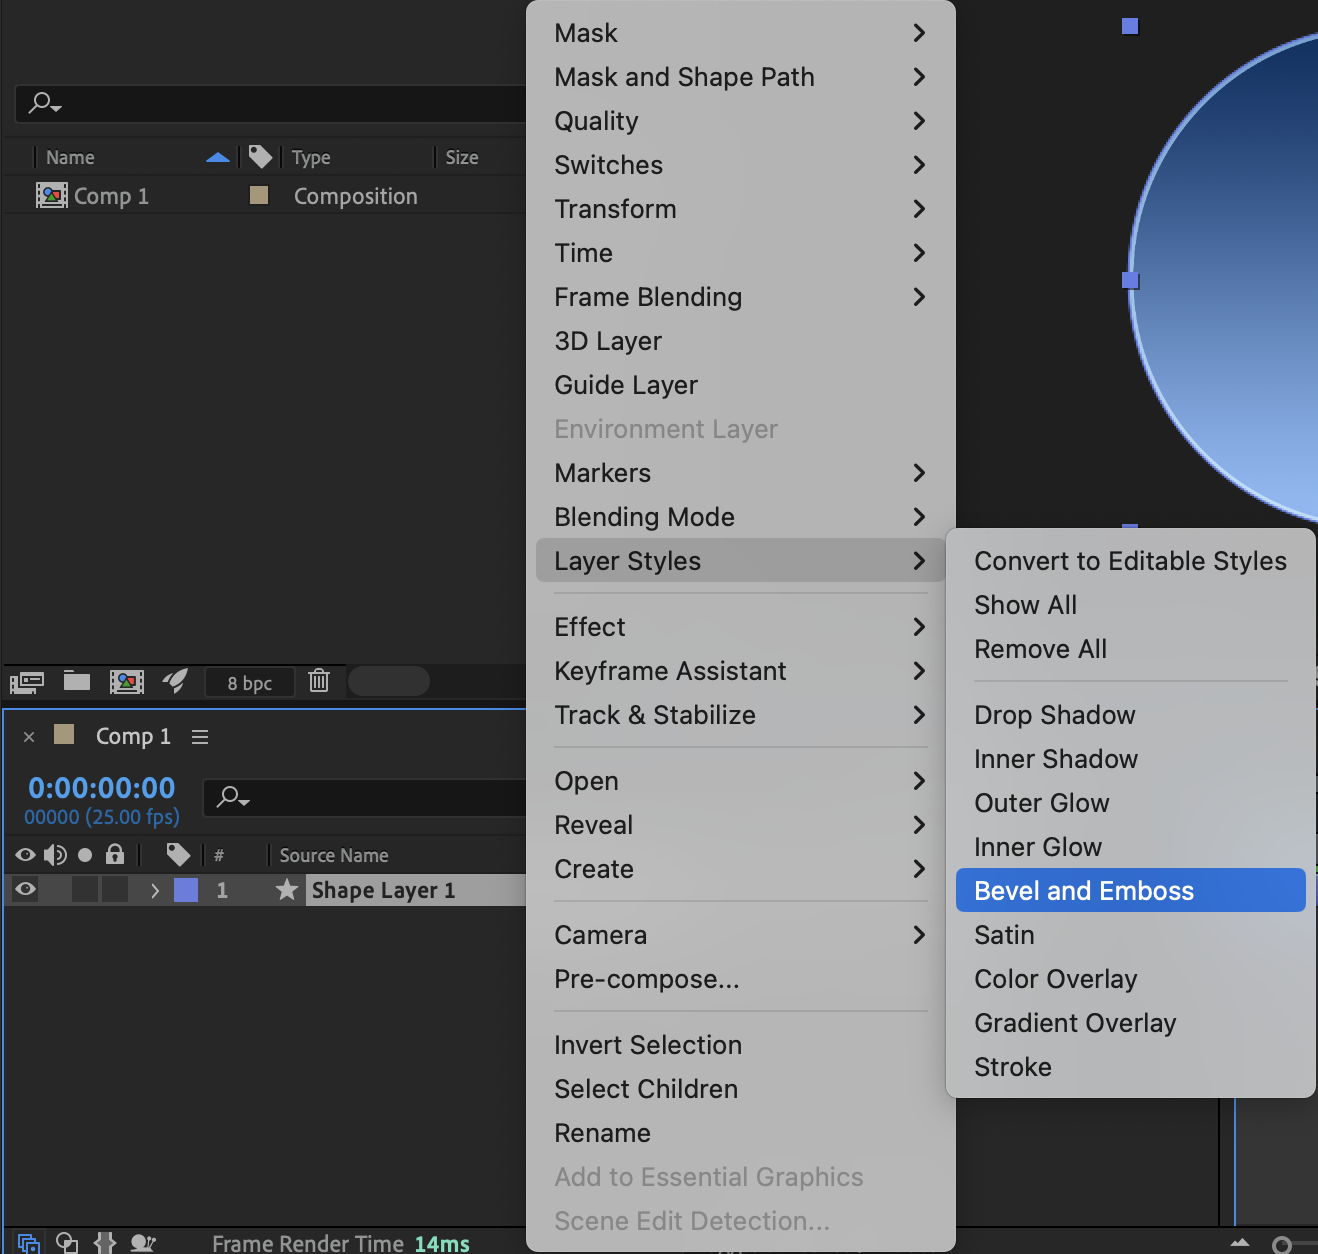
Step 4: Add Inner Glow
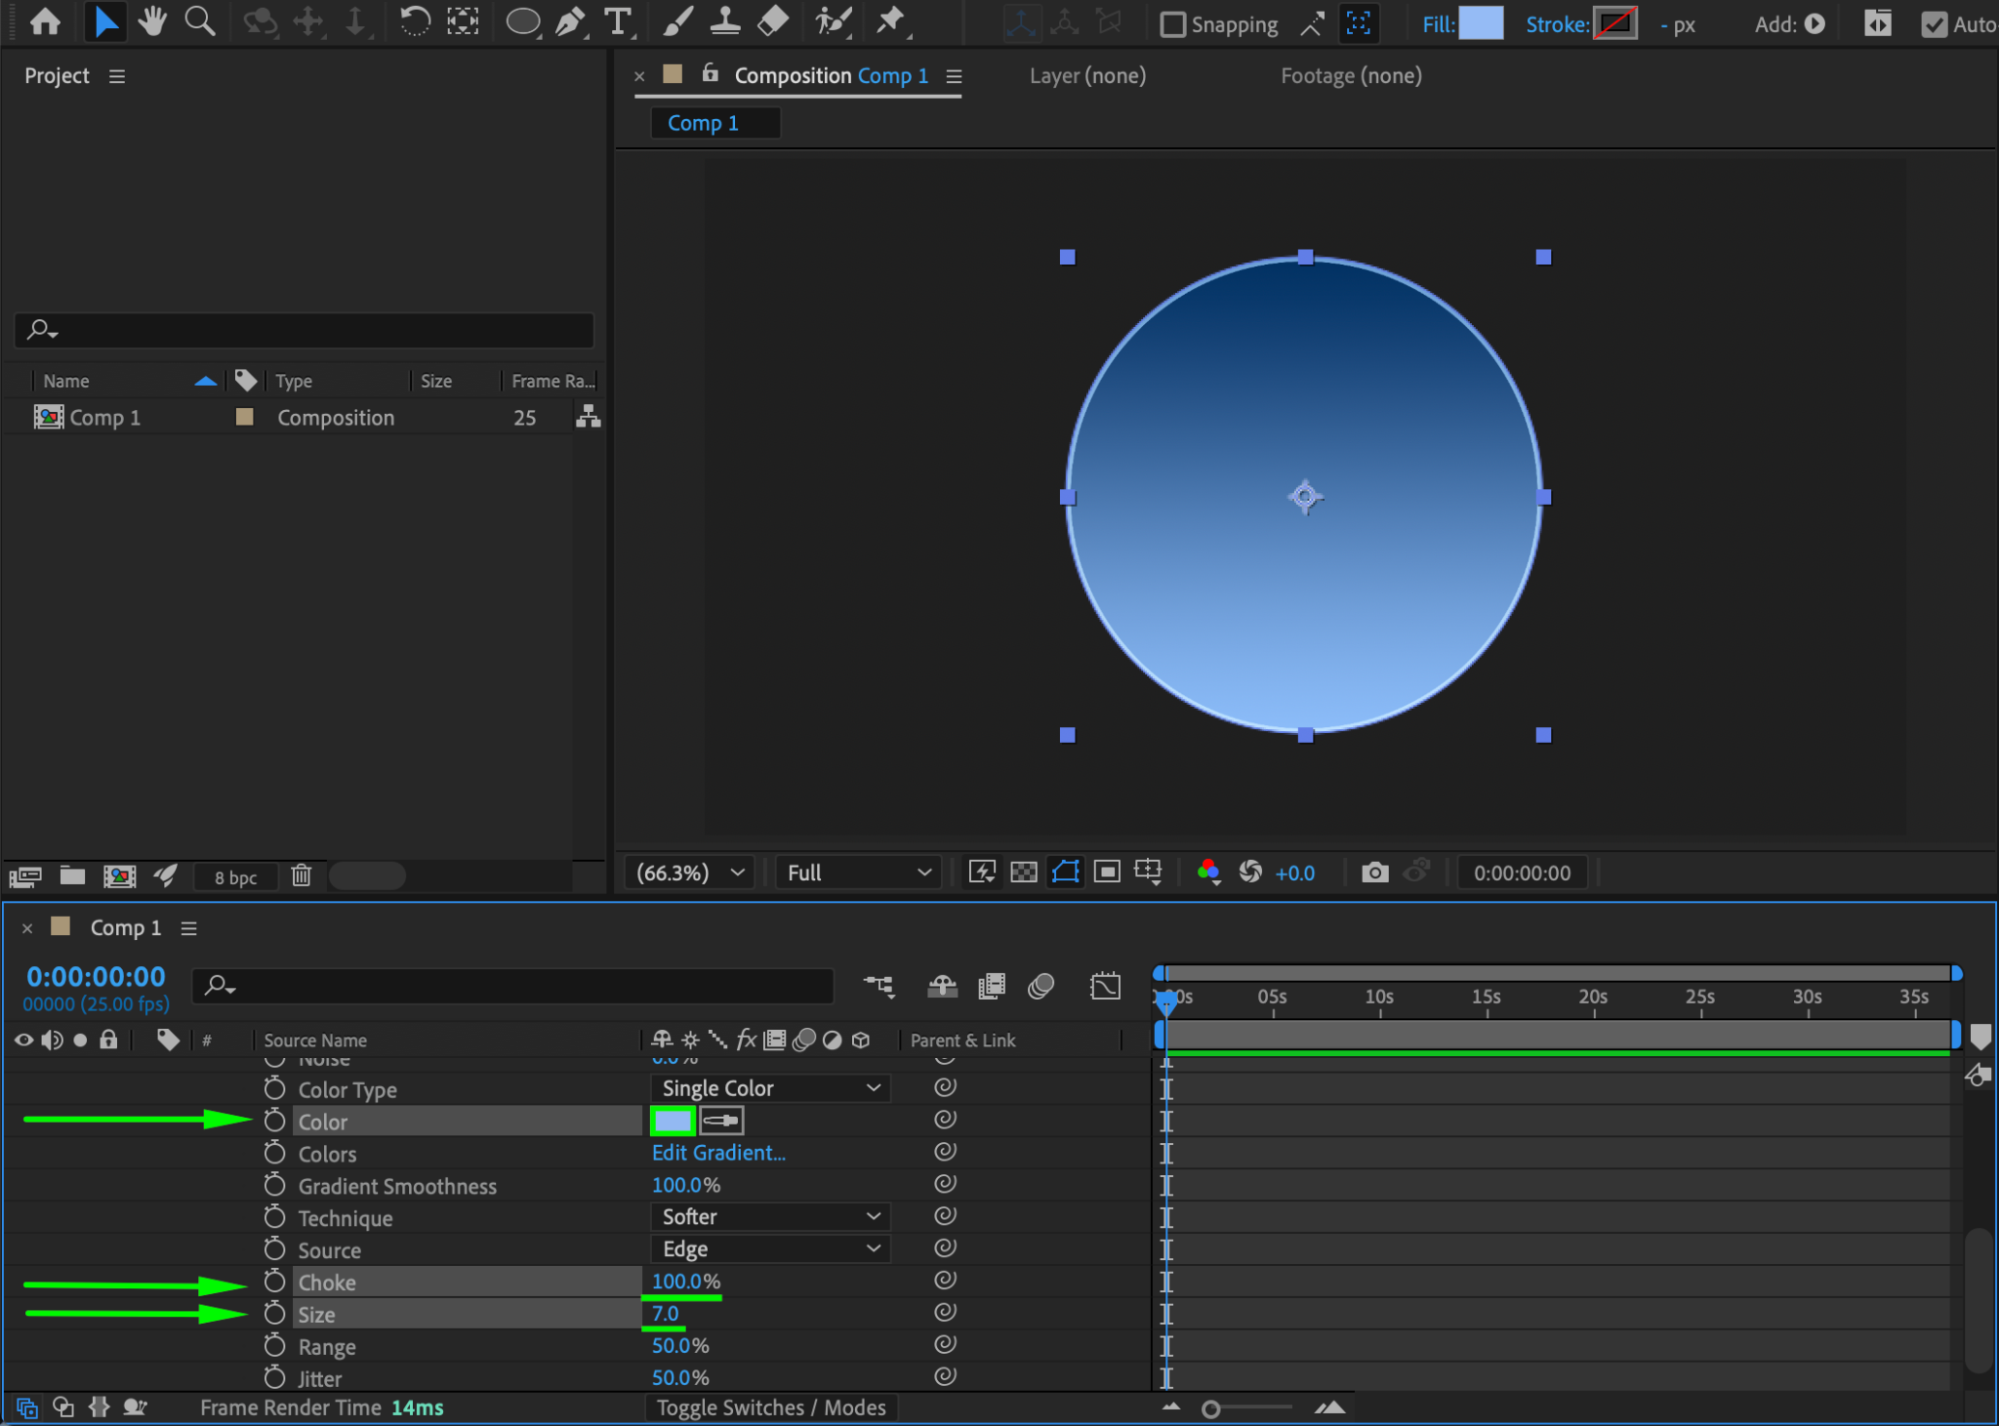
Right-click the layer → Layer Styles → Inner Glow. Expand the properties and set:
Color: Light Blue
Choke: 100
Size: 7
This adds subtle shading inside the circle, enhancing depth.
 Step 5: Add Bevel & Emboss
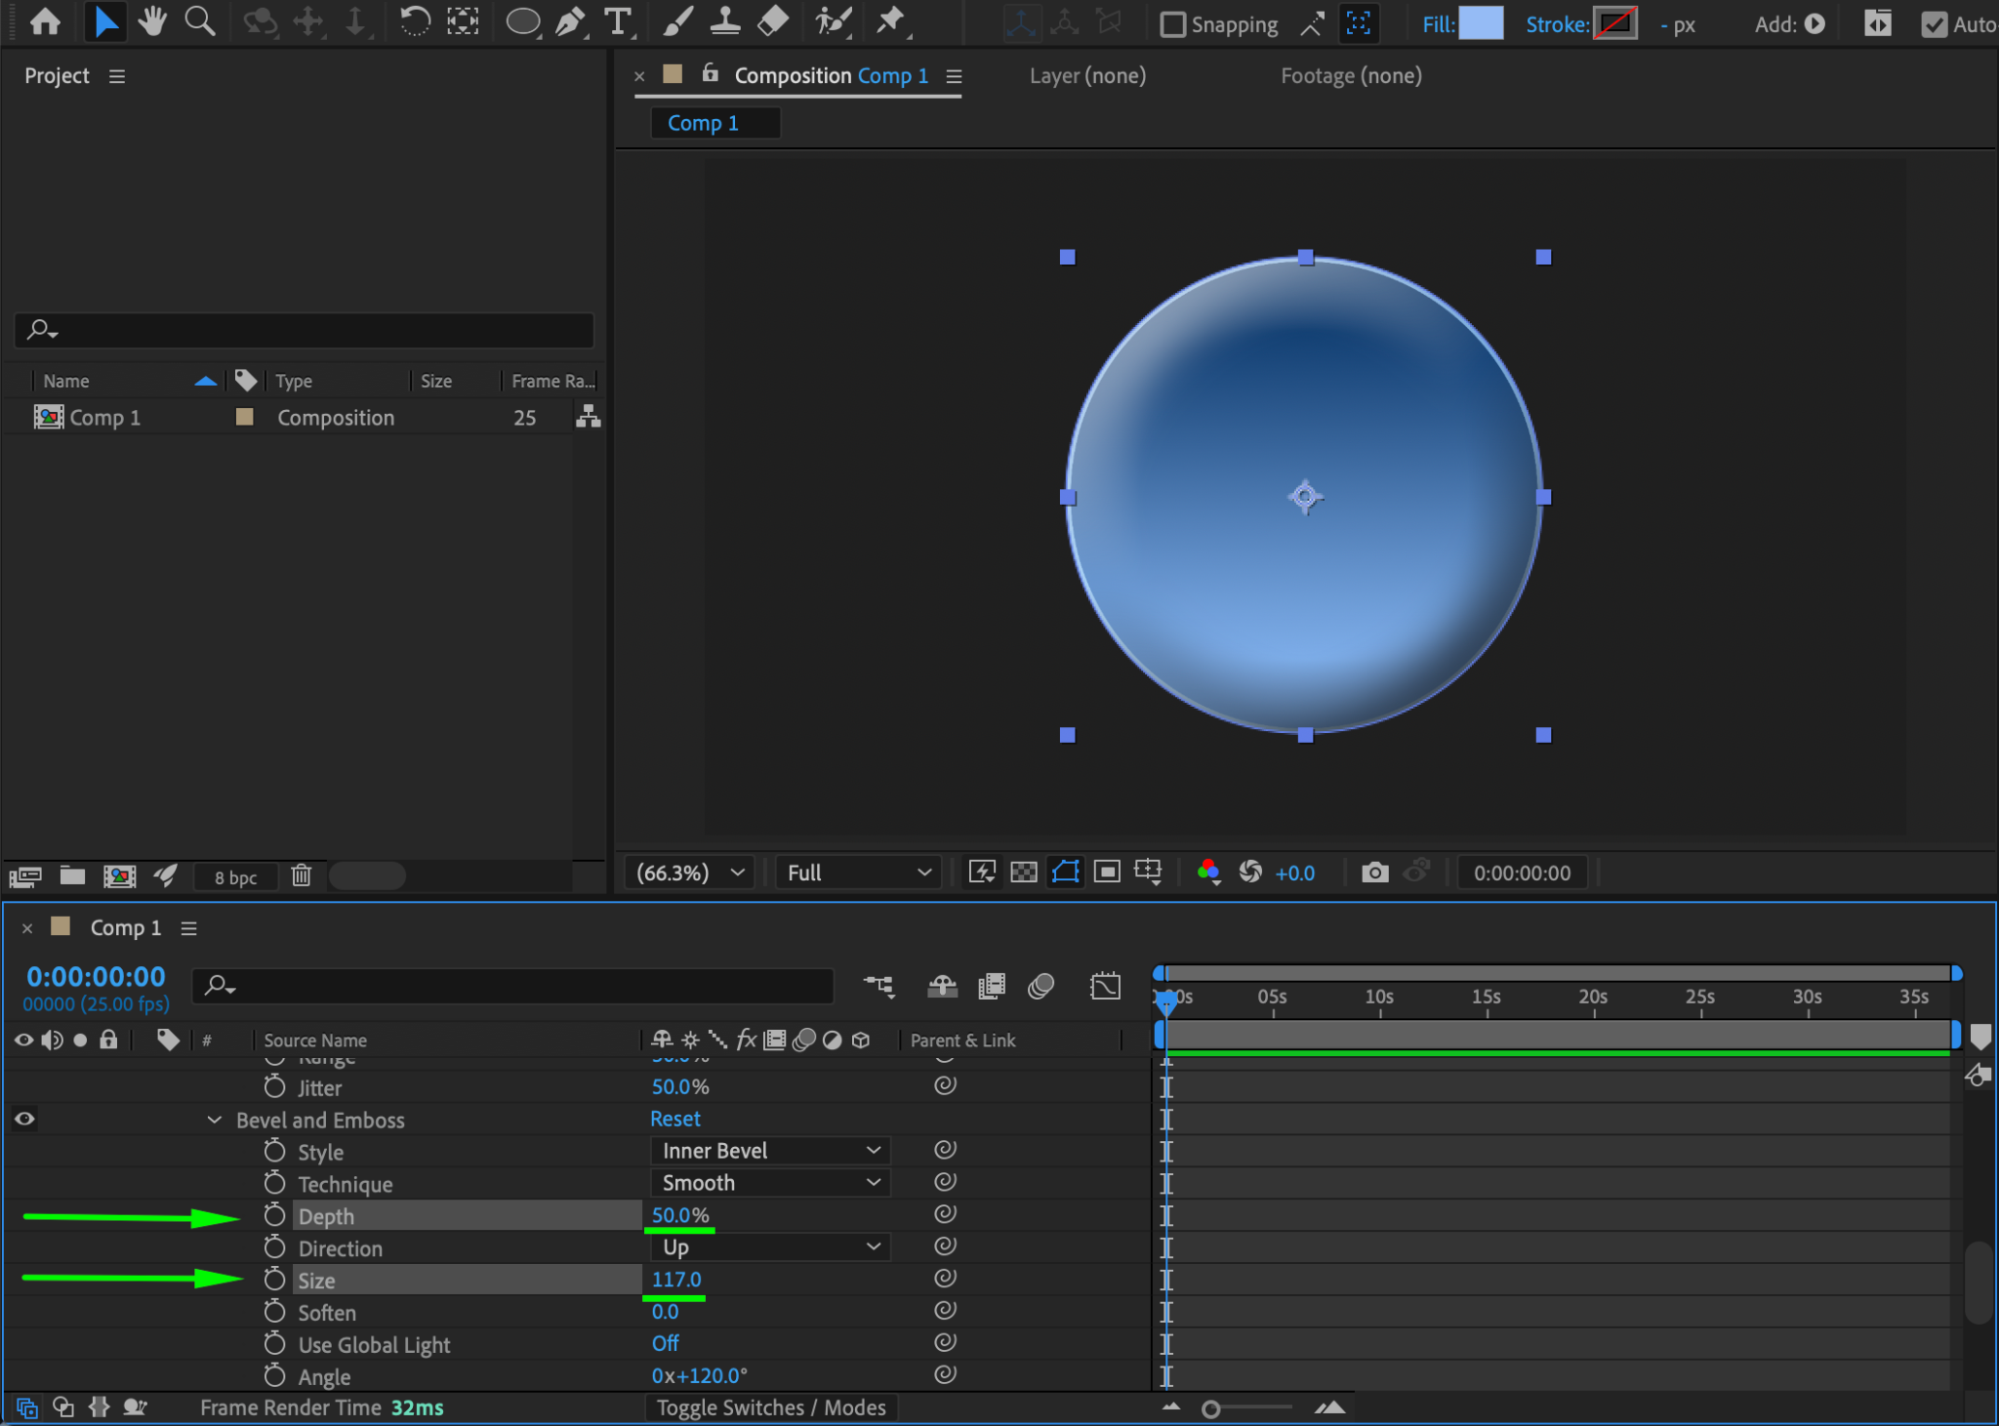
Right-click the layer → Layer Styles → Bevel & Emboss. Expand the properties and set:
Depth: 50
Size: 117
This gives the circle a three-dimensional beveled look.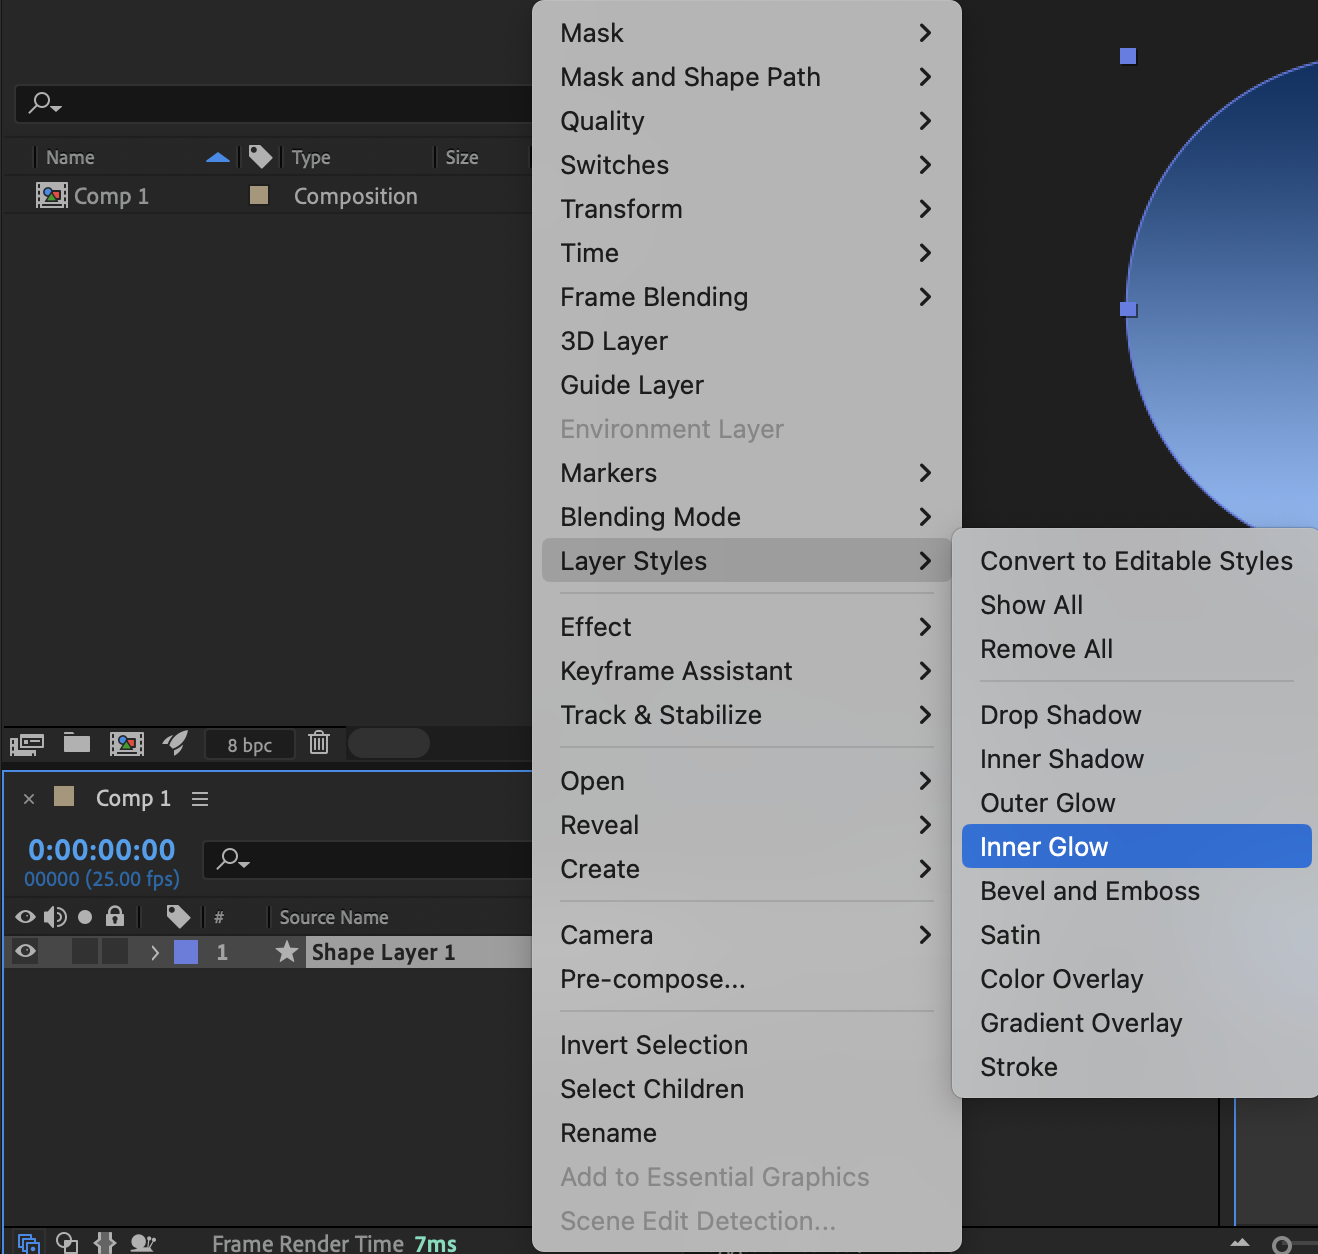
Step 6: Create an Adjustment Layer
Go to Layer → New → Adjustment Layer and place it above the circle.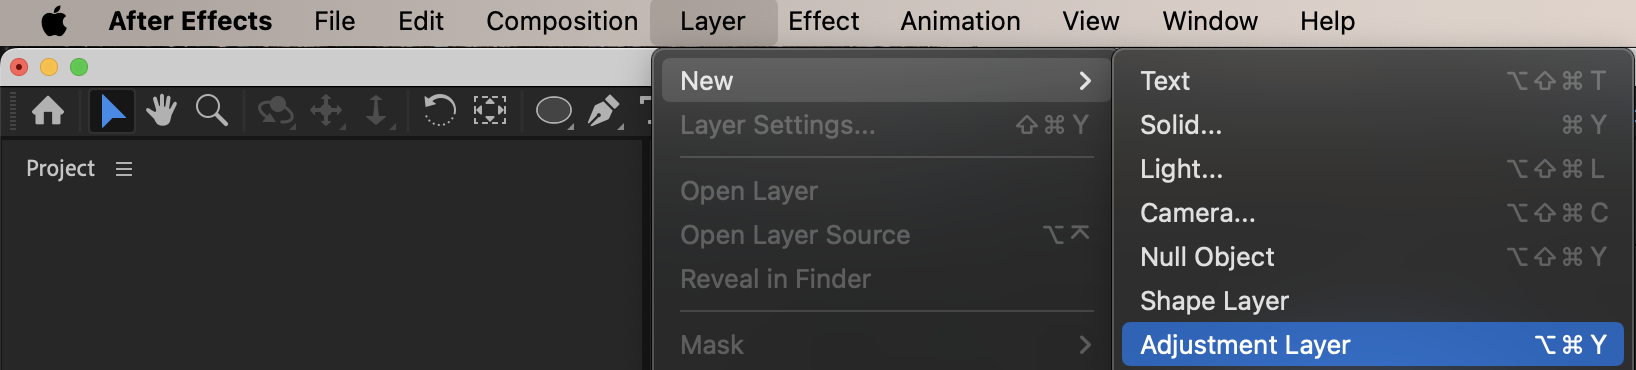 Step 7: Add Glow
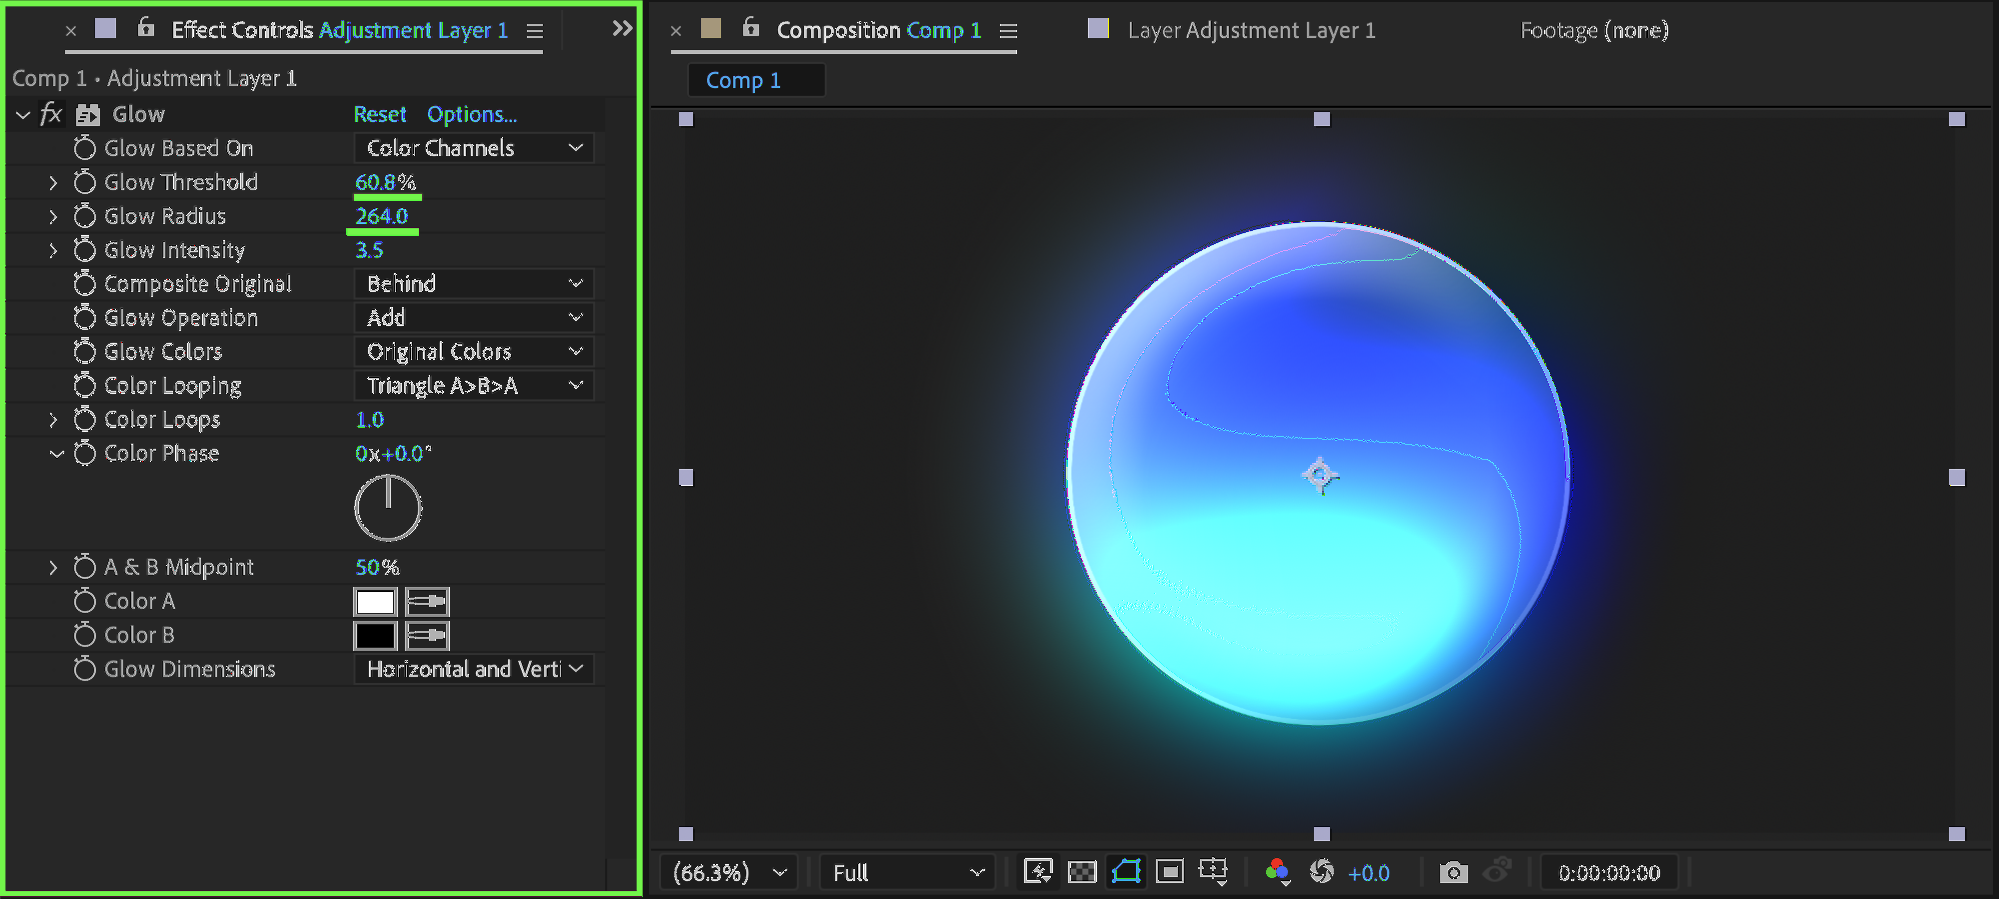
Apply Glow from the Effects & Presets panel to the adjustment layer. Set:
Glow Threshold: 60
Glow Radius: 264
This enhances the circle’s highlight and adds a soft glow effect.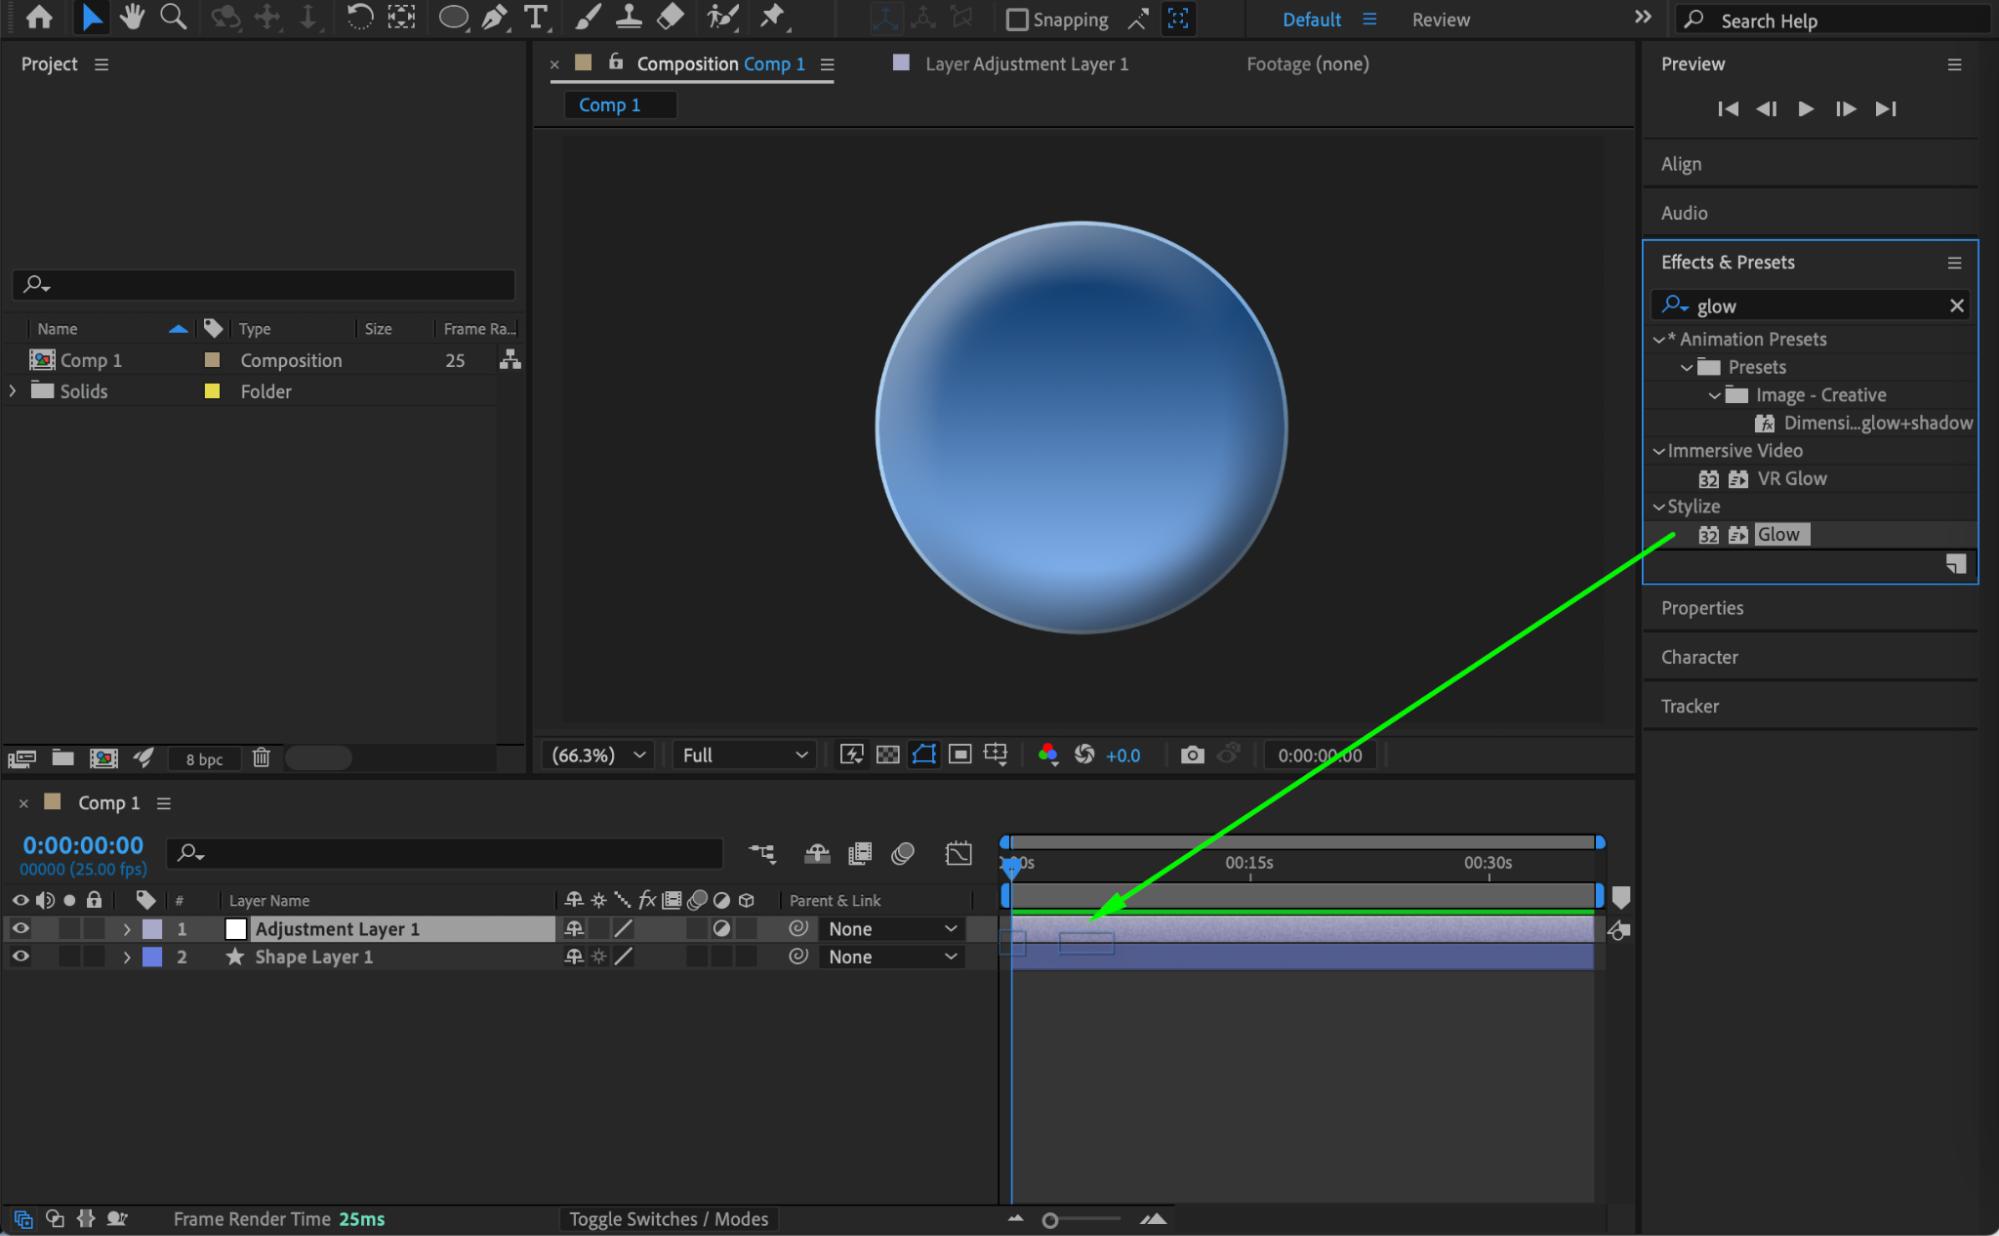
 Step 8: Preview the Result
Preview the composition and adjust gradient, bevel, inner glow, or glow settings as needed to achieve the desired depth.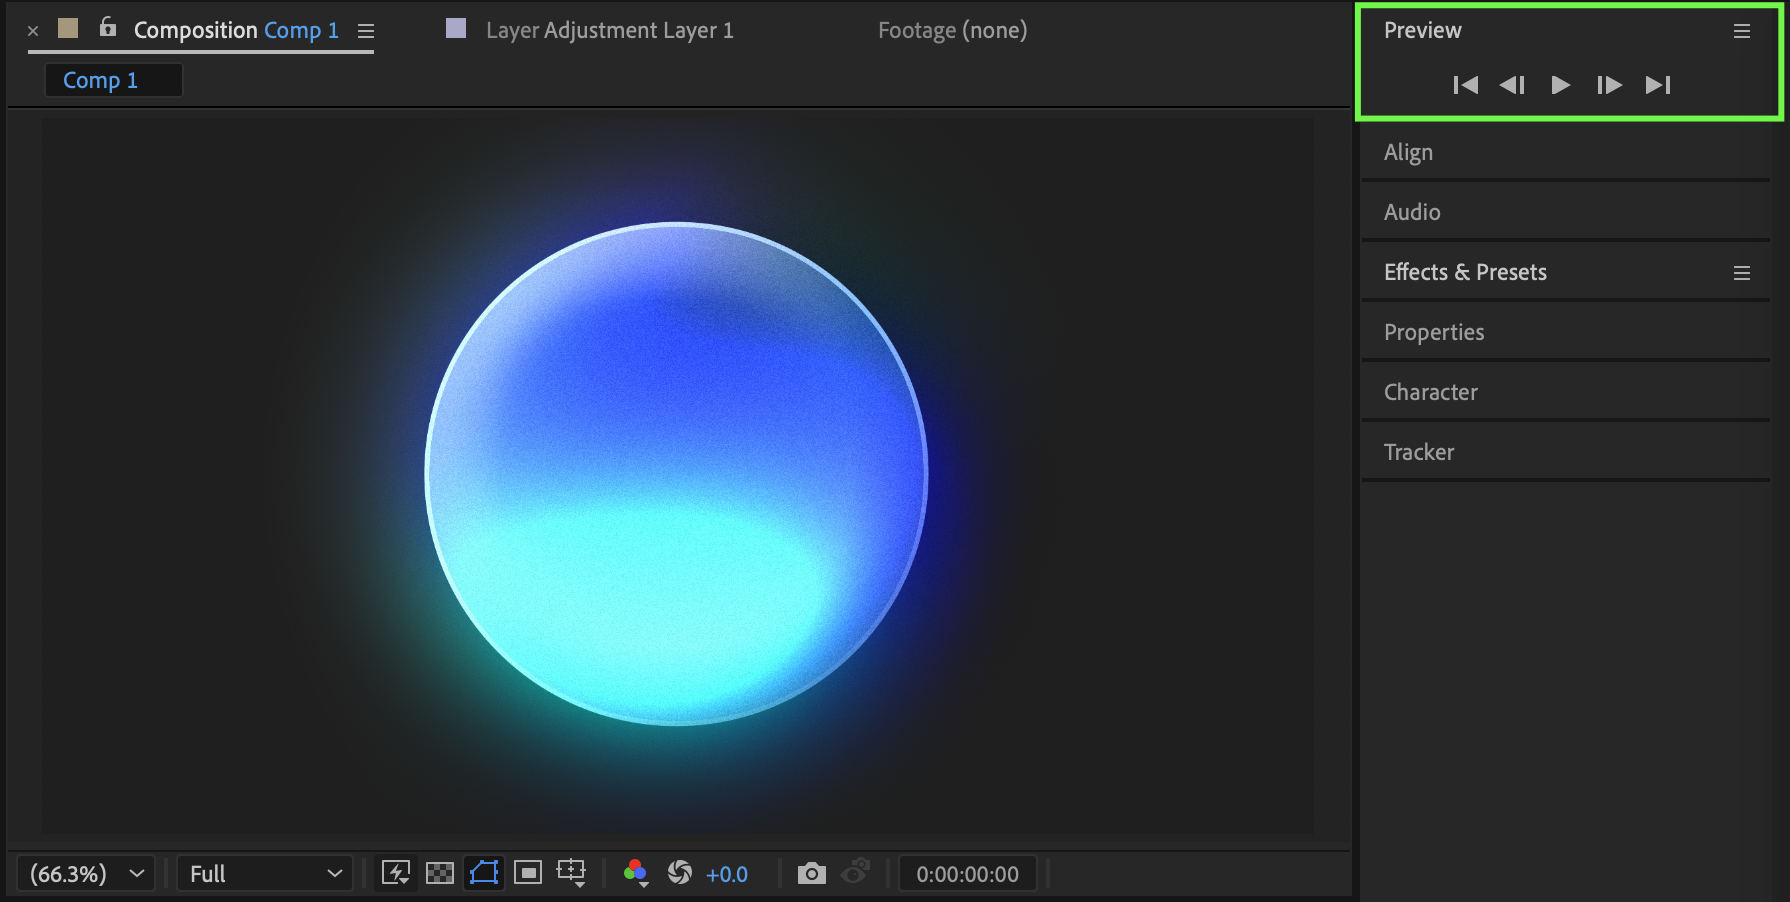 Conclusion
By combining gradient overlays, inner glow, bevel & emboss, and adjustment layer glow, you can create a circle with realistic three-dimensional depth in After Effects. This technique works well for icons, buttons, logos, and UI elements.
Our Bestsellers
Our Bestsellers

