
Introduction to Creating Fan Edits in After Effects
Fan edits are a popular way to reimagine movies, TV shows, and characters, letting fans express creativity through video. While simple software can handle basic cuts, Adobe After Effects offers powerful tools to make your edits look professional. This guide will take you through the process — from importing files to adding effects — so you can make edits that are engaging and polished.
Step 1: Import and Organize Your Files
Open After Effects and import all the media you need for your project, including videos, images, and audio. Keep your files organized in folders inside the Project panel. This will make editing faster and easier.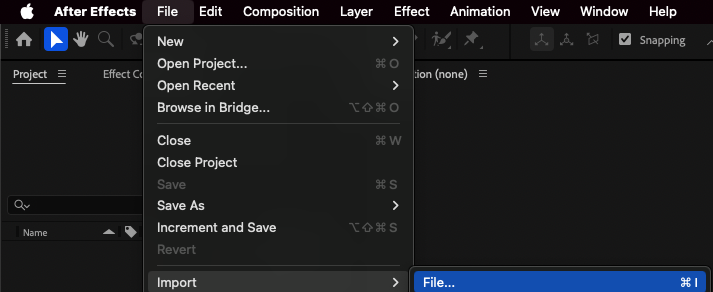
Step 2: Create and Set Up Your Composition
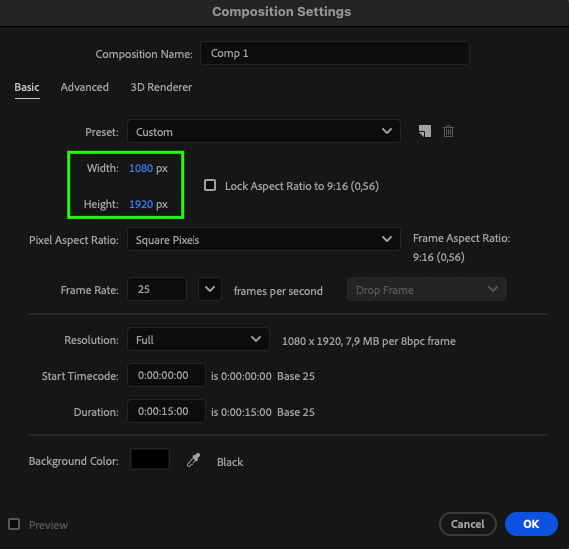
Create a new composition (Composition > New Composition) and choose settings based on where your video will be published. Use vertical settings for platforms like TikTok or Instagram Reels, and horizontal for YouTube or Vimeo.
Step 3: Add Media to the Timeline
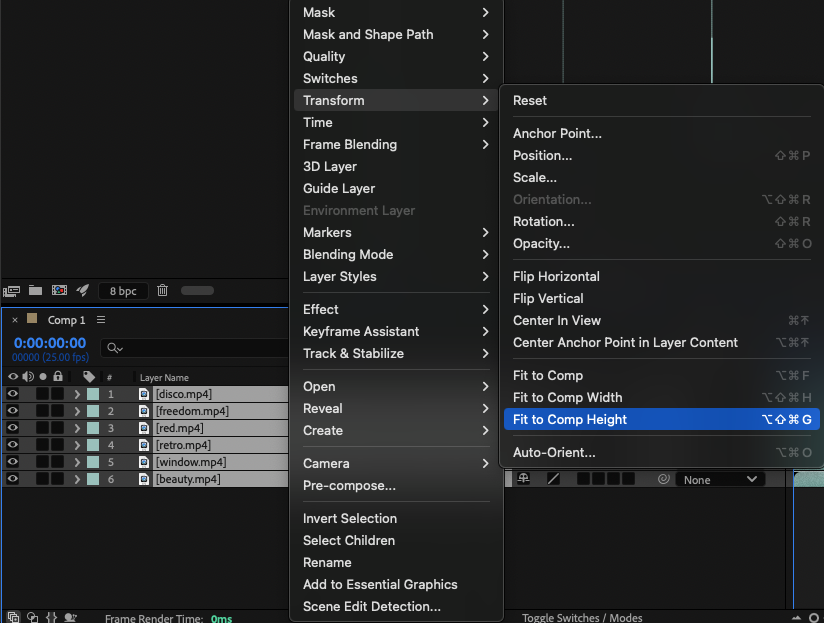
Drag your imported videos or images onto the timeline. For vertical edits, right-click the selected layers and choose Transform > Fit to Comp Height. For horizontal edits, choose Fit to Comp Width. This ensures your footage fills the frame.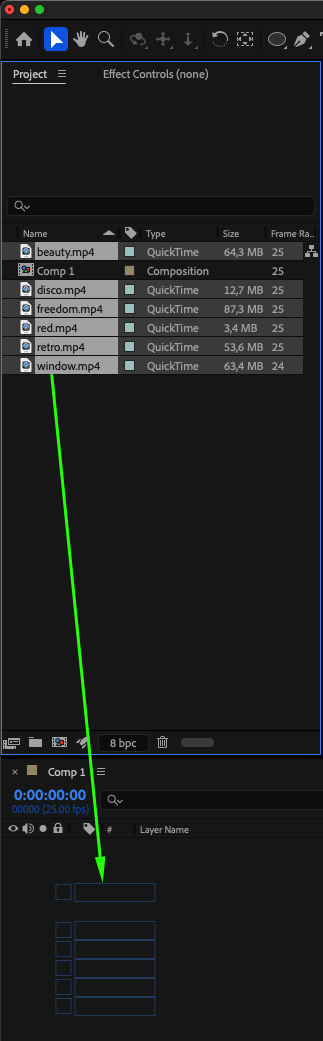
 Step 4: Split and Trim Footage
Go to Edit > Split Layer to break your video into smaller parts. Delete sections you don’t need. This helps focus your edit on the most important moments.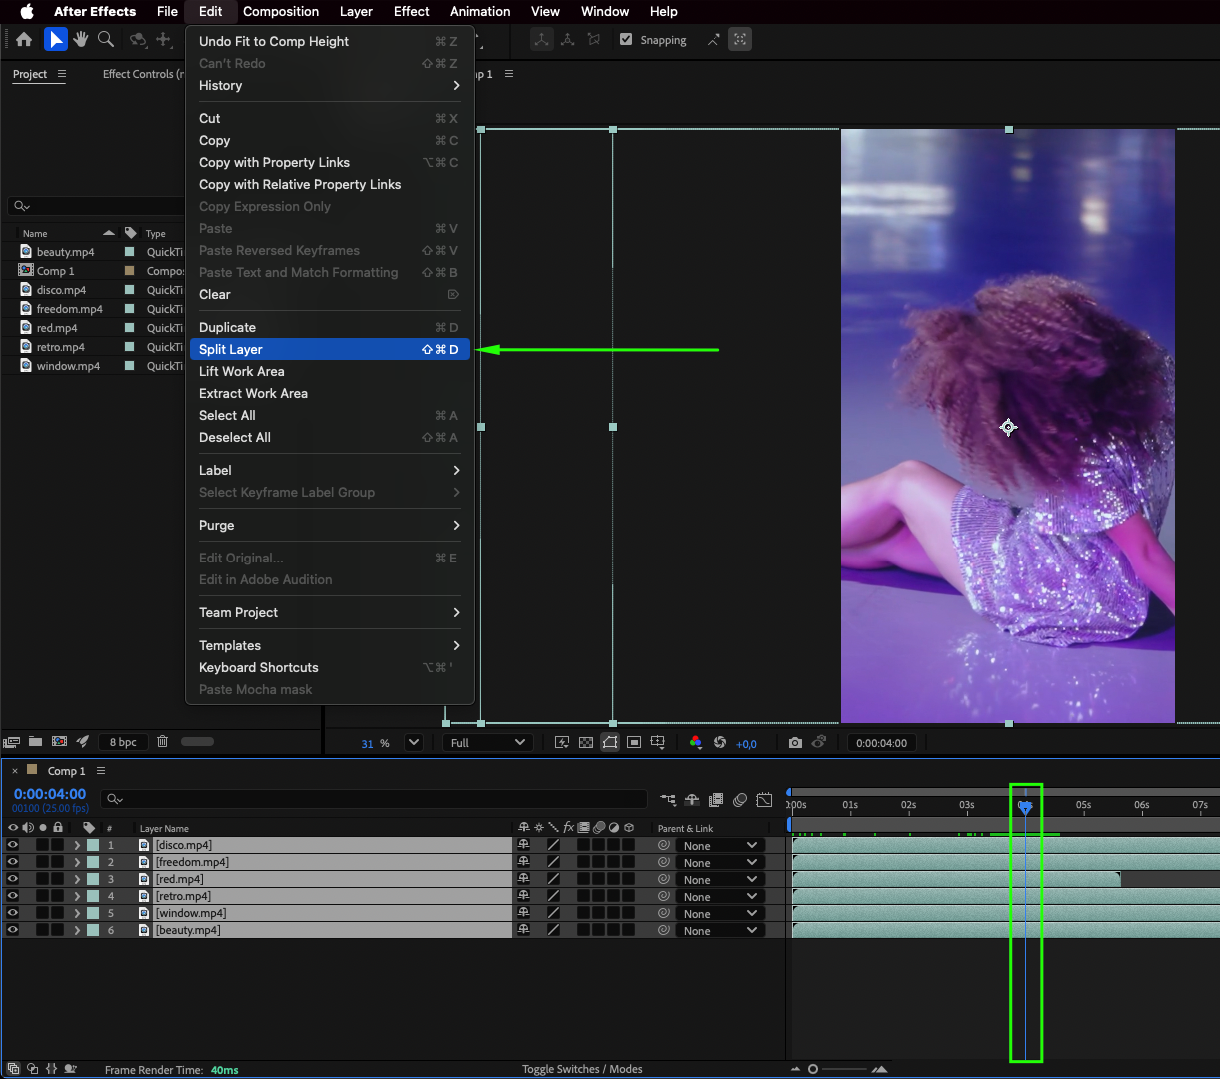 Step 5: Sequence the Layers
Select all the video fragments, right-click, and choose Keyframe Assistant > Sequence Layers. This arranges your clips in order without gaps, making your timeline more organized.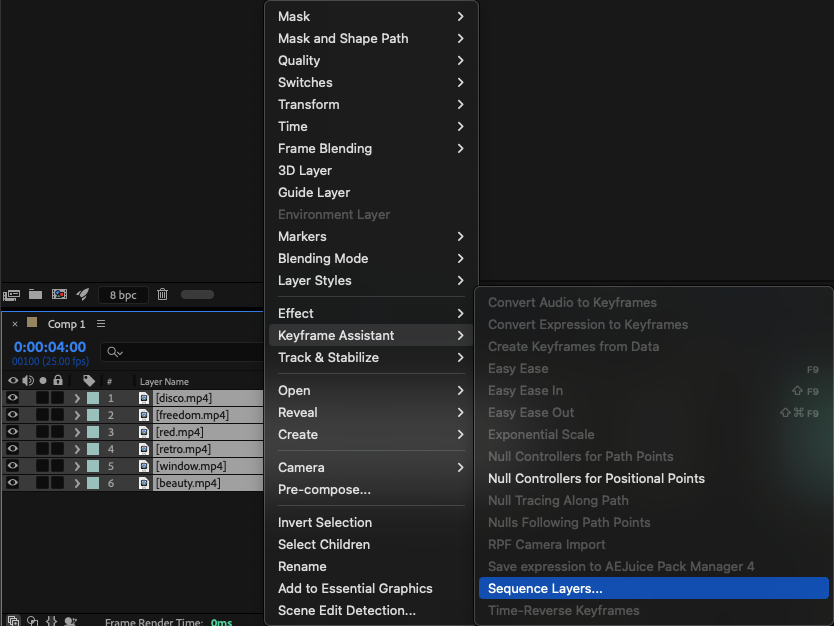 Step 6: Adjust and Animate Video Parameters
For each video fragment, fine-tune its position, scale, and rotation. If working in vertical format, use small zoom-ins or pans to add movement. You can keyframe these adjustments for smooth animation.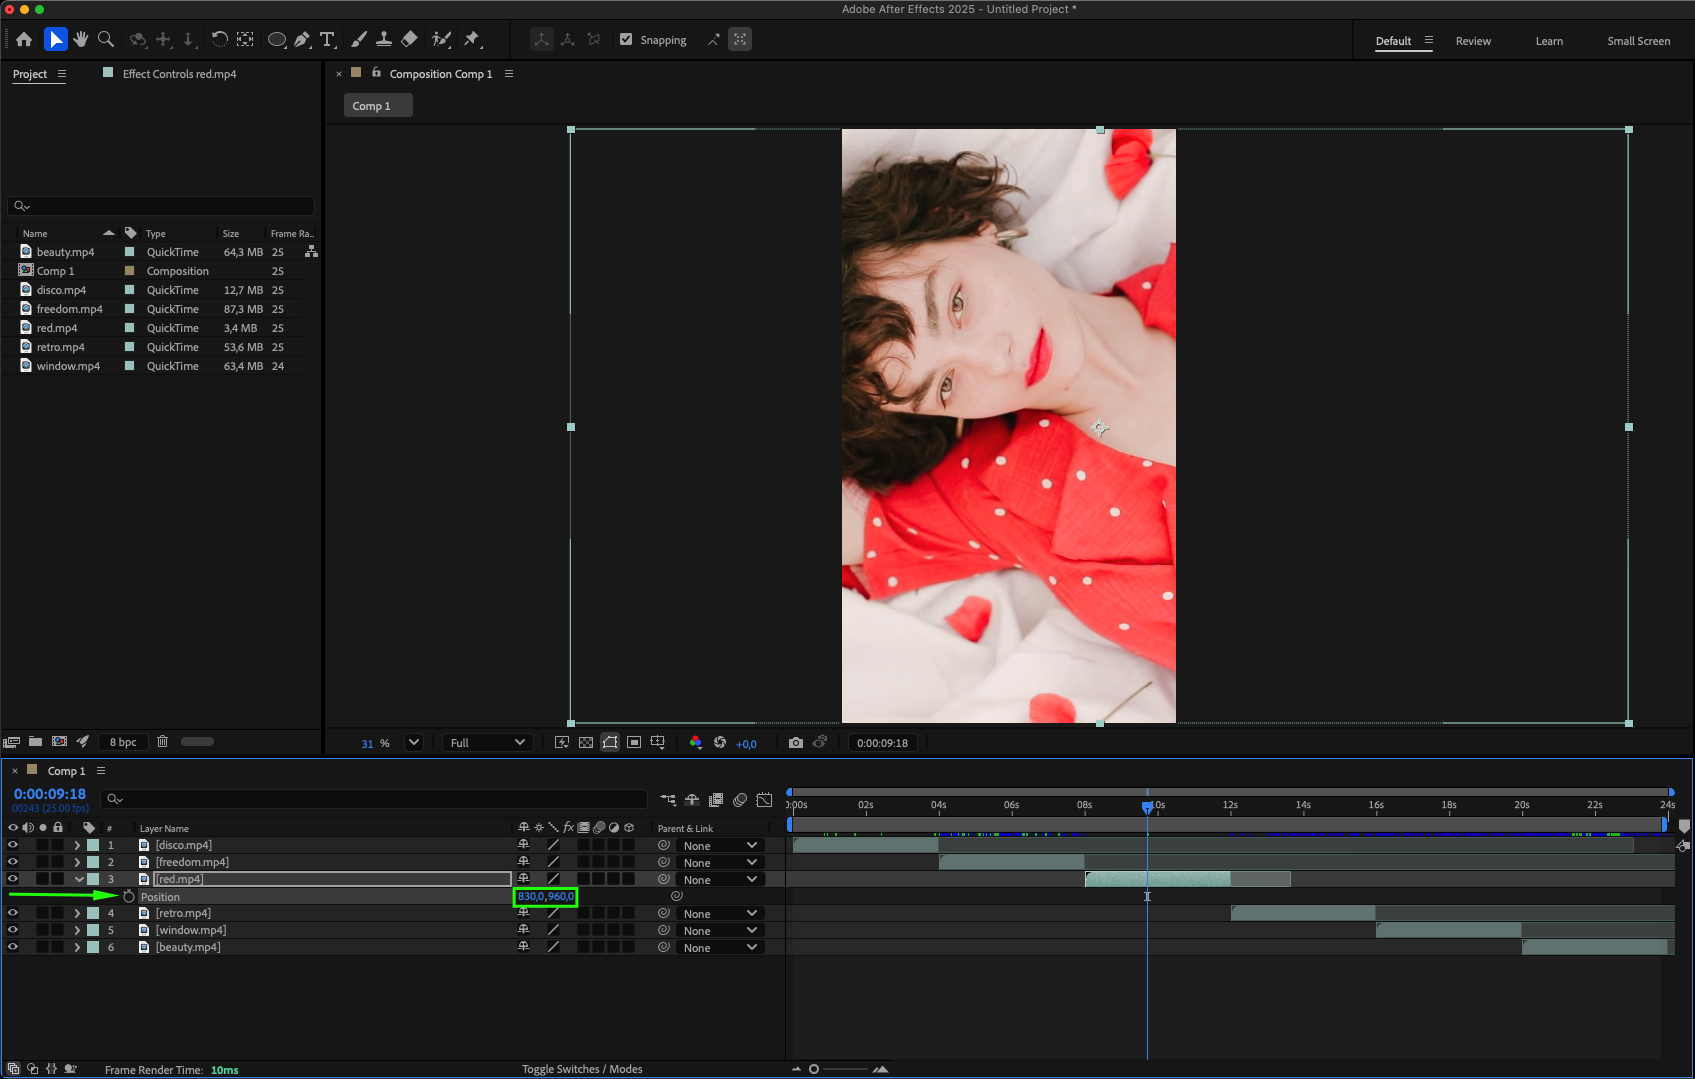
Step 7: Apply Adjustment Layers for Effects
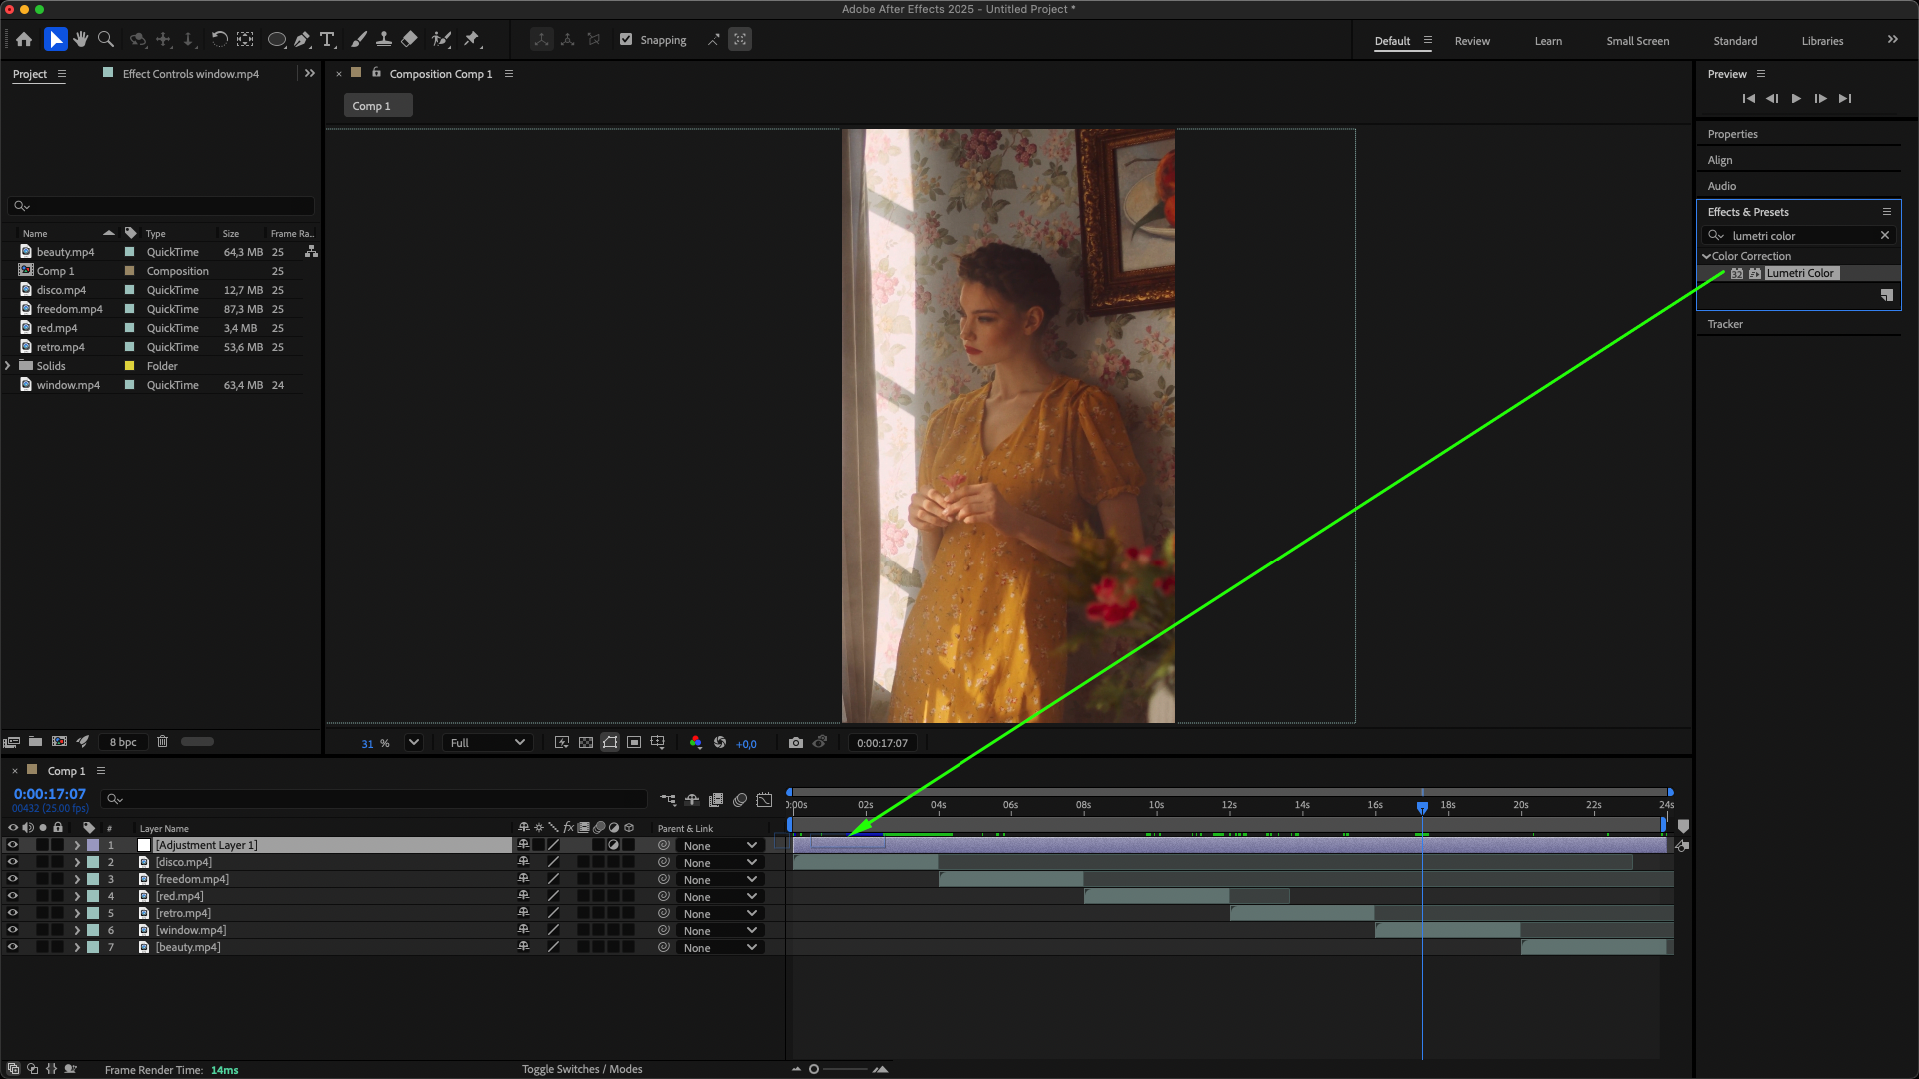
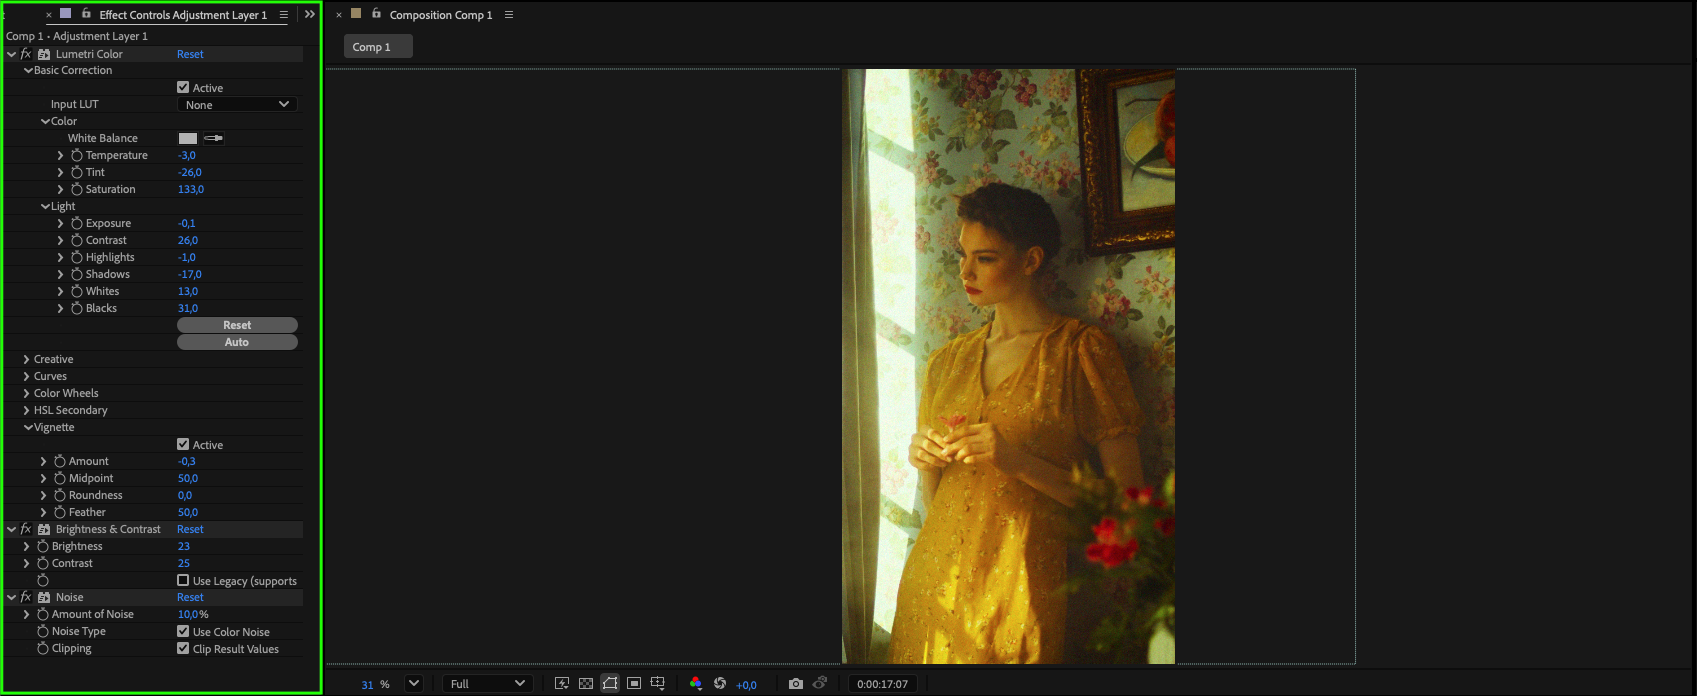
Create an adjustment layer (Layer > New > Adjustment Layer) to apply effects like color correction, sharpening, or blur to all clips at once. This keeps your edit consistent and saves time.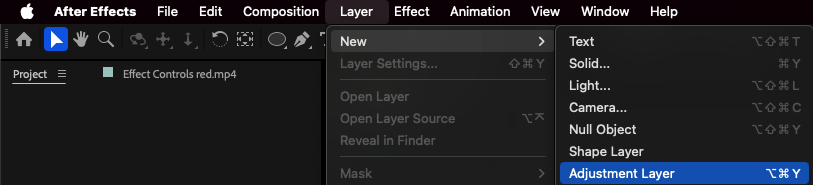
 Step 8: Add Music
Import your chosen music track and drag it onto the timeline. Make sure it is synced with your visuals for better emotional impact.
Step 9: Preview and Refine
Press the spacebar to preview your edit. Adjust timing, effects, and transitions until you’re satisfied with the final result.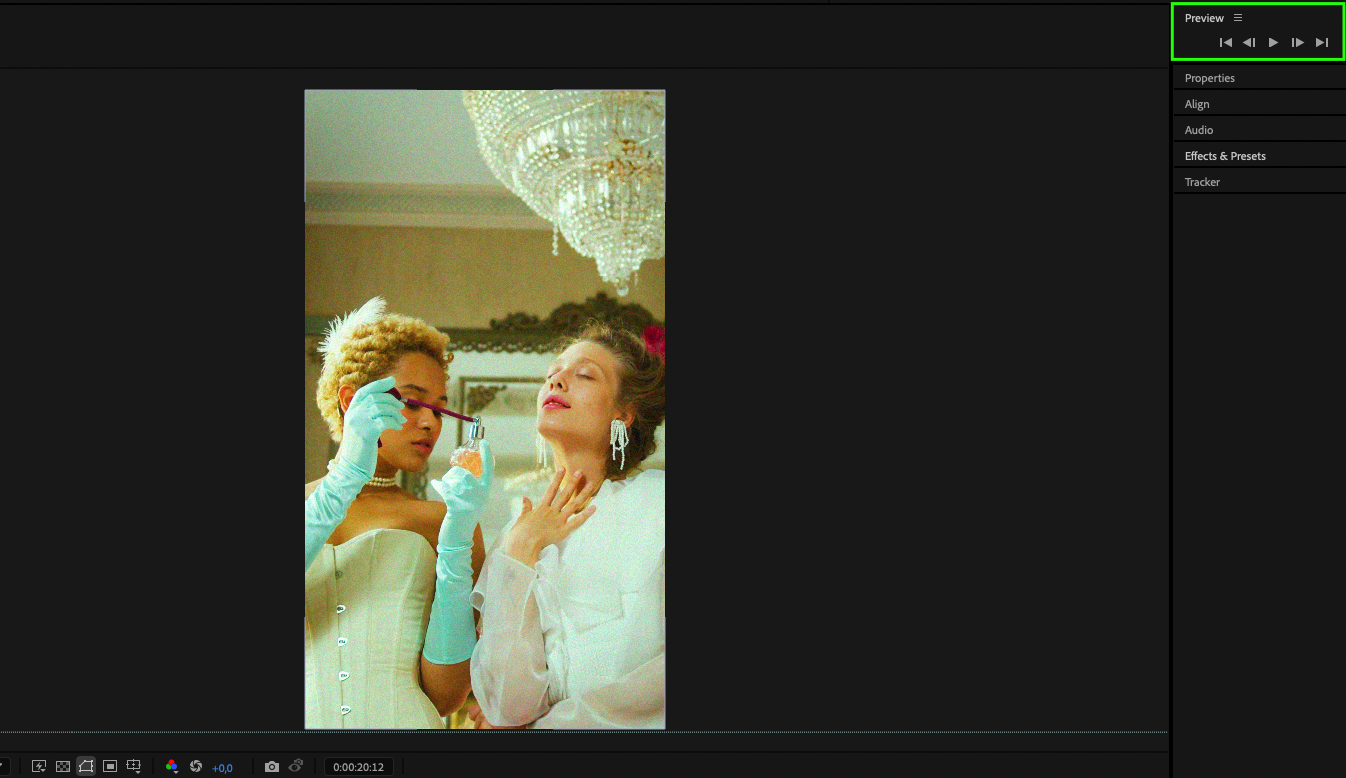
Conclusion
With Adobe After Effects, fan edits can go beyond simple cuts and transitions. Using its tools for animation, effects, and organization, you can create edits that are visually impressive and emotionally engaging. Keep experimenting with techniques, and each project will bring you closer to professional-quality results.
Our Bestsellers
Our Bestsellers


