Step-by-Step Guide to Adding an Audio Spectrum in After Effects
Introduction to Audio Spectrum Effects
Are you tired of your videos looking plain and lacking that extra visual appeal? Well, we’ve got just the solution for you! In this step-by-step tutorial, we’ll show you how to add an audio spectrum effect to your videos in After Effects. It’s a simple way to make your visuals more engaging and captivating.
Before we dive into the tutorial, let’s talk a bit about why audio visualizations are so important in creating captivating videos. They add a dynamic element to your content, making it more visually interesting and immersive for your audience. With AEJuice’s collection of dynamic audio spectrum templates, you can easily incorporate these effects into your videos and bring your music to life.
Now, let’s get started with the tutorial:
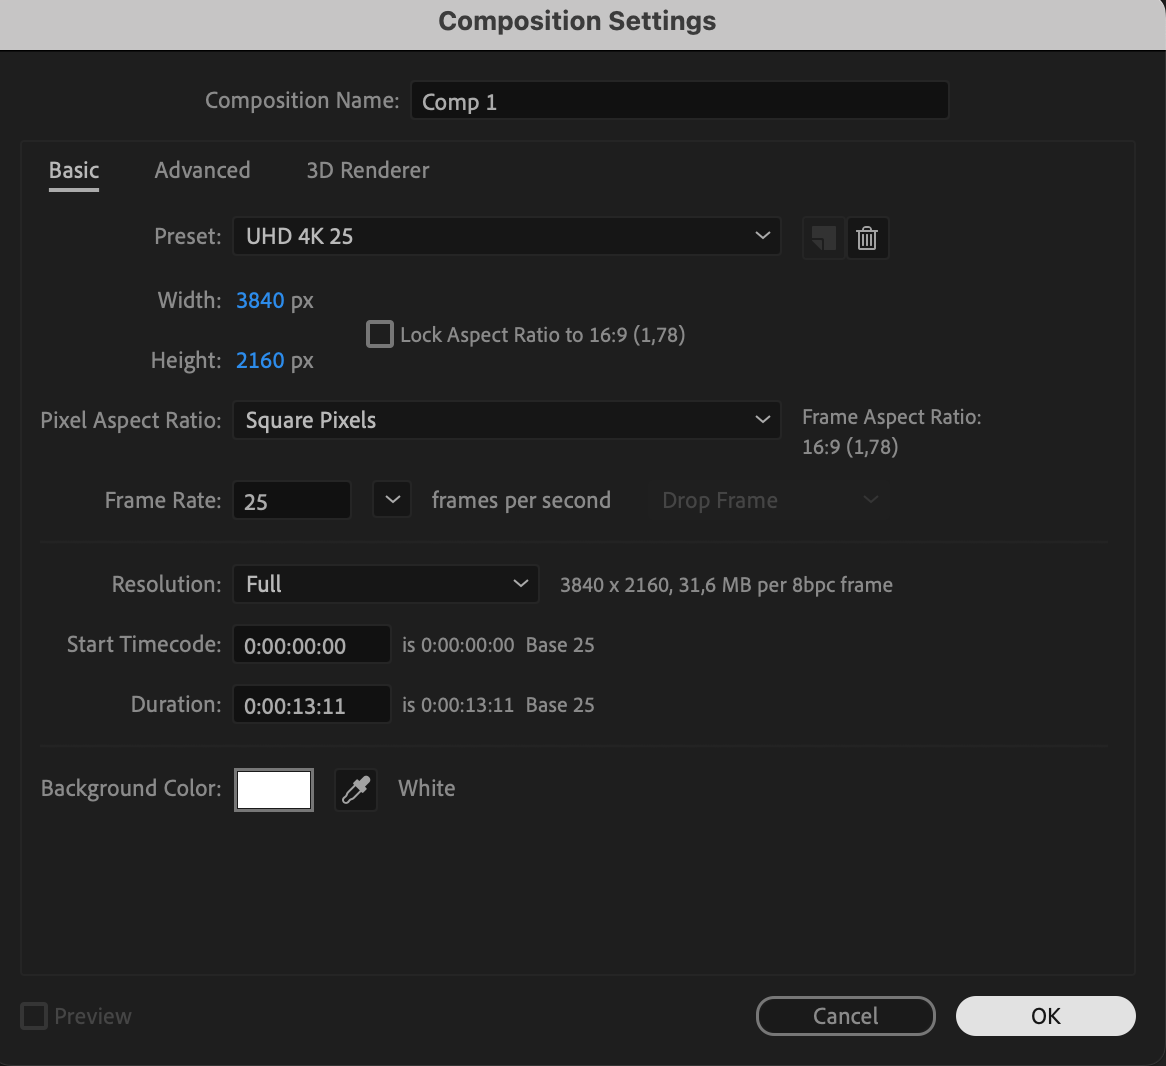
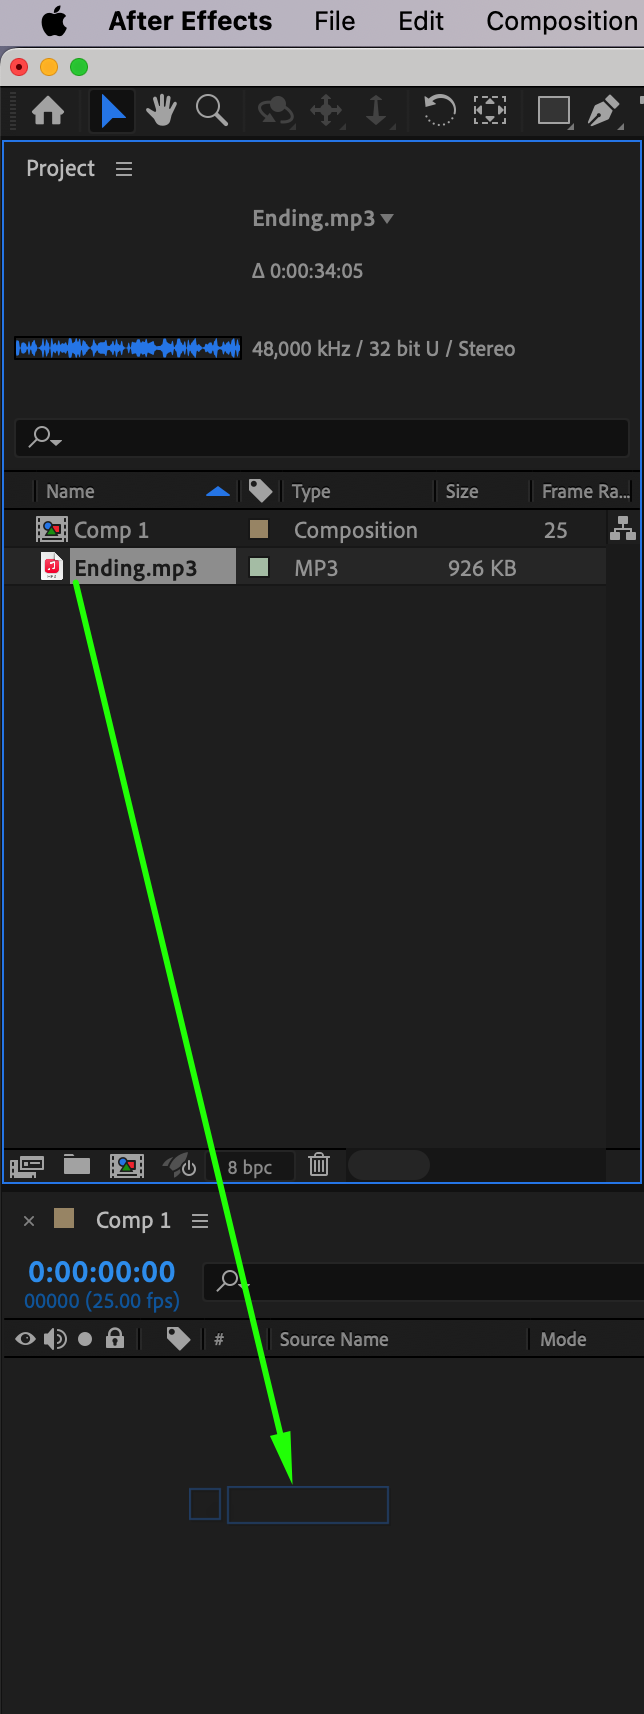
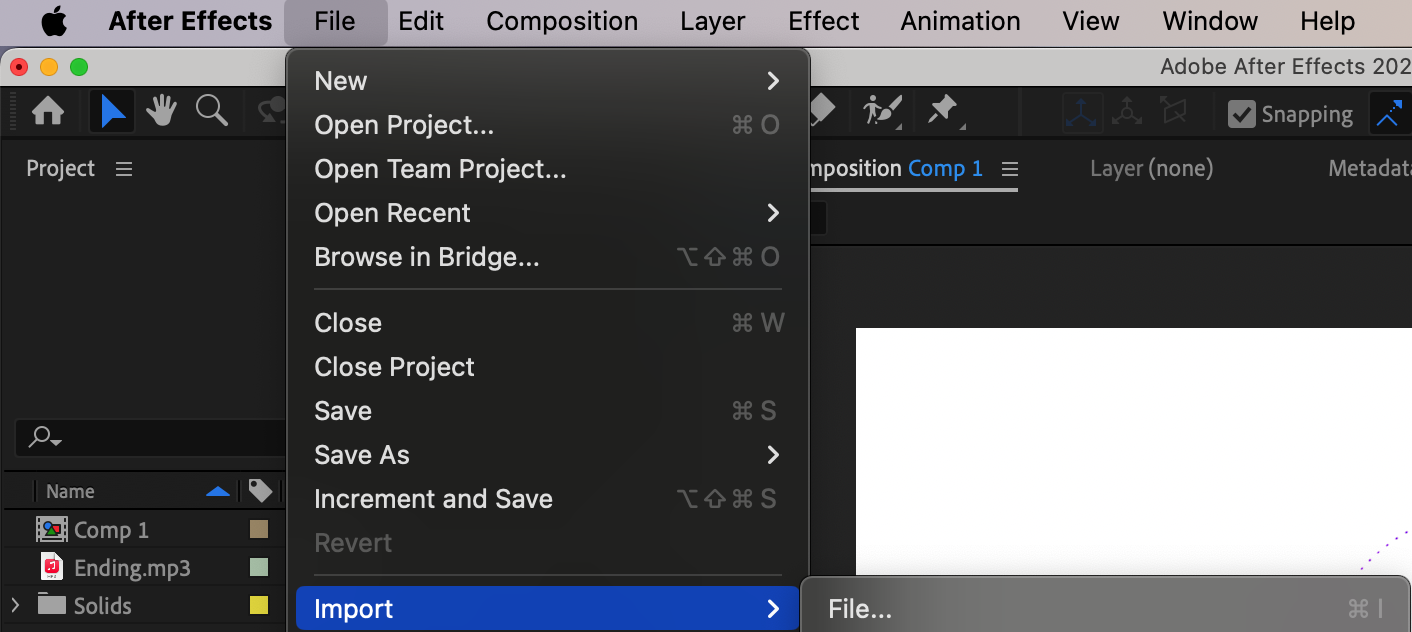
Step 1: Import your audio file. Drag and drop your preferred audio file into After Effects or use the “Import” option in the File menu.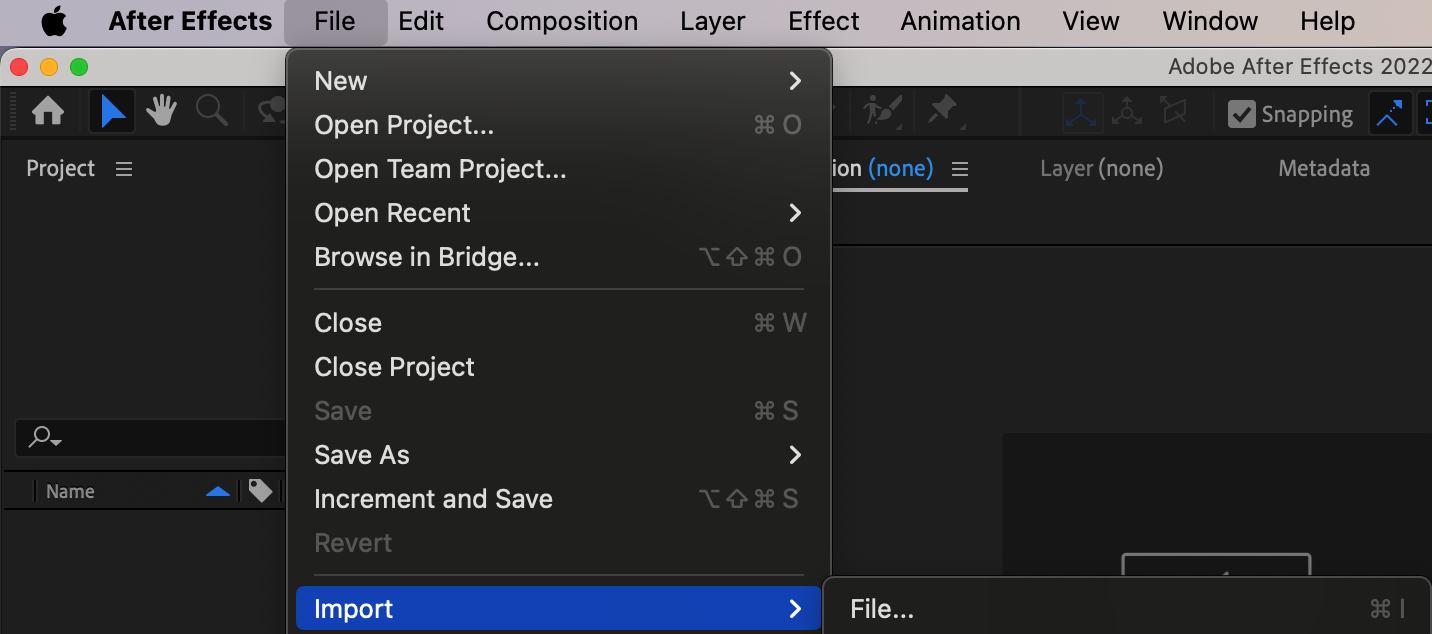 Step 2: Create a new composition. Click on “Composition” in the top menu bar and choose “New Composition.” Make sure to adjust the settings to match your desired output size and frame rate. After that, drag your audio file onto the timeline panel to start working with it.
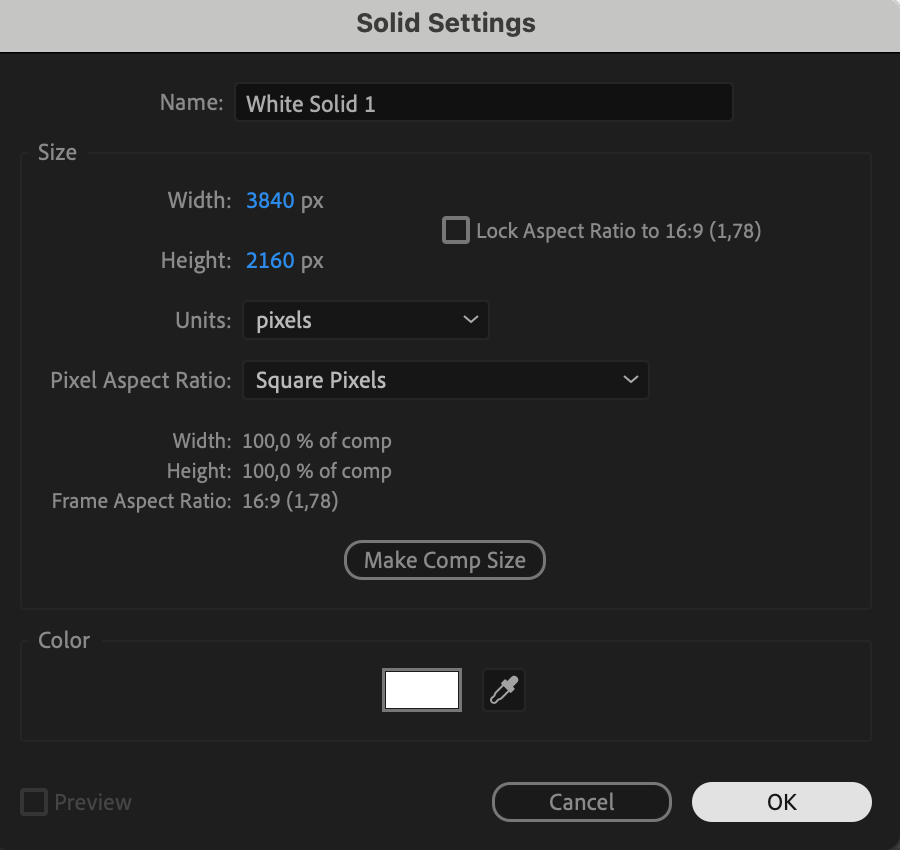
 Step 3: Add a Solid layer. Go to the “Layer” menu, select “New,” and then choose “Solid.” Pick a color that complements your video’s overall aesthetic.
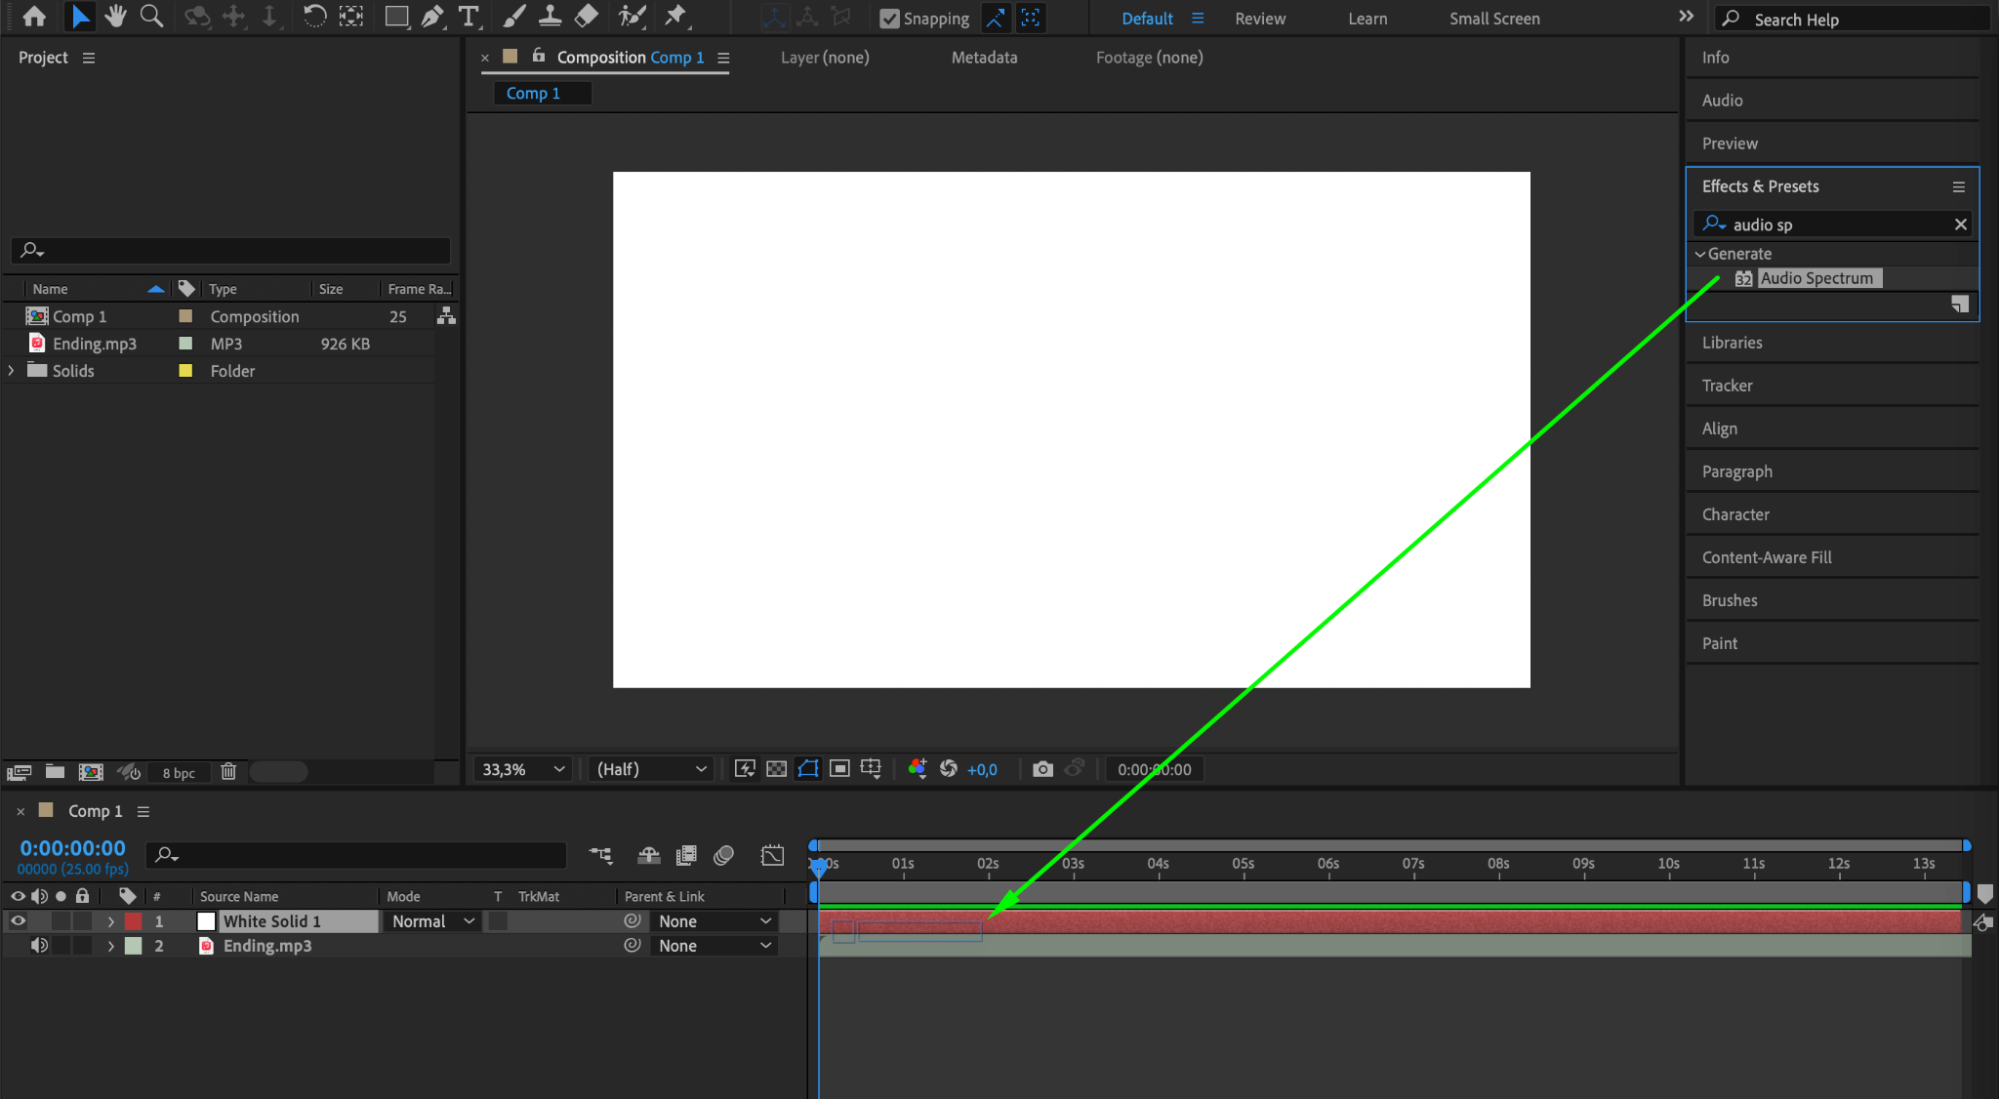
 Step 4: Apply the Audio Spectrum effect. Select the Solid layer and open the Effects & Presets panel. Search for the “Audio Spectrum” effect and drag it onto the Solid layer in the Composition panel.
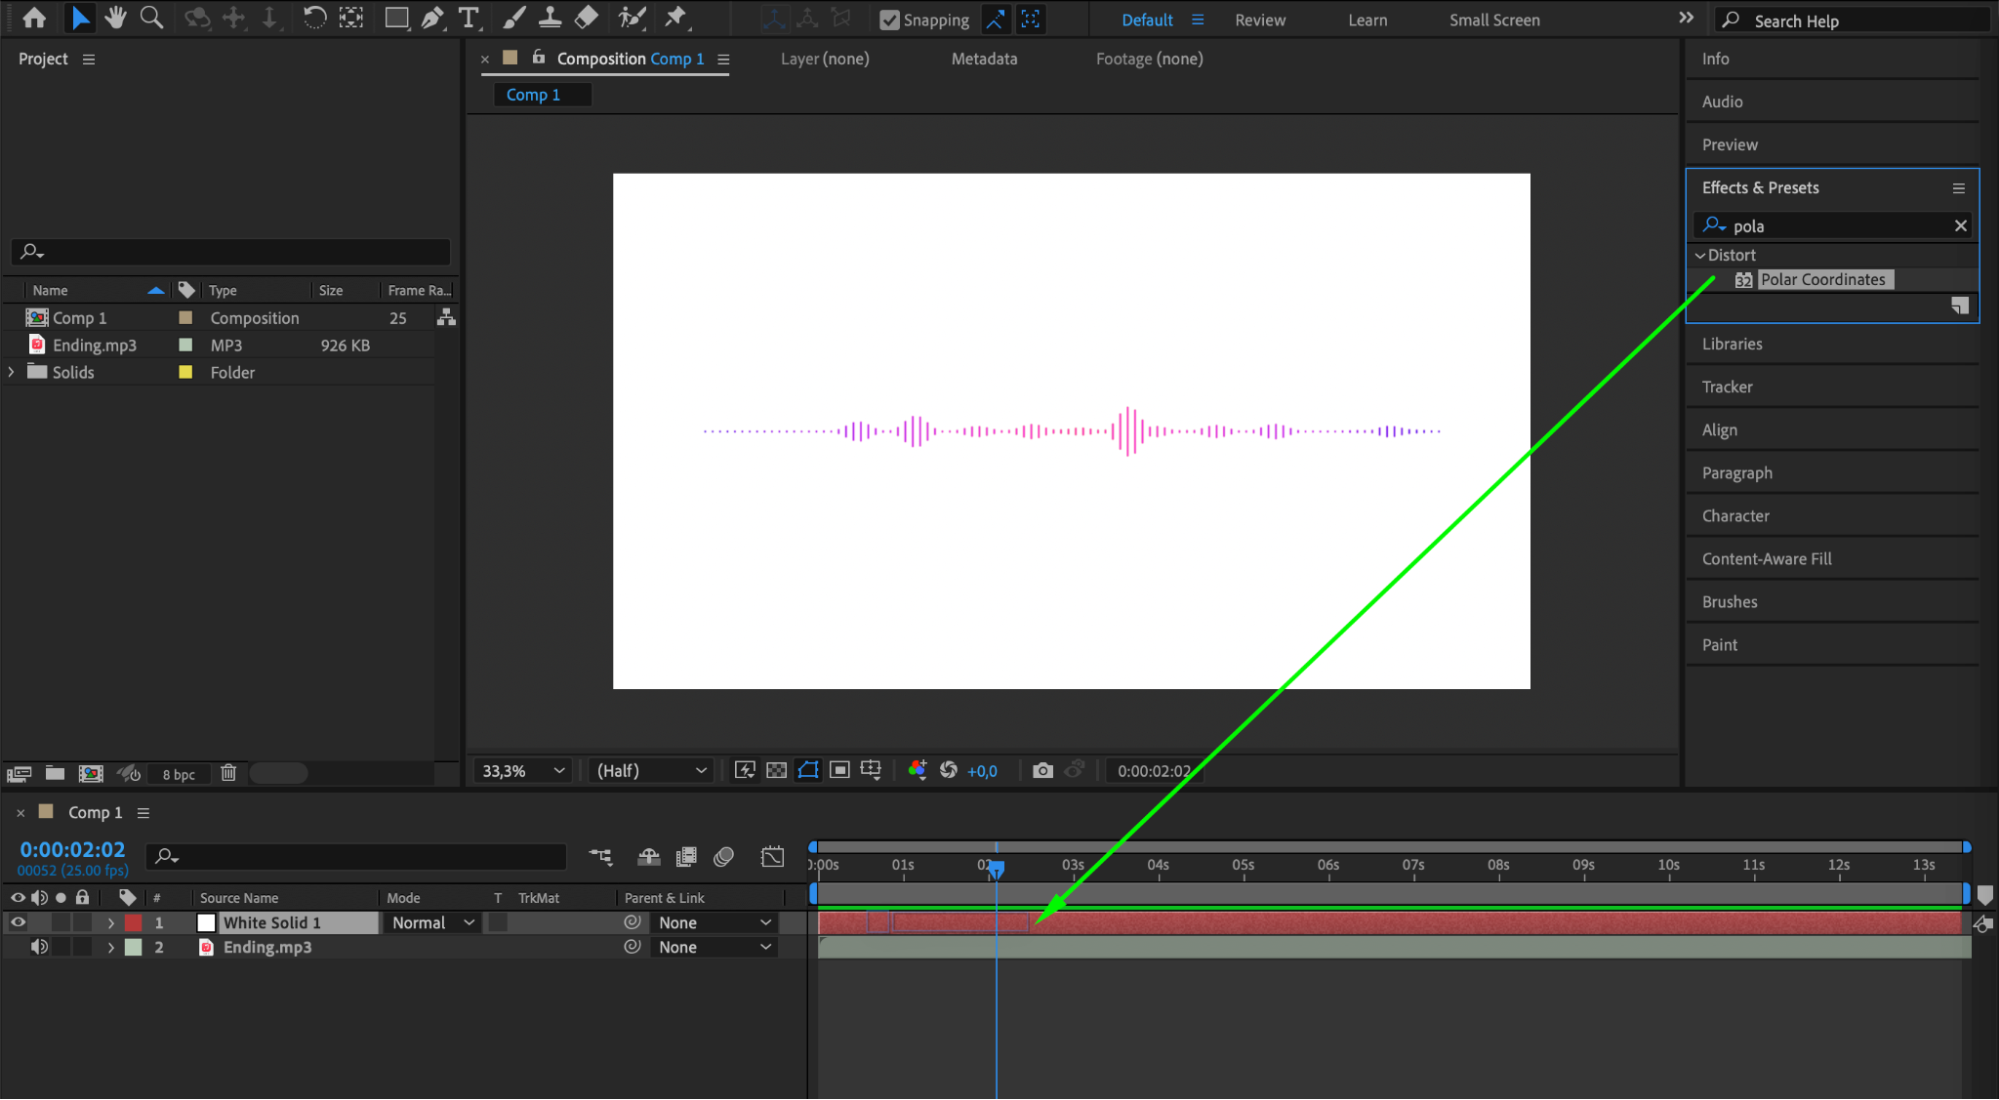
Step 5: Customize the Audio Spectrum effect. In the Effect Controls panel, assign the imported audio file to the Audio Layer property. Adjust parameters such as Frequency Bands, Maximum Height, Color, and Thickness to achieve the desired visual effect.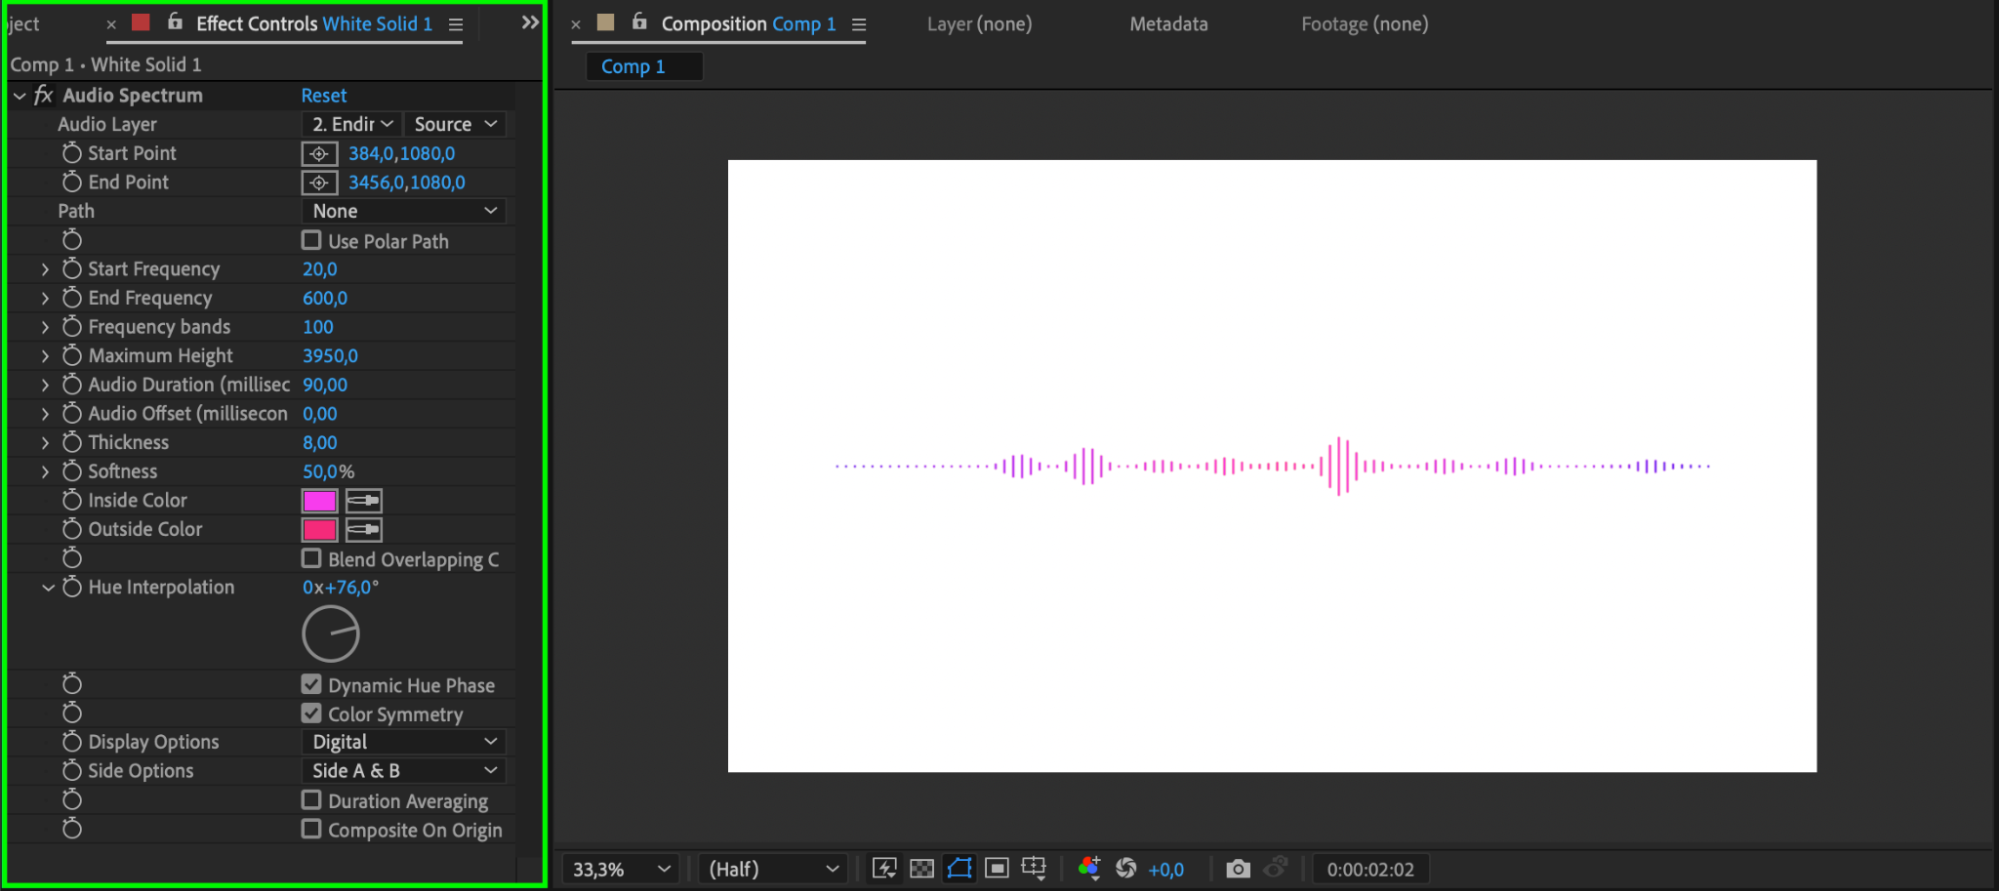 Step 6: Transform Audio Waves into a Spectrum. Use the Polar Coordinates effect to convert your audio waves into a spectrum. Find this effect in the Effects & Presets panel and drag it onto the Solid layer.
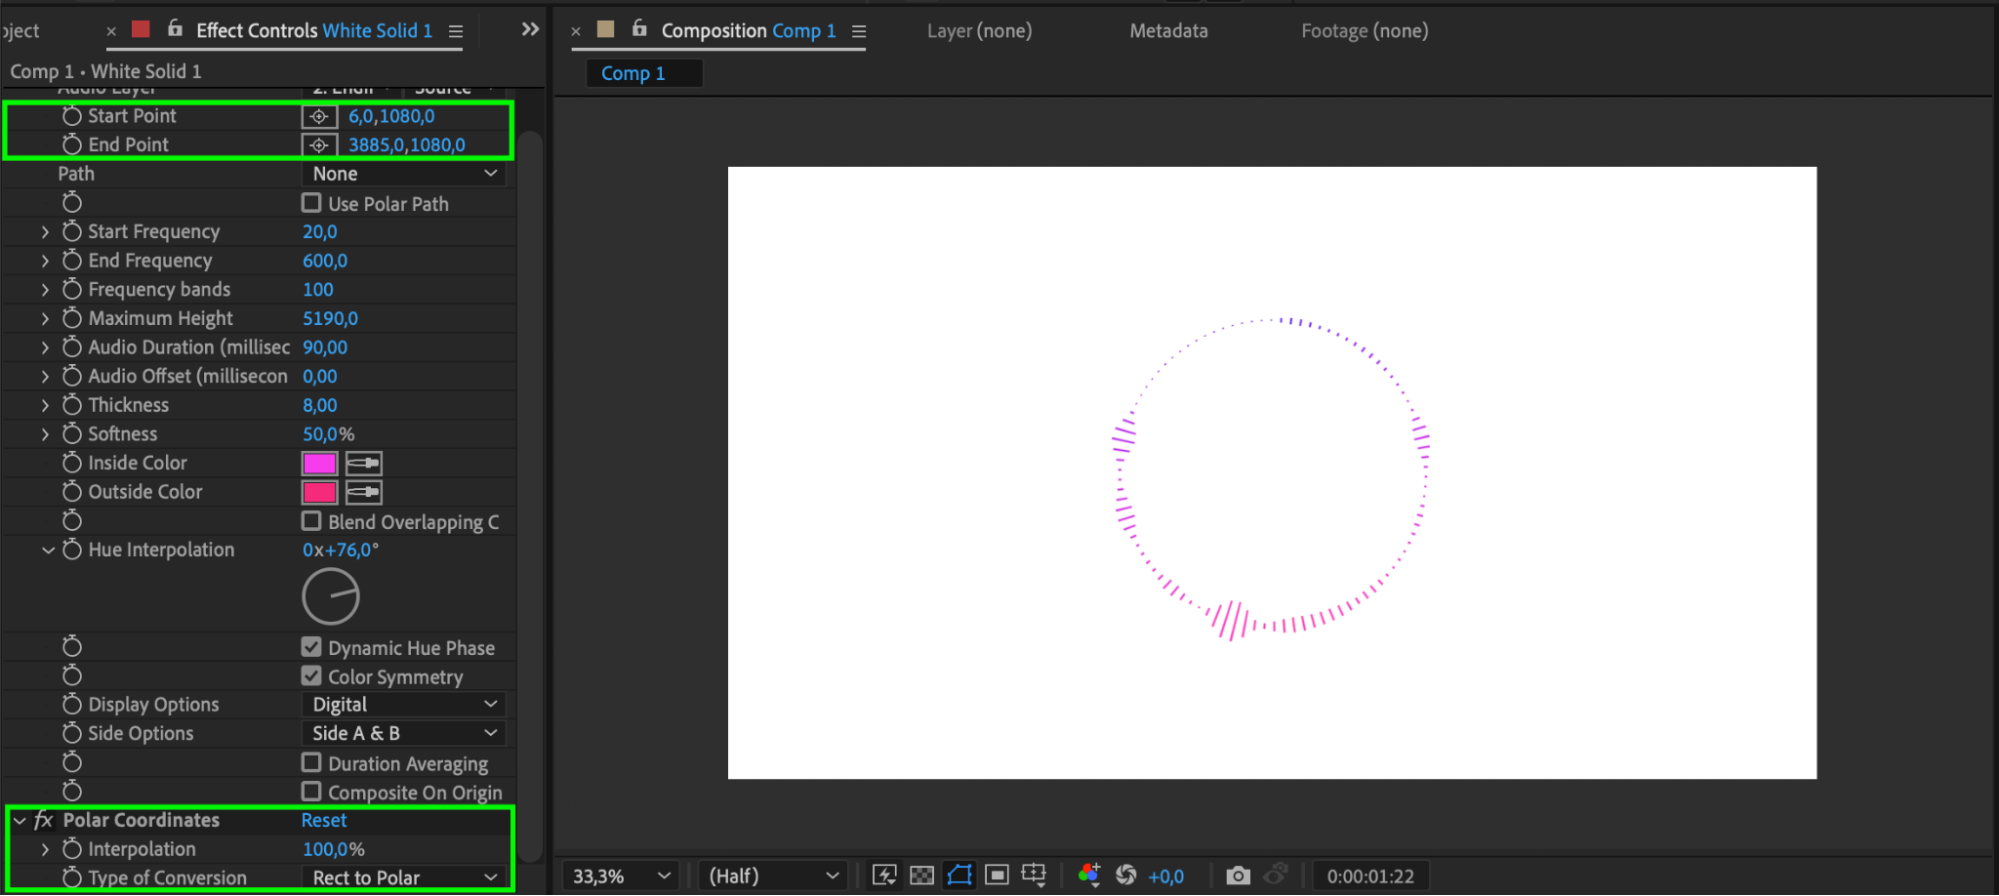
 Step 7: Adjust Polar Coordinates Settings. In the Effect Controls panel, set the Interpolation parameter to 100 and the Type of Conversion to “Rect to Polar.” Adjust the Start and End Points for the audio spectrum effect to create a closed circle.
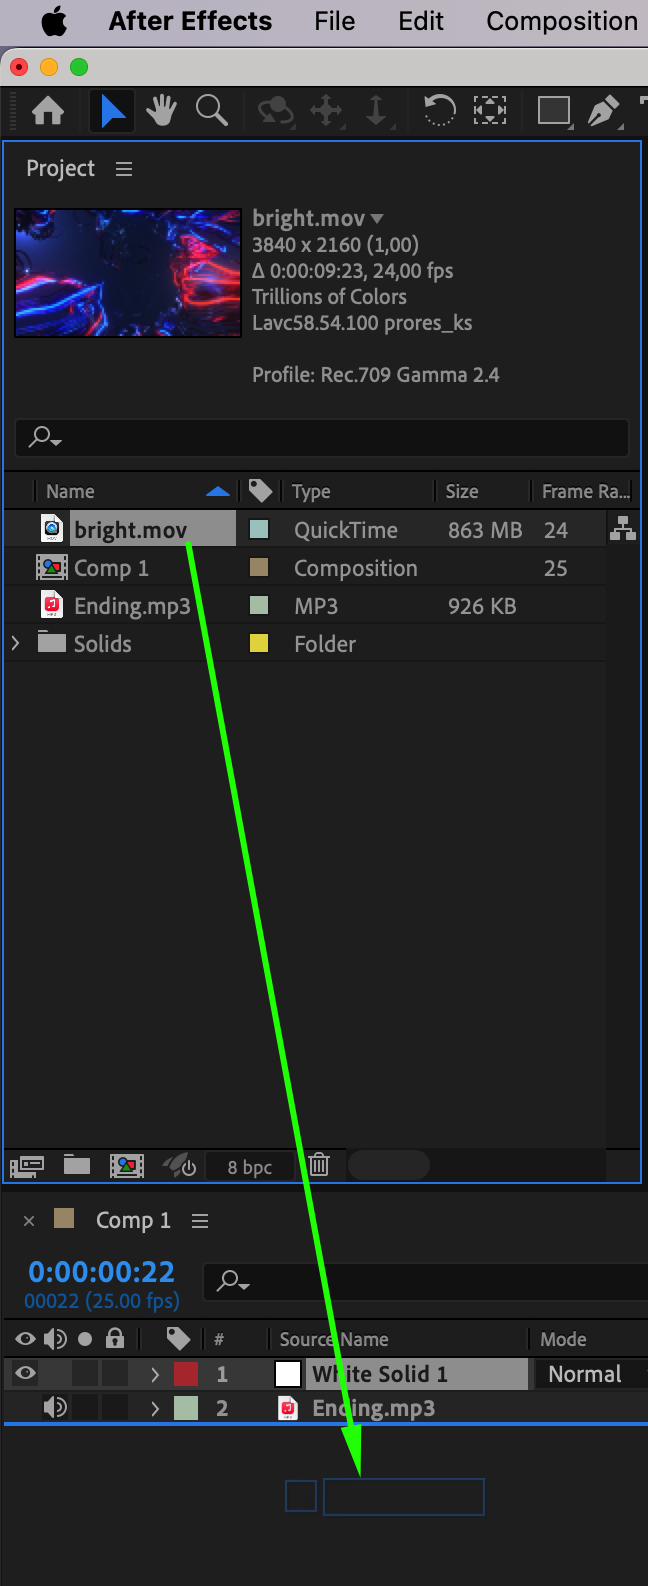
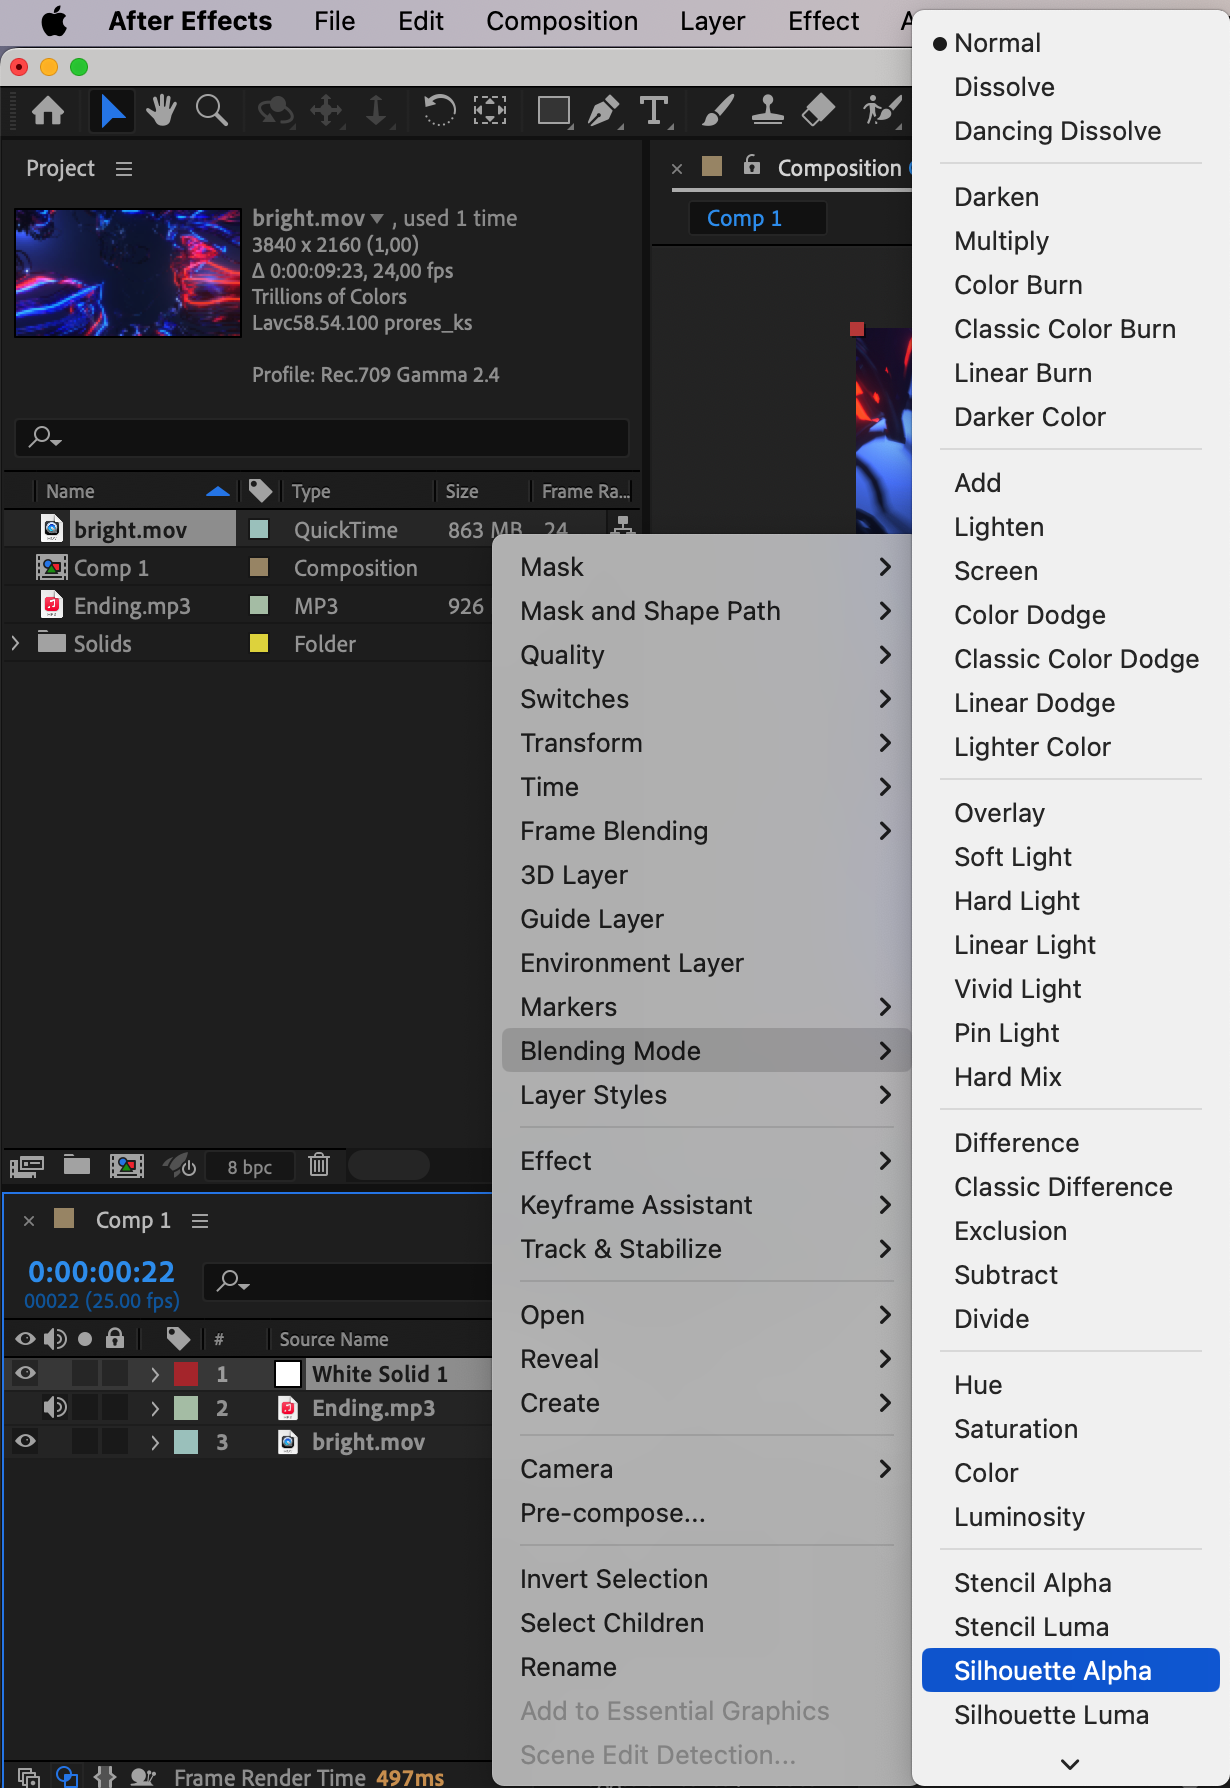
 Step 8: Experiment with Video. You can also experiment with adding video. Import your video into the Project panel and drag it onto the timeline. Set the Blending Mode of the Solid layer to “Silhouette Alpha.”
Get 10% off when you subscribe to our newsletter

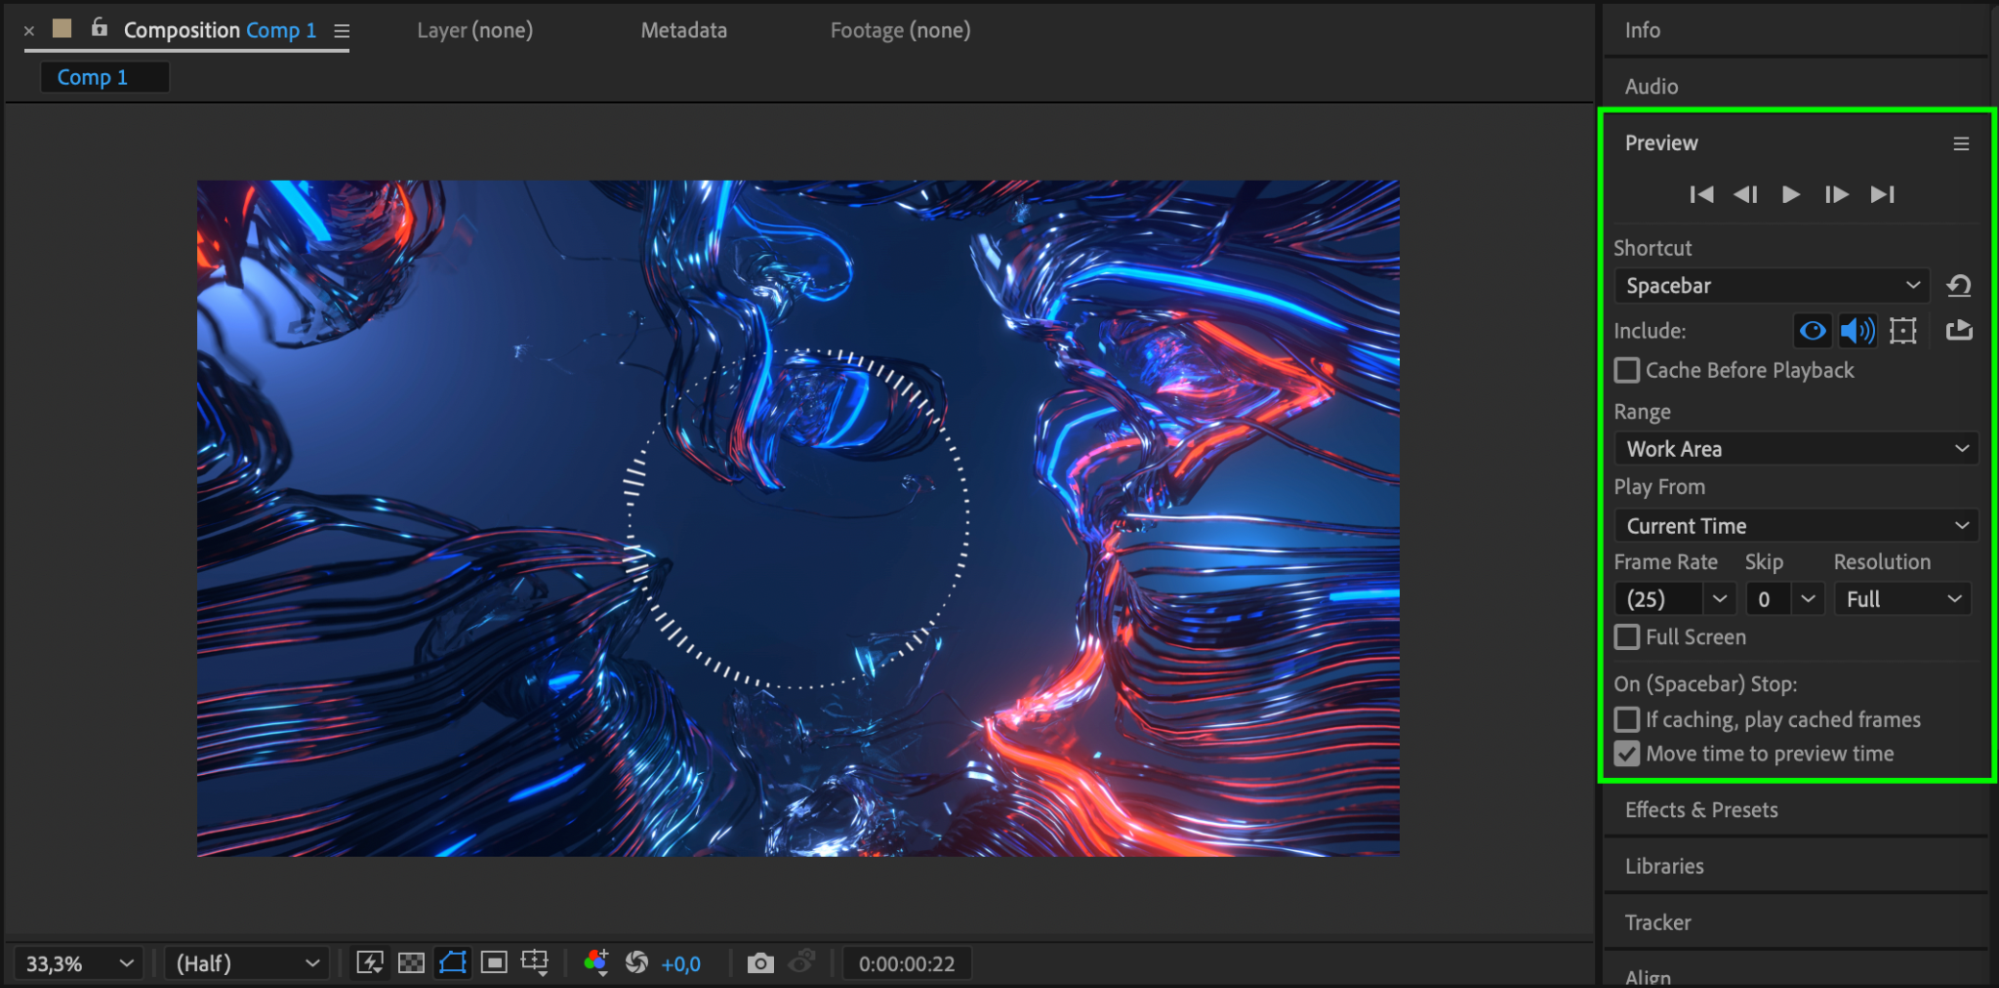
 Step 9: Preview Your Work. Use the Preview panel to play back your composition and make any necessary adjustments to the audio spectrum effect or other layers.
 Conclusion
By following these steps, you can create a dynamic audio spectrum effect that enhances the visual appeal of your videos. This effect is a great way to make your content more engaging and visually interesting, capturing the attention of your audience and bringing your music to life.


