Introduction
You can easily create a futuristic hallway or tunnel animation in After Effects using shape layers and the Repeater operator. This effect works great for motion backgrounds, sci-fi scenes, transitions, and music videos. Follow the steps below to build a clean animated hallway from scratch.
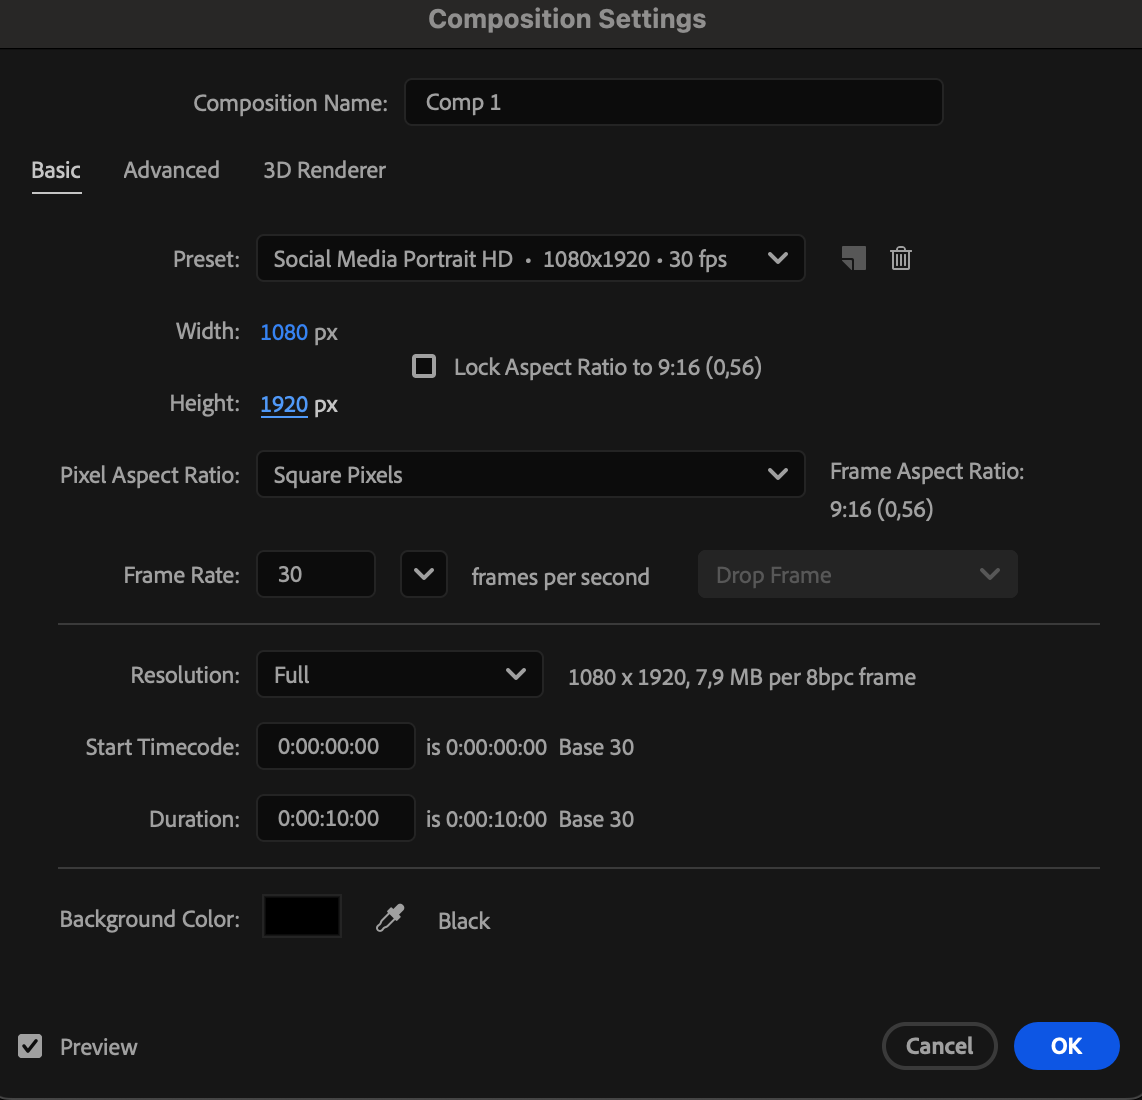
Step 1: Create a New Vertical Composition
Go to Composition > New Composition and create a vertical comp with your preferred settings.
 Step 2: Create the Main Rounded Rectangle
Use the Rounded Rectangle Tool (Q) to draw a rectangle slightly smaller than your composition frame. Set:
Fill: None
Stroke: White
Stroke Width: 15 px
Open the layer properties and set:
Roundness: 385
This will form the repeated glowing hallway frames.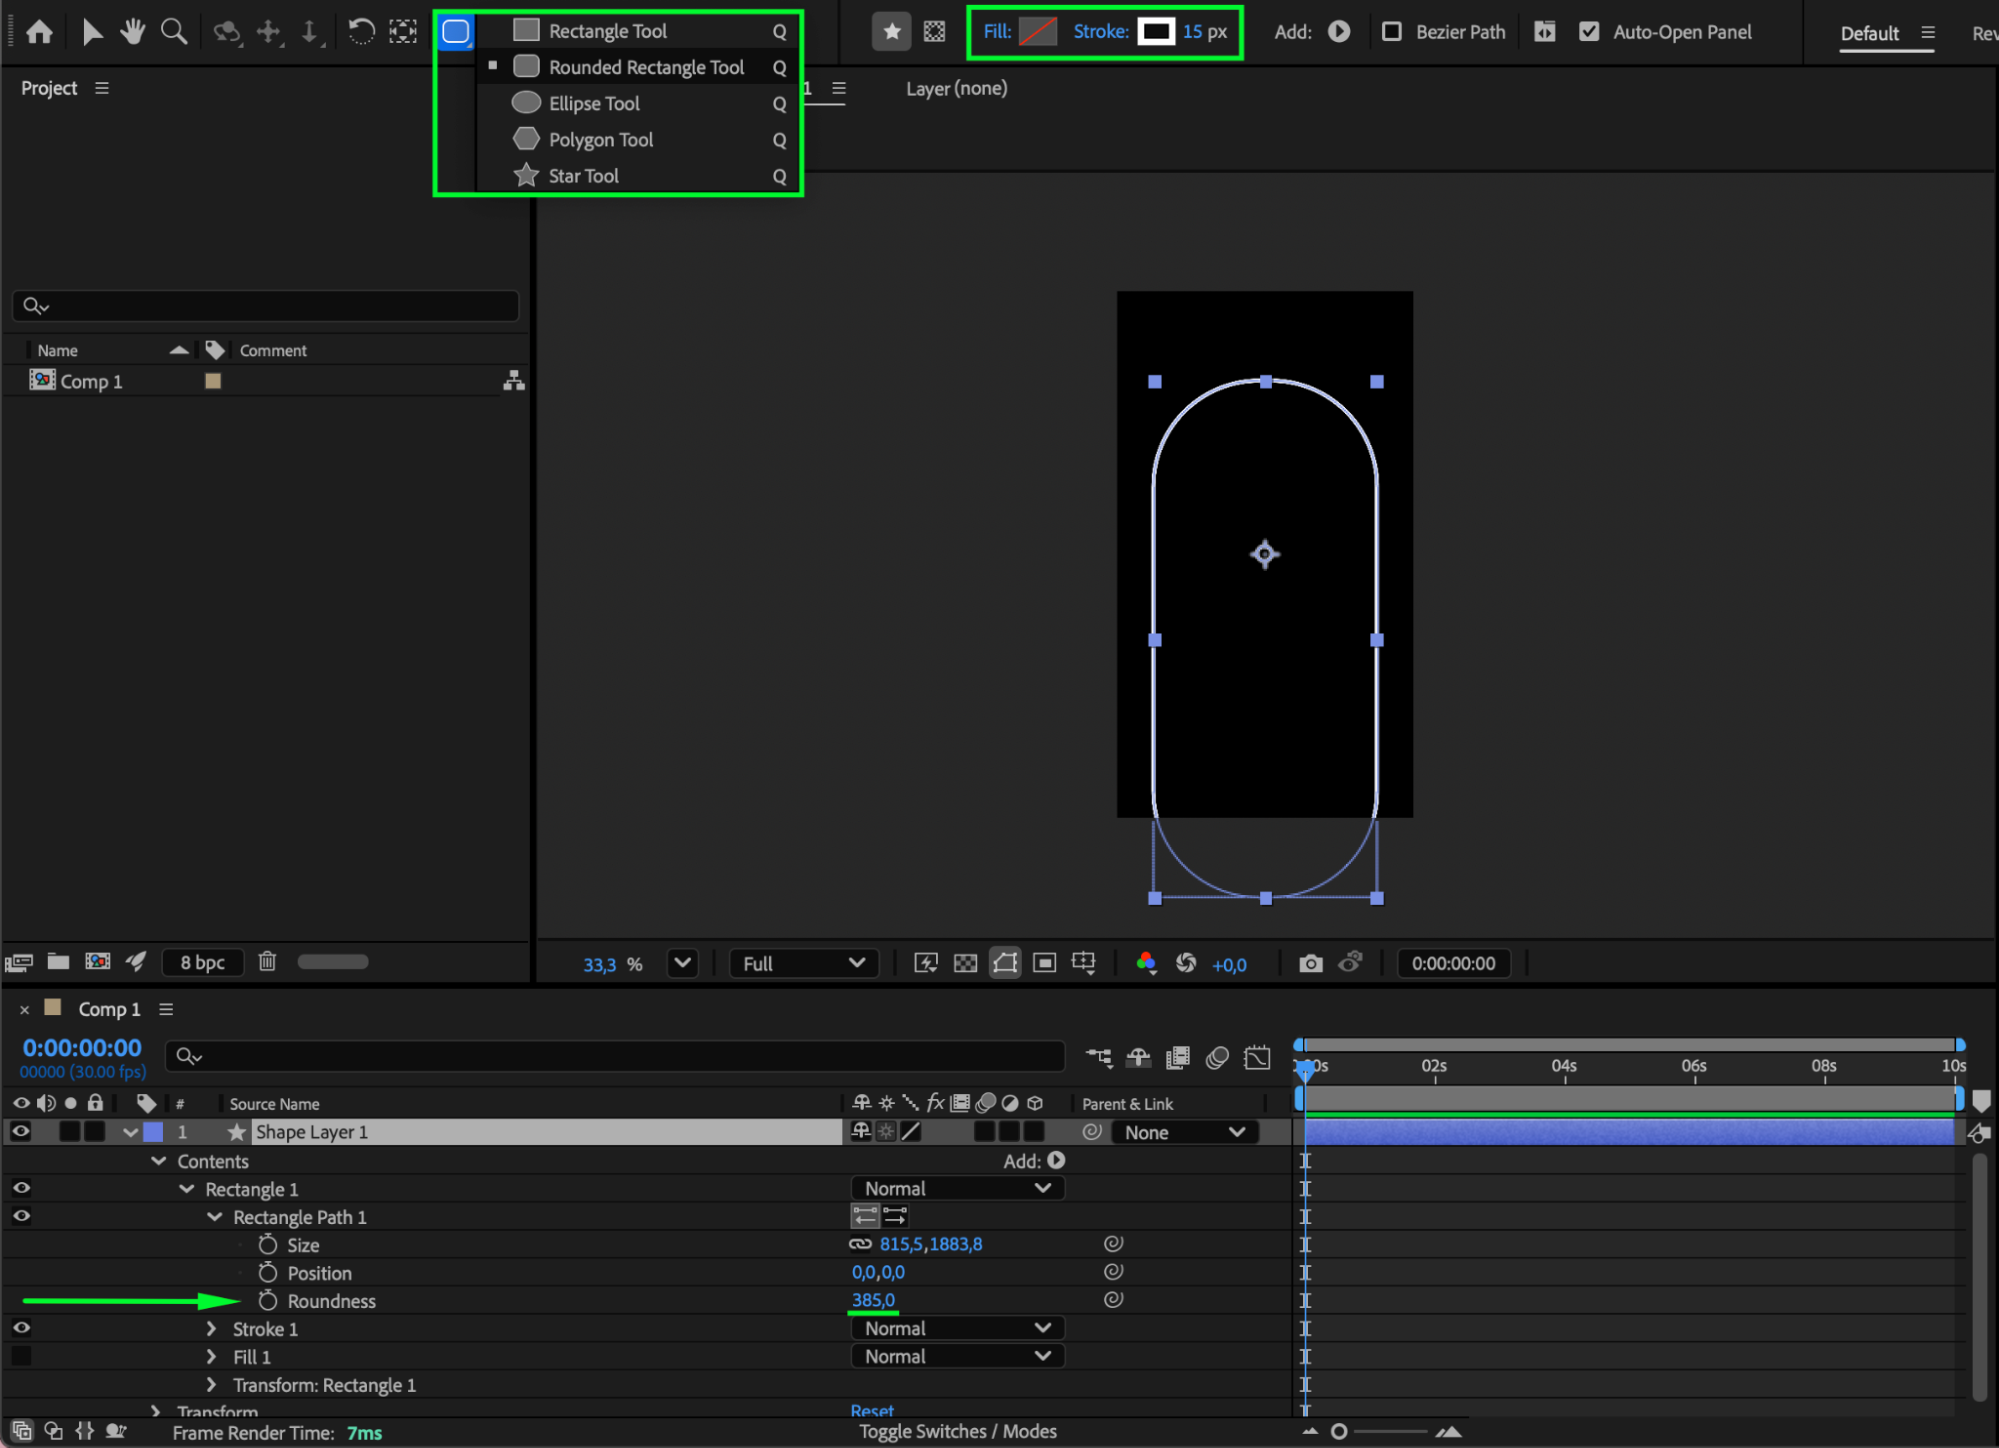
Step 3: Add a Repeater for the Hallway Depth
Expand the shape layer properties. Next to Contents, click Add > Repeater. Adjust the Repeater settings:
Copies: 13
Position: 0, 0
Scale: 82 (example value)
This creates multiple shrinking frames, forming the tunnel depth.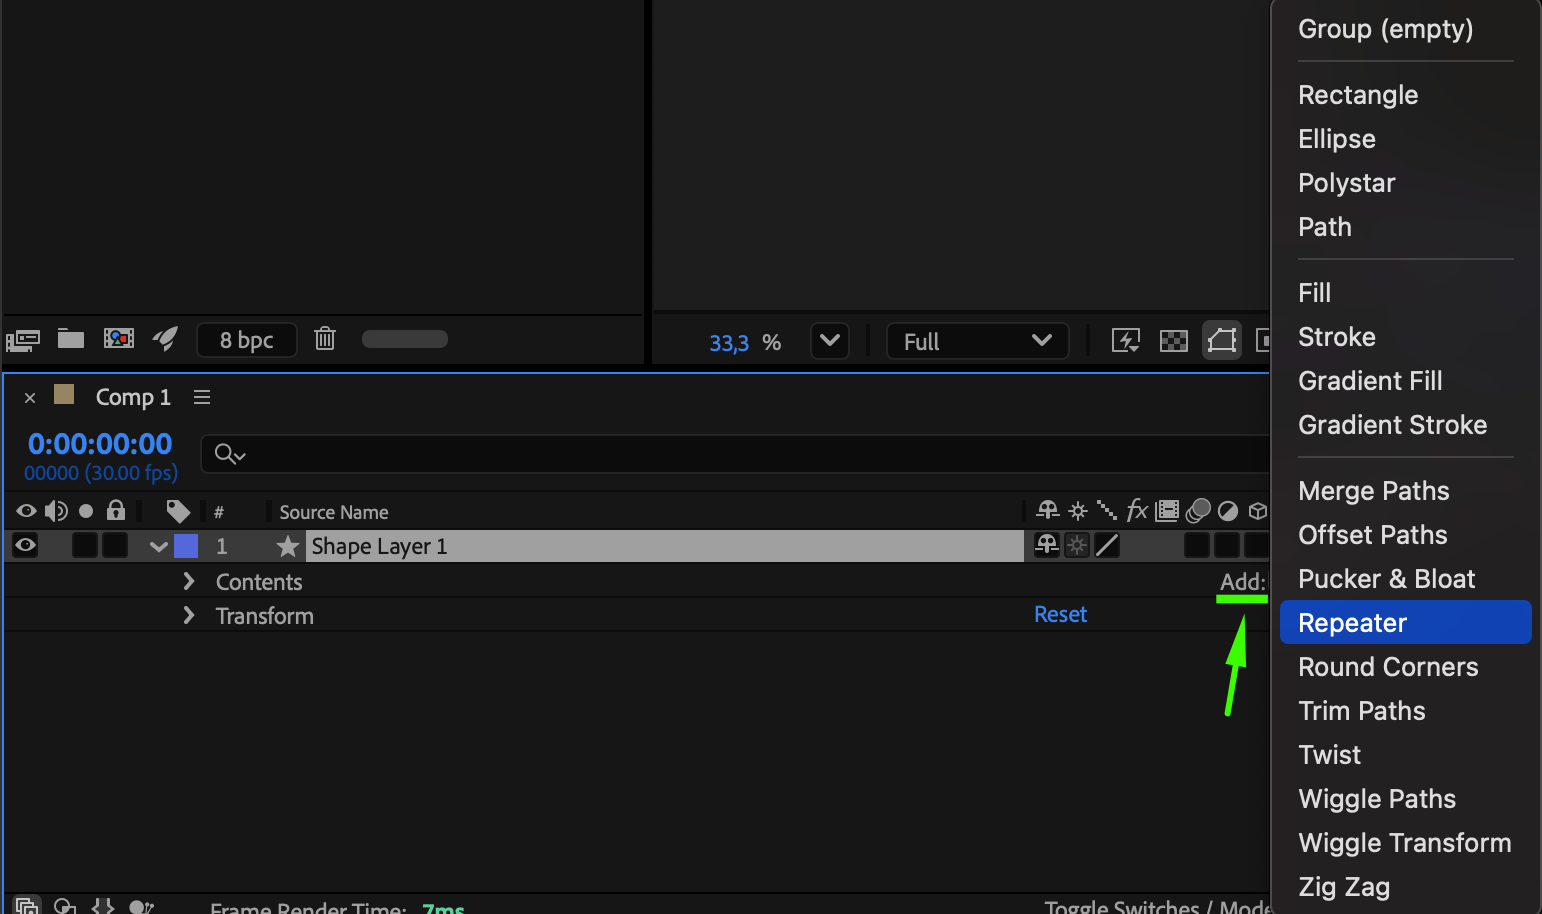

Get 10% off when you subscribe to our newsletter

Step 4: Create the Floor Line
Use the Pen Tool (G) to draw a straight line from the bottom of the comp up to where the rectangle’s roundness begins (to simulate the hallway floor). Set:
Fill: None
Stroke: Black (same color as your background)
Stroke Width: 1167
Open the shape properties and adjust:
End Length: 27
This trims the line so it blends properly with the shapes.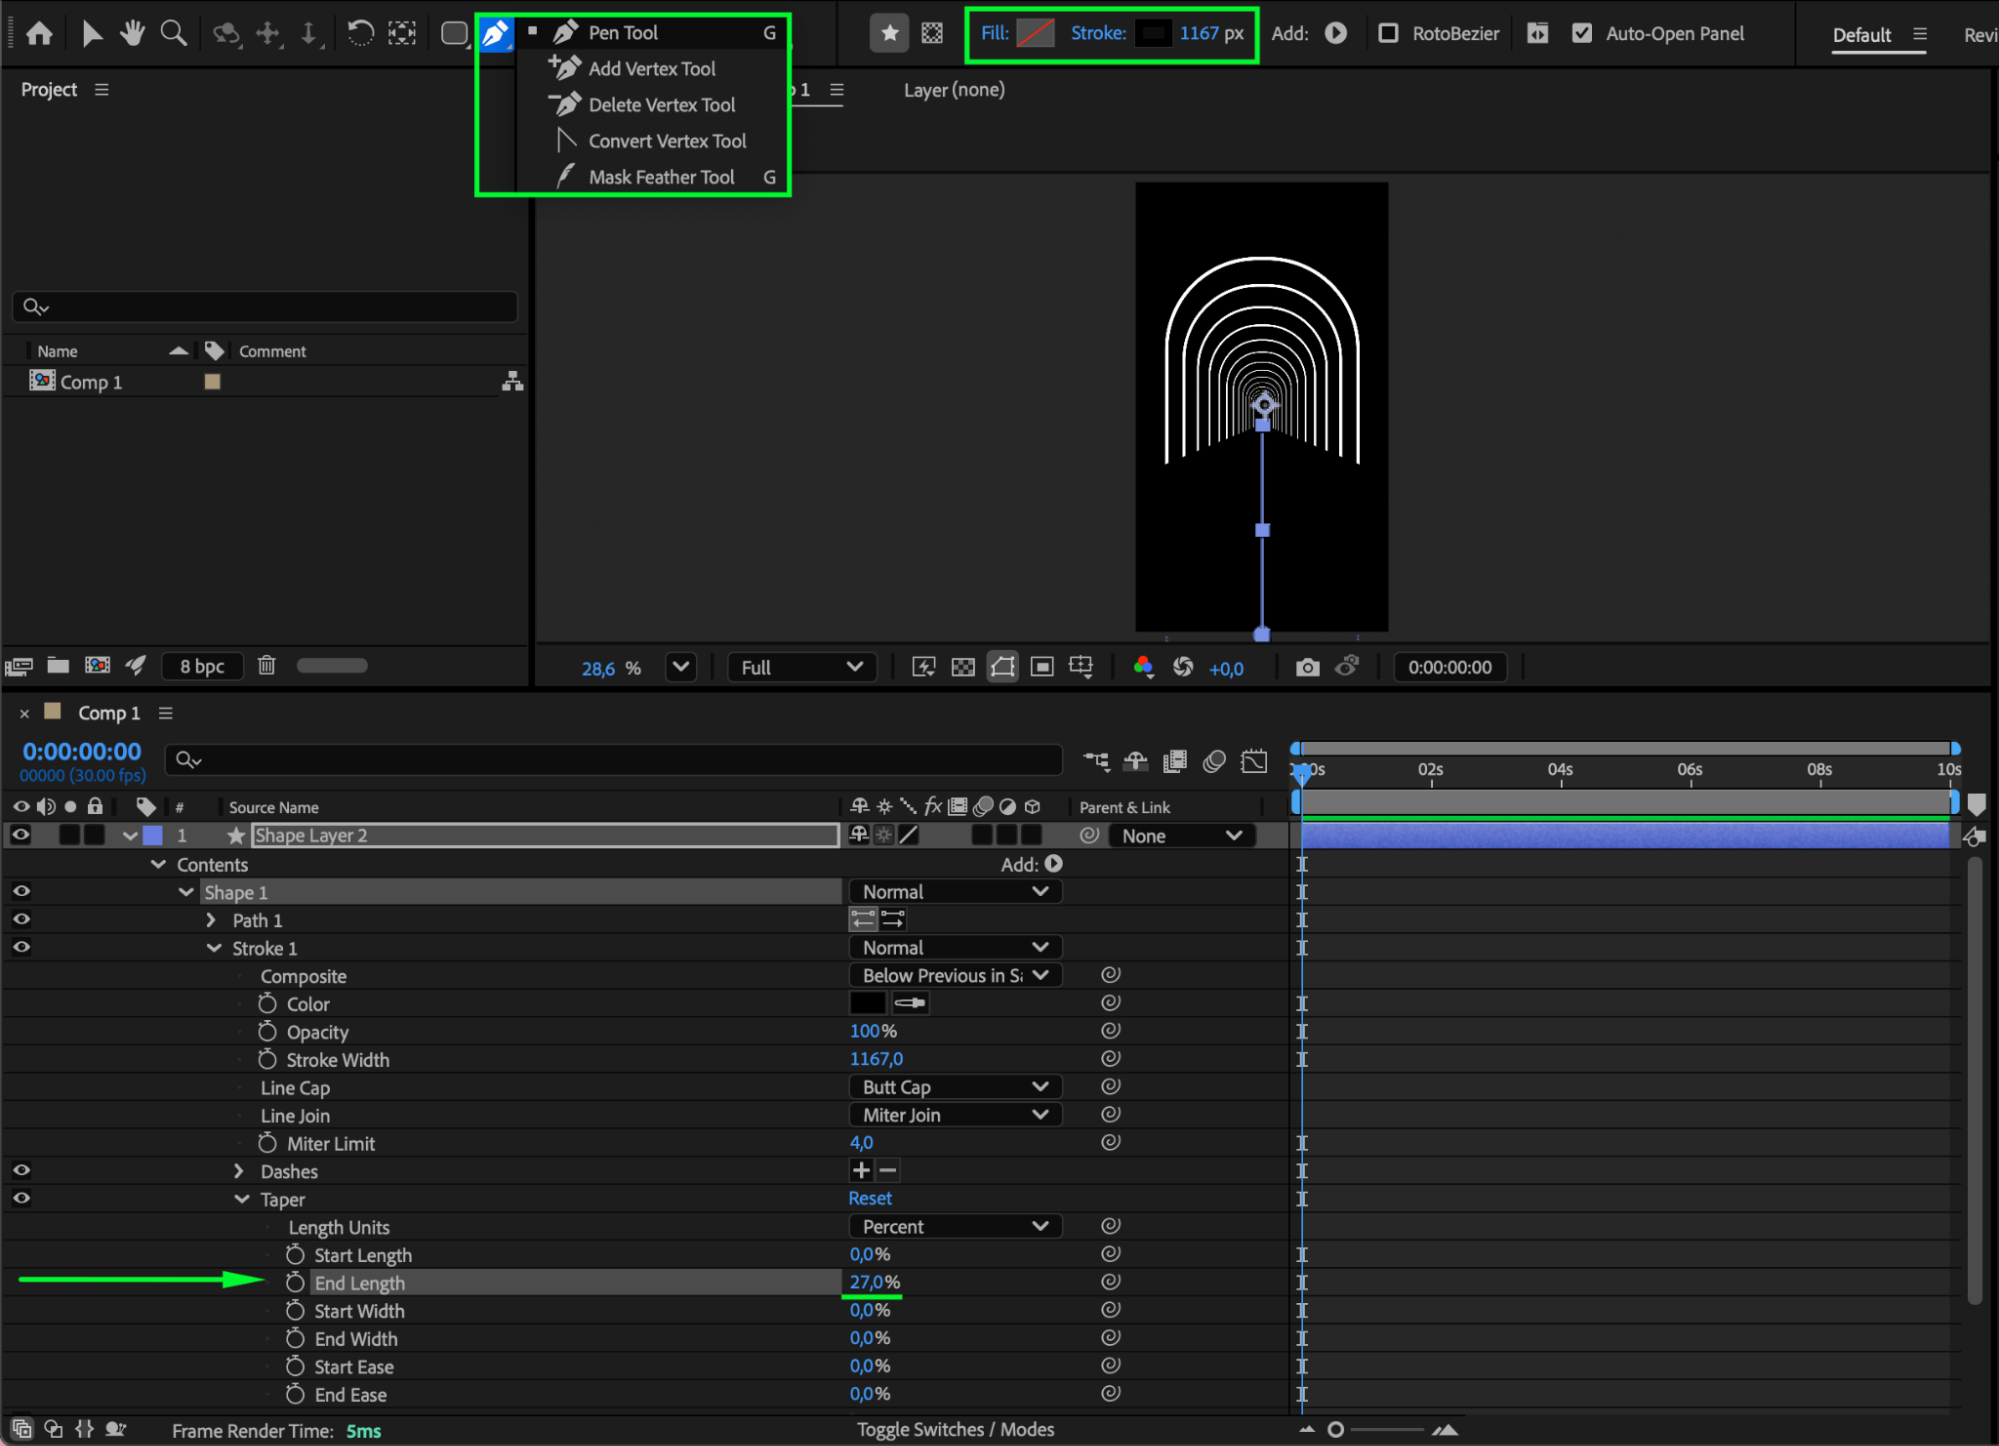
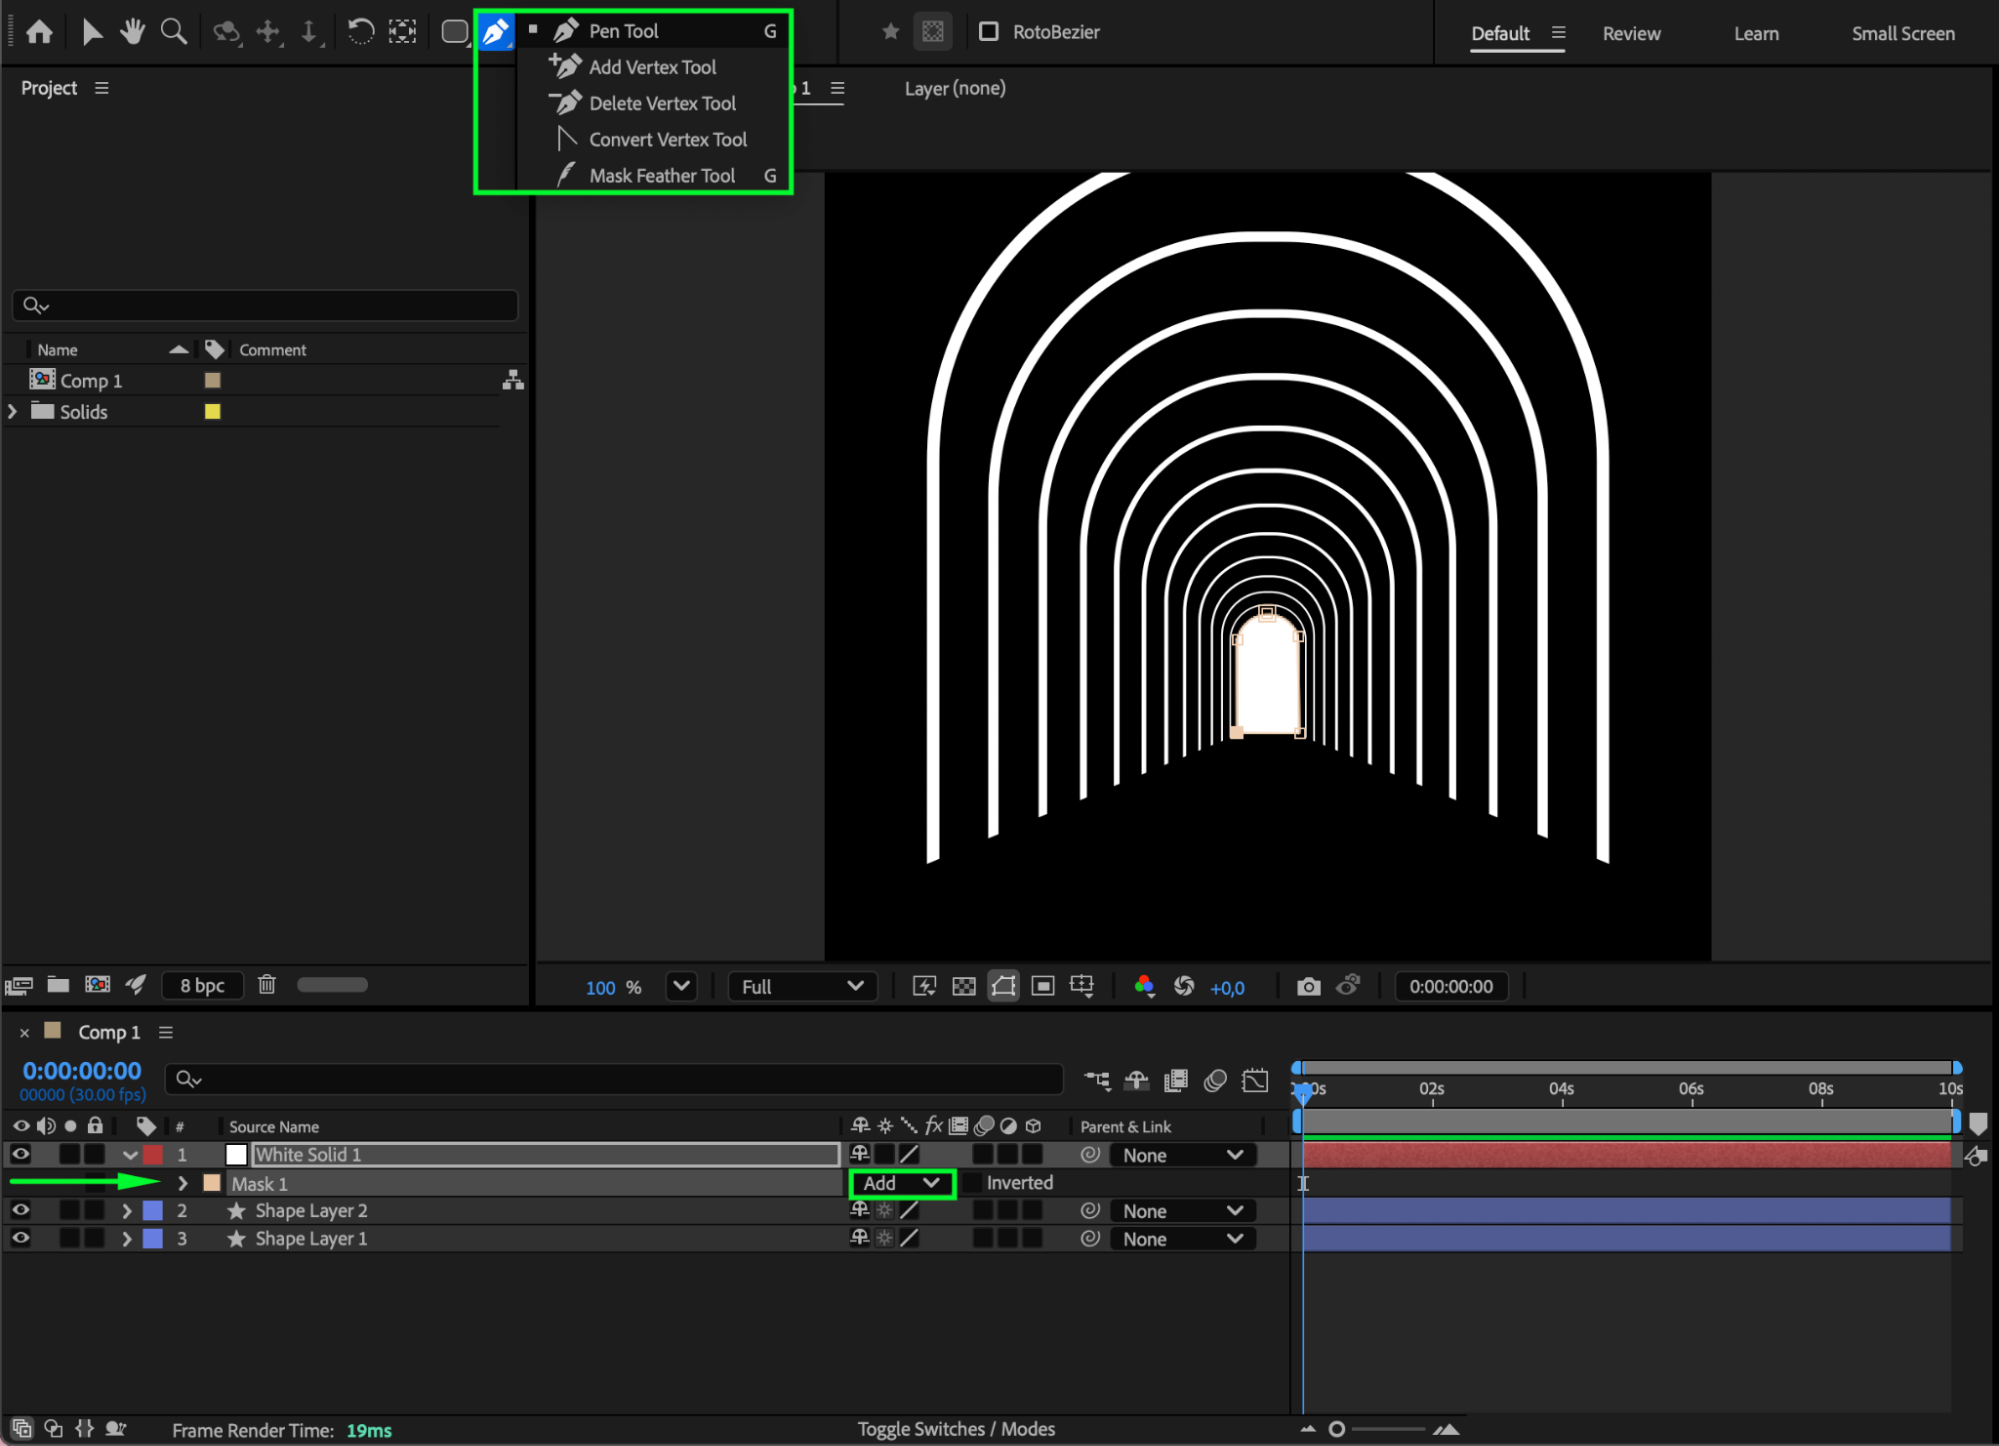
Step 5: Add a White Solid and Create a Mask
Go to Layer > New > Solid and choose white as the color. Use the Pen Tool (G) to draw a mask around the smallest center rectangle. Set Mask Mode = Add. This adds a glowing center light effect for the hallway.

Step 6: Add Glow to Enhance the Light
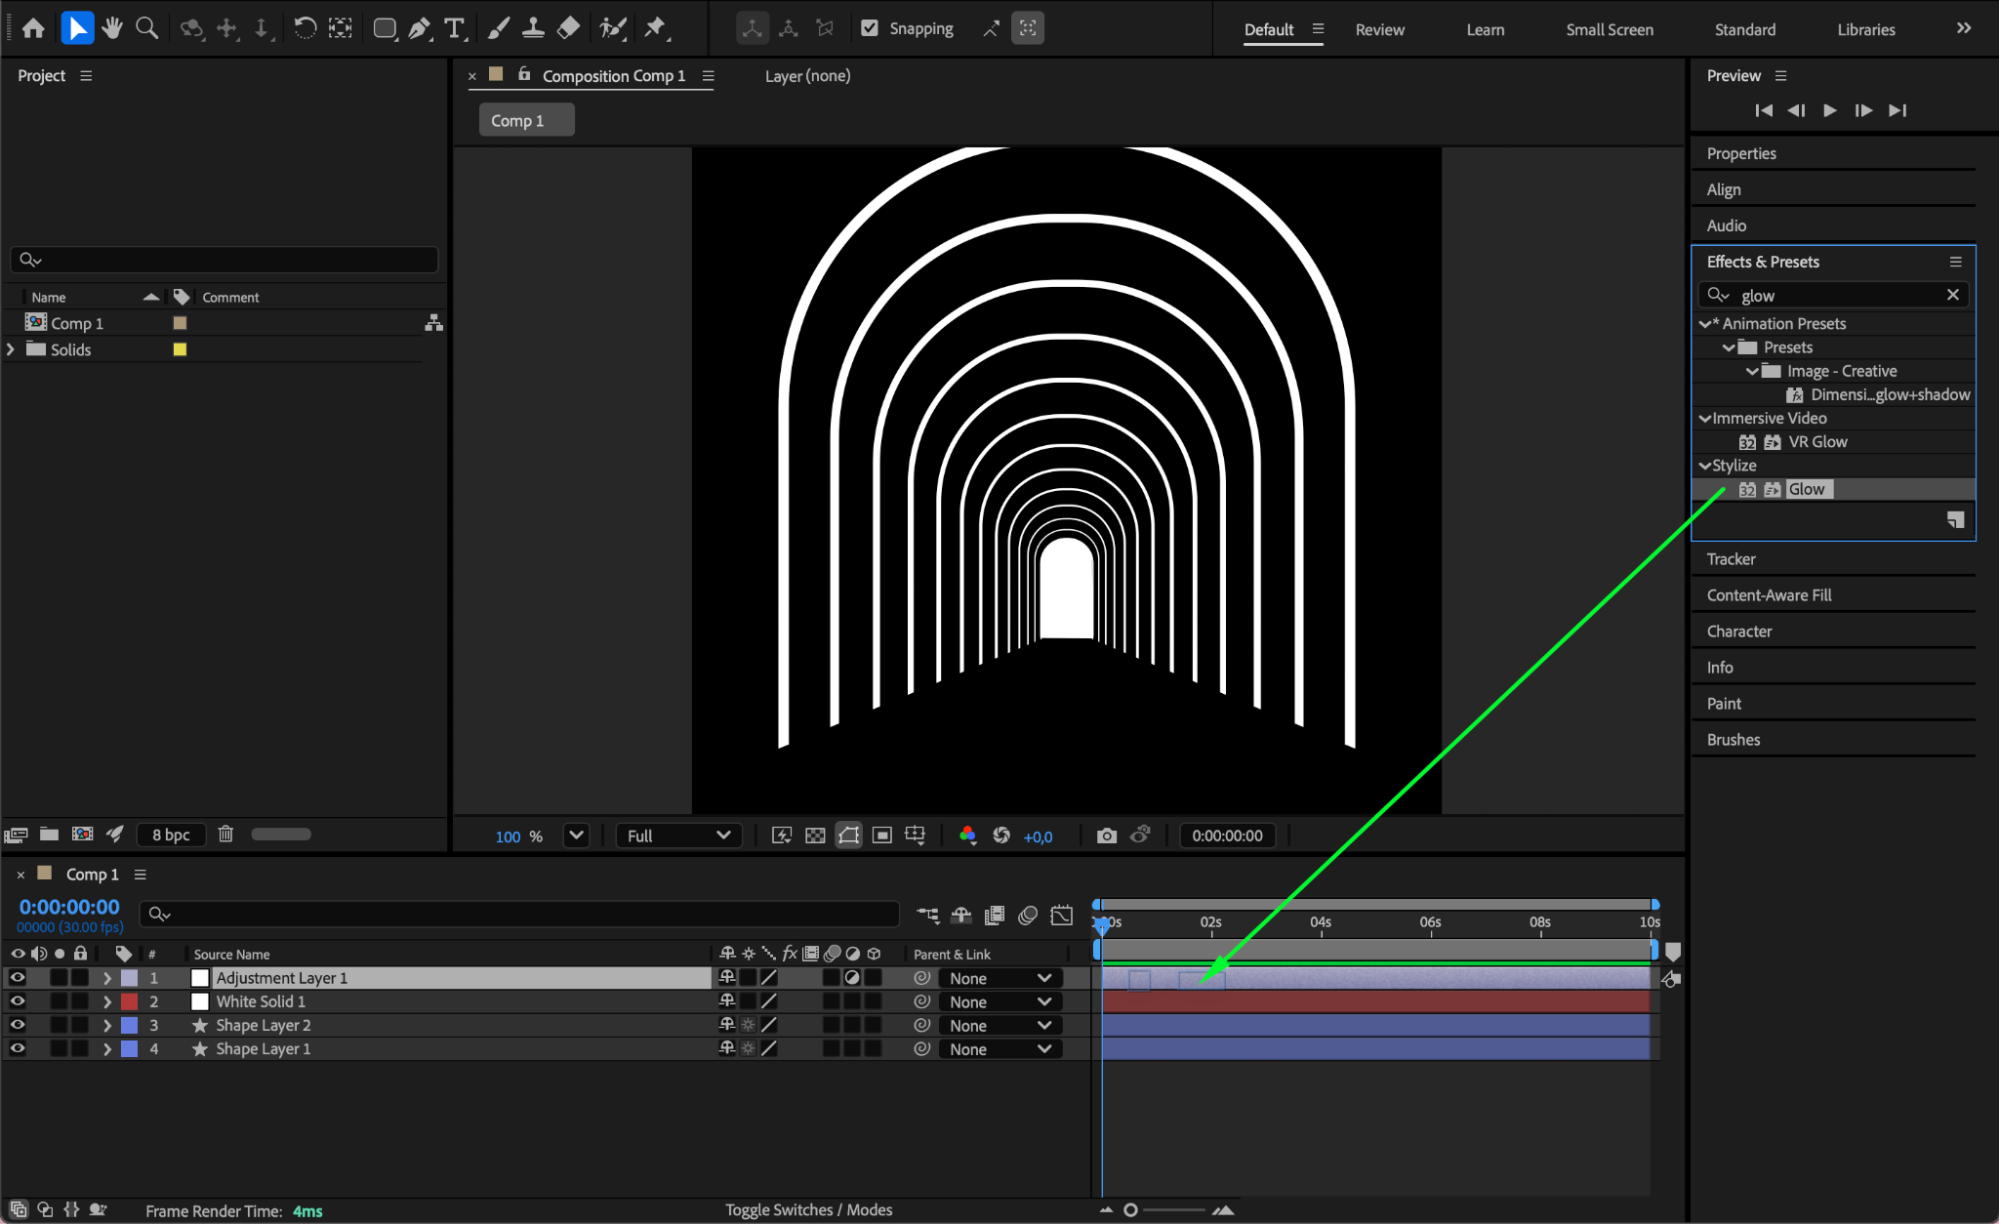
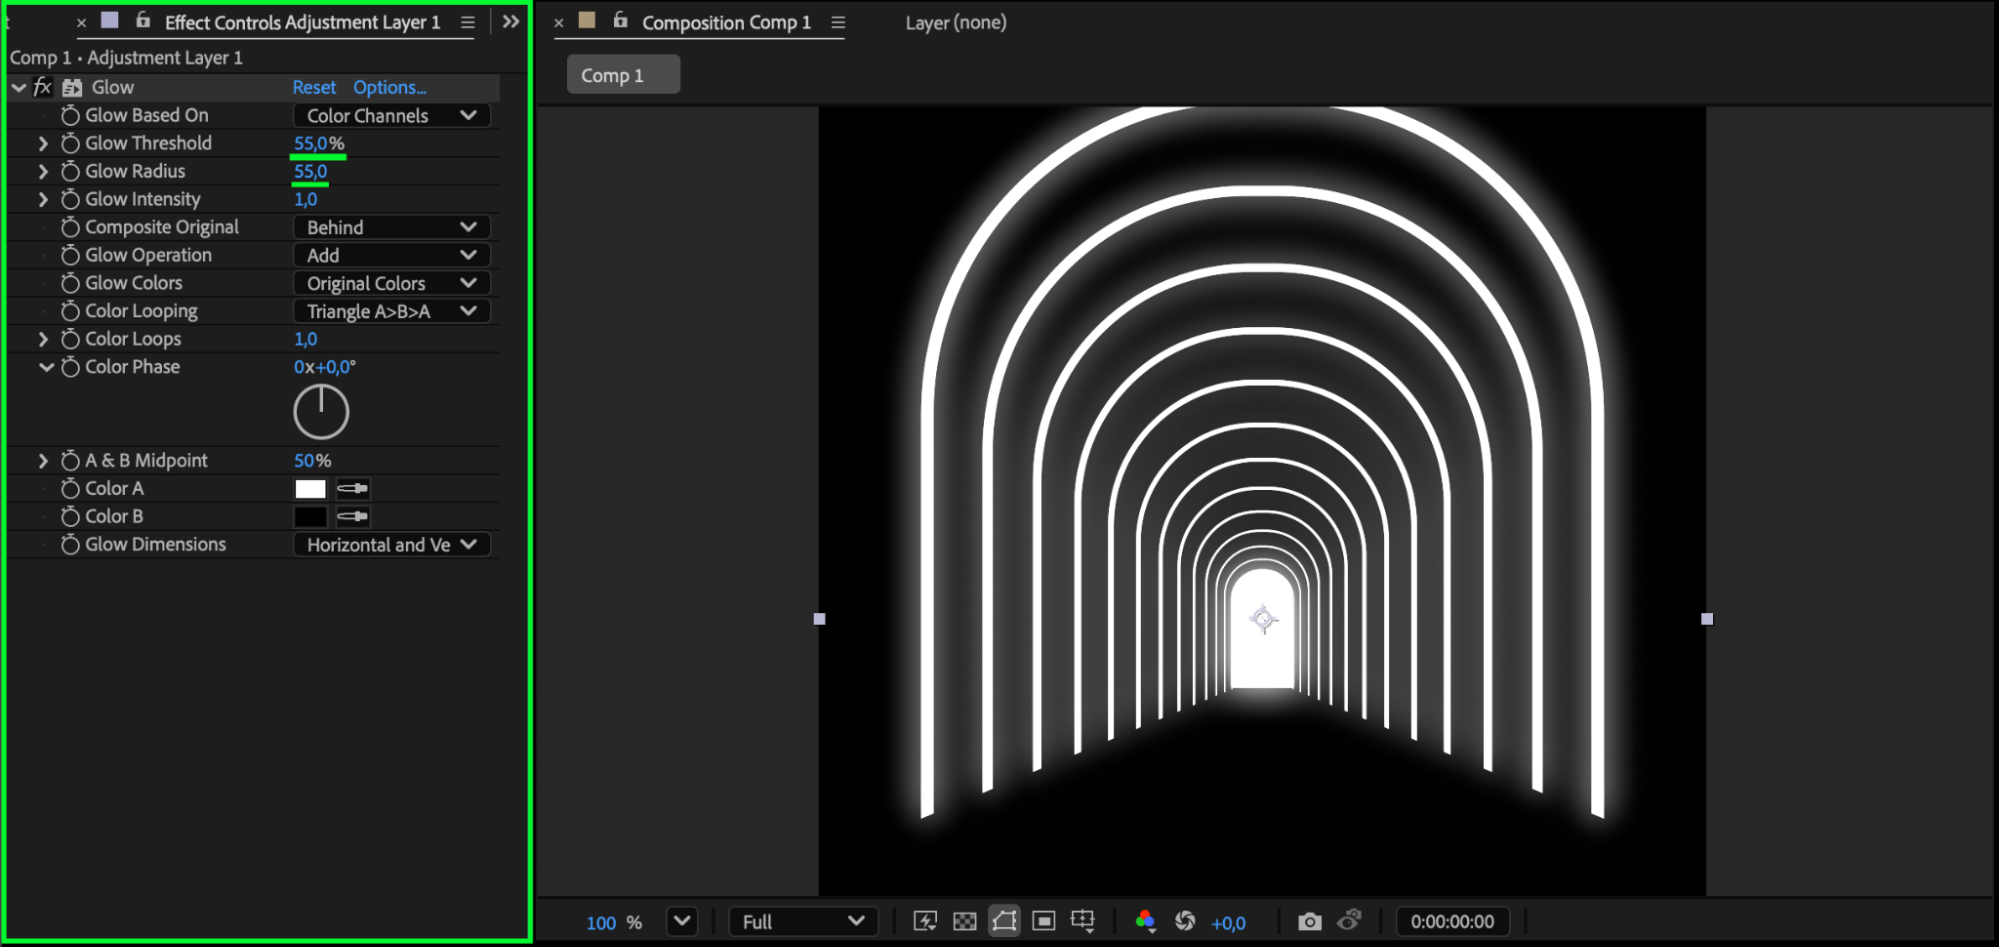
Go to Layer > New > Adjustment Layer. Apply Glow from the Effects & Presets panel to this adjustment layer. You can tweak Glow Radius, Glow Intensity, and Threshold as needed.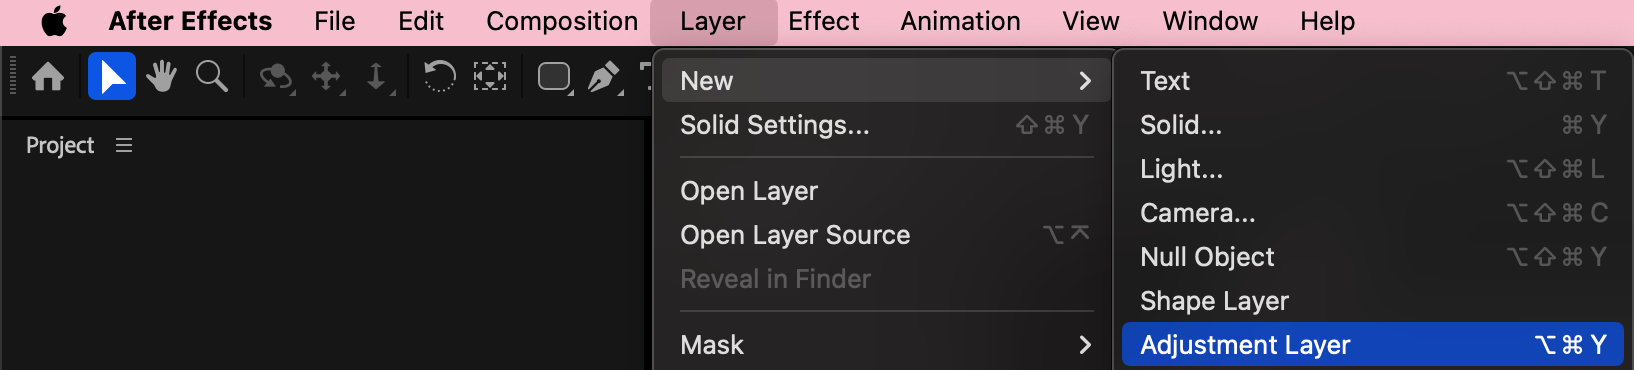
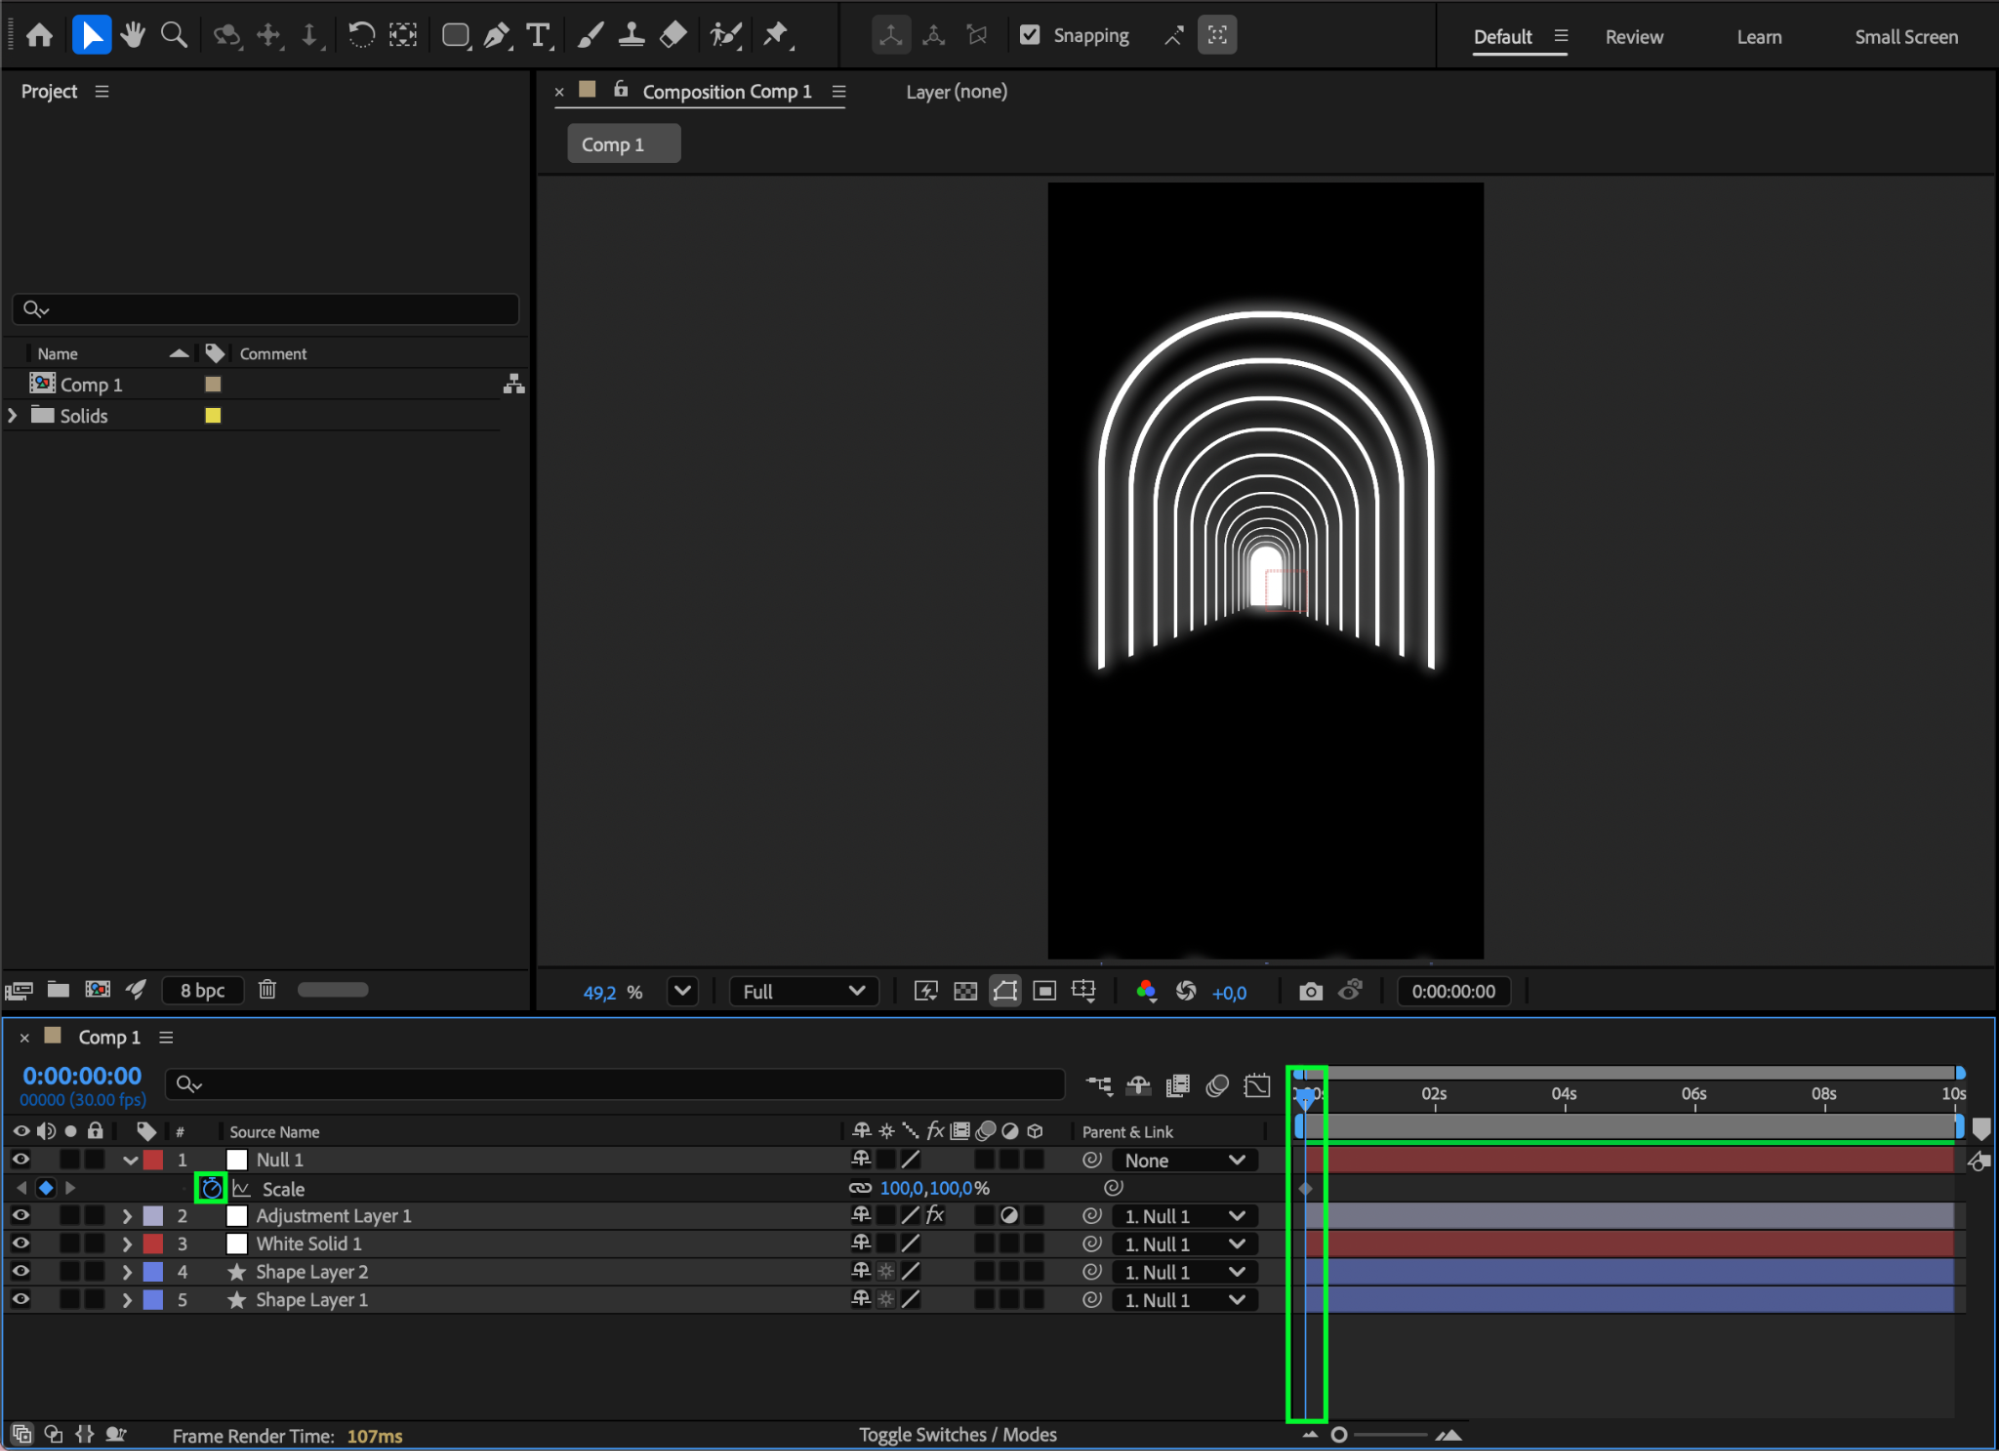
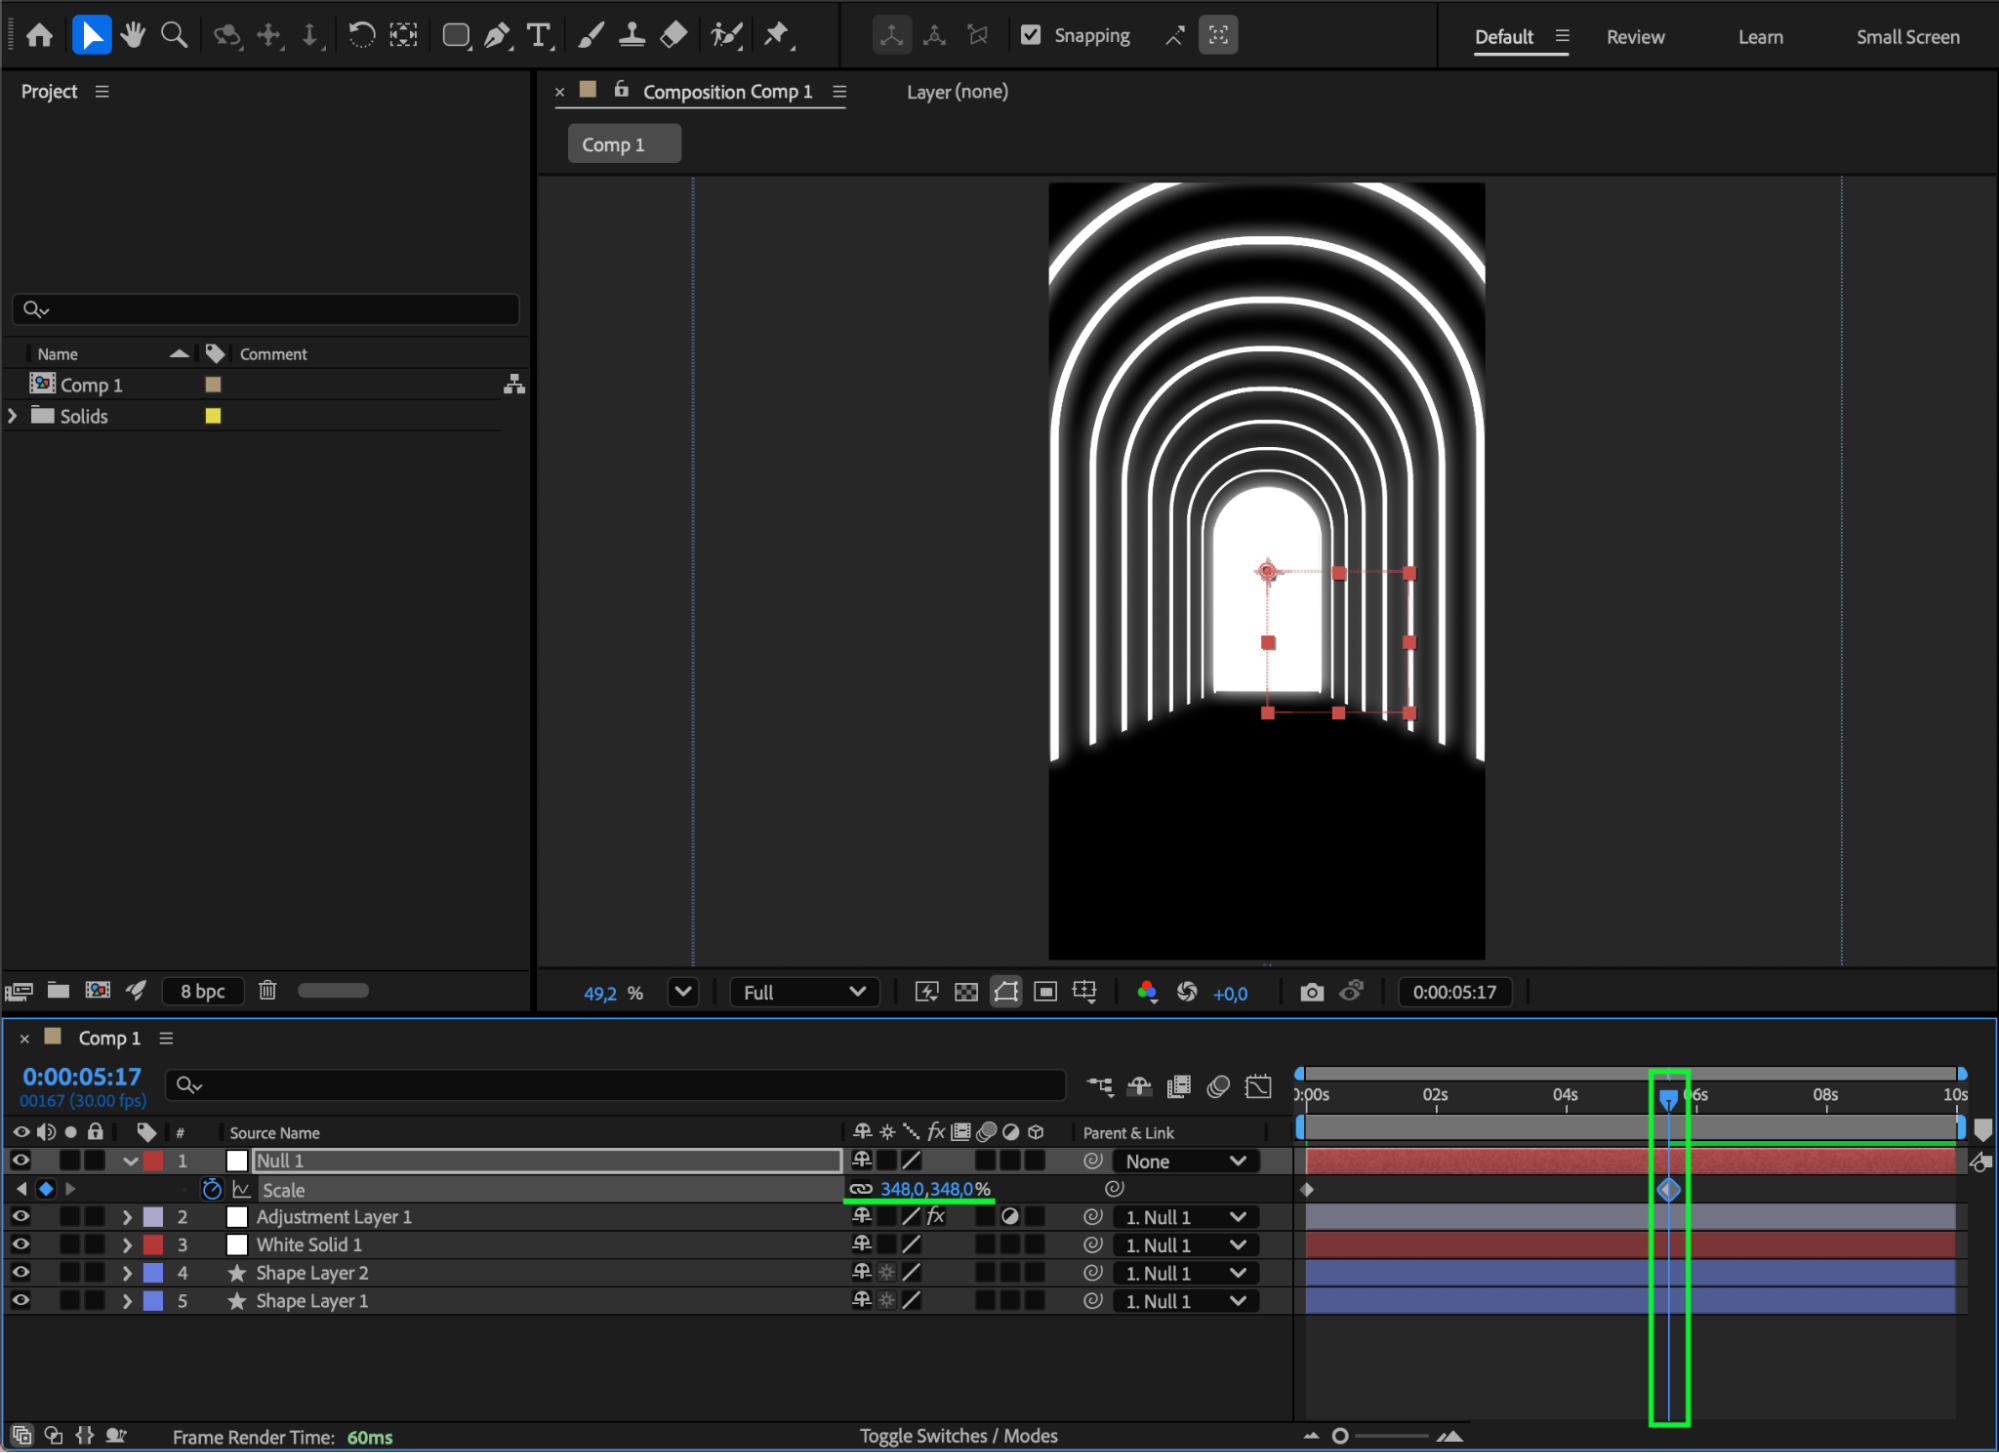
Step 7: Animate the Hallway Using a Null Object
Go to Layer > New > Null Object. Parent all hallway layers to the Null using the Pick Whip. Animate the Null’s Position or Scale to create movement through the hallway.
Example:
At the start of the comp: value = 100
Mid-composition: value = 348
This gives the impression of the camera moving forward.

 Step 8: Preview and Refine
Press Spacebar to preview your animation. Adjust the Repeater, Glow, or Null keyframes until the hallway movement feels smooth and visually appealing. Conclusion
By combining shape layers, the Repeater operator, masks, Glow, and Null Object animation, you can create a dynamic glowing hallway animation in After Effects. This effect is perfect for futuristic visuals, transitions, or tunnel-style motion graphics.
Our Bestsellers


