Introduction
Creating an organic, fluid “liquify” animation in After Effects is easy using a combination of distortion, texture, and glow effects. Follow the steps below to build a dynamic liquid movement from scratch.
Step 1: Create a New Composition
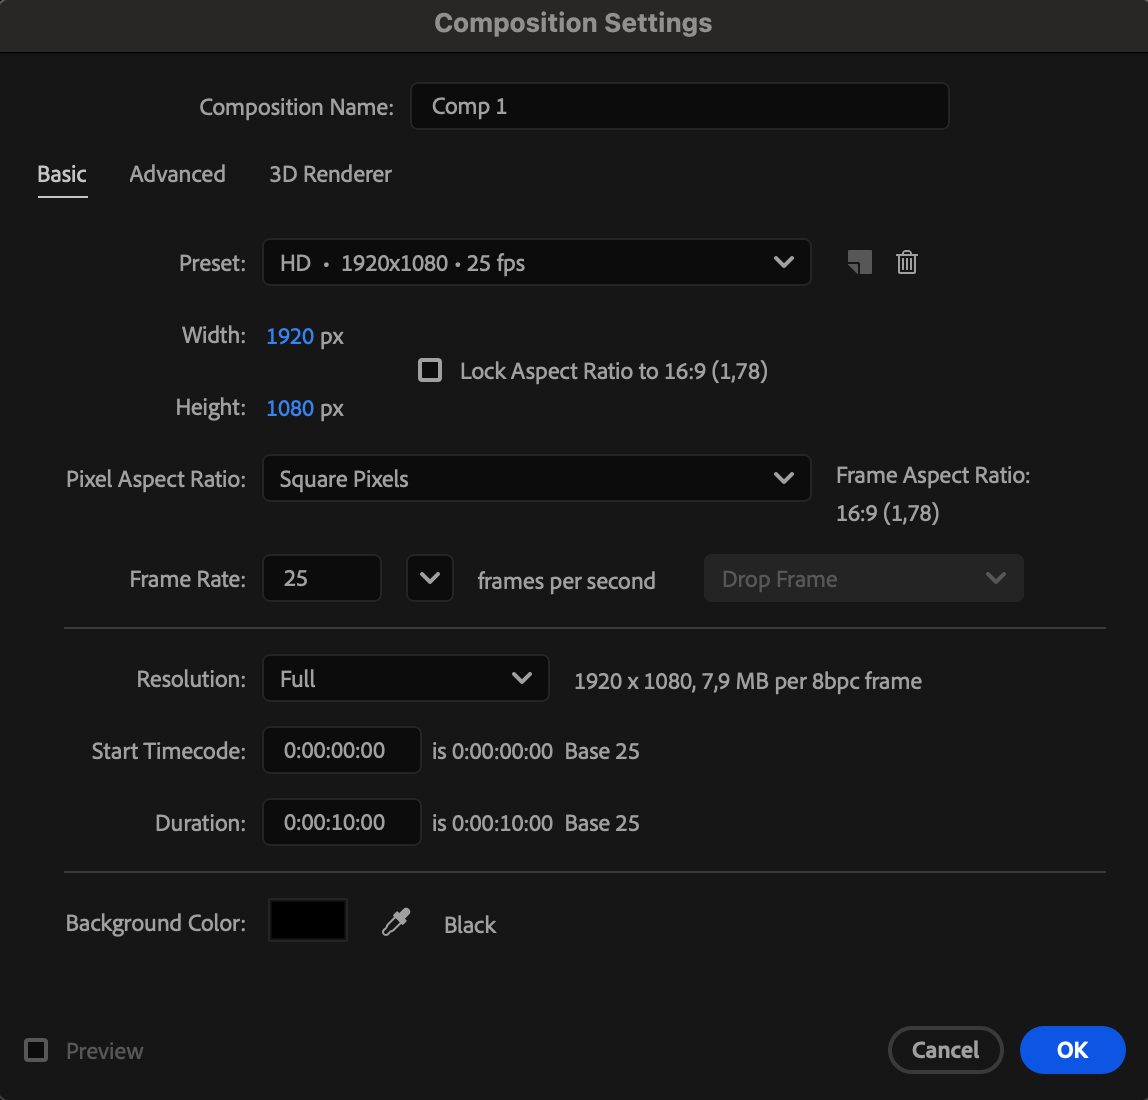
Go to Composition > New Composition and set your desired resolution and duration.
 Step 2: Add a Solid Layer
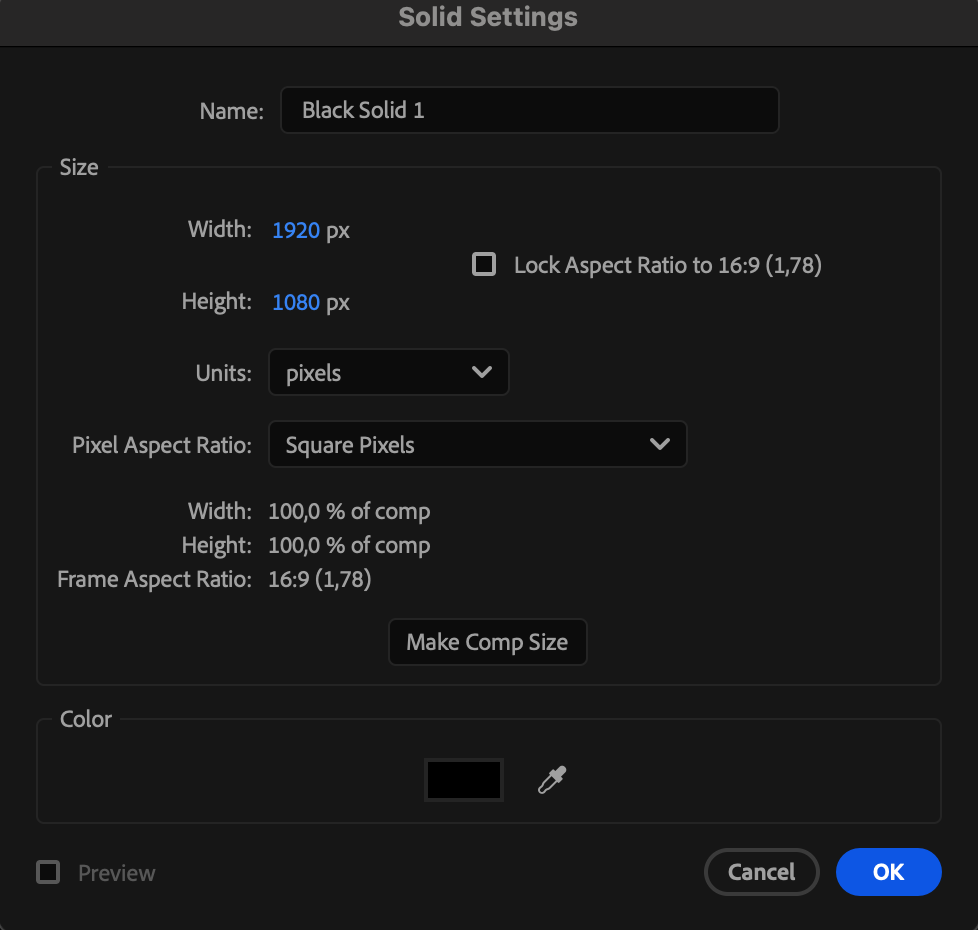
Go to Layer > New > Solid and choose a black solid. This will be the base for your liquid effect.
 Step 3: Add Fractal Noise
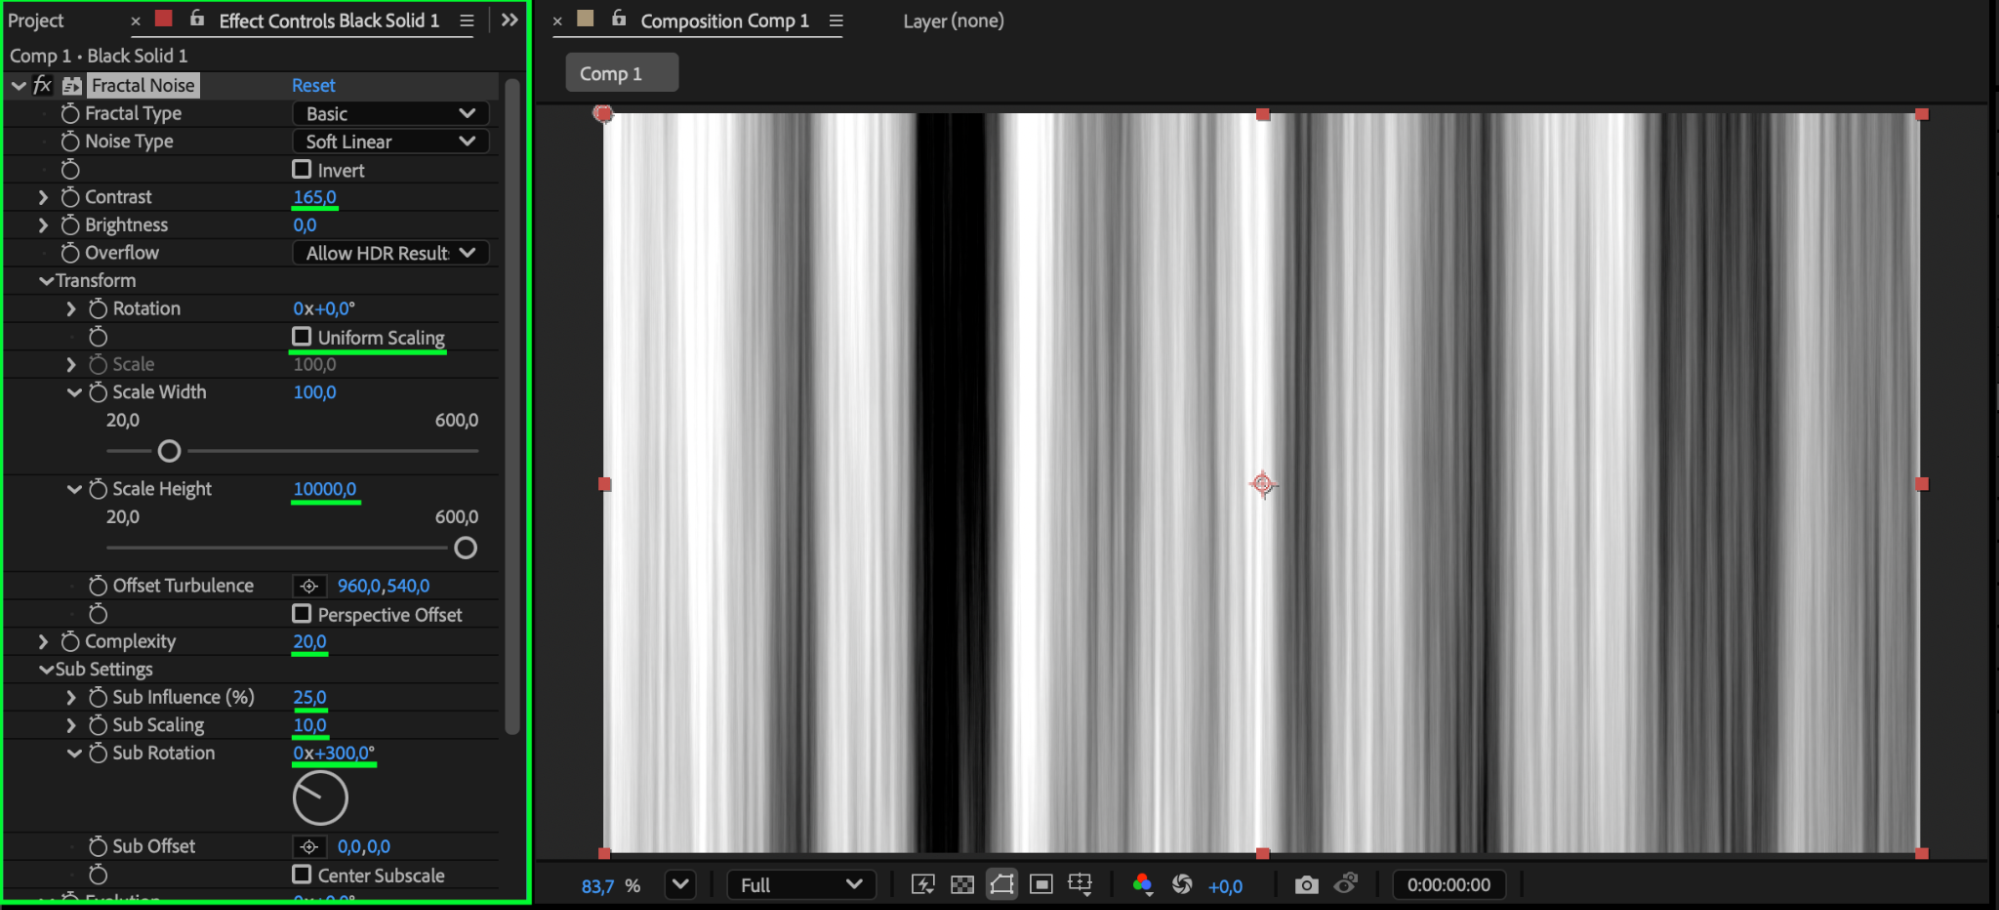
From the Effects & Presets panel, apply Fractal Noise to the solid. Adjust the following settings:
Contrast: 165
Uniform Scaling: Off
Scale Height: 10,000
Complexity: 20
Sub Scaling: 10
Sub Rotation: 300°
This creates stretched, organic textures for your liquid base.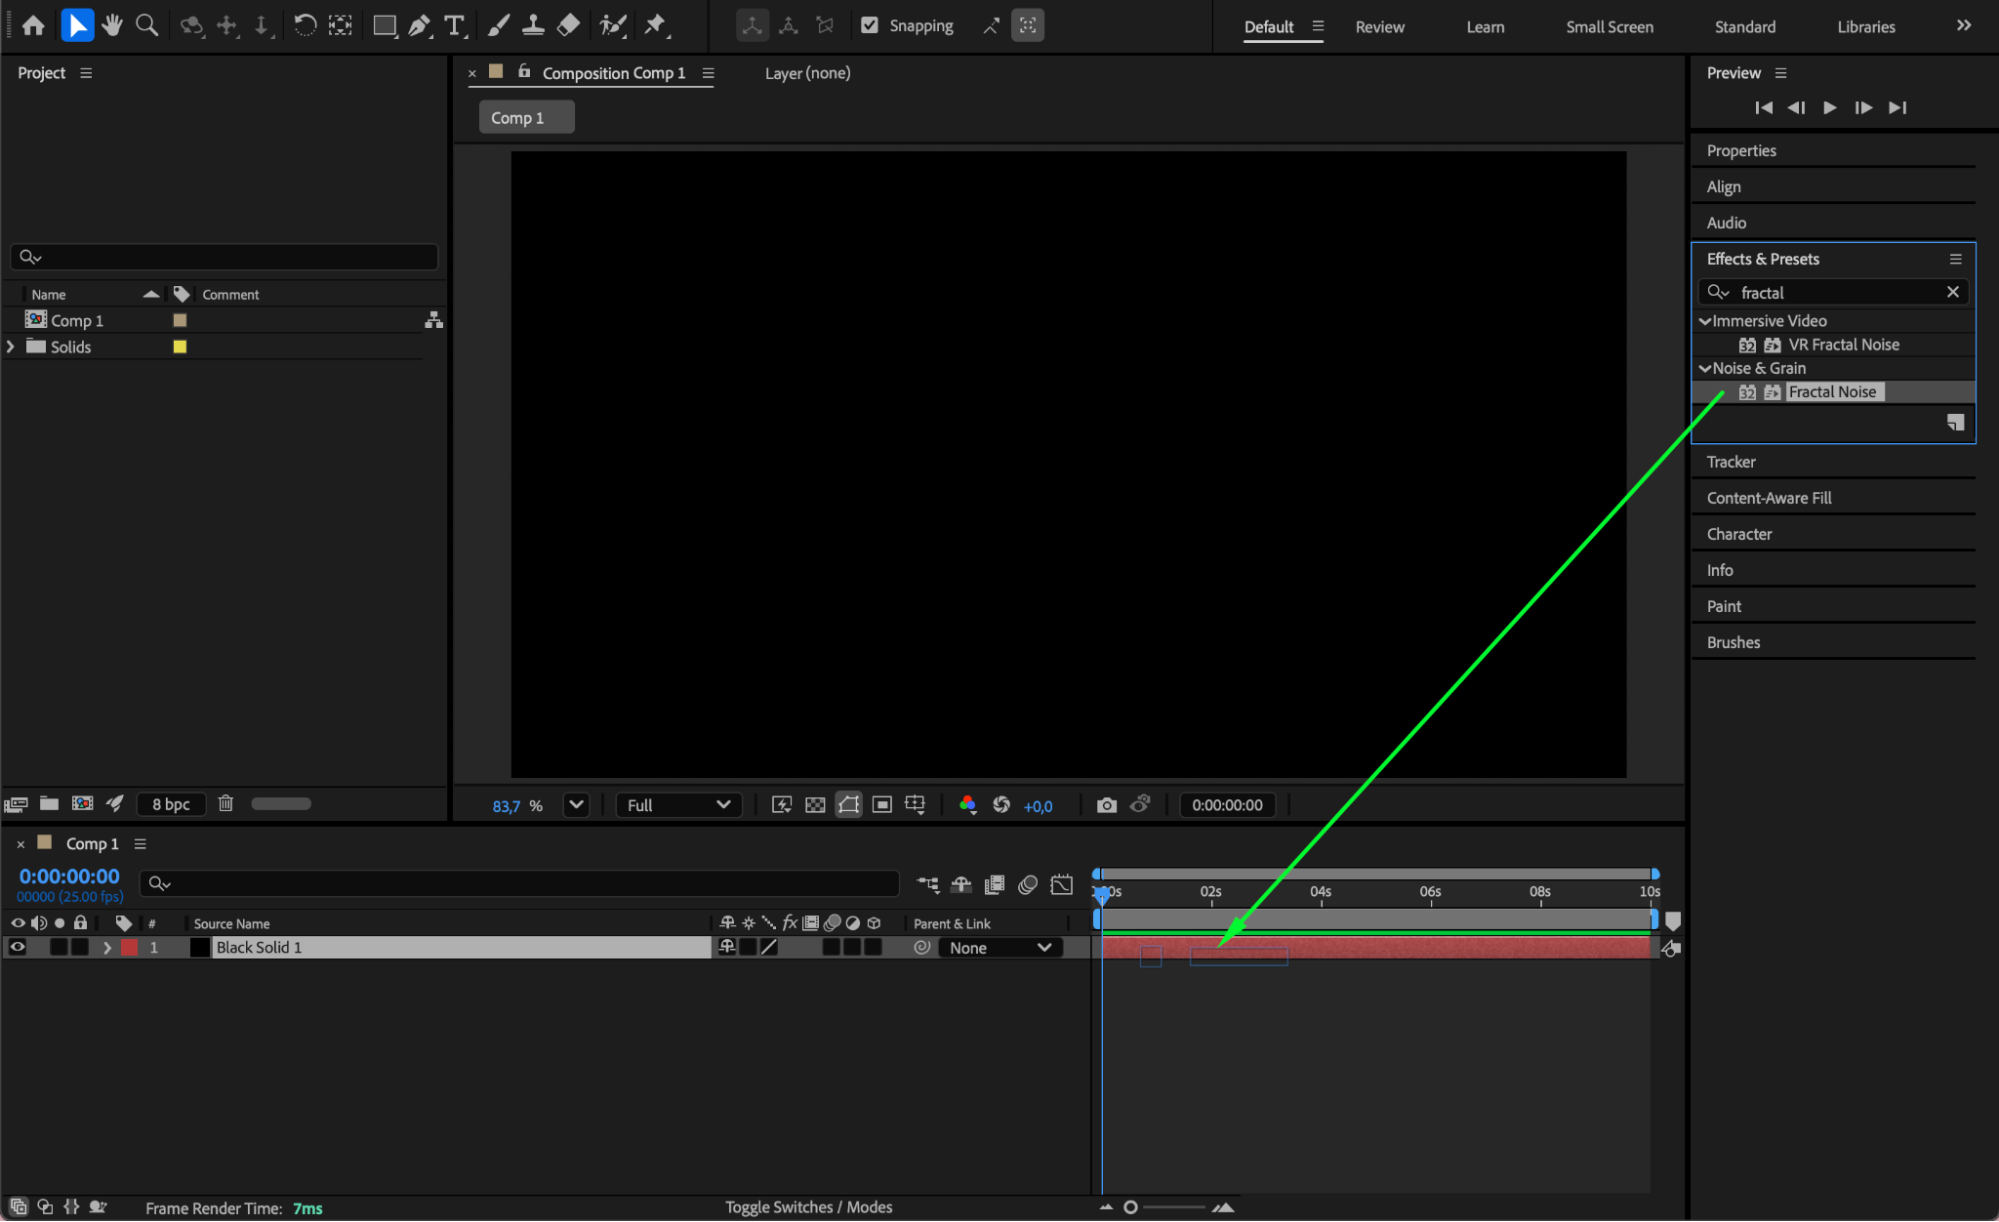
Get 10% off when you subscribe to our newsletter

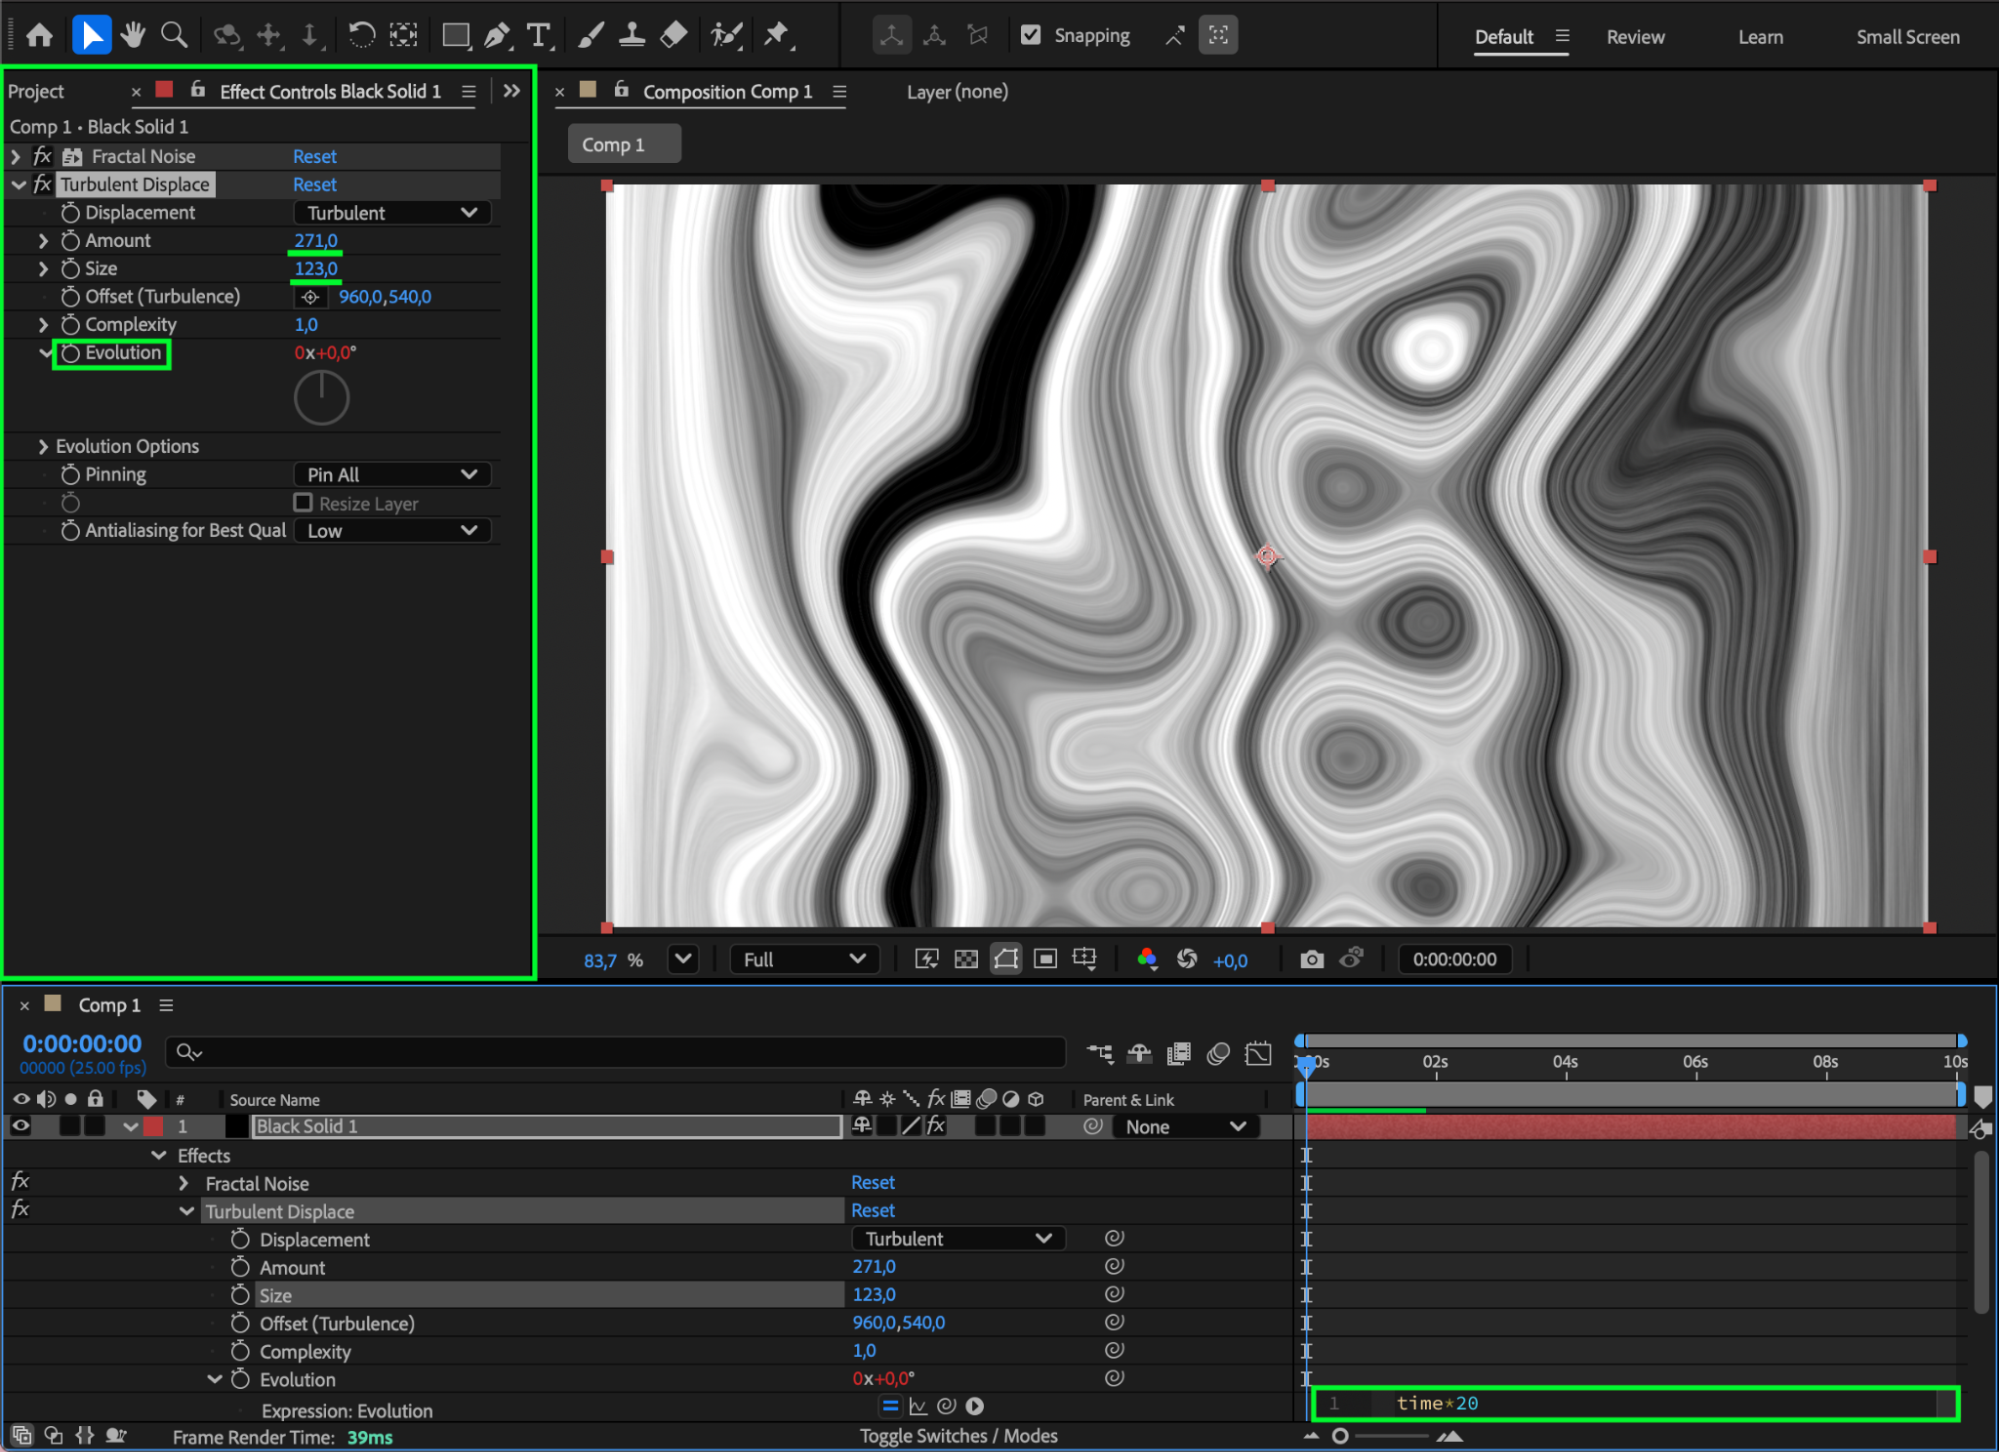
Step 4: Add Turbulent Displace
Apply Turbulent Displace from the Effects & Presets panel. Set:
Amount: 271
Size: 123
Evolution: Alt/Option + click the stopwatch and type: time*20
This animates the displacement over time to make the liquid move.

 Step 5: Add CC Toner
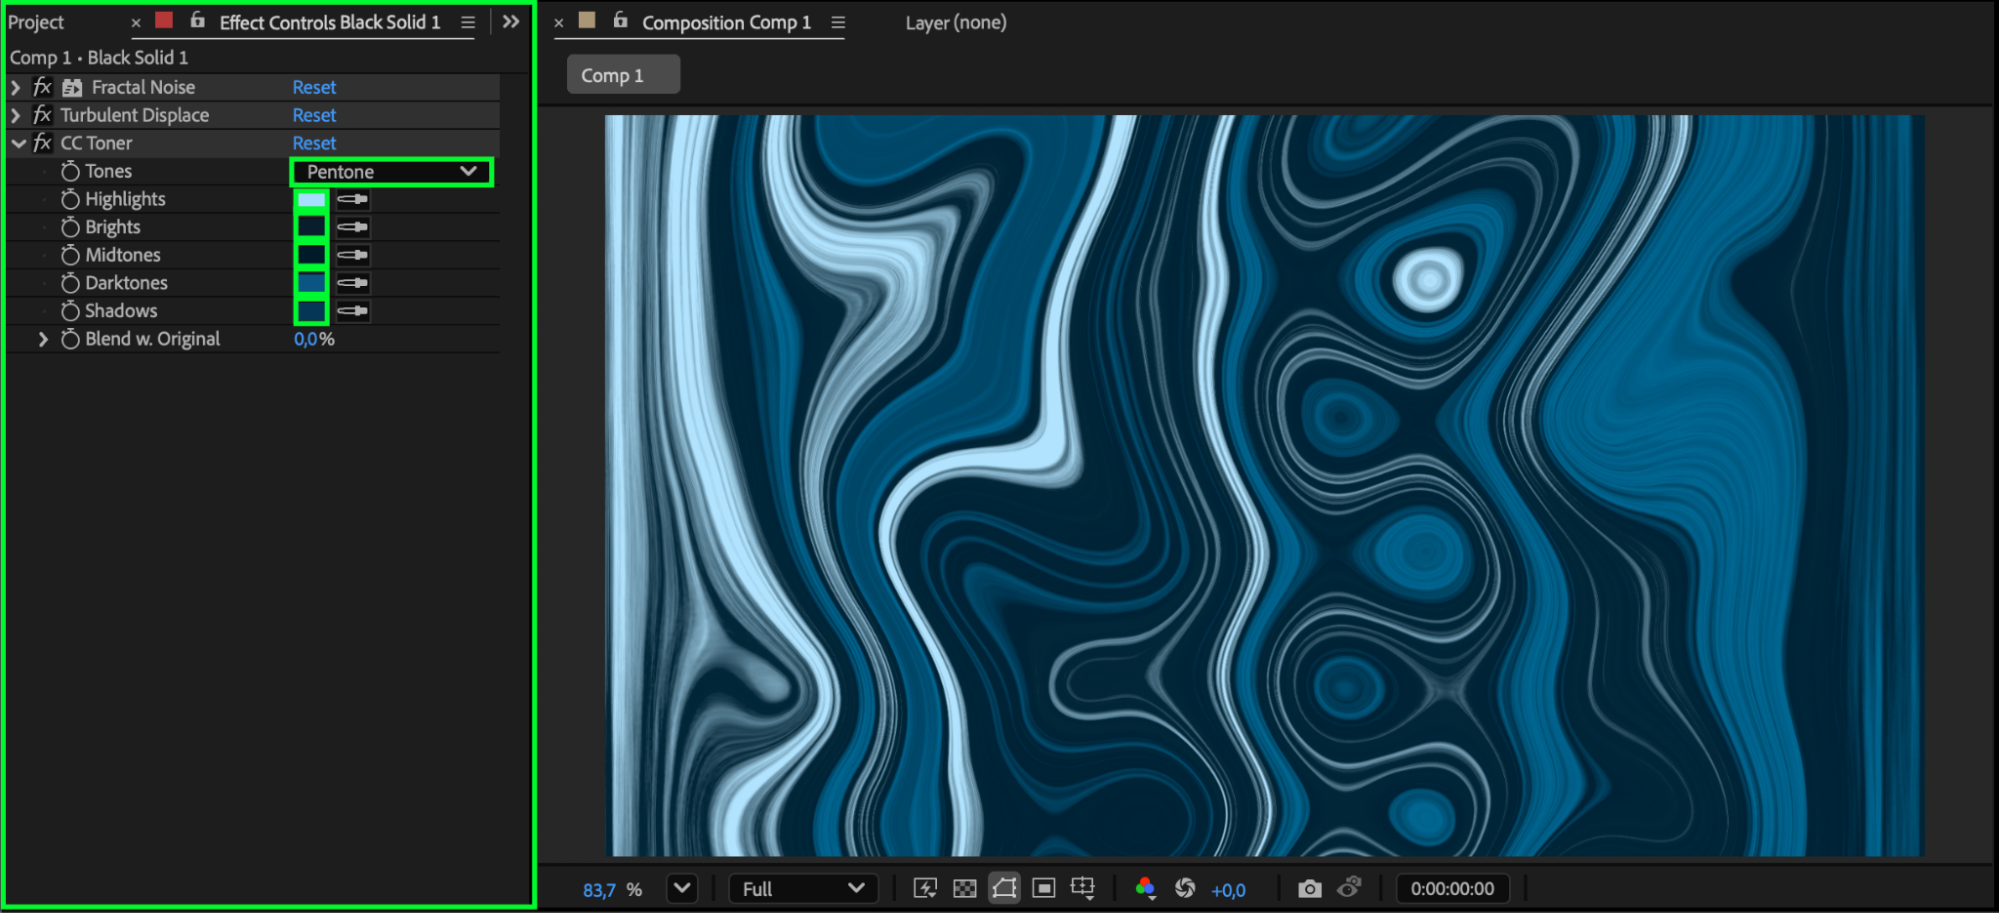
Apply CC Toner and set:
Tones: Pentones
Choose various shades of blue, from light to dark, for a rich liquid color palette.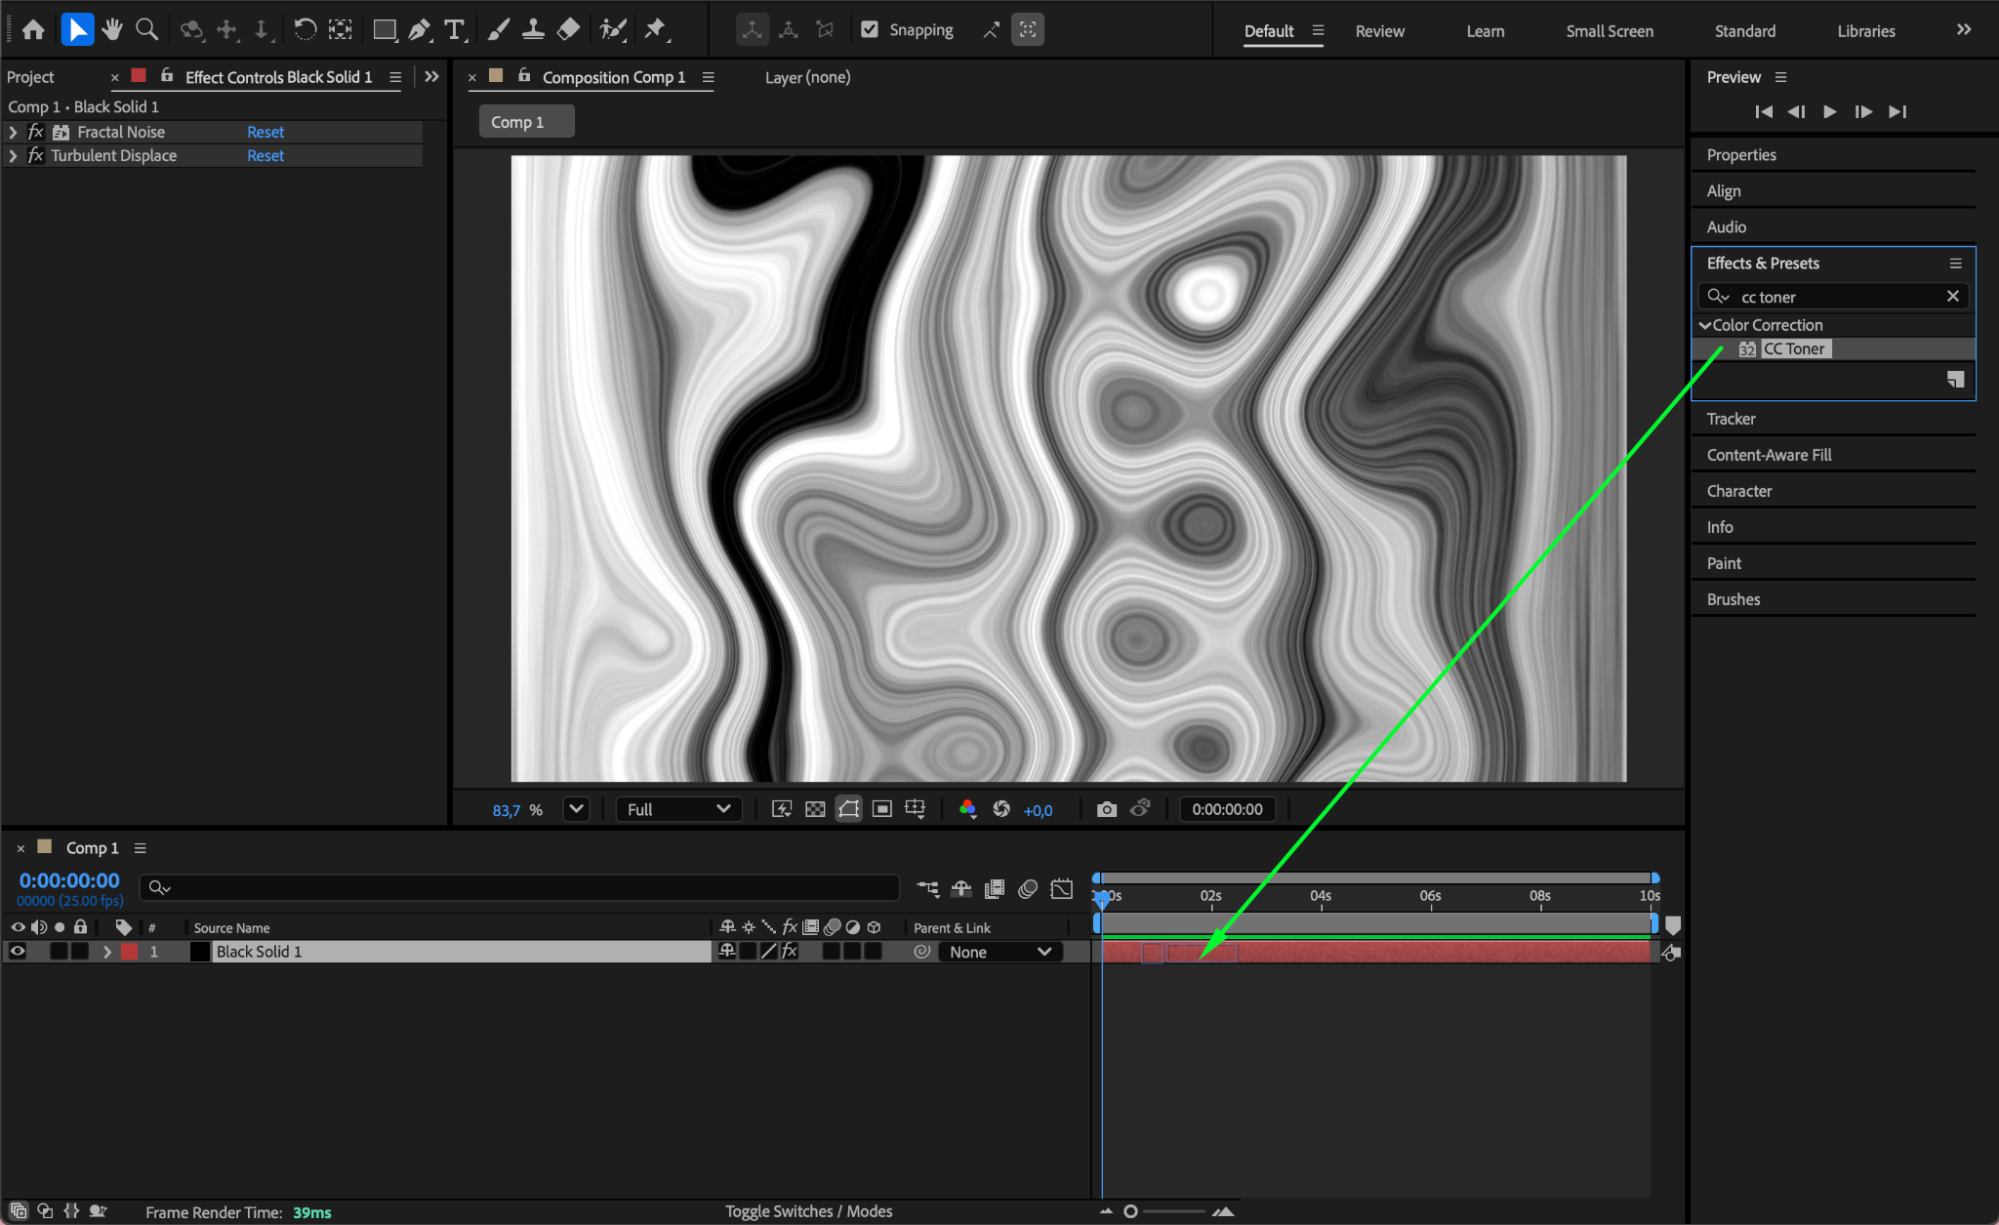
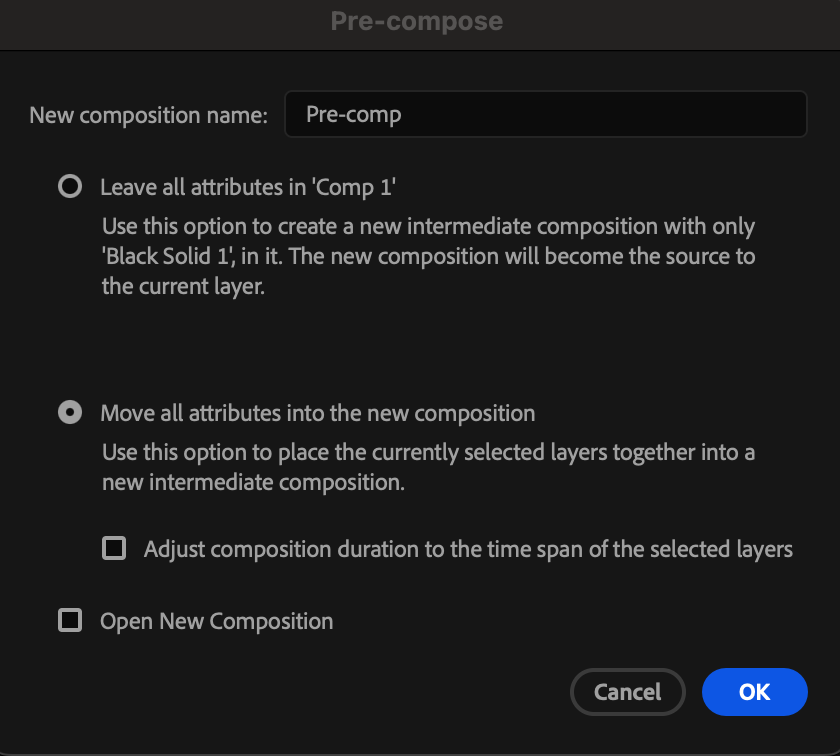
 Step 6: Pre-Compose the Solid
Select the solid layer, right-click, and choose Pre-compose. Move all attributes into the new composition.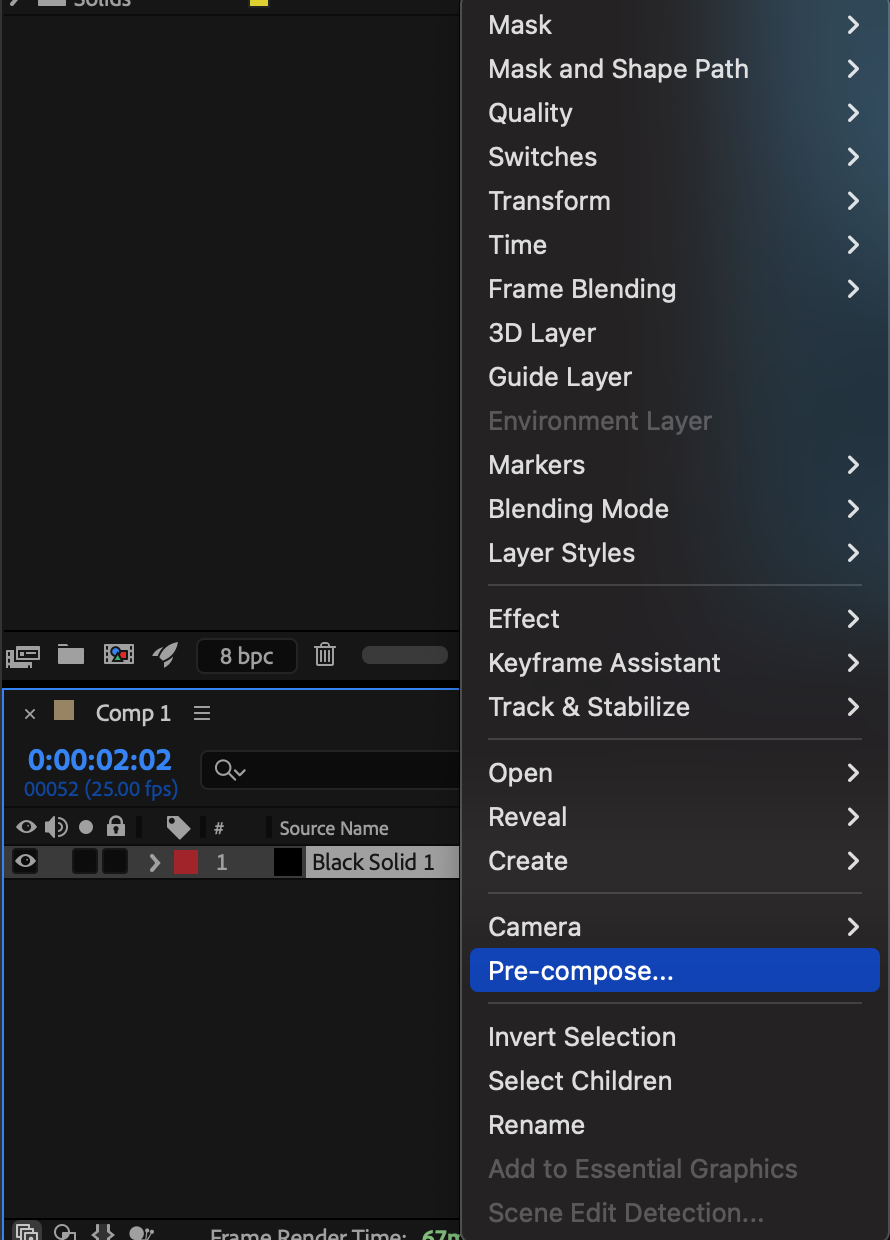
Step 7: Add CC Glass and Glow
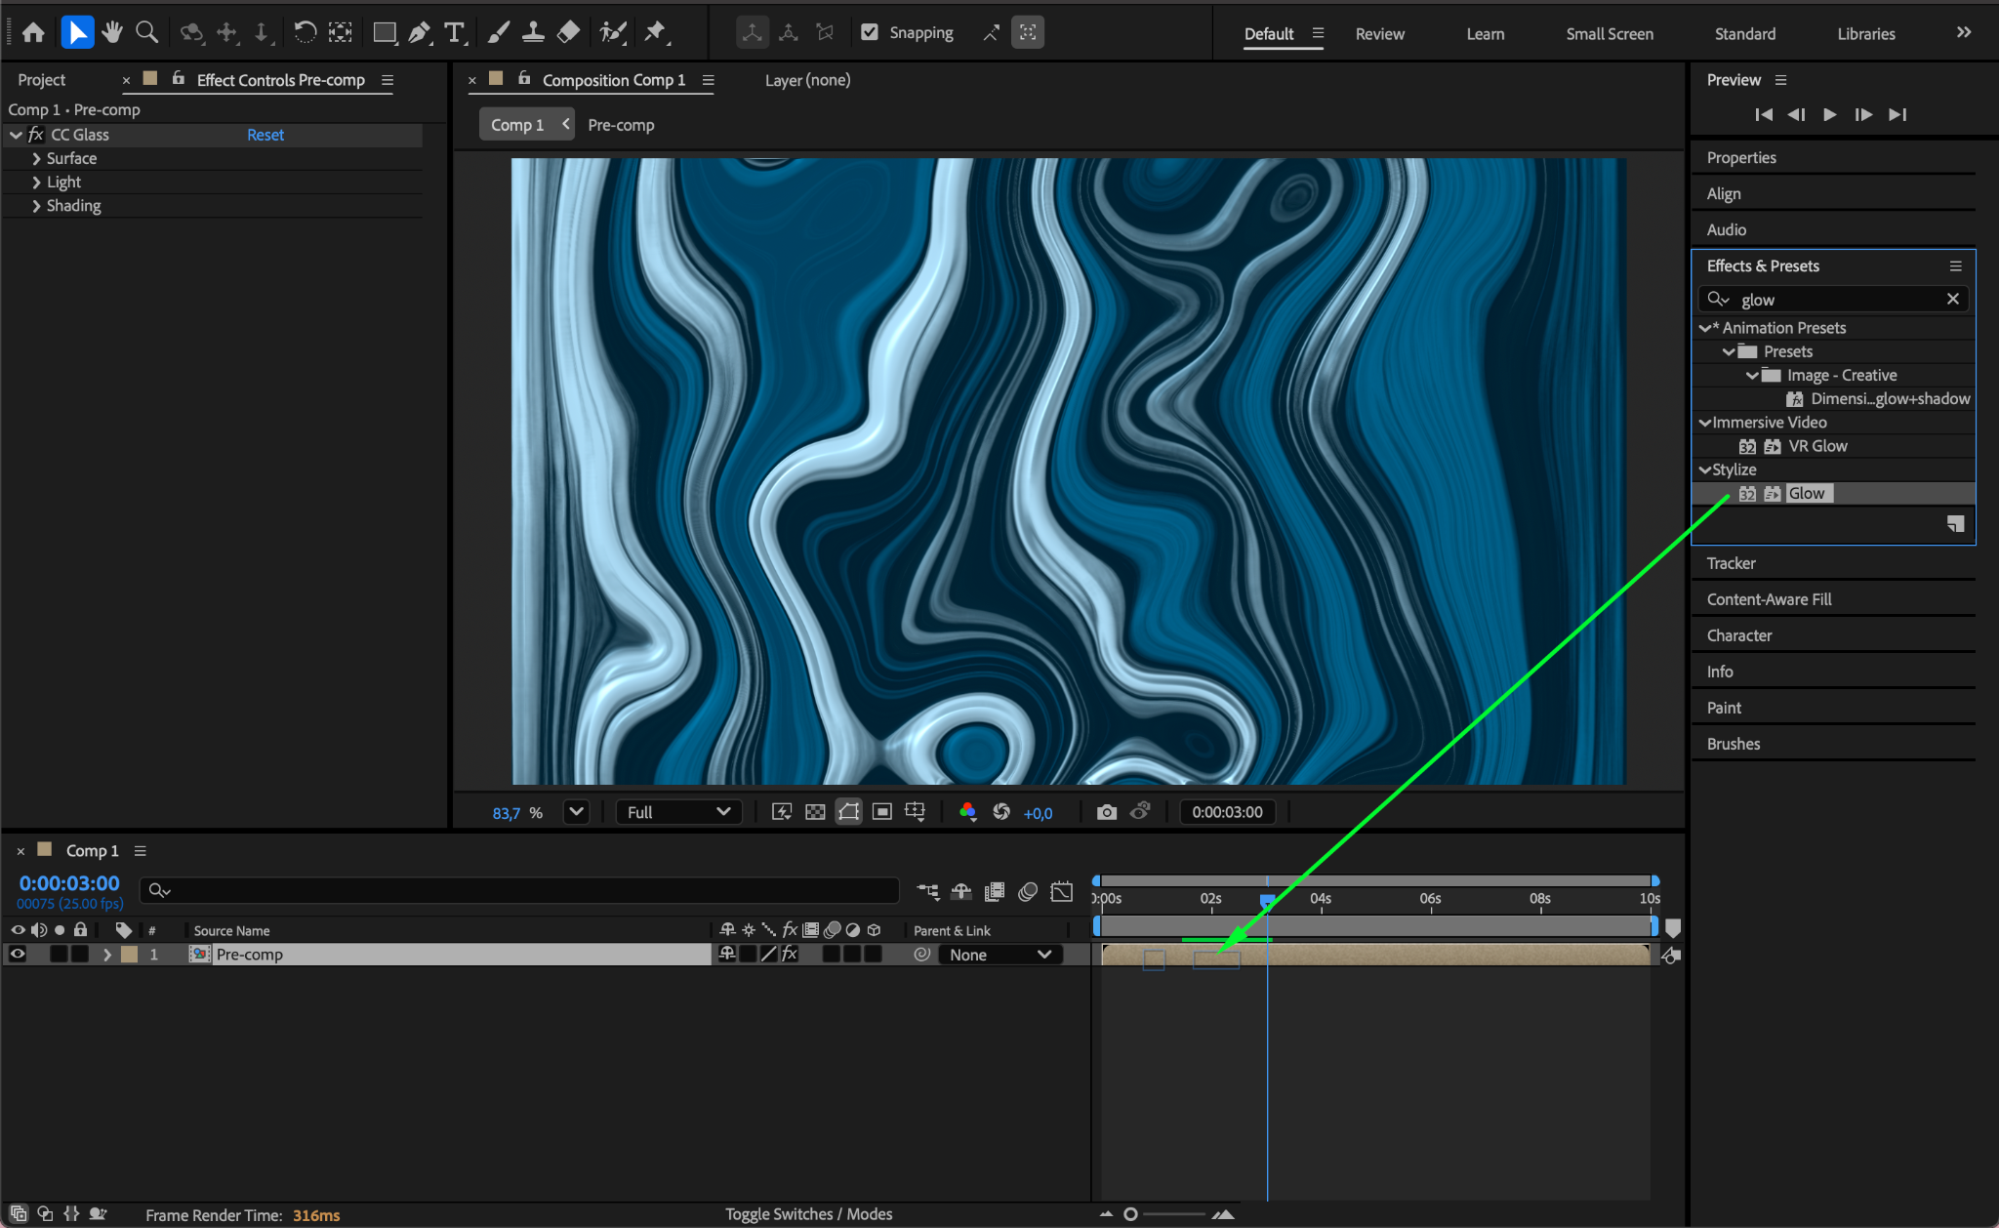
Apply CC Glass and Glow to the pre-comp. Adjust:
Glow Threshold: 93
Glow Radius: 8
Glow Intensity: 6.5
These effects add highlights and surface depth to the liquid.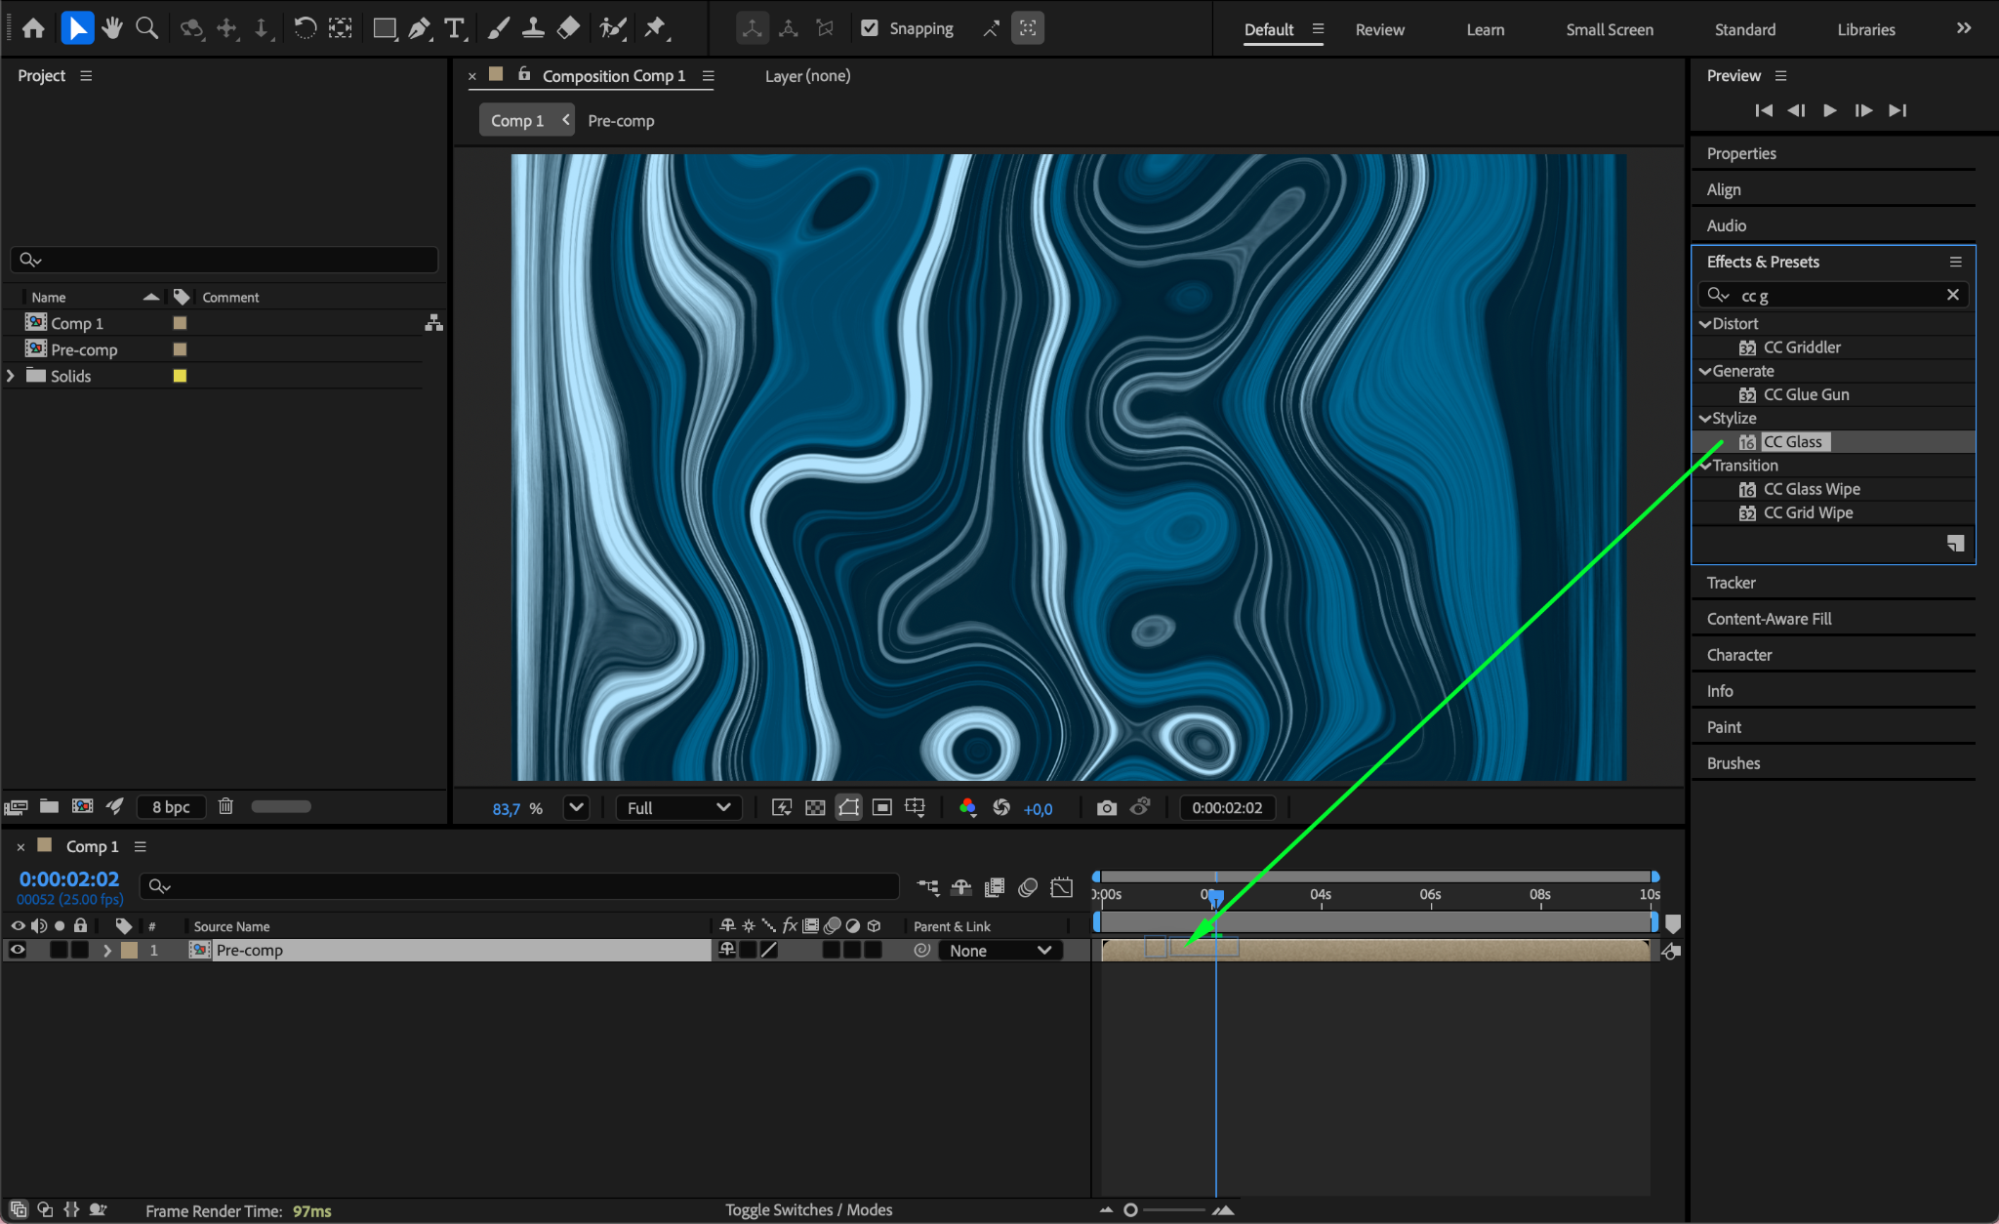
 Step 8: Preview and Refine
Press Spacebar to preview the animation. Tweak the glow, distortion, or noise settings to achieve the exact liquify effect you want.
Conclusion
With Fractal Noise, Turbulent Displace, CC Toner, and CC Glass, you can create a beautiful animated liquify effect in After Effects. This method is perfect for backgrounds, transitions, and futuristic motion graphics.
Our Bestsellers


