Mastering Perspective Changes in After Effects
Introduction to Changing Video Perspective
Are you looking to give your videos a new dimension by changing their perspective in Adobe After Effects? Whether you’re aiming to create dynamic visuals or add subtle shifts, After Effects offers powerful tools to adjust video perspectives in 3D space. In this guide, we’ll walk through the steps for transforming your footage, from setting up a 3D layer to using camera controls, so you can unlock your creative potential.
Get 10% off when you subscribe to our newsletter

Step 1: Import Your Video File
Start by importing the video you want to work on.
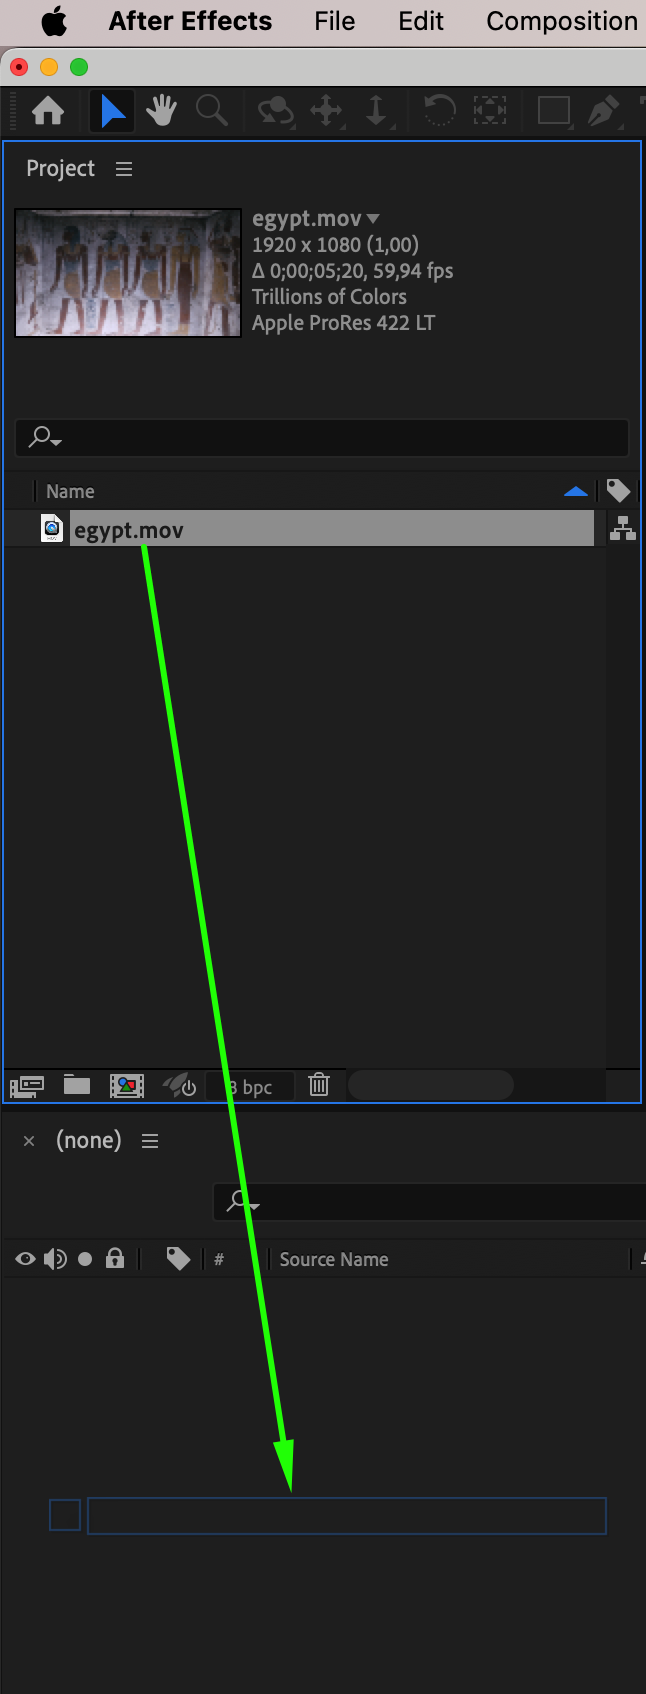
Go to the “File” menu and select “Import” > “File.” Once the video appears in your Project panel, drag it to the Timeline to begin editing. Importing ensures the footage is correctly placed within your composition and ready for perspective adjustments. Make sure the video is positioned appropriately on the Timeline before proceeding.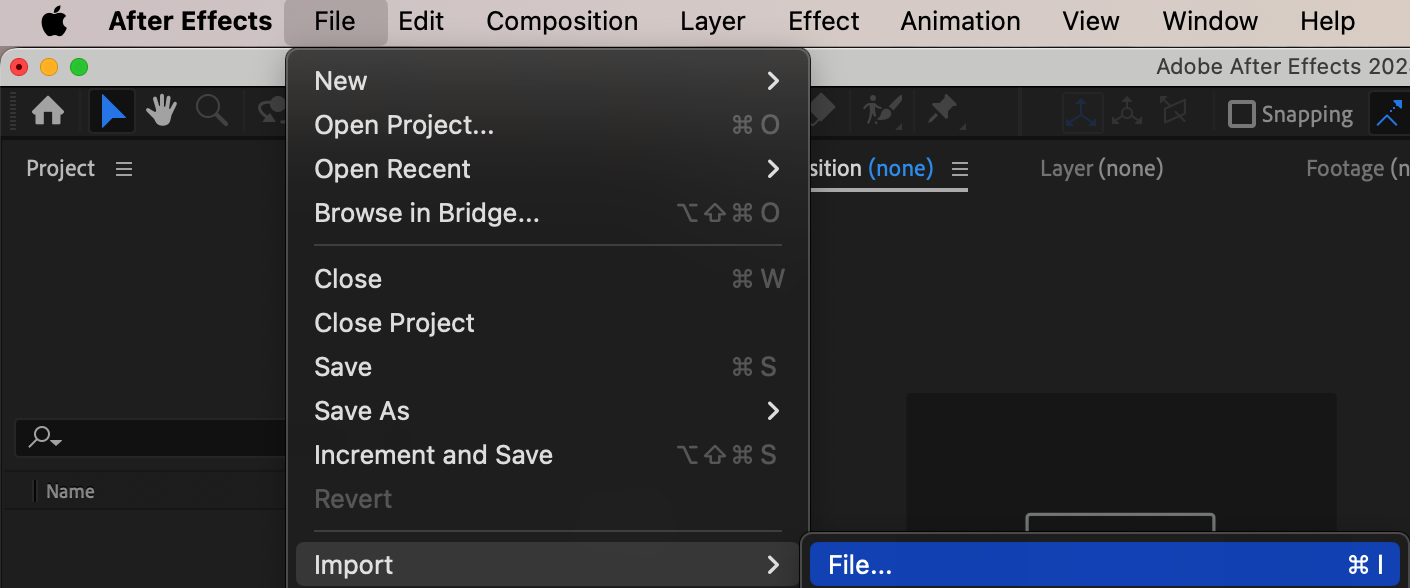
 Step 2: Apply 3D Layer to Your Video
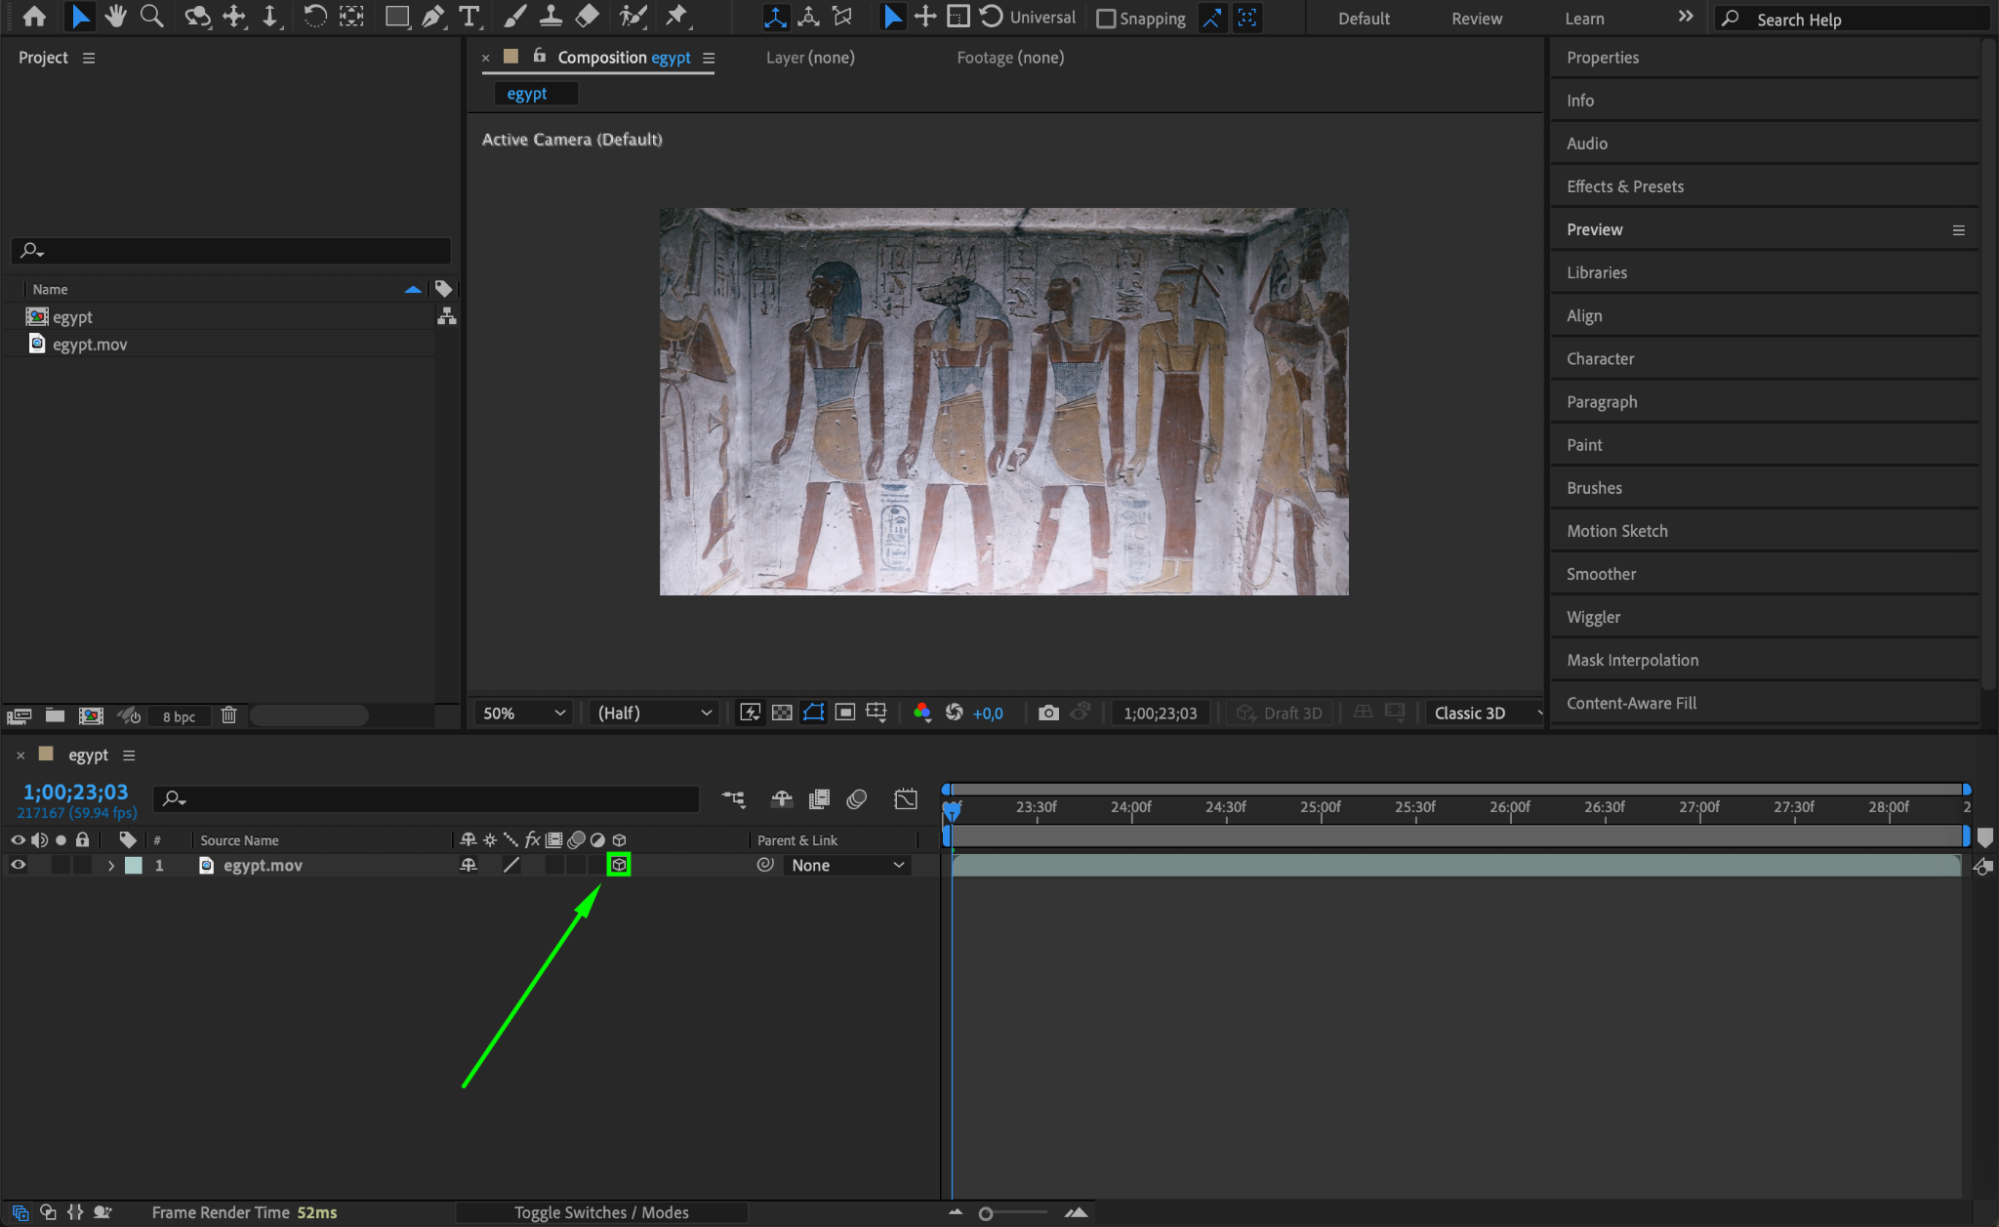
To change the perspective of your video, you need to turn it into a 3D layer.
In the Timeline panel, find the video layer and enable the 3D Layer option by clicking the cube icon next to the layer name. Activating the 3D layer feature allows you to manipulate the video along the X, Y, and Z axes, giving you full control over the perspective. This step is essential for transforming the way your video looks in a 3D environment.
 Step 3: Adjust Perspective Using the Transform Controls
Once your video layer is set as a 3D layer, you can change its perspective using Transform controls.
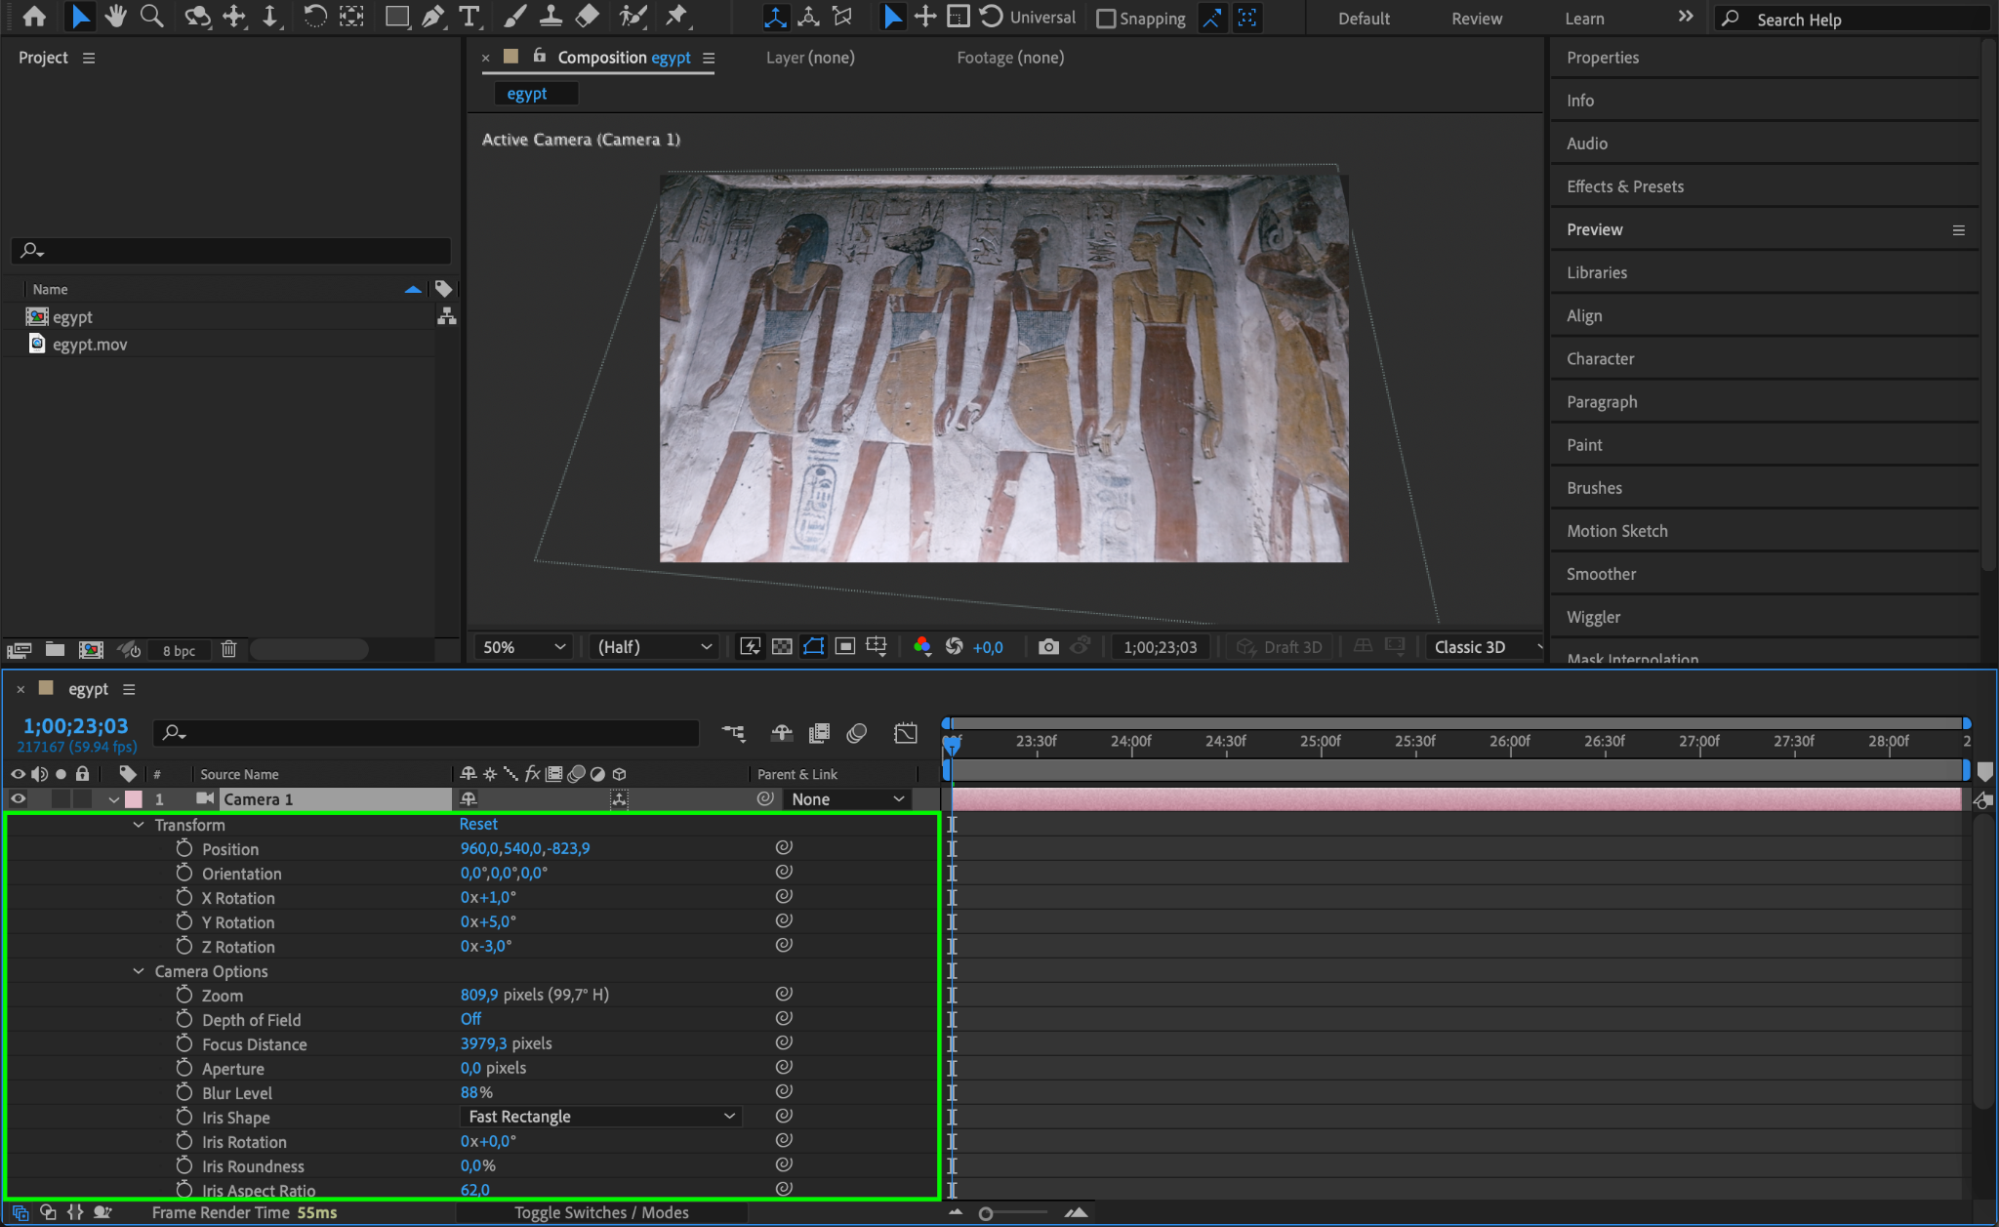
Select the video layer and press R to reveal the Rotation settings, or expand the Transform menu to access additional options like Position and Scale. Adjust the X, Y, and Z Rotation values to tilt or rotate your video in different directions:
X Rotation: tilts the video forward or backward.
Y Rotation: rotates the video left or right.
Z Rotation: spins the video around its axis.
Experiment with these settings to achieve the desired perspective effect.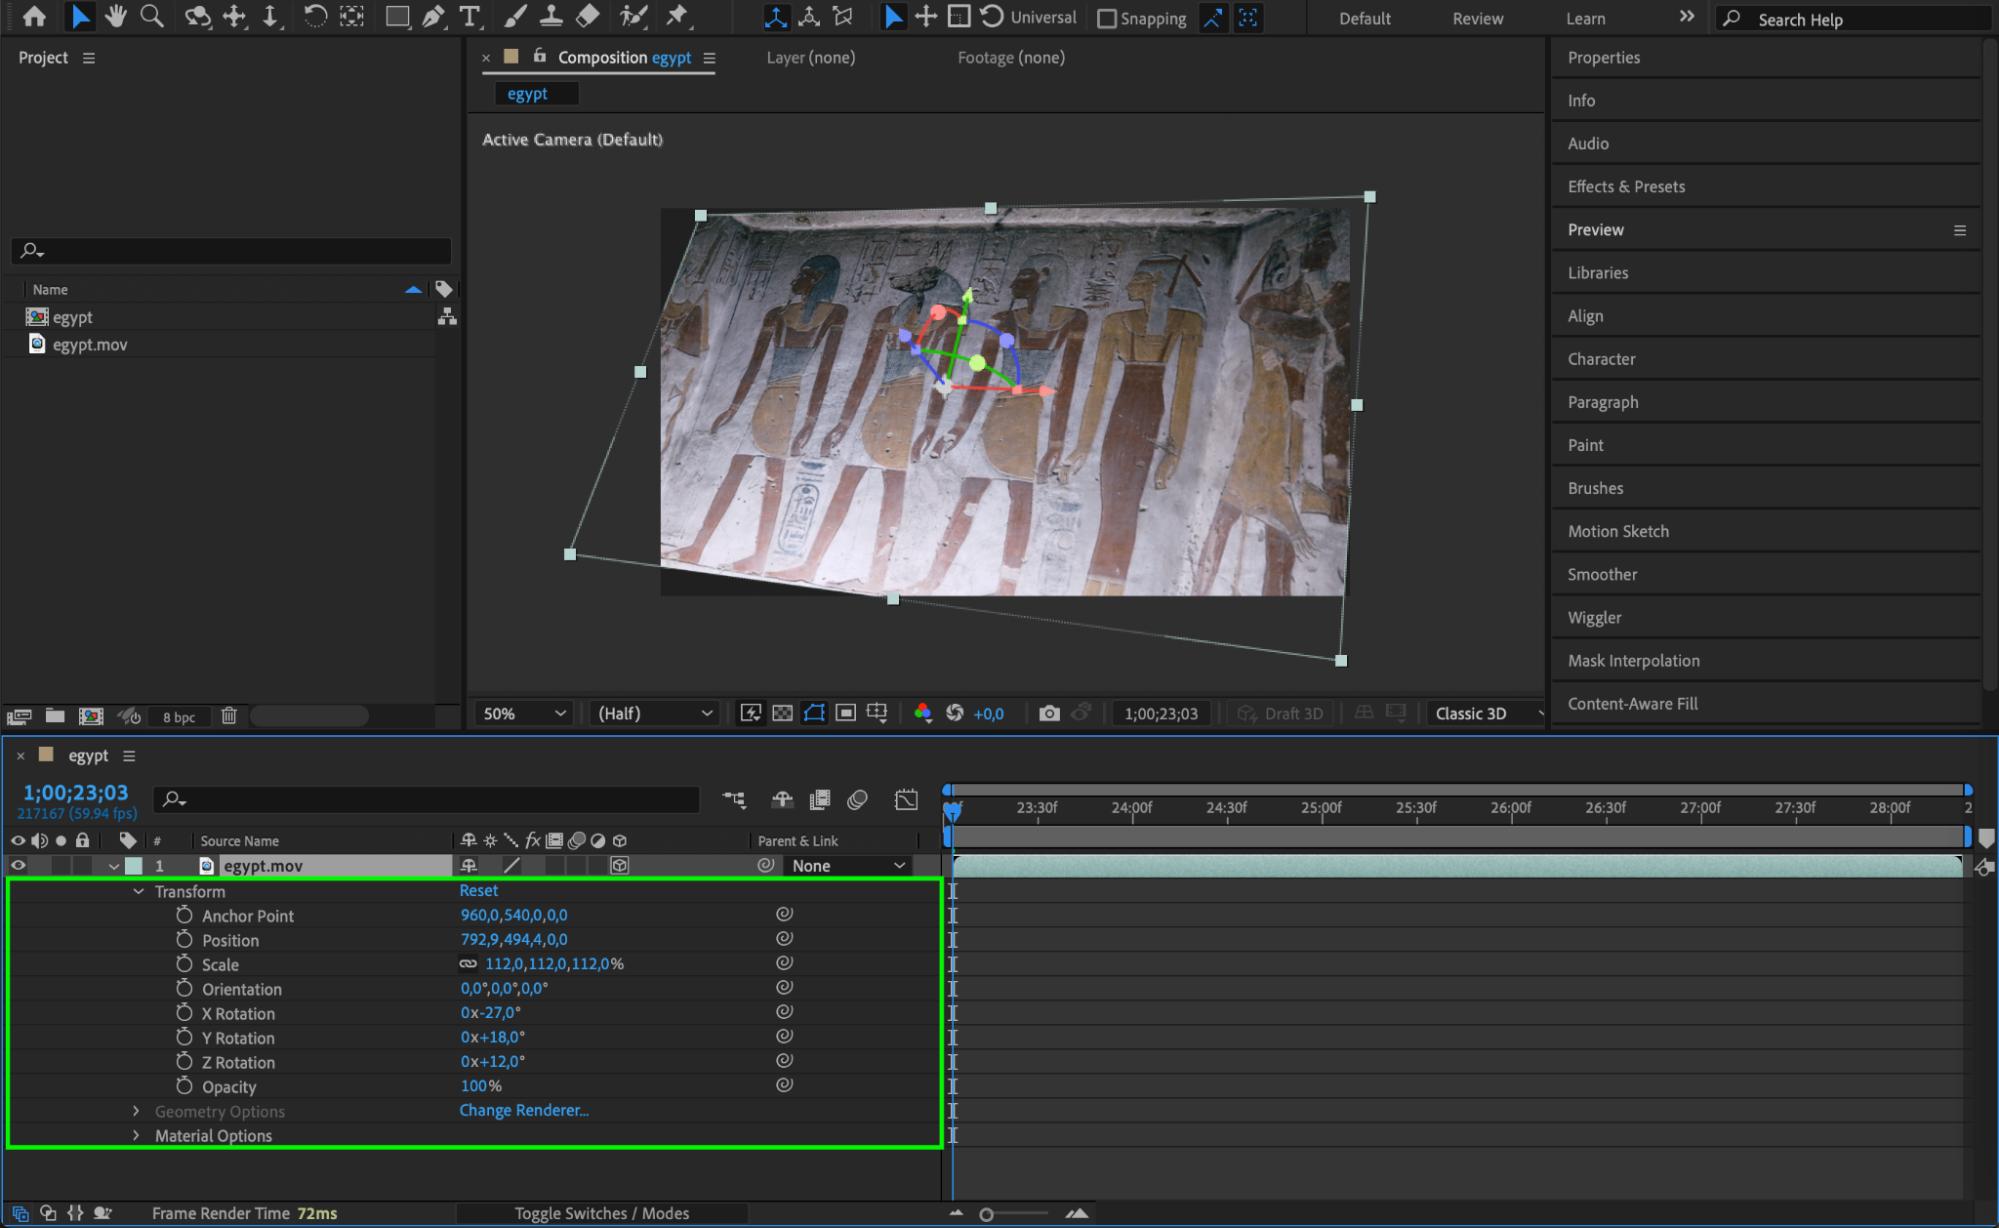 Step 4: Use the Camera Tool for Dynamic Perspective Changes
For more advanced perspective manipulation, you can add a camera to simulate real-world camera movements.
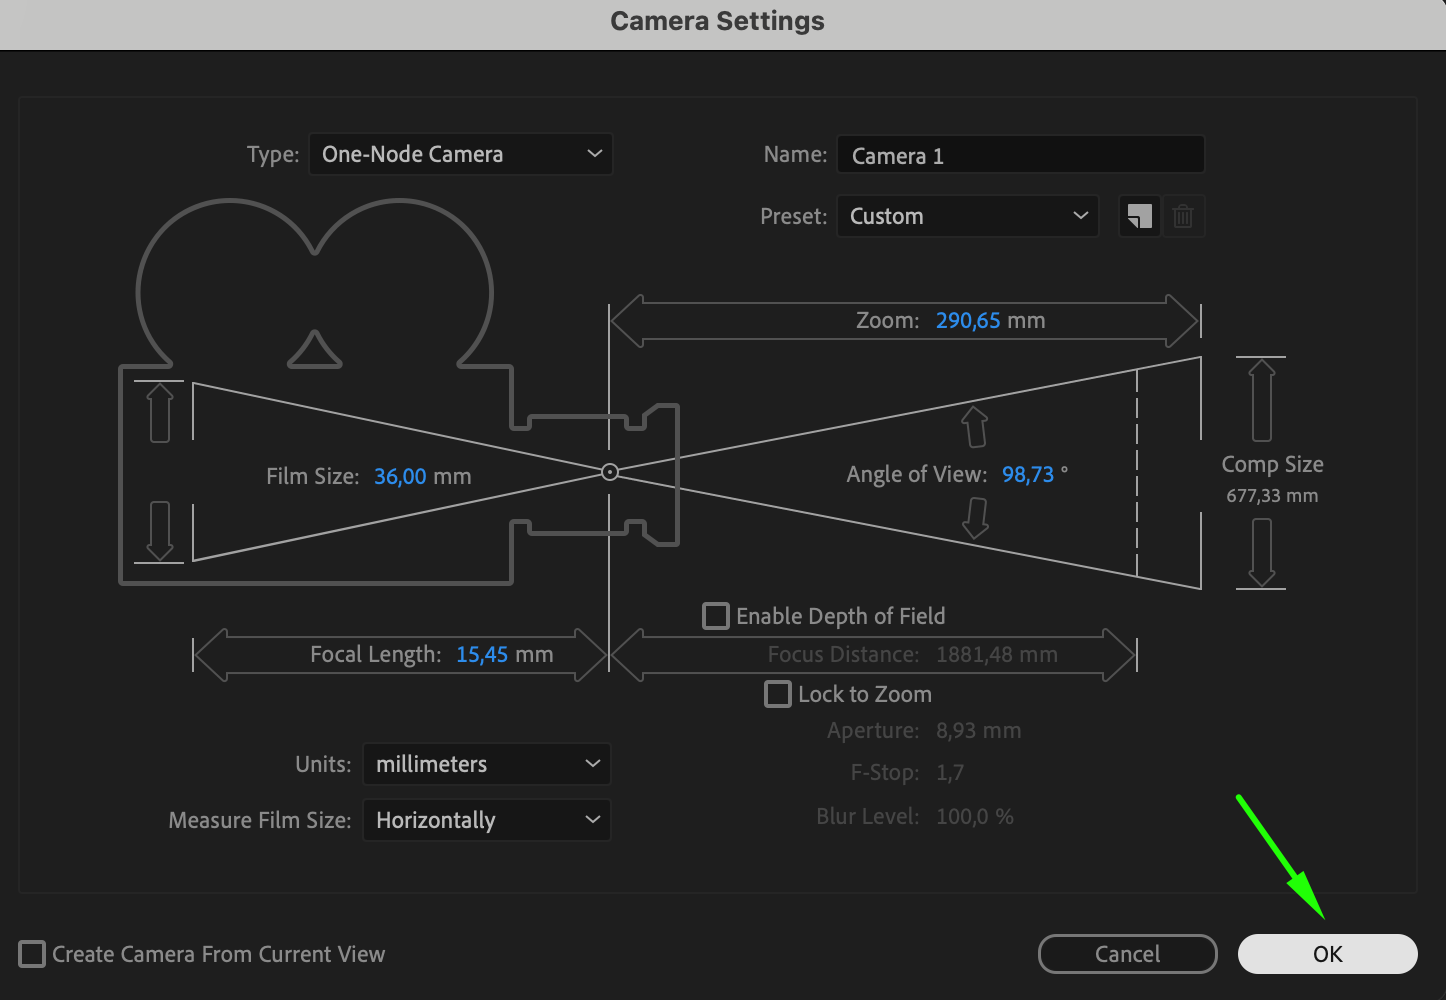
Go to “Layer” > “New” > “Camera” to create a camera layer. Once added, use the Camera Tool to adjust the camera angle and focal length, which will change how the video appears within the 3D space. The camera layer allows you to create more dynamic movements, like zooming or panning, to make your perspective shift more engaging. This tool is great for adding realism and depth to your scene.
 Step 5: Add a Ground Plane or Background to Anchor Perspective
To give your video more depth, add a ground plane or background that anchors the perspective.
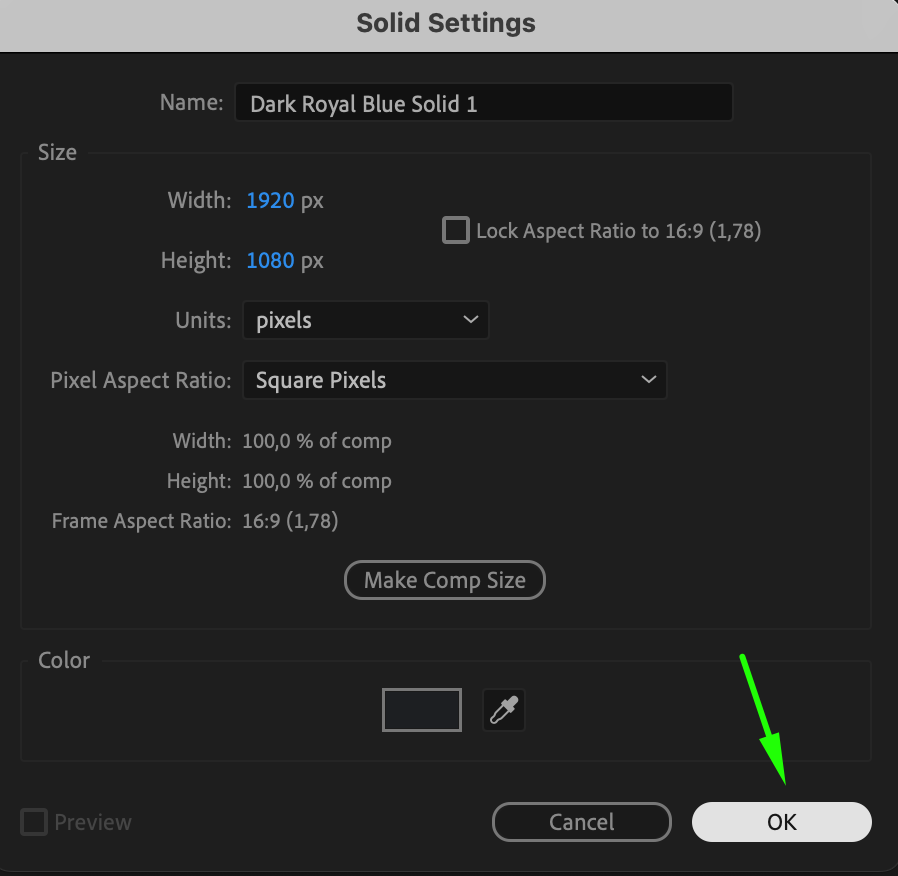
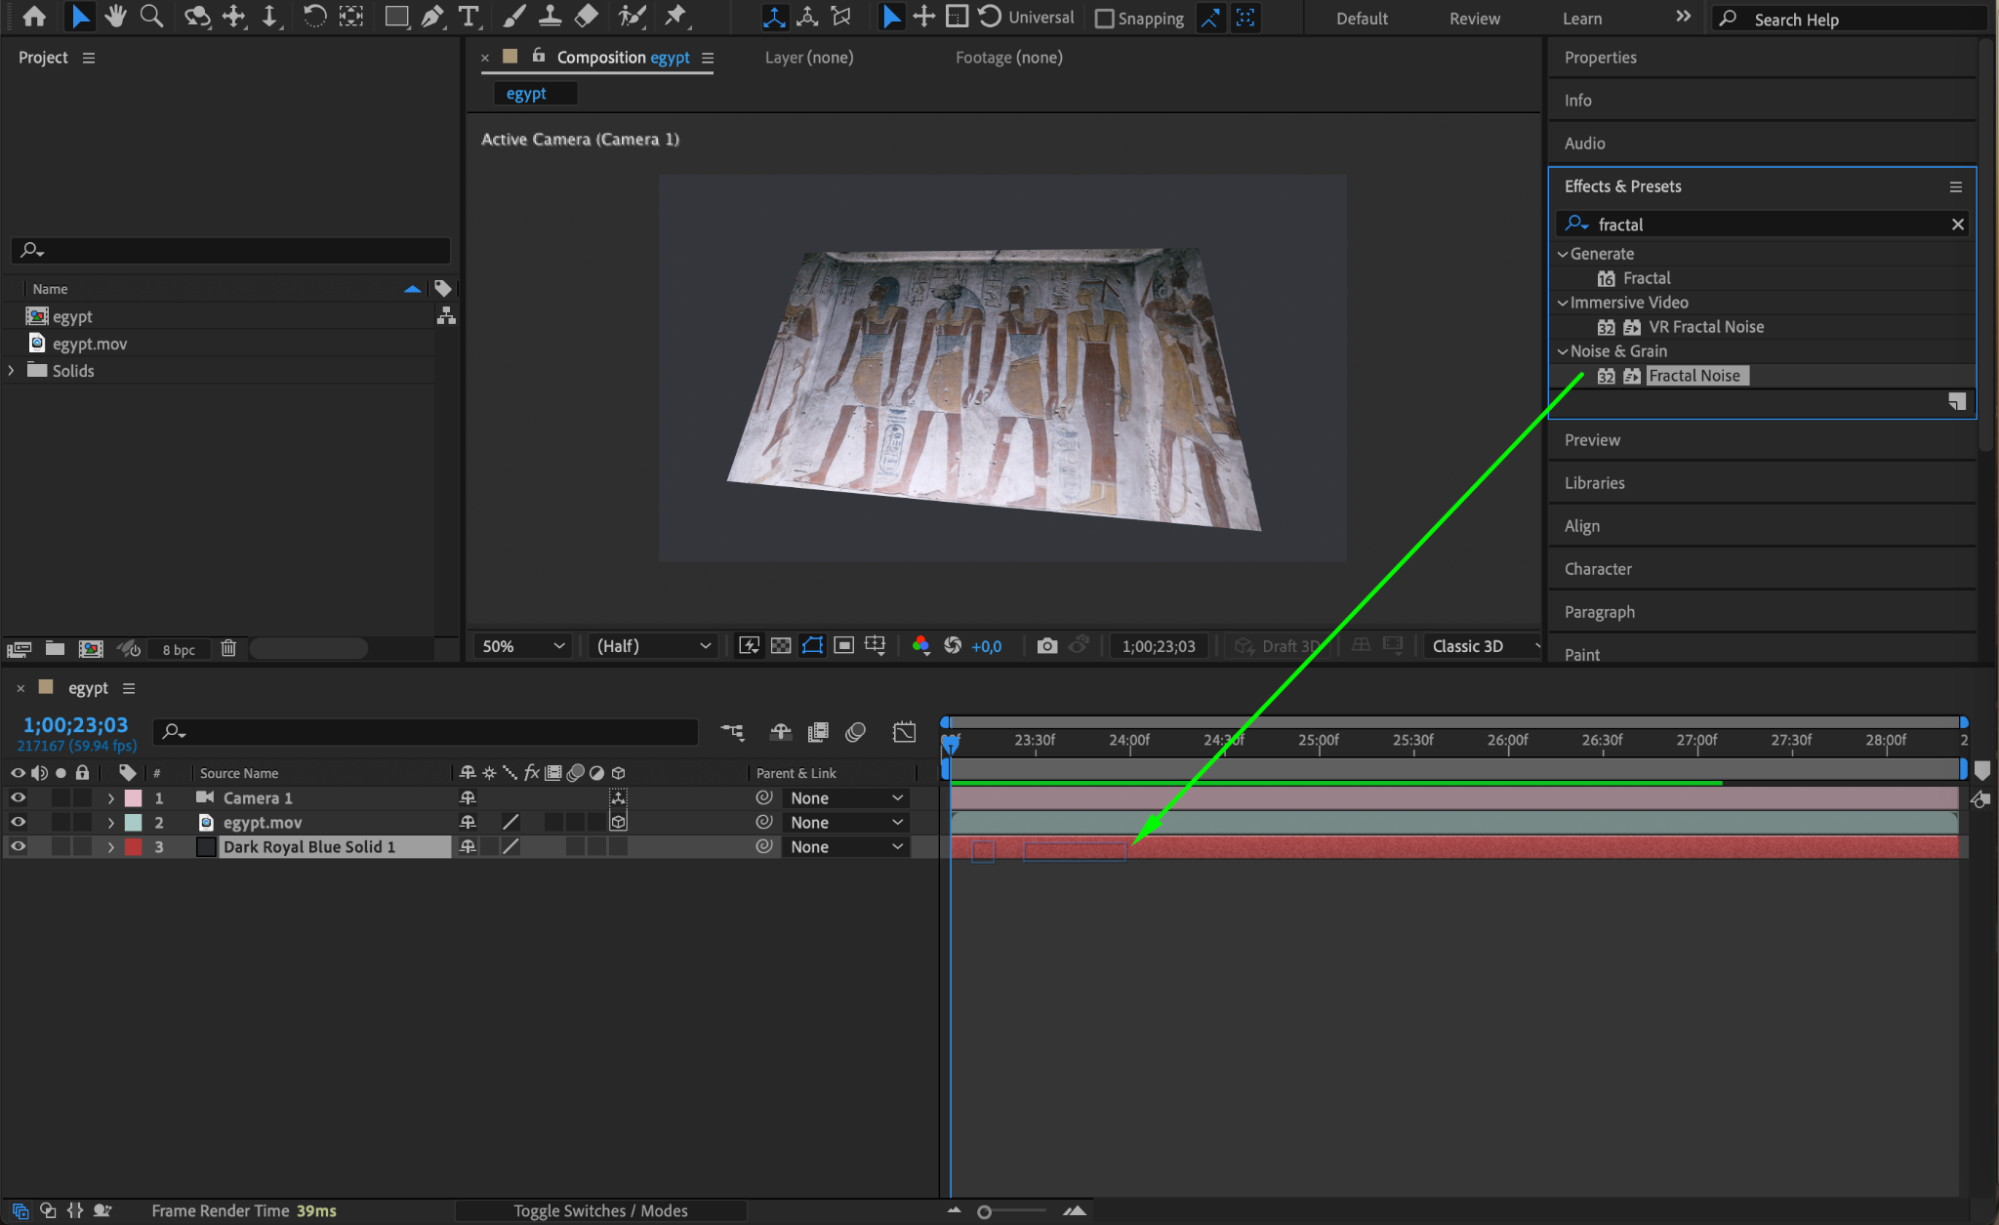
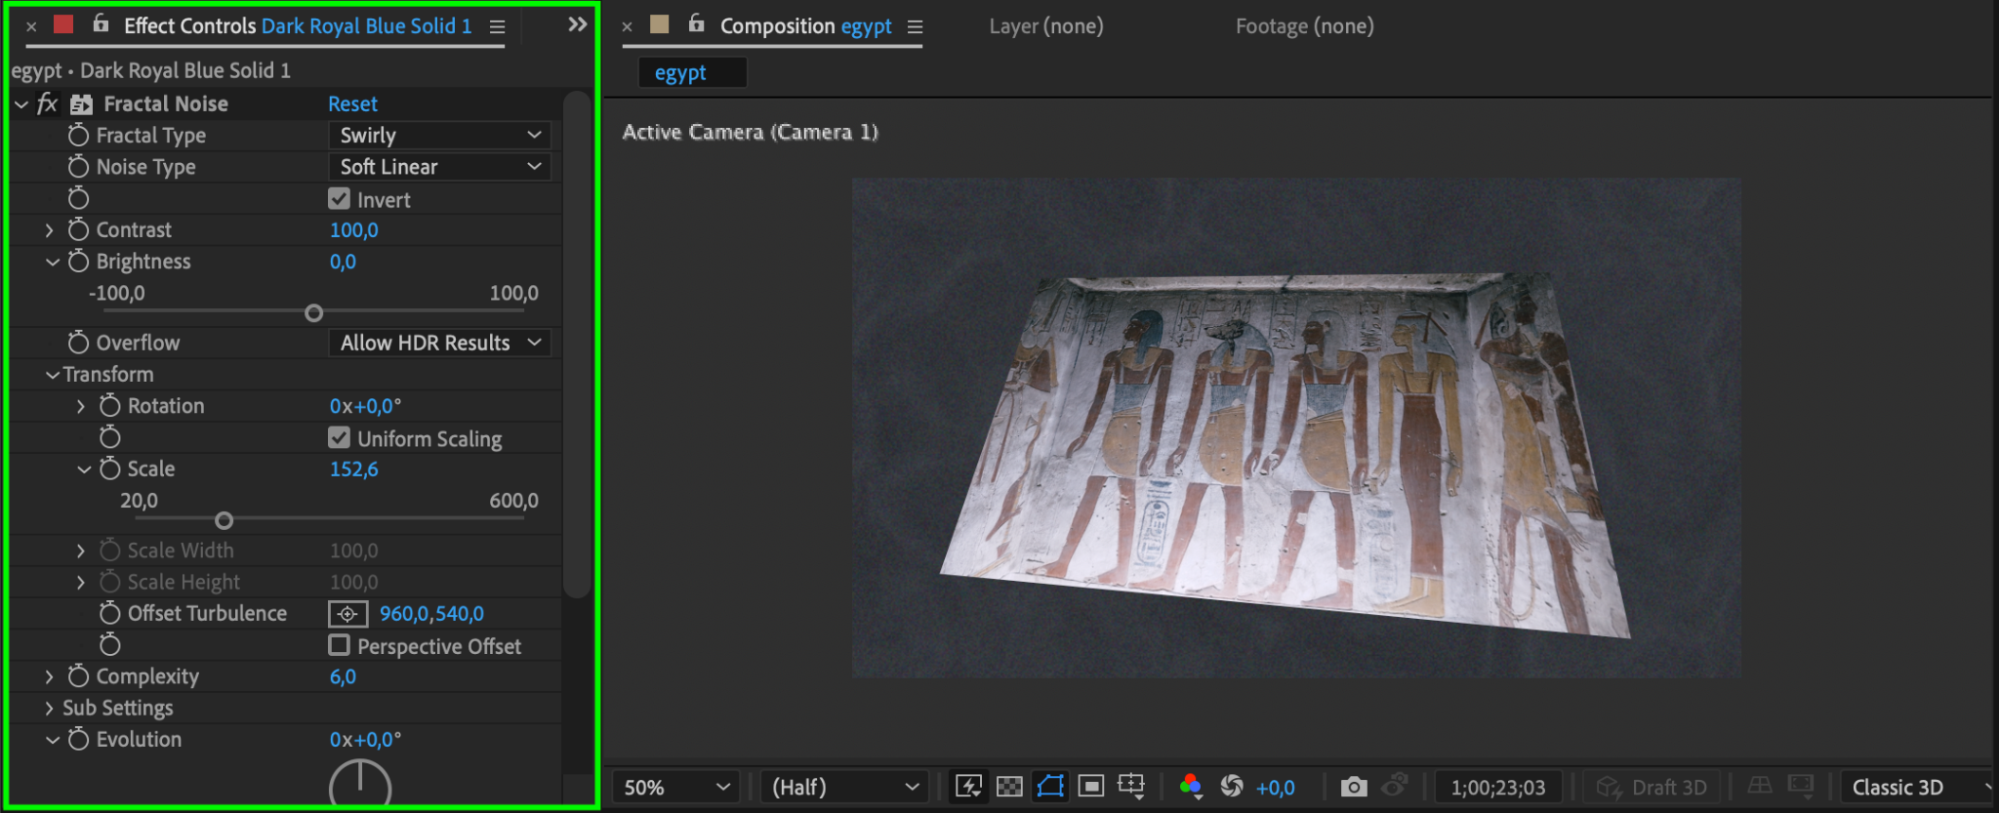
Create a new solid layer by selecting “Layer” > “New” > “Solid.” This layer can serve as a background or ground plane, which will help define the spatial relationships in your composition. Customize the solid layer by applying effects from the Effects & Presets panel, such as Glow or Fractal Noise, to enhance the overall look of your scene. This step helps ground the objects in your composition and gives them a sense of realism.
 Step 6: Preview Your Changes
Before finalizing your composition, preview the changes.
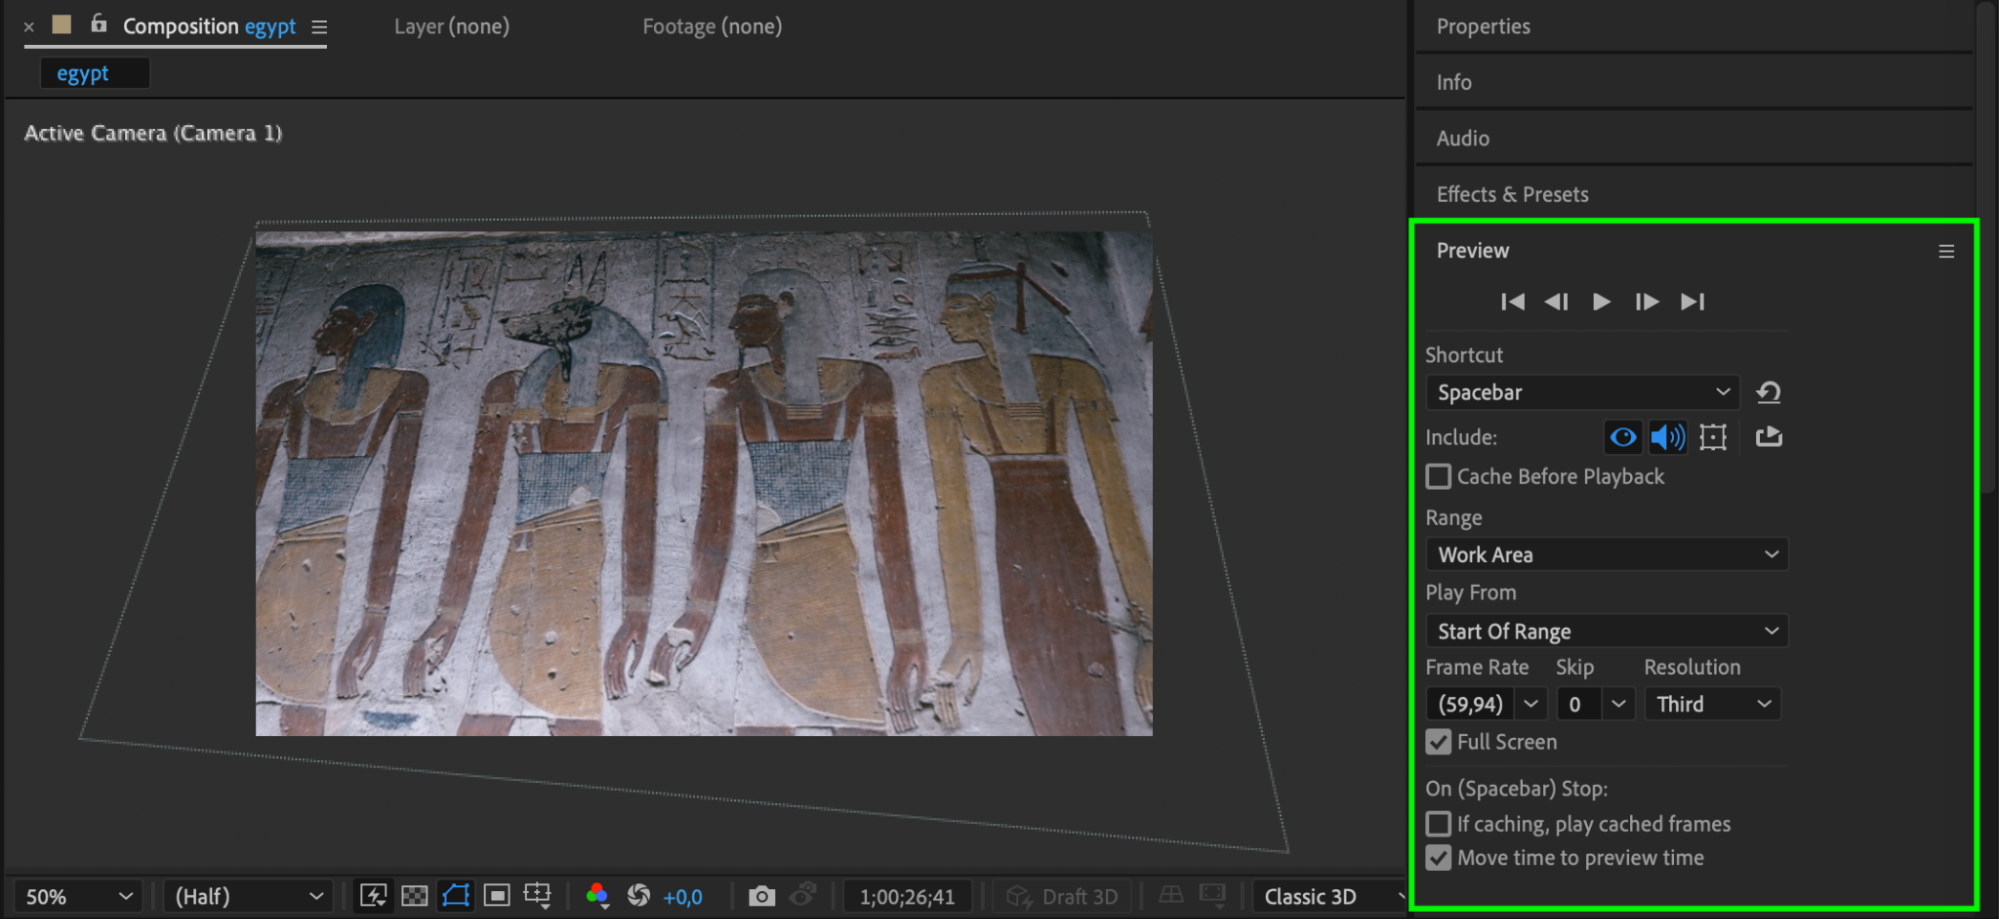
Press the spacebar to play your composition and review the adjustments. Pay attention to how the perspective shifts and how the video interacts with the 3D space. This step allows you to fine-tune any final details before moving on to the export process.
 Step 7: Render and Export the Video
Once you’re satisfied with the perspective adjustments, it’s time to render your project.
Go to “Composition” > “Add to Render Queue” to prepare your composition for export. Adjust the output settings if necessary, and select the file format and quality options that best suit your needs. Finally, click “Render” to export your video with the updated perspective.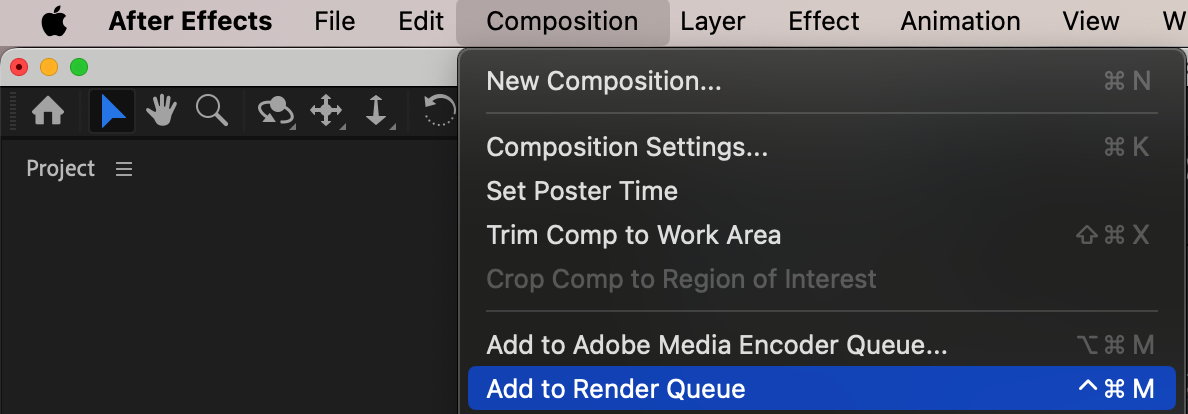

Conclusion
Now you’ve mastered the art of changing video perspectives in After Effects! By transforming layers into 3D, adjusting camera angles, and adding background elements, you can create stunning visual effects that captivate your audience. Explore these techniques and push the limits of your creativity to bring new life to your videos. Happy editing!


