Introduction
Trippy glow effects are great for music videos, experimental visuals, and psychedelic motion designs. In After Effects, you can create this look using a combination of built-in effects—no plugins required. This tutorial shows you how to stack and adjust effects to achieve a vibrant, surreal glow style.
Step 1: Import Your Video
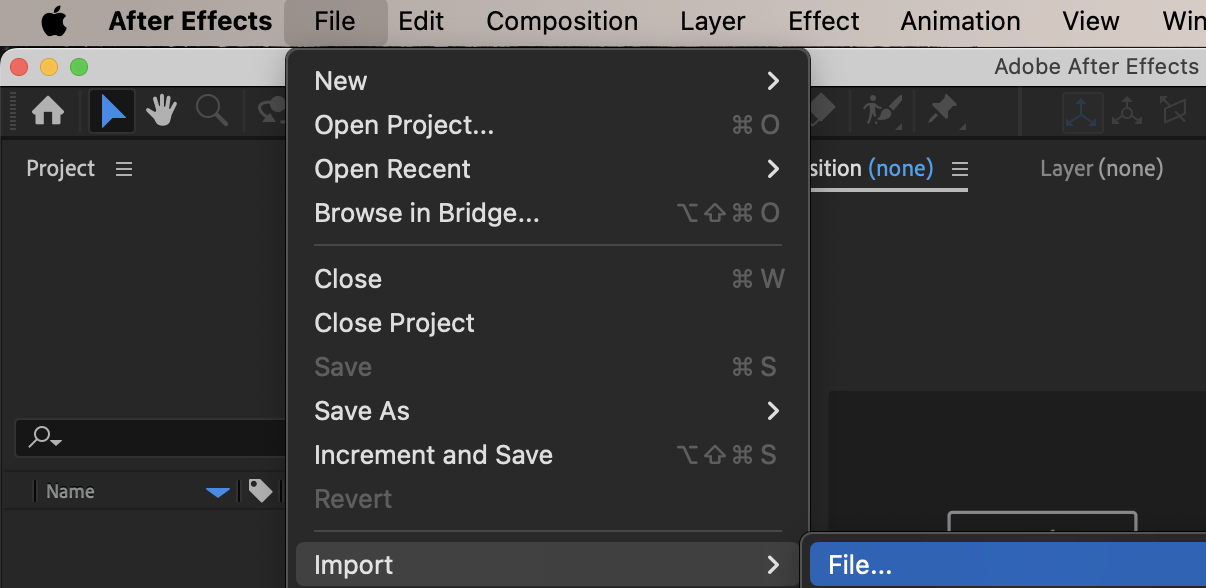
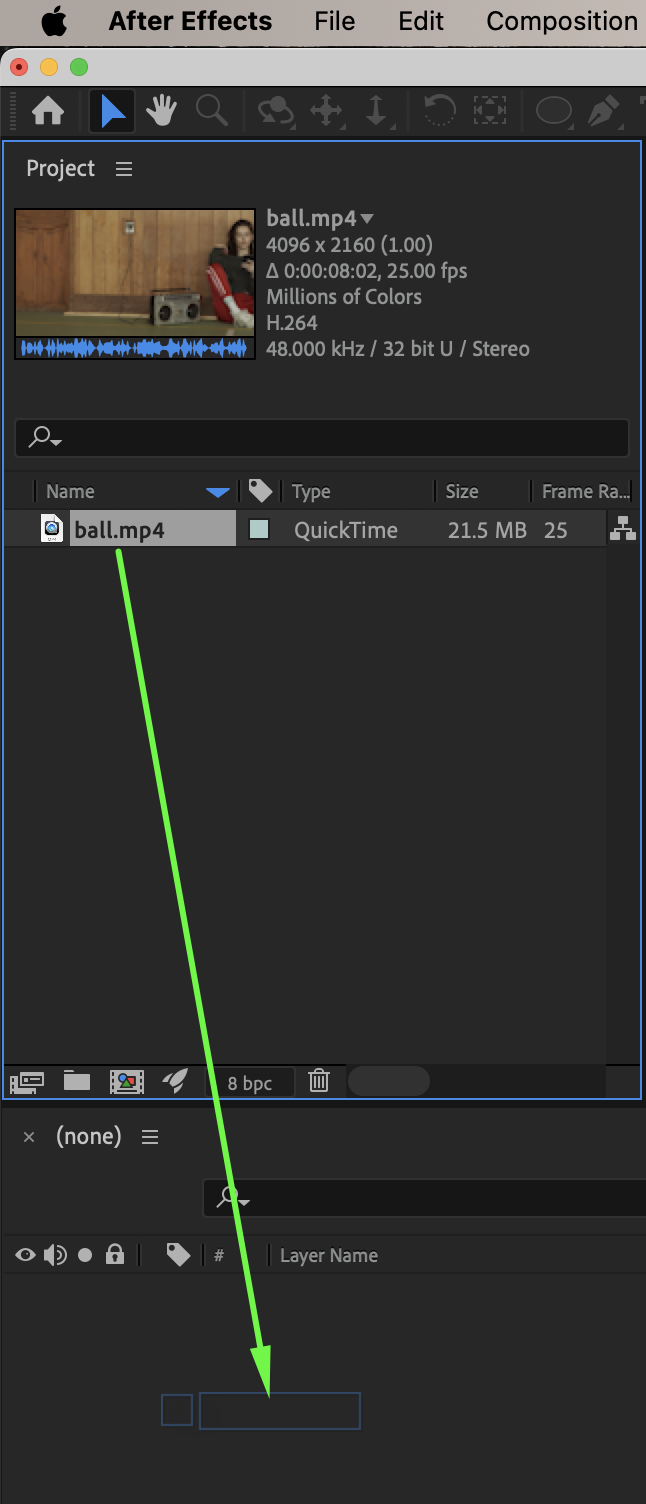
Go to File → Import → File and select your video. Drag the video onto the timeline to create a new composition.
 Step 2: Increase Brightness and Contrast
From the Effects & Presets panel, add Brightness & Contrast. Set:
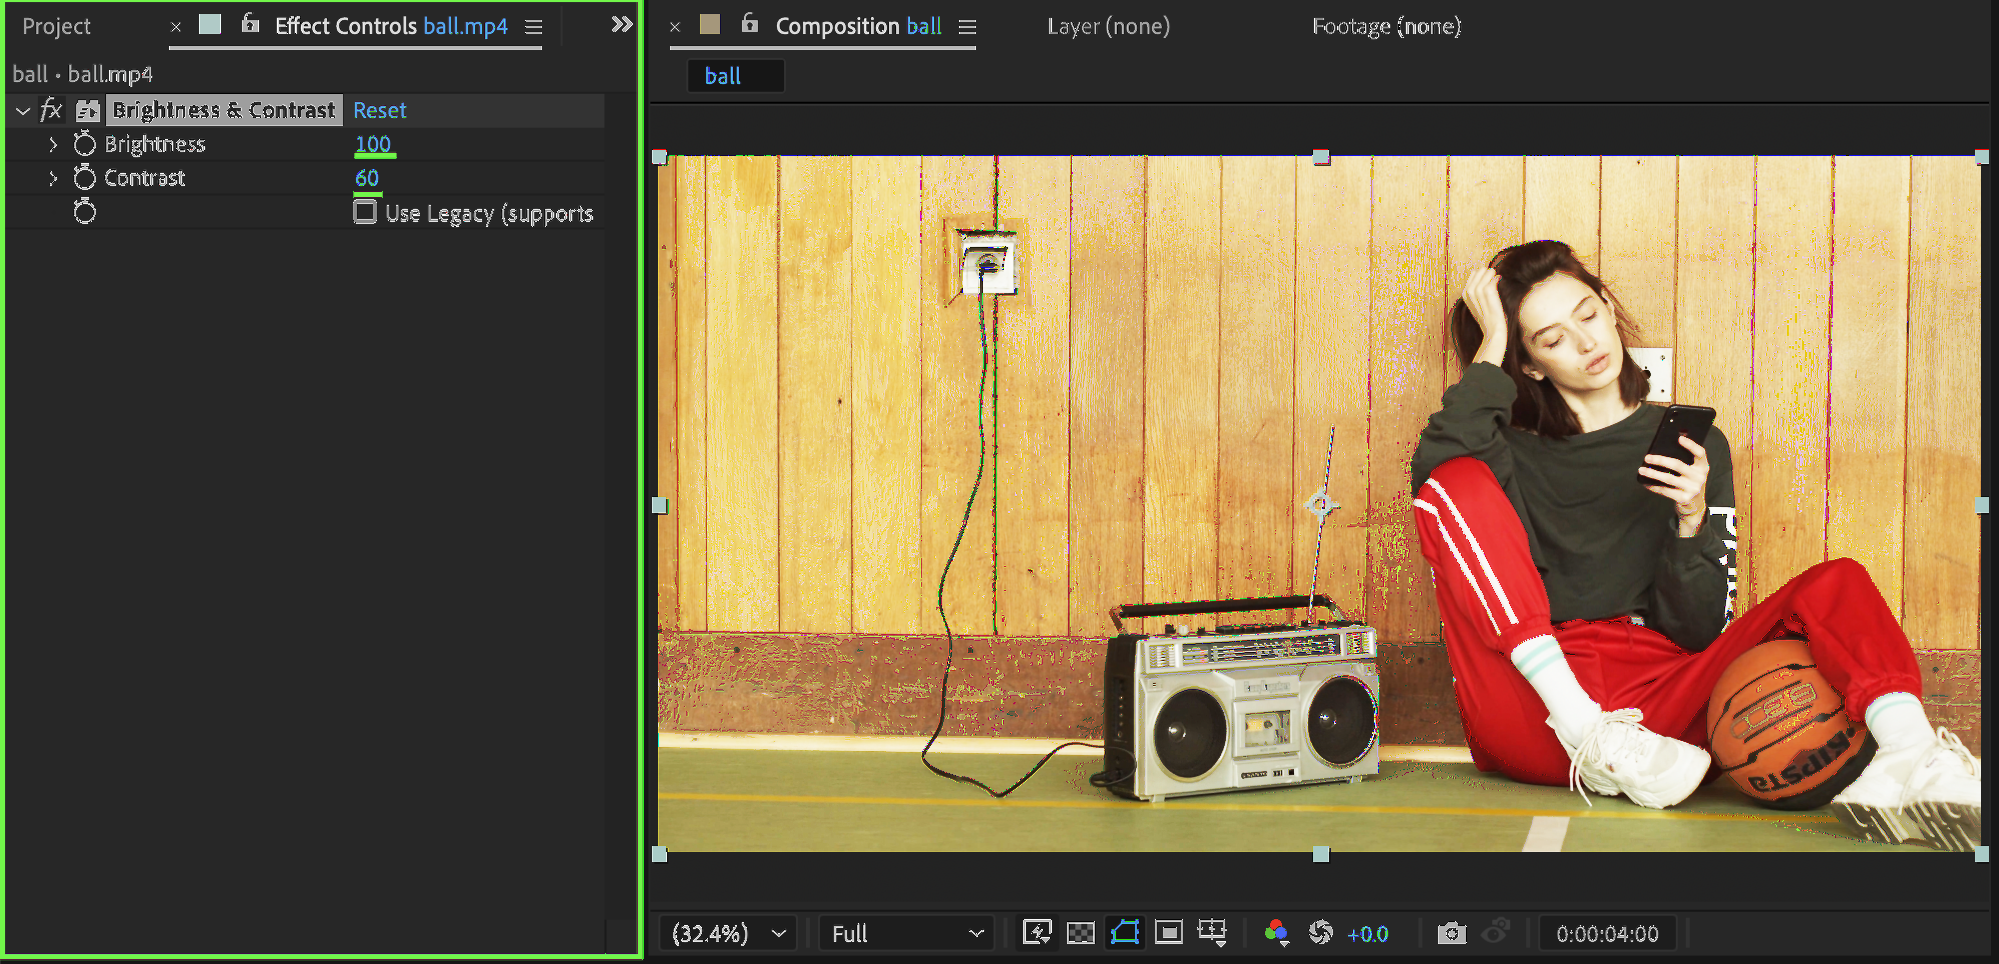
Brightness: 70 – 100
Contrast: 60
This helps intensify highlights for the glow effect.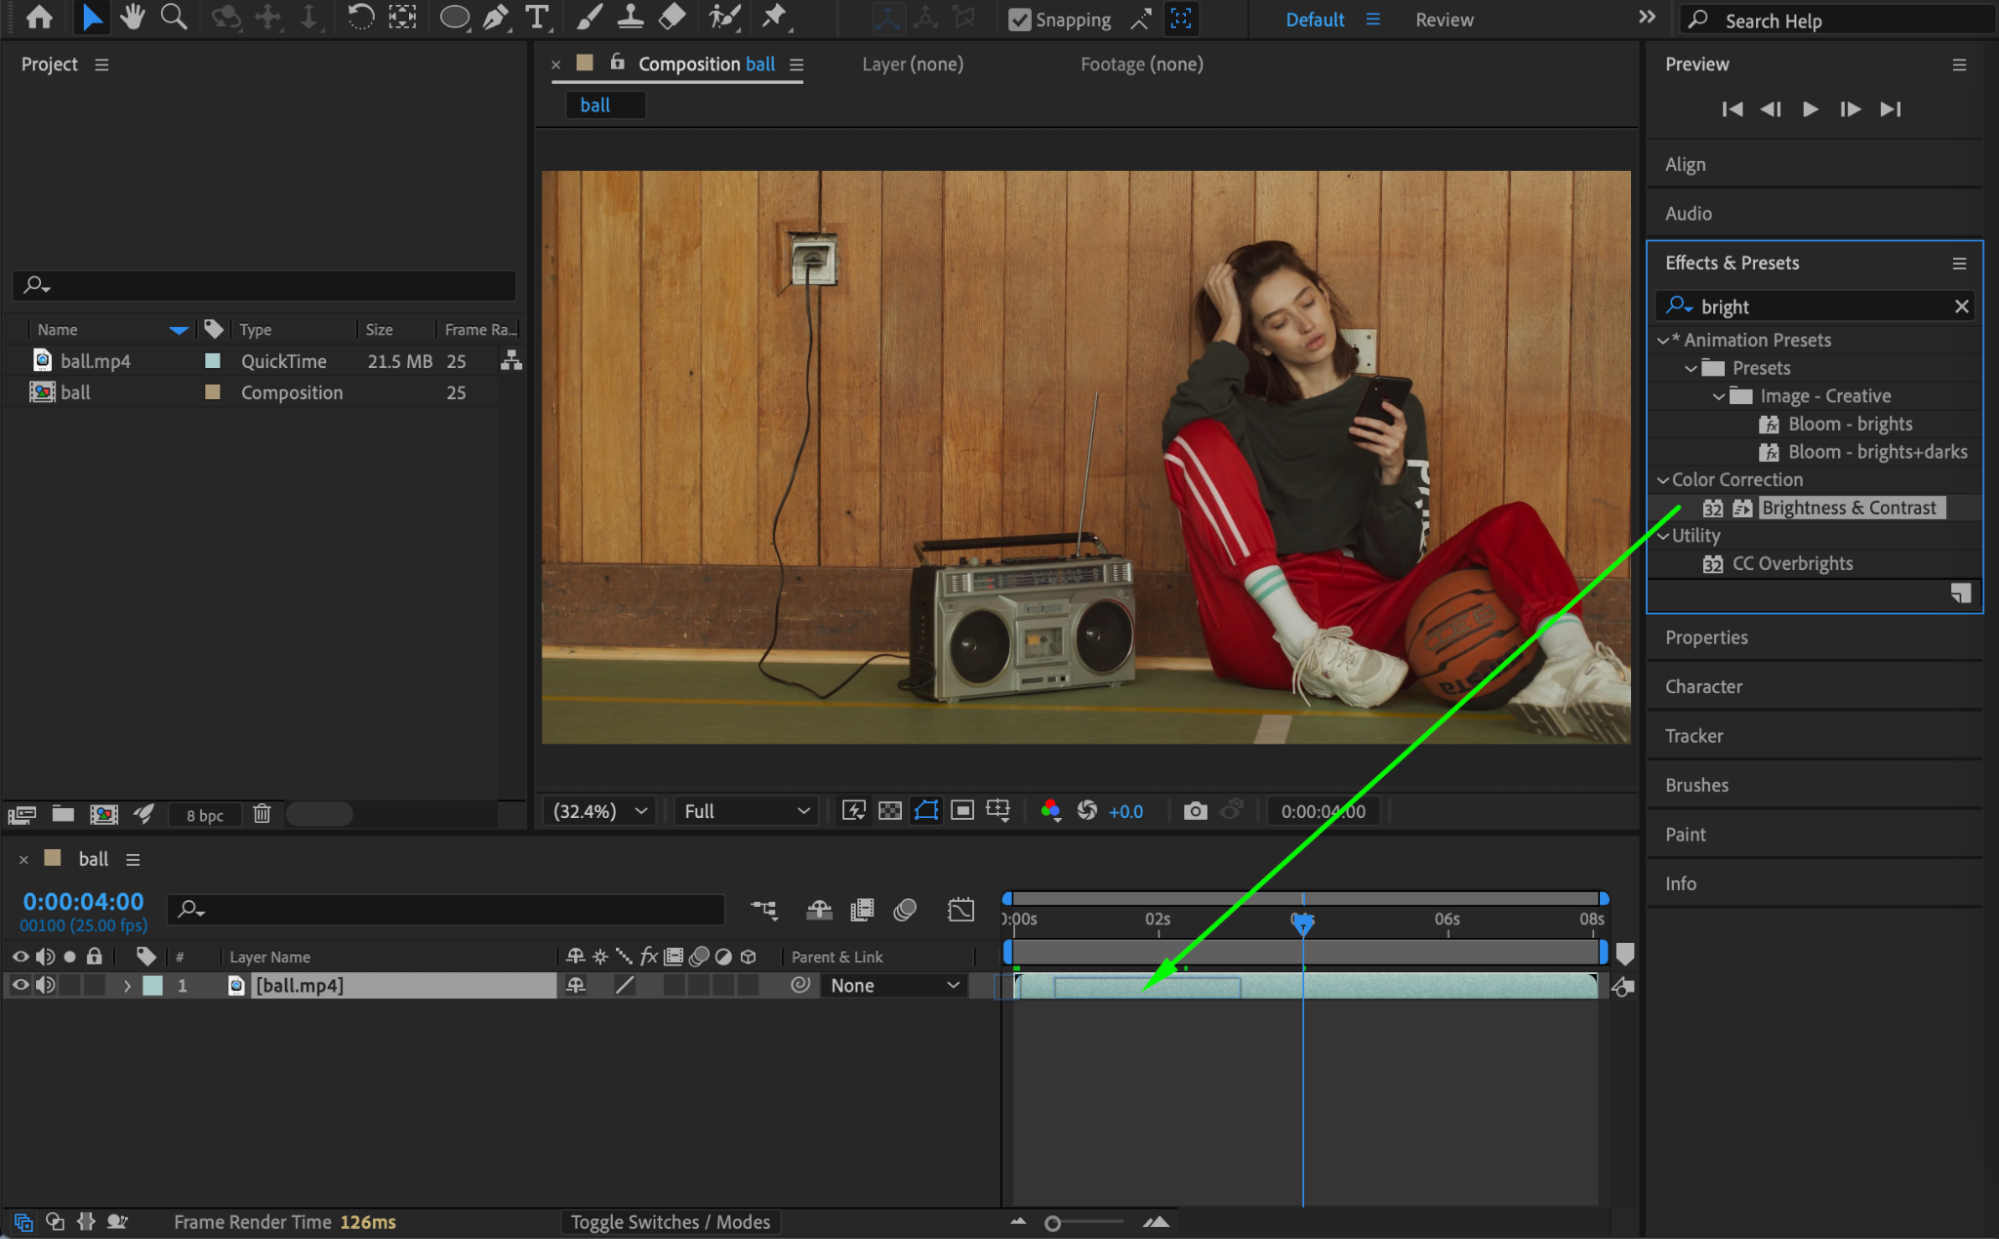
Get 10% off when you subscribe to our newsletter

Step 3: Add CC Lens
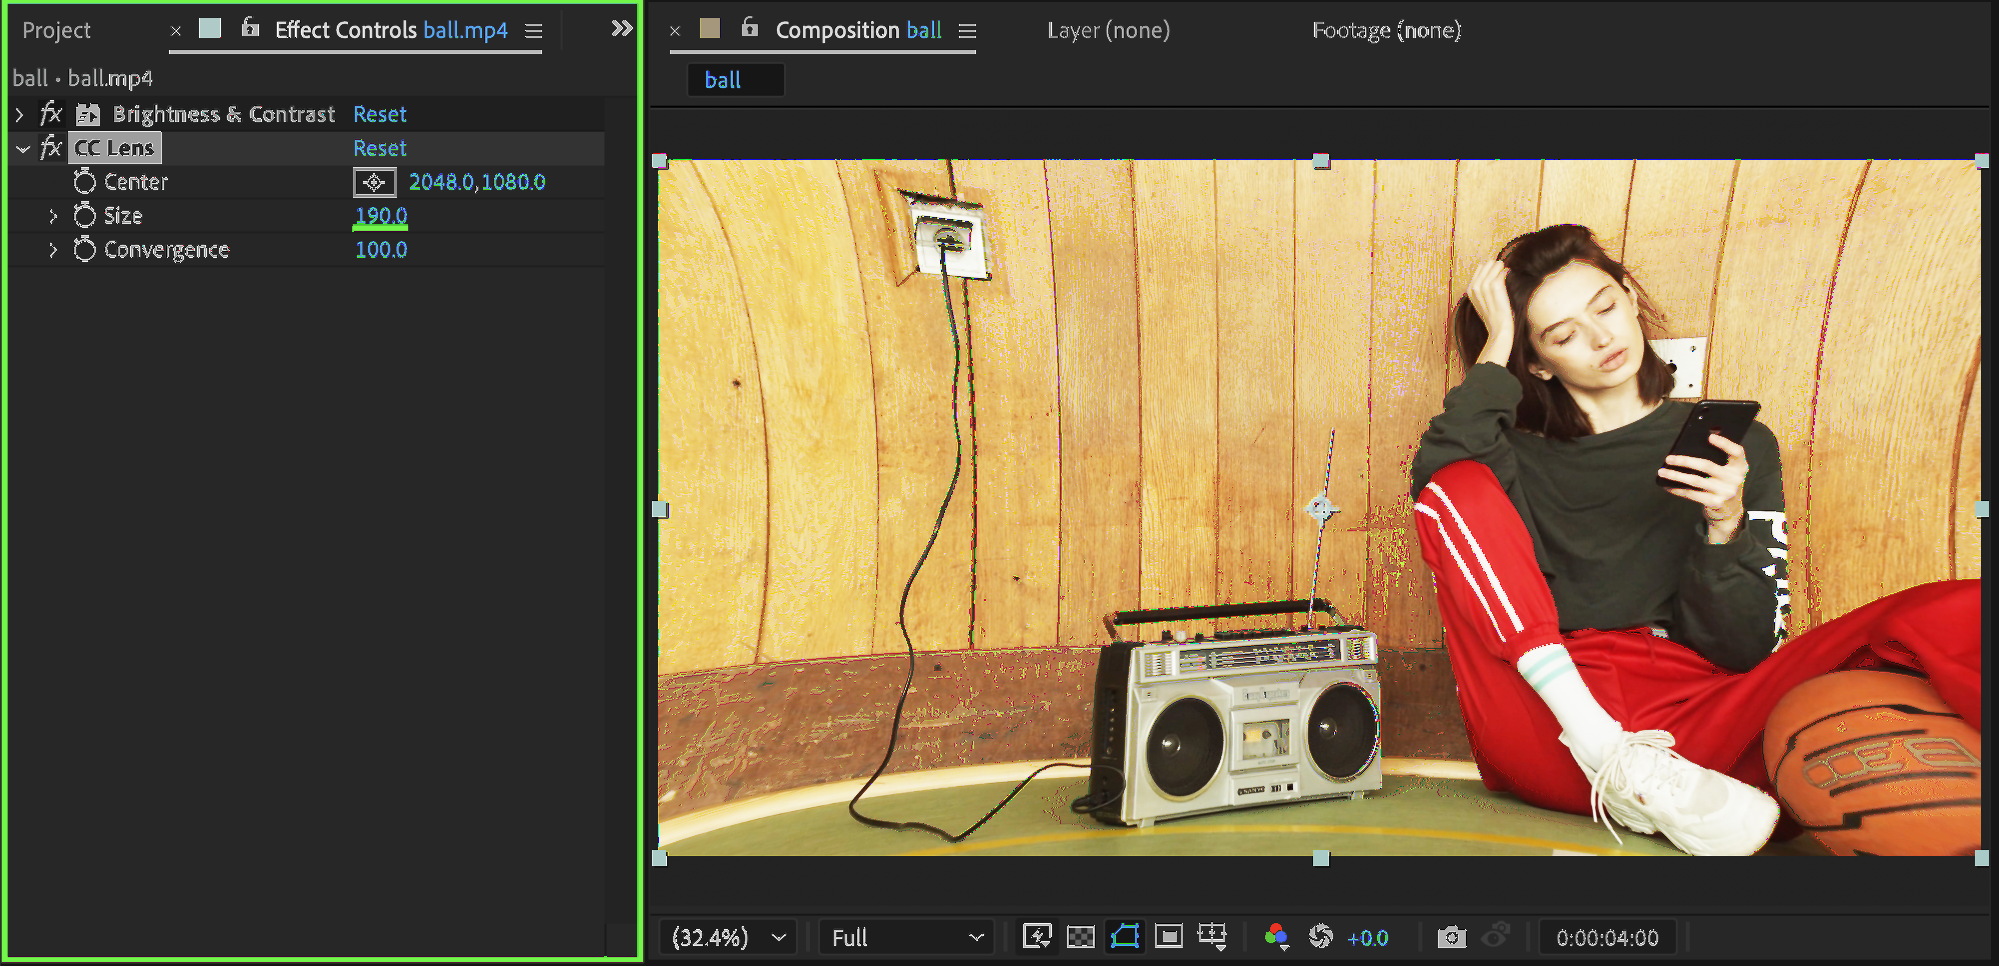
Add the CC Lens effect from the Effects & Presets panel. Set:
Size: 190
This creates subtle lens distortion for a trippy look.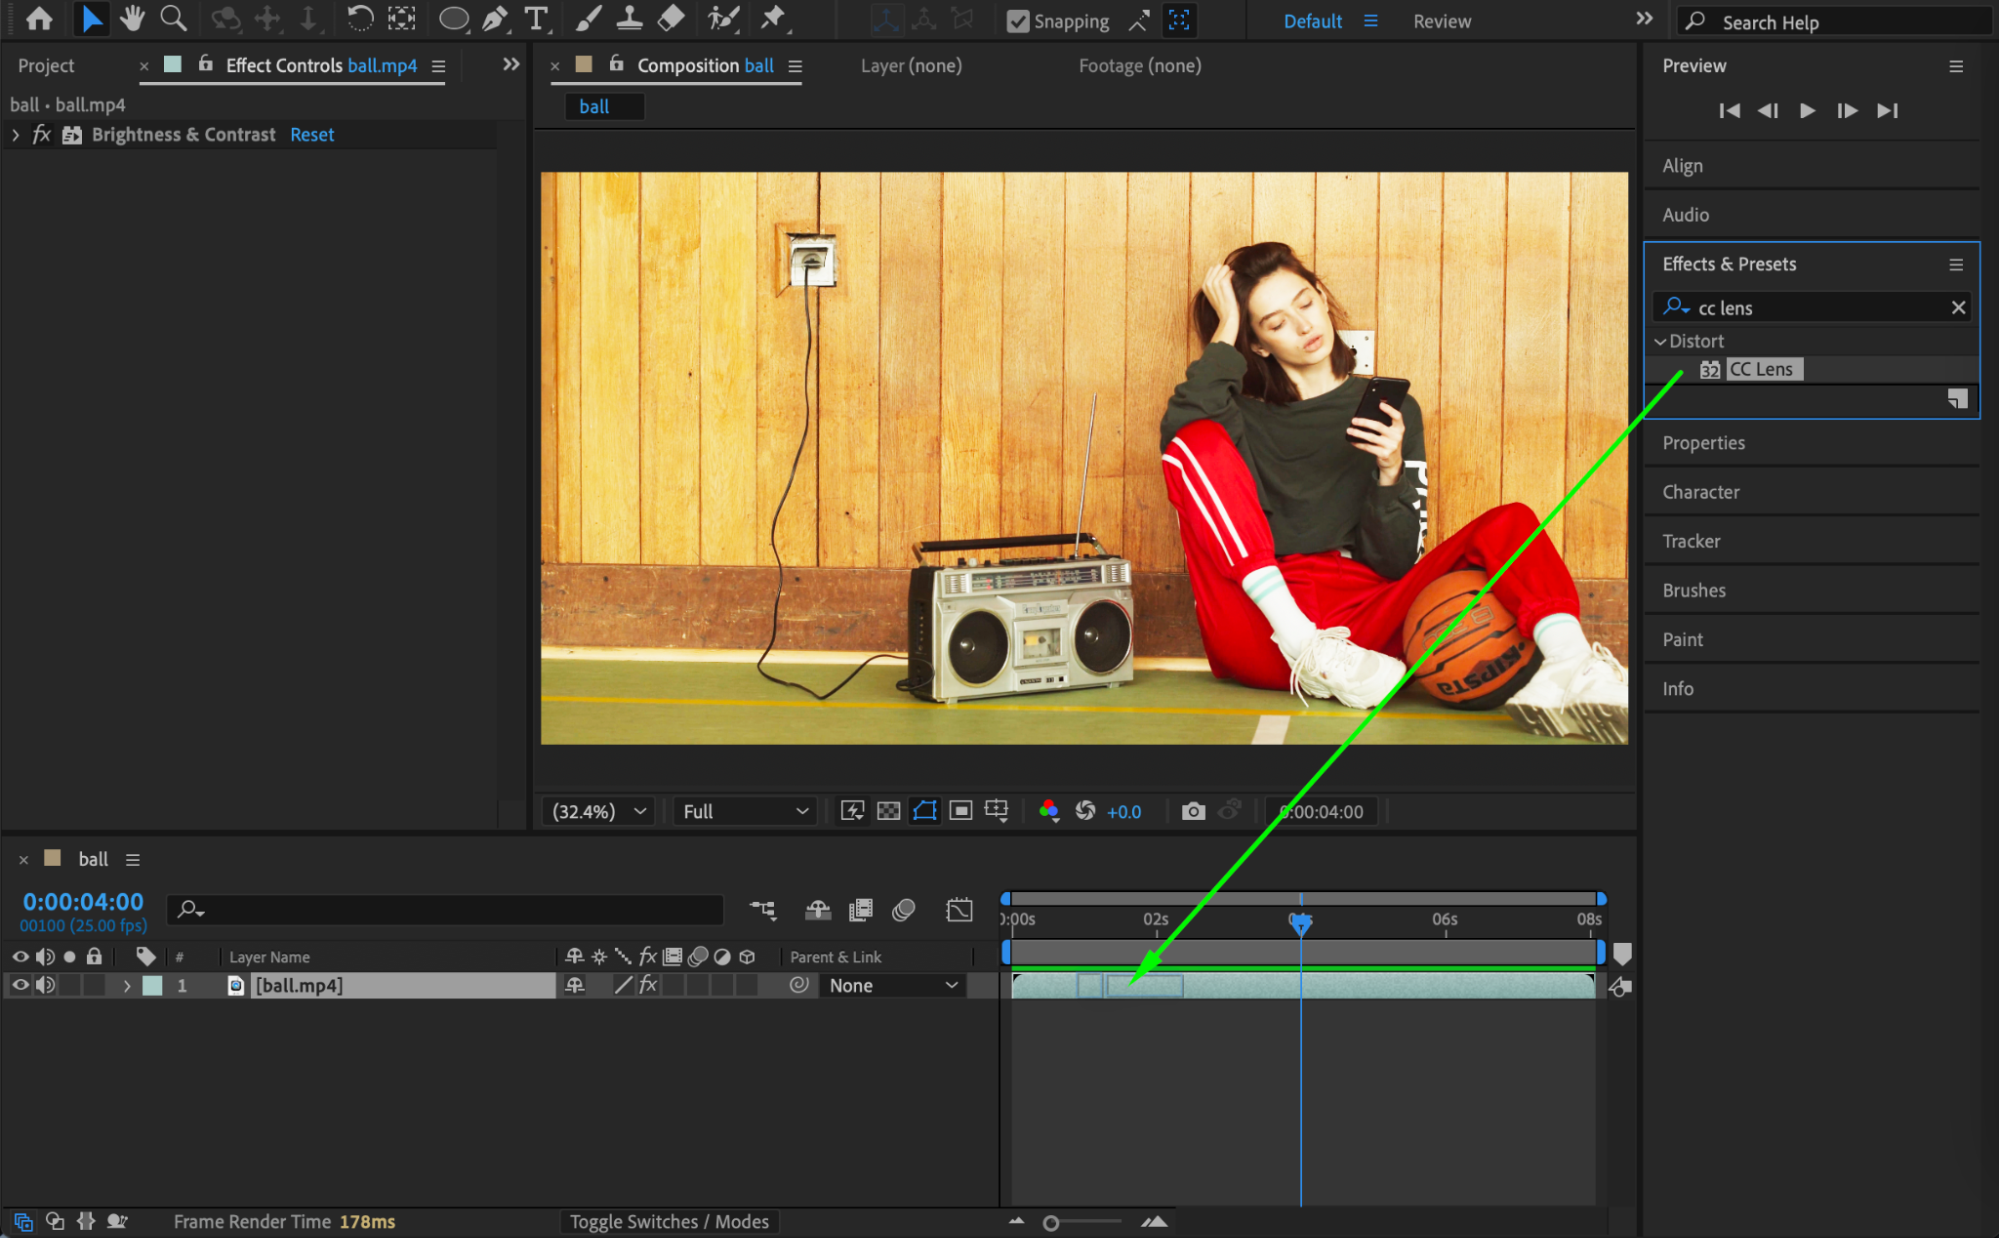
 Step 4: Apply Turbulent Displace
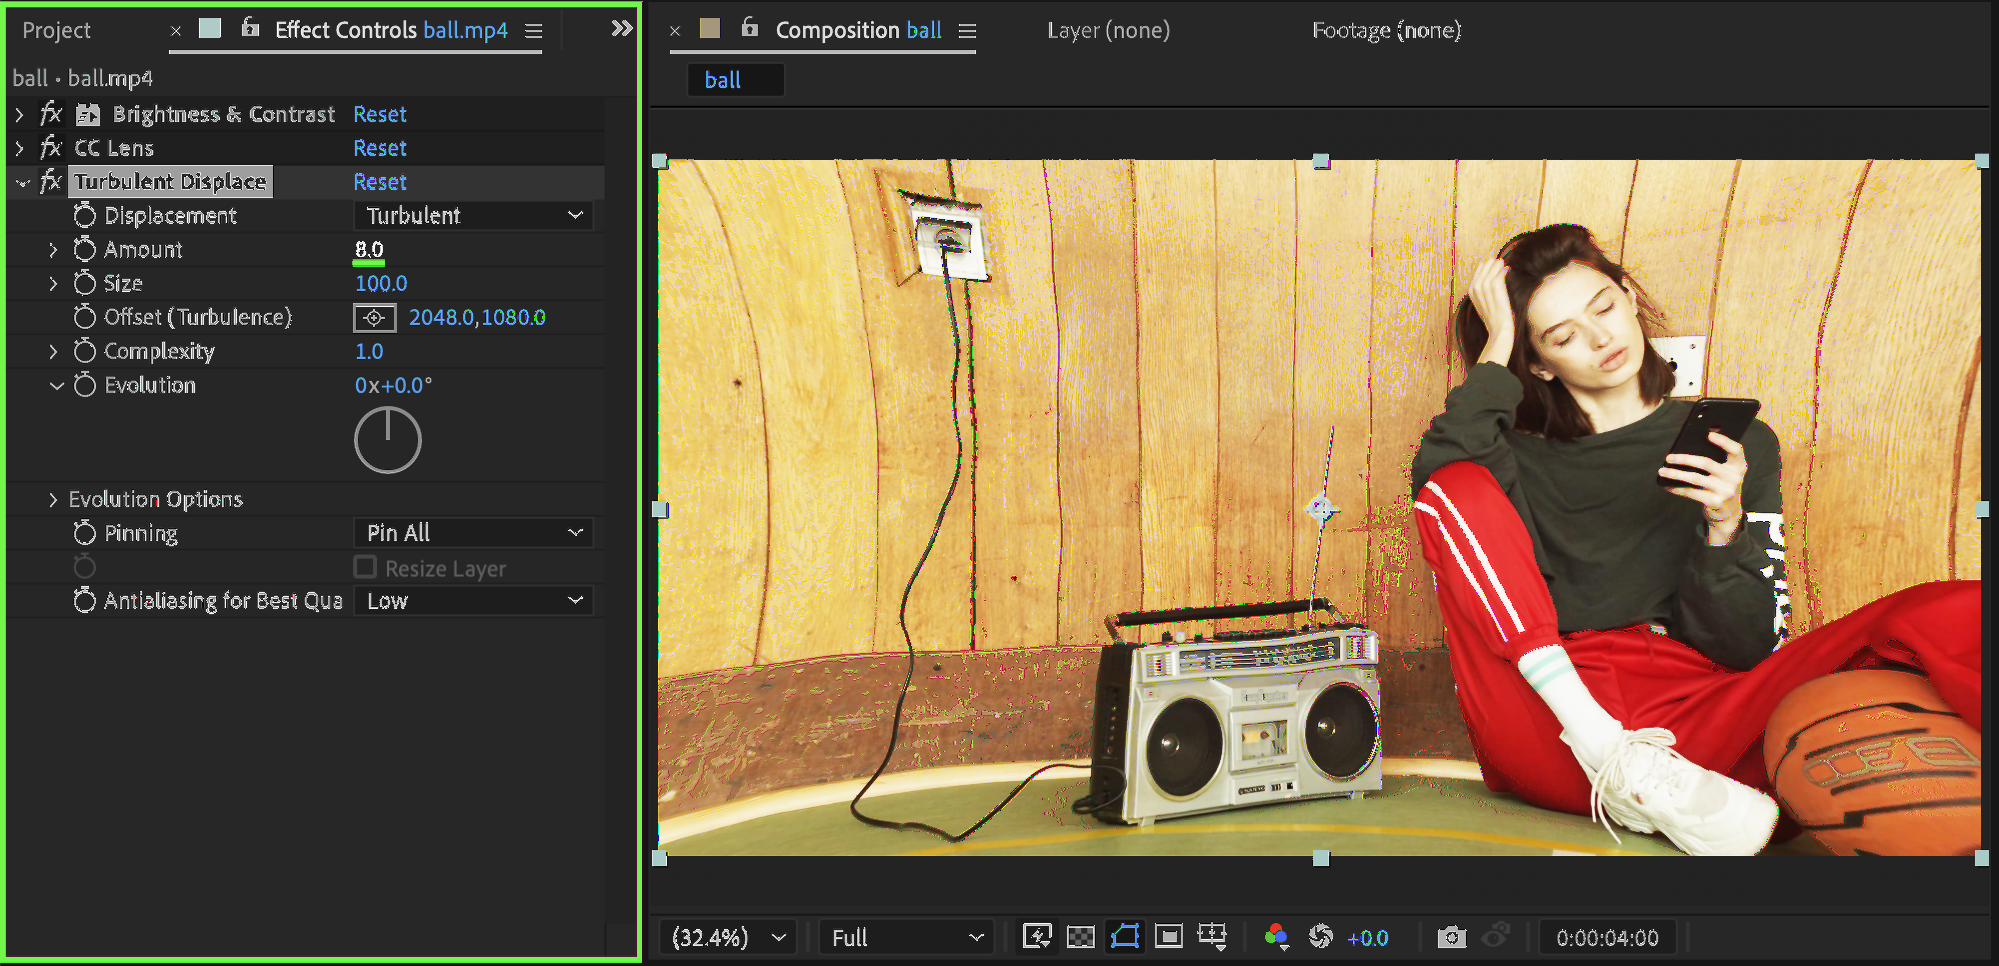
Add Turbulent Displace. Set:
Amount: 8
This introduces organic distortion and movement.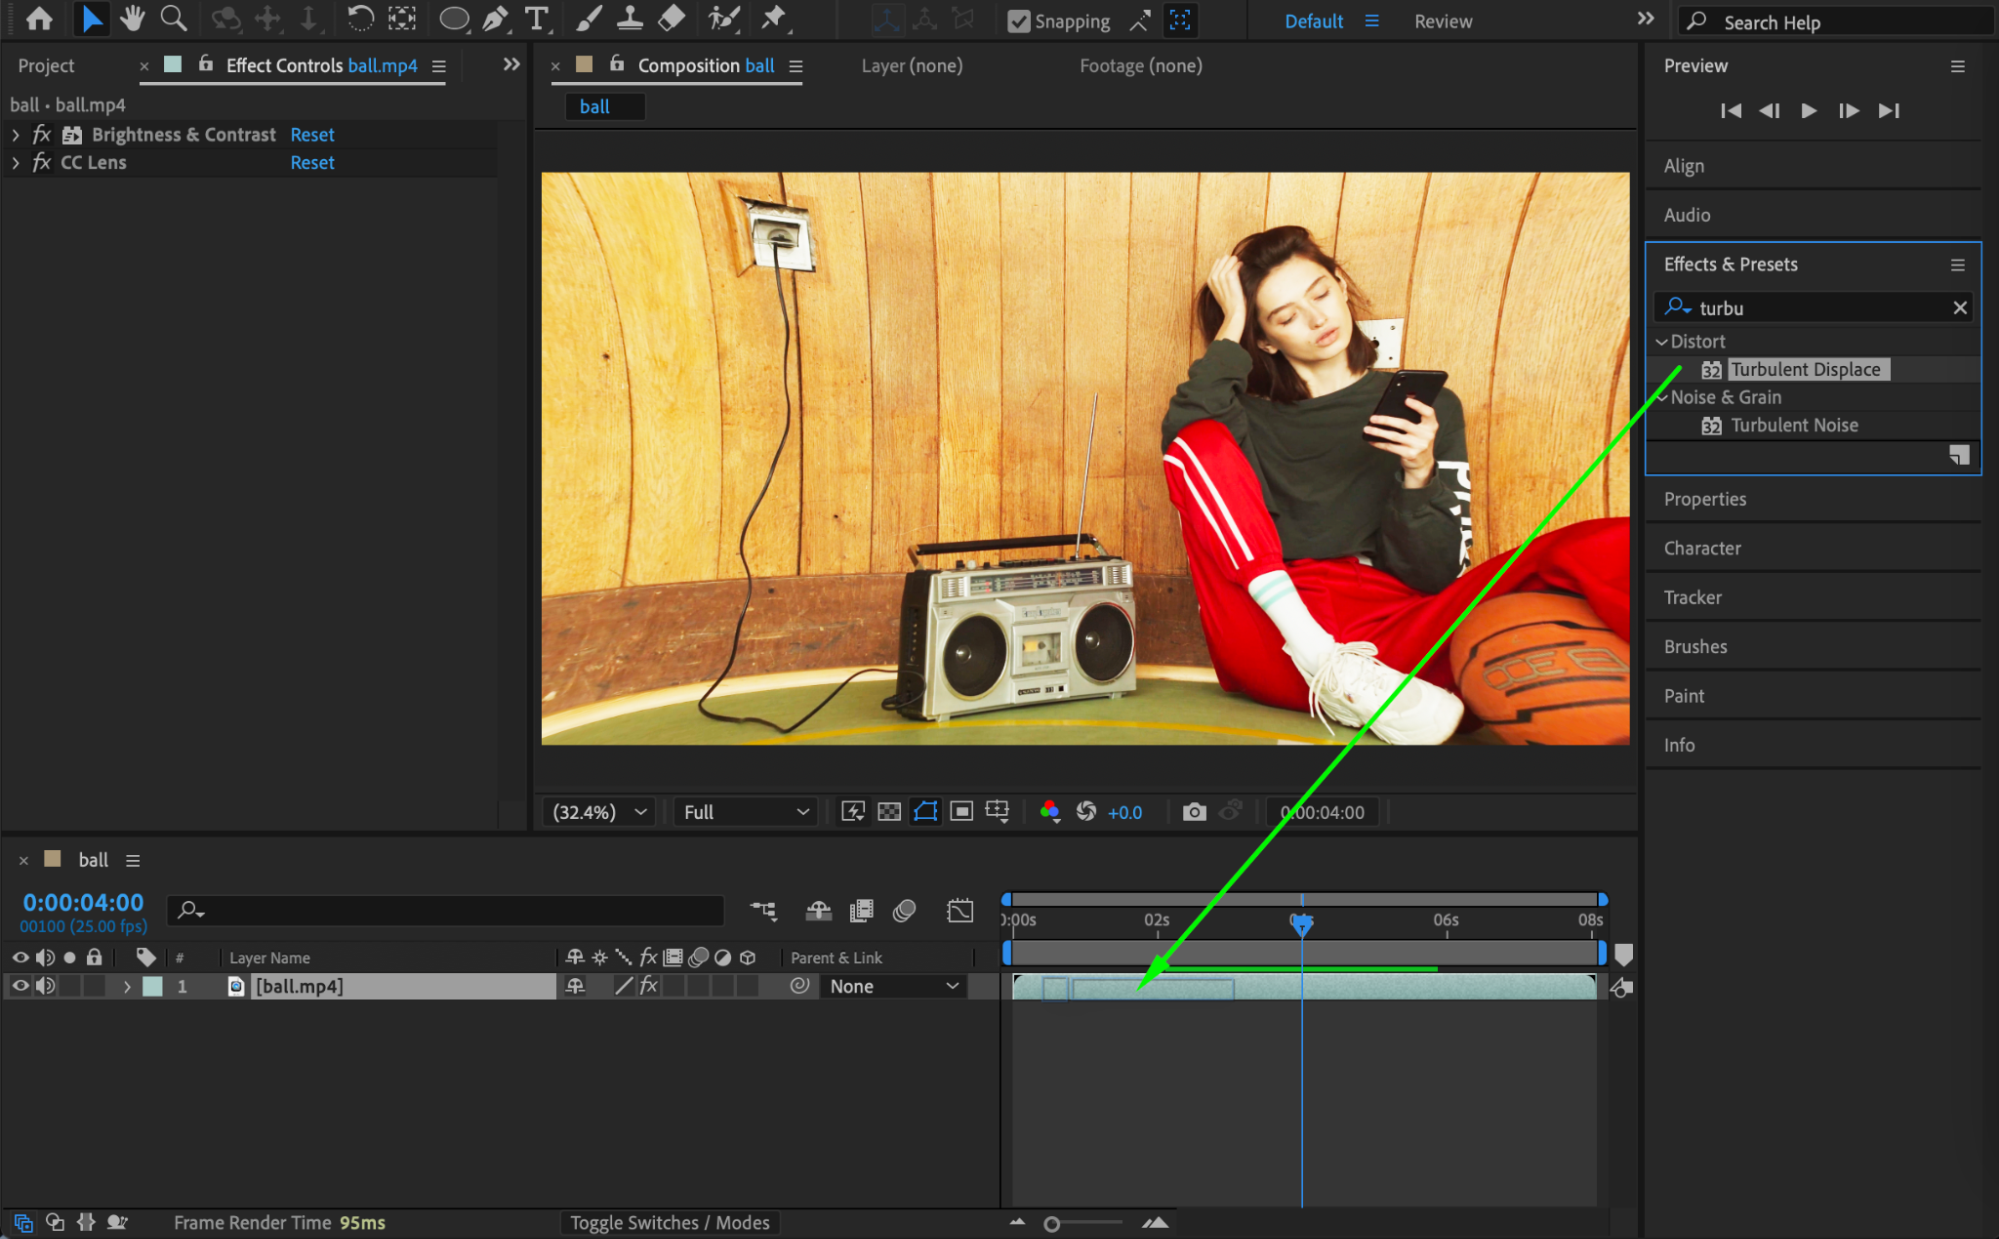
 Step 5: Add Radial Blur
Add Radial Blur. Set:
Type: Zoom
Antialiasing: High
This creates a zoomed, energetic blur effect.
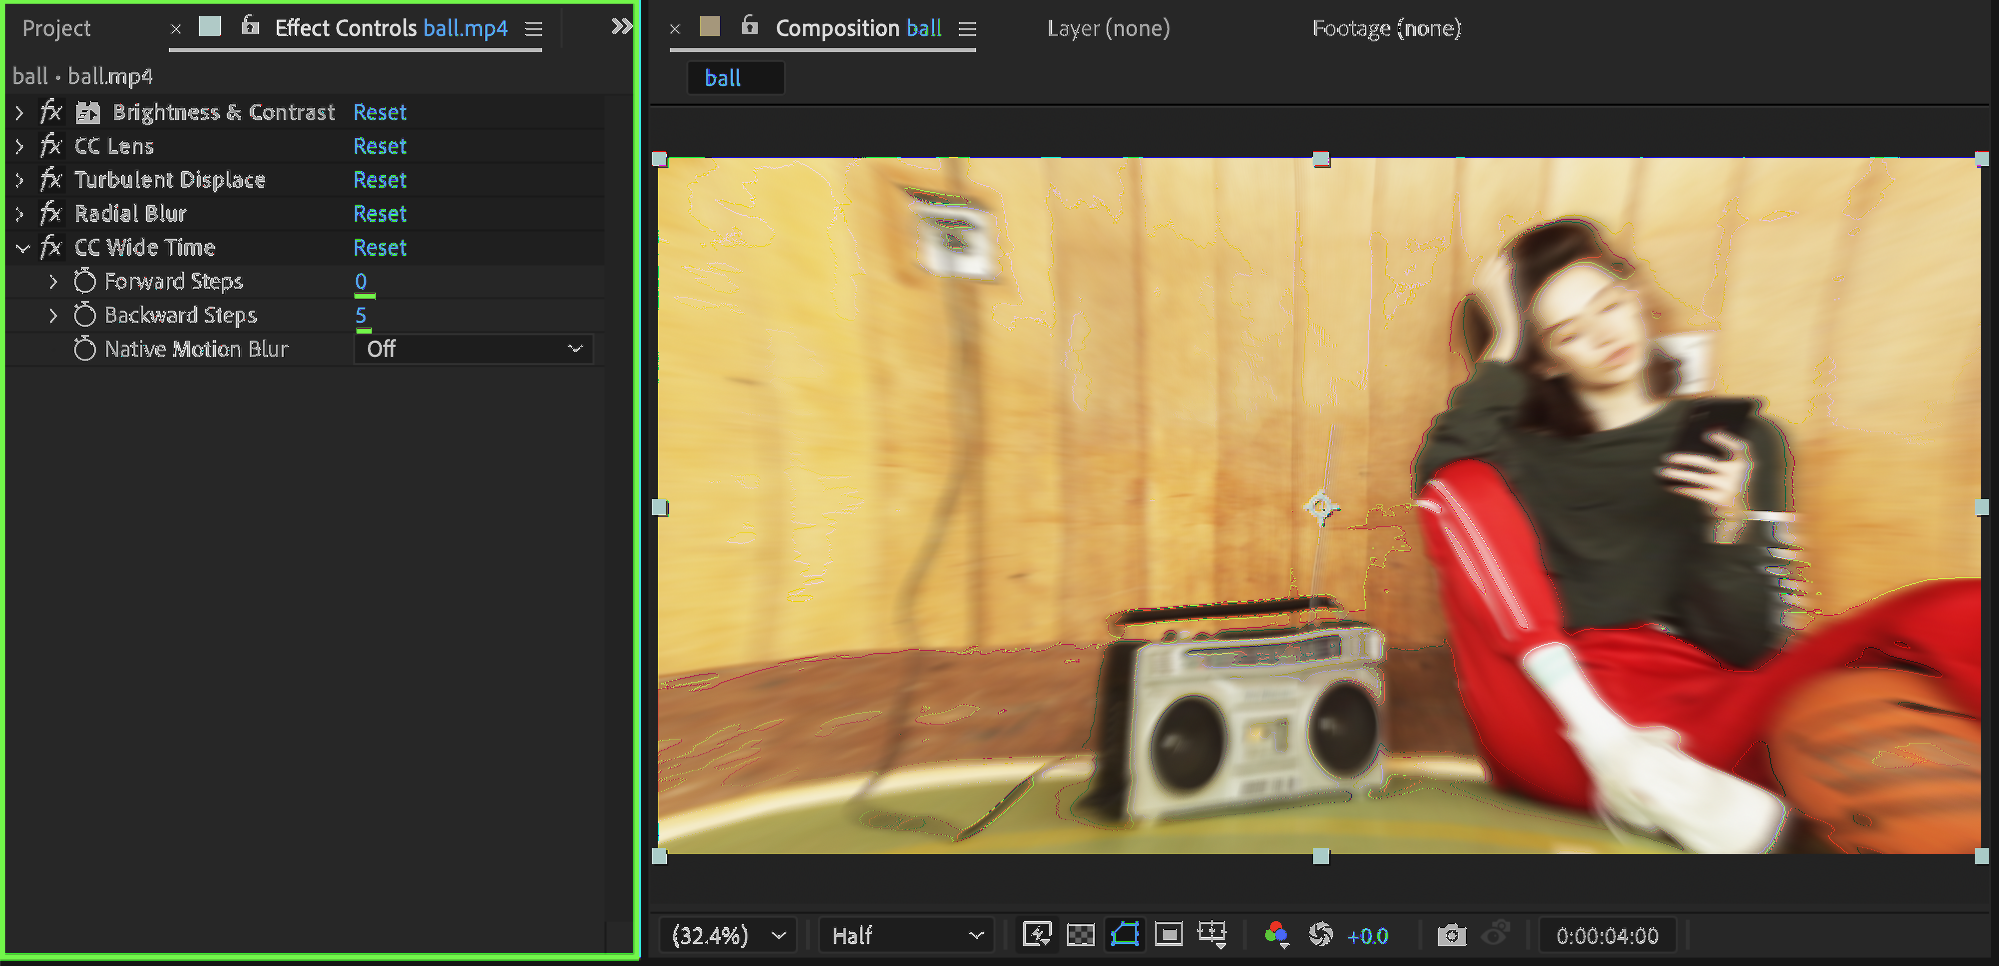
 Step 6: Add CC Wide Time
Add CC Wide Time. Set:
Forward Steps: 0
Backward Steps: 5
This creates subtle motion trails for a dreamy effect.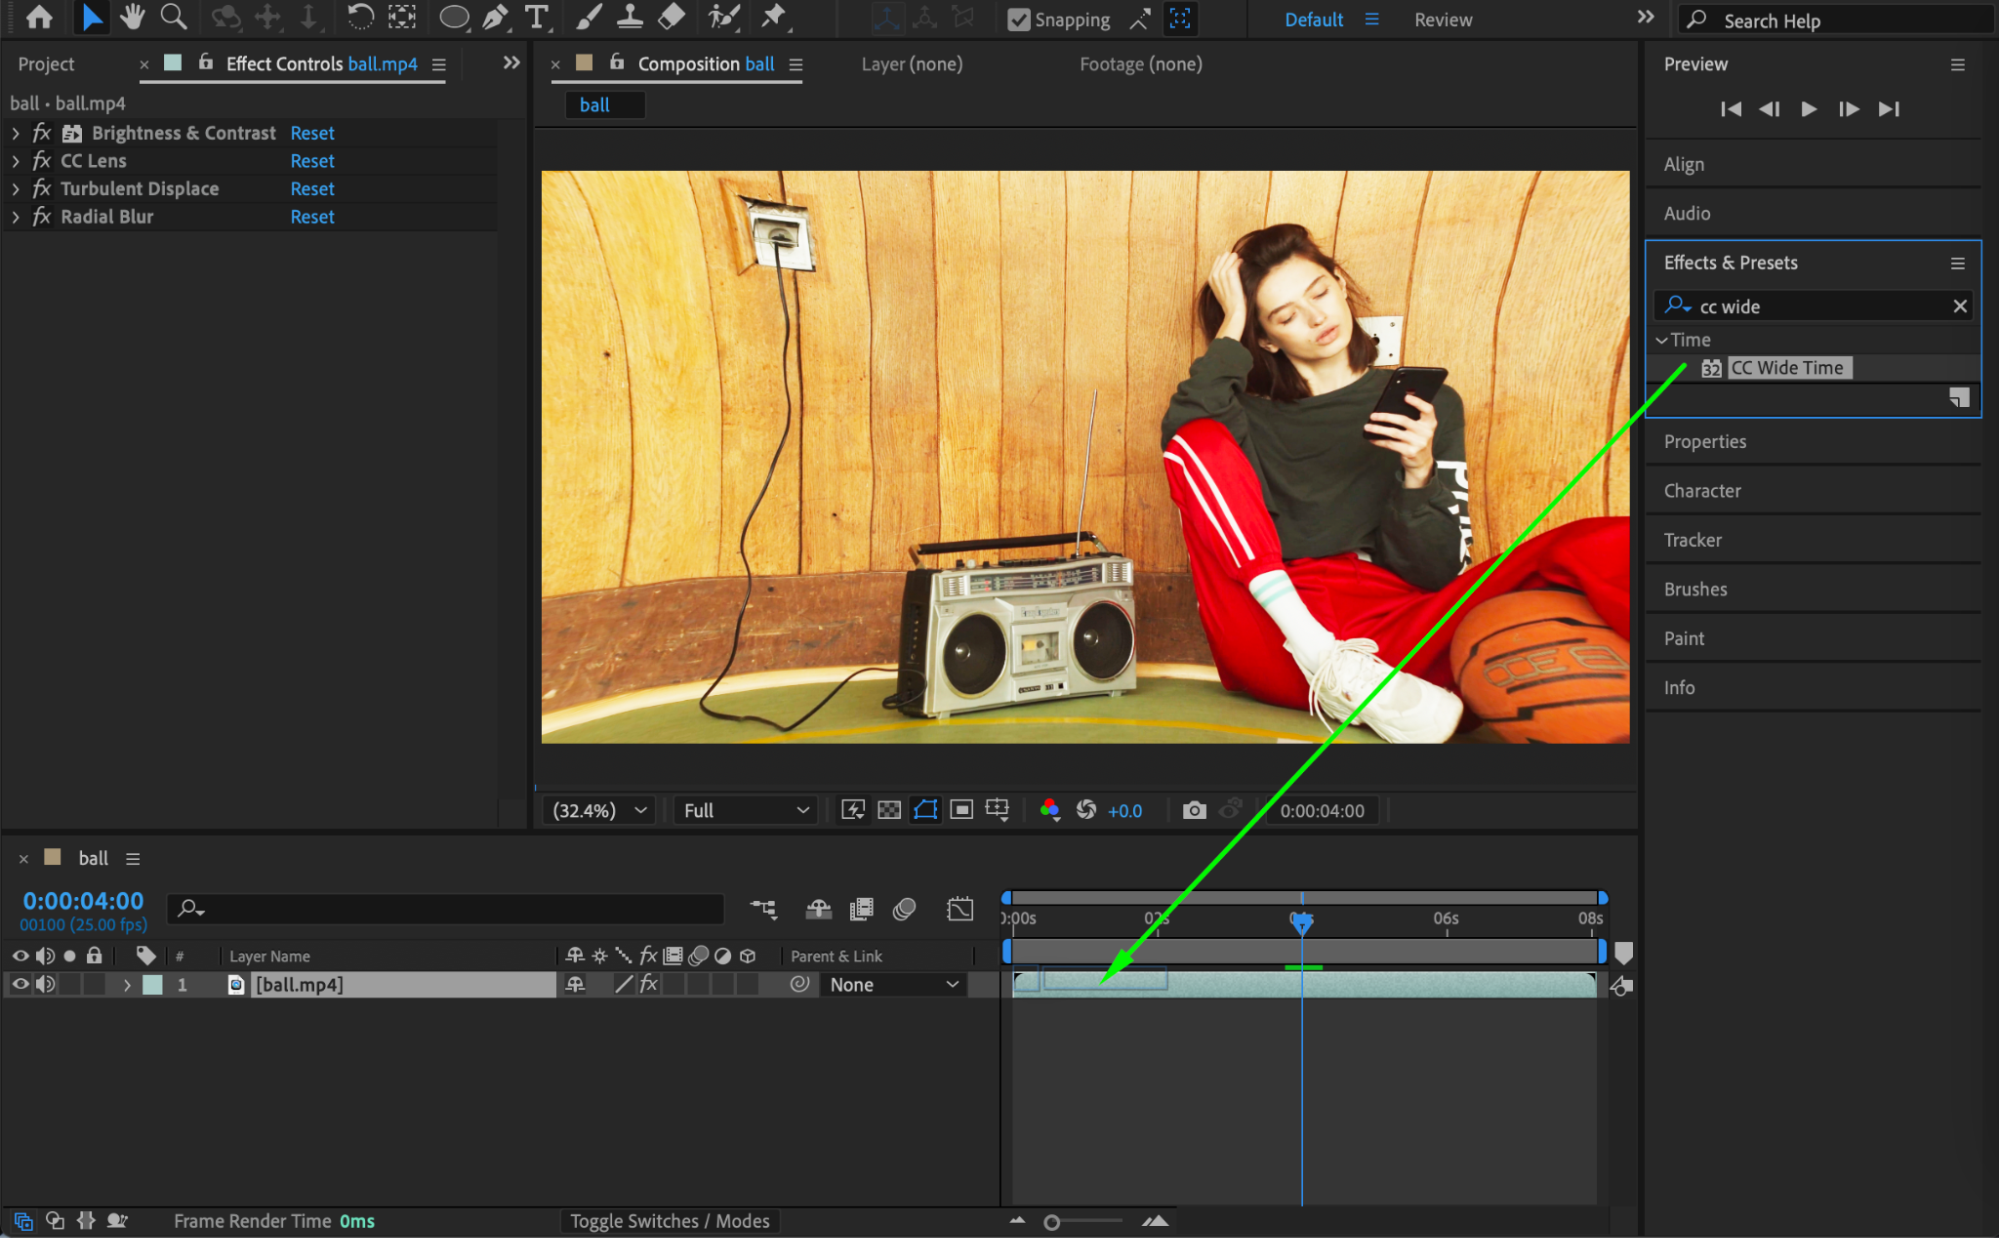
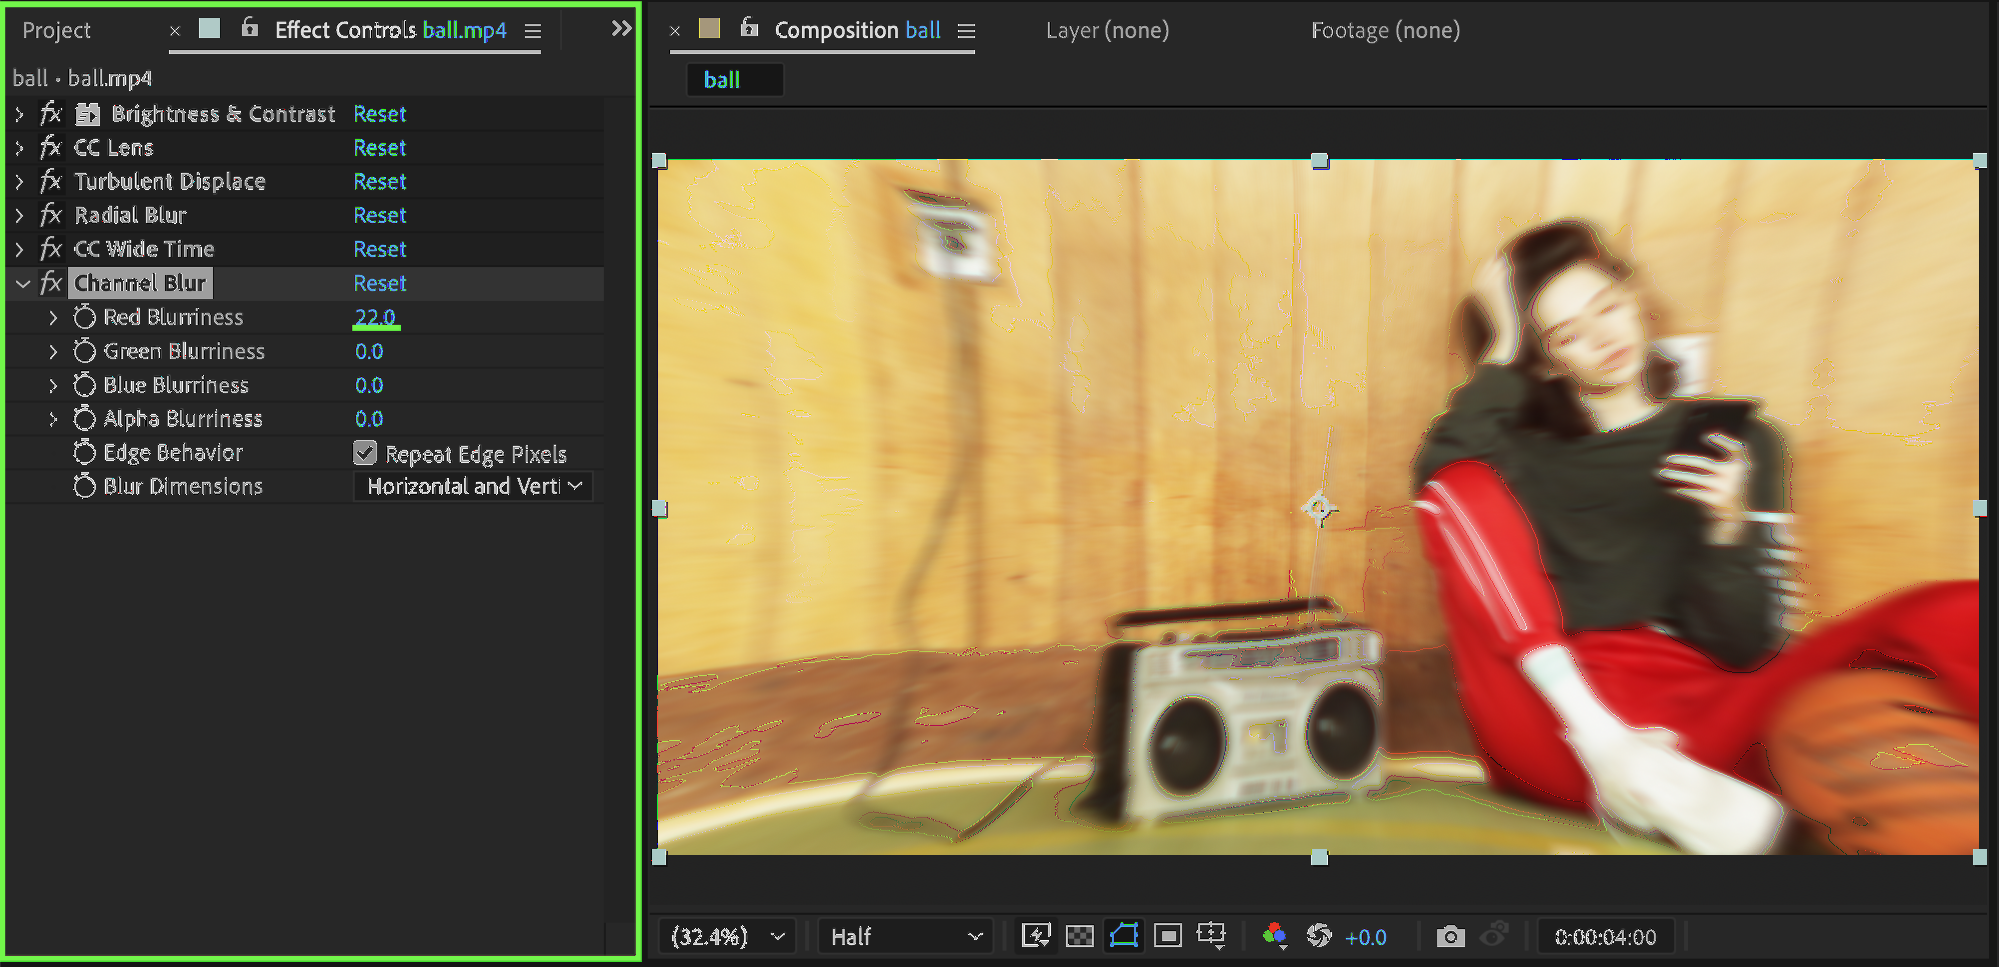
Step 7: Add Channel Blur
Add Channel Blur. Set:
Red Blurriness: 22
This adds slight color separation for a psychedelic vibe.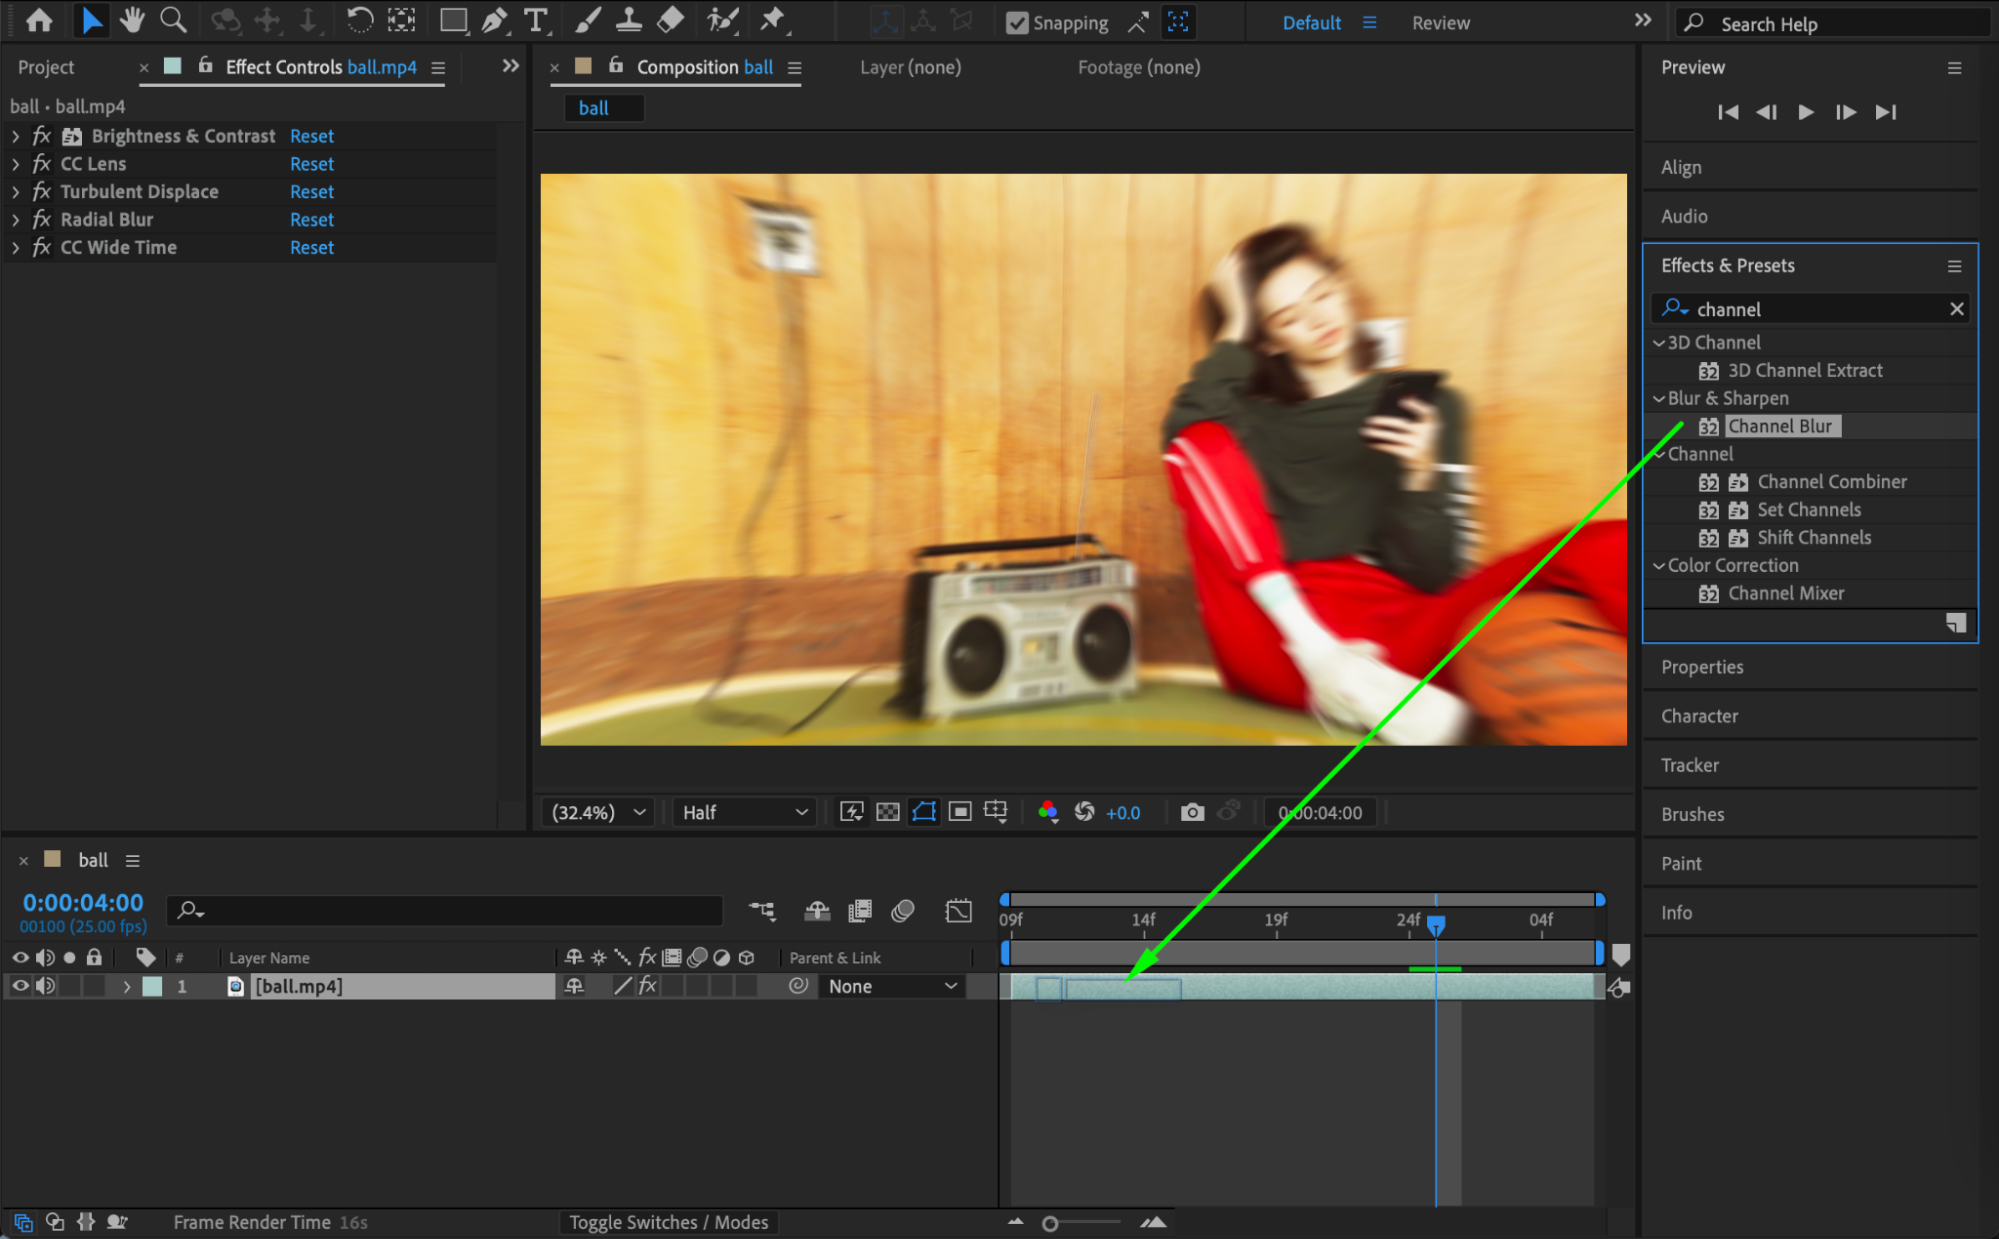
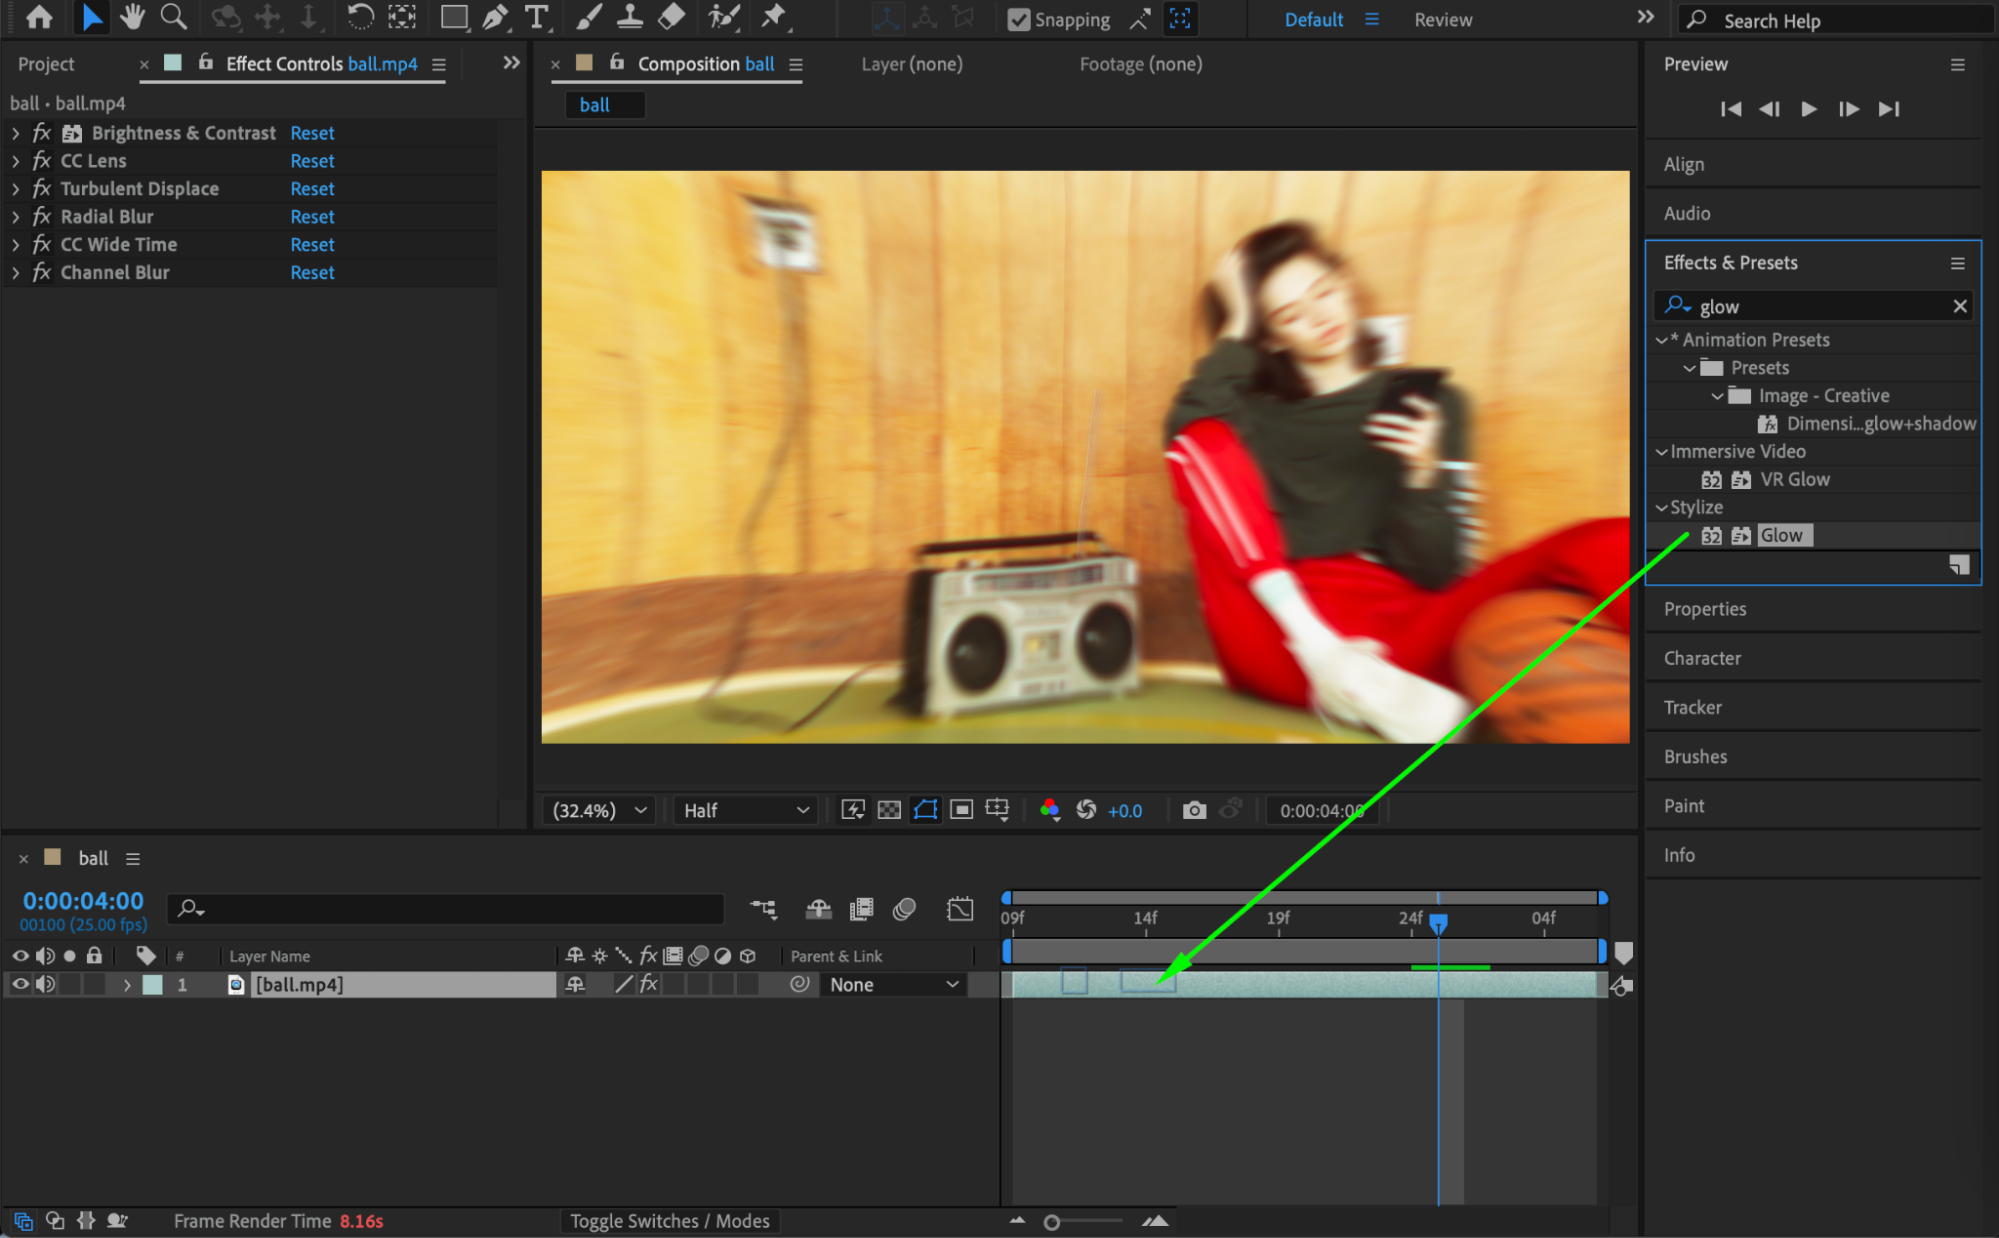
 Step 8: Add Glow
Add the Glow effect. Set:
Glow Threshold: 90
Glow Radius: 290
Glow Intensity: 1.5
Glow Dimensions: Vertical
This final step brings everything together with a strong glowing finish.

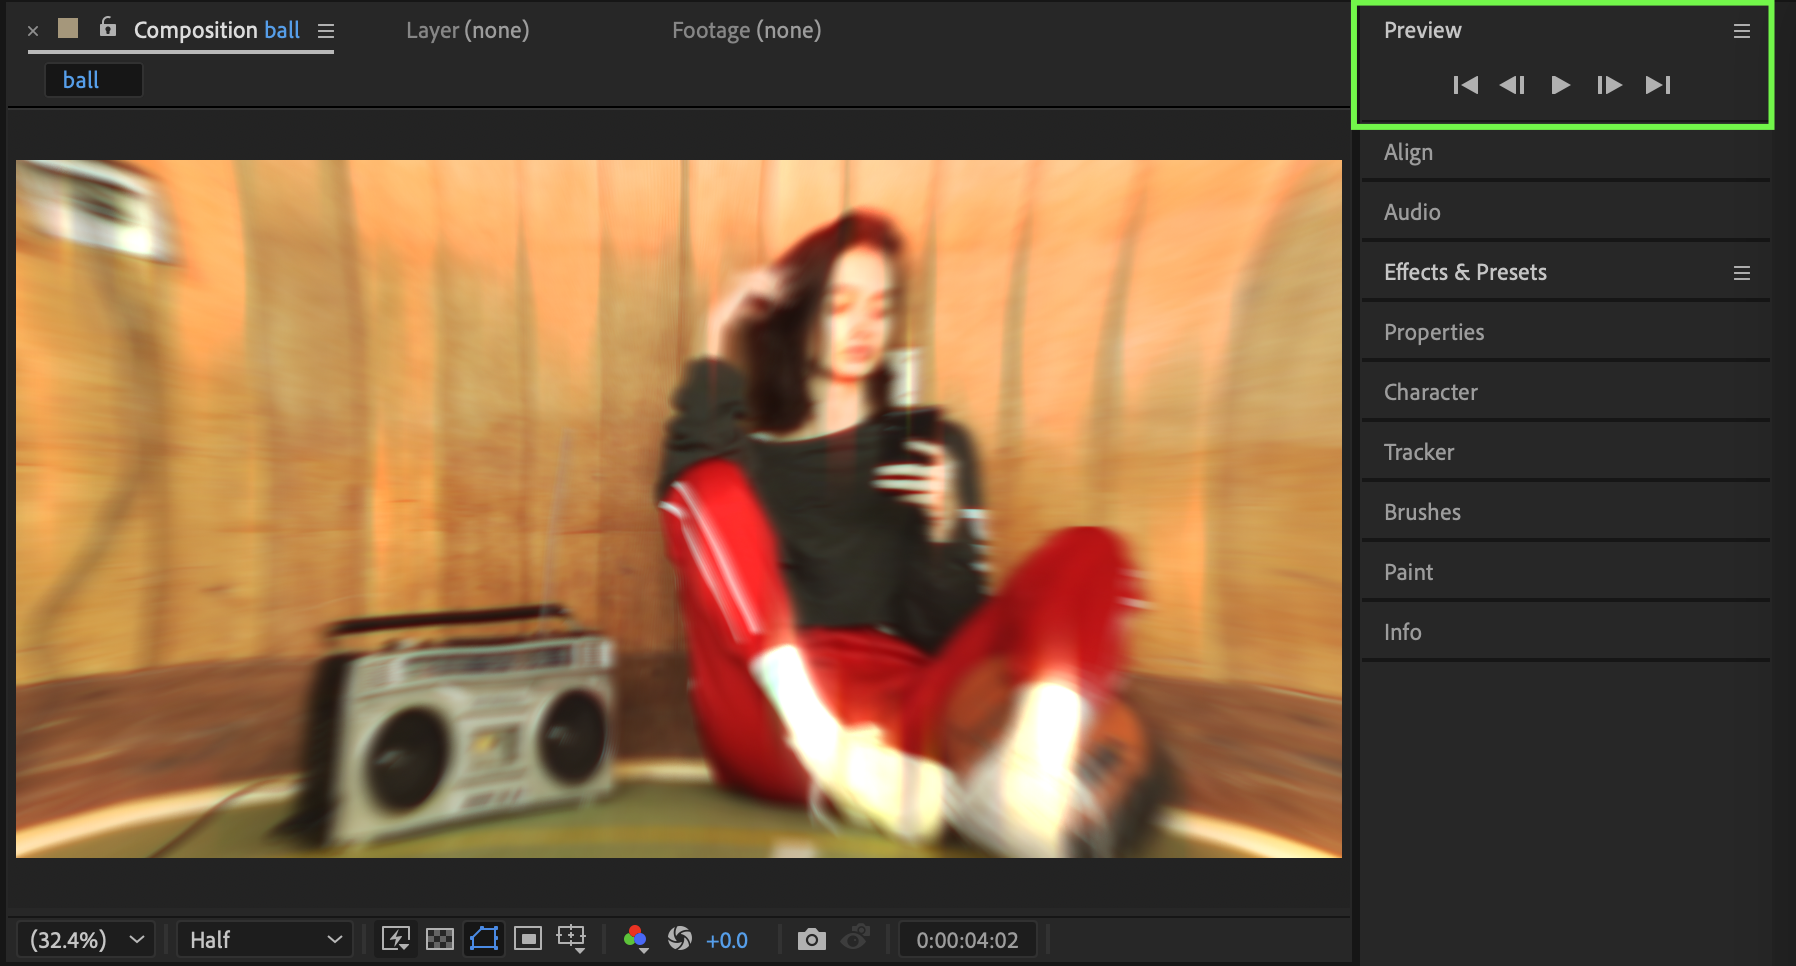
Step 9: Preview the Result
Preview the composition and fine-tune effect values to match your desired intensity and style.
Conclusion
By stacking distortion, blur, time, and glow effects, you can create a trippy glow look entirely inside After Effects. This effect works especially well for music visuals, abstract edits, and experimental motion graphics — and can be easily customized for different moods.
Our Bestsellers

