Introduction
The X-ray effect is a popular visual style used in sci-fi, medical, and futuristic videos. It usually features inverted colors, high contrast, glowing highlights, and a slightly digital or scanned look. In this tutorial, you’ll learn how to build a convincing X-ray effect in After Effects using only native effects stacked on adjustment layers.
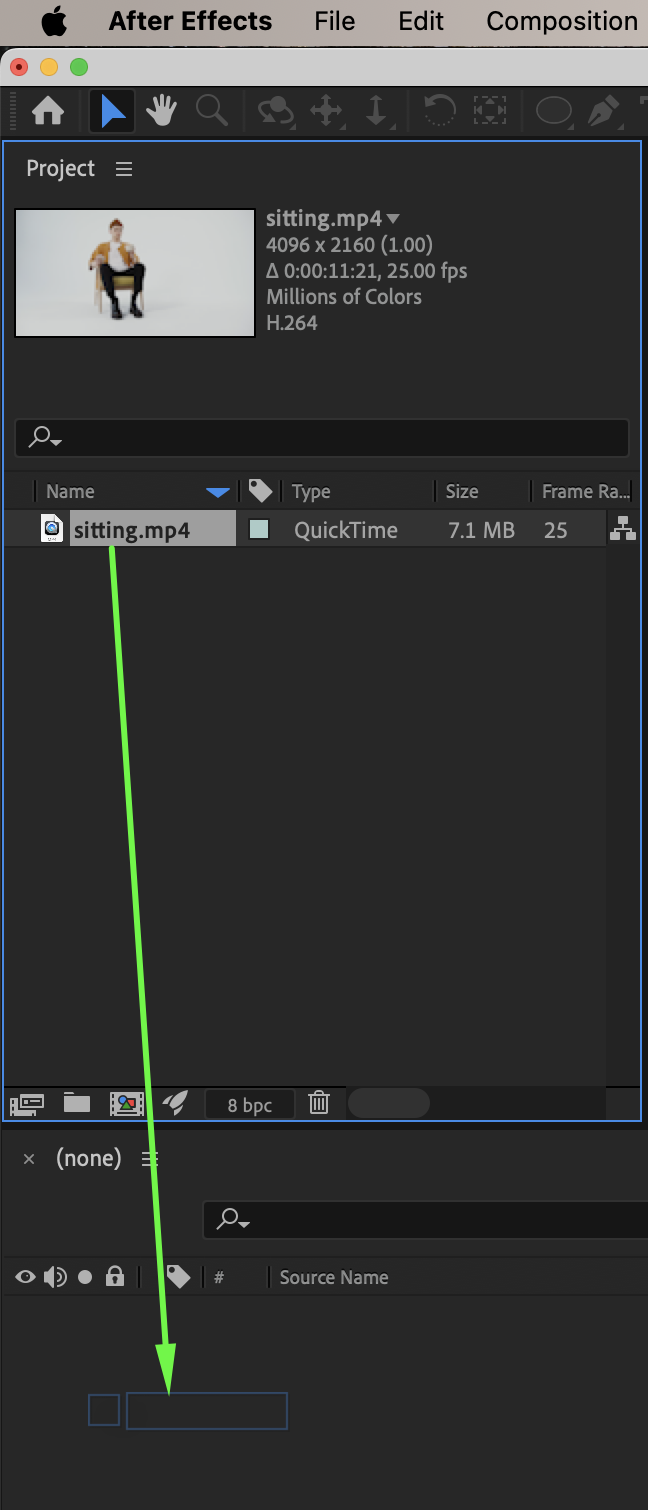
Step 1: Import and Place Your Footage
Go to File → Import → File and import your video. Drag the footage onto the timeline to create a new composition.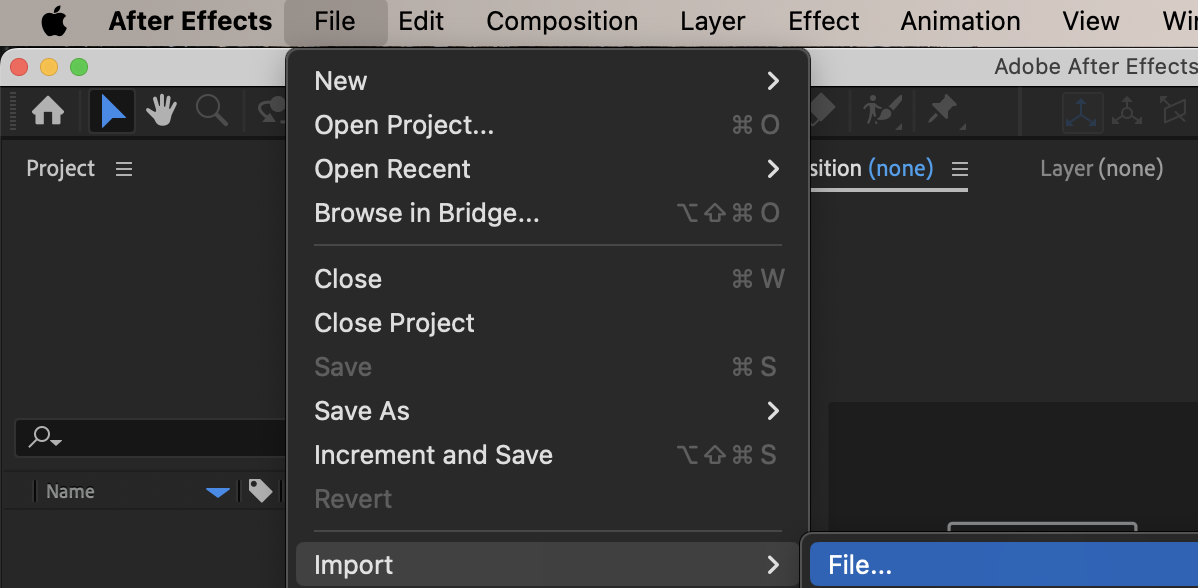
 Step 2: Create the First Adjustment Layer
Go to Layer → New → Adjustment Layer. This layer will define the core X-ray color and contrast.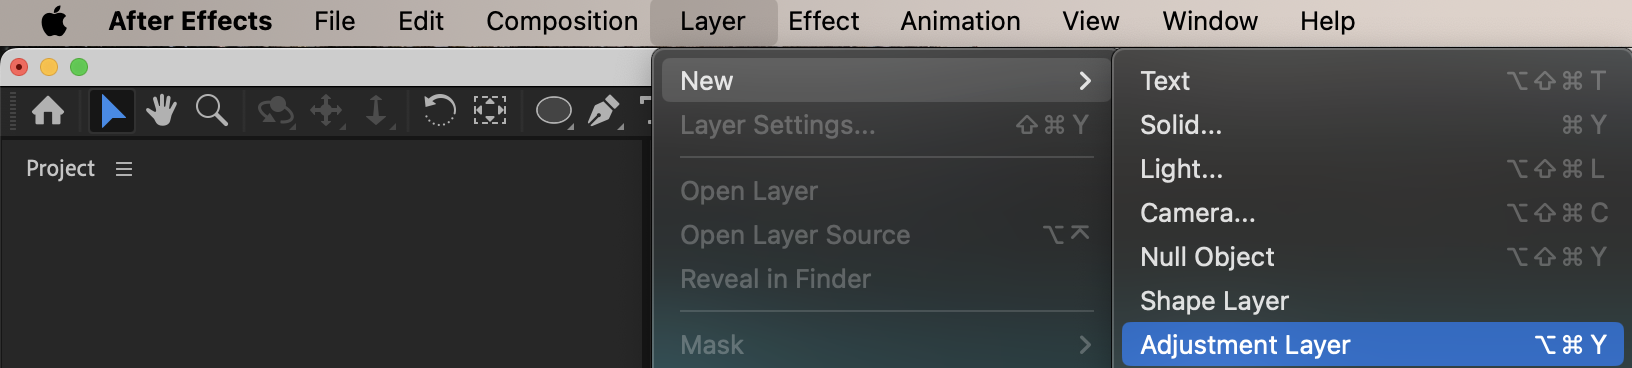 Step 3: Add Tint
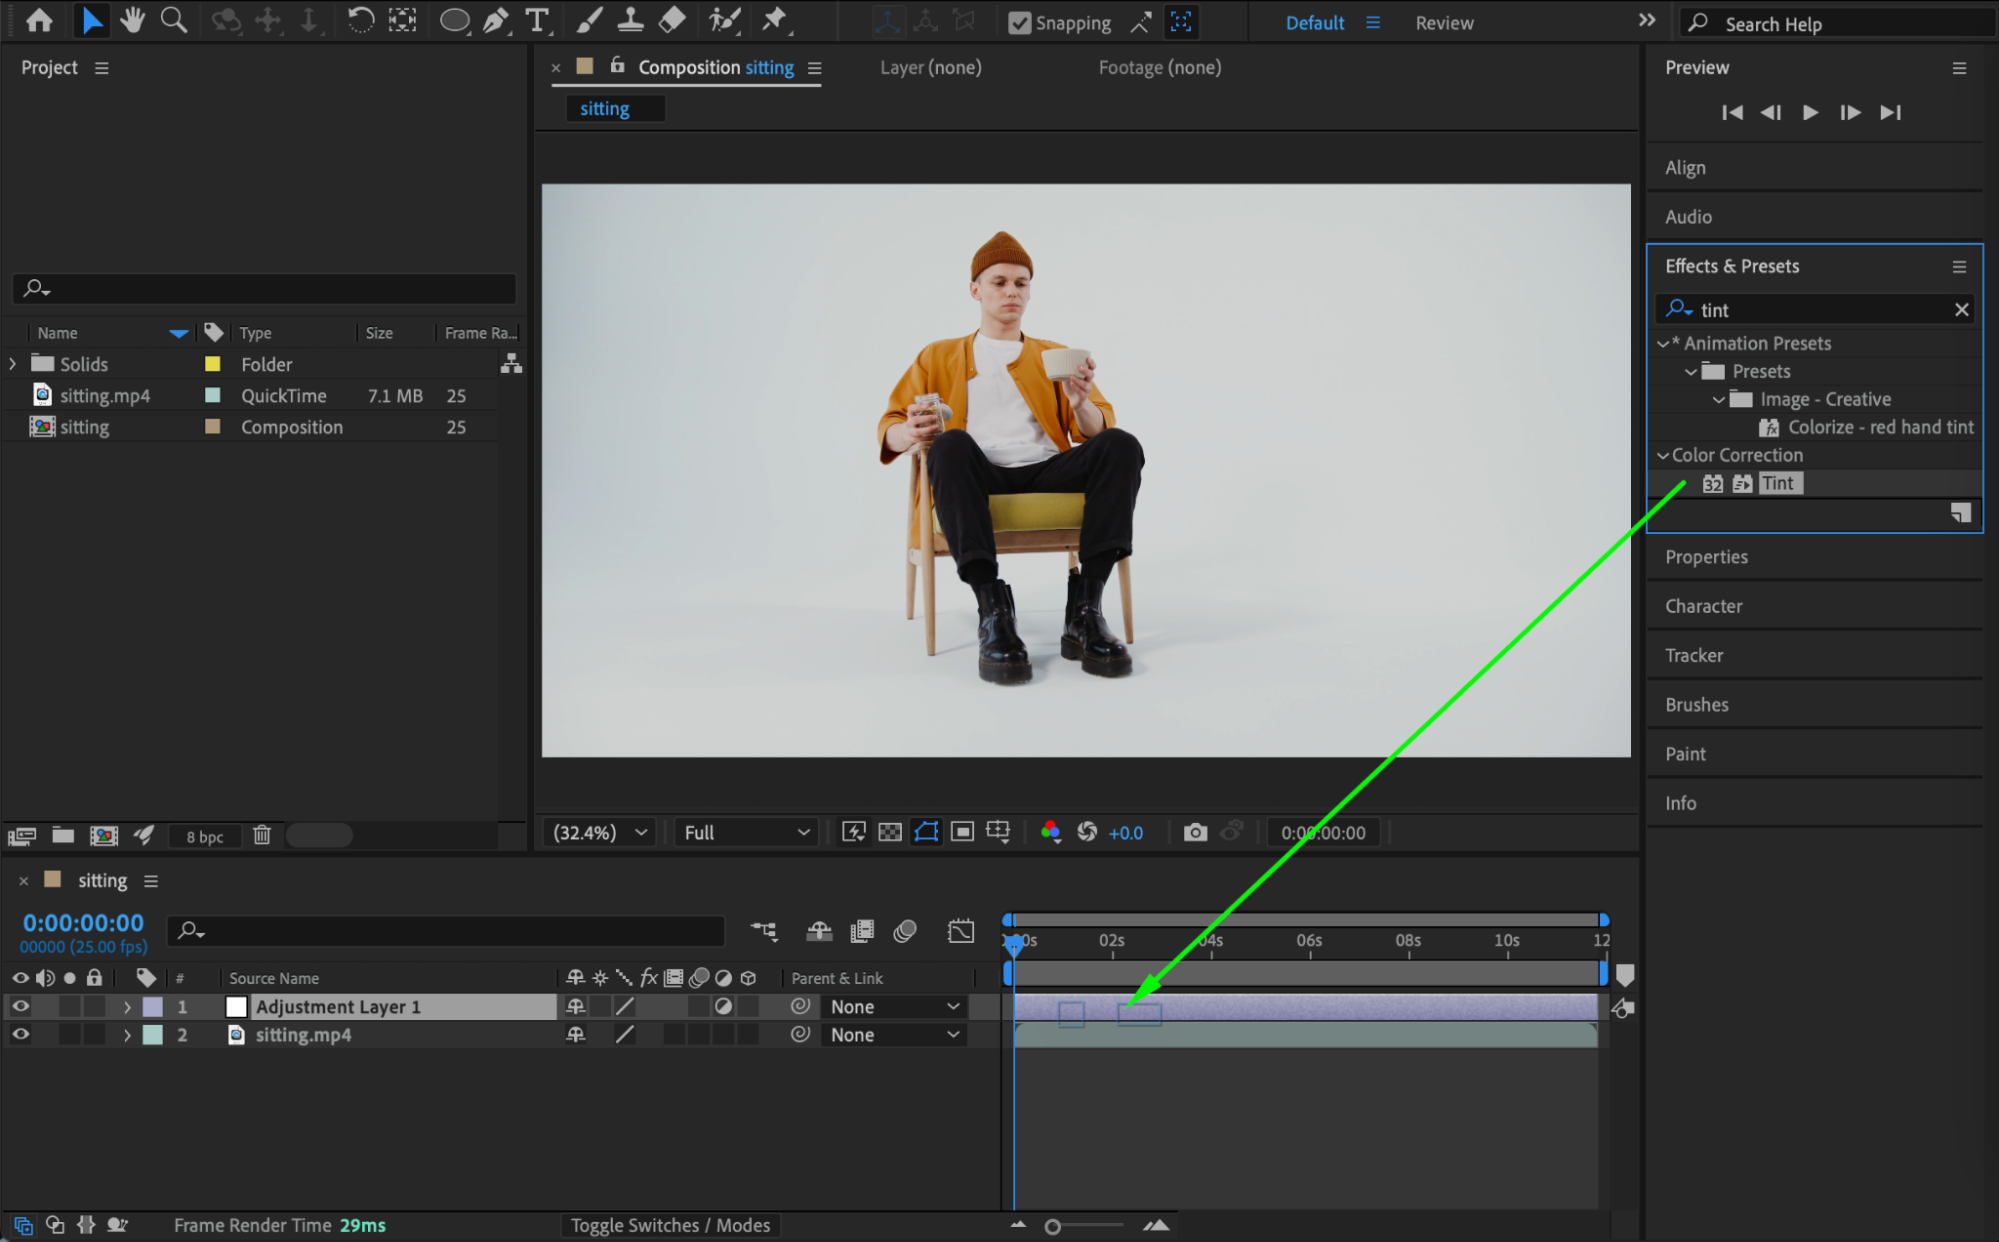
From the Effects & Presets panel, apply the Tint effect to the adjustment layer. This simplifies the color range and prepares the image for inversion.
 Step 4: Add Invert
Apply the Invert effect to the same adjustment layer. This creates the inverted, X-ray-style luminance.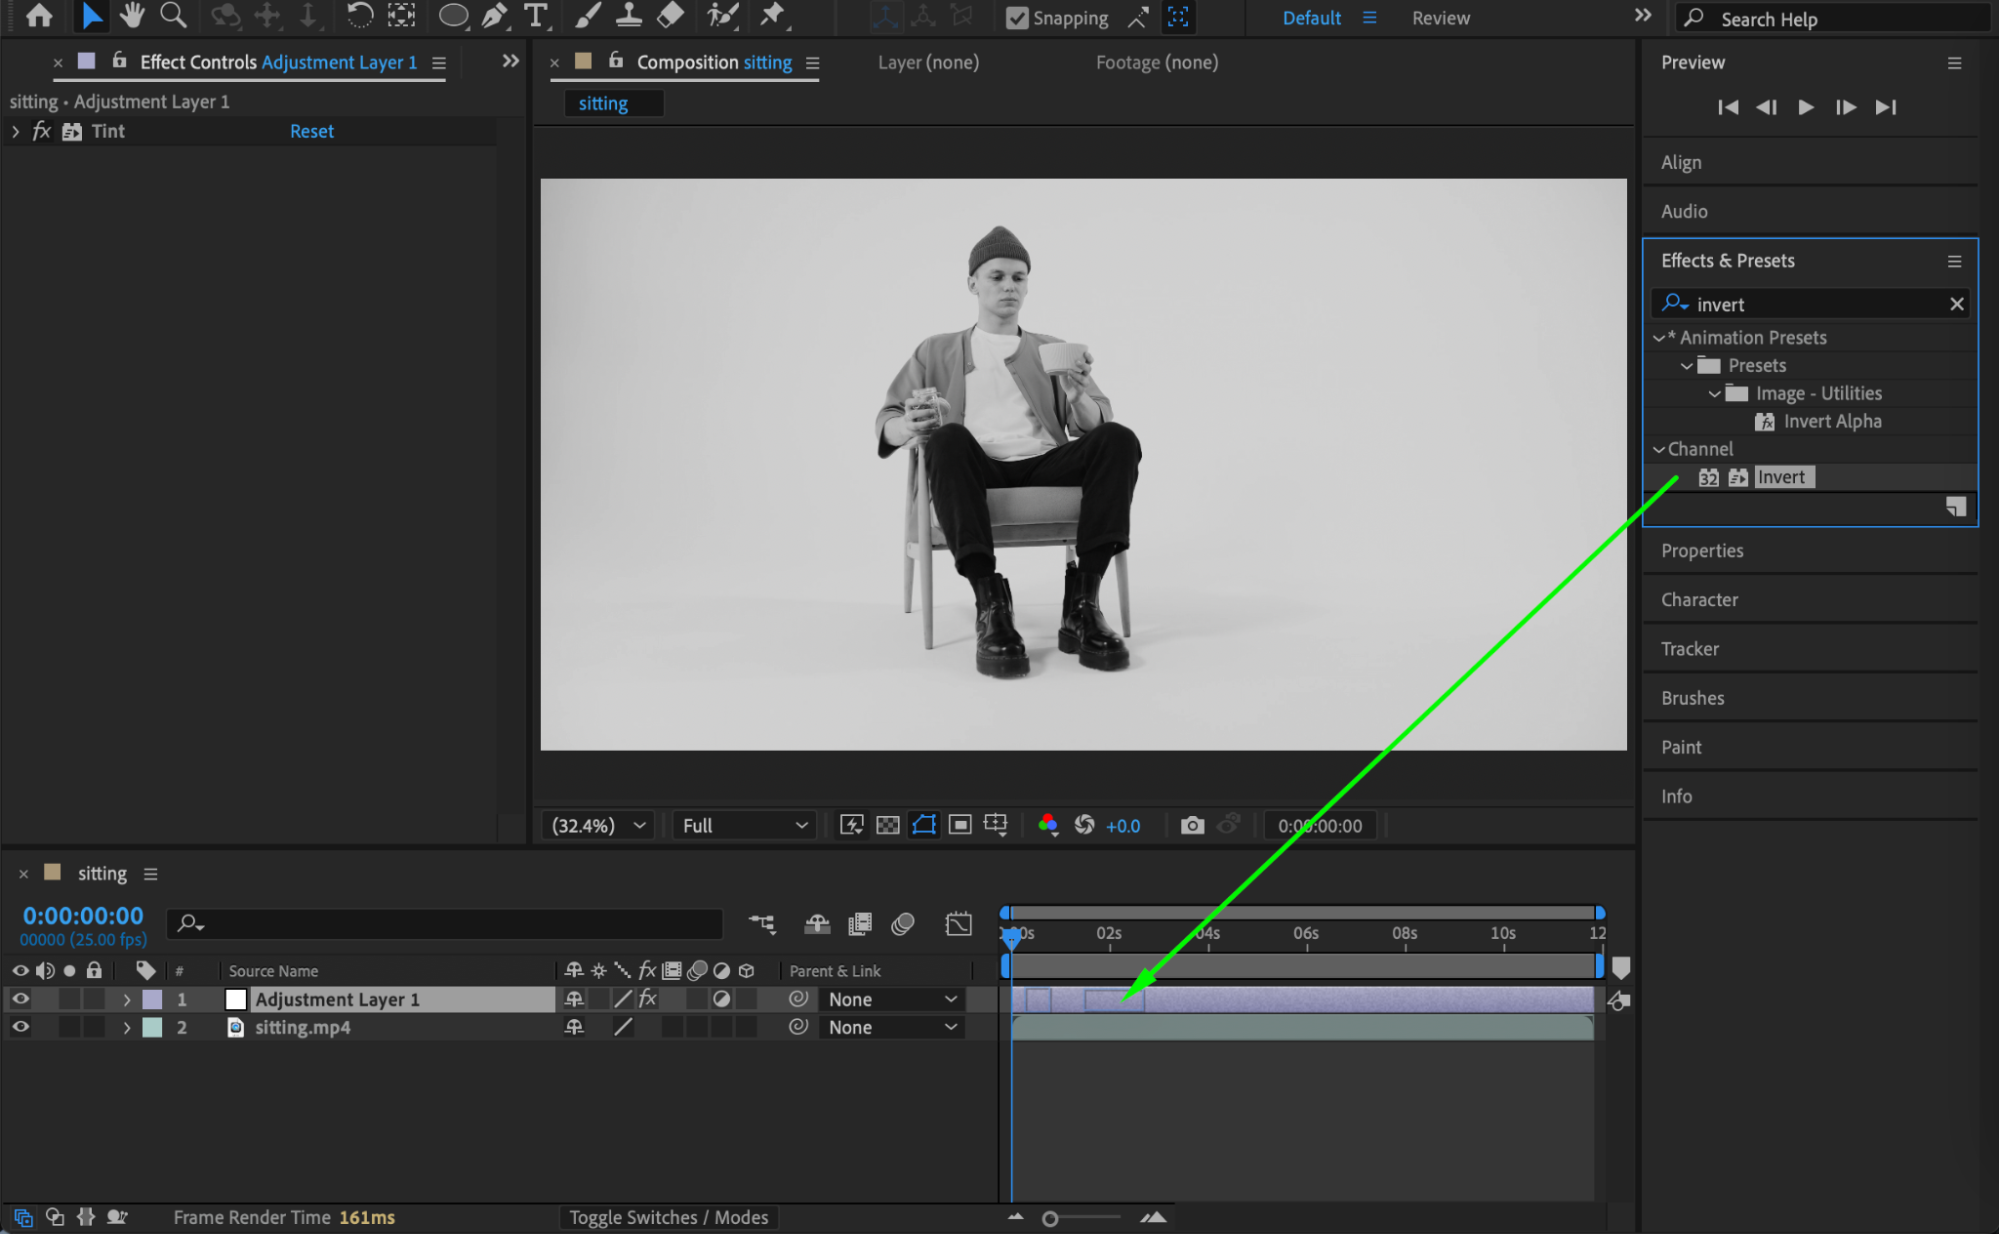 Step 5: Adjust Brightness and Contrast
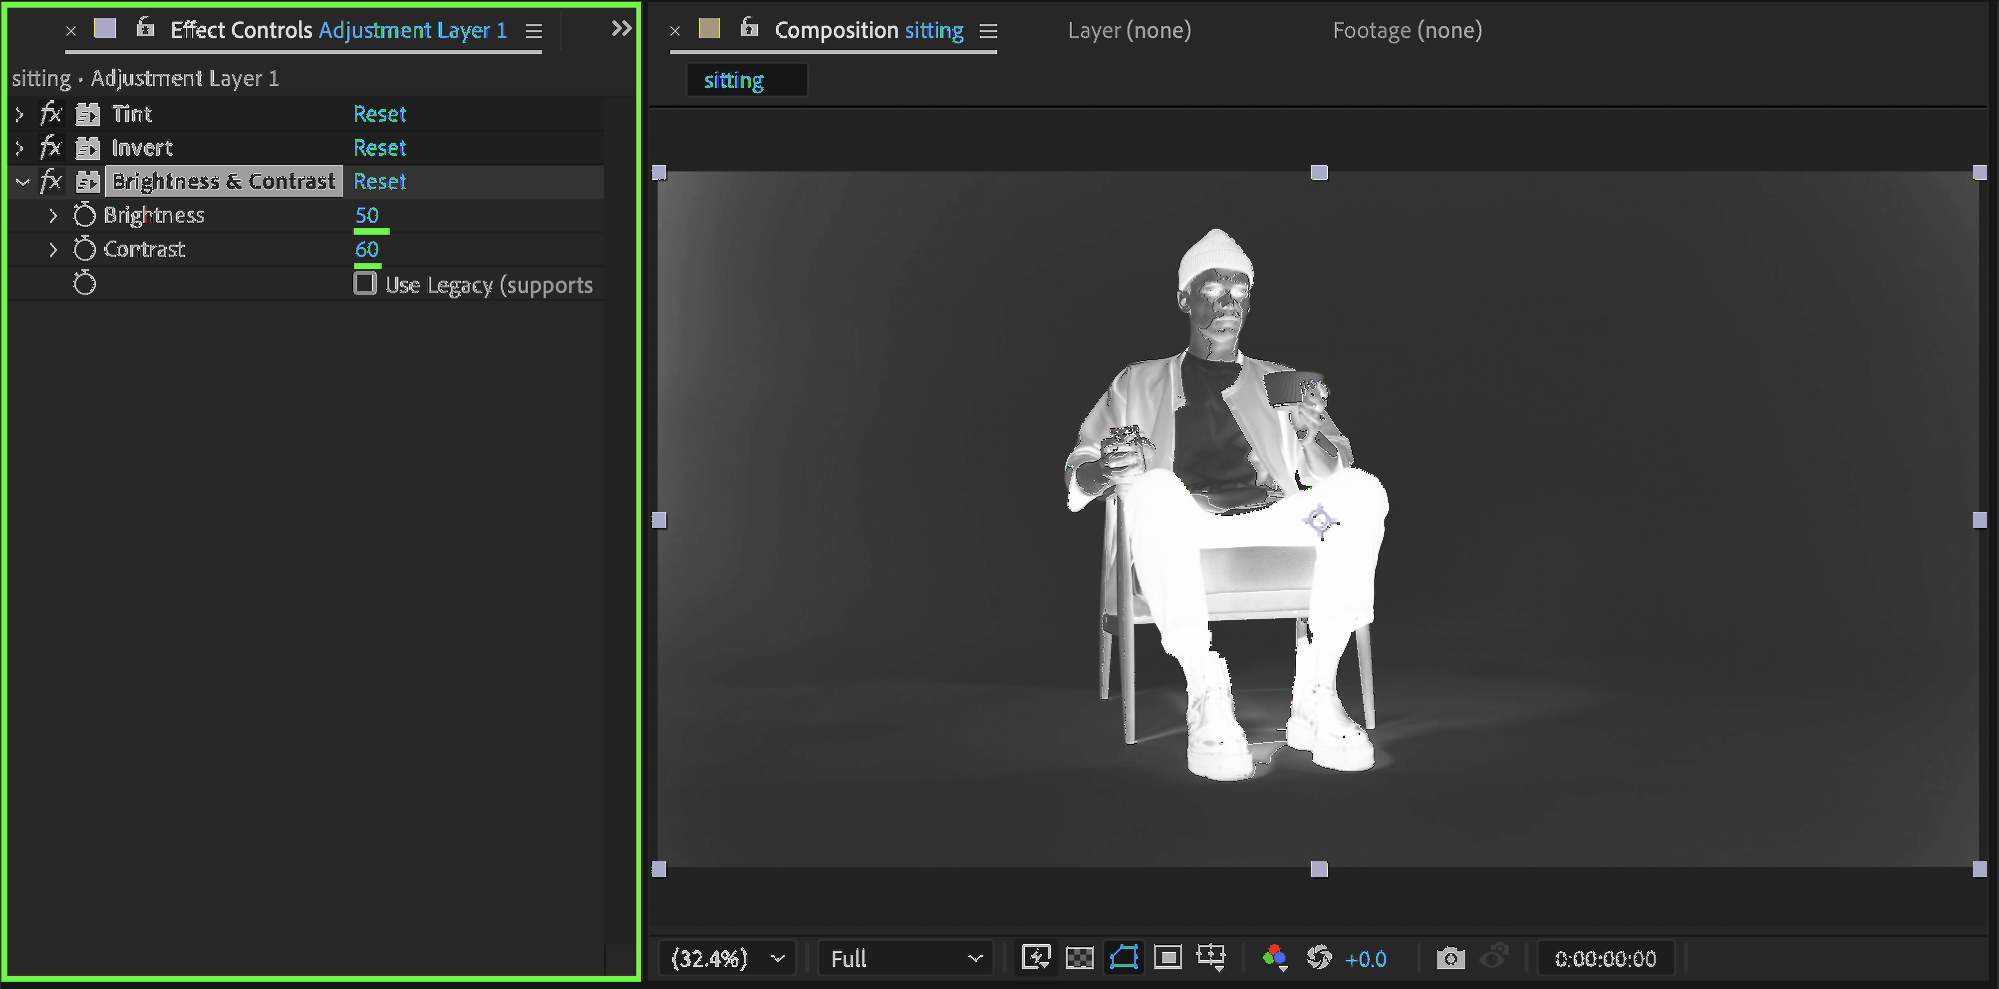
Add Brightness & Contrast and use these settings as a starting point:
Brightness: 50
Contrast: 60
This enhances visibility and edge definition.
Get 10% off when you subscribe to our newsletter

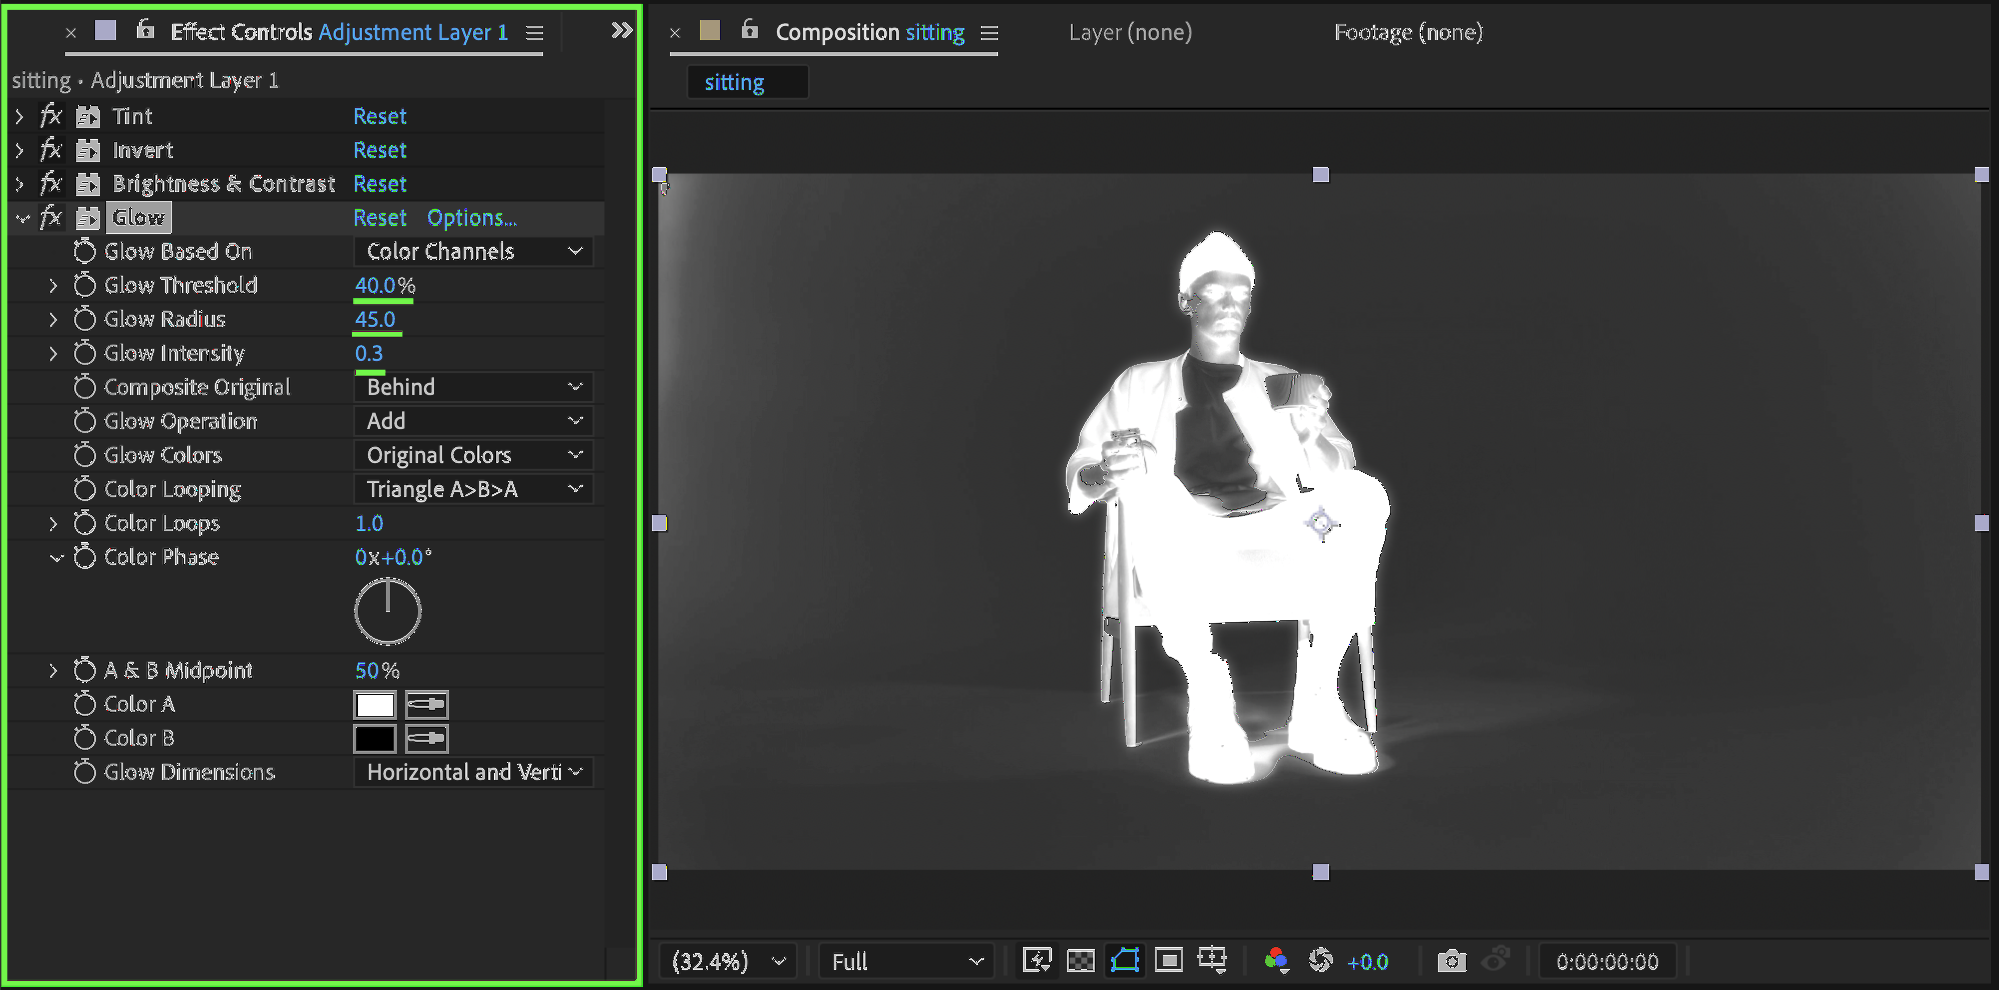
Step 6: Add Glow
Apply the Glow effect:
Glow Threshold: 50
Glow Radius: 45
Glow Intensity: 0.3
Glow adds luminous highlights, which are essential for the X-ray look.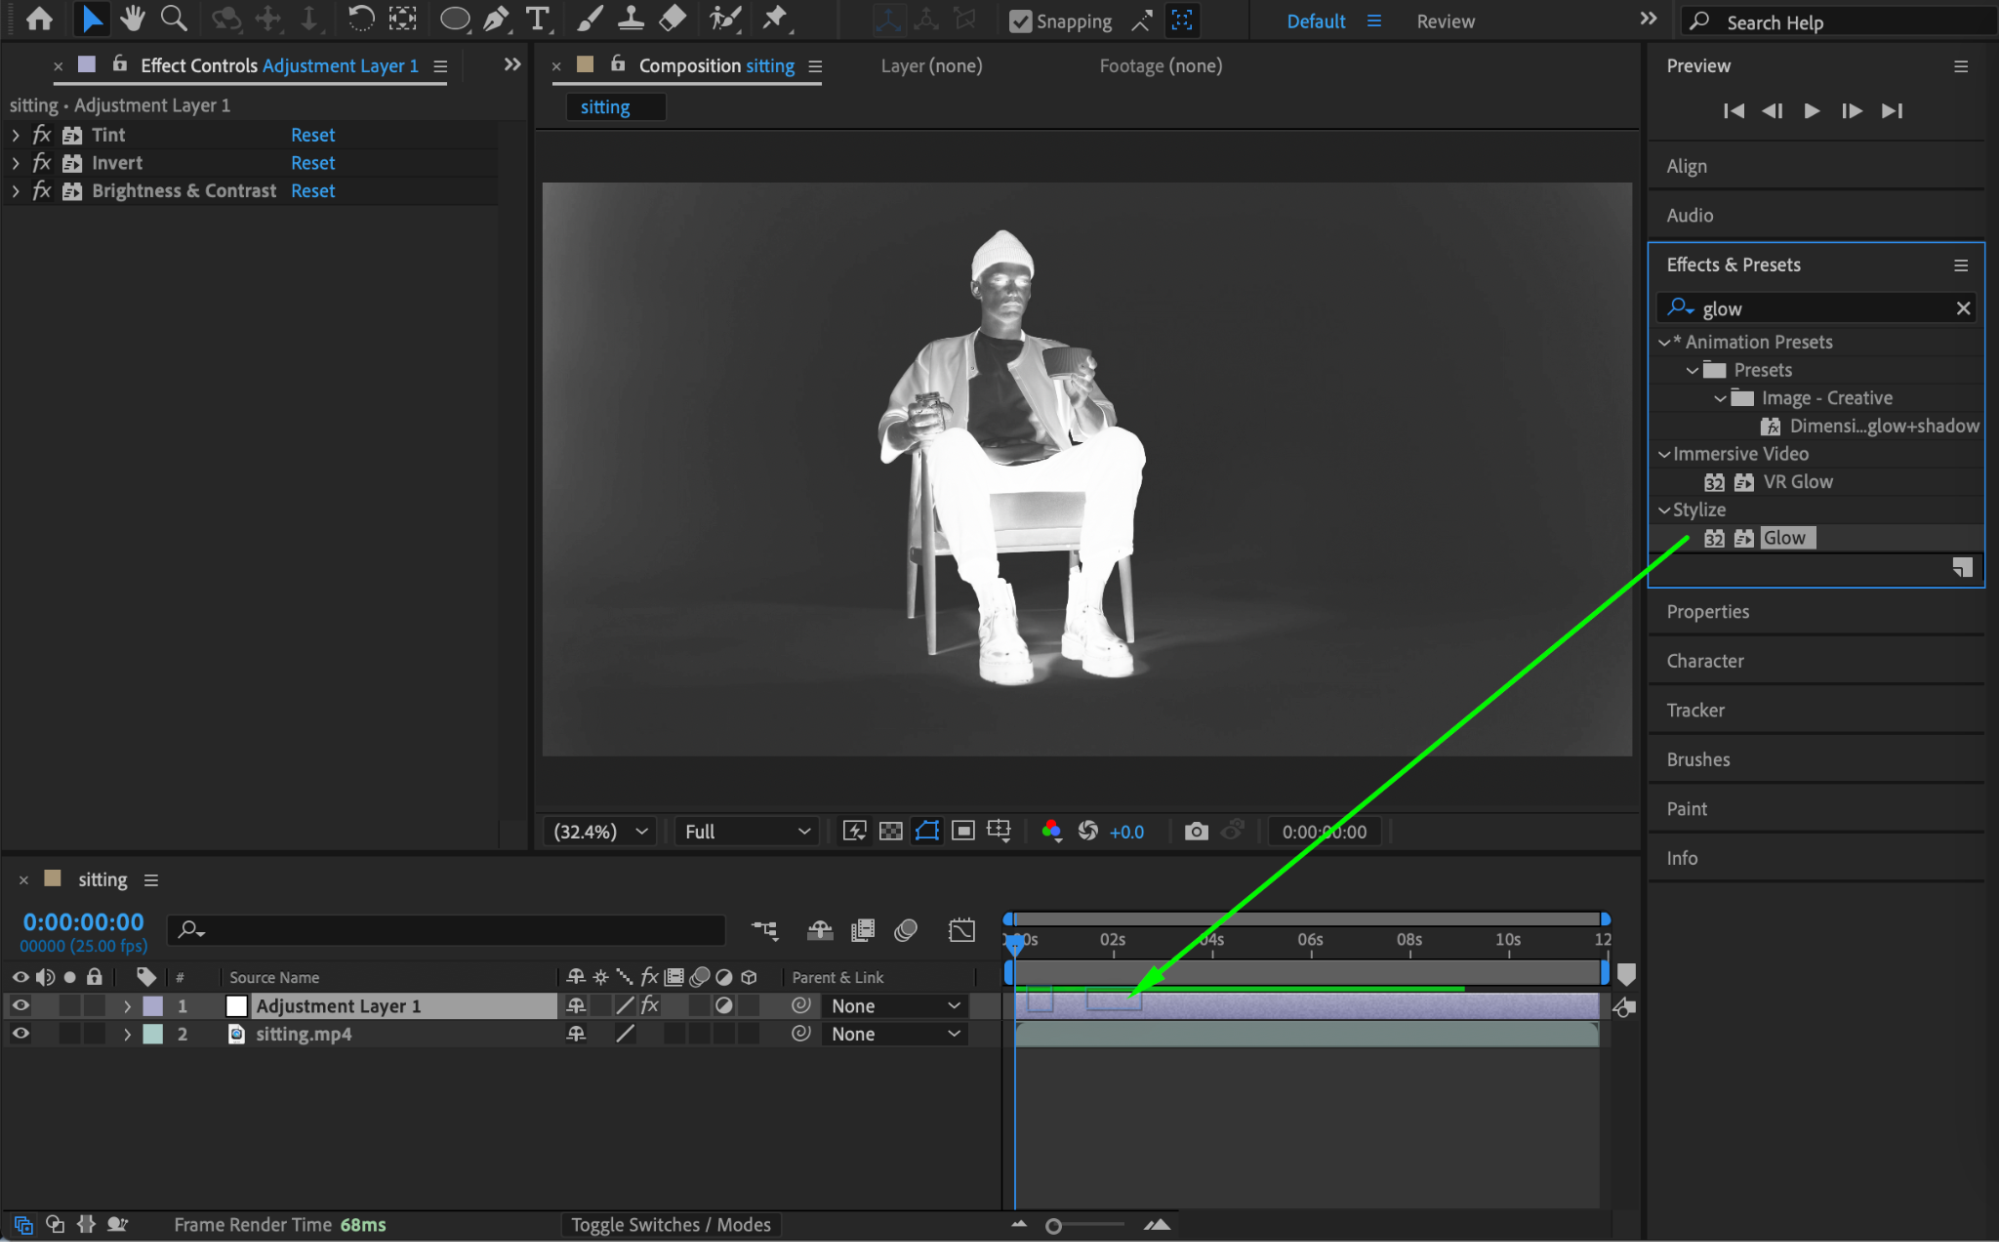
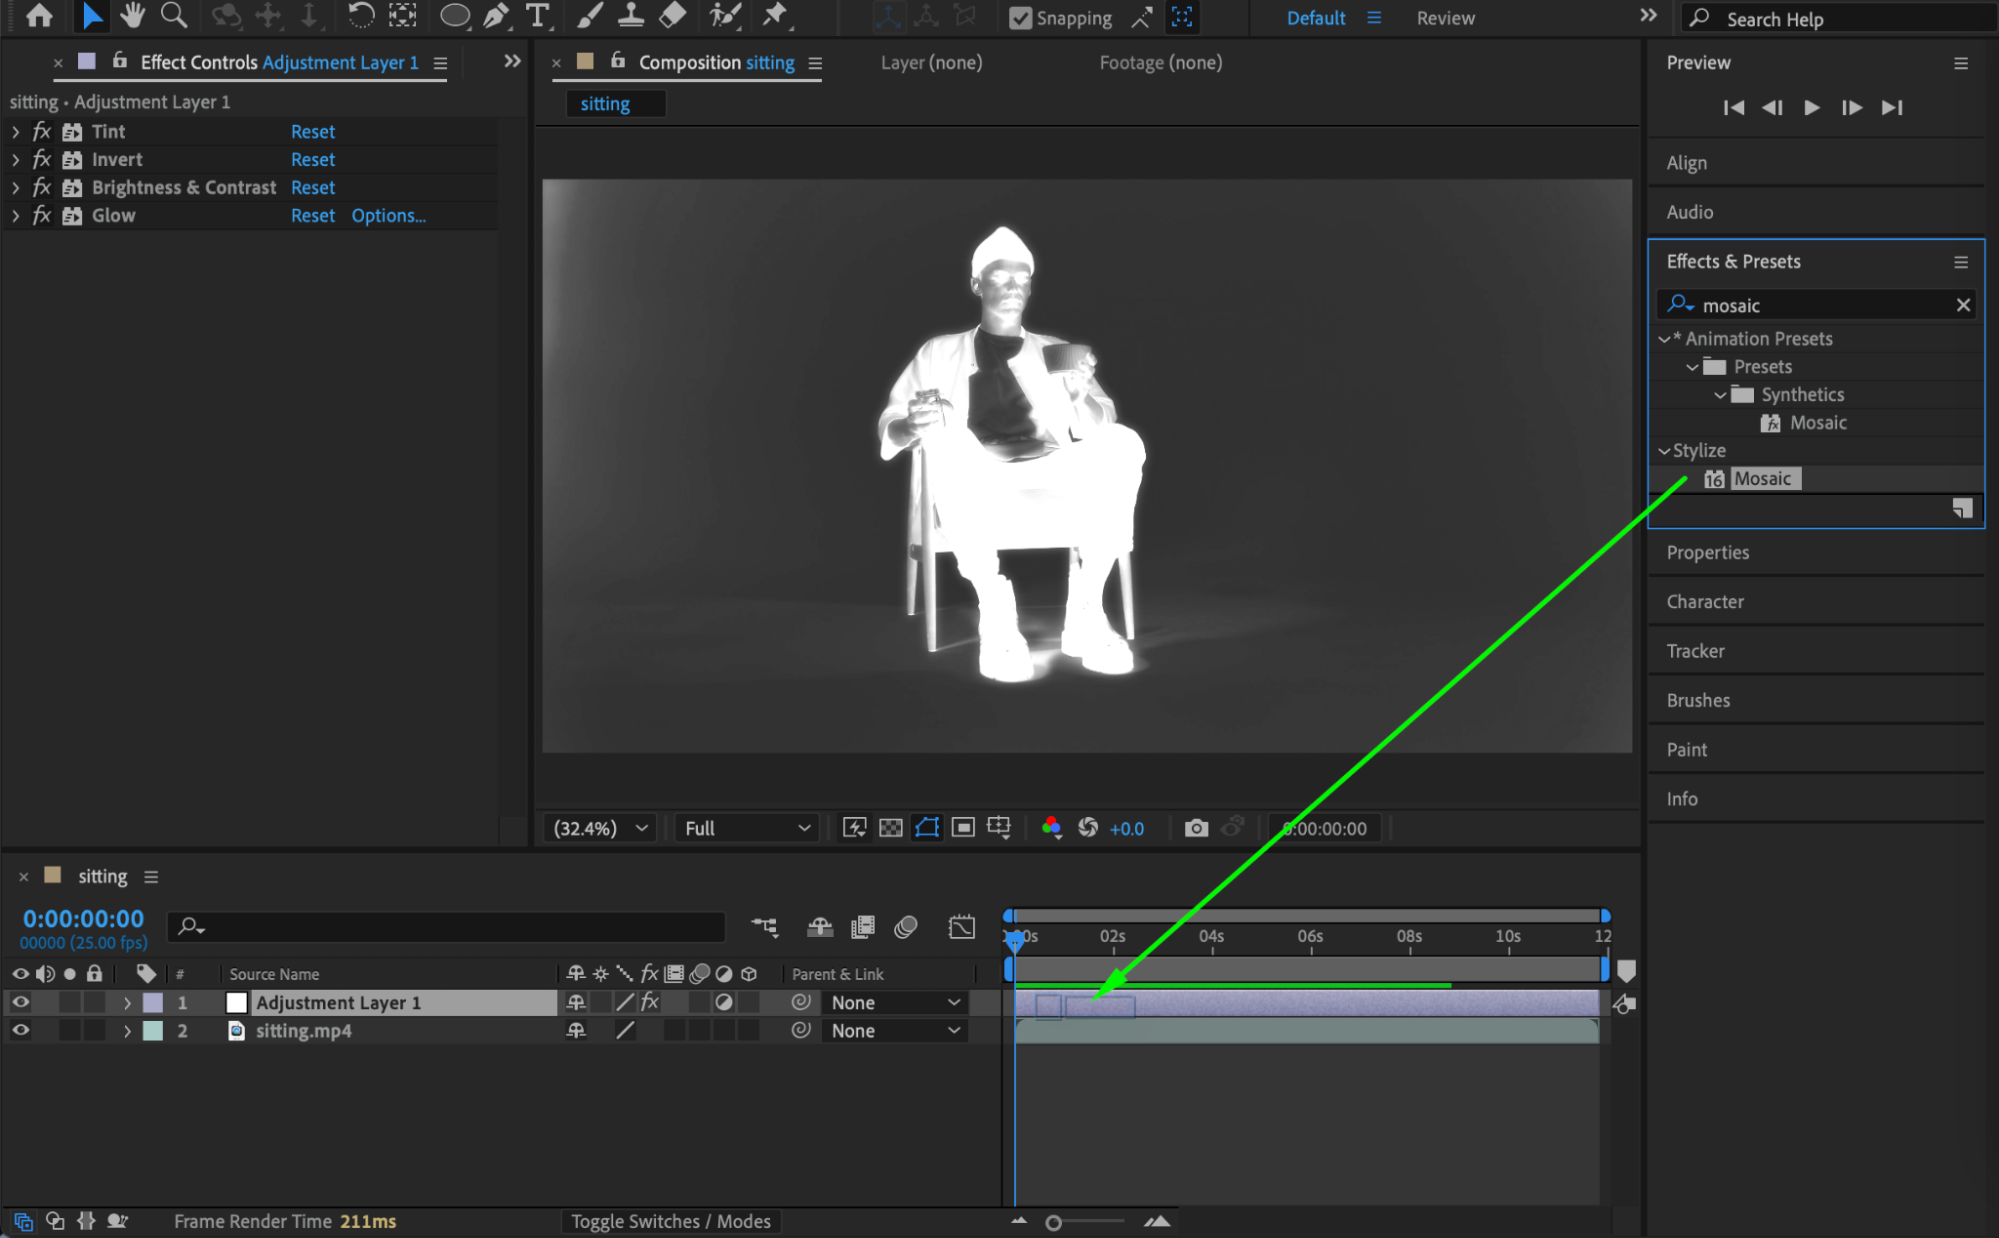
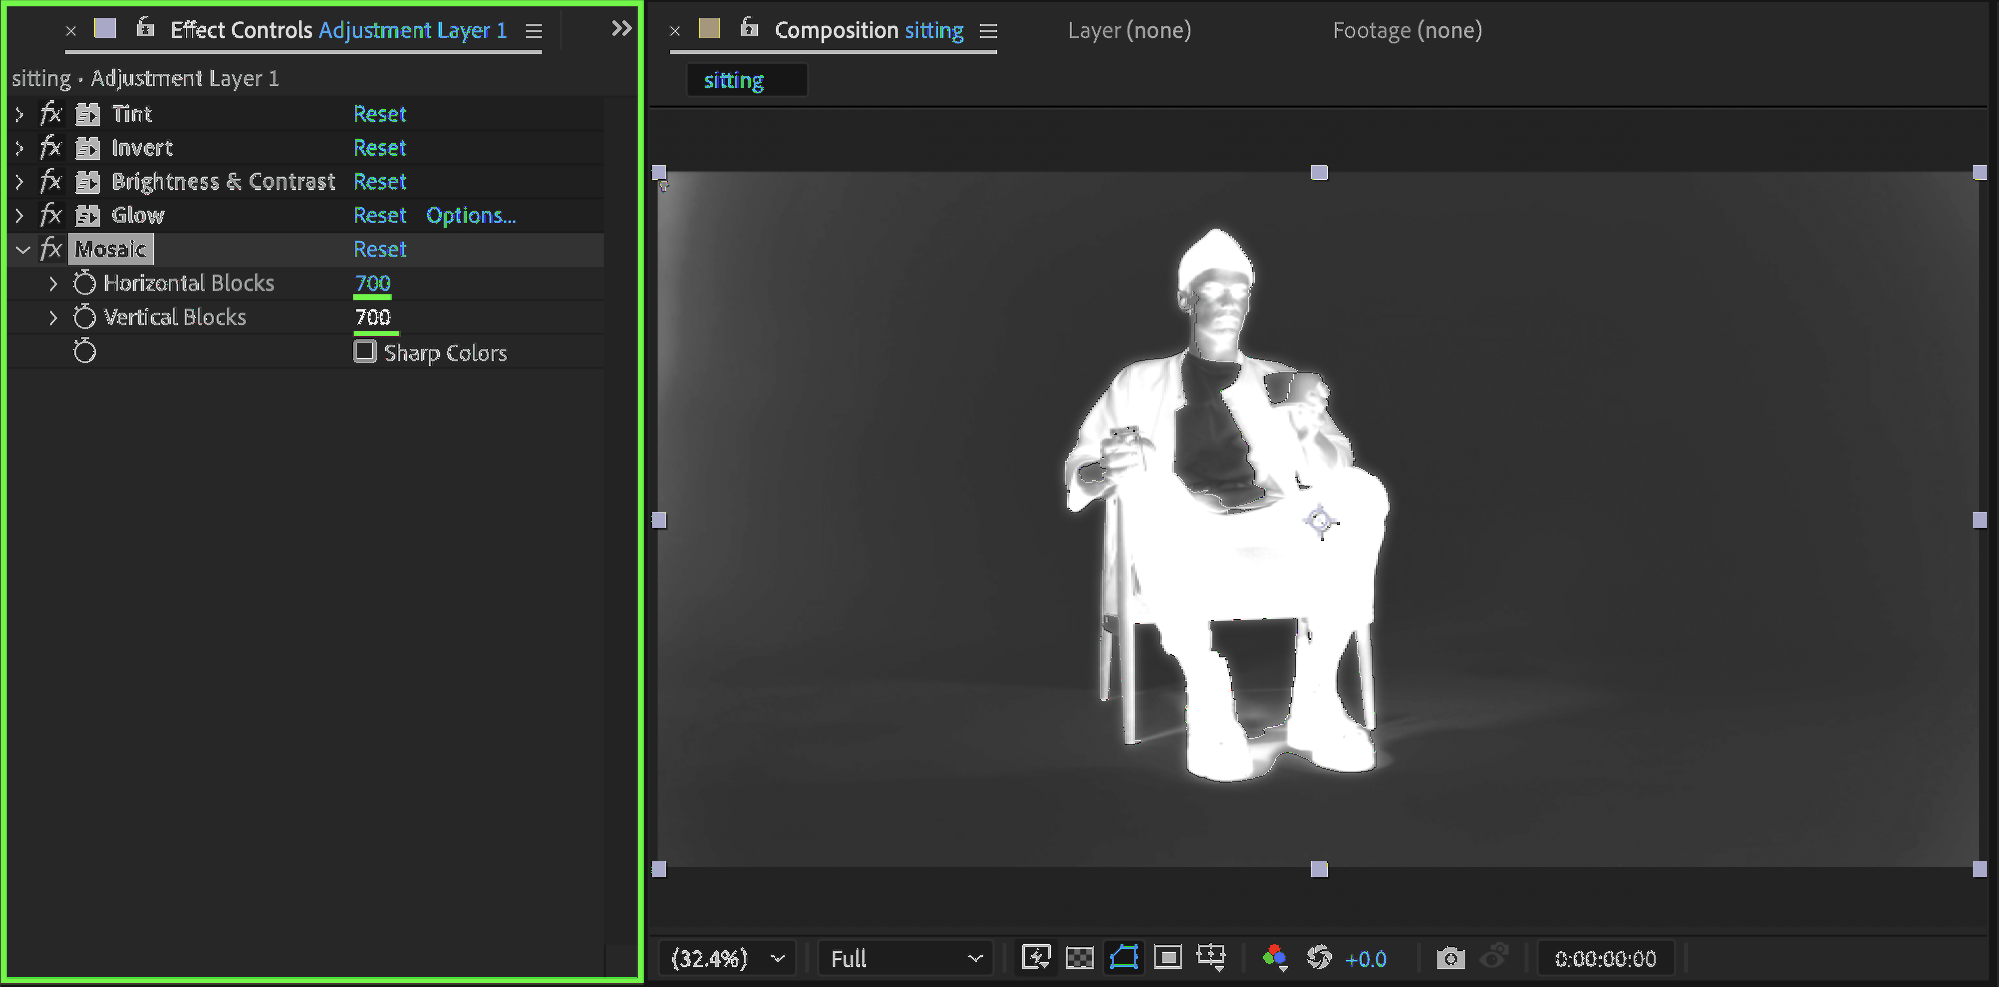
 Step 7: Add Mosaic
Apply the Mosaic effect:
Horizontal Blocks: 700
Vertical Blocks: 700
This introduces a subtle digital scanning texture.
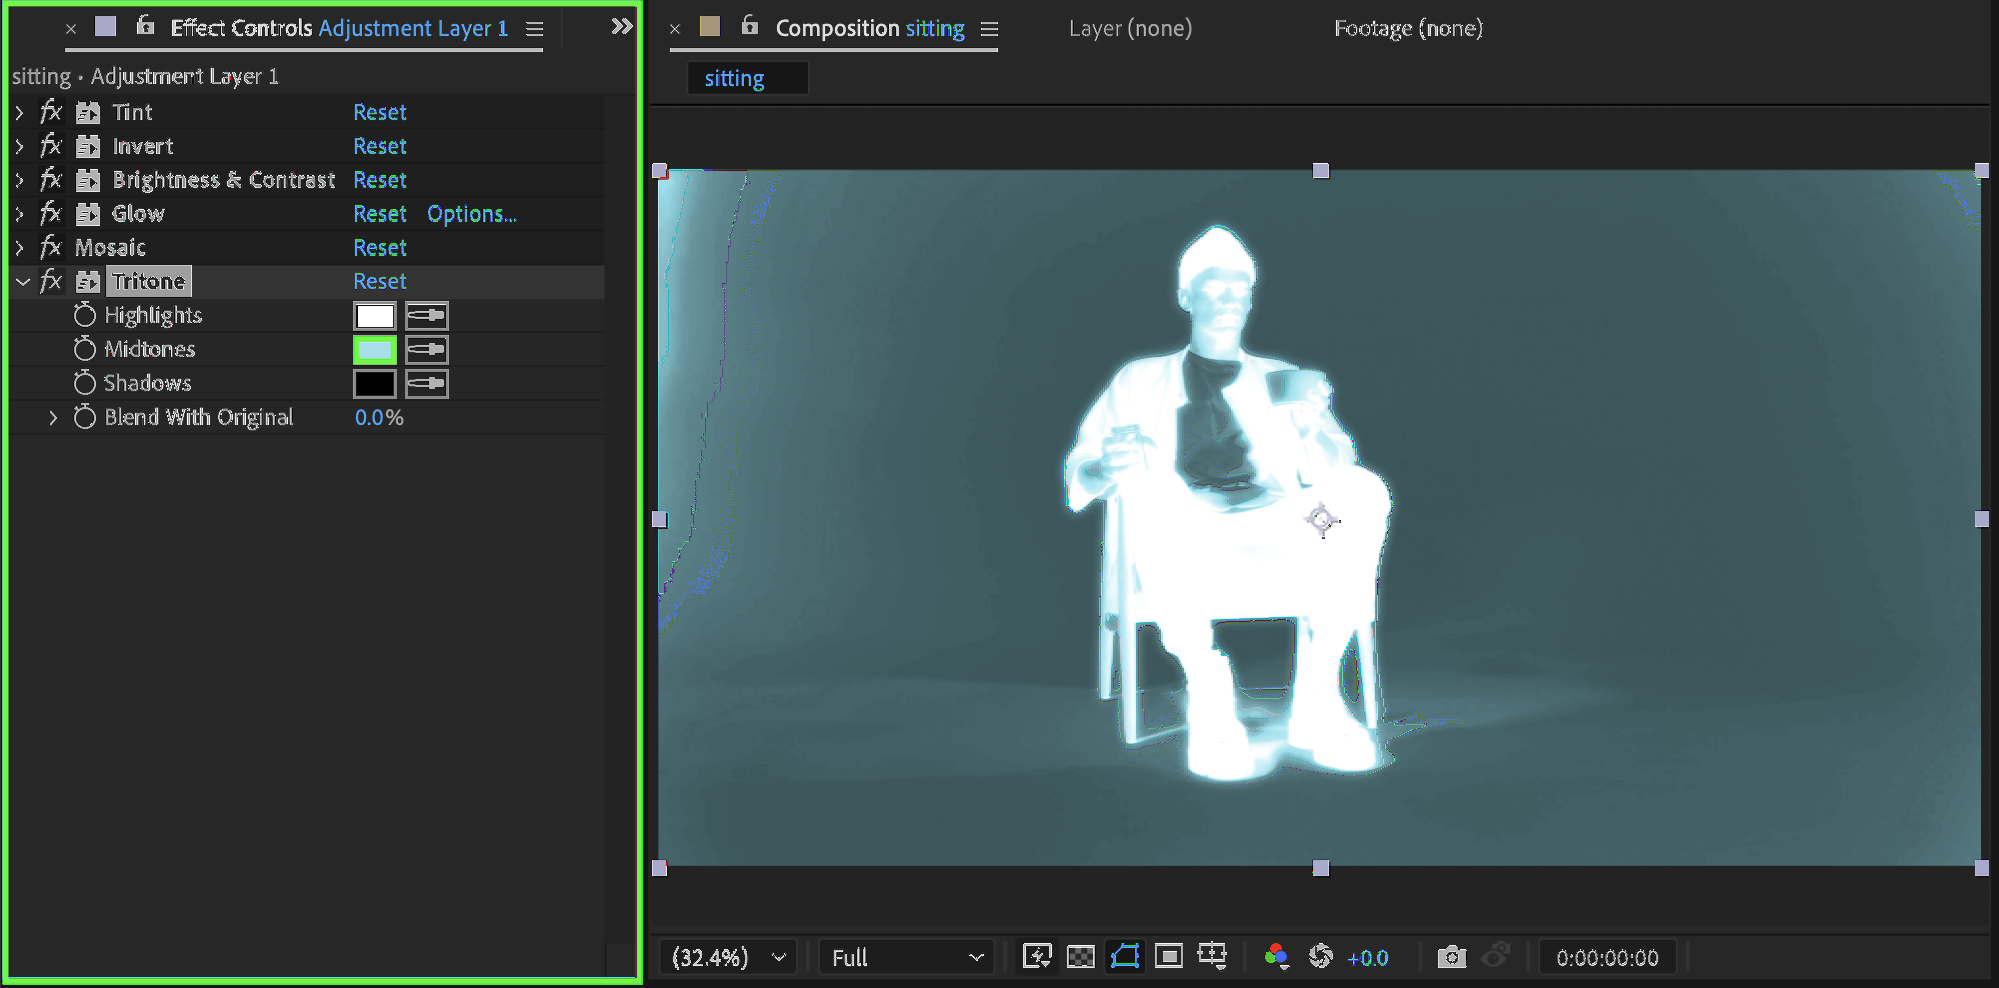
Step 8: Apply Tritone
Add the Tritone effect. Set the Midtones color to a light tint of your chosen color (for example, light blue or cyan). This gives the X-ray effect its signature color tone.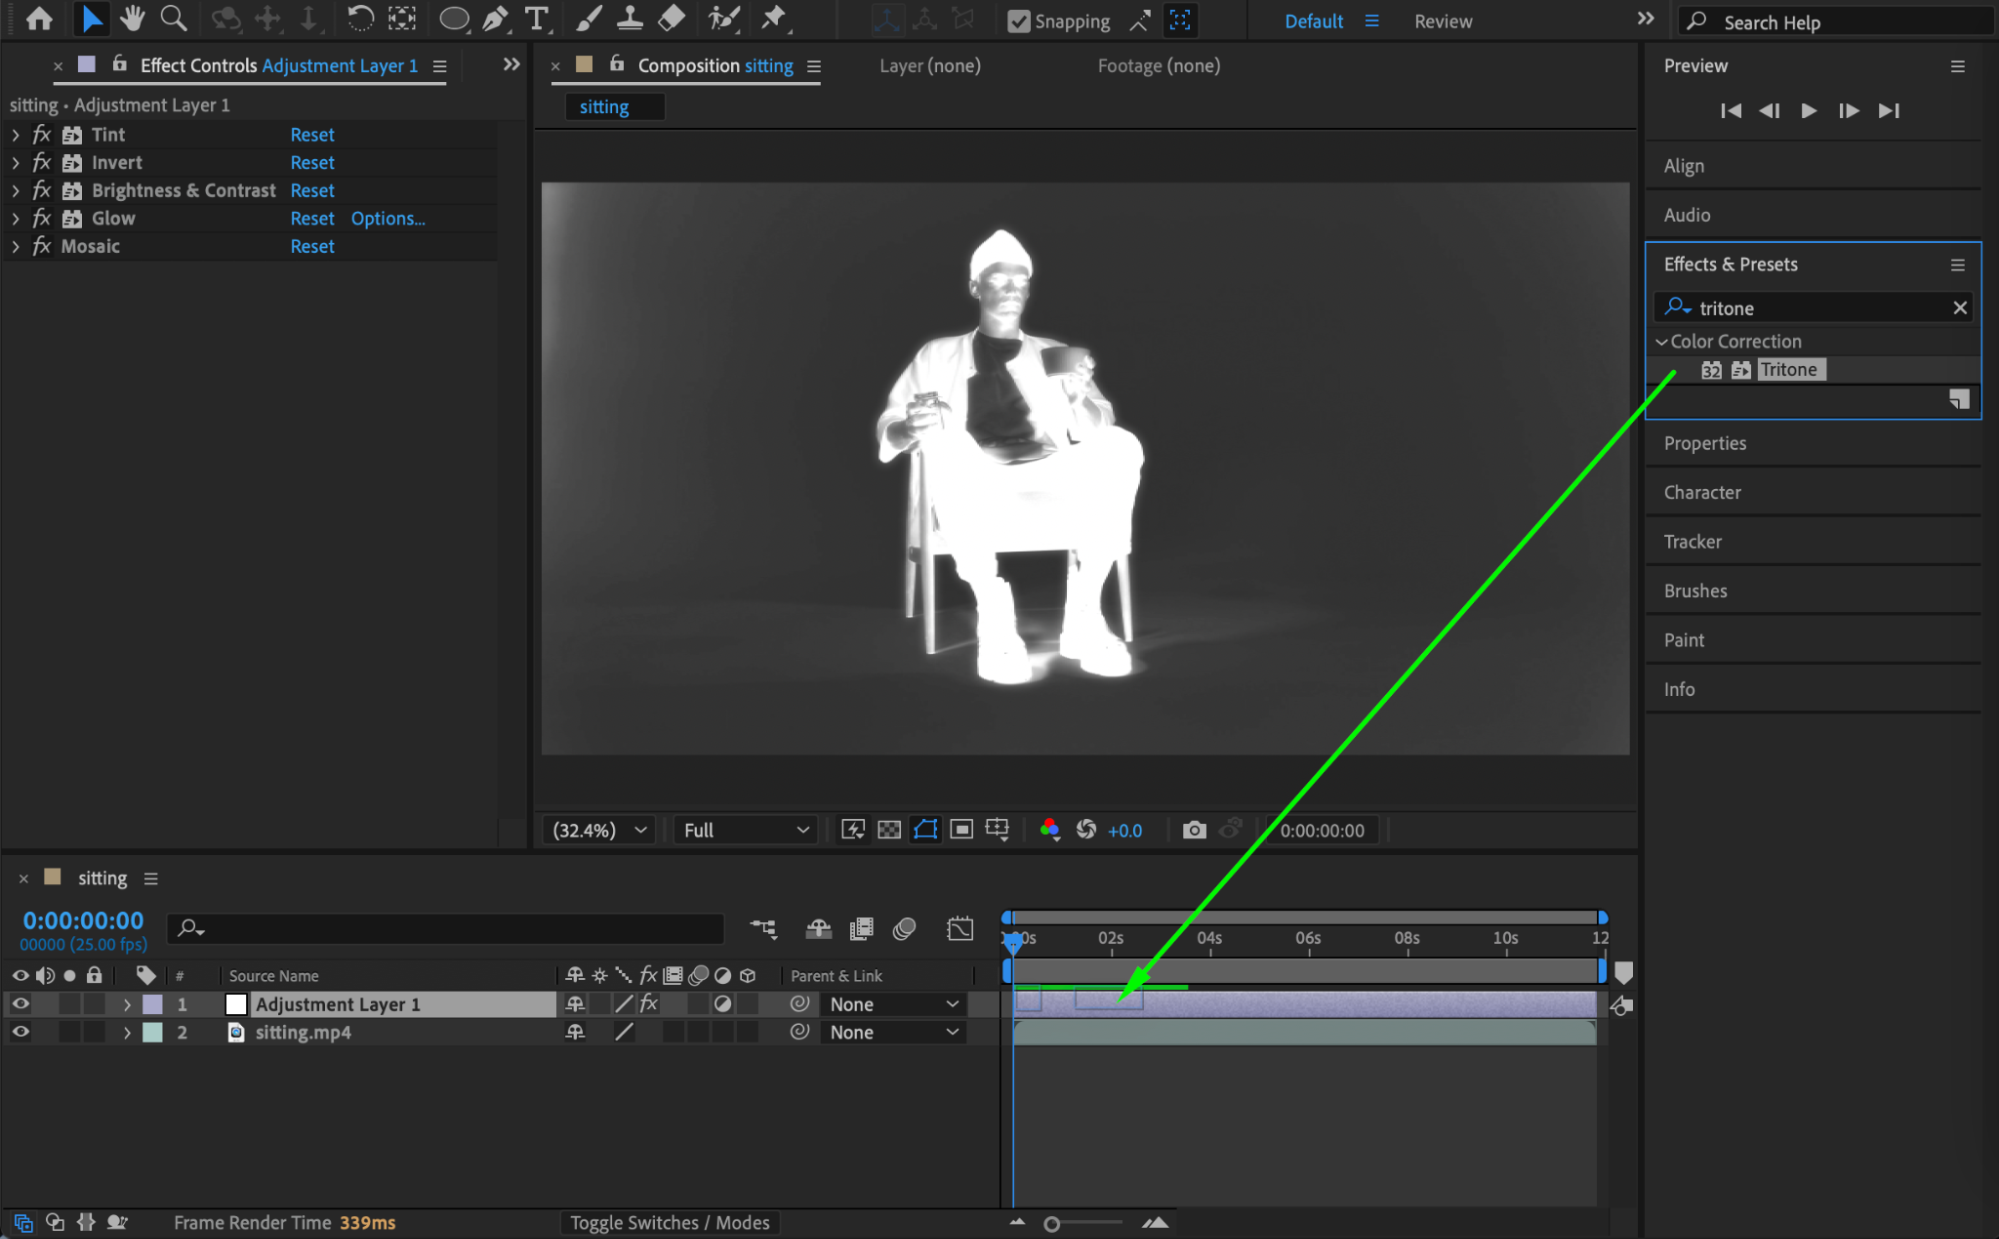
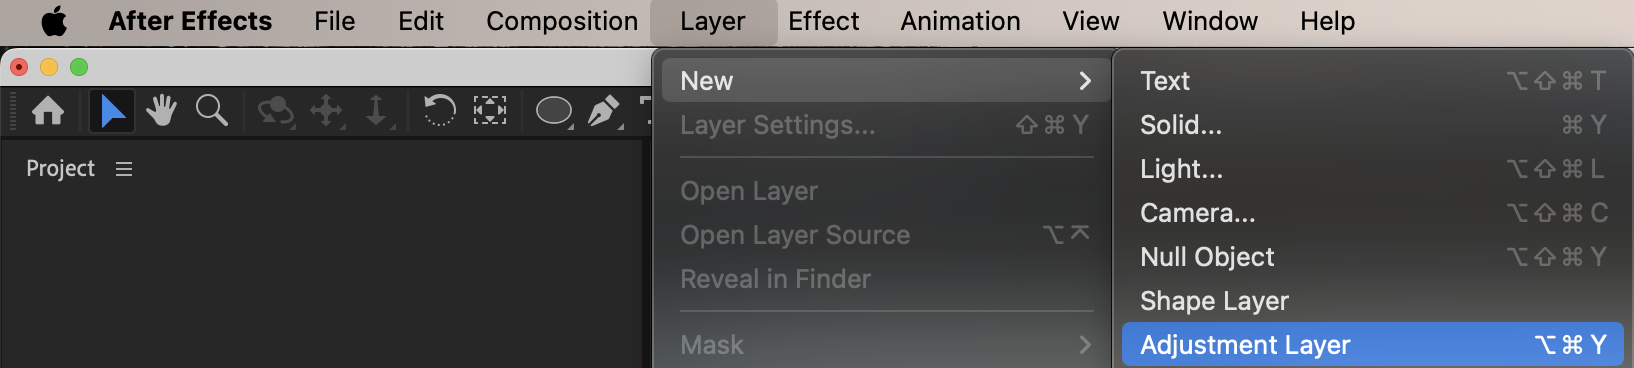
 Step 9: Create the Second Adjustment Layer
Go to Layer → New → Adjustment Layer. This layer will enhance glow and motion softness.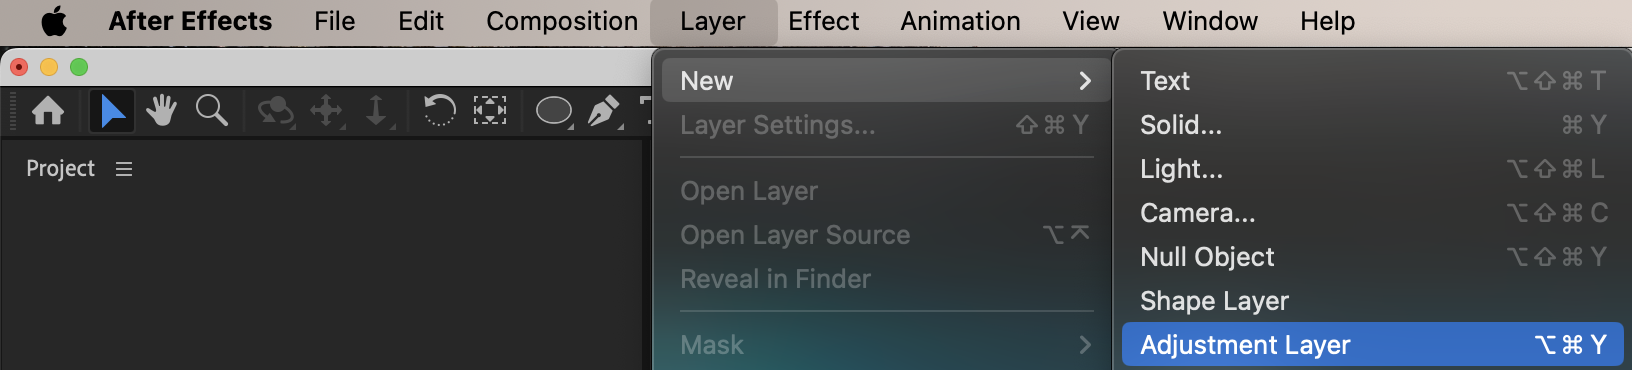
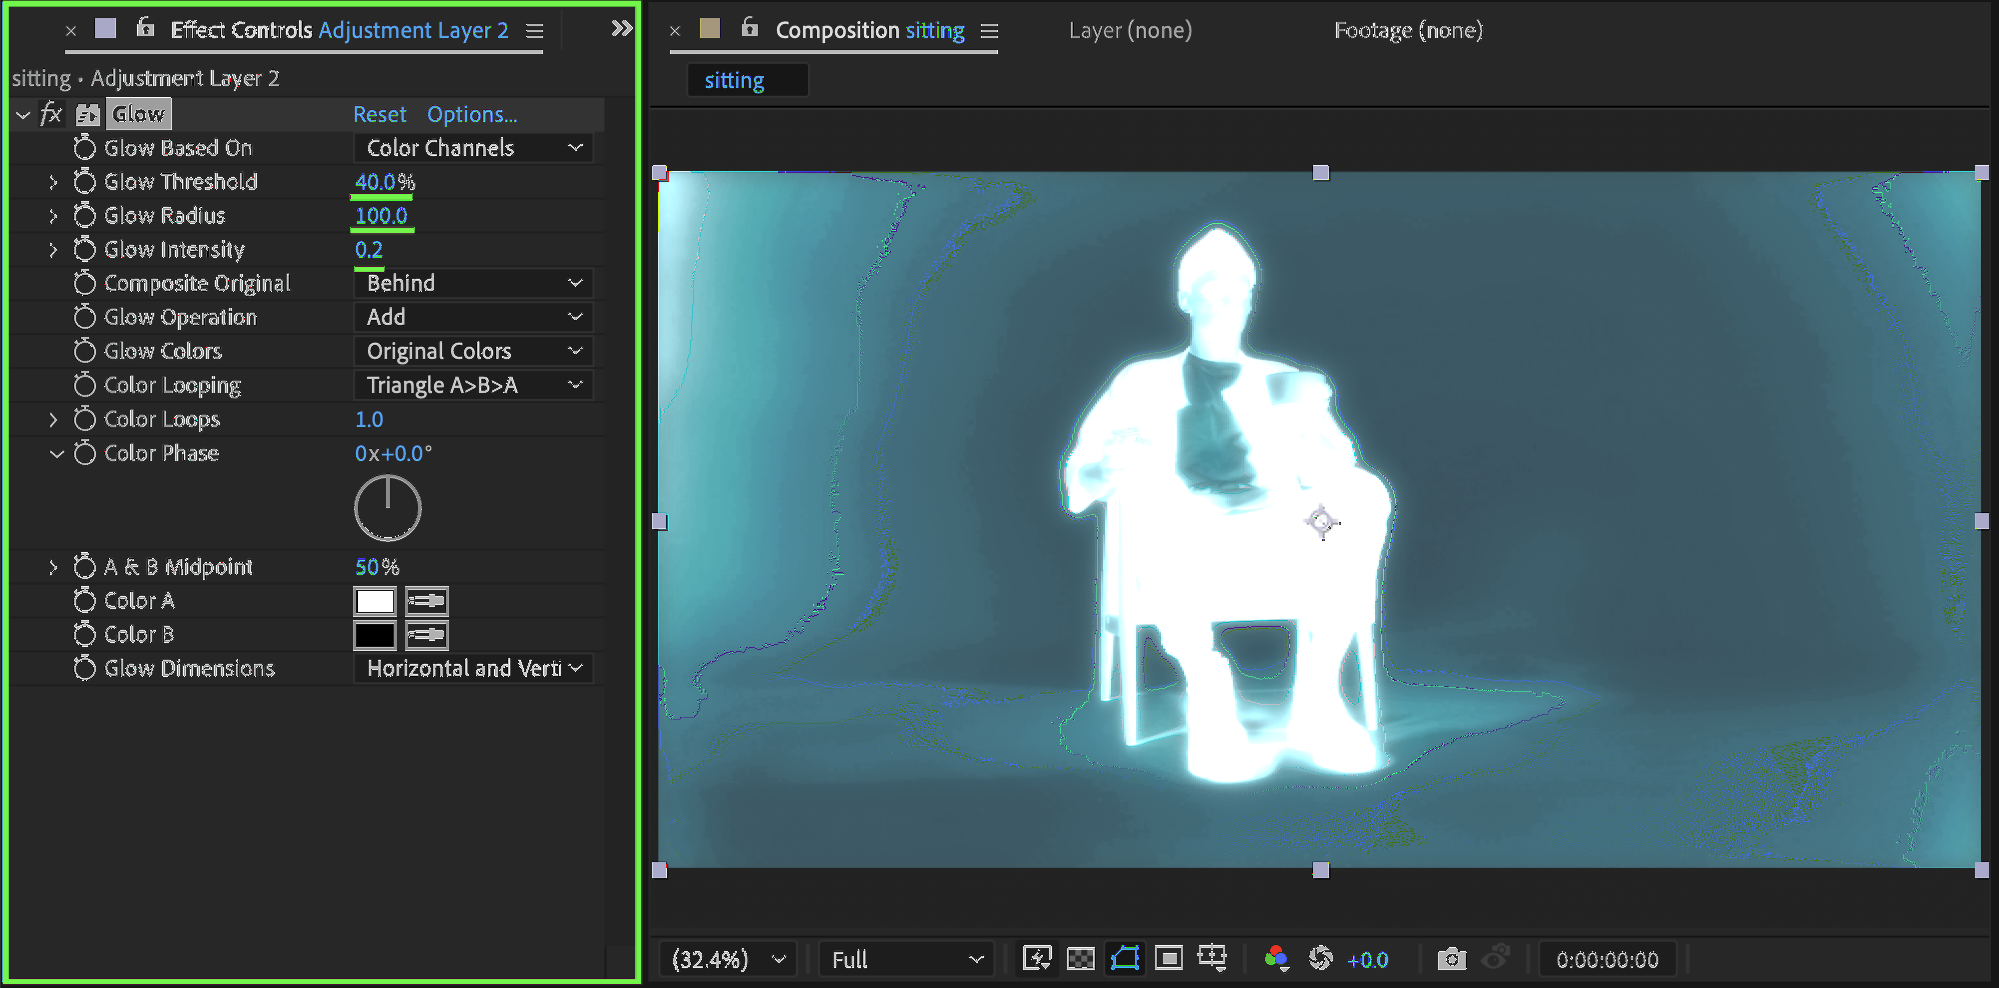
Step 10: Add Secondary Glow
Apply Glow with these settings:
Glow Threshold: 40
Glow Radius: 100
Glow Intensity: 0.2
This creates a softer, outer glow.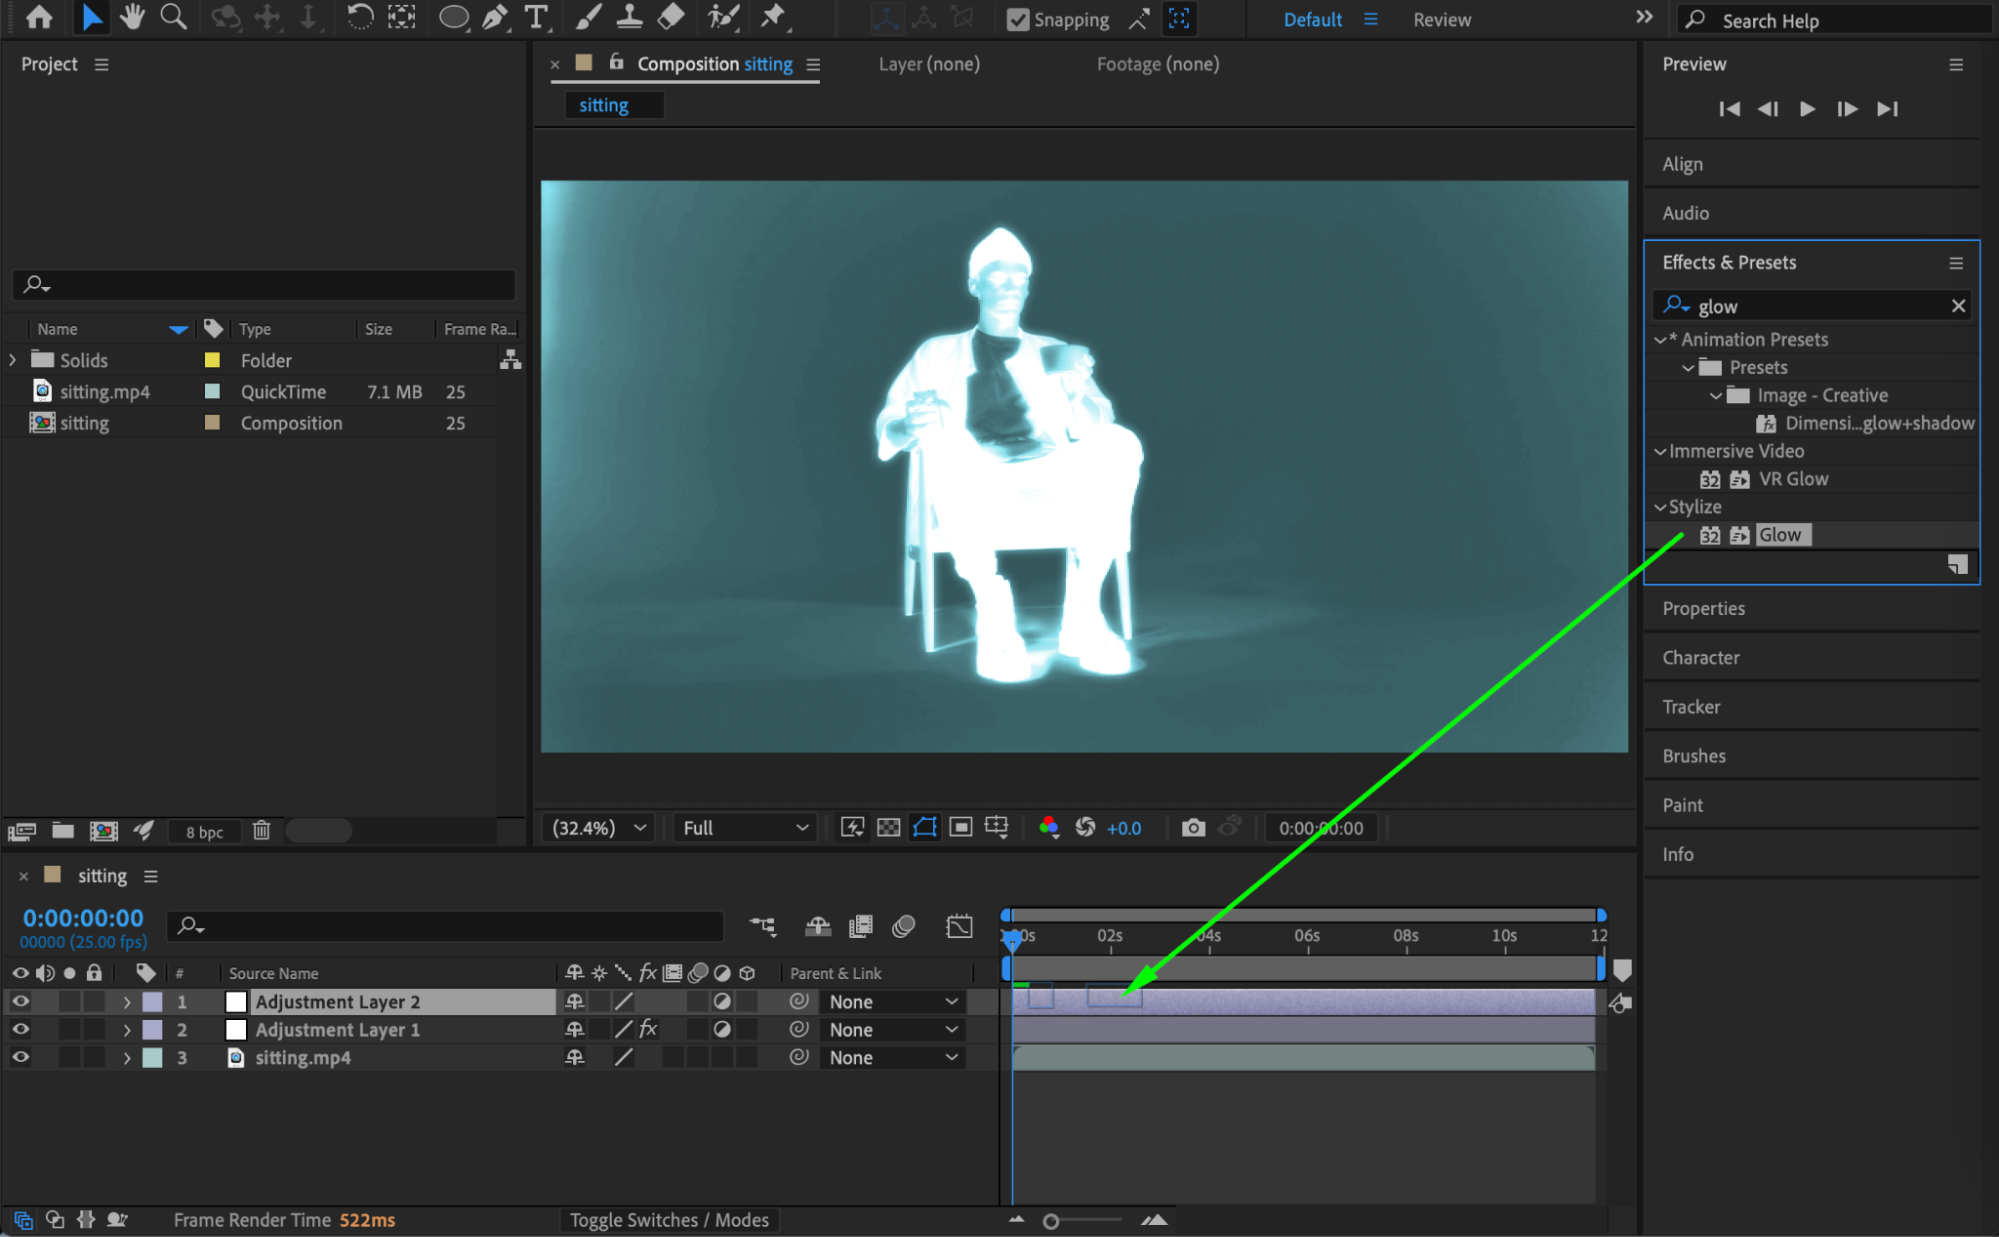
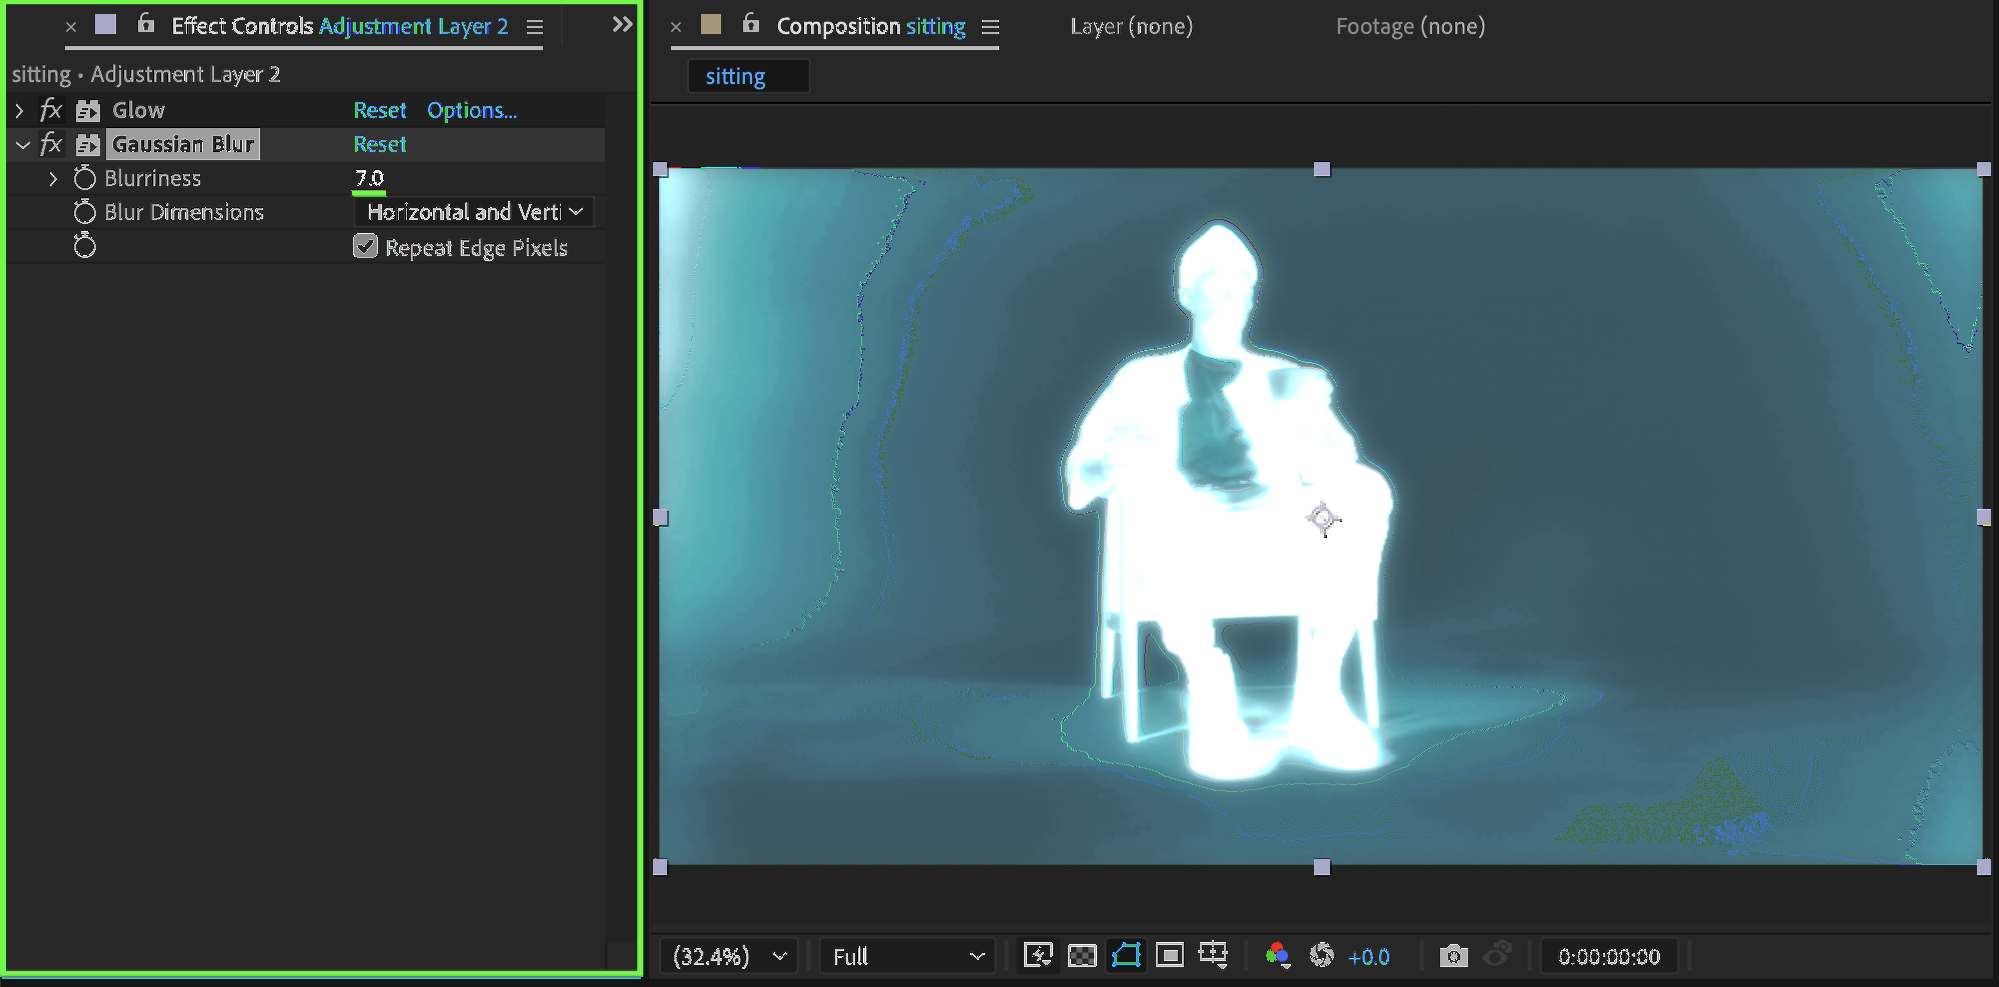
Step 11: Add Gaussian Blur
Apply Gaussian Blur:
Blurriness: 7
This softens harsh edges and blends the glow.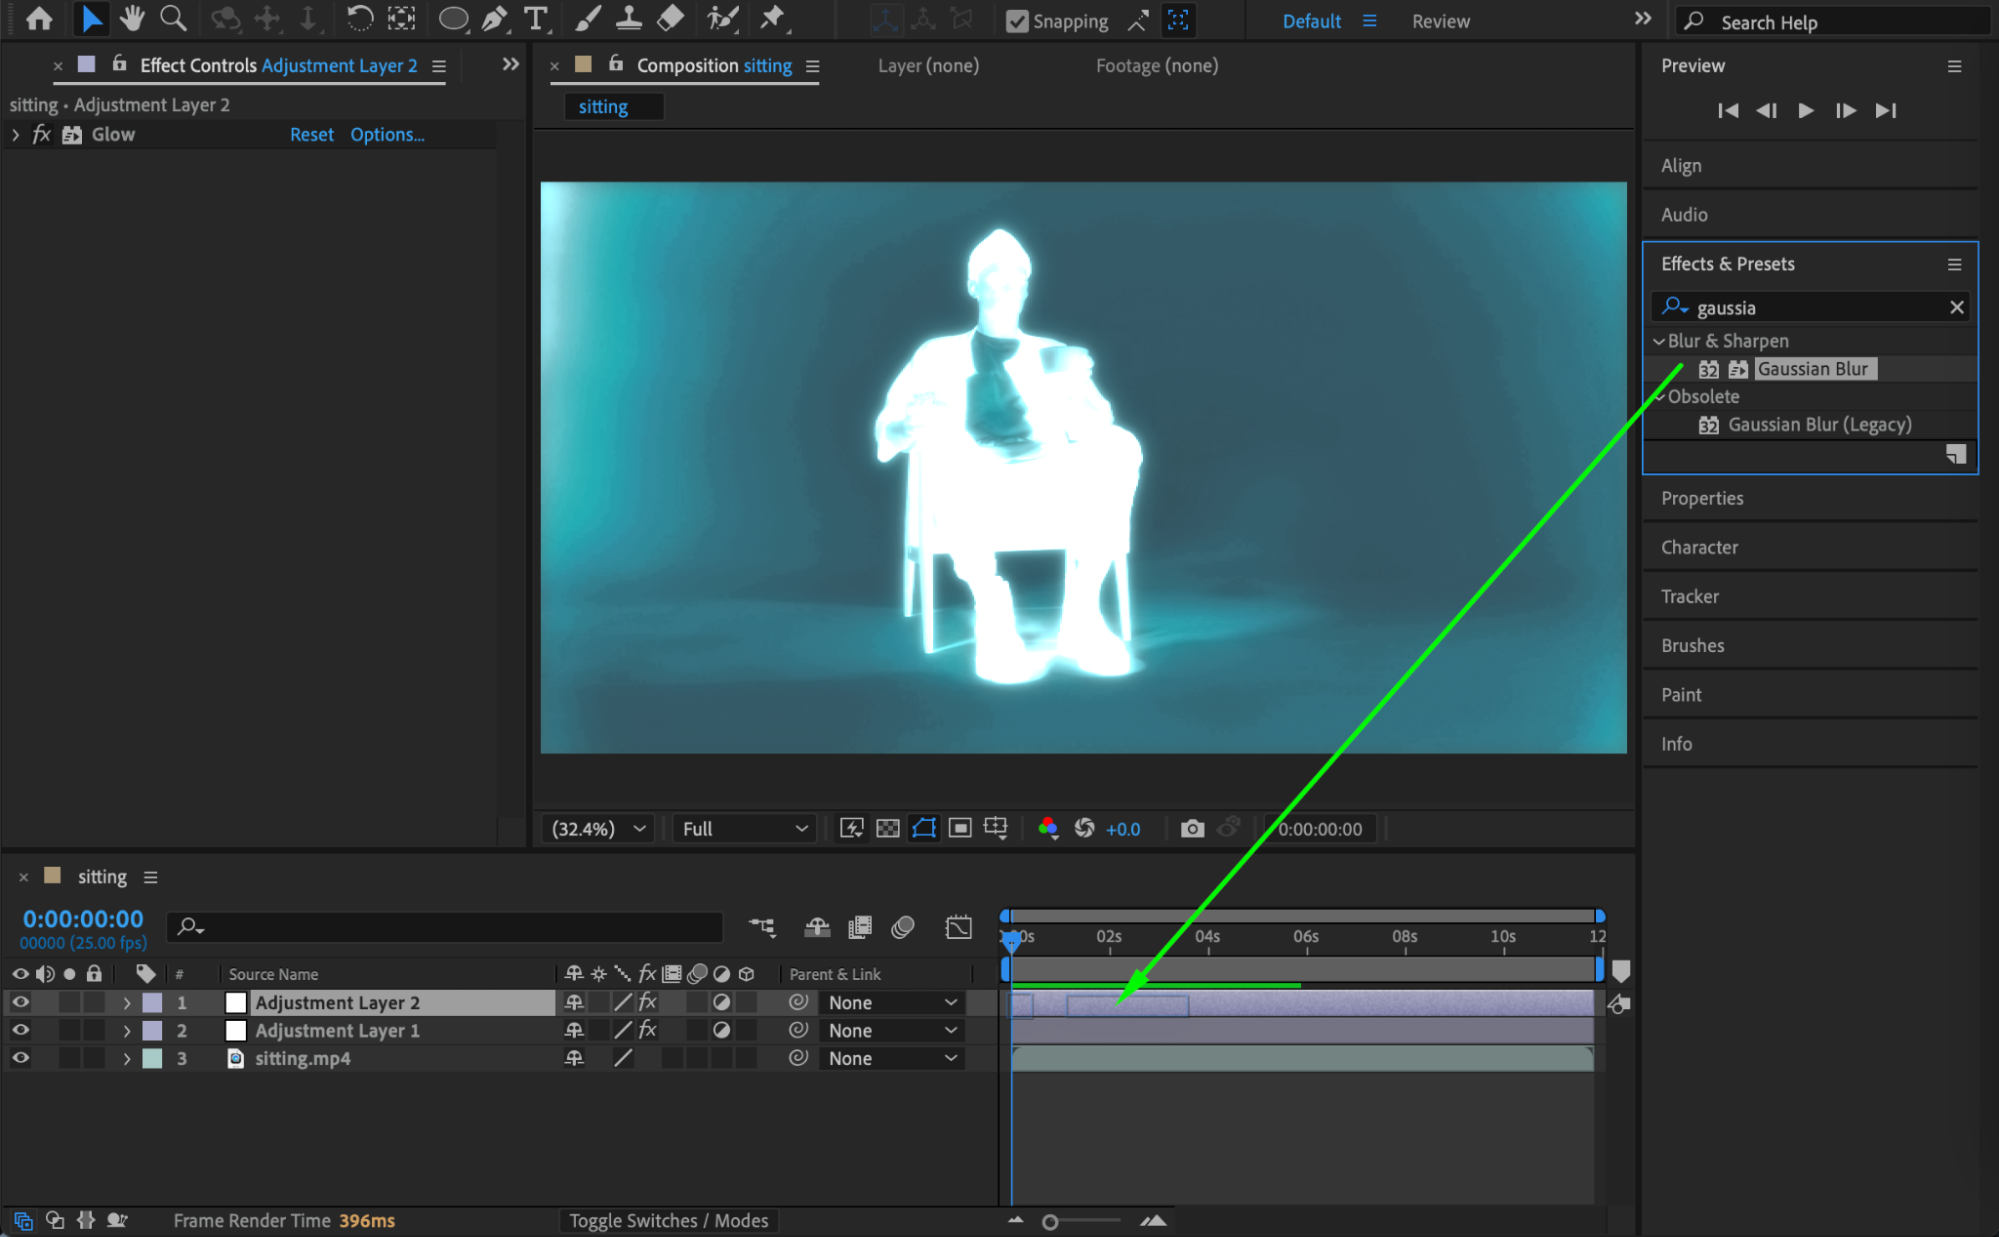
 Step 12: Add Posterize Time
Apply Posterize Time:
Frame Rate: 16
This gives the effect a scanned, slightly choppy digital feel.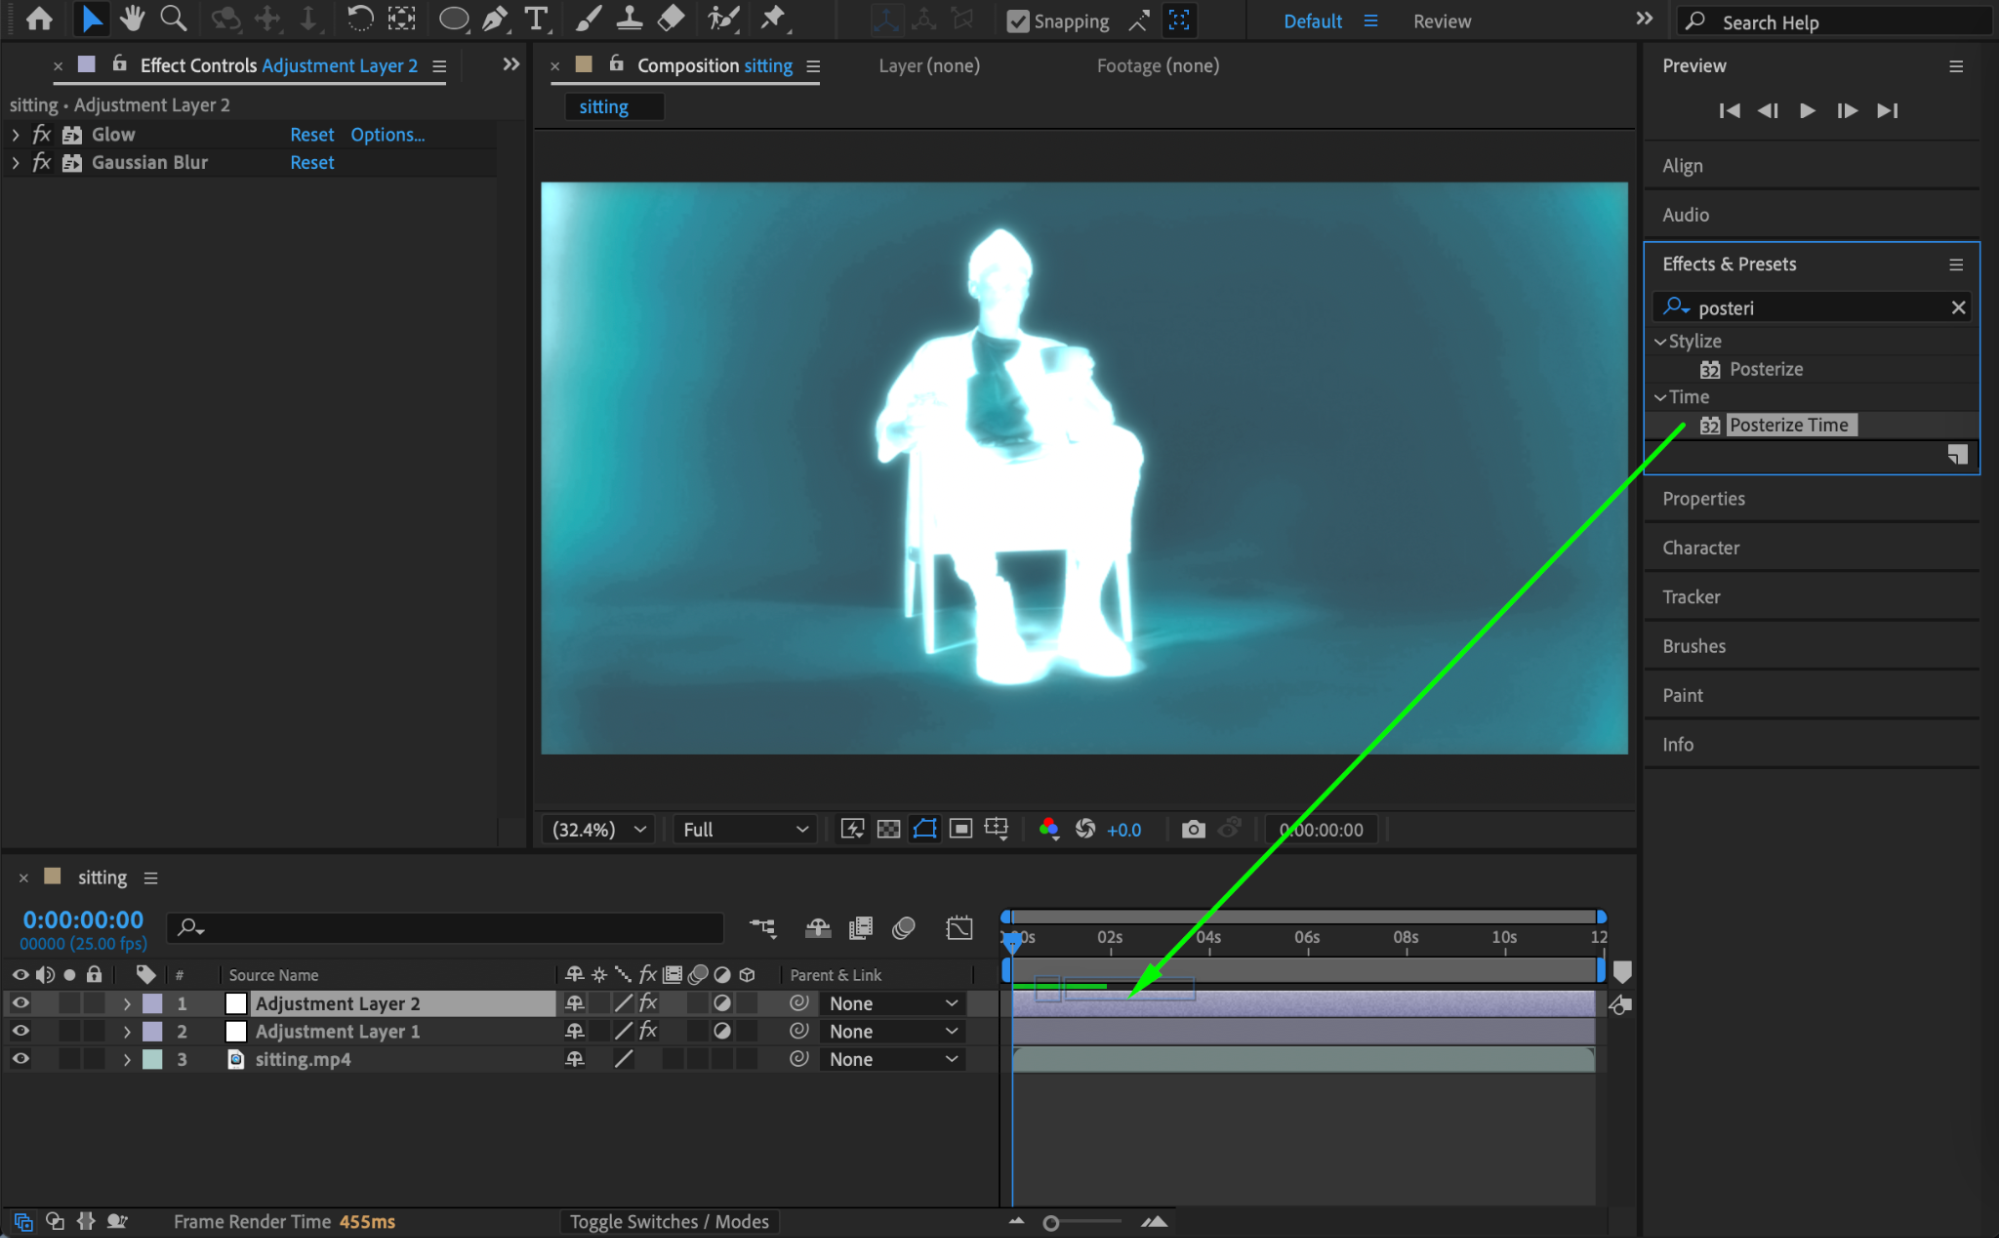
 Step 13: Create the Third Adjustment Layer
Go to Layer → New → Adjustment Layer. This layer adds texture and sharpness.
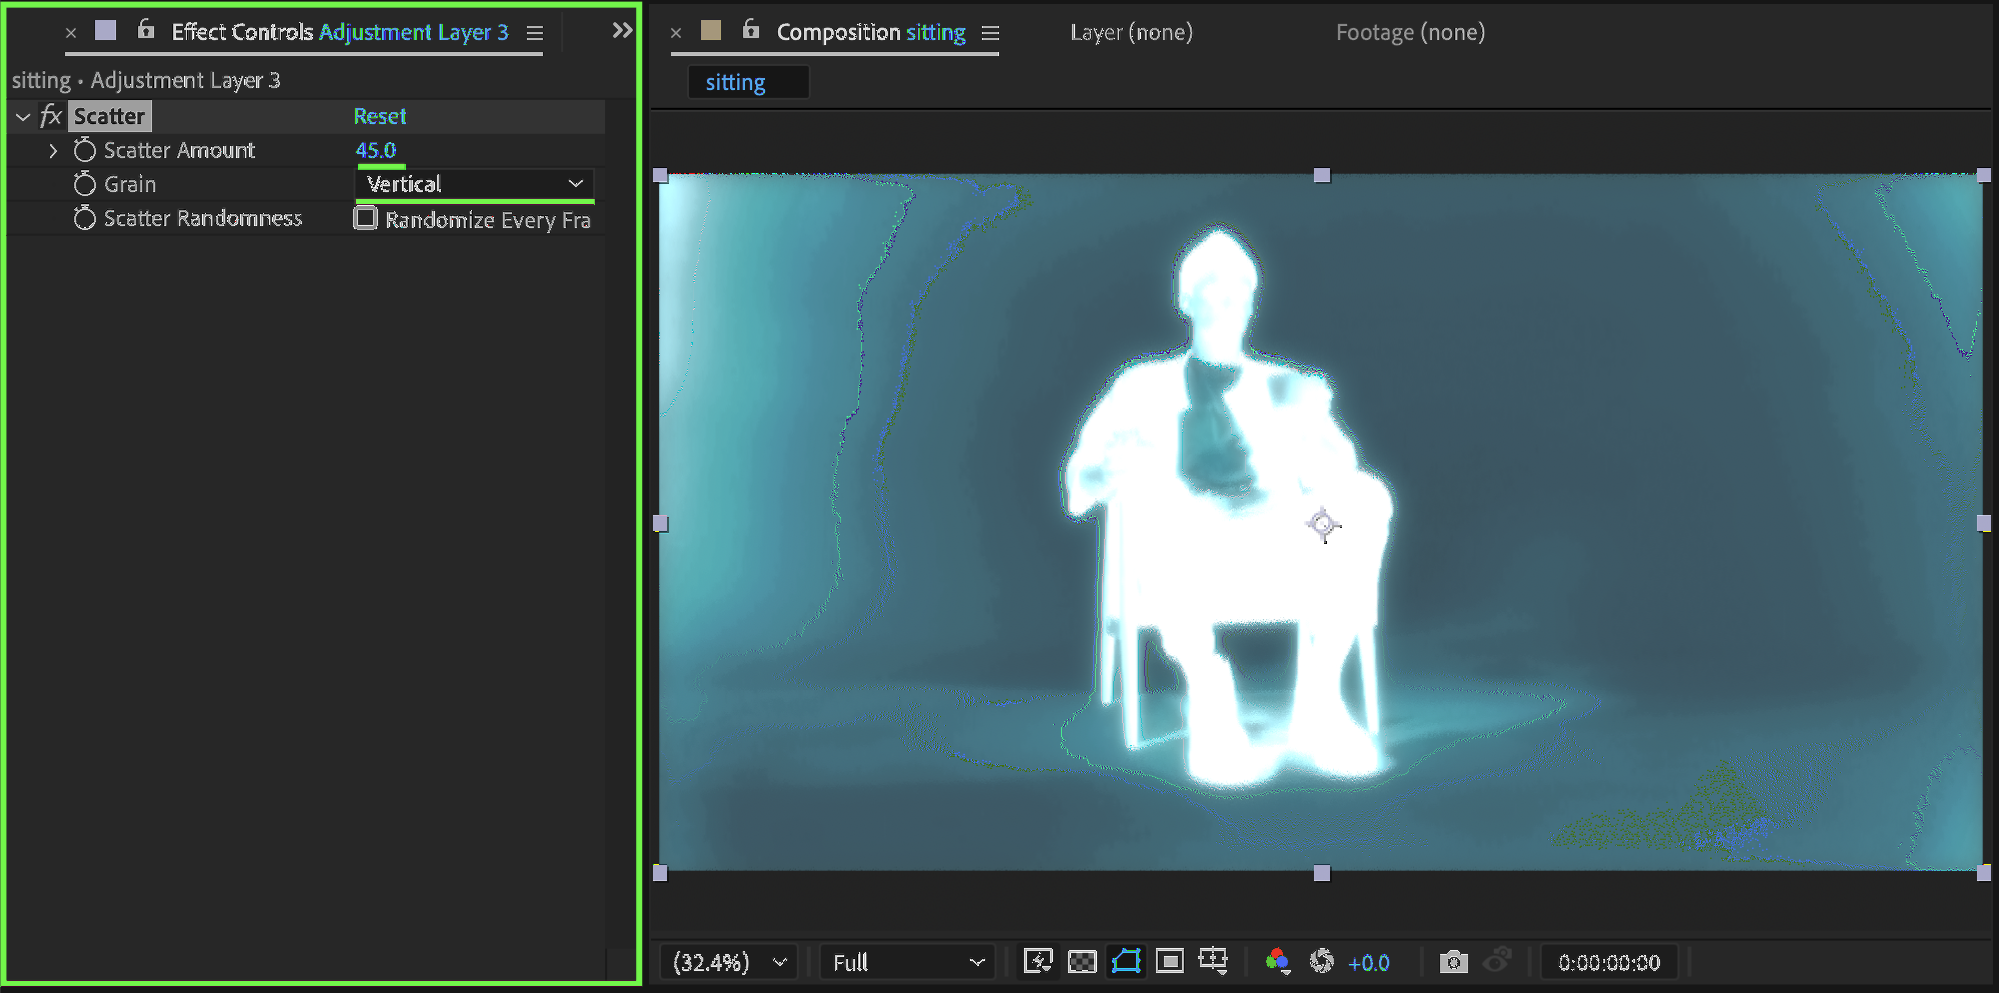
Step 14: Add Scatter
Apply Scatter:
Scatter Amount: 45
Grain: Vertical
This introduces subtle distortion and scan-line motion.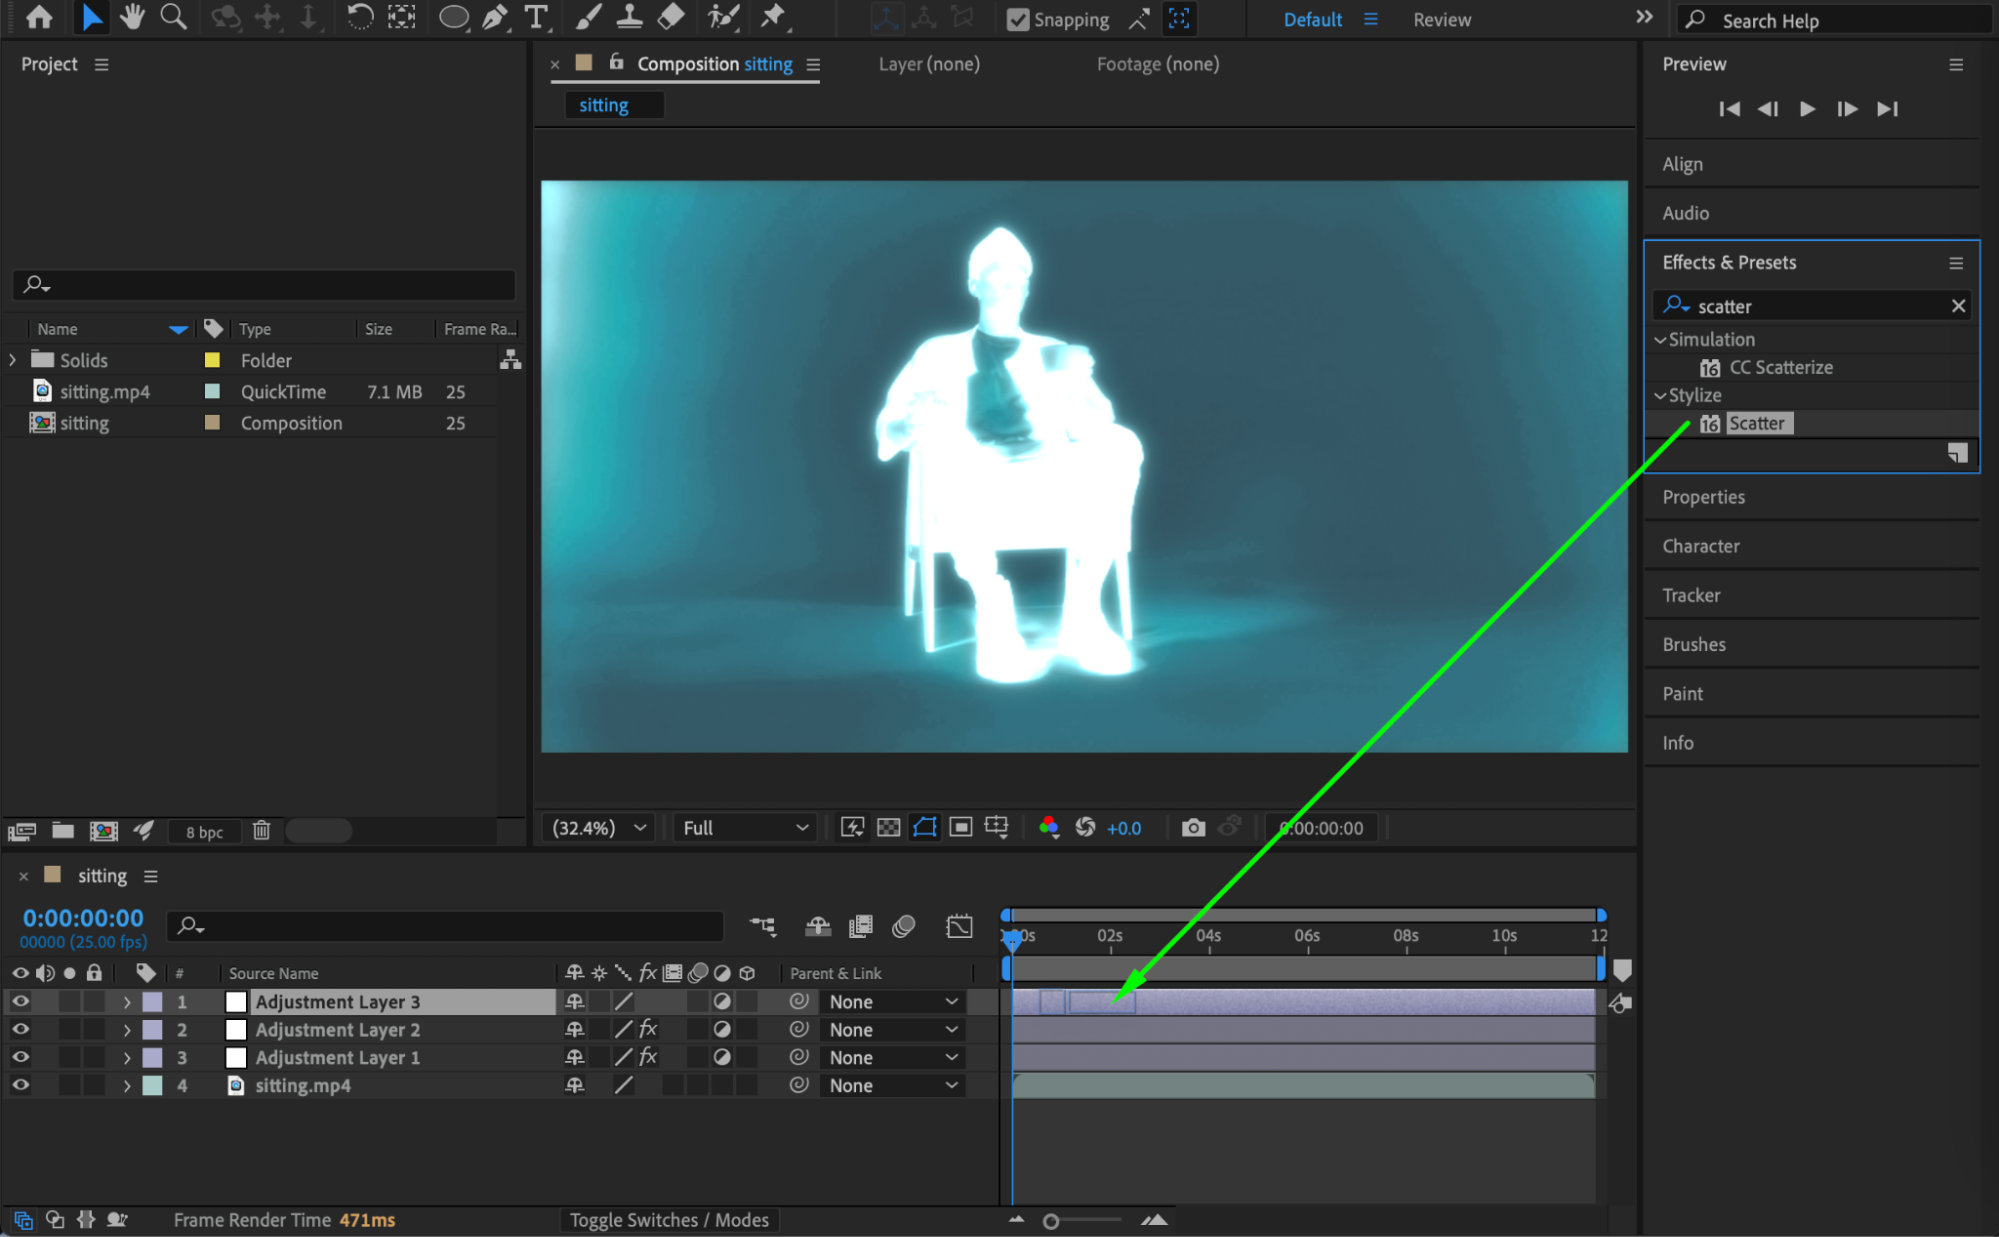
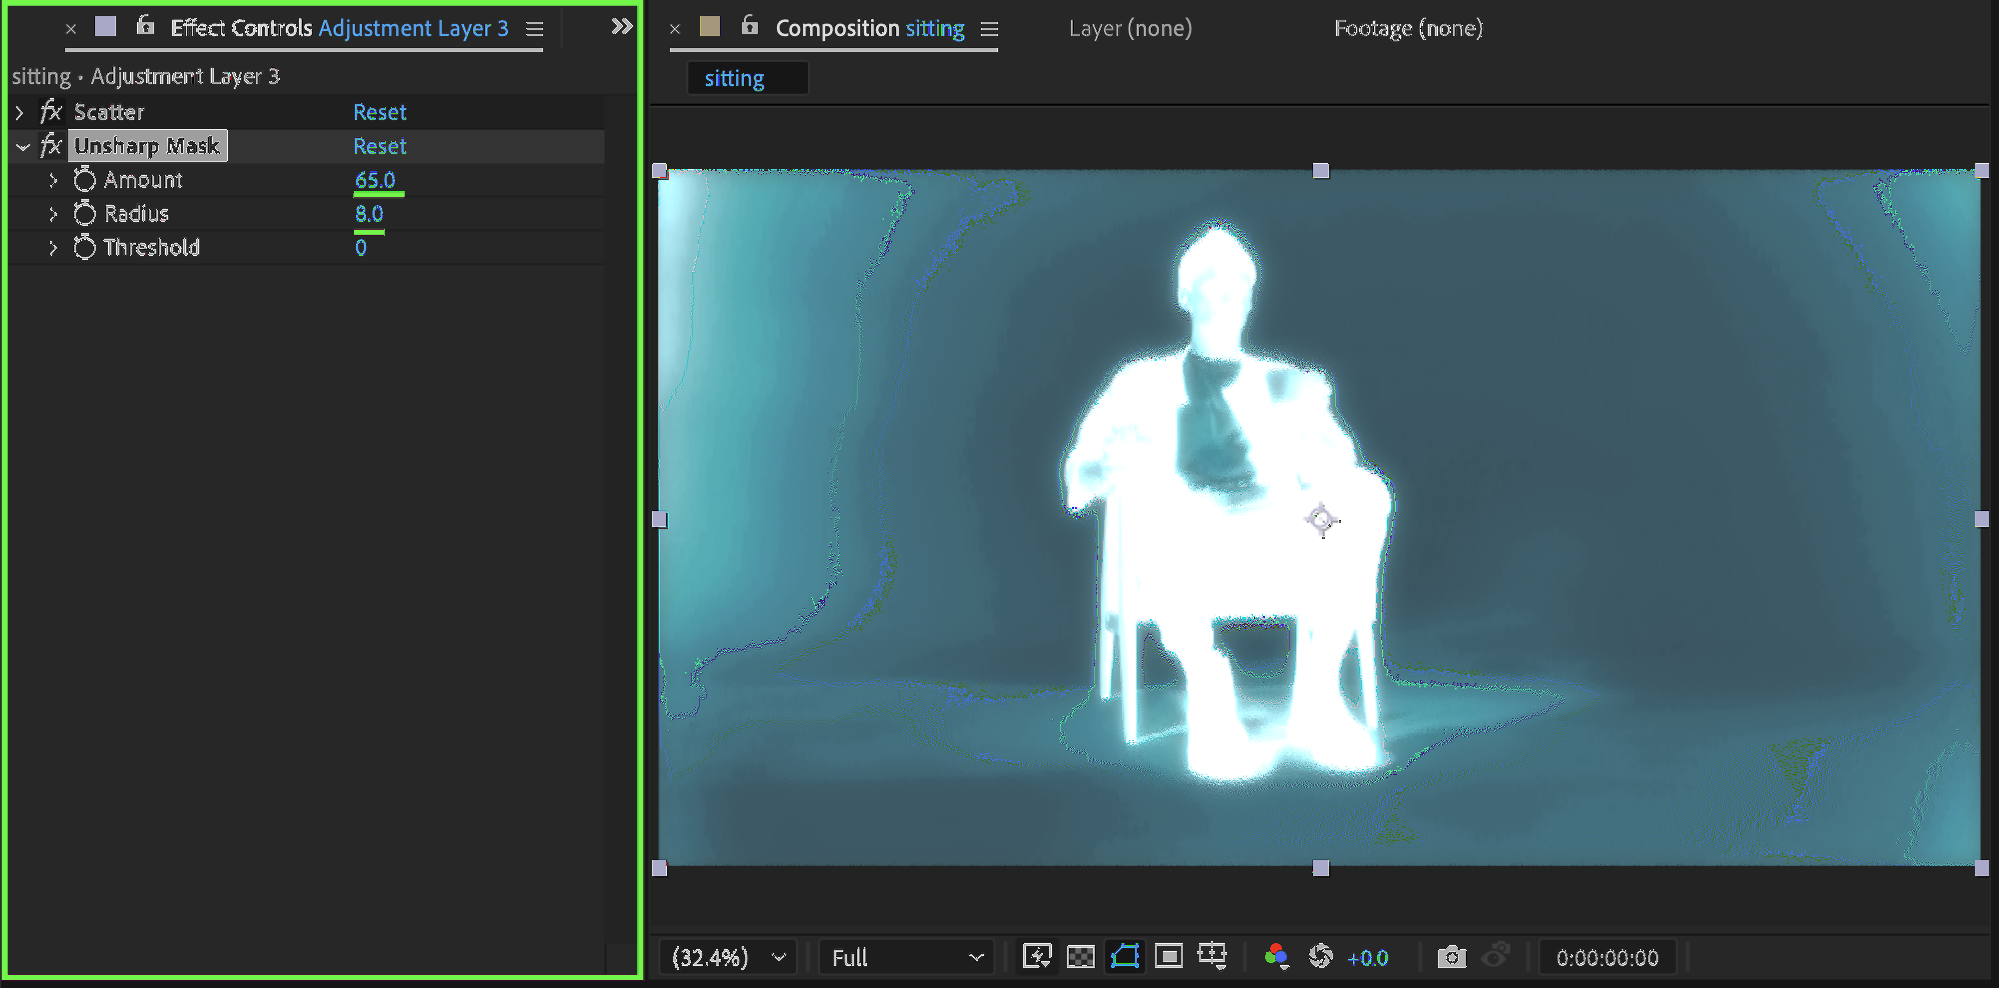
 Step 15: Sharpen with Unsharp Mask
Apply Unsharp Mask:
Amount: 65
Radius: 8
This brings back edge clarity lost during blurring.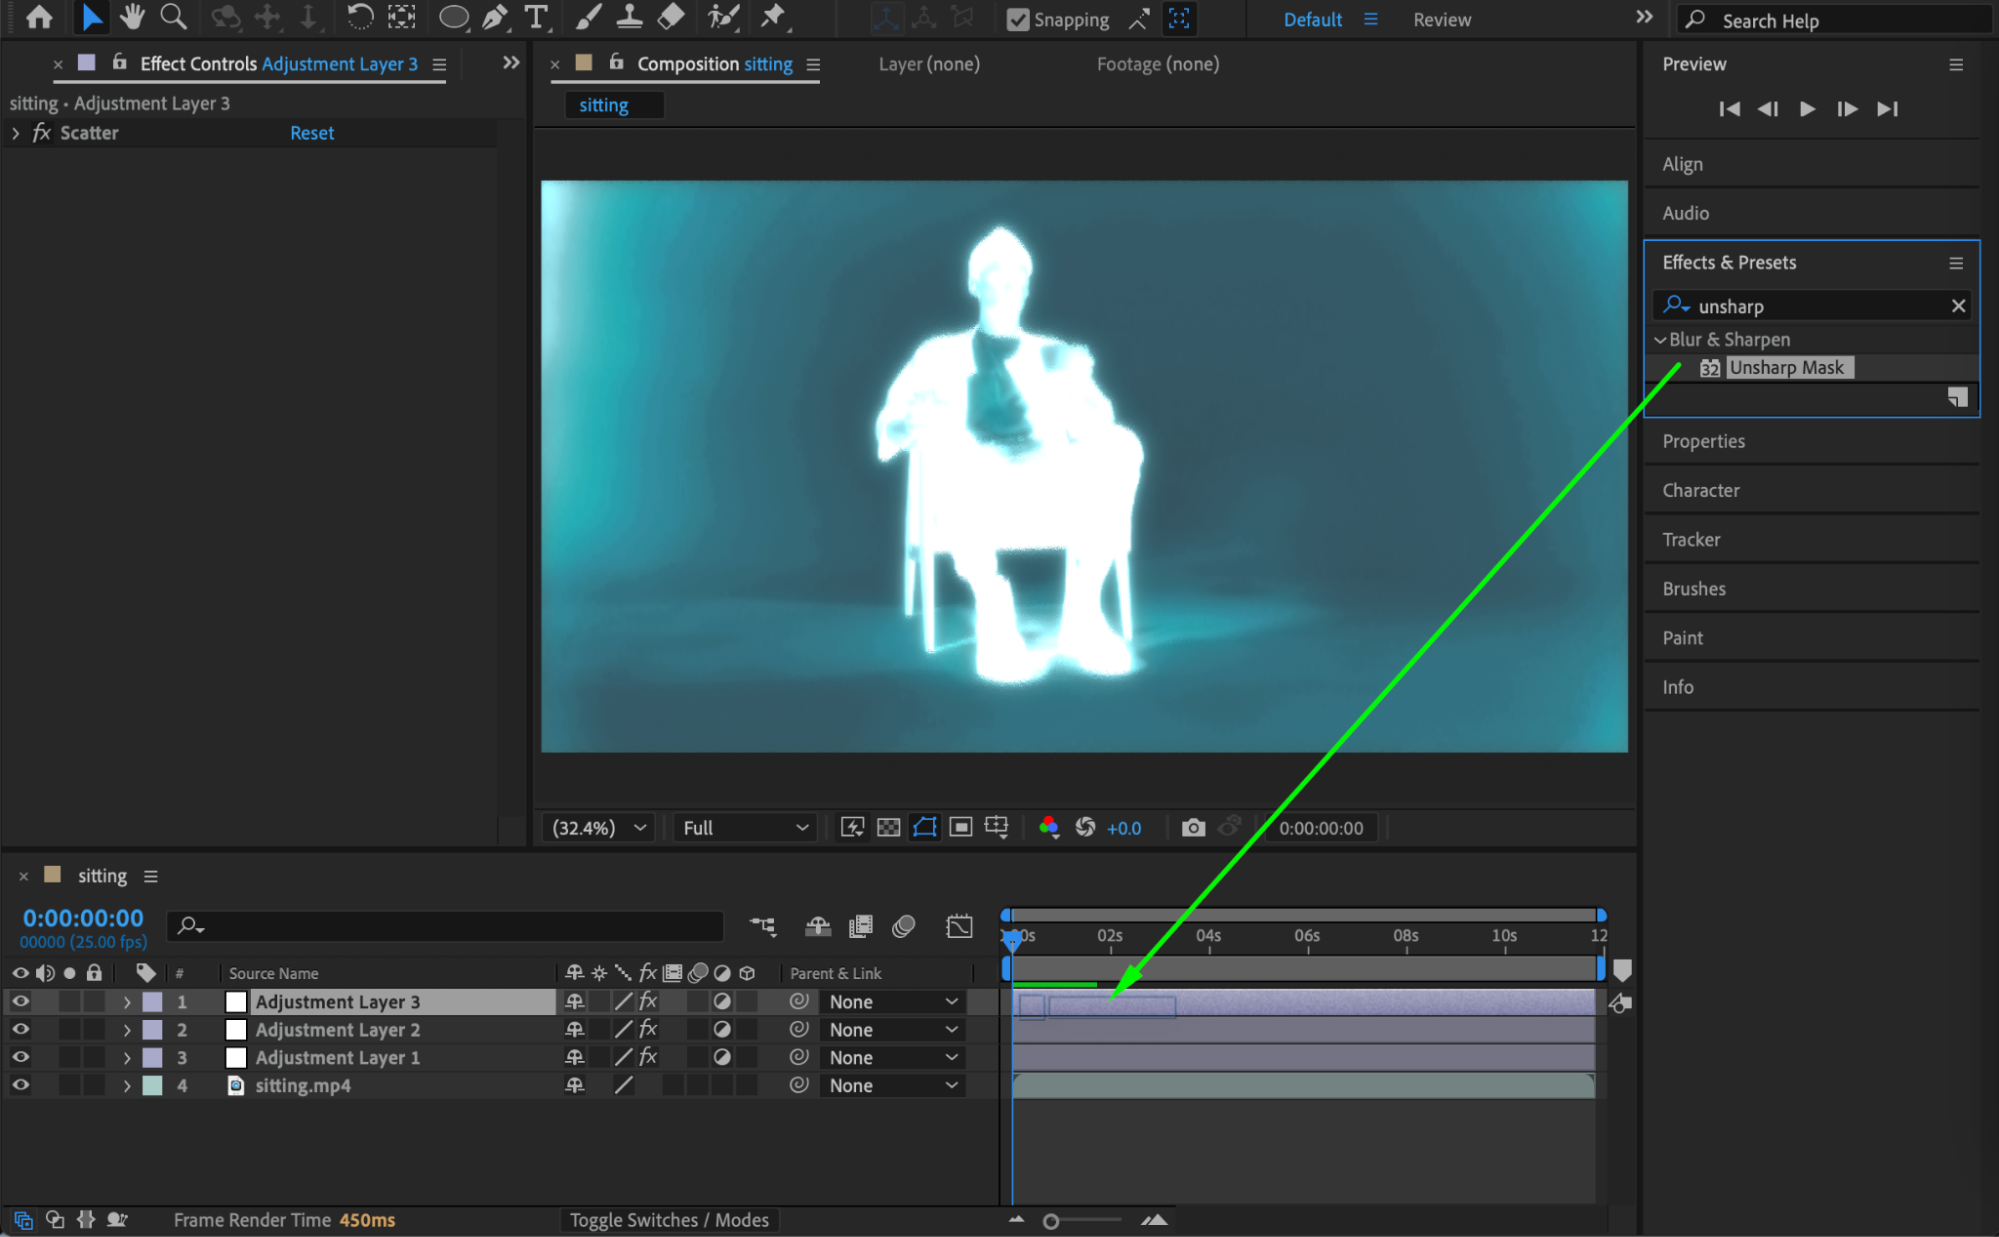
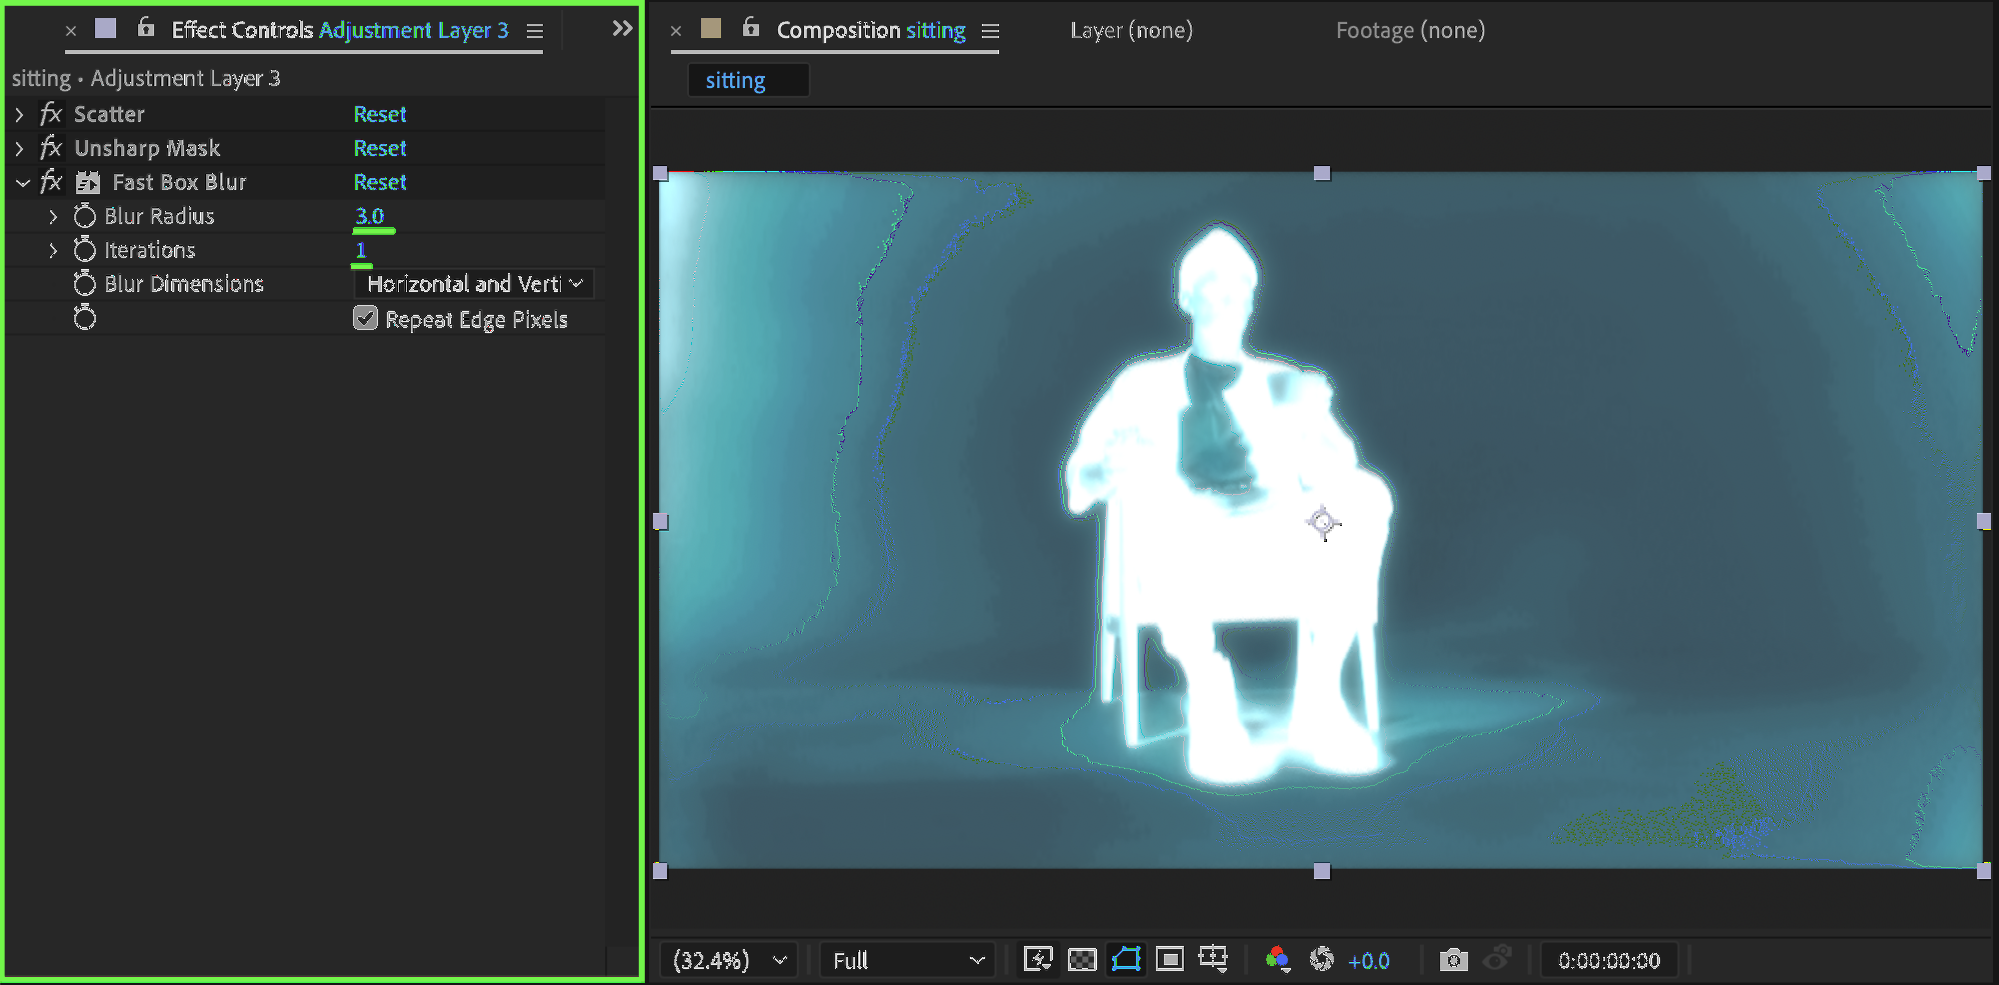
 Step 16: Add Fast Box Blur
Apply Fast Box Blur:
Blur Radius: 3
Iterations: 1
This smooths any remaining harsh transitions.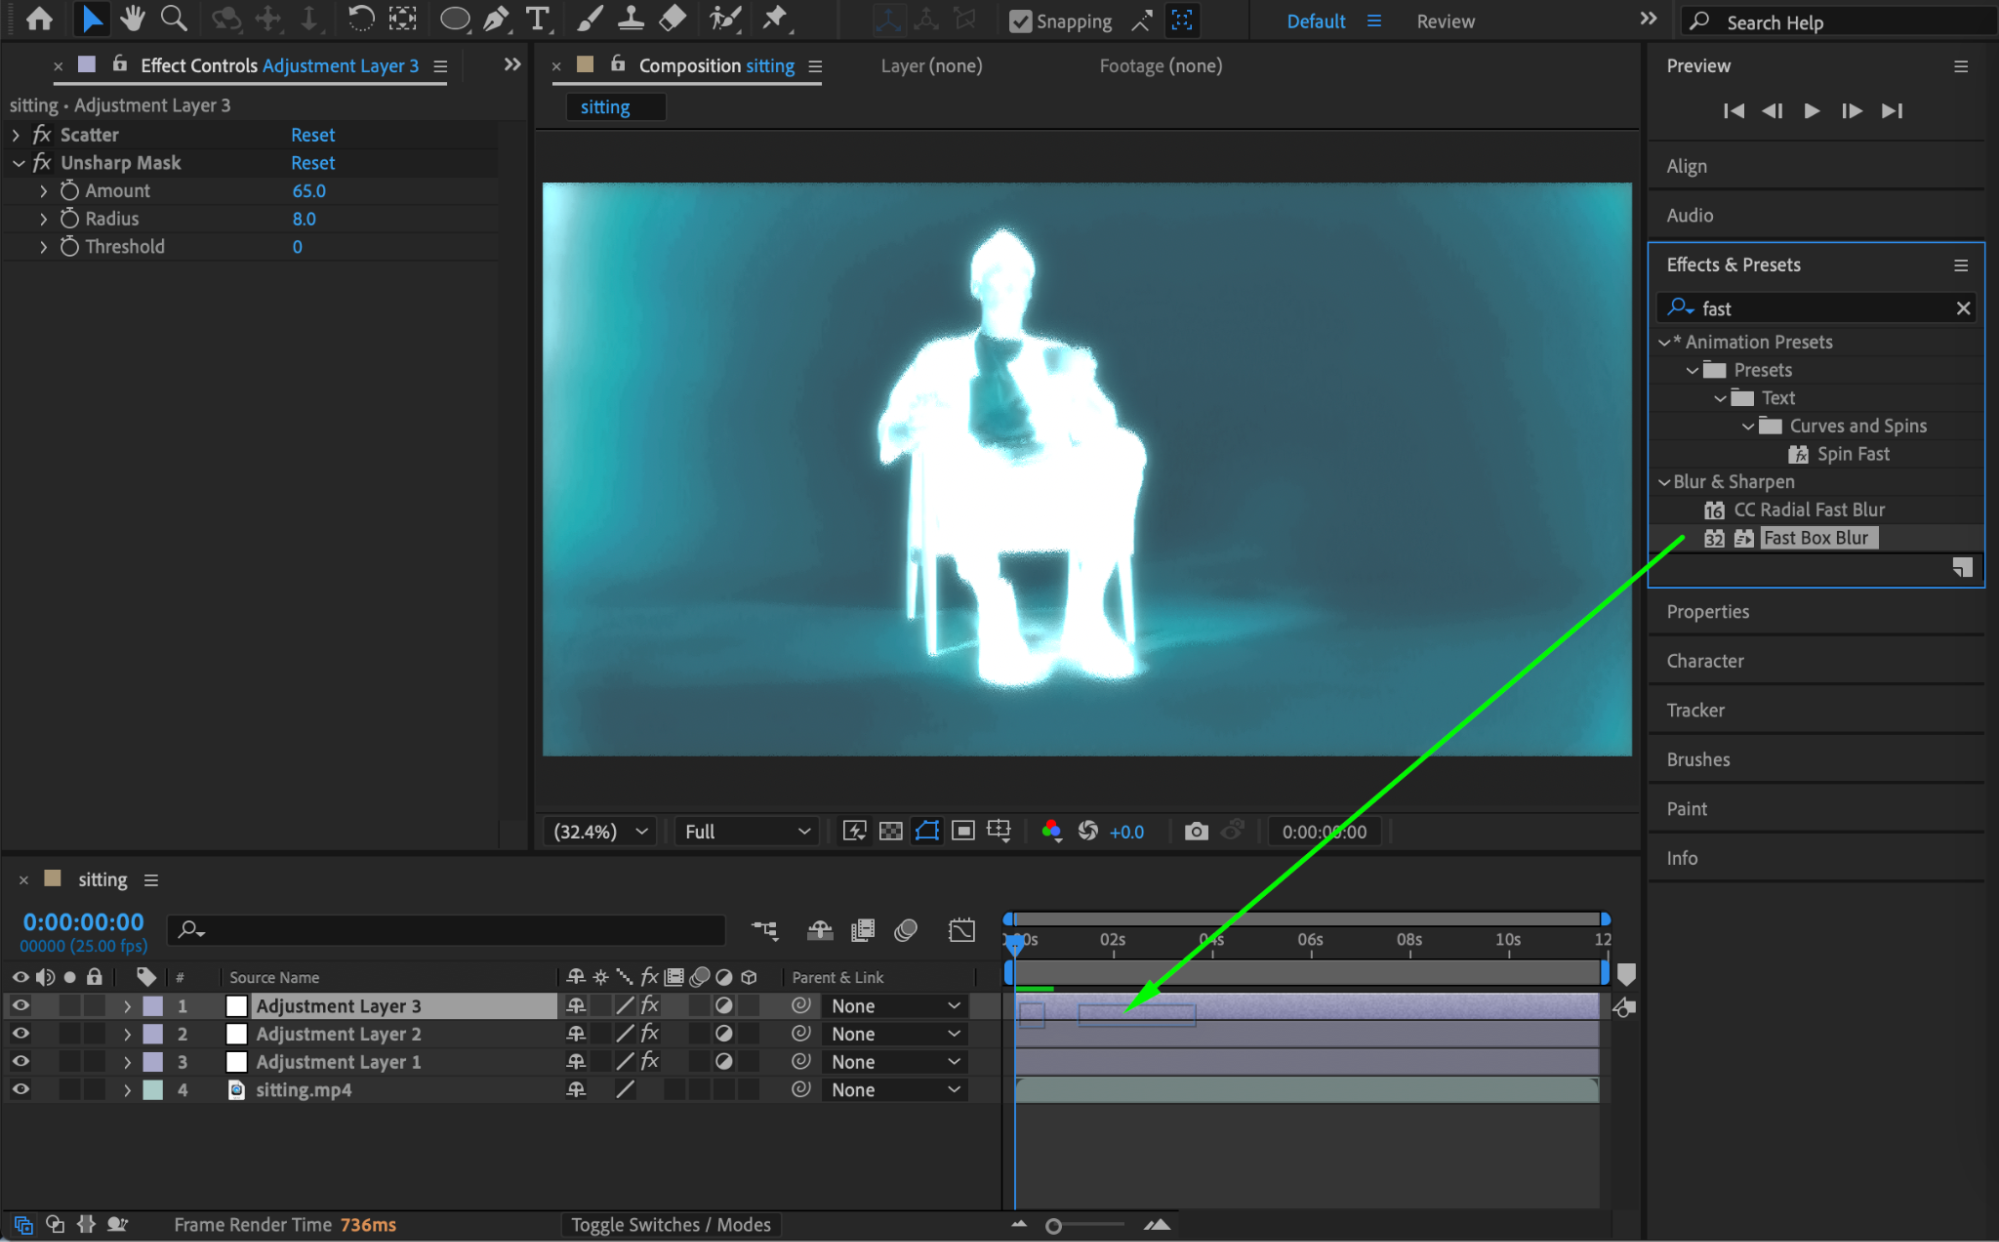
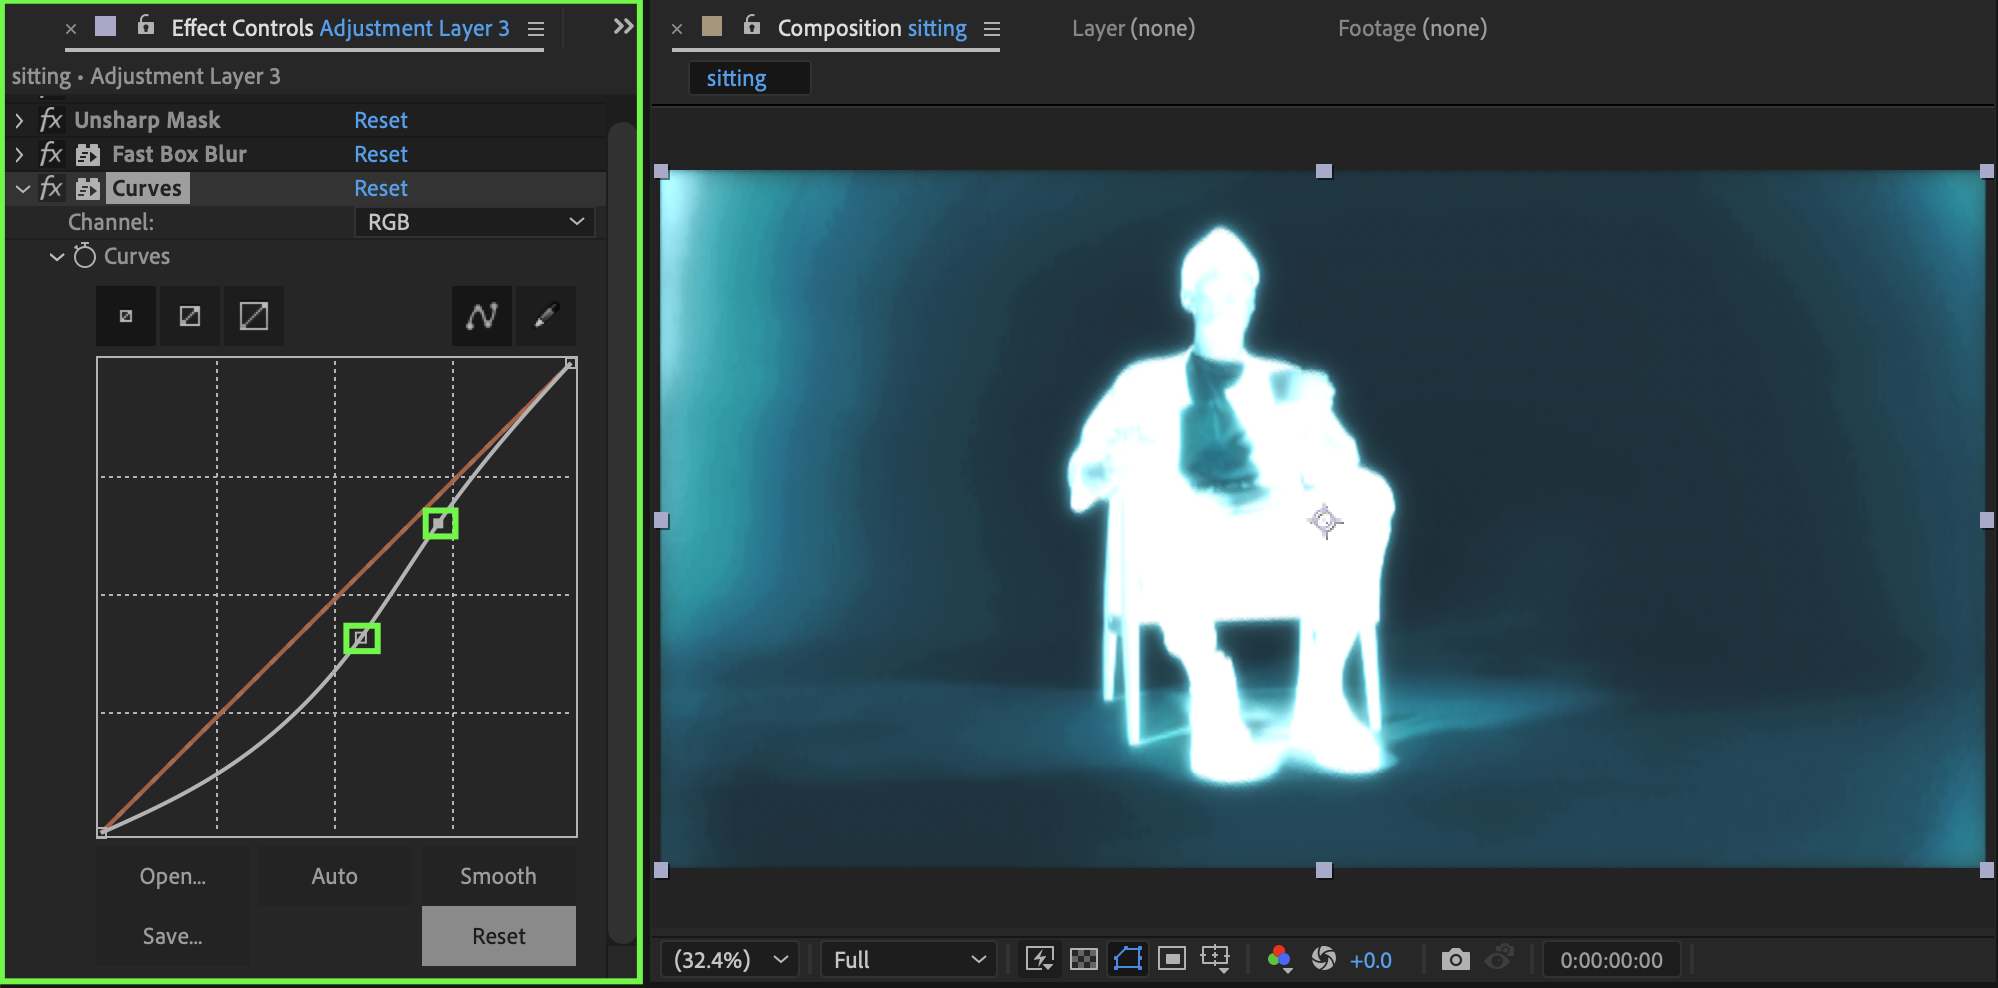
 Step 17: Fine-Tune with Curves
Apply Curves and adjust the tonal range to best suit your footage. Focus on enhancing contrast without crushing details.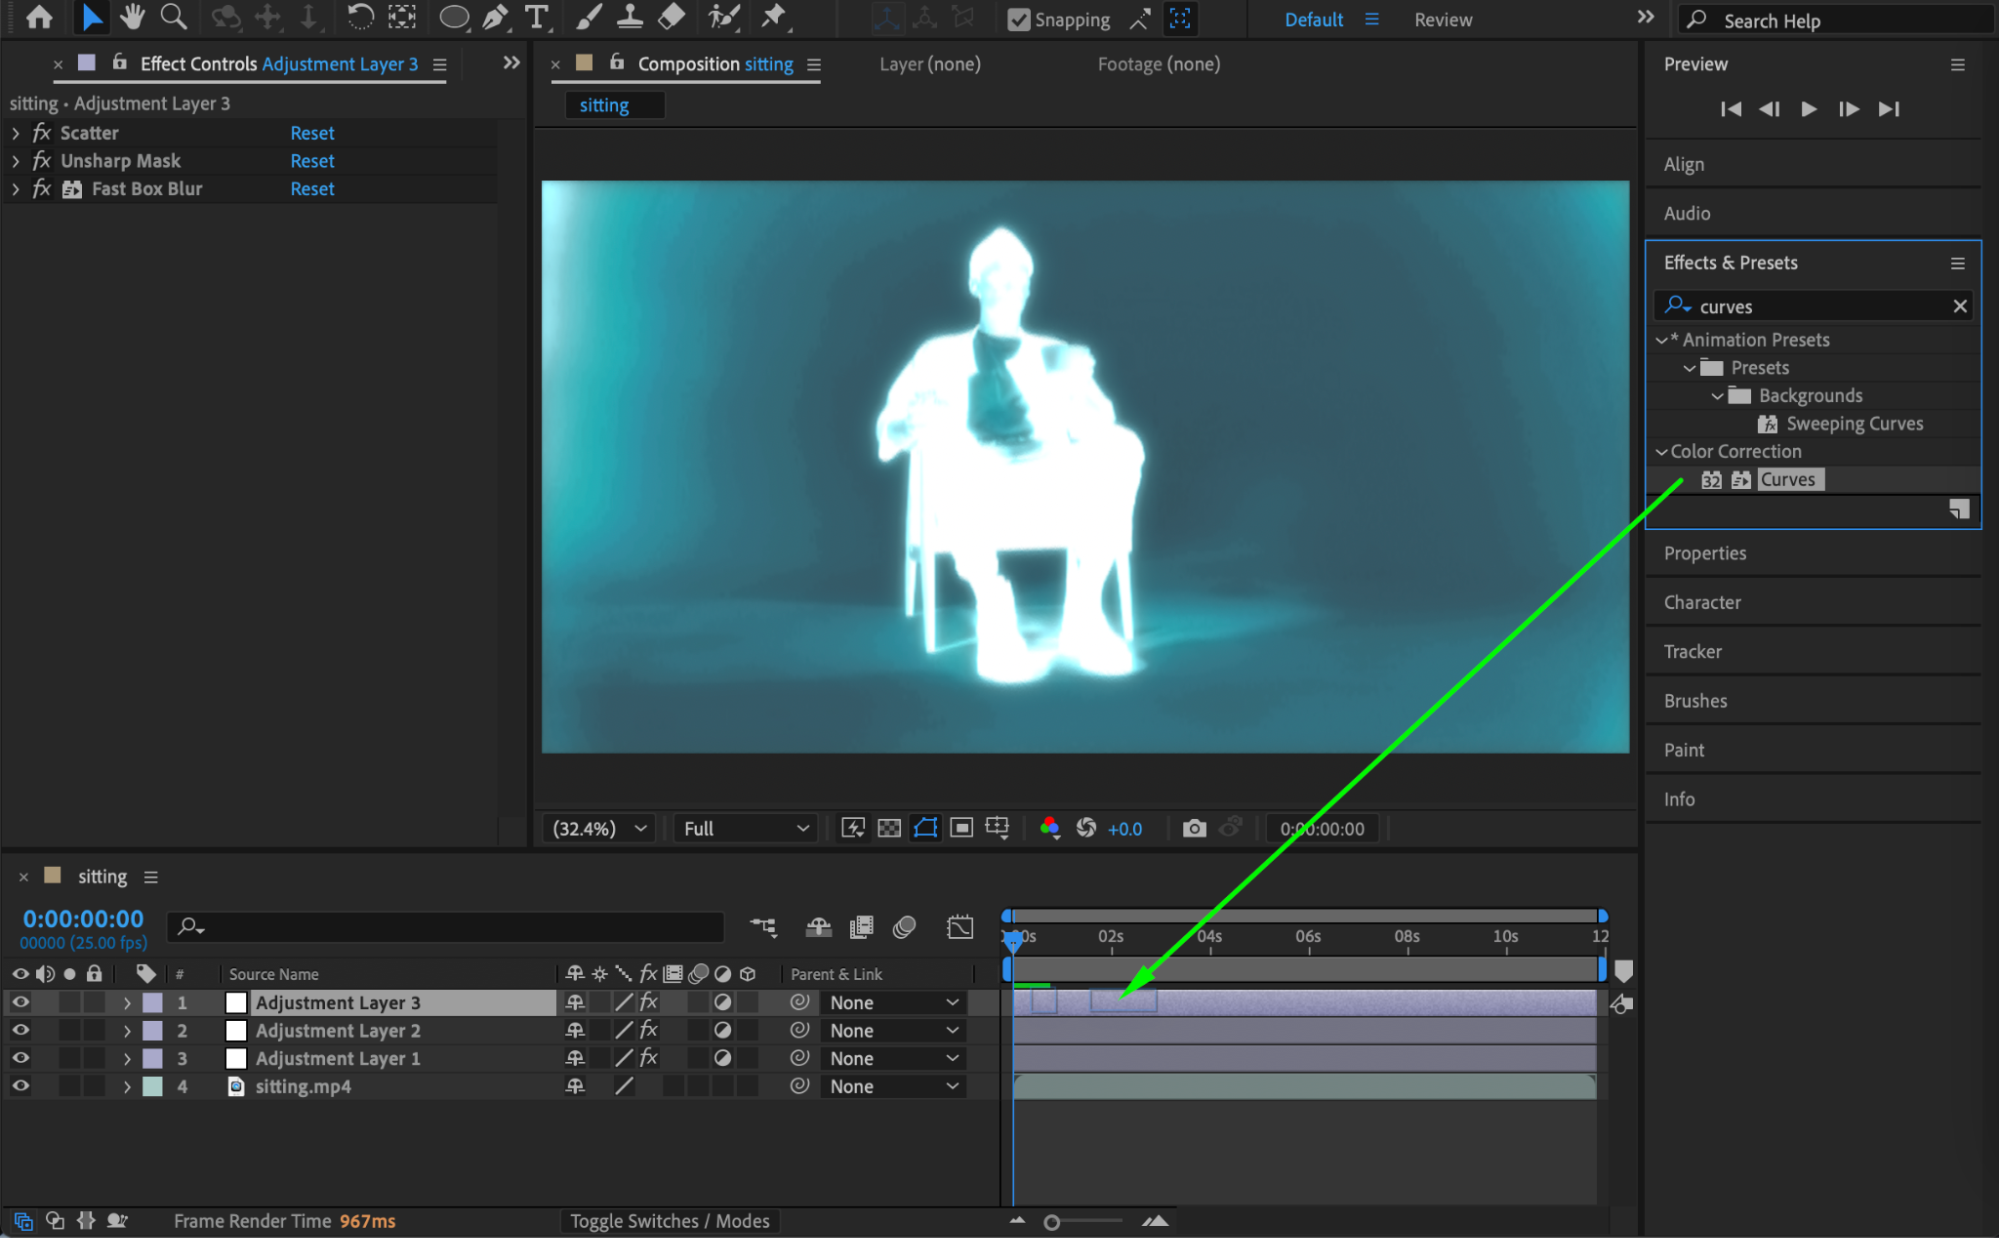
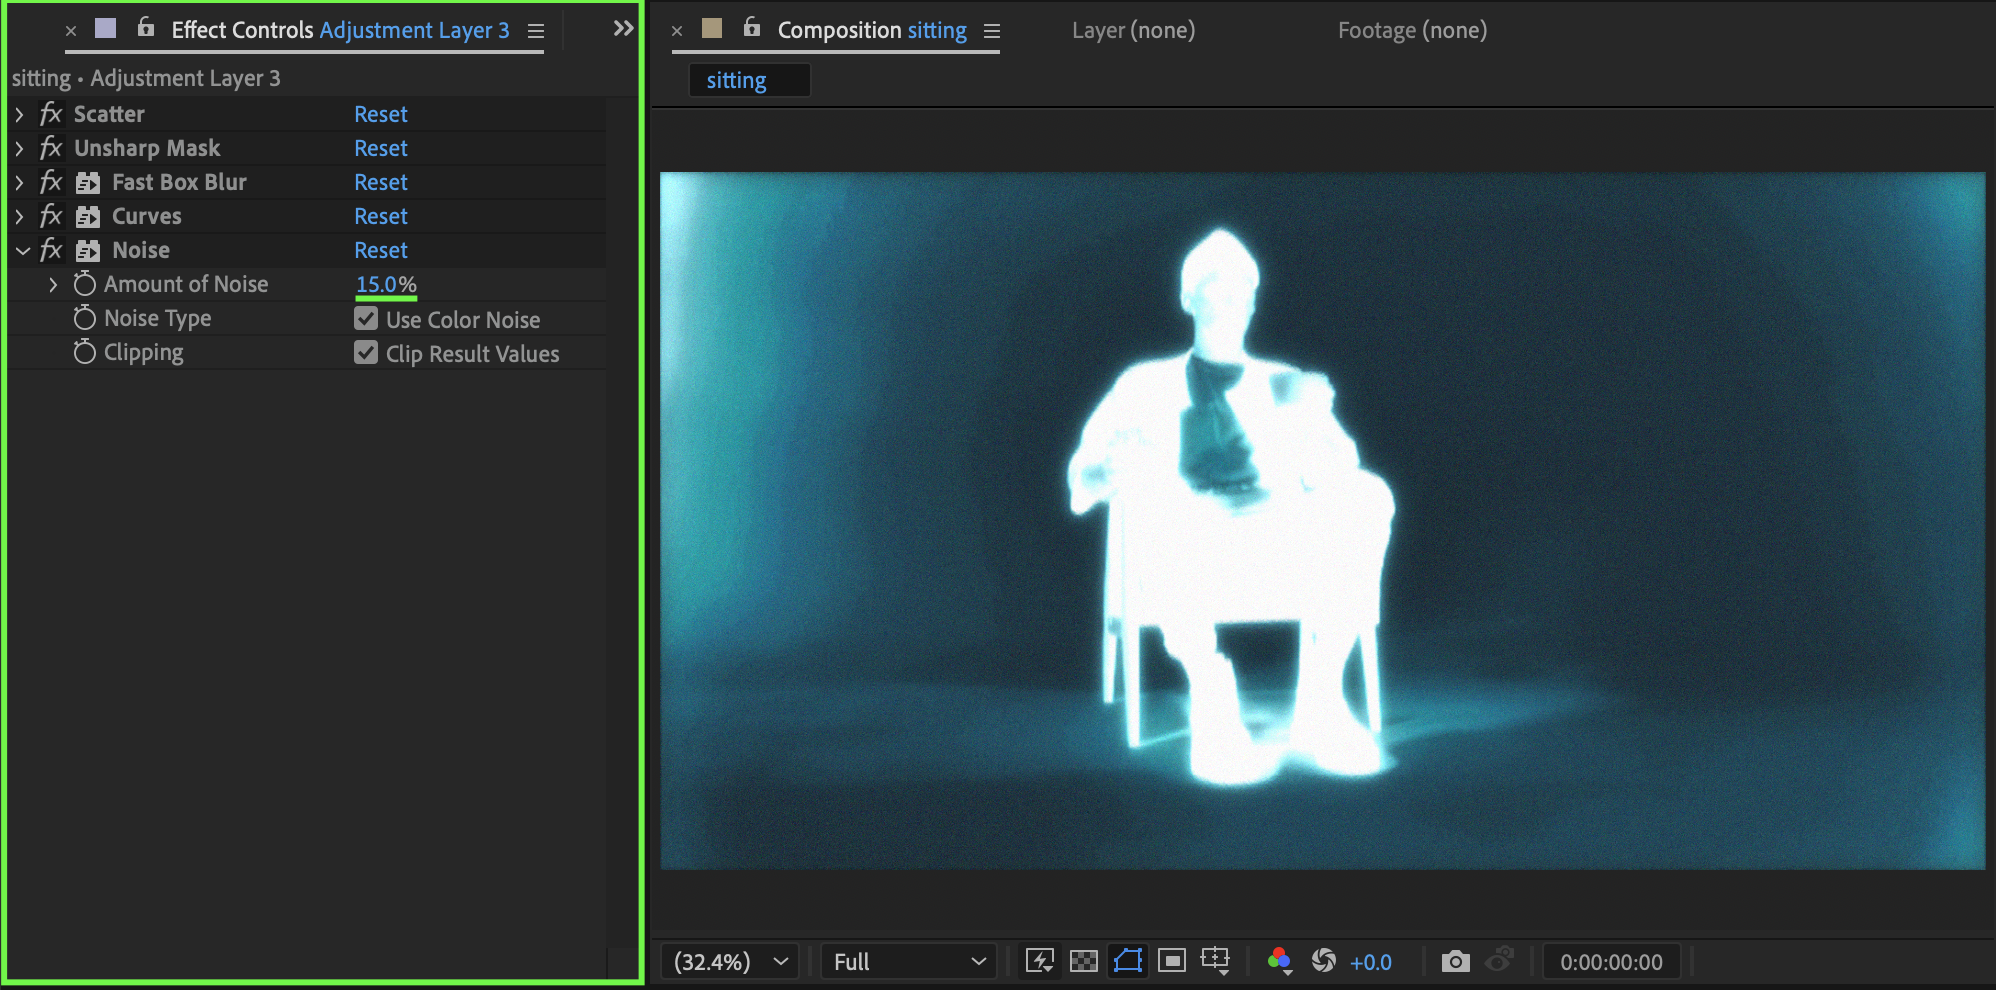
 Step 18: Add Noise
Apply the Noise effect:
Amount of Noise: 15
This adds subtle grain, making the effect feel more organic and less clean.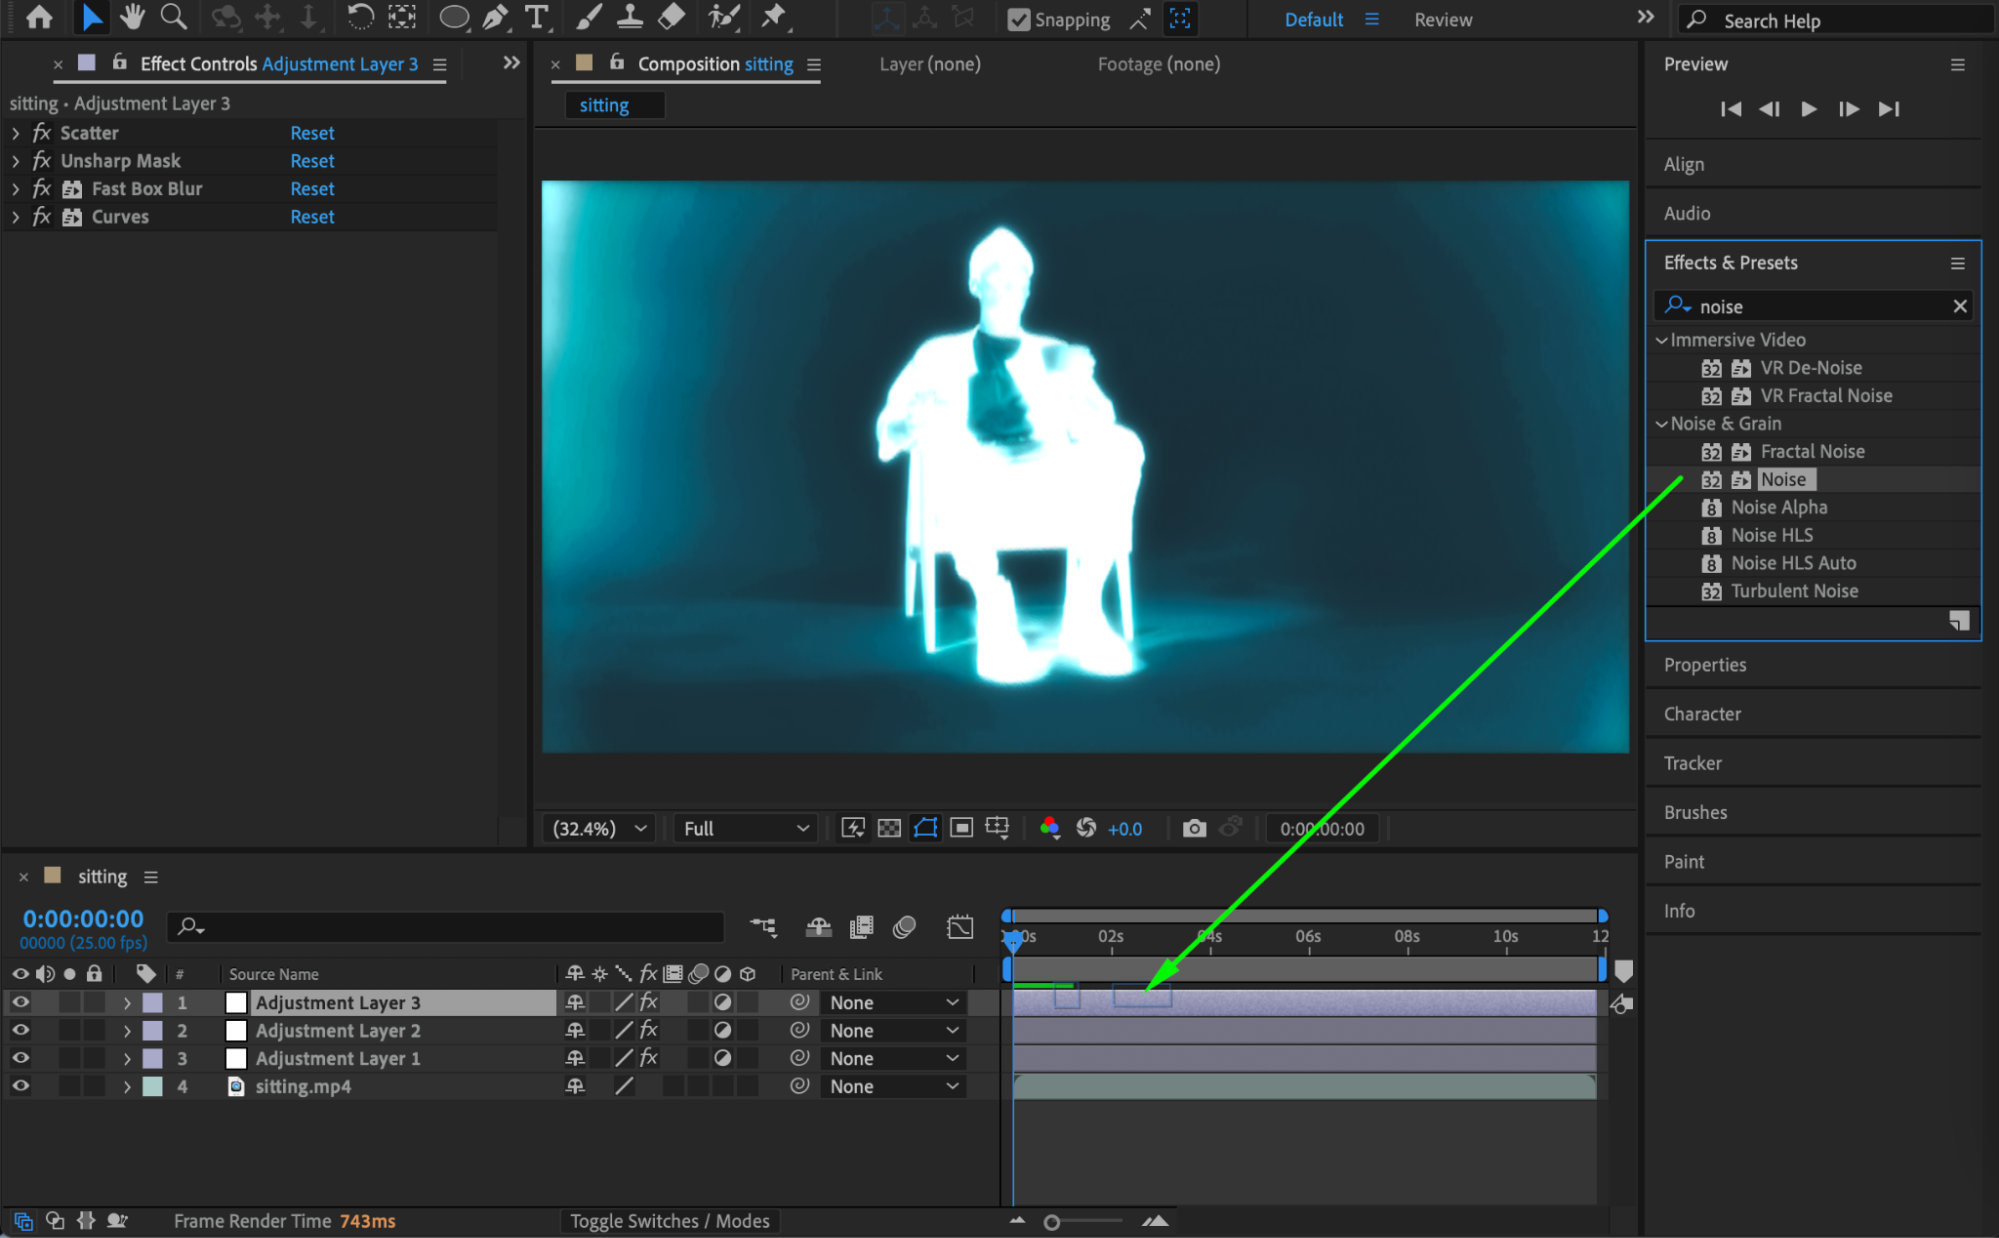
 Step 19: Preview the Result
Preview the composition and adjust glow intensity, colors, or contrast until the X-ray effect matches your desired style.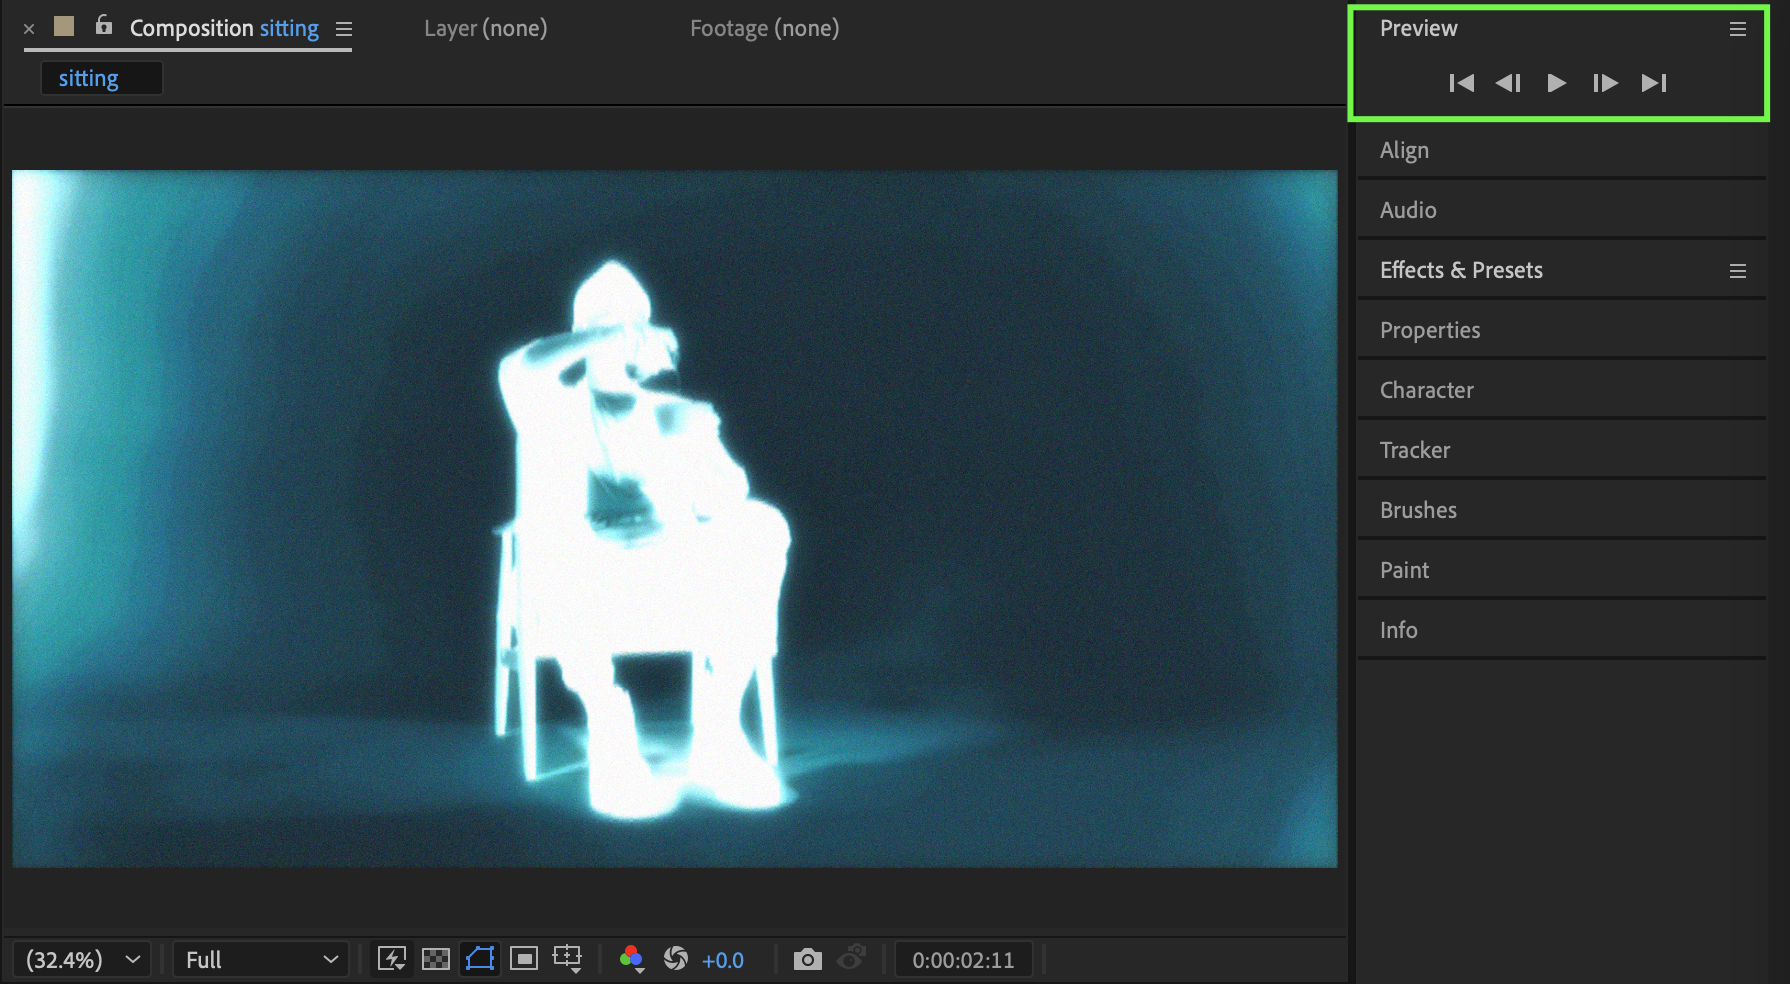
Conclusion
By stacking multiple adjustment layers with carefully chosen effects, you can create a convincing X-ray effect entirely inside After Effects. This technique is flexible, non-destructive, and easy to customize for sci-fi visuals, medical animations, or futuristic motion graphics.
Our Bestsellers

