Introduction
Elastic or springy motion adds life and personality to animations. It’s commonly used in UI animations, kinetic typography, and motion graphics to make movement feel more dynamic and natural. In this tutorial, you’ll learn how to simulate elastic movement in After Effects using Position keyframes, separated dimensions, and value graph manipulation — without expressions.
Step 1: Open Your Project
Open your project and select the layer you want to animate, for example, a shape layer. Step 2: Center the Anchor Point
Right-click on the layer and choose: Transform → Center Anchor Point in Layer Content. This ensures the motion behaves evenly and predictably.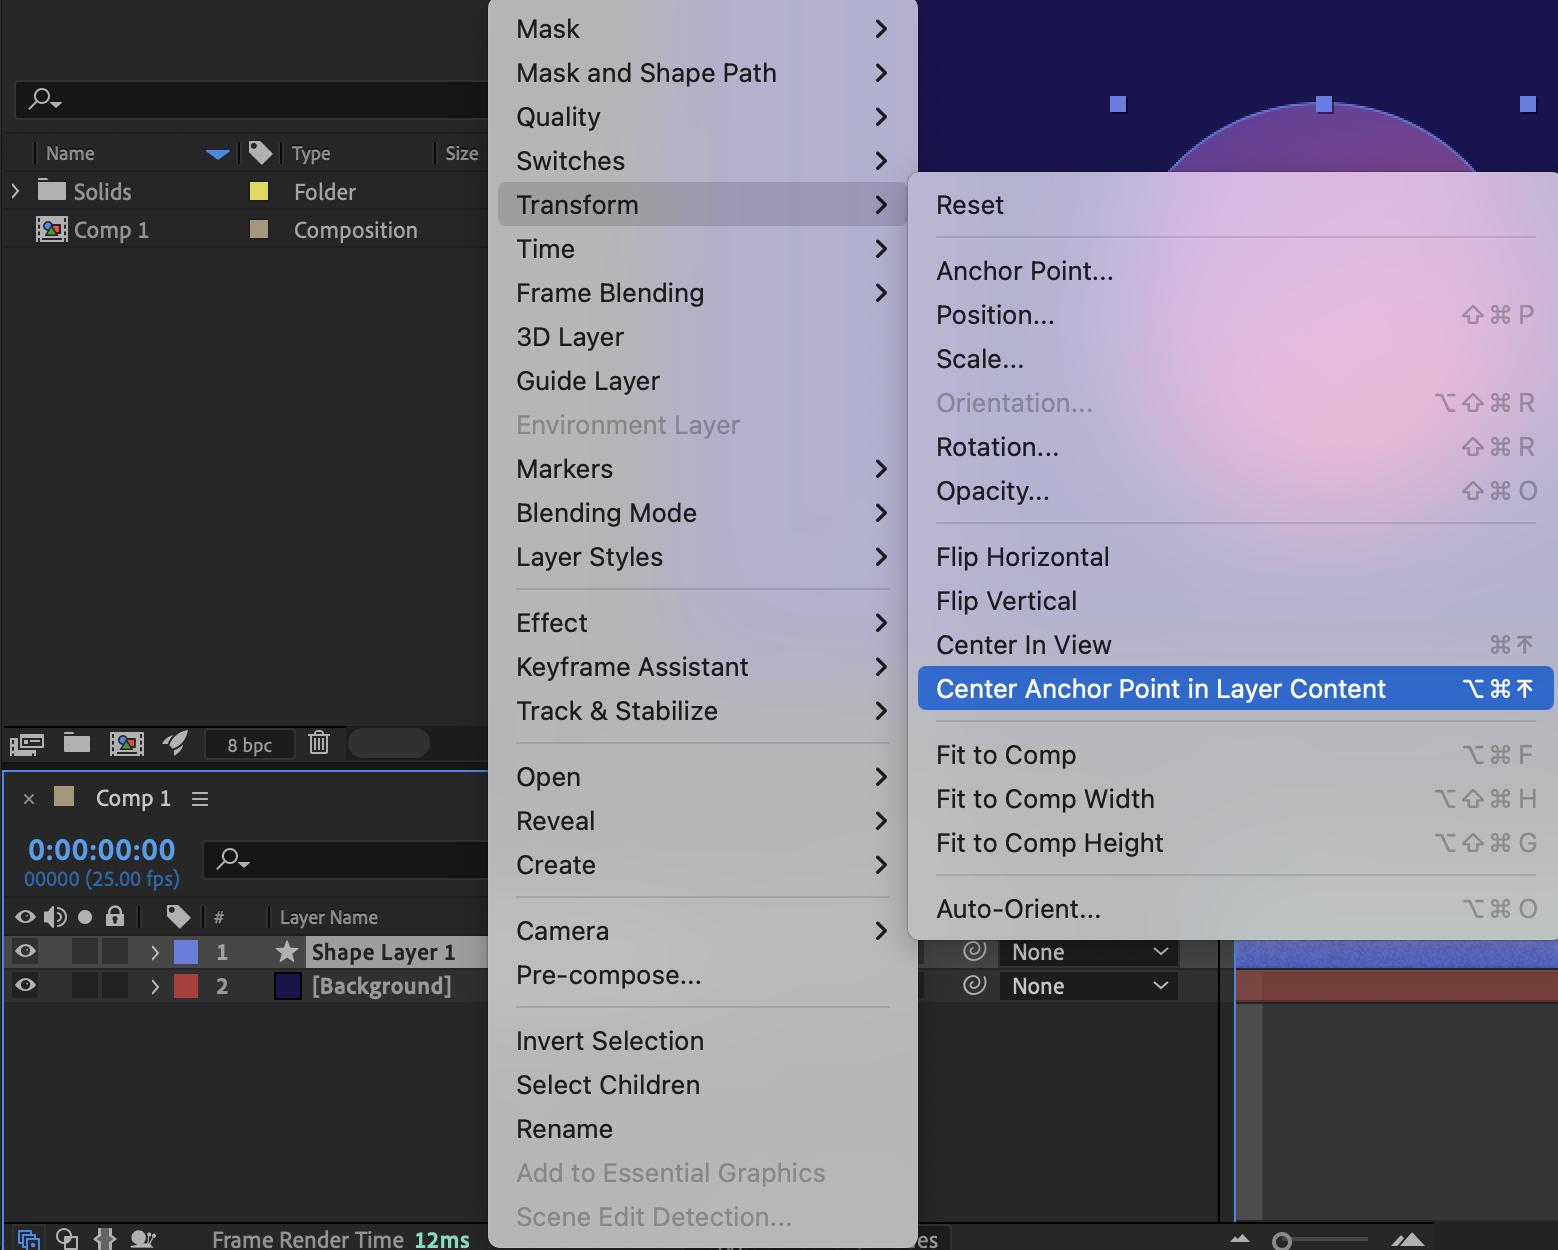 Step 3: Separate Position Dimensions
Press P to reveal the Position property. Right-click on Position and choose Separate Dimensions. This allows you to animate the X and Y positions independently.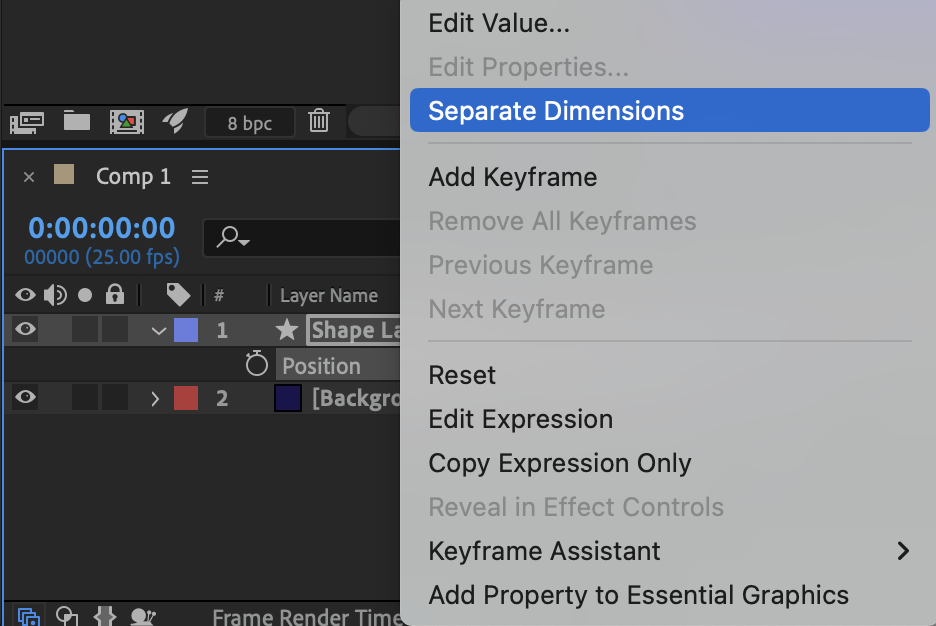
Get 10% off when you subscribe to our newsletter

Step 4: Set the Starting Position
Move the Current Time Indicator (CTI) to the beginning of the timeline.
In the Align panel: Align the layer to the left edge of the composition
Enable the stopwatch for X Position to create the first keyframe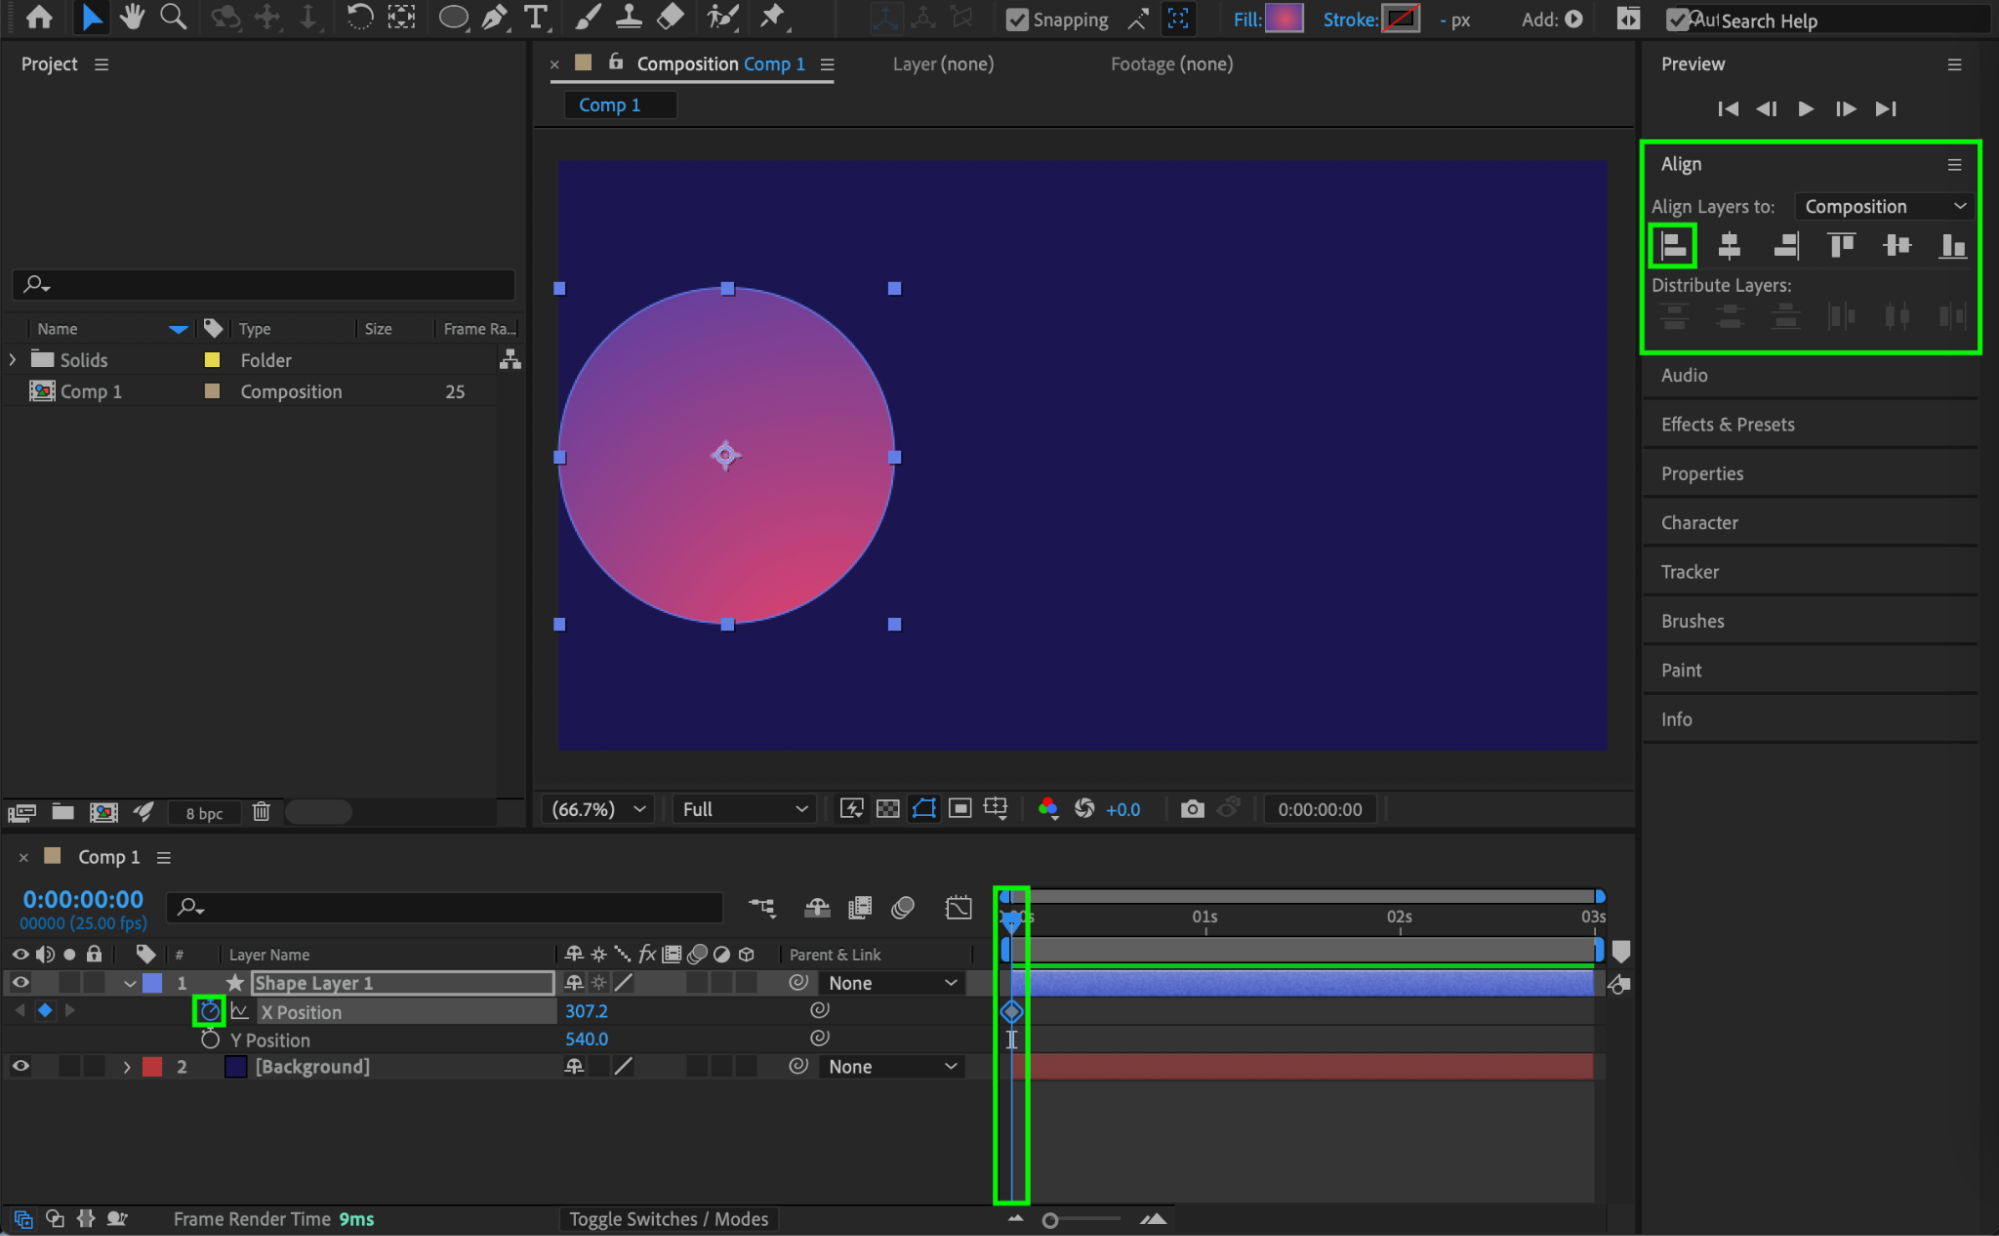 Step 5: Animate to the Opposite Side
Move the CTI 10 frames forward.
In the Align panel: Align the layer to the right edge of the composition
This creates a strong directional movement. Step 6: Duplicate the Motion
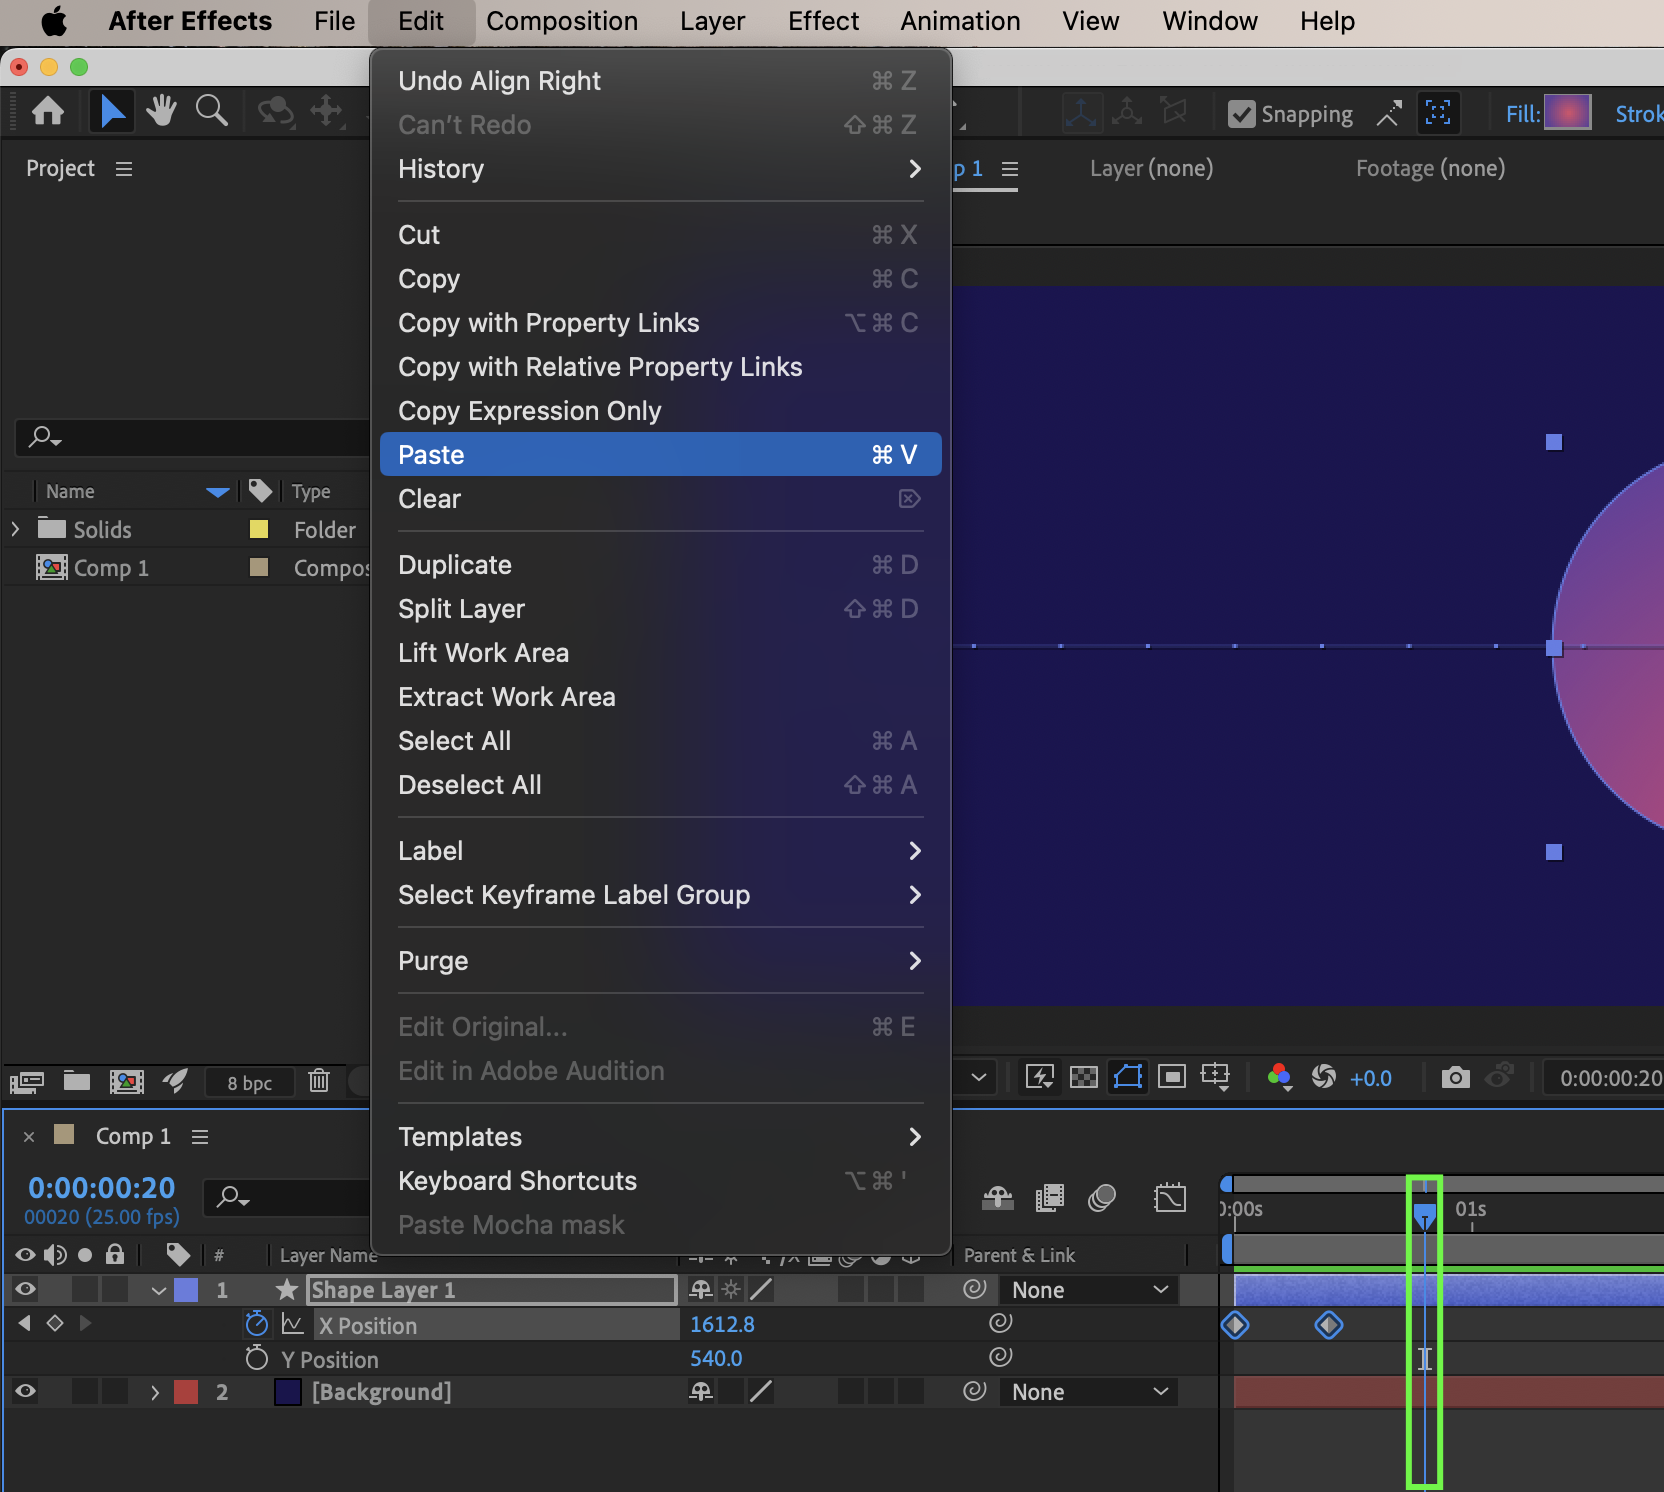
Select the two X Position keyframes you just created and copy them.
Paste the keyframes 10 frames after the last keyframe.
Repeat this process 2 more times to build oscillation.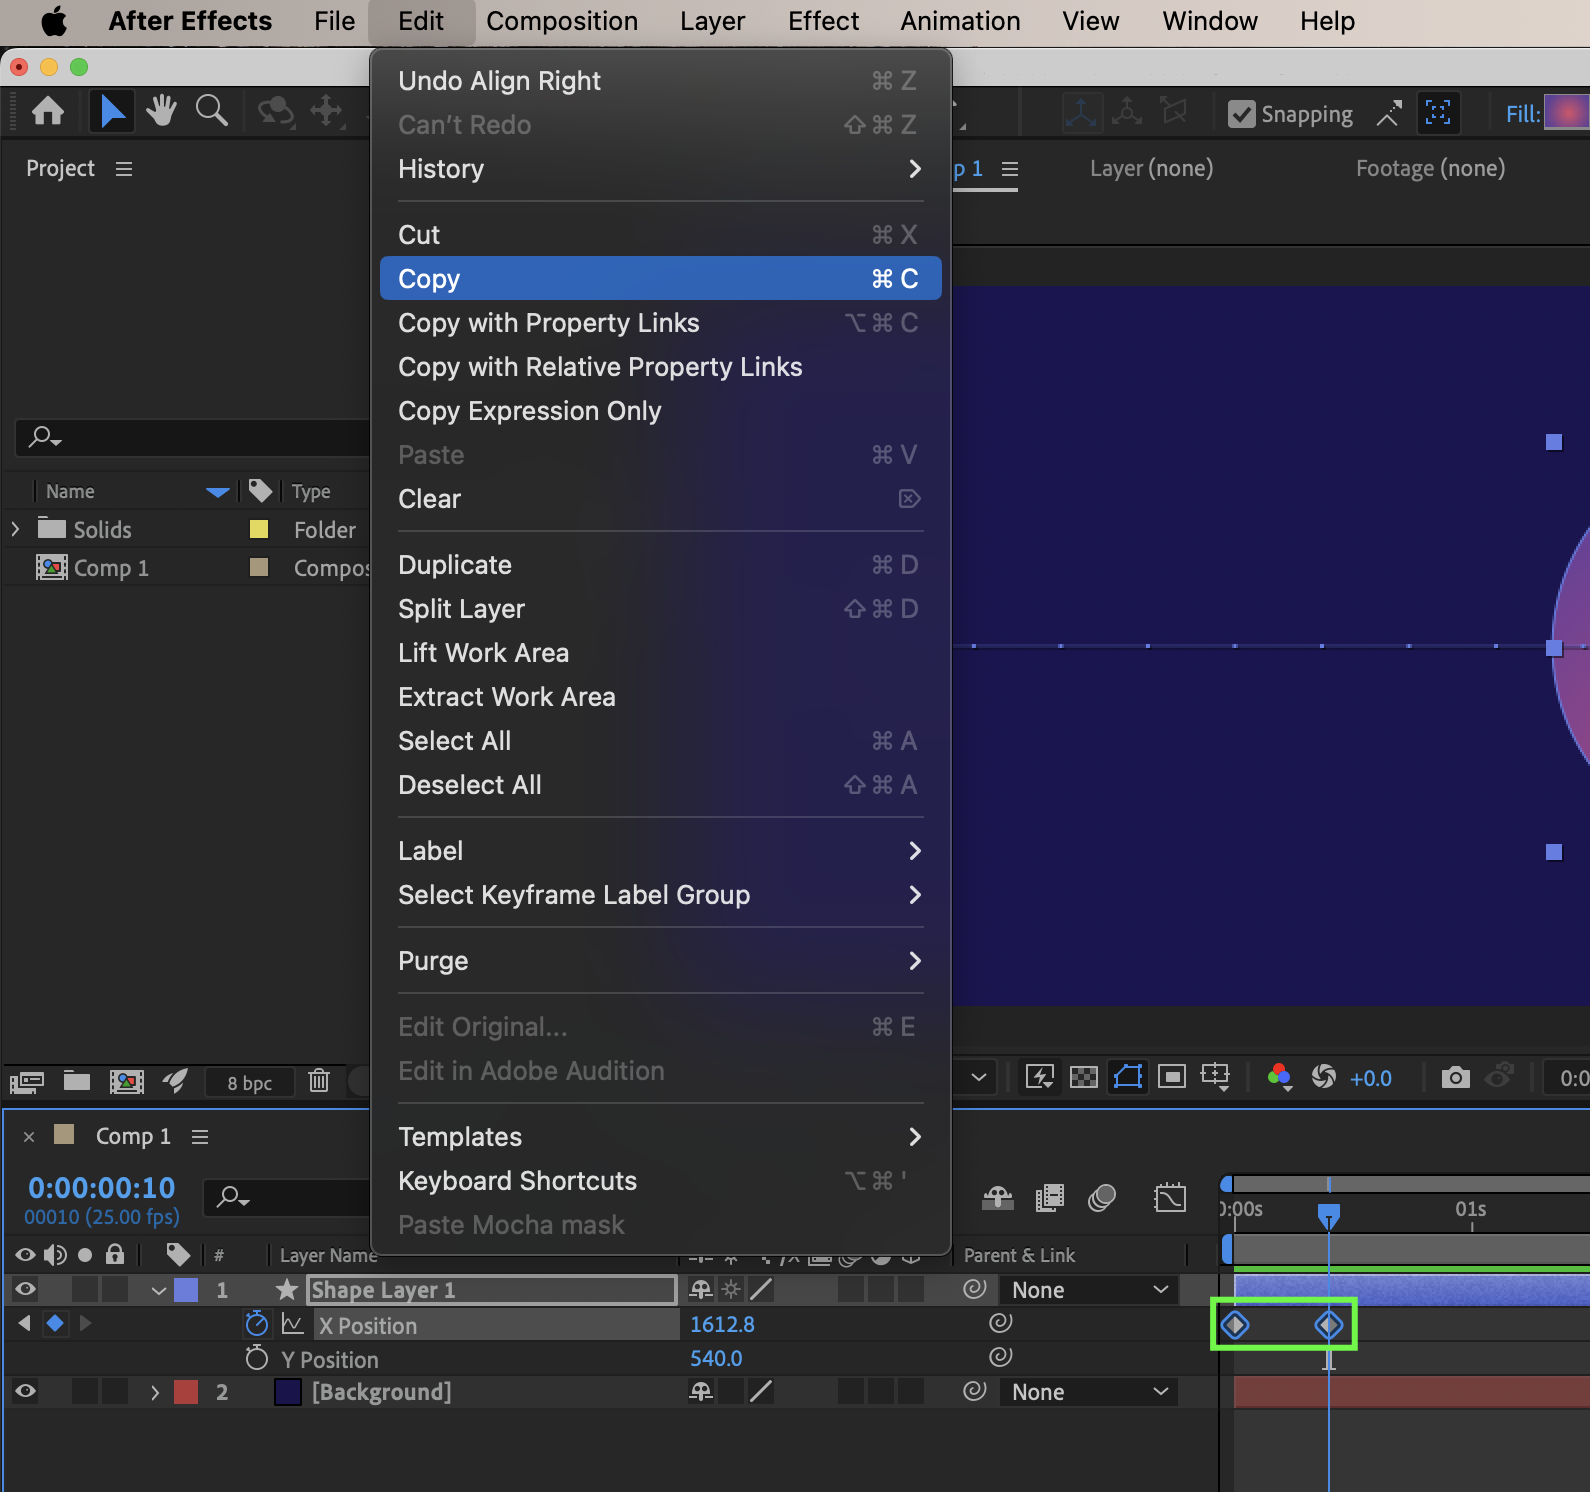
 Step 7: Apply Easy Ease
Select all the X Position keyframes. Apply Easy Ease to soften the motion.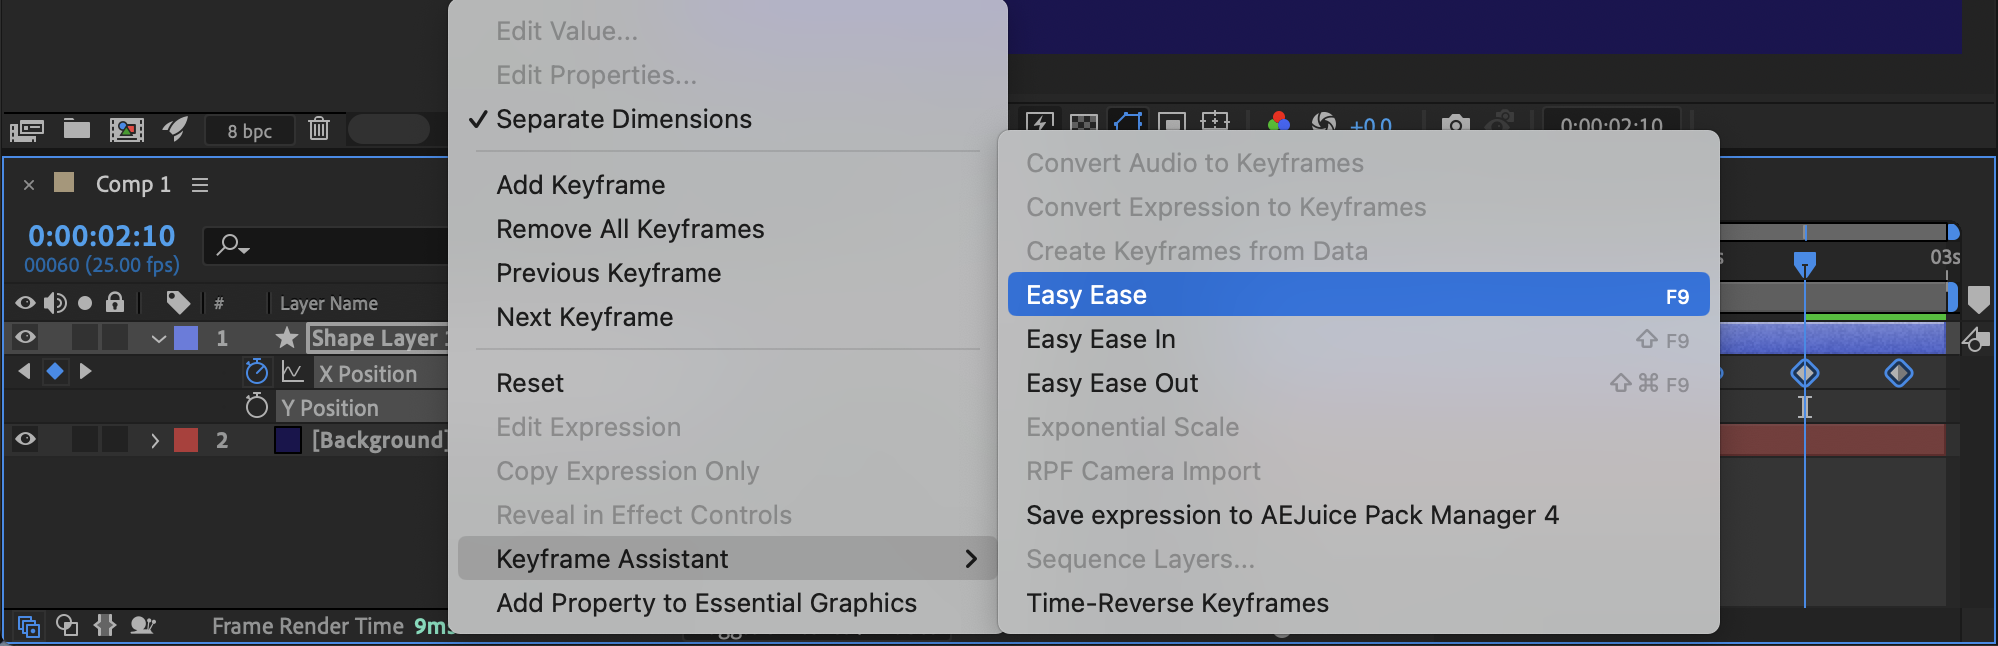
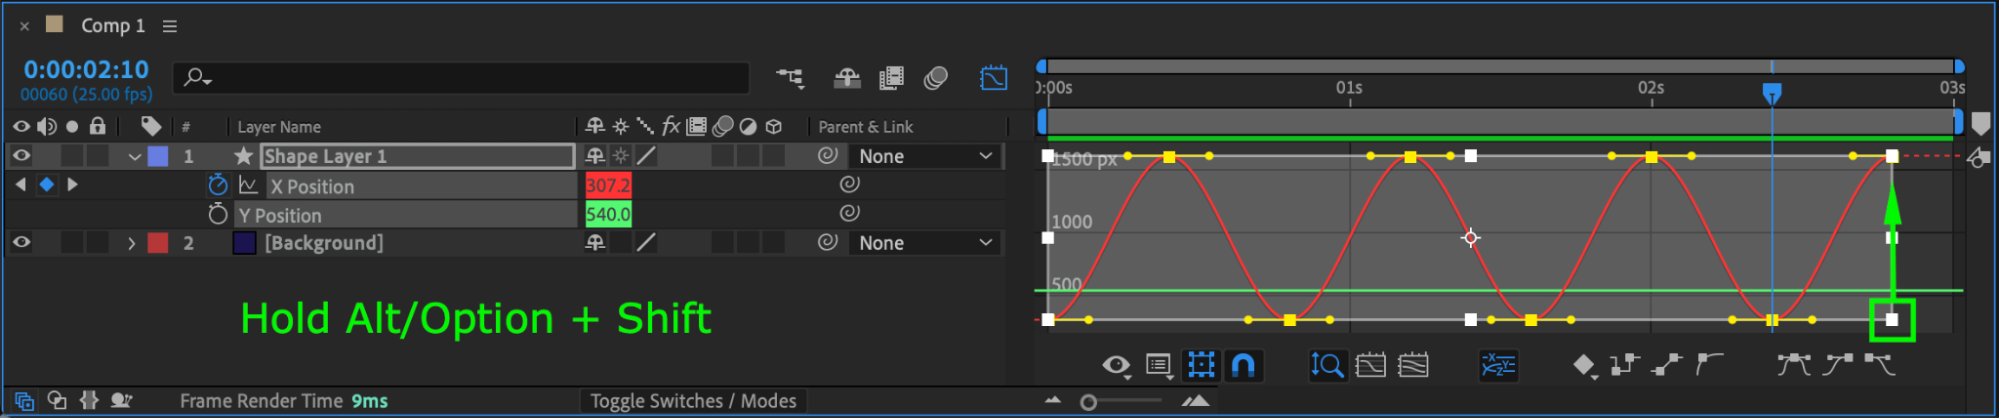
Step 8: Shape the Elastic Motion in the Graph Editor
Open the Graph Editor. Make sure the following options are enabled:
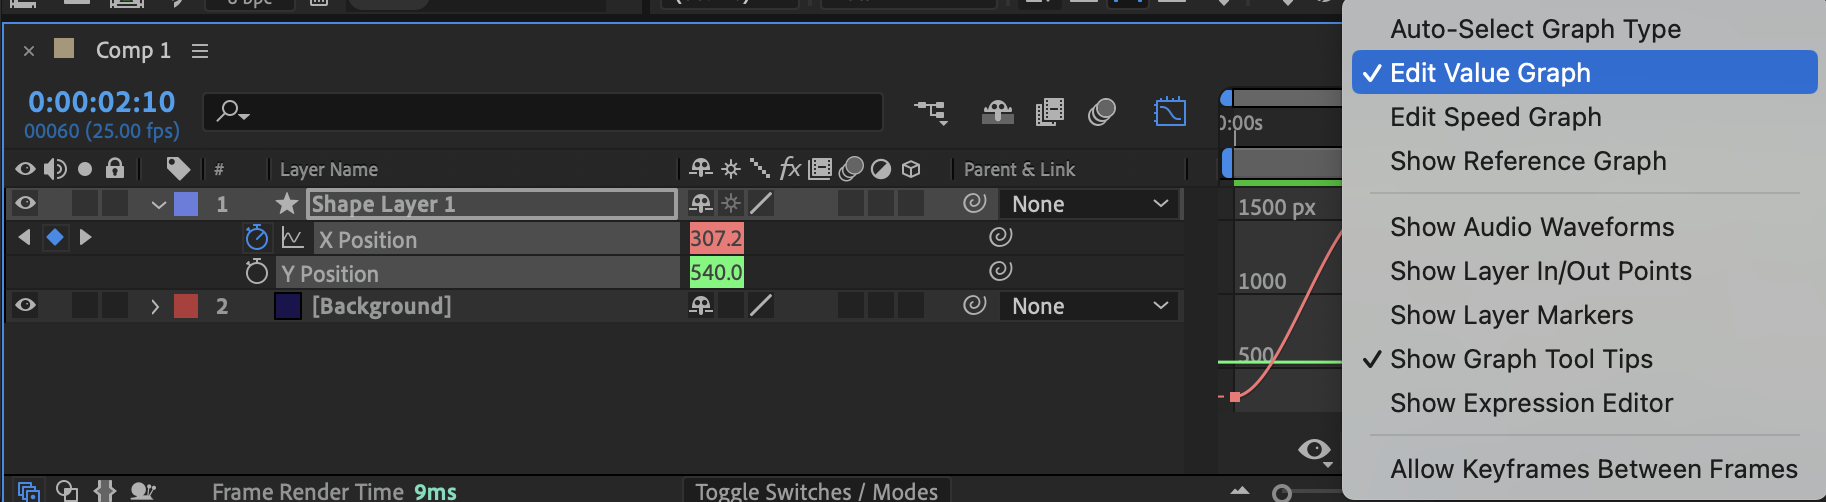
Edit Value Graph
Show Transform Box When Multiple Keys Are Selected
Select all keyframes.
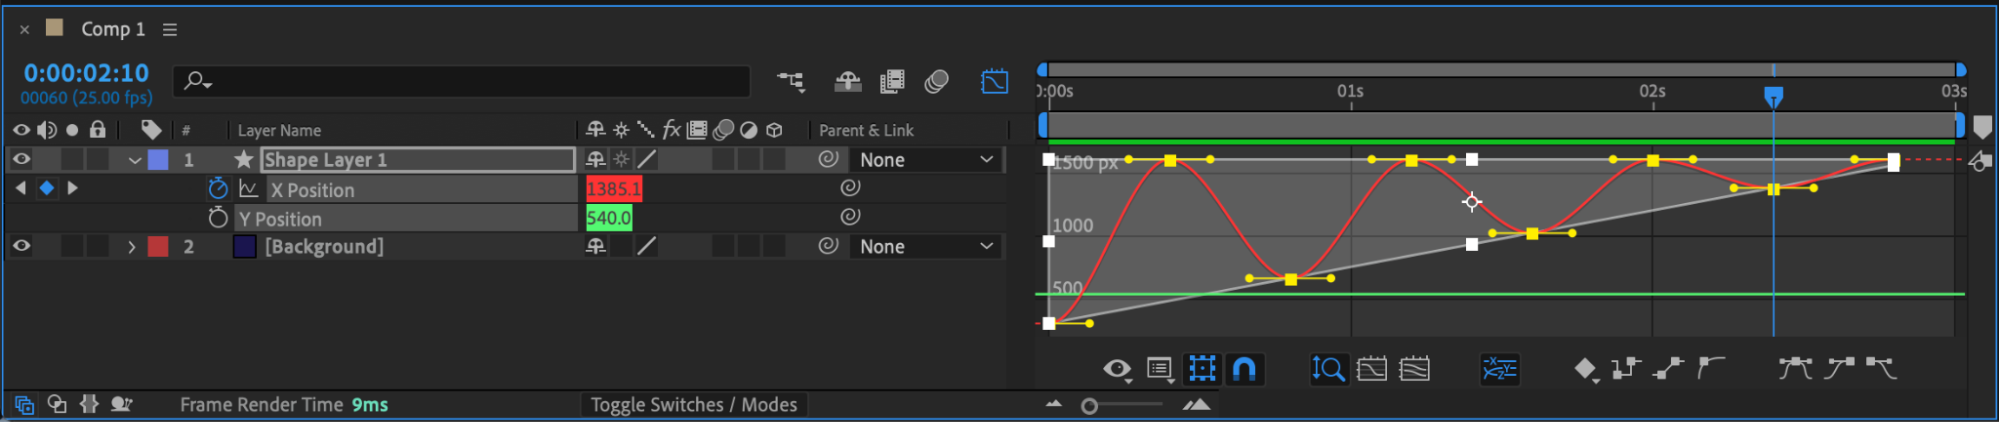
Hold Alt / Option + Shift and drag the bottom-right corner of the white transform box upward and slightly to the right.
This exaggerates the overshoot and creates a springy, elastic feel.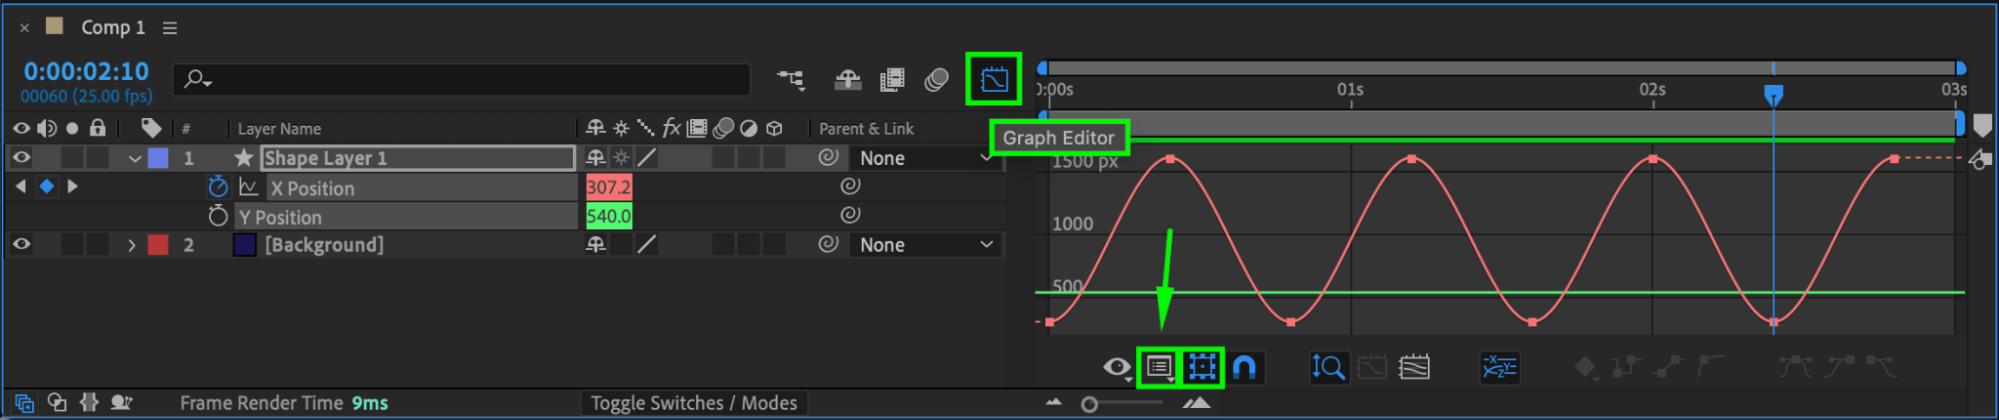
 Step 9: Enable Motion Blur
Enable Motion Blur for the layer and for the composition to enhance realism.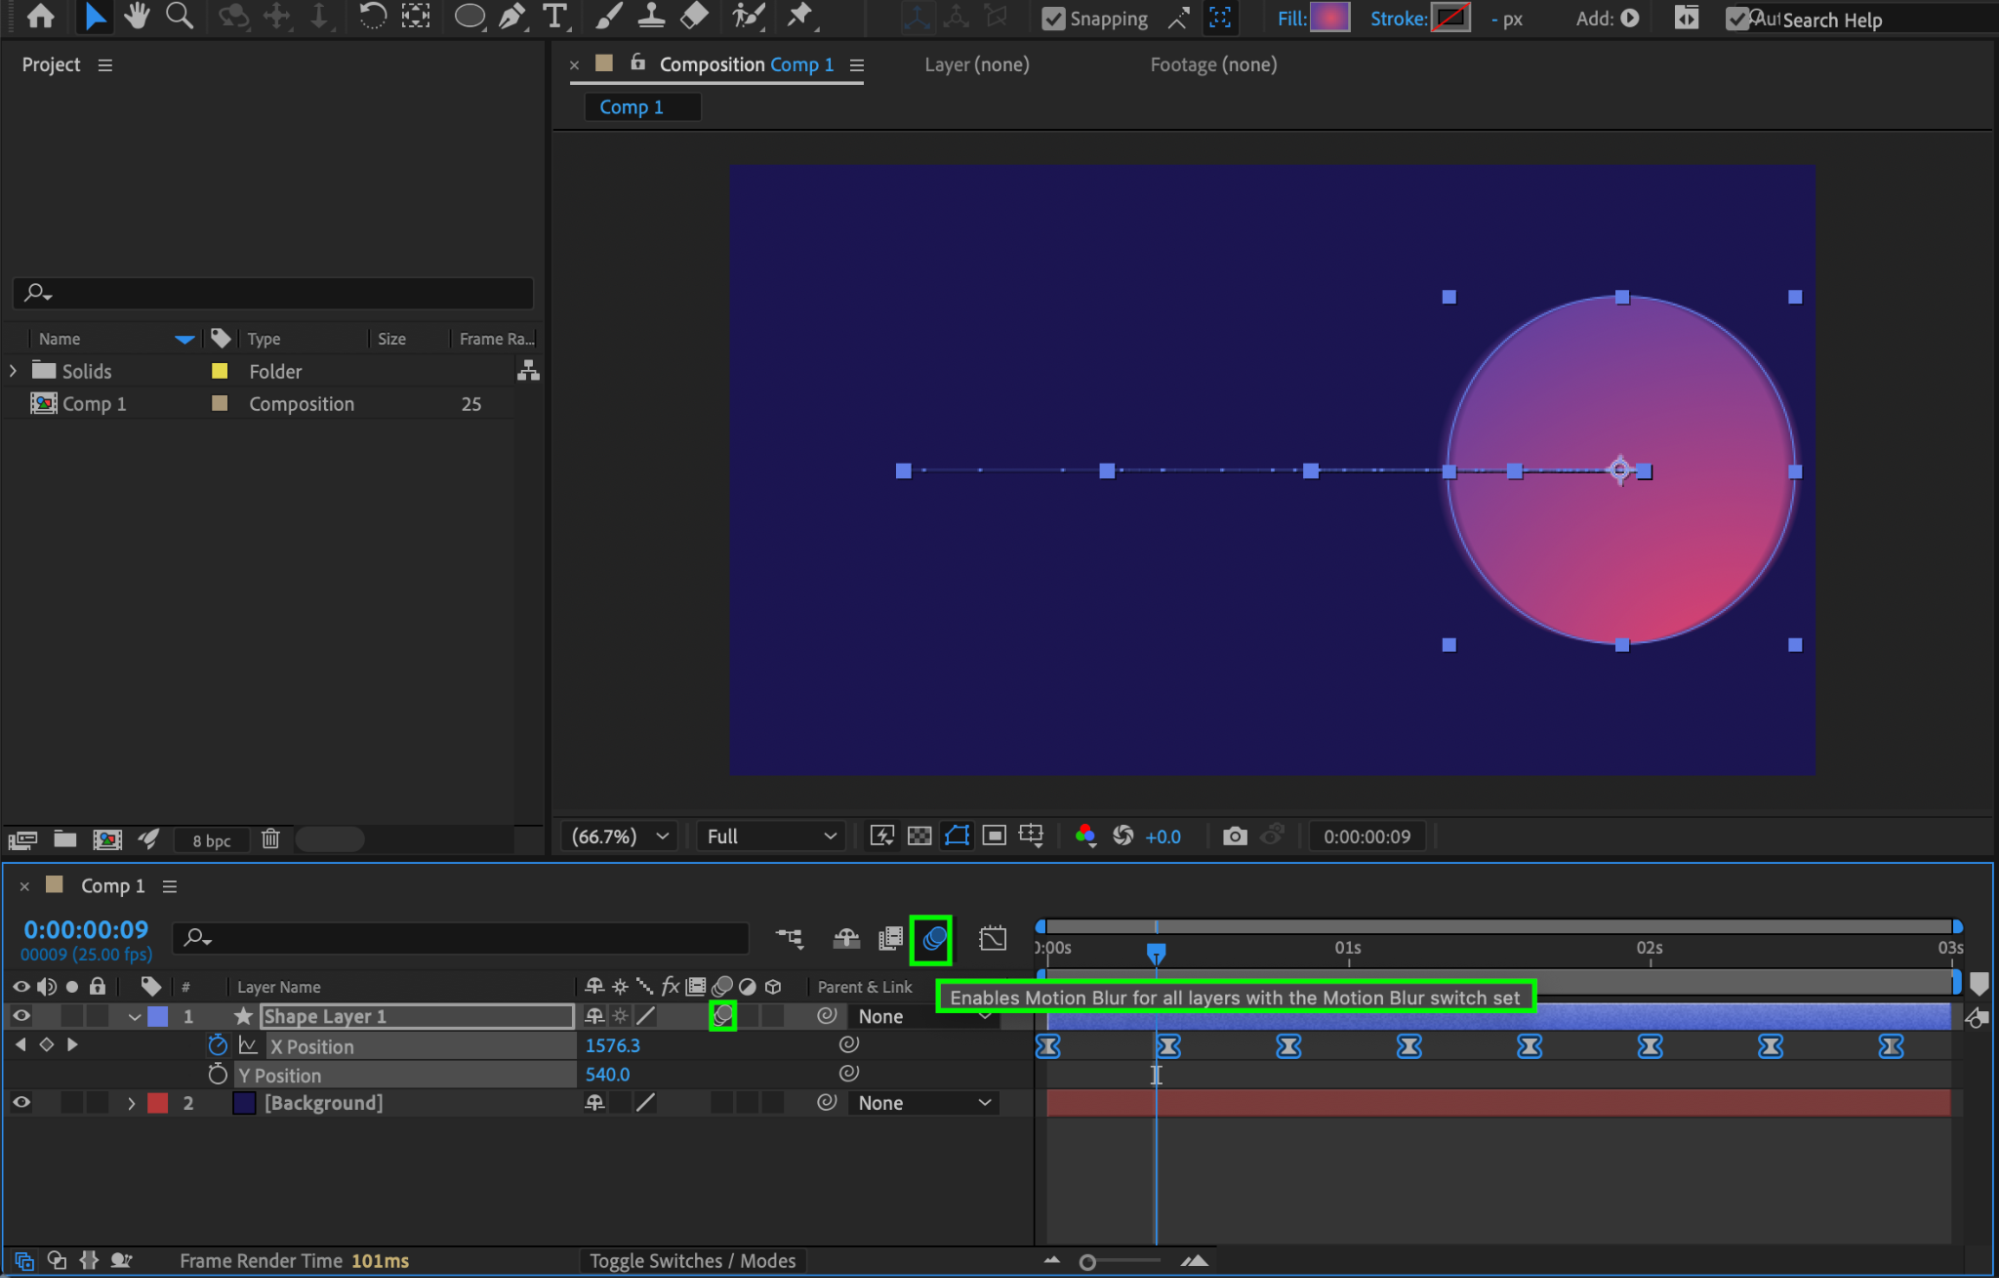 Step 10: Preview the Result
Preview the animation and fine-tune the graph shape or spacing between keyframes if needed.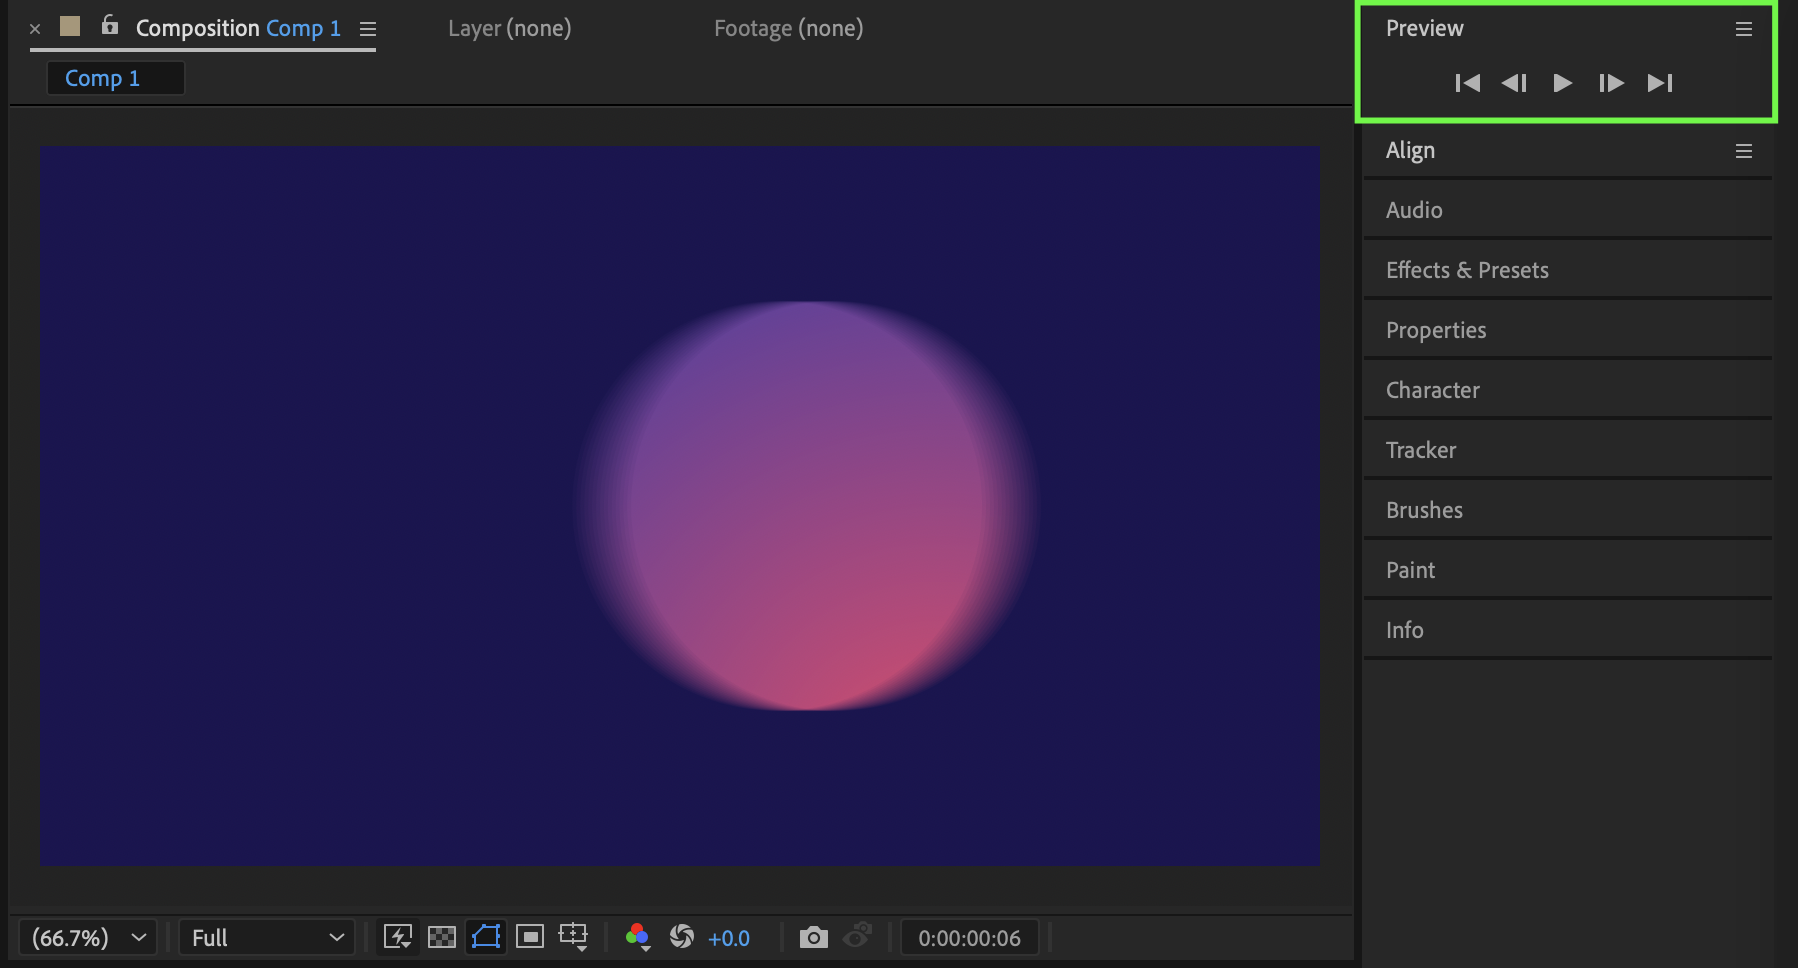
Conclusion
By repeating position keyframes and shaping their values in the Graph Editor, you can create smooth elastic motion without using expressions. This technique gives you full creative control and works perfectly for shapes, text, and UI-style animations in After Effects.
Our Bestsellers

