A Step-by-Step Guide to Creating Custom Lower Thirds in After Effects
Introduction – Why Create Lower Thirds in After Effects?
Lower thirds are an essential tool for video editing, providing context or additional information like names, titles, or locations in a clean and professional way. After Effects makes it easy to design custom lower thirds, complete with animations and effects, that align with your video’s branding. This guide walks you through creating and animating lower thirds step by step.
Step 1: Start a New Composition
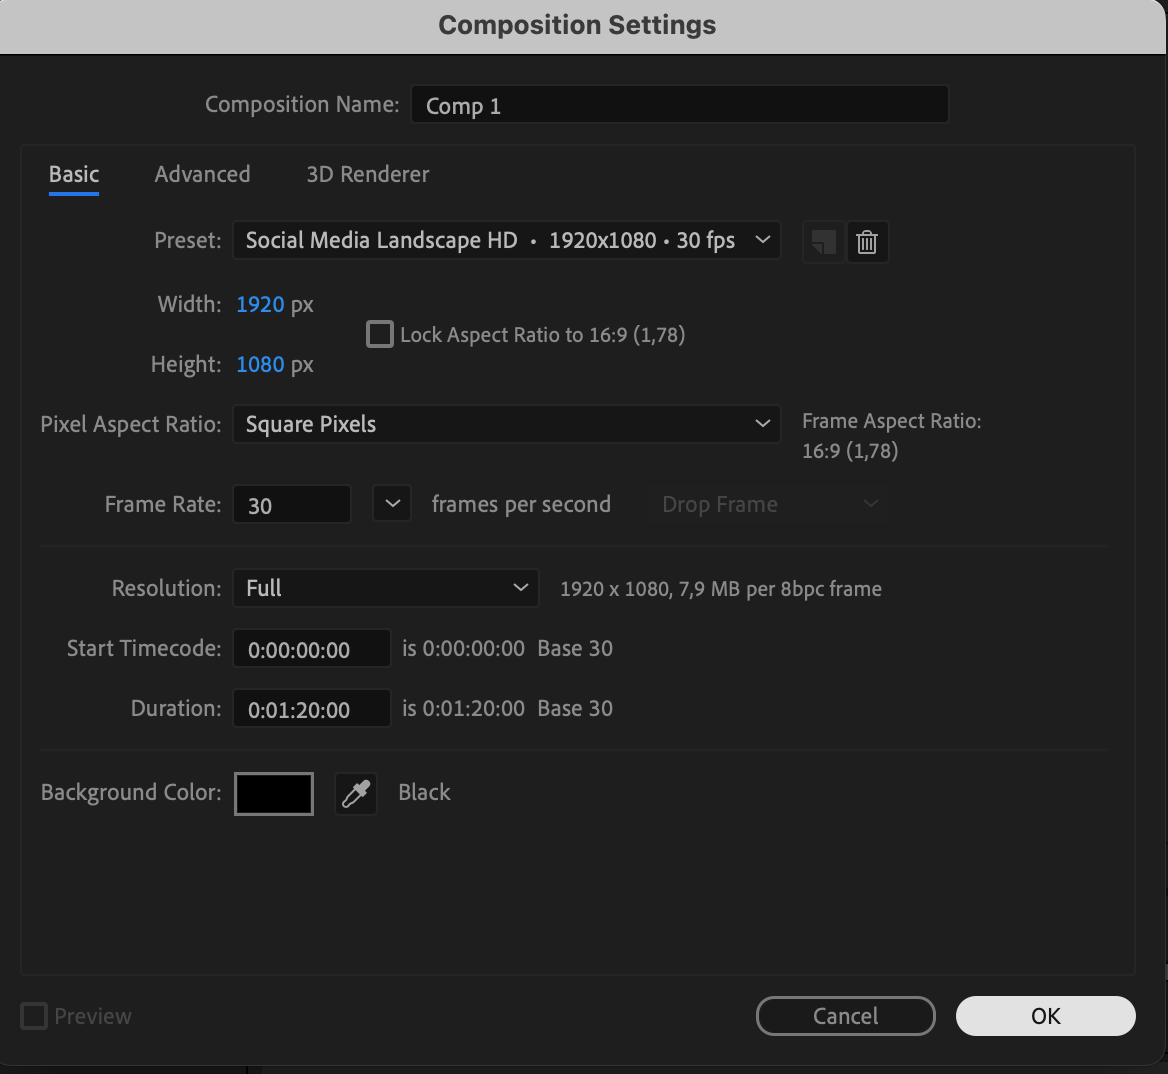
Begin by creating a new composition. Go to Composition > New Composition and set the resolution (e.g., 1920×1080), frame rate (e.g., 30fps), and duration. This will serve as your workspace for designing the lower thirds.

 Step 2: Add a Shape Layer for the Background
Get 10% off when you subscribe to our newsletter

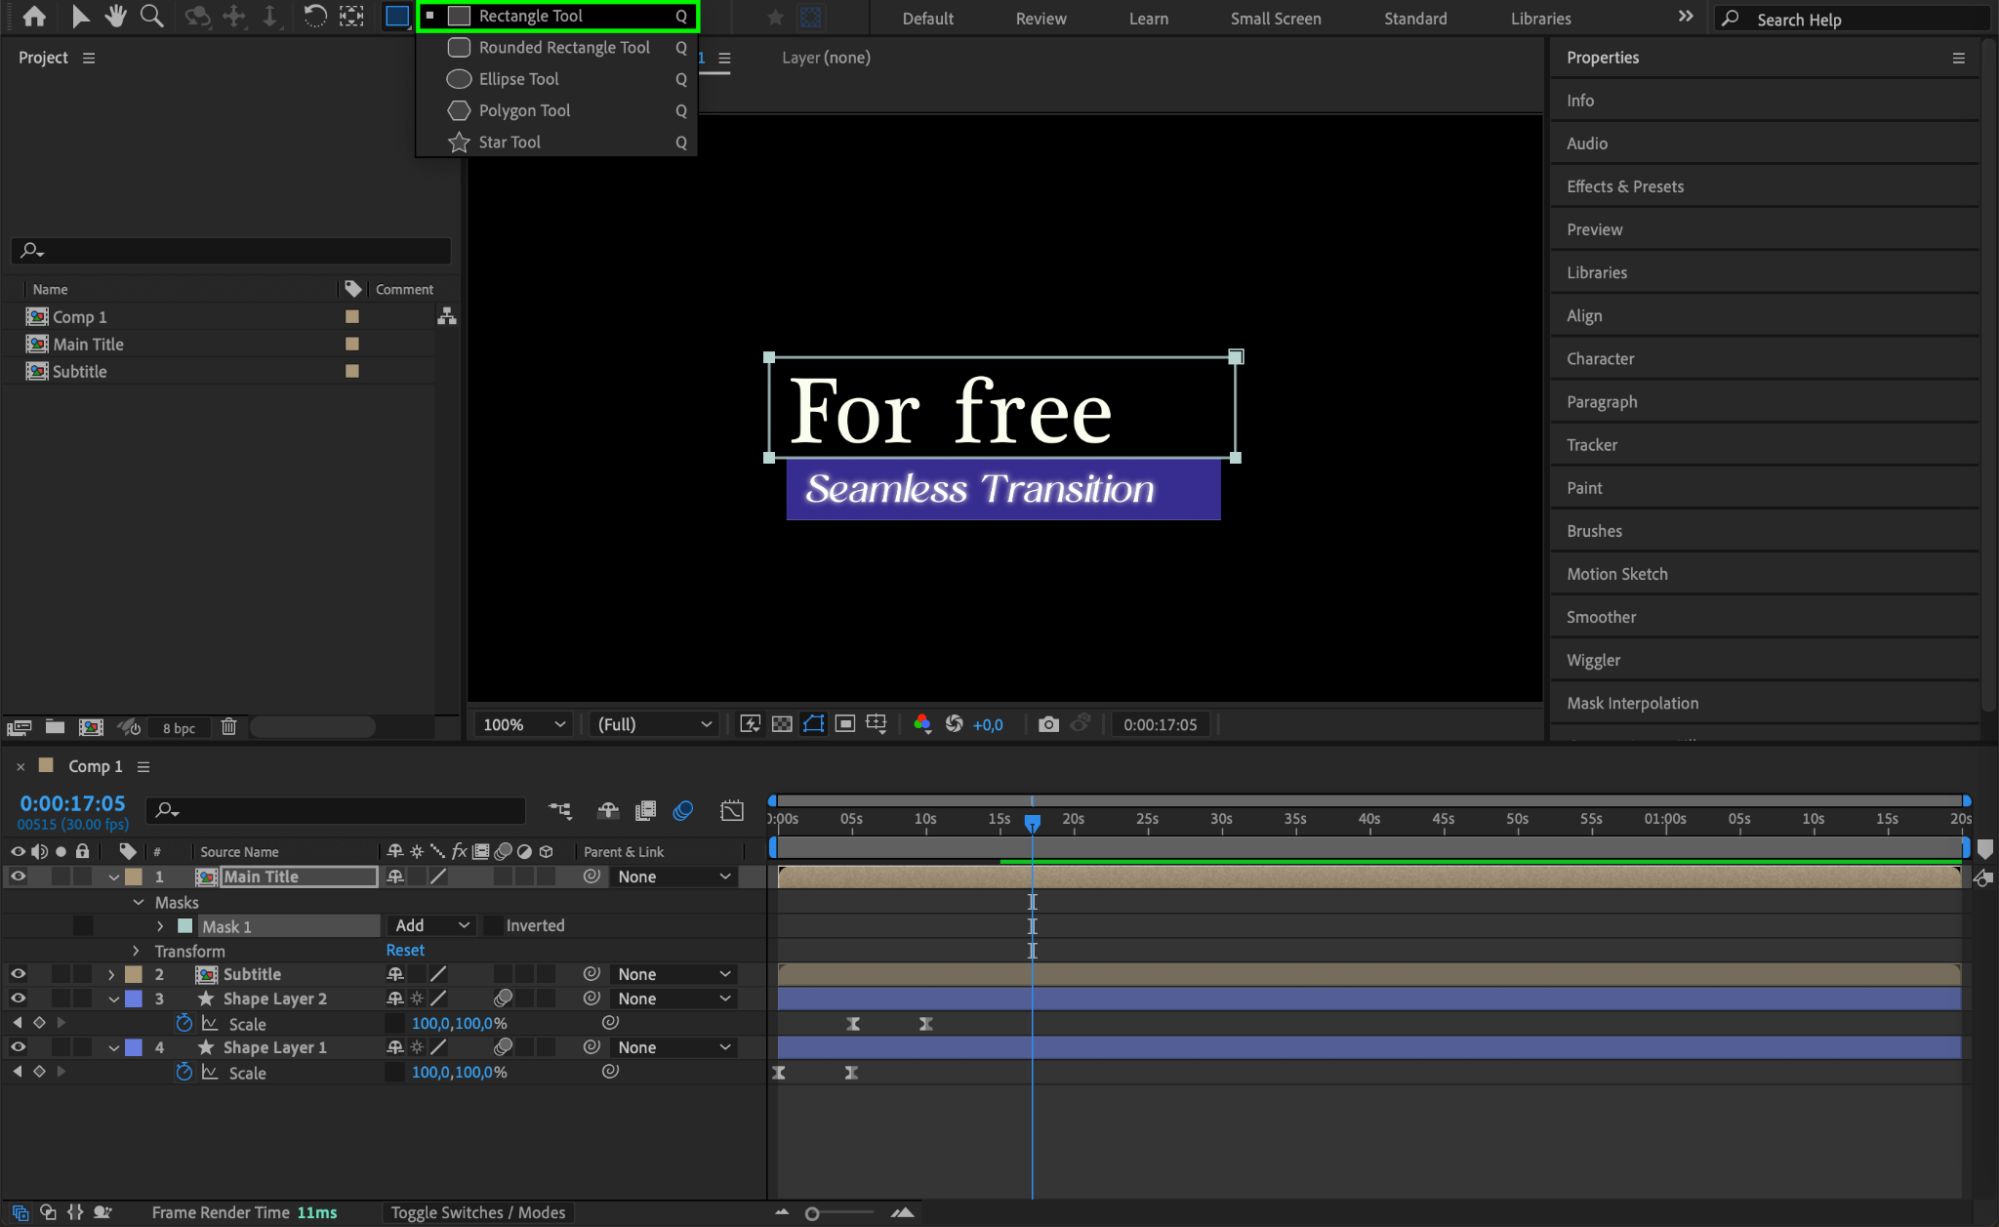
Select the Rectangle Tool(Q) from the toolbar and draw a rectangle at the bottom-left or bottom-center of the composition. Adjust the fill color and remove the stroke as necessary. This rectangle will act as the background for your text.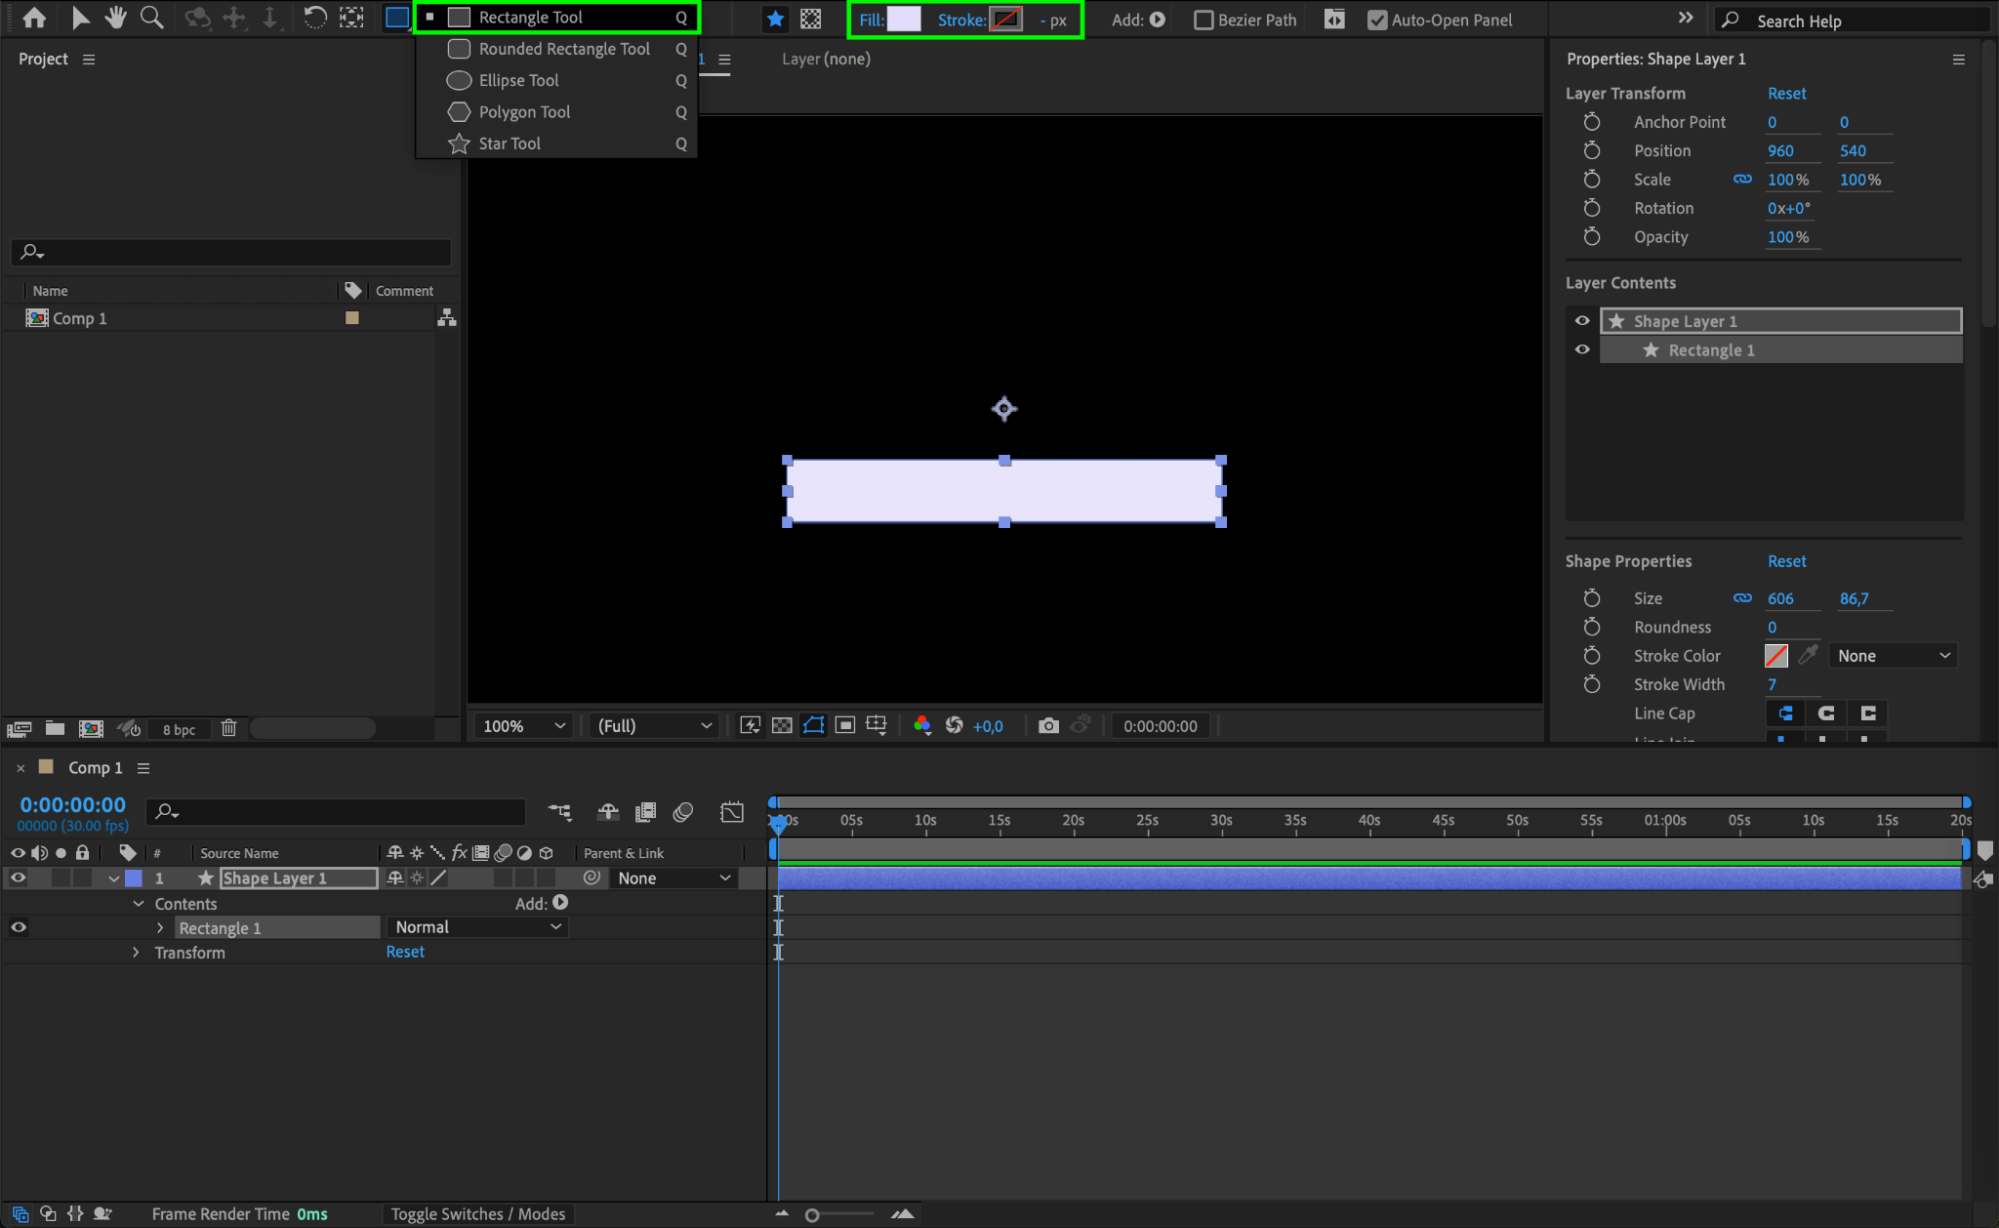 Step 3: Adjust the Anchor Point
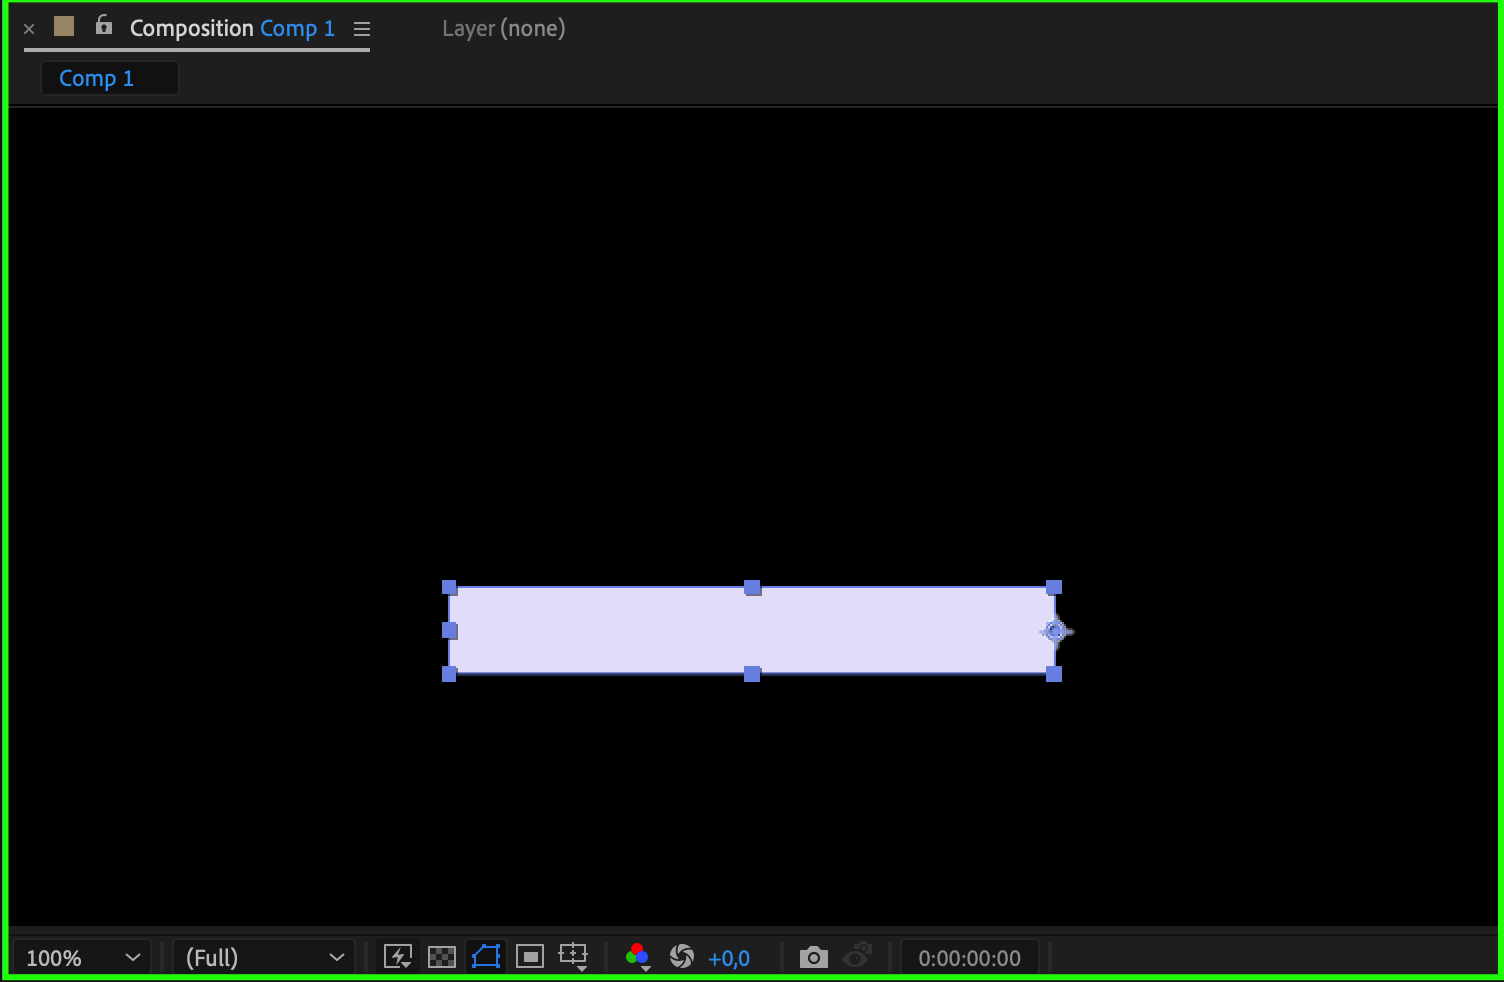
Use the Pan Behind Tool (Y) to reposition the anchor point of the rectangle to the right edge. This adjustment ensures animations will originate from the right side of the shape.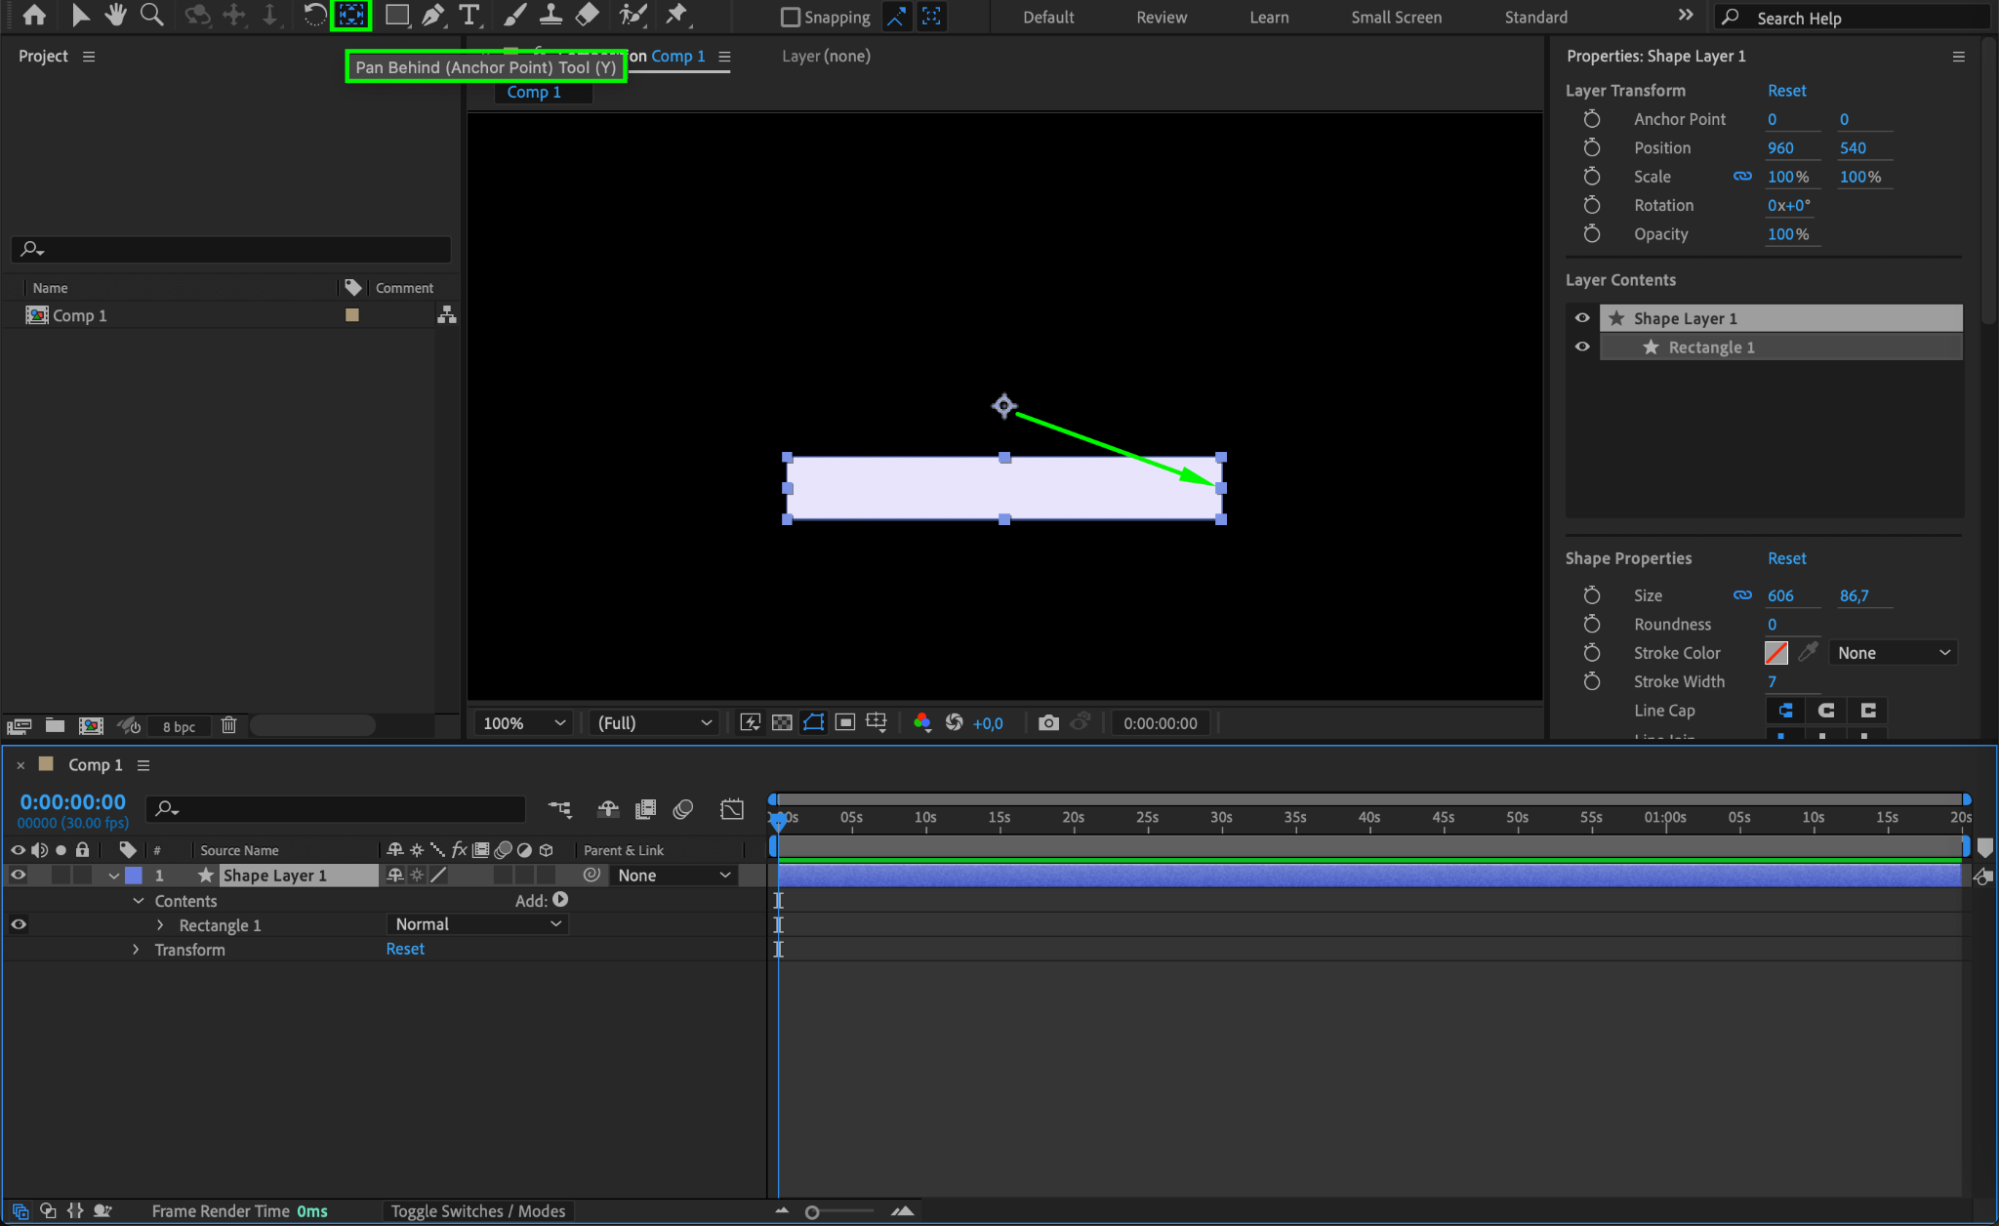
 Step 4: Animate the Shape Layer’s Scale
To animate the rectangle’s appearance:
Select the shape layer and press “S” to reveal the Scale property.
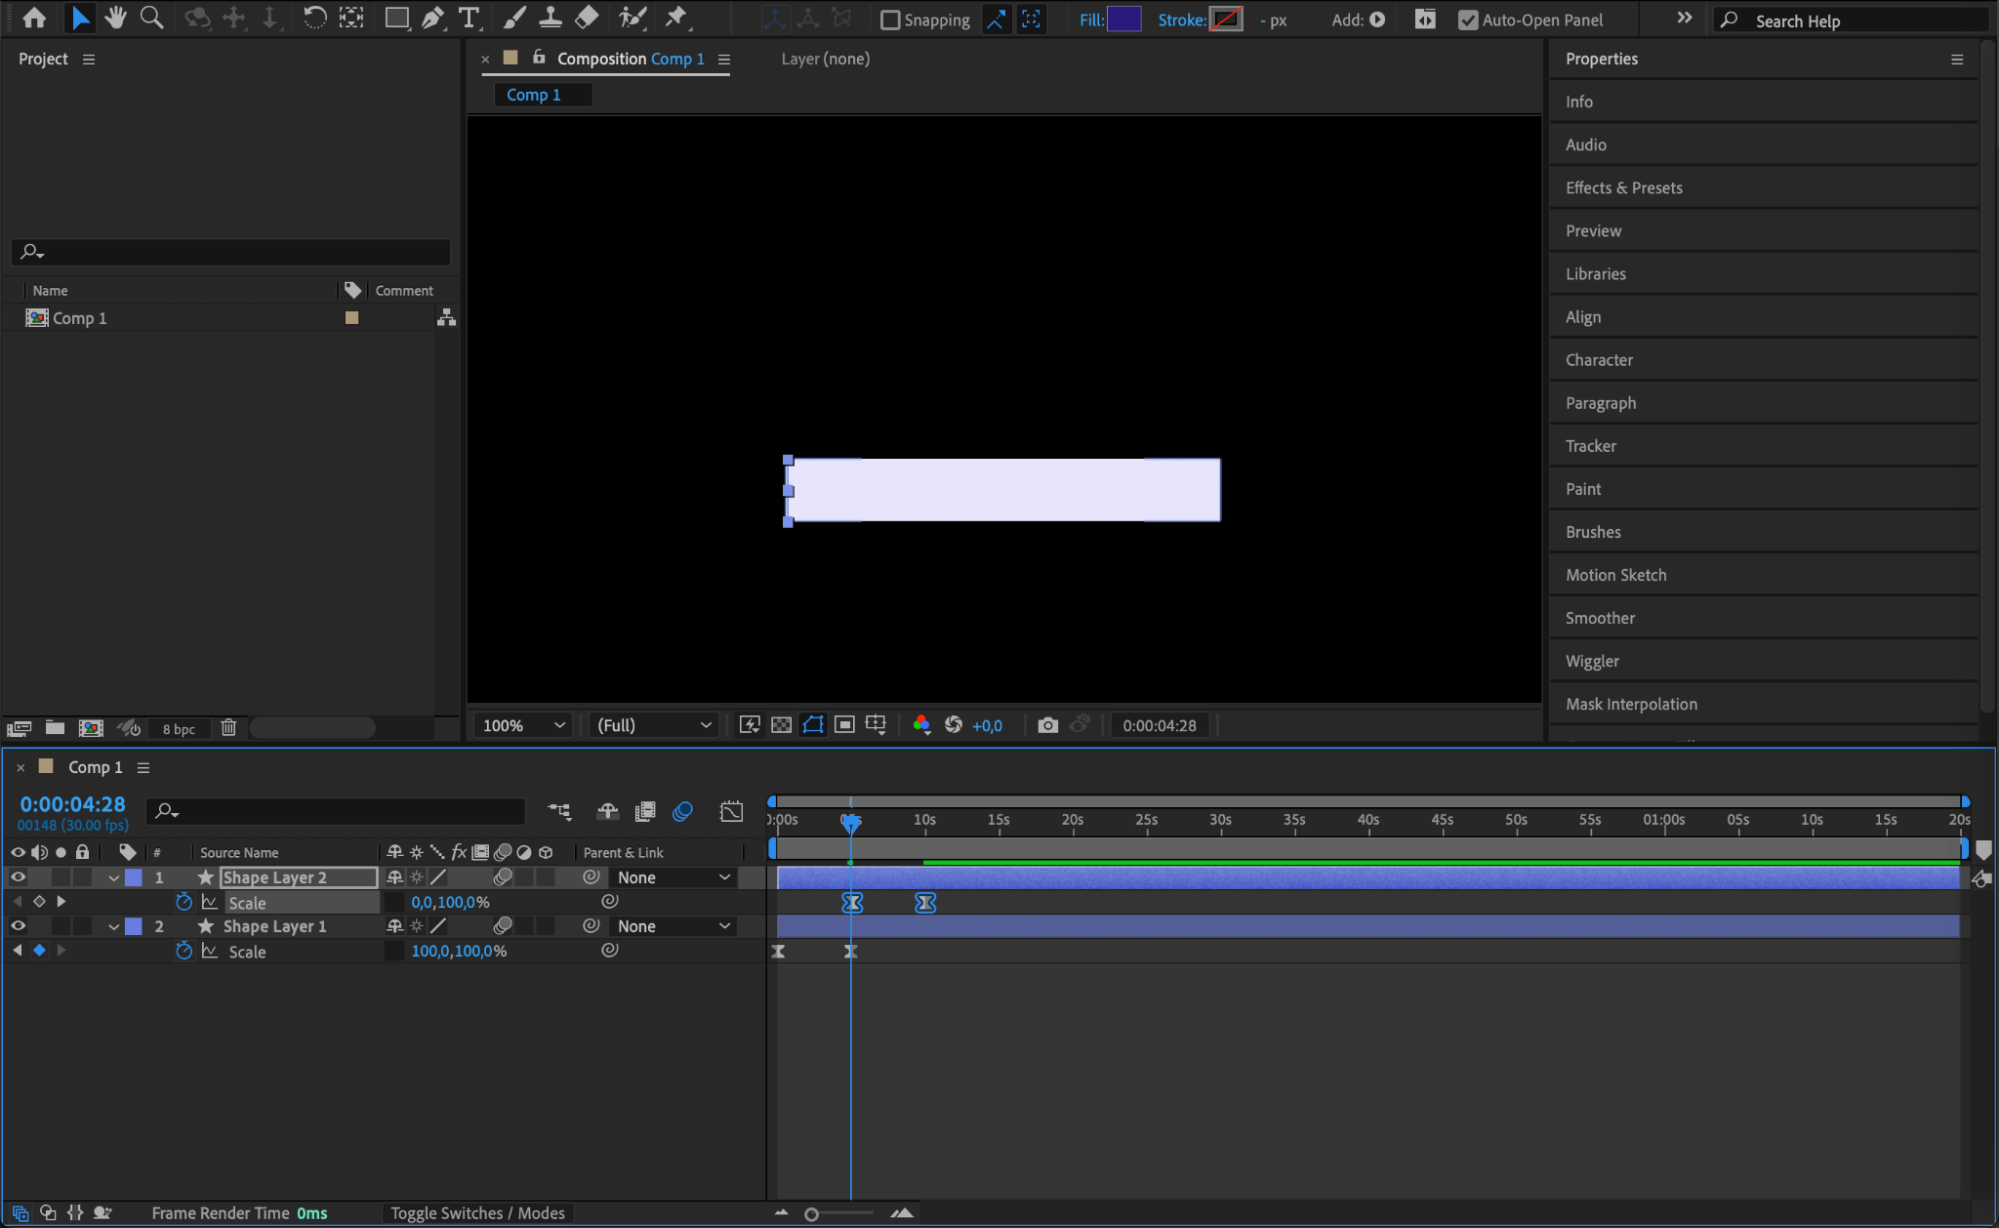
Create the first keyframe with a value of (0,100) at the starting point.
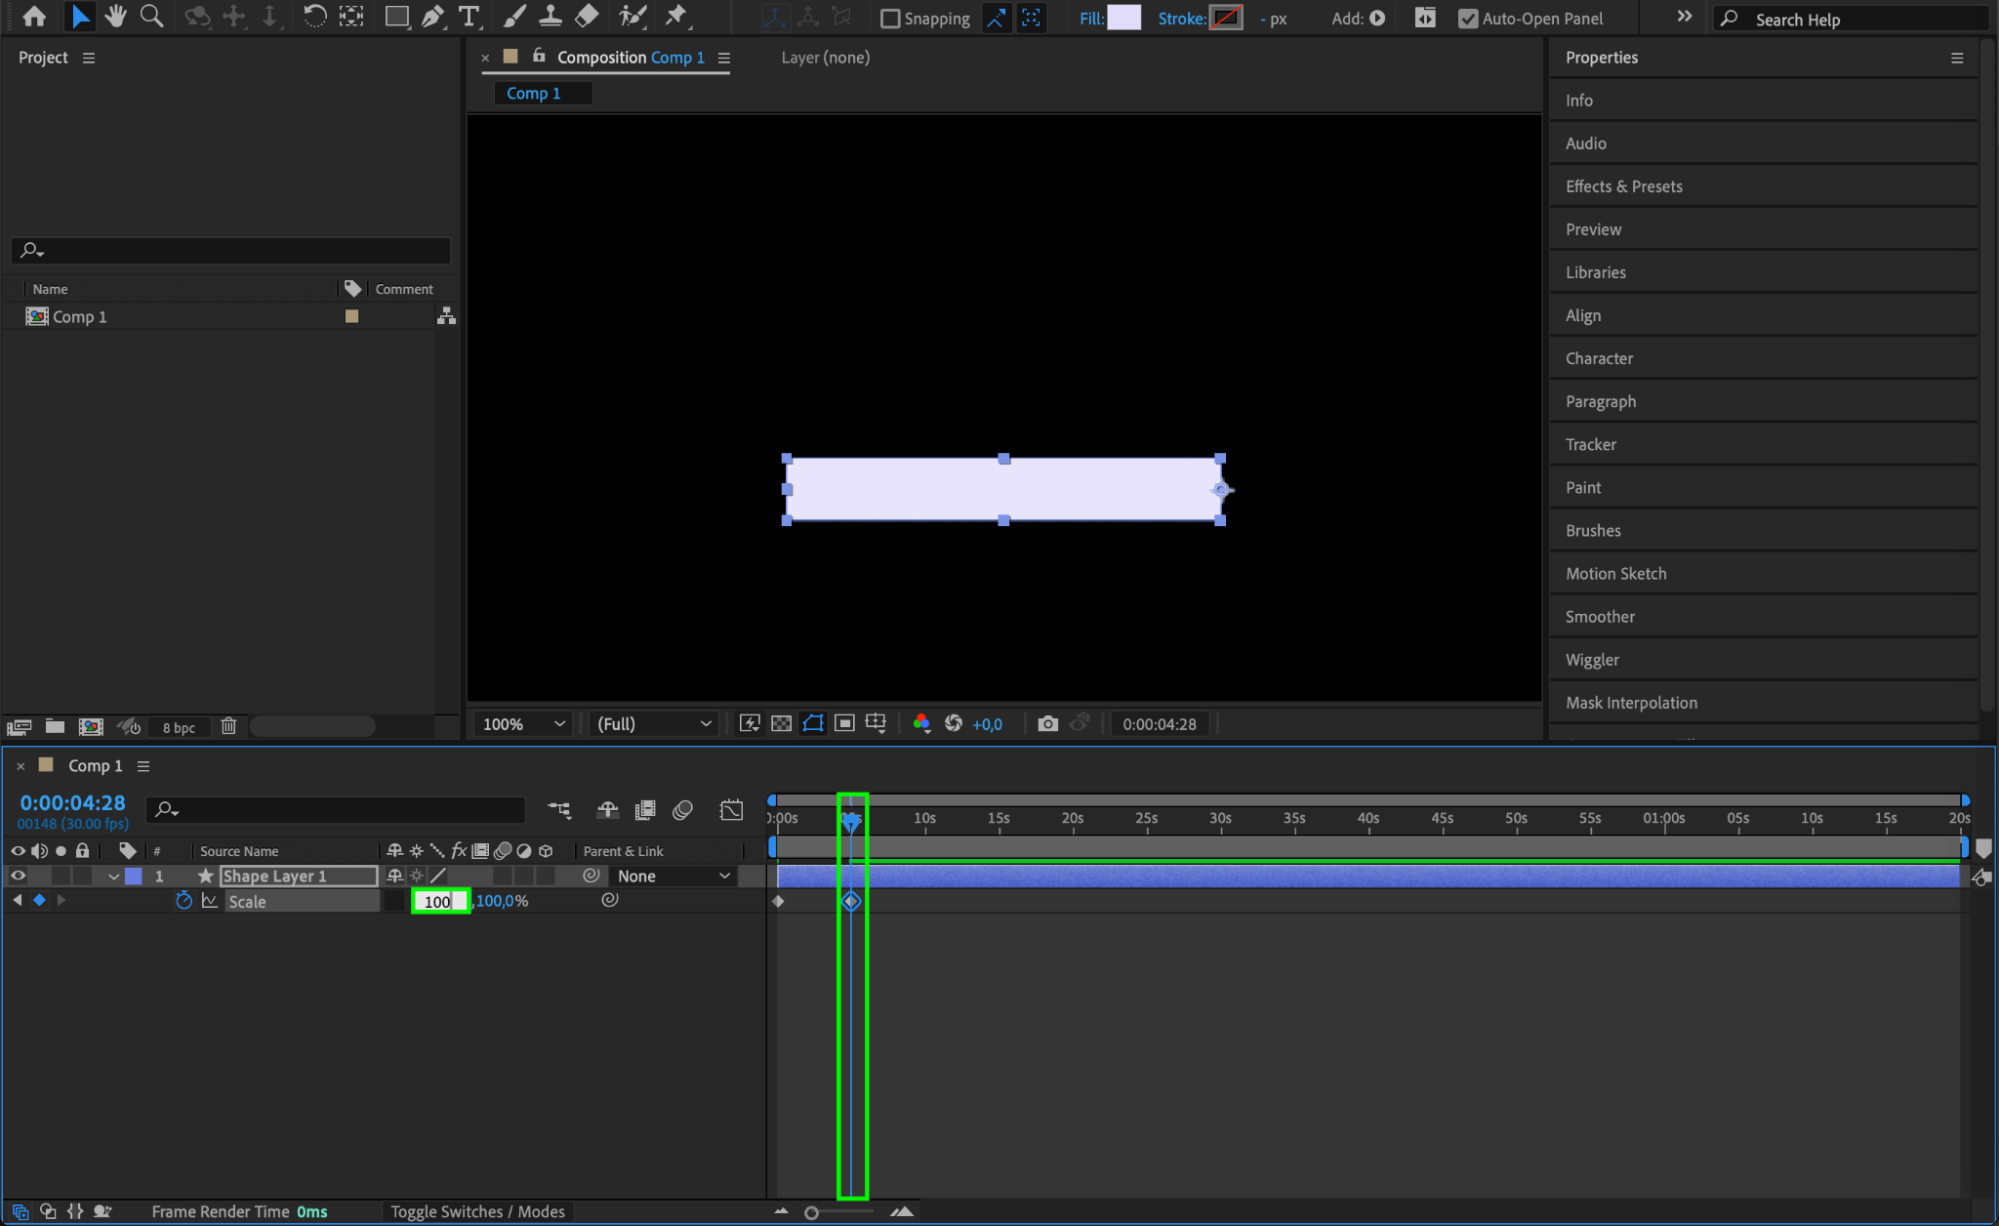
Move the CTI forward in the timeline and set the second keyframe to (100,100).
Apply Easy Ease to the keyframes and enable Motion Blur for smoother animation.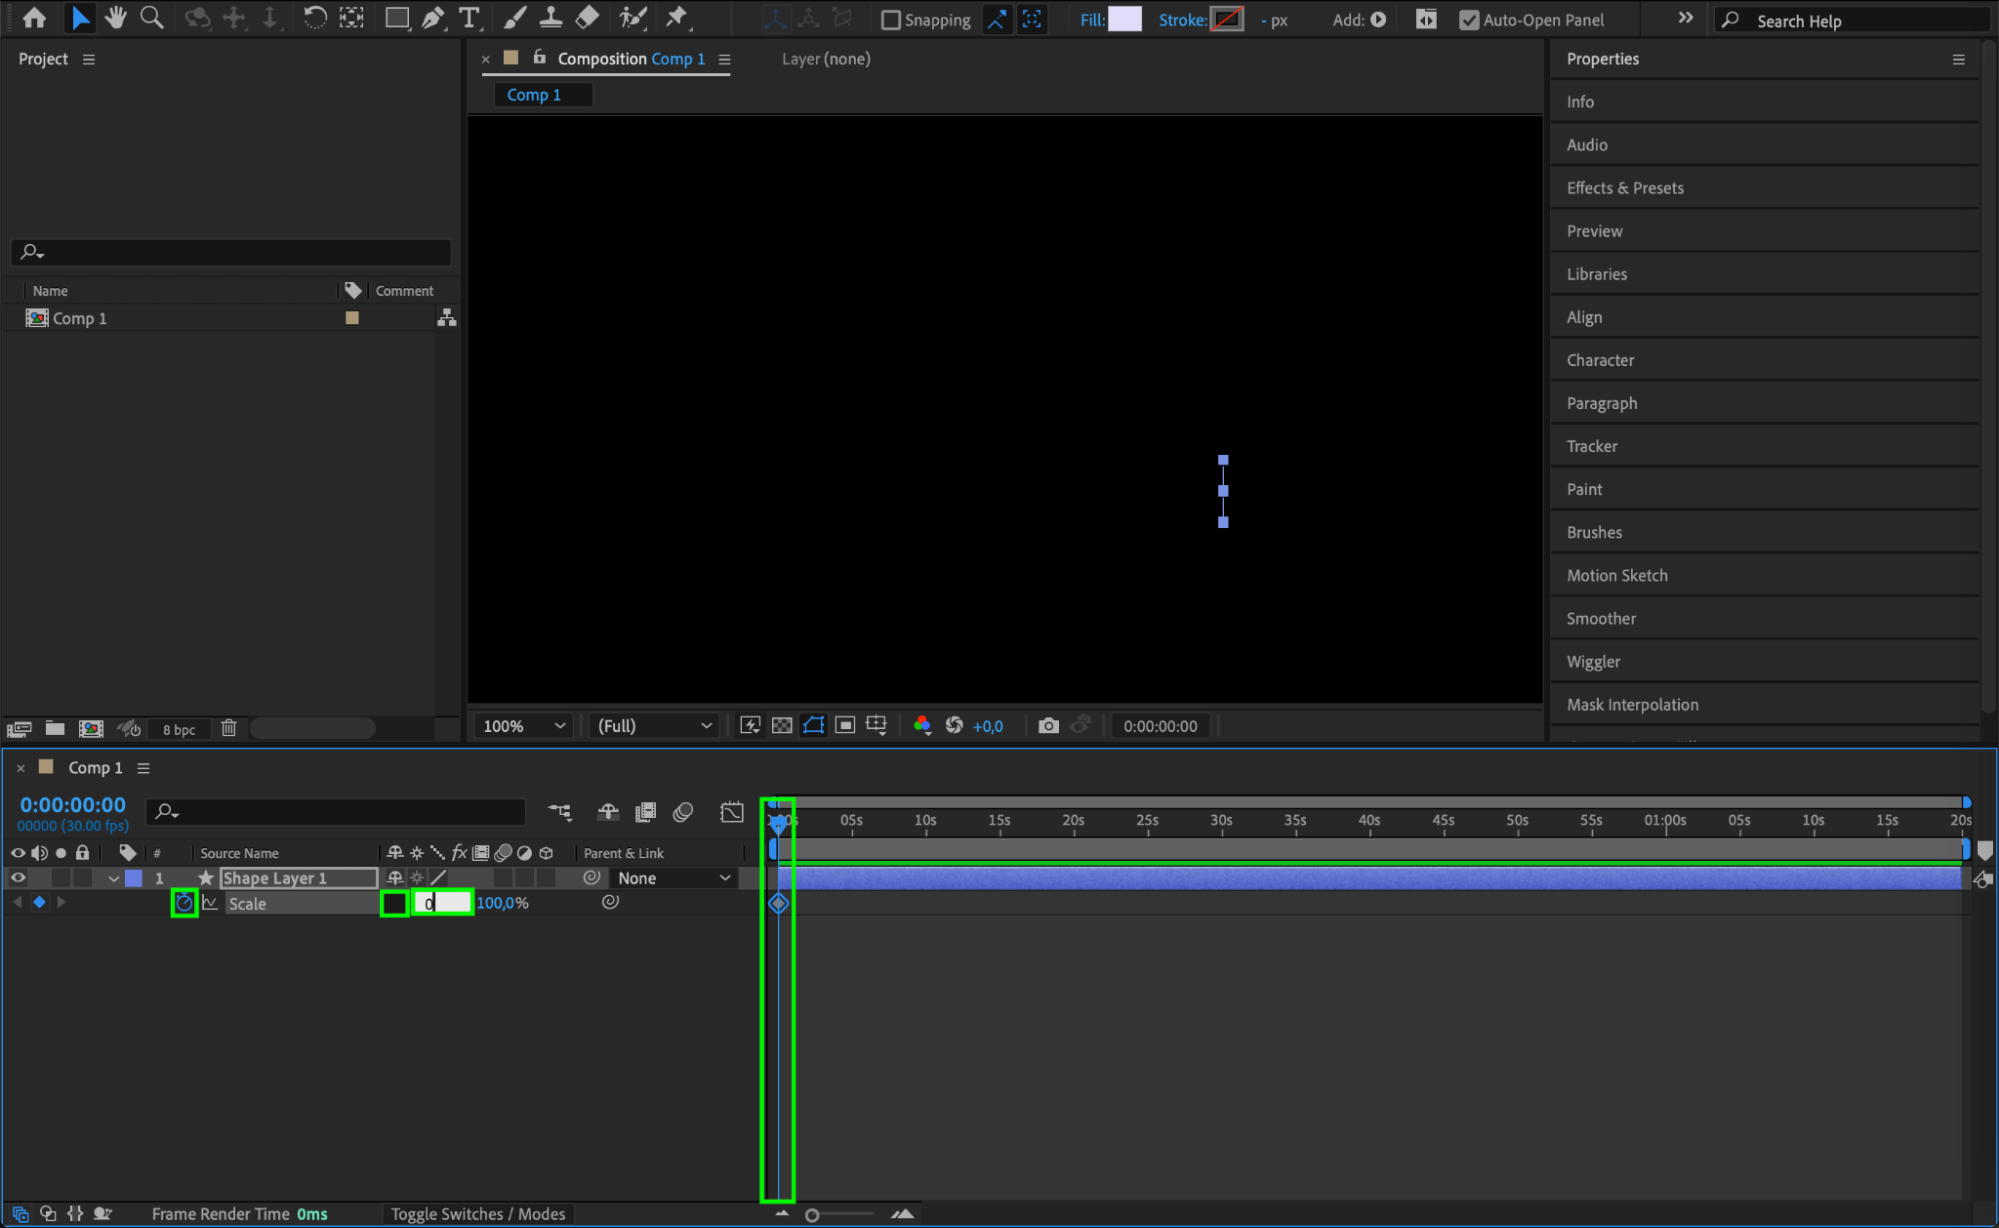

 Step 5: Duplicate the Shape Layer
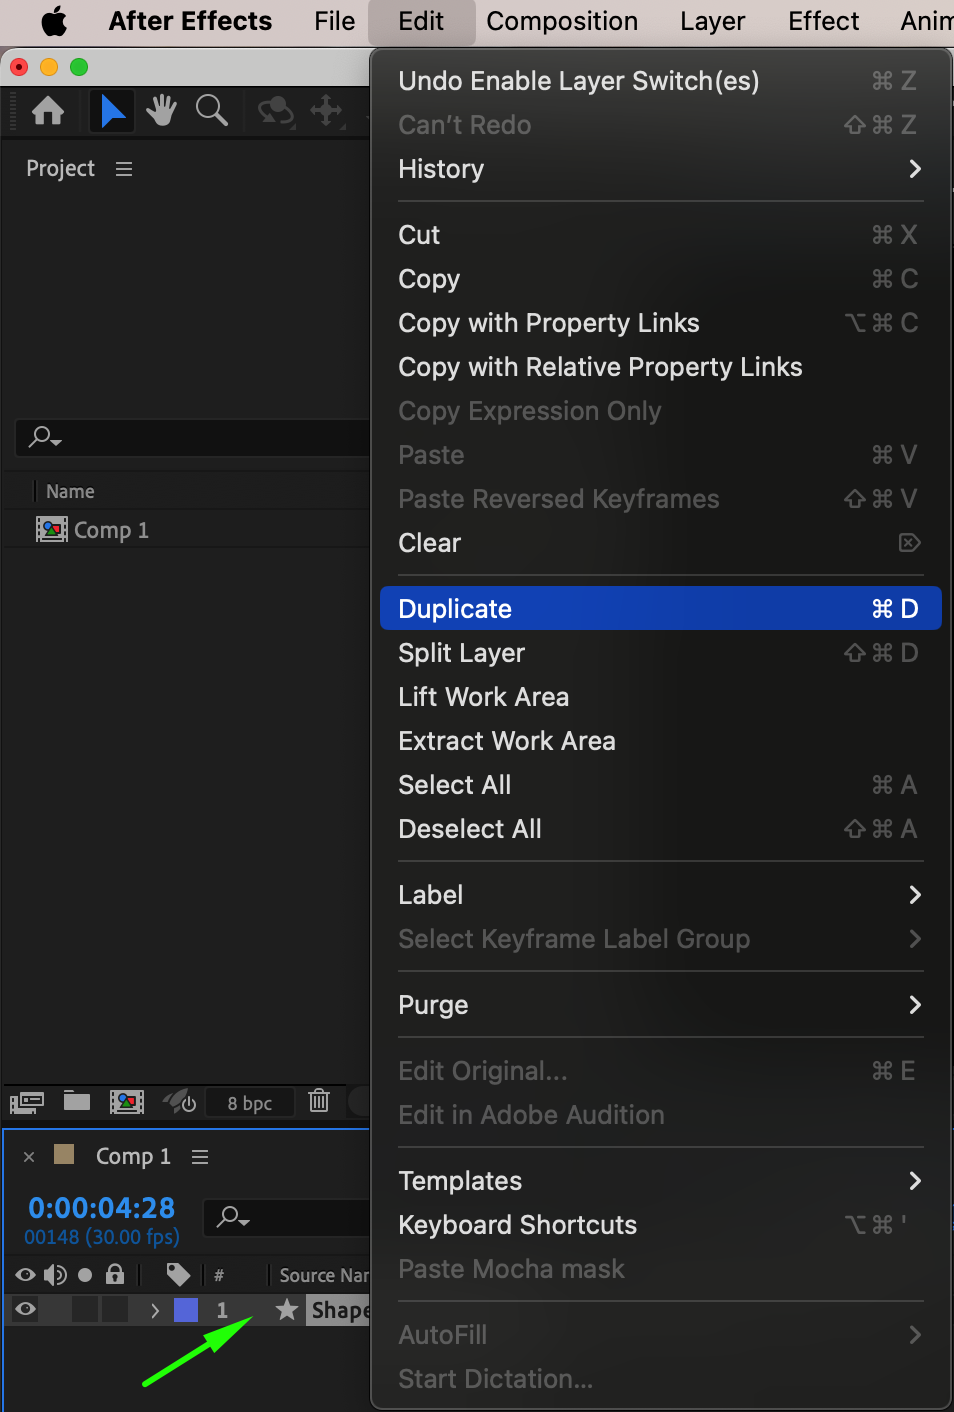
Duplicate the rectangle layer (Ctrl/Cmd + D).
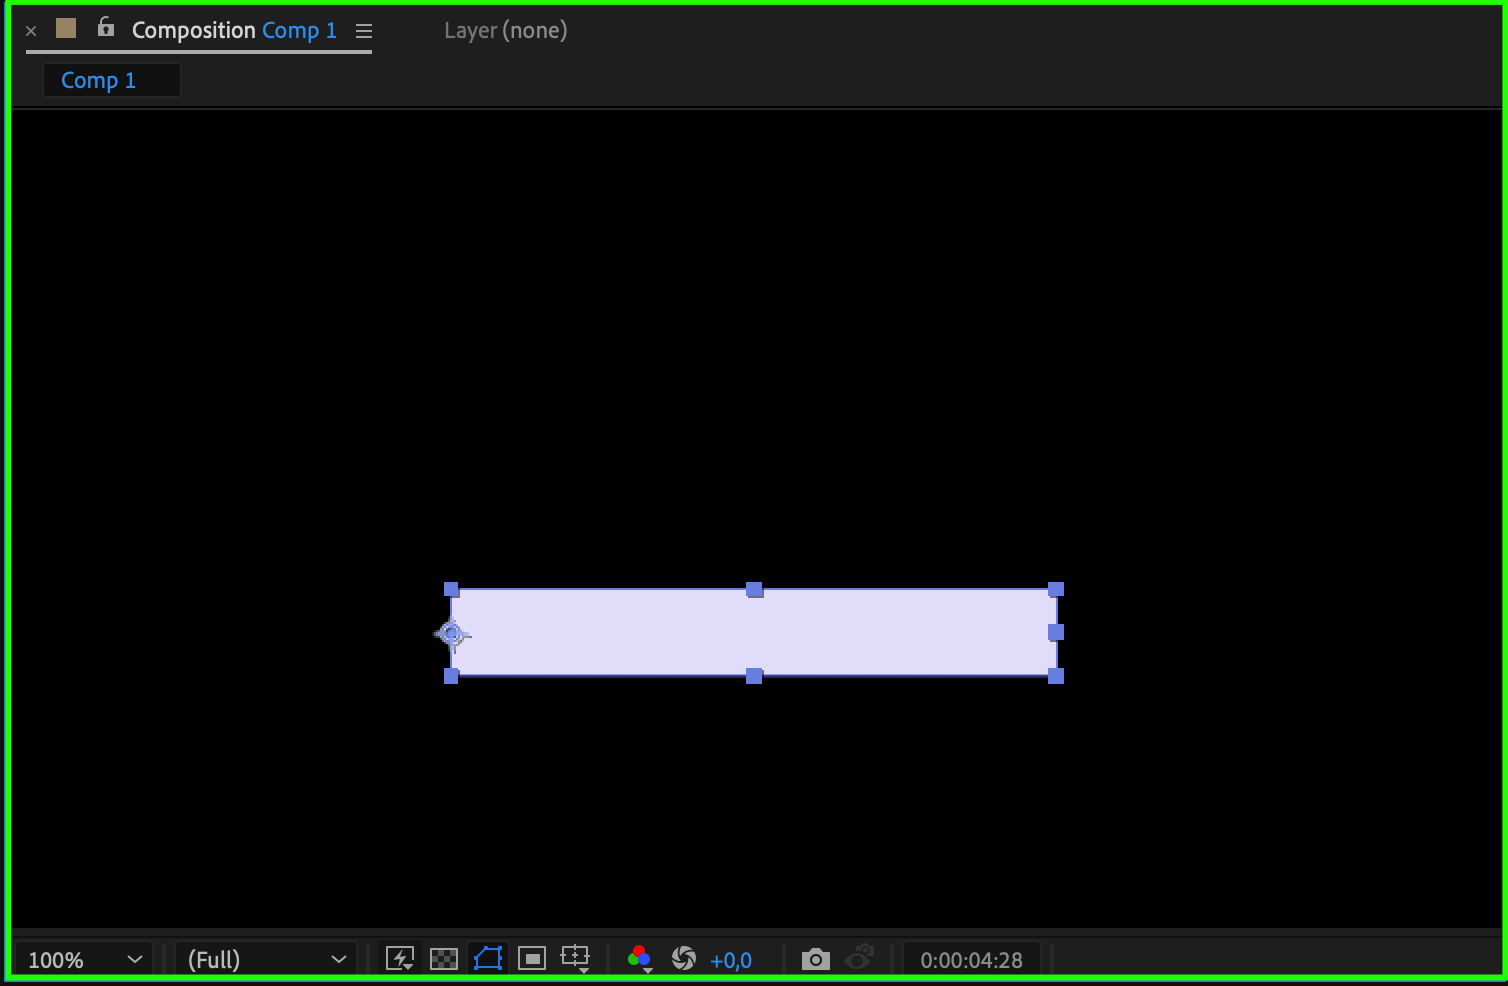
Adjust the anchor point to the left edge using the Pan Behind Tool.
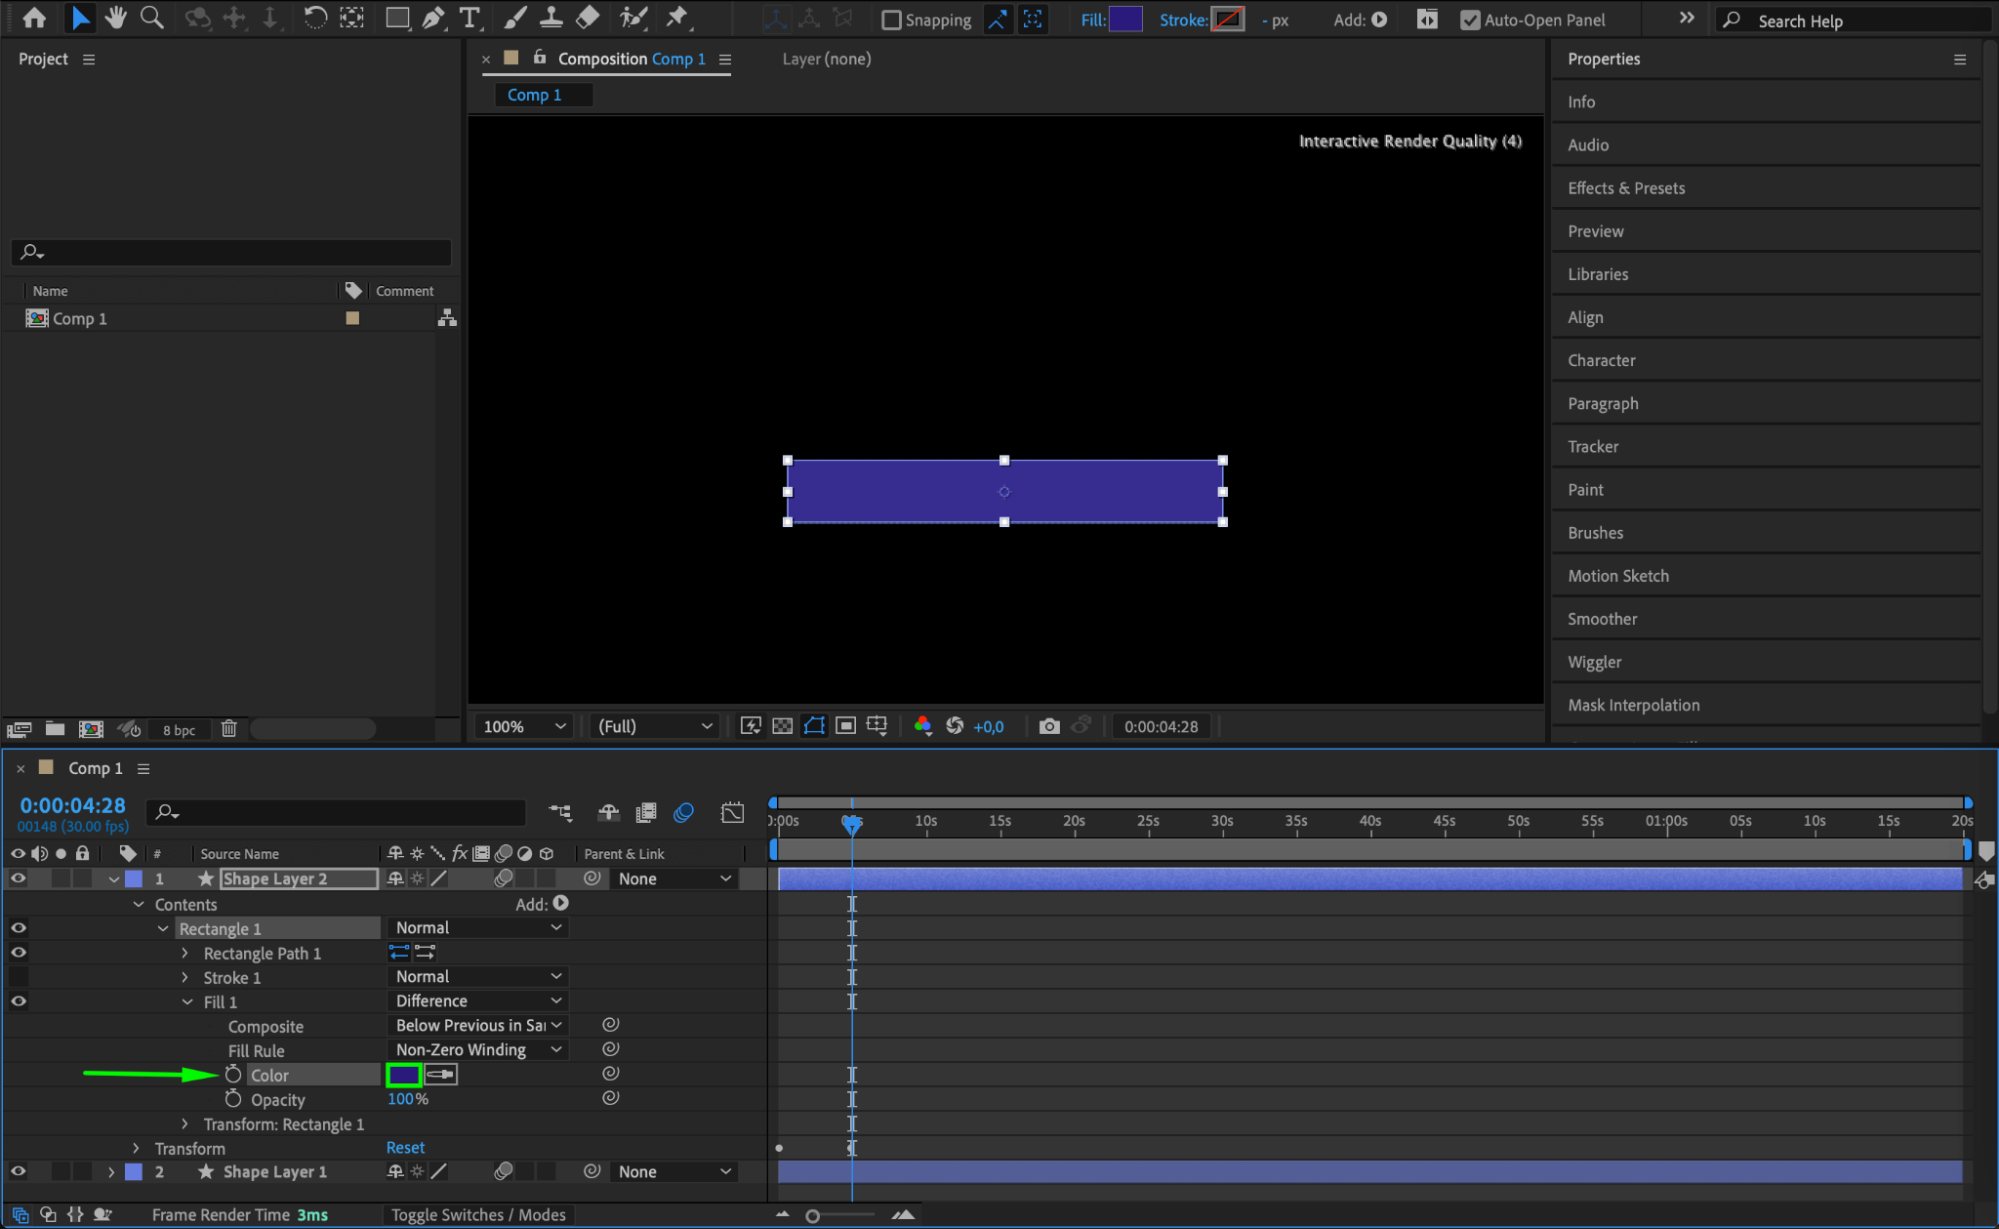
Change the color of the duplicate layer for contrast.
Offset the duplicate layer’s keyframes so its animation starts after the original layer finishes


 Step 6: Add a Subtitle
Create a text layer for the subtitle and position it over the rectangle. 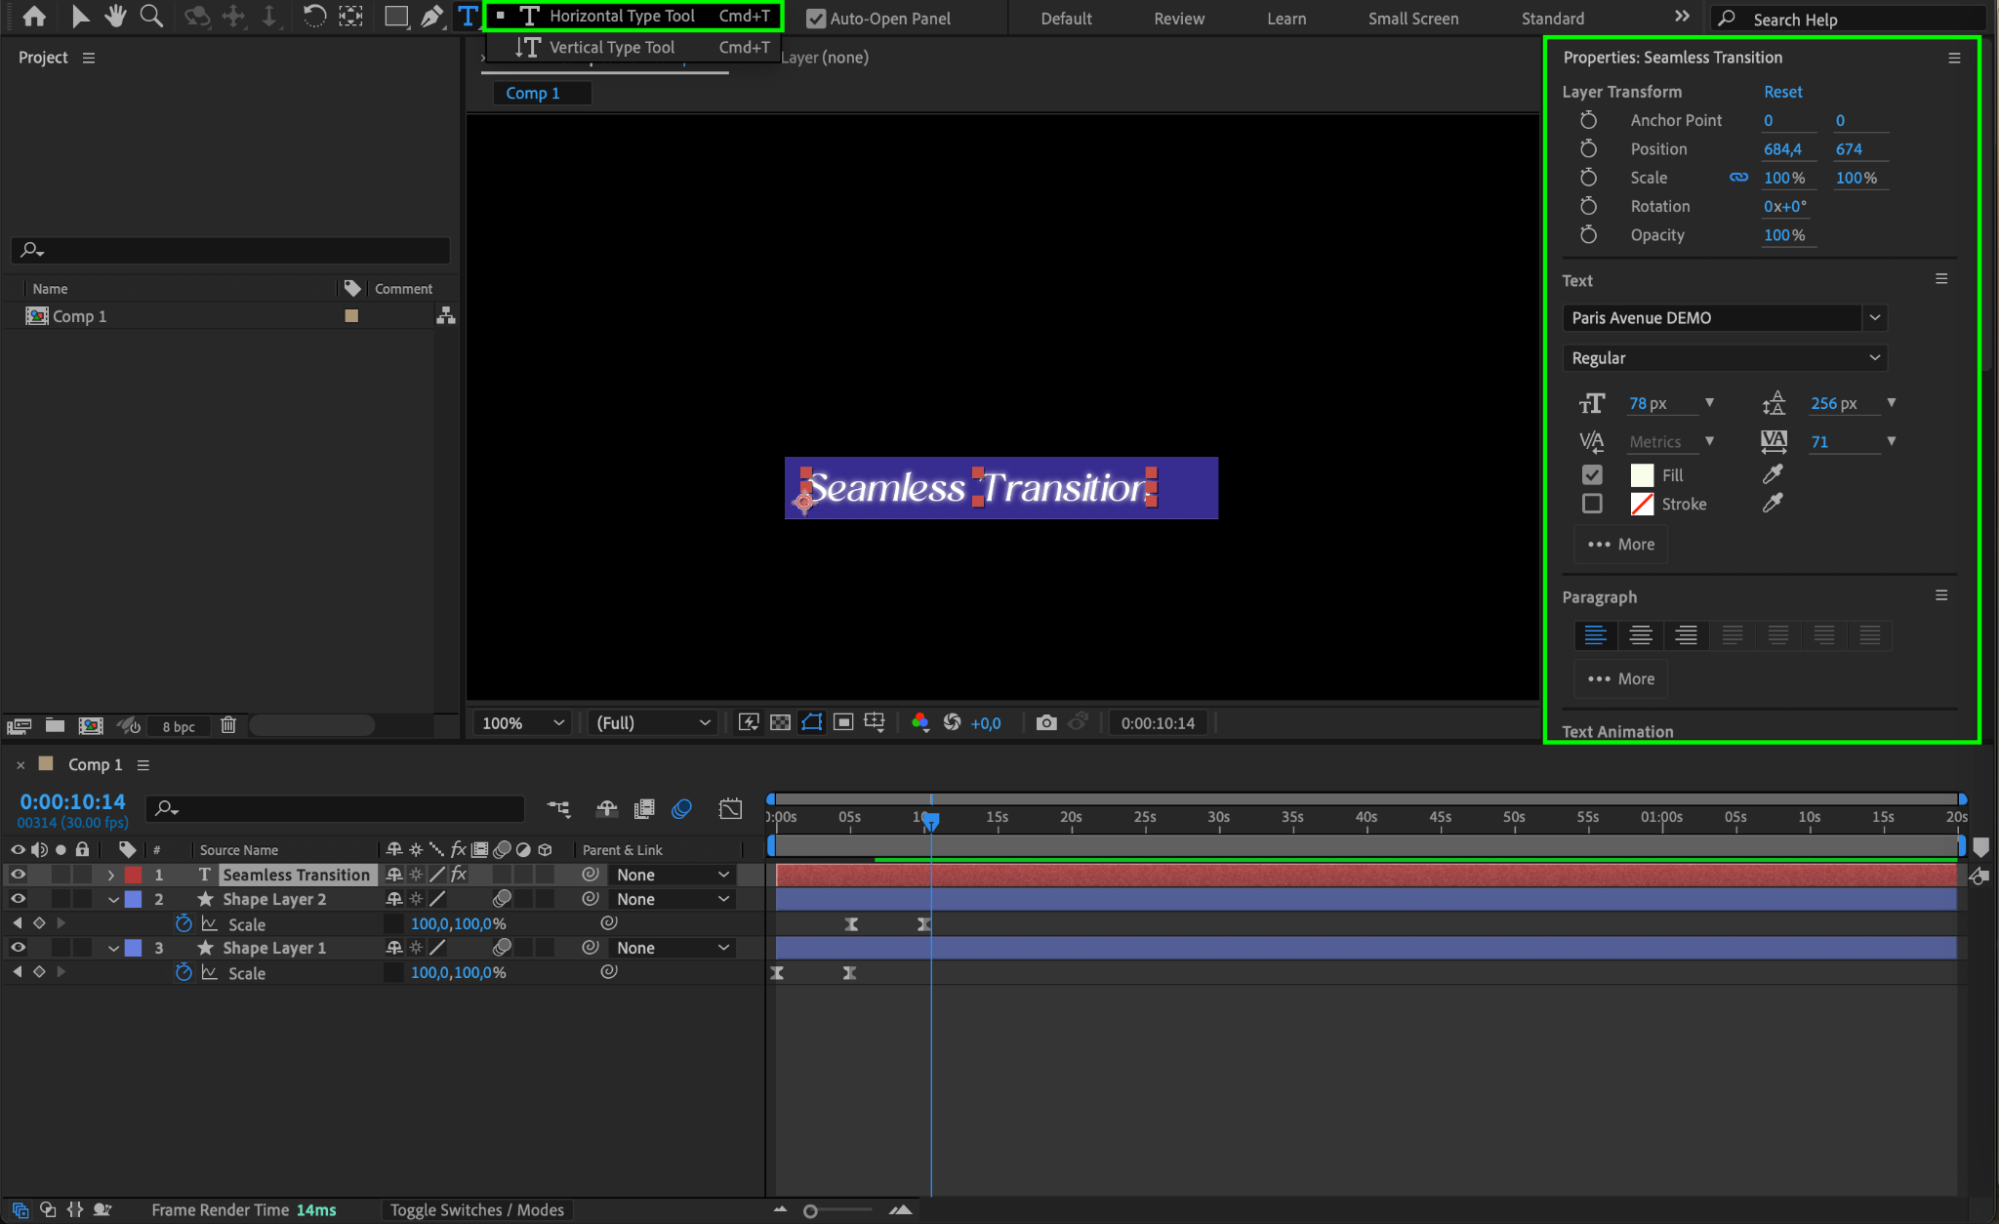 Step 7: Add a Main Text Layer
Create another text layer for the main title above or below the subtitle, depending on your design. Format the text to suit your overall composition style.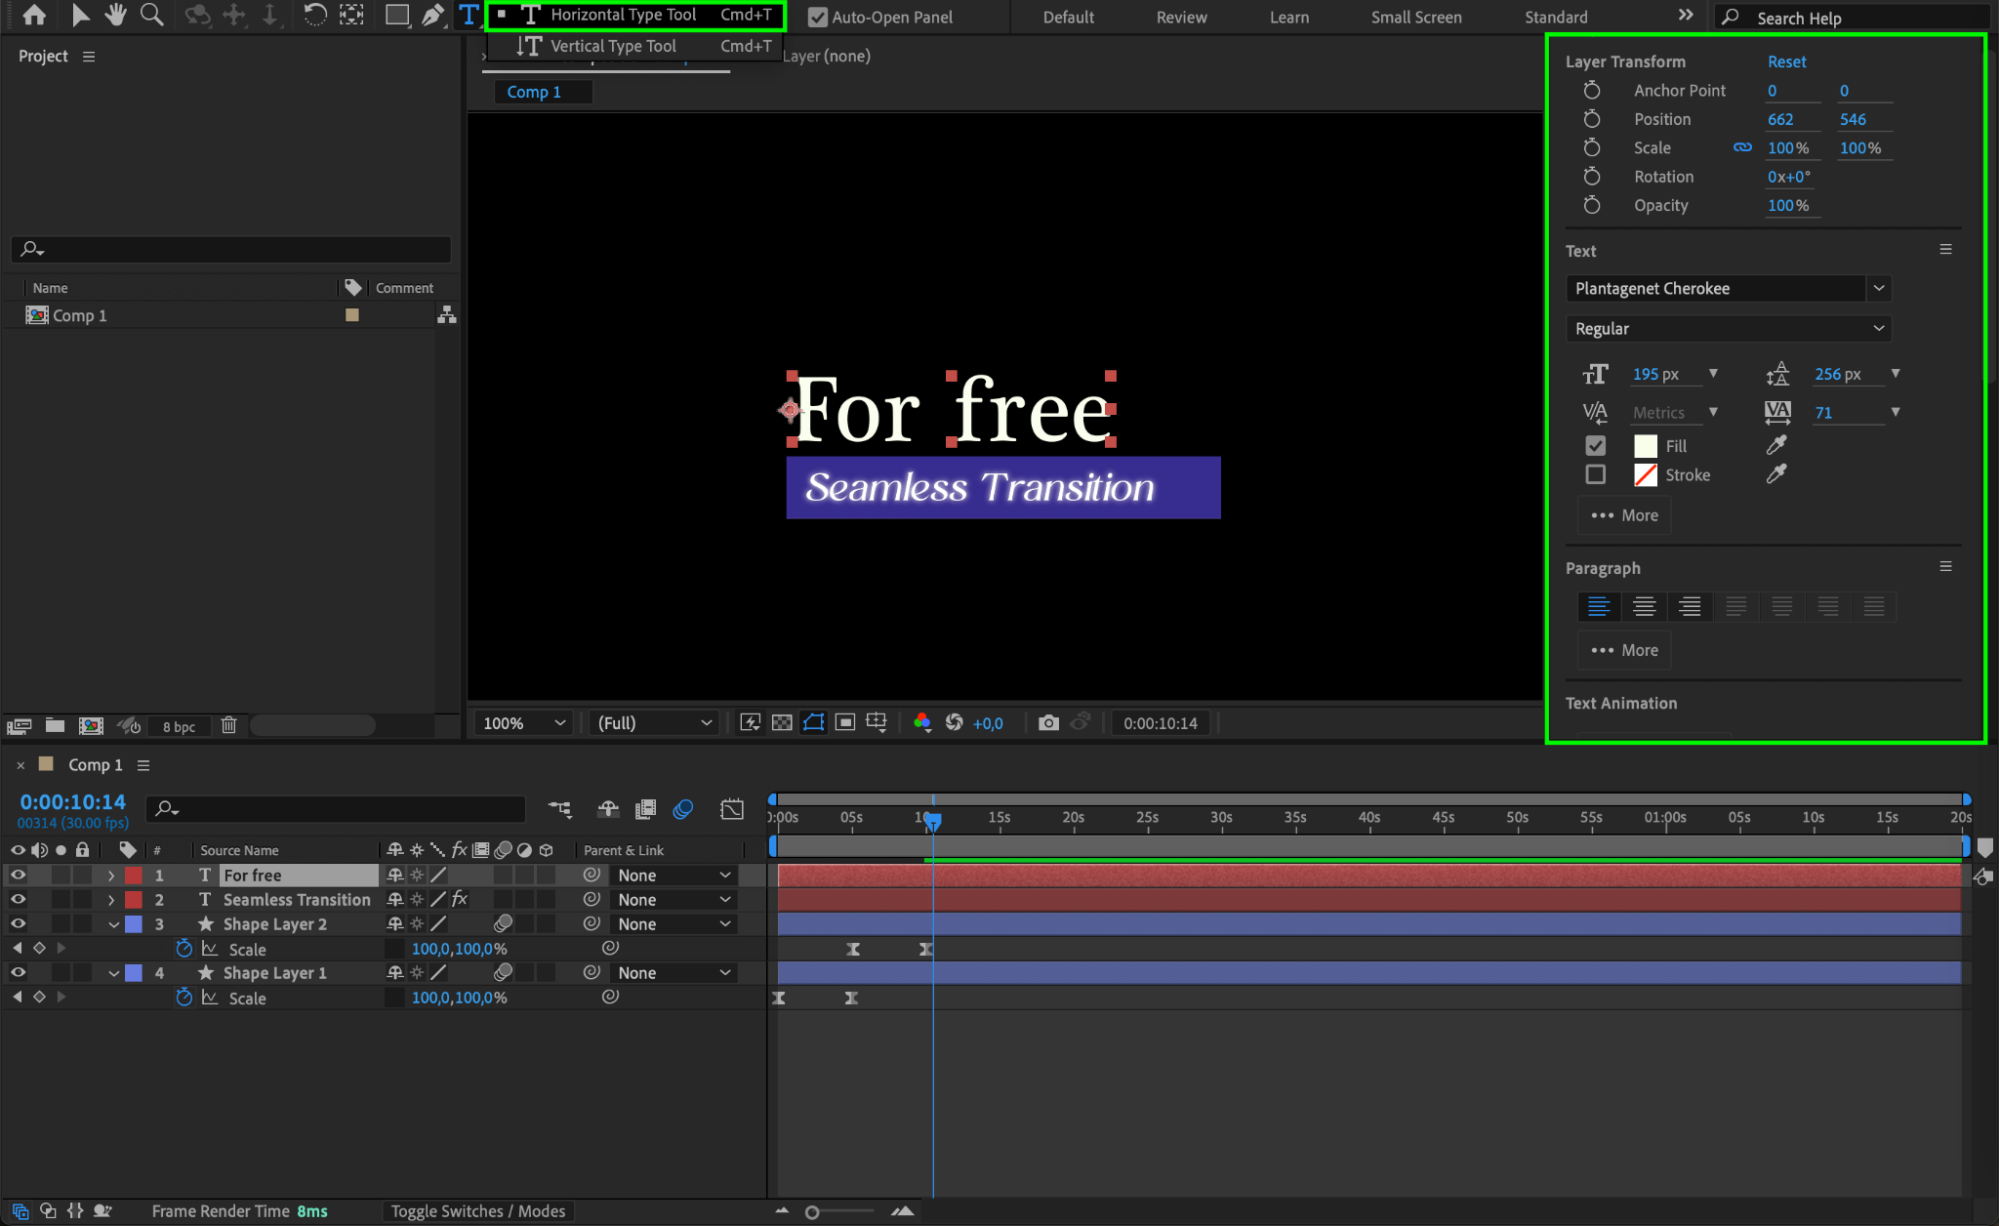 Step 8: Animate the Subtitle
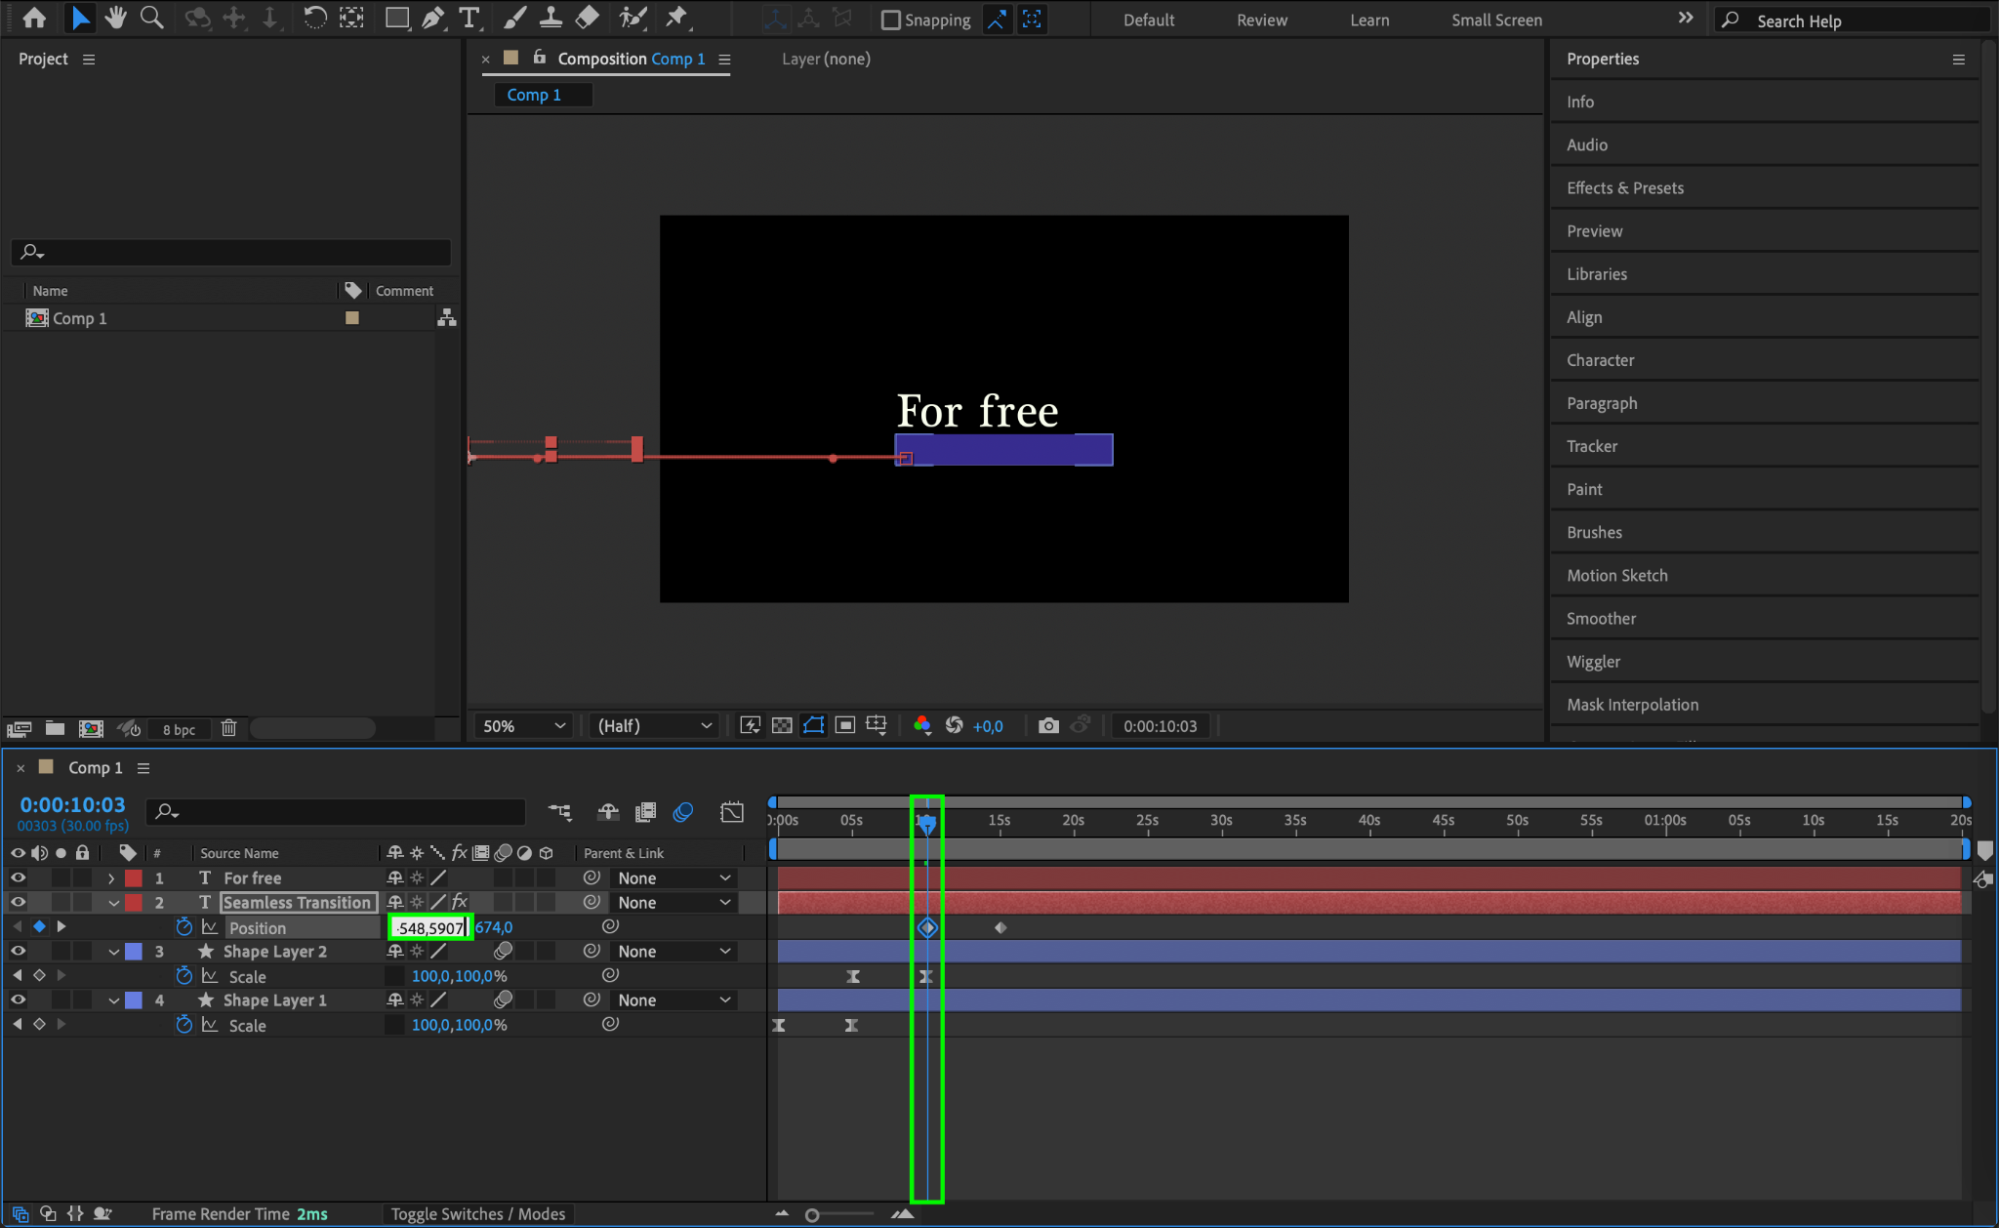
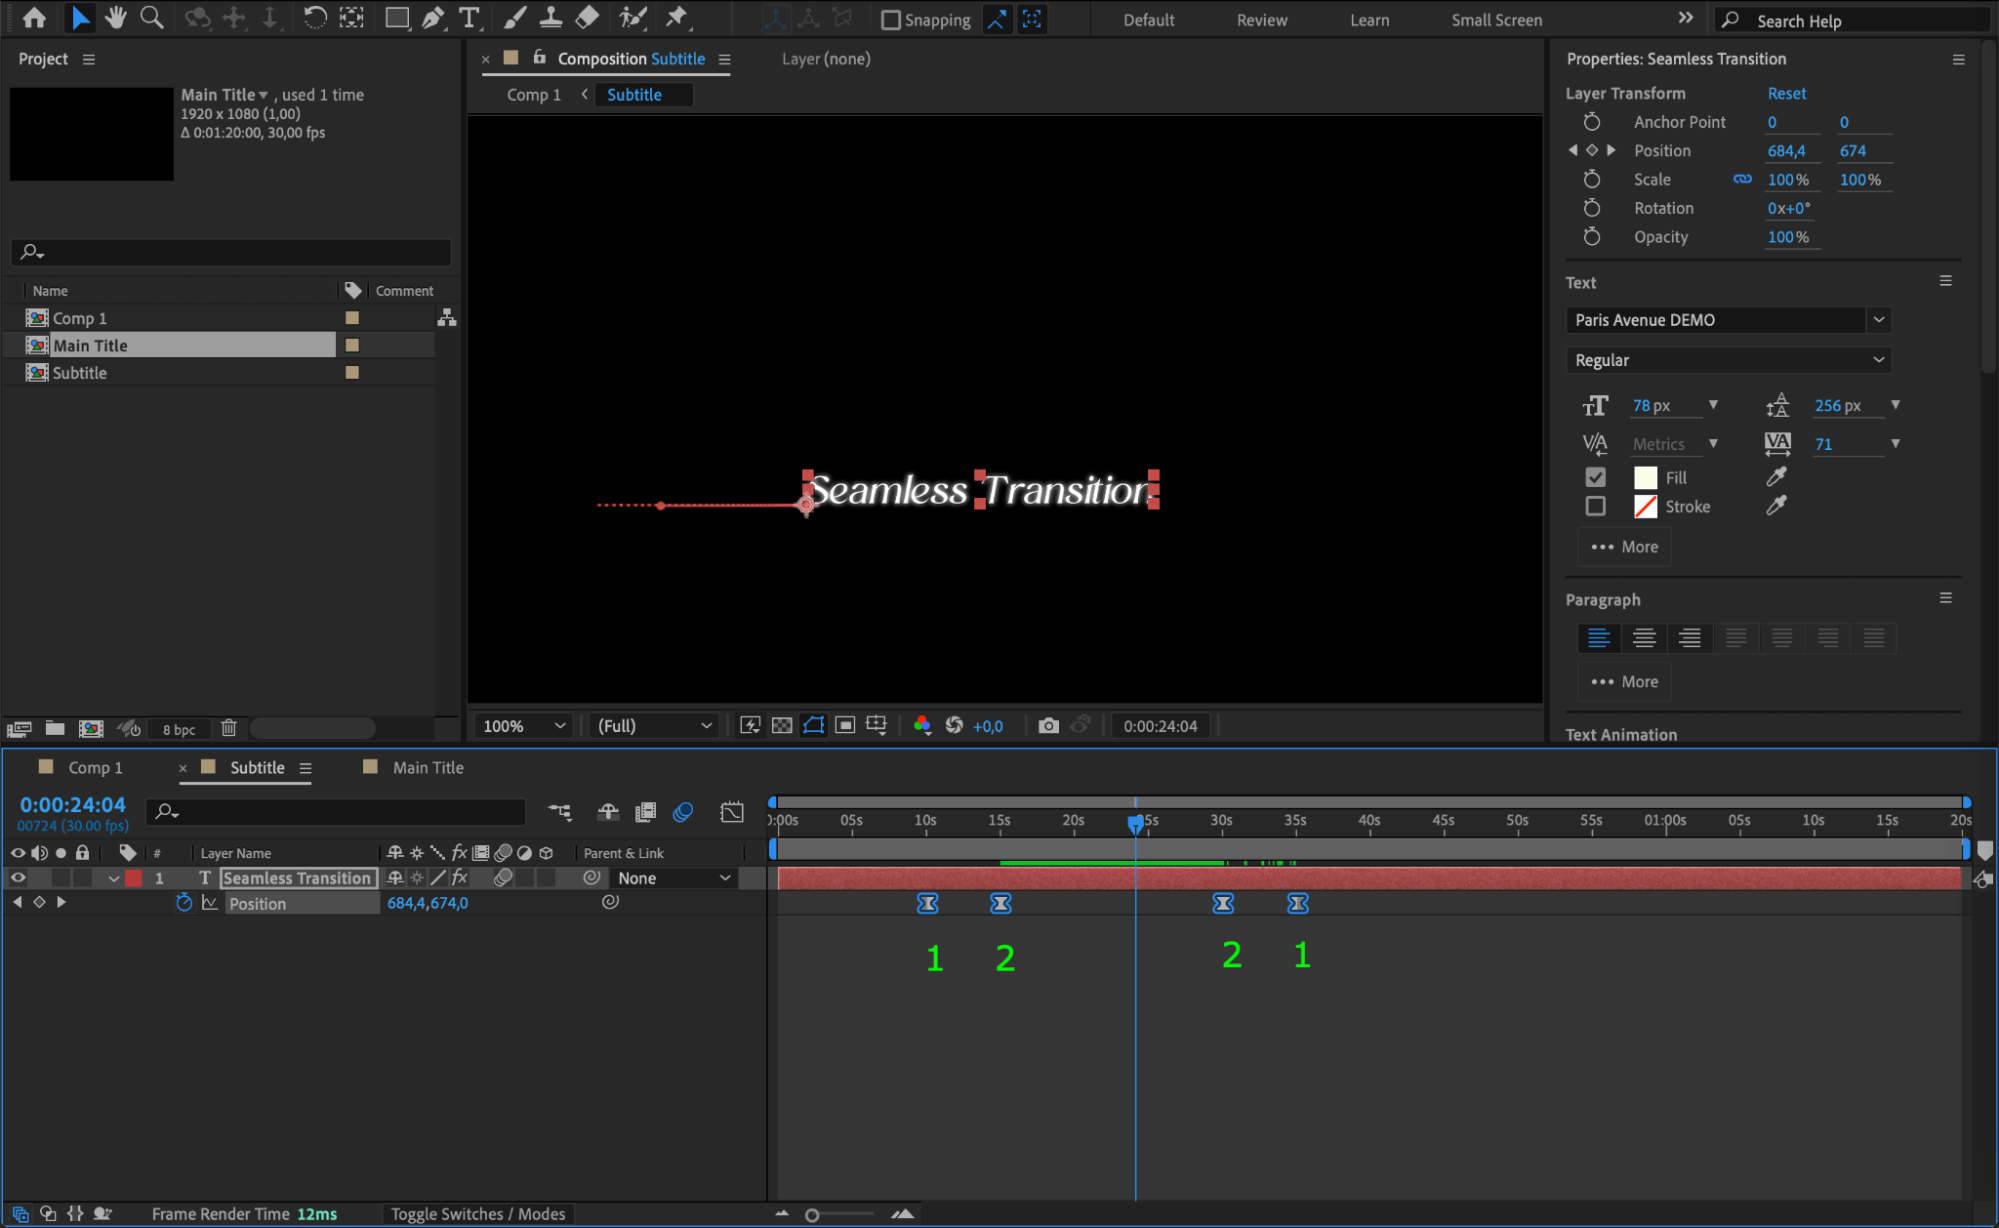
Select the subtitle text layer, press “P” to reveal the Position property.
Move the CTI forward, click the stopwatch to create a keyframe, and then move the CTI backward to position the text off-screen on the left.
Play the animation to ensure the text slides in from the left. Apply Easy Ease and enable Motion Blur for smoothness.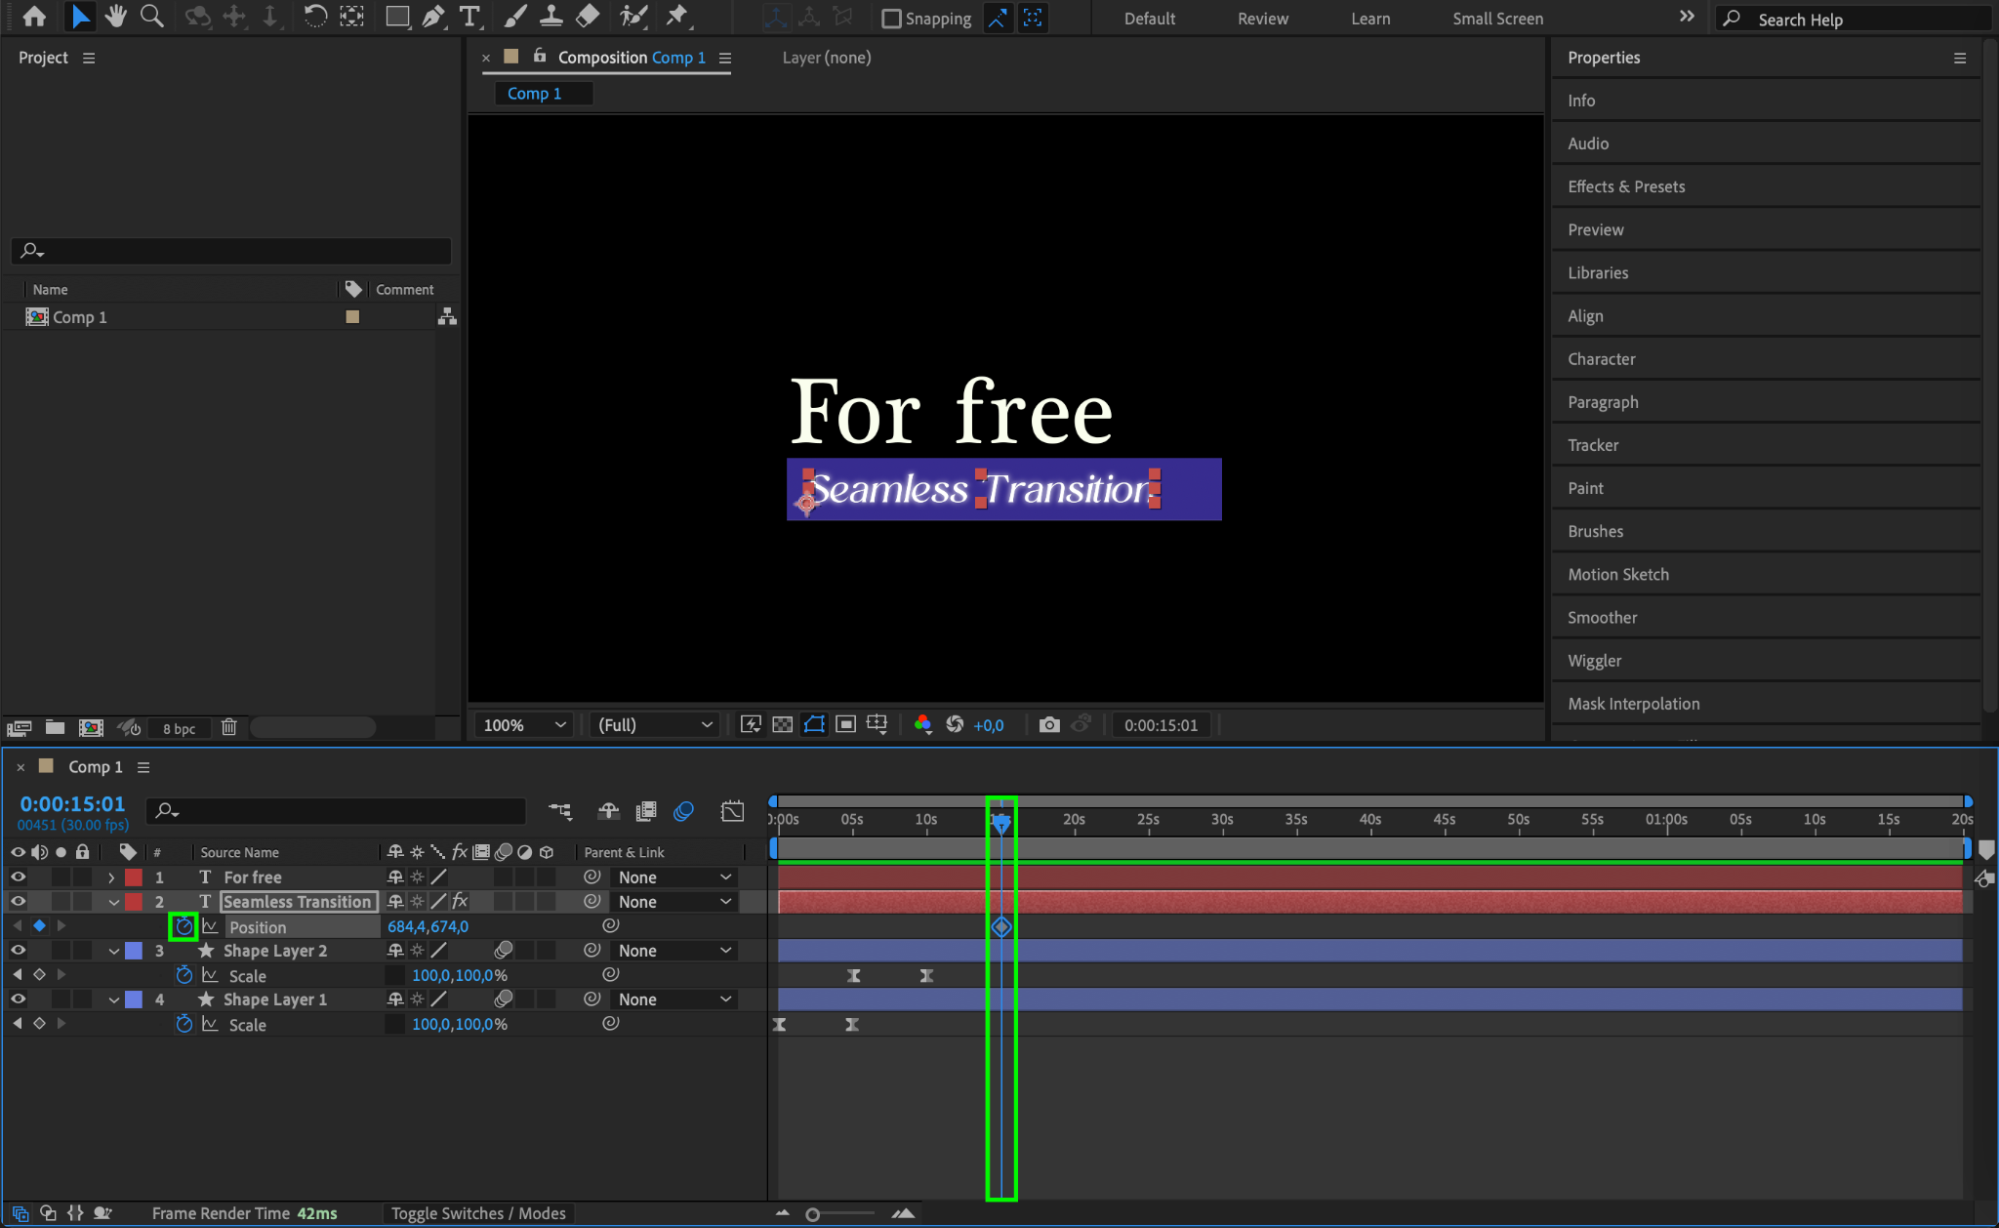

 Step 9: Pre-compose the Subtitle Layer
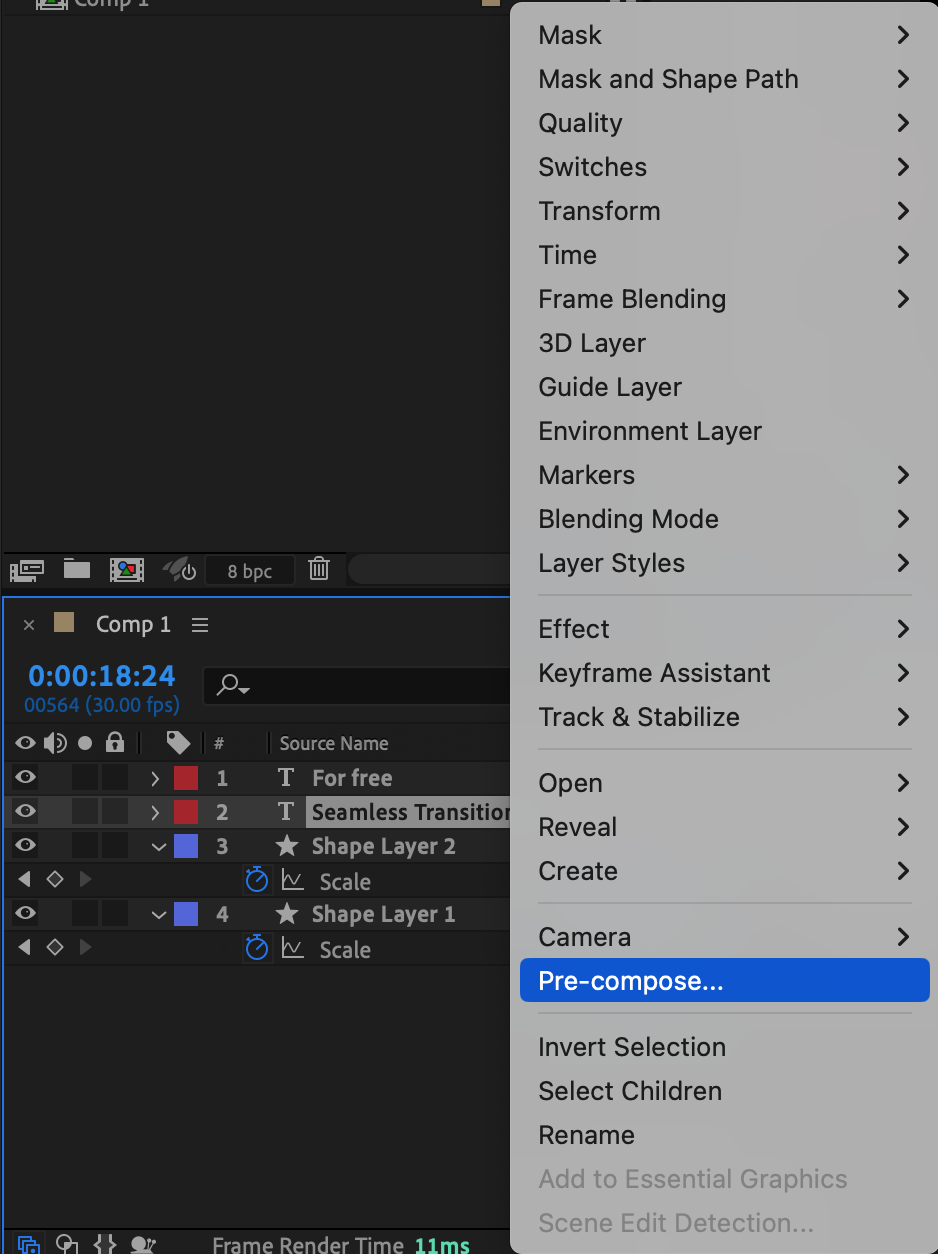
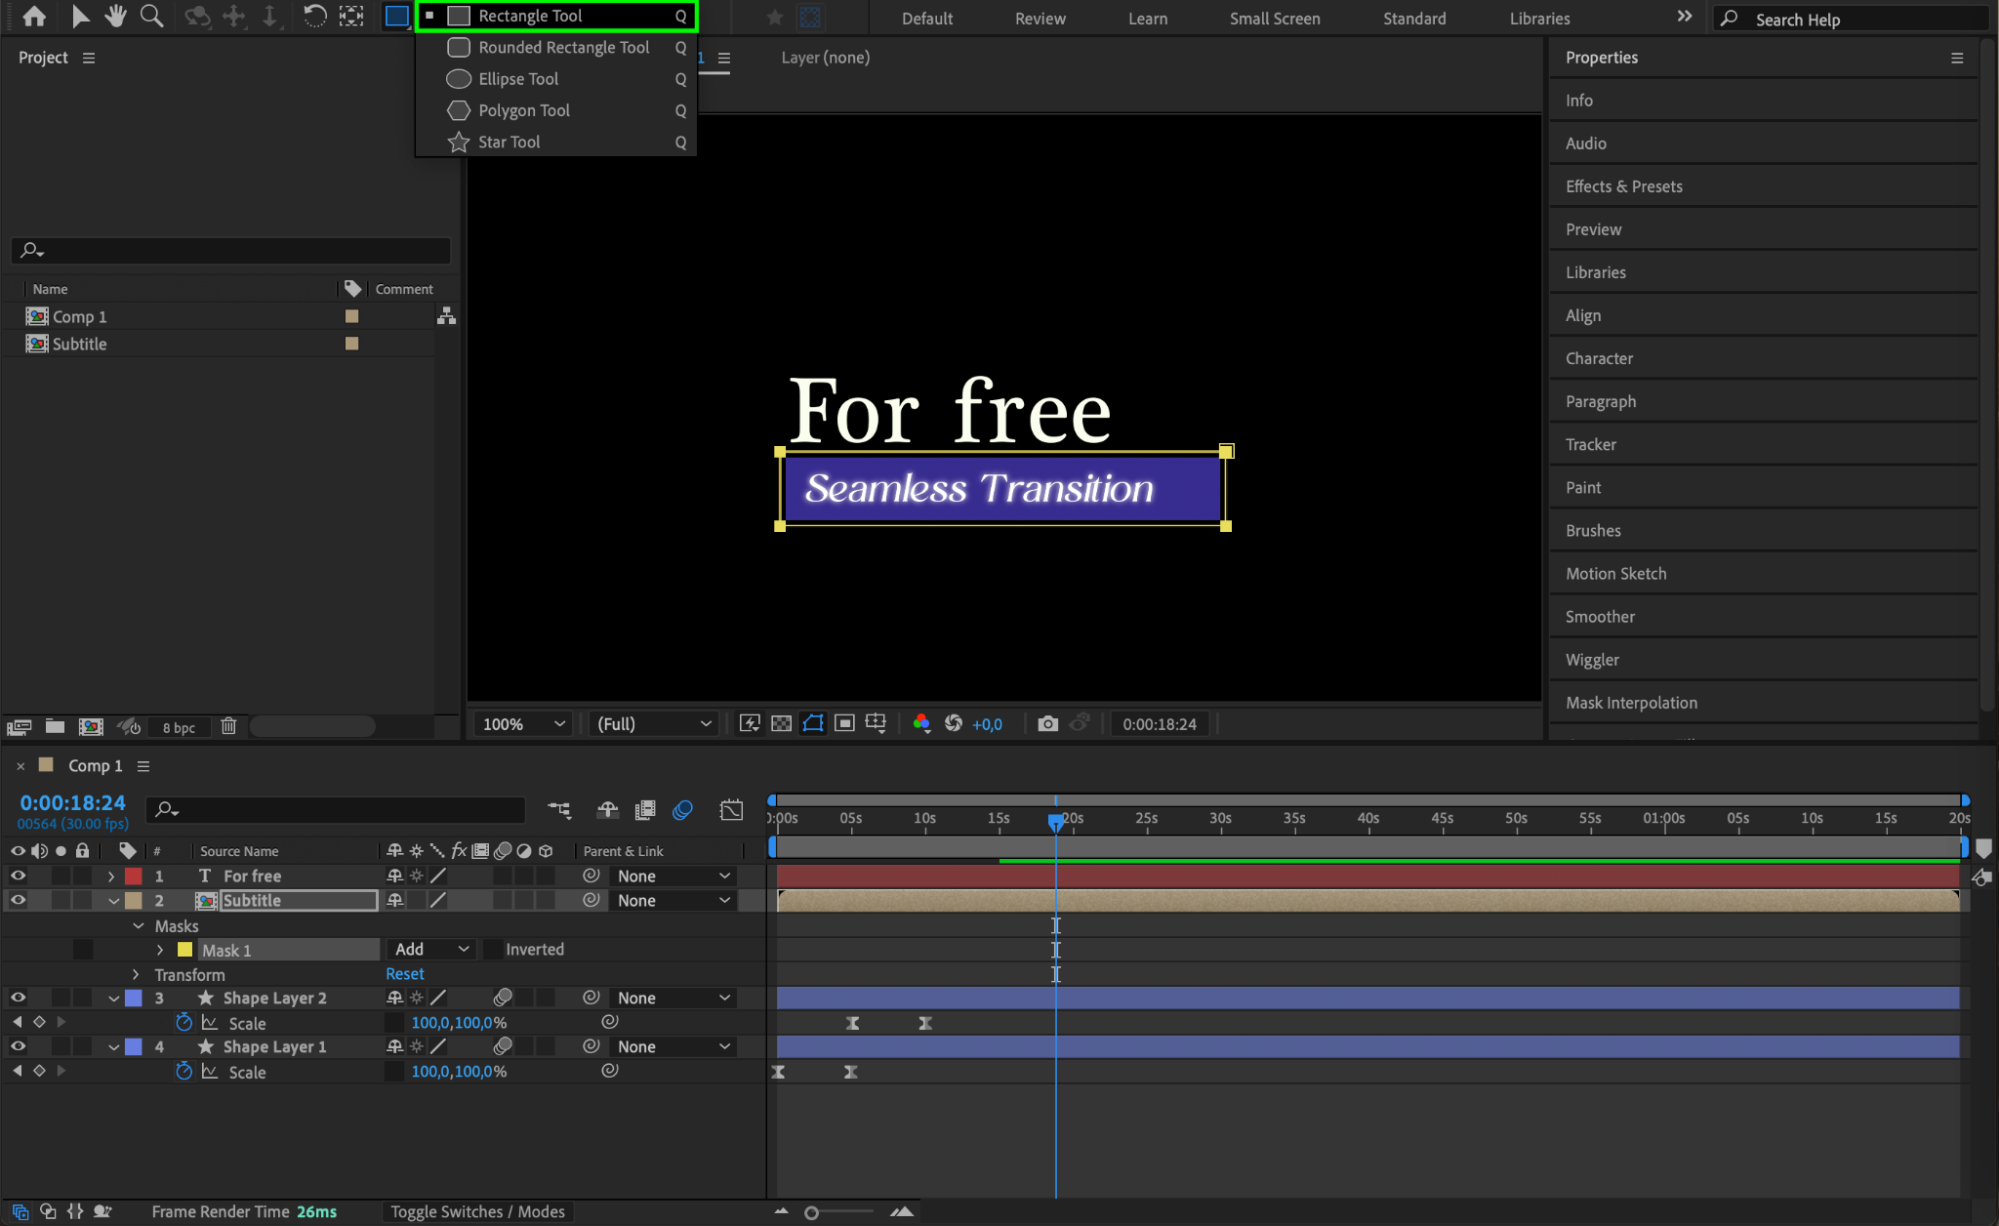
Select the subtitle text and the rectangle base layer, then go to Layer > Pre-compose and name it “Subtitle.” Use the Rectangle Tool to create a mask and restrict the animation to the visible bounds of the rectangle.

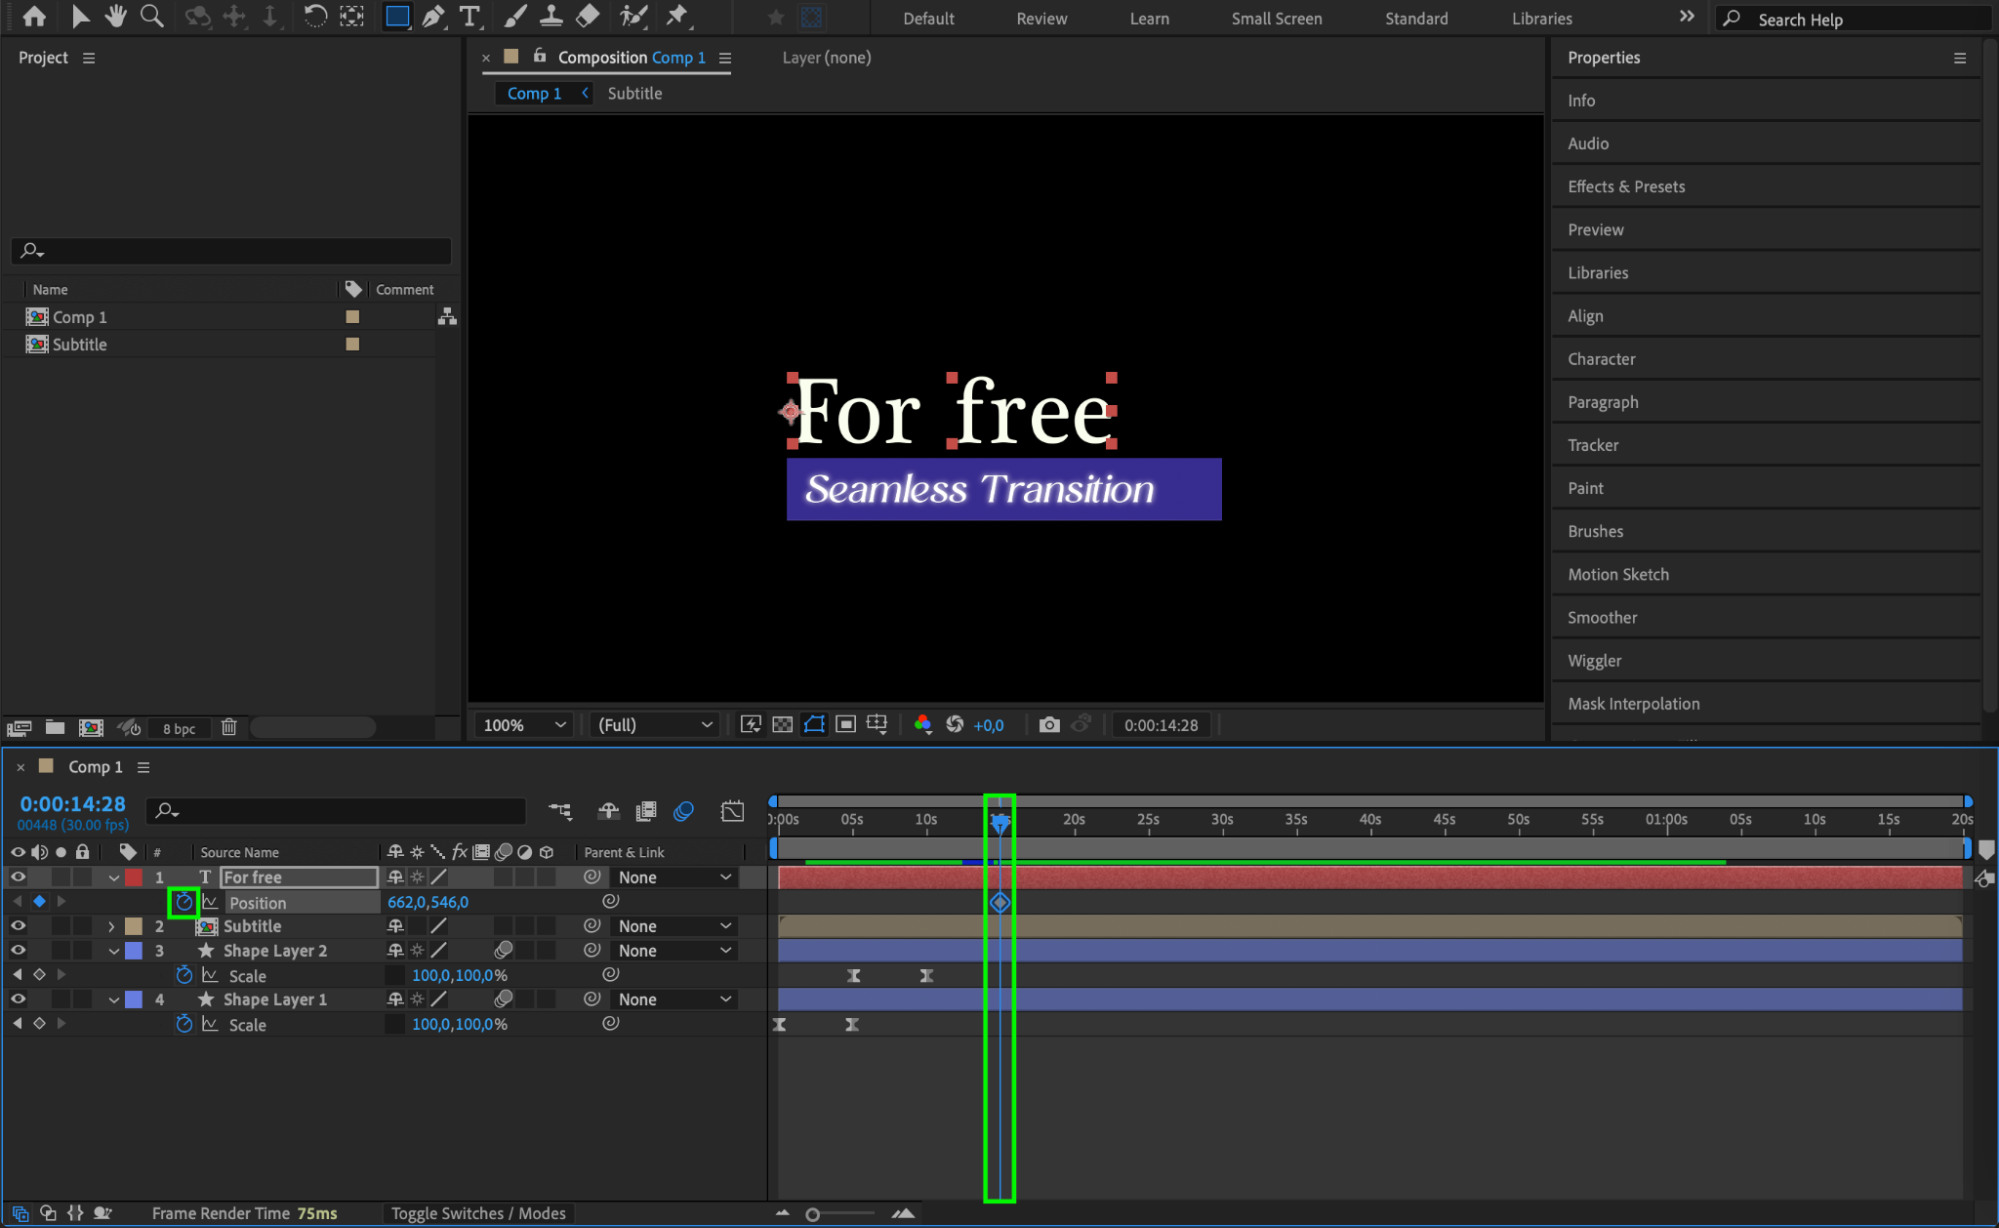
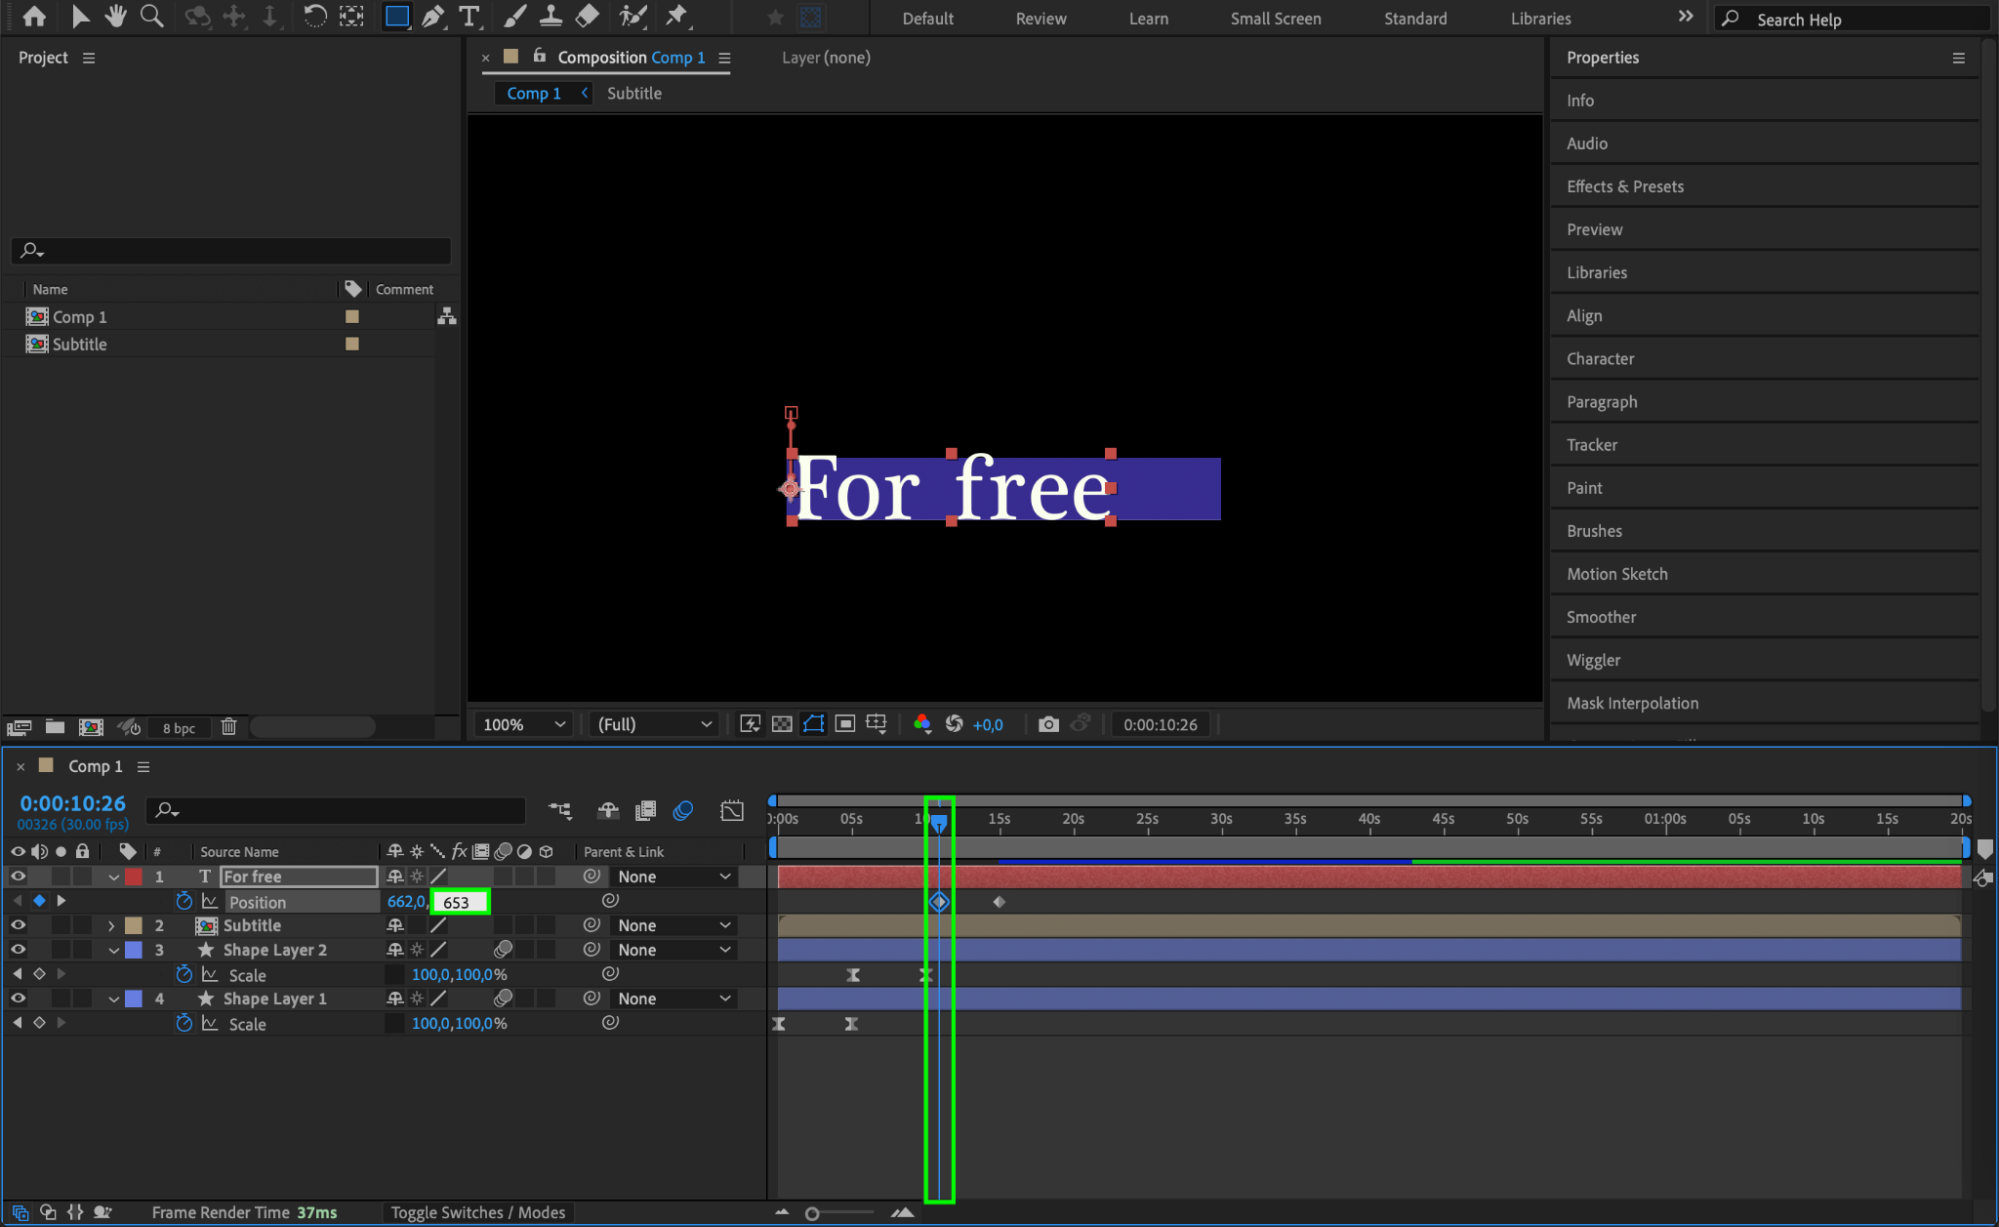
 Step 10: Animate the Main Text
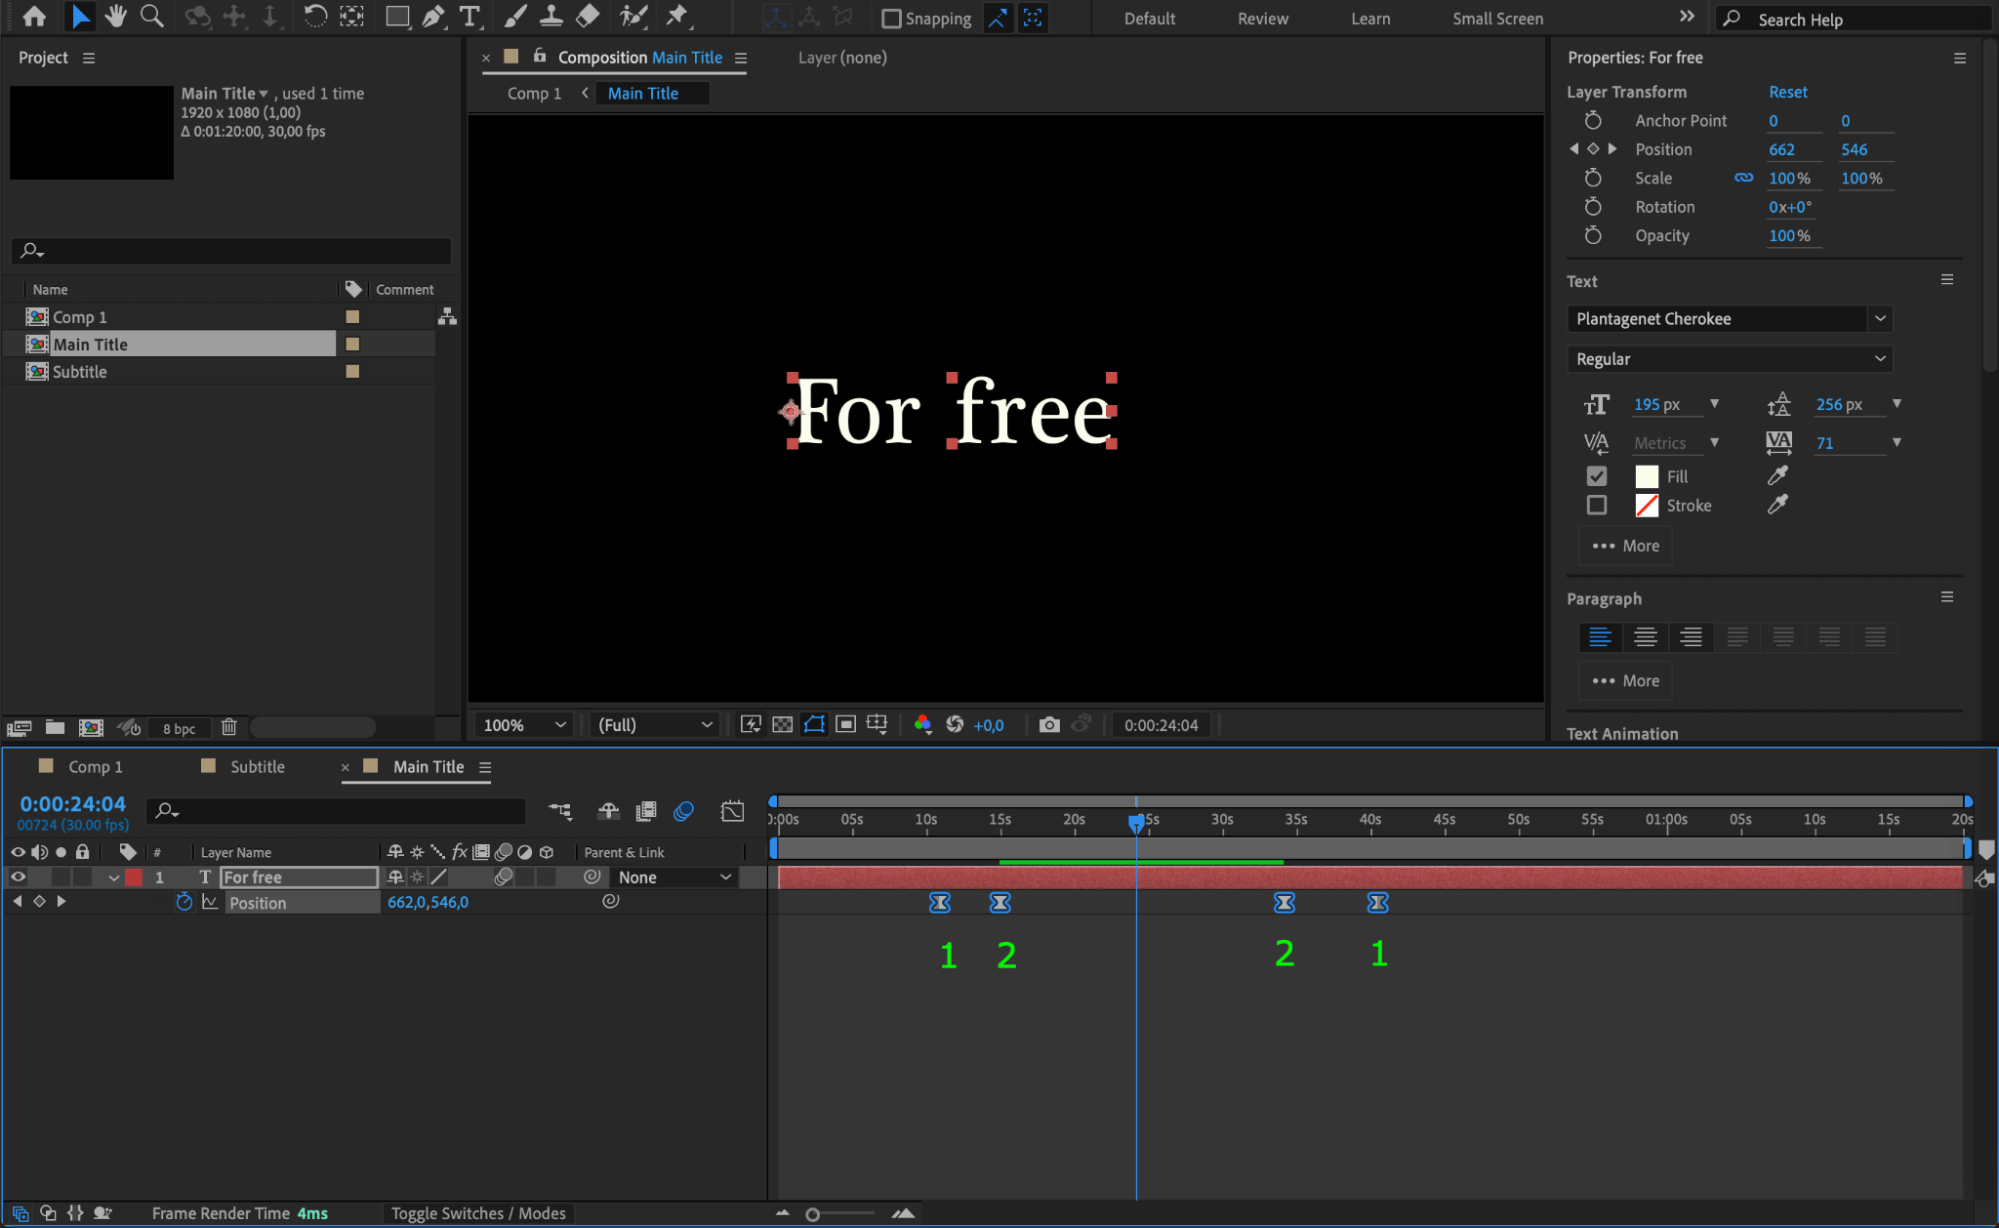
Select the main text layer and press “P” to reveal the Position property.
Move the CTI forward, set a keyframe for its starting position, and then move the CTI backward to place the text just below the shape layer.
Adjust the animation to slide up smoothly. Apply Easy Ease and enable Motion Blur for better results.

 Step 11: Pre-compose the Main Text
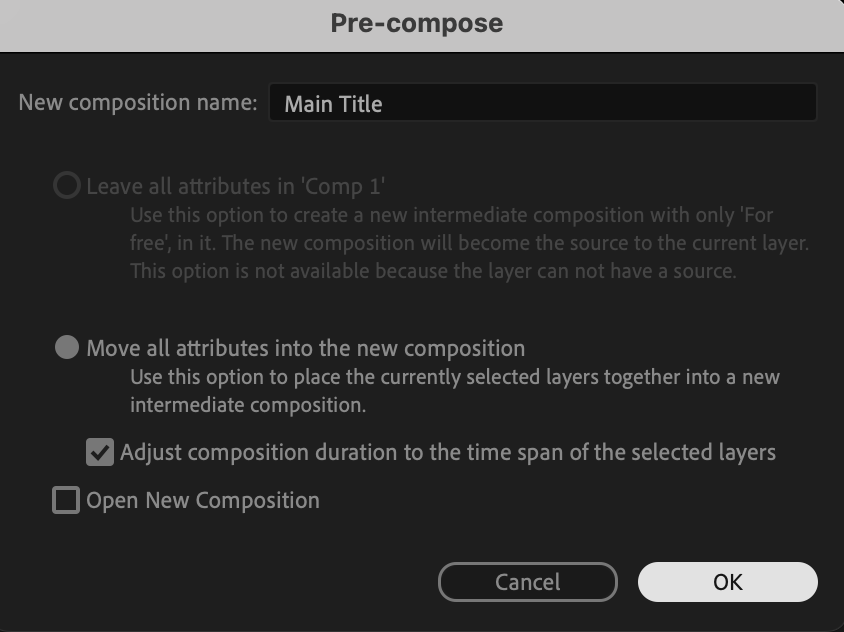
Pre-compose the main text layer and name it “Main Text.” Create a mask around the text to maintain a clean and organized look.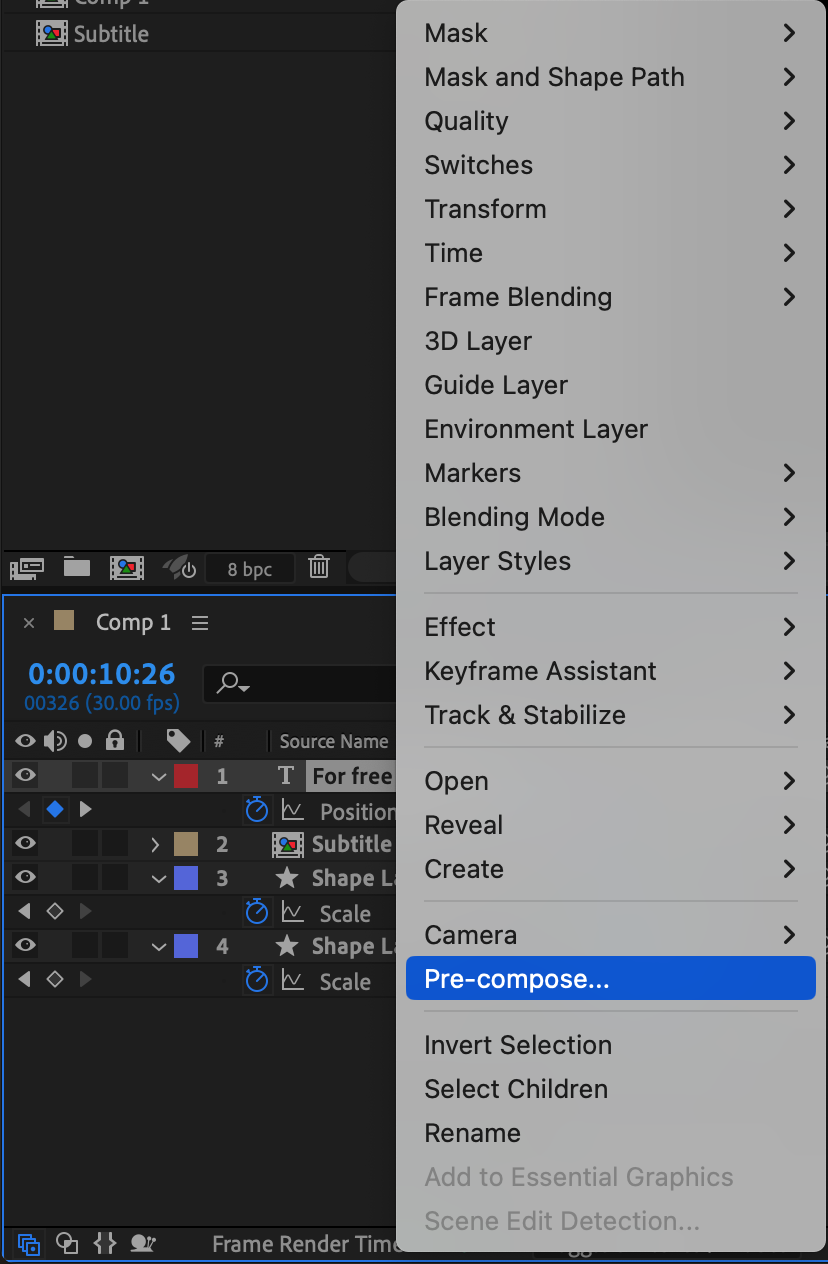
 Step 12: Finalize the Animation
Reverse the keyframes for each layer to create an exit animation. This ensures the lower third animates out in the same smooth manner it appeared.
 Step 13: Preview and Render
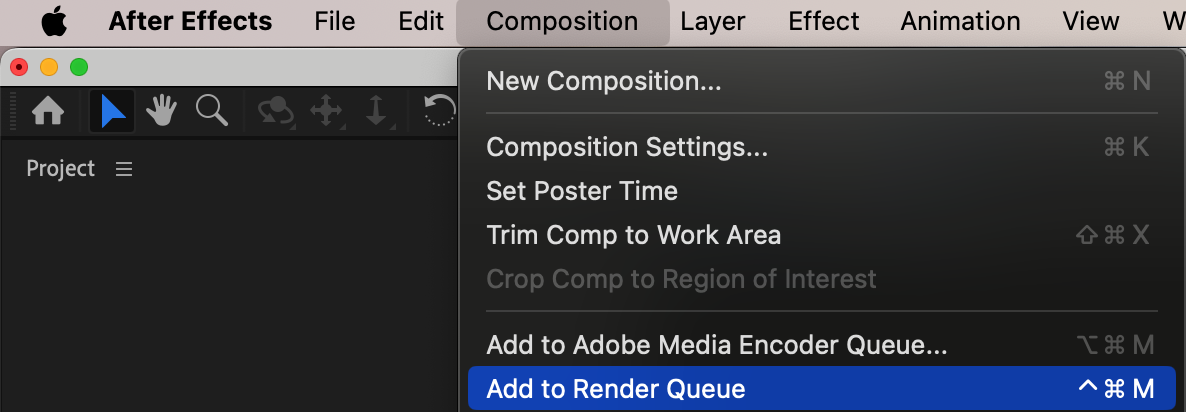
Preview the entire animation to confirm everything is working as expected. Go to Composition > Add to Render Queue and render your project with your desired output settings.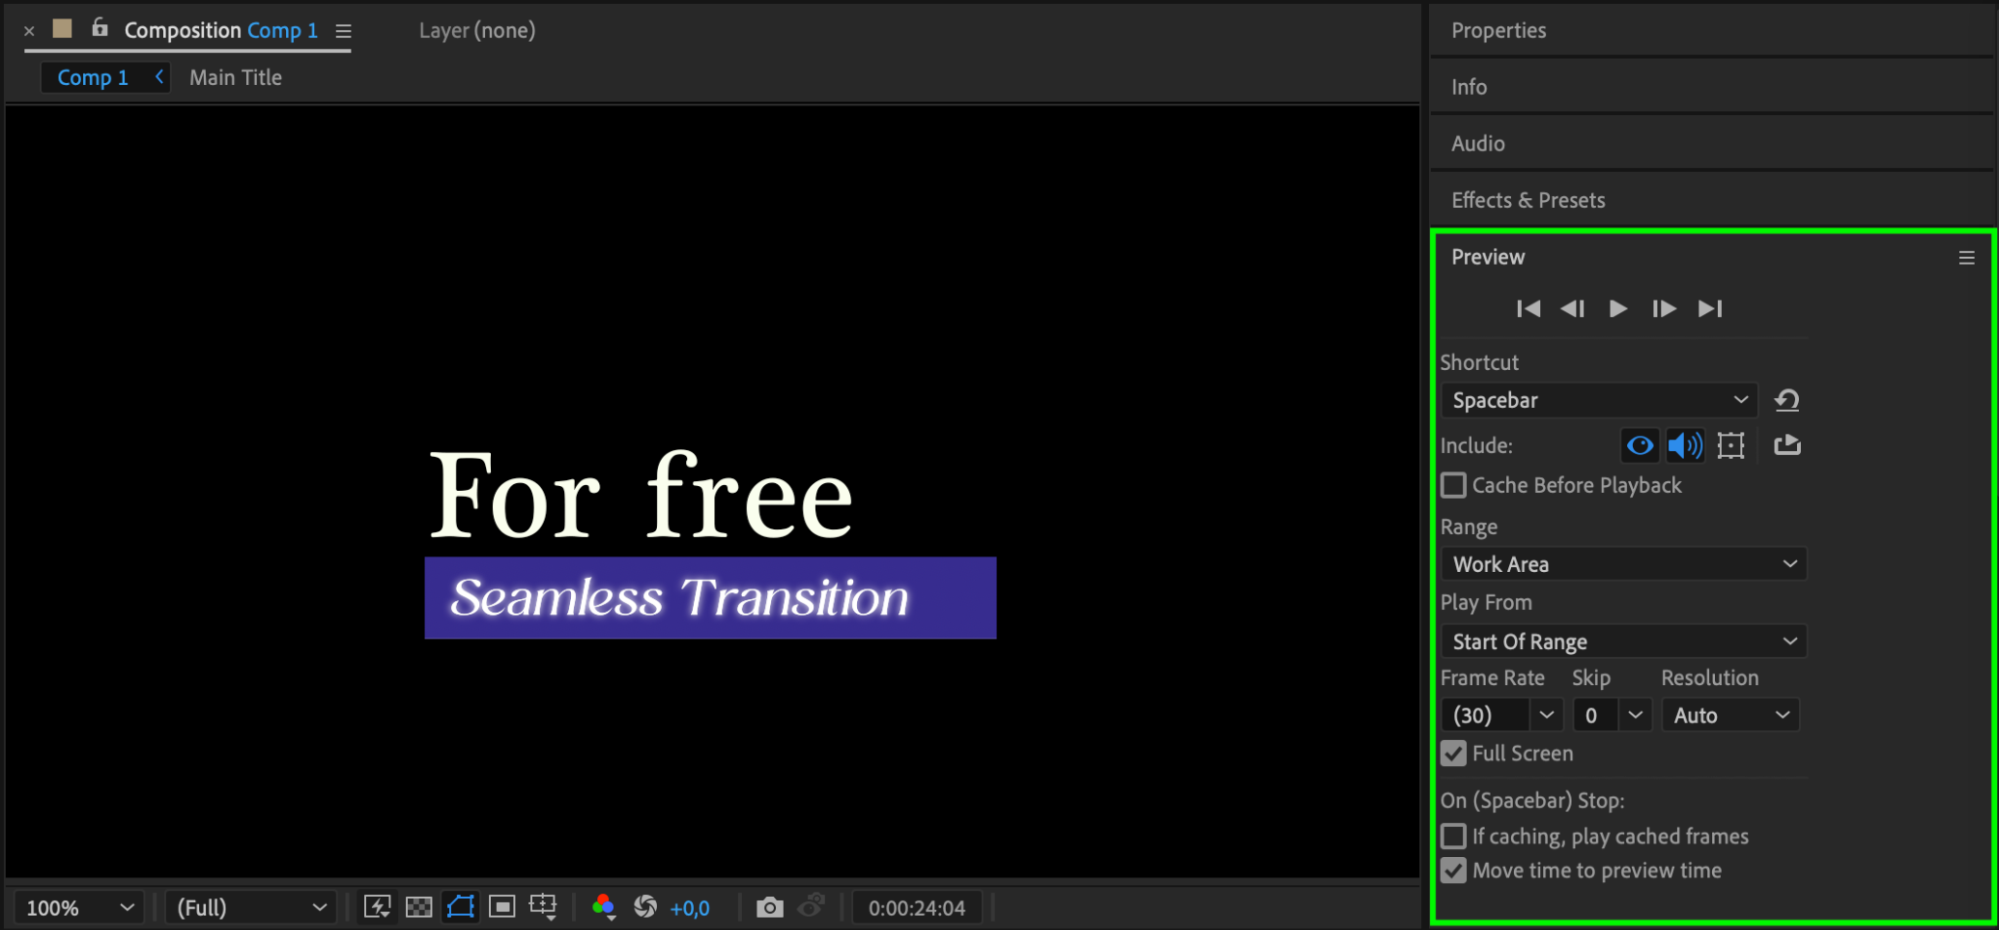

Conclusion
By following these steps, you can create polished lower thirds in After Effects with seamless animations. This method ensures your video content appears professional and visually appealing. Experiment with colors, timing, and fonts to customize your design.


